
jeff351
-
Posts
323 -
Joined
-
Last visited
Content Type
Profiles
Forums
Gallery
Everything posted by jeff351
-
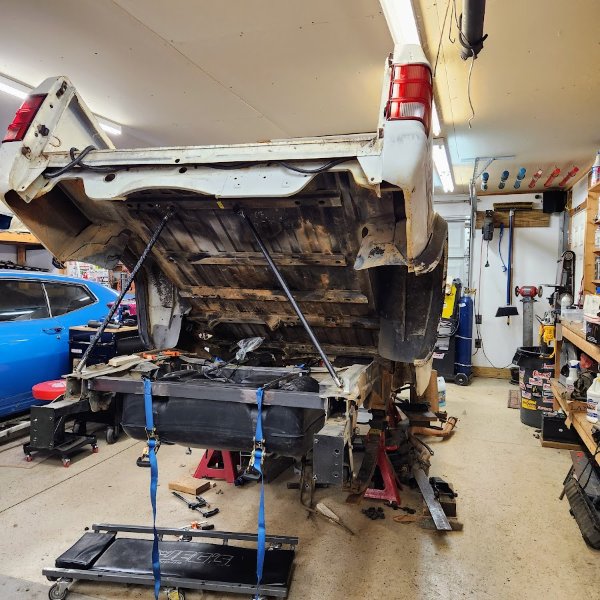
I realized I couldn't get the bed out of my shop with my current configuration so I figured out a way to prop up the bed with a couple of welded brackets. Now working on installing a 98 XJ gas tank to finish off my 97+ conversion. More to follow...
-
This build is spectacular. Not over the top, but the beauty is in the details. Whats your plan for it once its "done" ?
-
check your fuses. None of mine were blown, but corrosion had built up on them to the point some were no longer conductive. I had the same problem as you and it was remedied by pulling all of them out and cleaning with a wire brush. I think the 7.5a fuse was the culprit.
-
Traded the D30 (?) rear end out of my MJ into the parts Jeep for the 8.25 rear axle. Amazing what a size difference there is just between these 2 axles.
-
amazing the rear bumper hasnt been ripped off yet with that overhang. Cool project!
-

paint matching Agate gray interior
jeff351 replied to jeff351's topic in MJ Tech: DIY Projects and Write-Ups
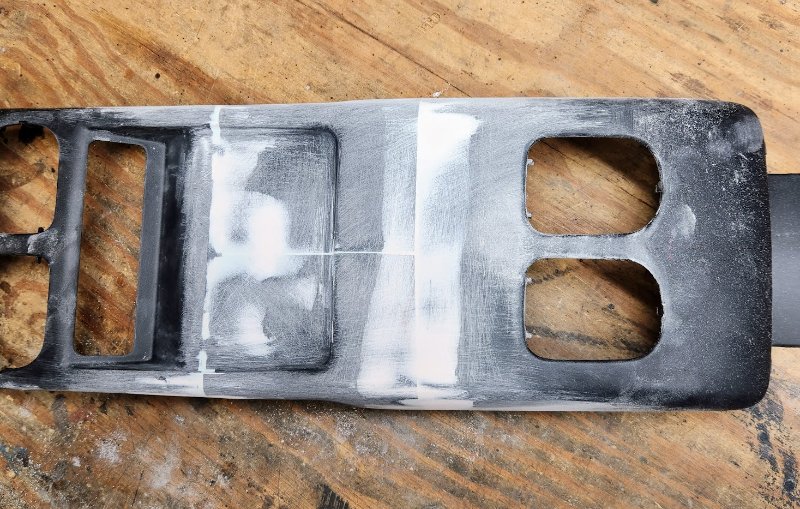
UPDATE so I sprayed the radio/ HVAC controls bezel and the dash vents this weekend (mine had some faded spots.) After I installed them and stood back to see how it looks, the color has the slightest blue-greenish tint to it. Just barely noticeable if you really pay attention, but not glaringly obvious. You can see the difference here. If I didn't point it out I bet most people wouldn't notice. The SEM products are great to work with. I 1st cleaned the parts with SEM soap, then 38351 Plastic and Leather Prep, then 38363 Sand Free Adhesion Promoter, then paint.
-
outstanding thread! I literally just spent 3 hours sitting here going through this build.
-
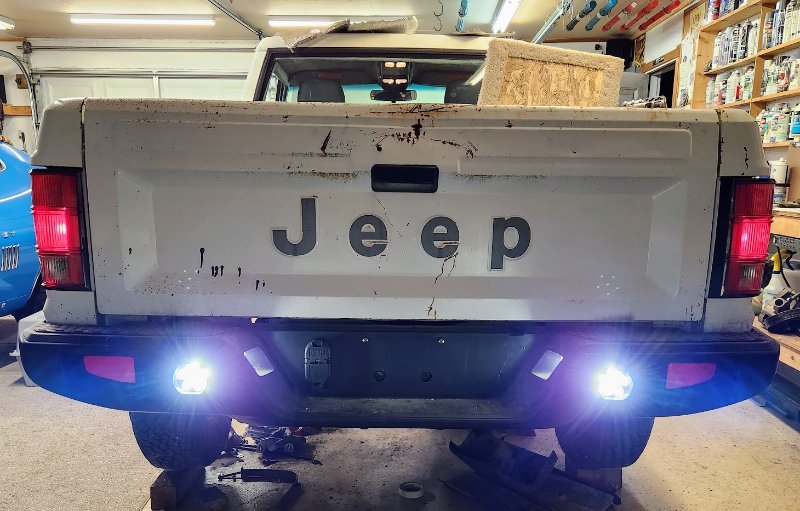
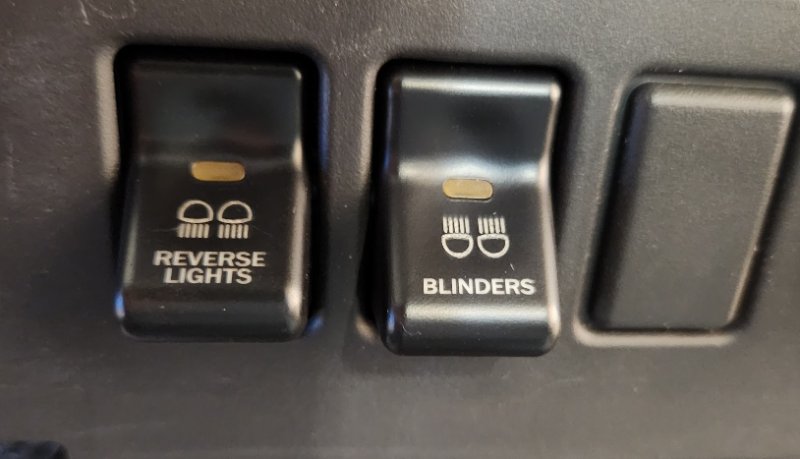
Wiring complete! Nothing sexy about wiring but it can be a PITA. I installed a pair of basic LED "offroad" lights in the rear bumper and wired them using the Jeep XJ rear wiper harness via a "reverse lights" switch in the factory rear wiper switch location. No more squinting to see whats behind me when backing up in dark places. Next to that I also installed a switch for the front bumper lights which runs to a couple of relays for some brand new Vision X halogens I've had on the shelf for years.
-
How did you aquire your Comanche and what is the story behind it?
jeff351 replied to Classy Comanche's topic in The Pub
I wasn't even looking to buy anything other than some small parts for my Torino when I was walking around a cool junkyard here in the upstate SC area. Came across this Jeep and I immediately realized its something I just needed to have. Best part is telling my wife I just bought a Jeep from the junkyard and she didn't even flinch. -
paint matching Agate gray interior
jeff351 replied to jeff351's topic in MJ Tech: DIY Projects and Write-Ups
I just added it. Figured with the popularity of 97+ conversions it would come up at some point. I'm always that guy who raises his hand whenever someone says "are there any questions?" -
Interior colors/paint
jeff351 replied to eaglescout526's topic in MJ Tech: DIY Projects and Write-Ups
adding my 2 cents. SEM 15303 Graphite is a really close match for Agate gray interior in the later XJs.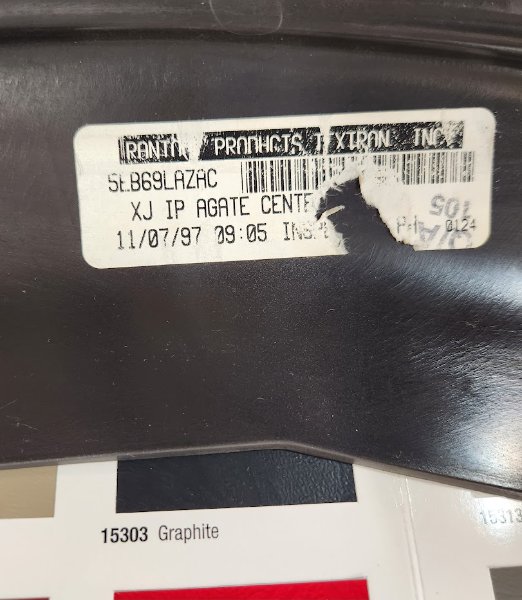
-
Thought I'd share since I know I saw it somewhere but can't figure out where now... For my 97+ conversion, I need to repaint some interior trim thats faded. 1998 factory color is Agate gray. Got a SEM Color Coat color chart and looks like the 15303 Graphite will be a pretty close match

-
Thats a good term I've been dealing with myself, but not with my Jeep. My 70 Torino GT restomod is SO close to being done but I'm totally burned out on it; havent touched it in at least a year. The Jeep is my alternate project to keep me distracted and having something else to do. I also had the same lack of motivation last fall with trail running. I completely lost interest in running for a several months and completely stopped, then suddenly poof I find myself signing up for races and now I'm back it. No idea what that was about, other than taking a break.
-
Theres one local that is pretty cool. Definitely one of those vehicles that spends all its time in the slow lane.
-
I almost bought a Unimog 404; even the wife liked it. Called to go get it and seller said someone else beat me to it. Probably for the best.
-
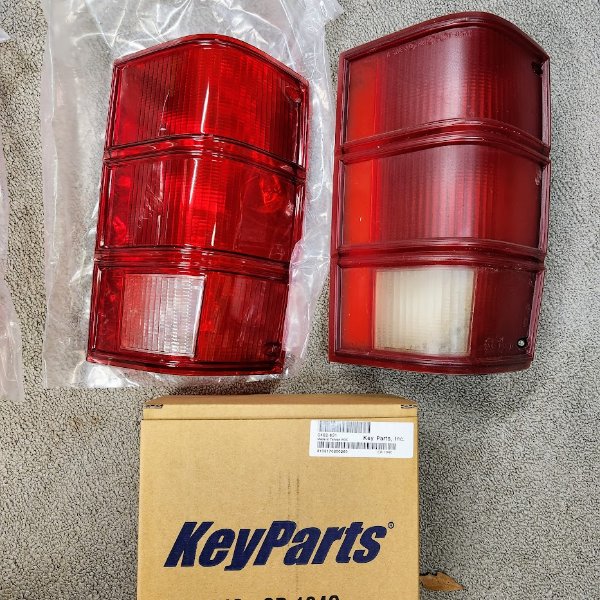
I have E6000 adhesive from another project but just wondering what you used. In my case, I have the new Keyparts lenses. Part 2, do you put sealant around the edges after its glued on?
-
Thanks!
-
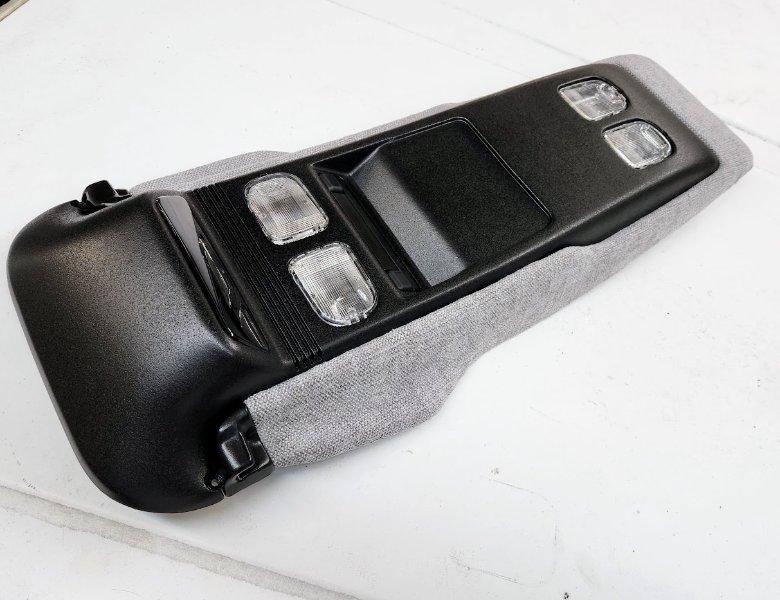
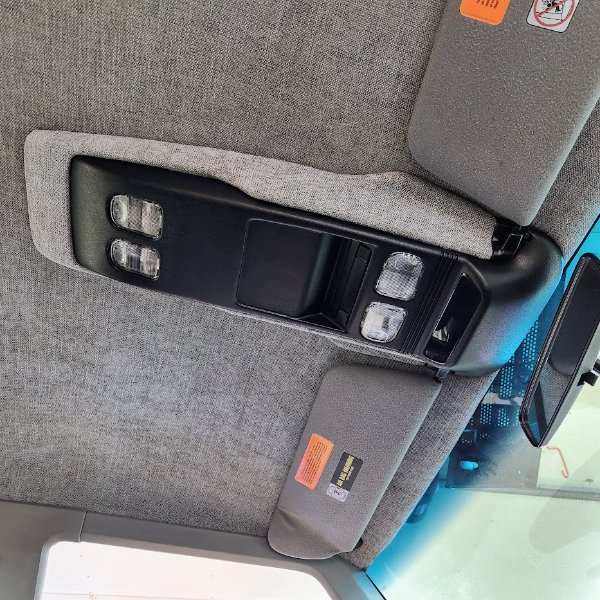
Since I had the fully functional overhead console out of the XJ donor and all the wiring moved over, I figure I might as well incorporate it into Scuzzy. After cutting it down a couple feet and doing a little body work it came out pretty good. The compass/thermometer display still work as original and the 4 courtesy lights should be sufficient at night. Covered the outer portion in the same material as the headliner. Painted the black portion with texture paint first, and then a couple coats of SEM satin black.
-
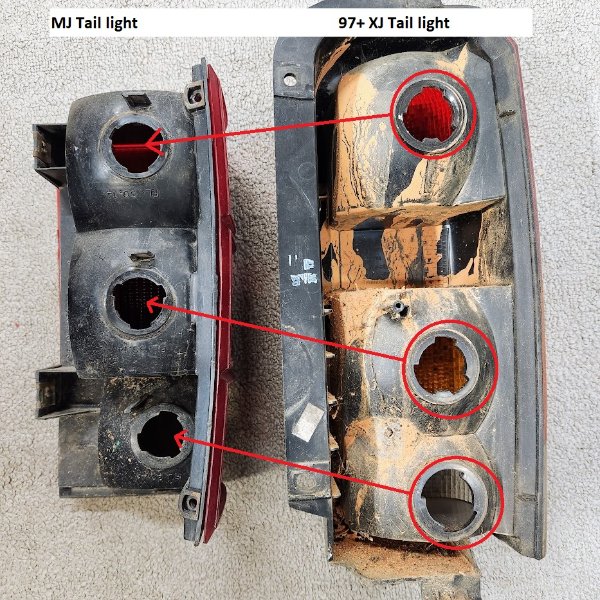
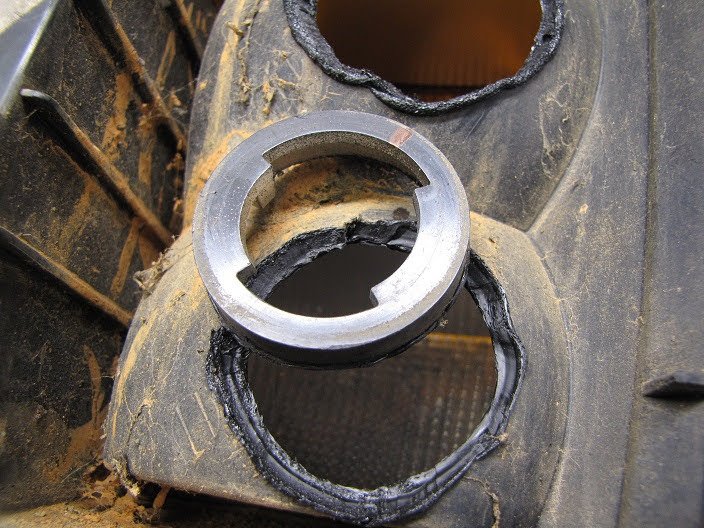
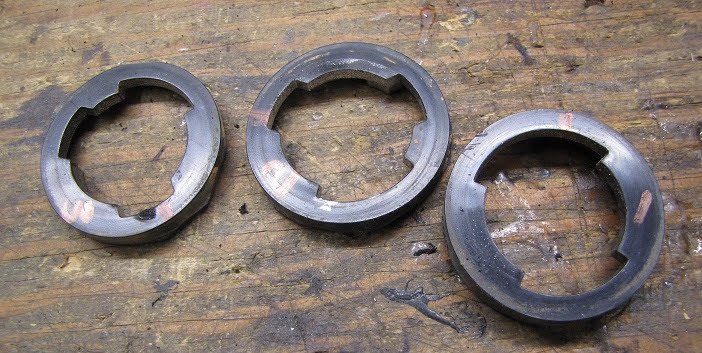
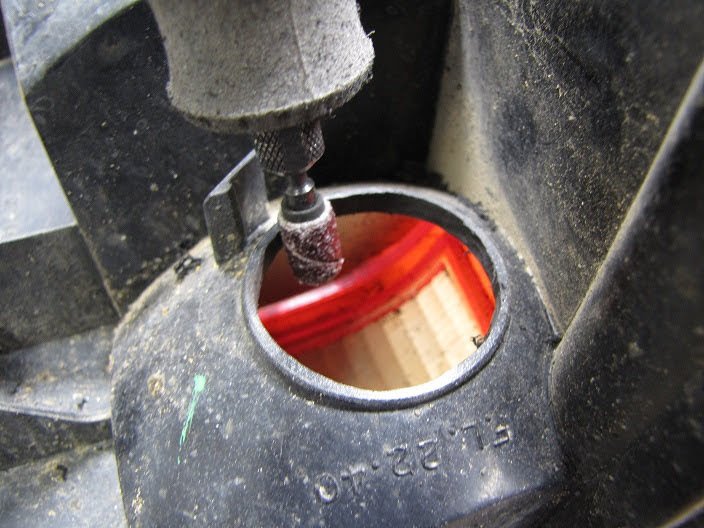
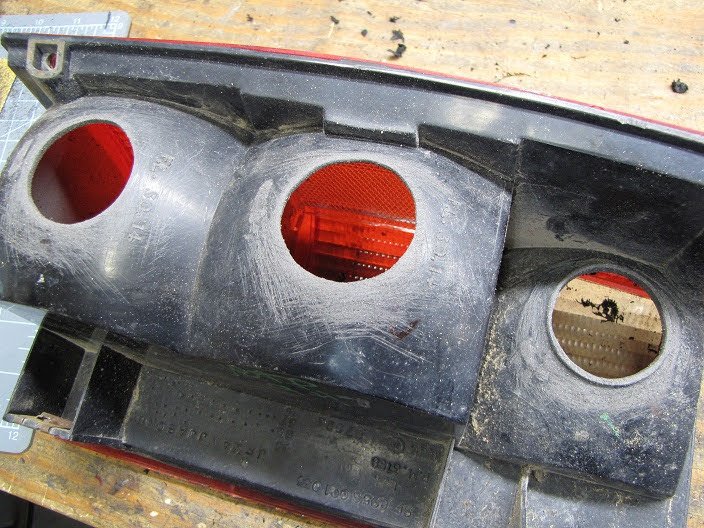
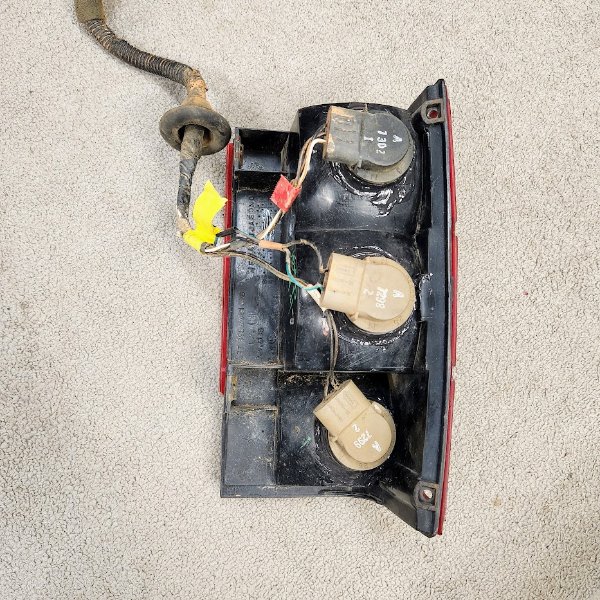
Those of you who are familiar with XJs know already but the rear wiring harness is divided from the fuse box, one side goes along the passengers door sill to the passengers tail light and the other along the drivers side doorsill to the drivers taillight. I was concerned about exhaust heat cooking the passengers side wiring, so I removed a knockout plug on the floor behind the drivers seat and ran both sides together through that hole following the stock MJ wiring route. When it comes to wiring up the tail lights, the light sockets for the 97+ and MJ are physically different sizes and aren't compatible. So you have 2 options: A) sort out the wiring and how to merge the 97+ harness into the MJ tail light wiring harness. B) modify the MJ tail light housing to accept the 97+ light sockets. Instead of messing with mating the XJ wiring to the MJ wiring, I instead modified the MJ taillight housing to accept the XJ sockets. After this, the only wiring mod needed now is just extend the straight section from the fuse box back to the tail light connectors. Now its just a matter of plugging the harness in. Tools used: hot knife tool (soldering iron with a tip ground to an edge), Dremel tool, sander, sand paper, superglue, JB Weld. Comparing the 2 housings side by side, the socket difference is clear. At this point, take a sharpie marker and make a mark at the 12:00 position so you get them installed in the right direction at the end. Using the soldering iron with a sharp edge attachment, cut out the socket bezel from the XJ housing. Quick hit on the belt sander to clean up the edges. Now onto the MJ housing. Dremel away the sockets. Test fit the bezels above to make sure you trimmed enough material away where there is no interference when you go to connect the bulb. Scuff up the area with 60 grit sandpaper so the epoxy has a good adhesion. I put a small dab of superglue on the bezels just to hold them in place, and once it dried applied a hefty dose of JB Weld around the perimeter. Note: Ensure they are oriented in the right clock direction and you don't have the reverse light in the wrong place. Let it cure overnight. Next day, put it together and install. Done! This is a quick project. Maybe 45 mins per tail light to complete. Quote
-
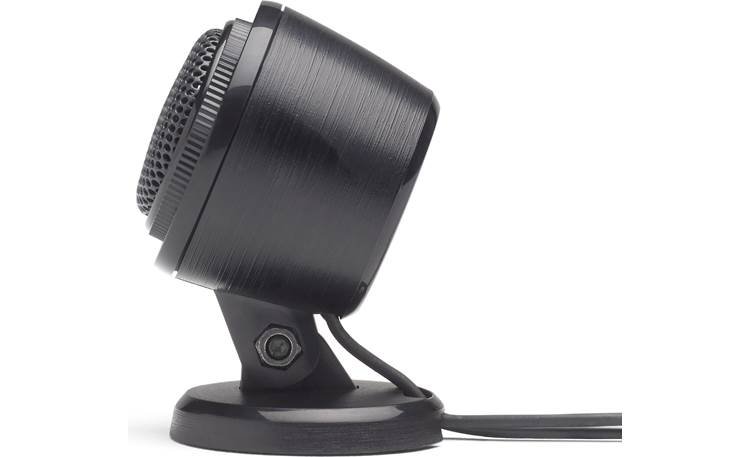
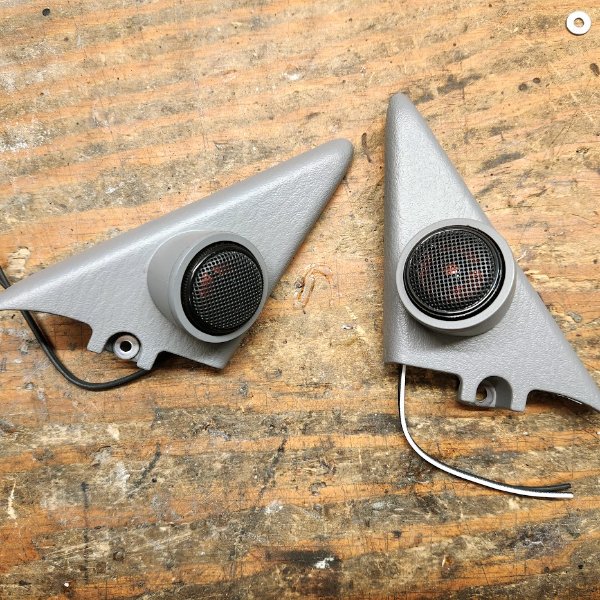
The JBL tweeters came with several various types of mounting options. I chose the pod, sliced it at an angle on the bandsaw, sanded the back edge flat, and glued it on the regular XJ door corner piece (whatever that part is called.) Once the superglue dried, I then reinforced the inside area with JB Weld. Painted up with SEM gray, and done. Simple little project.

-
Do I just post that part separately in the DIY section?
-
Late Christmas present arrived today. New pair from Keyparts! Nice improvement comparing new vs old
-
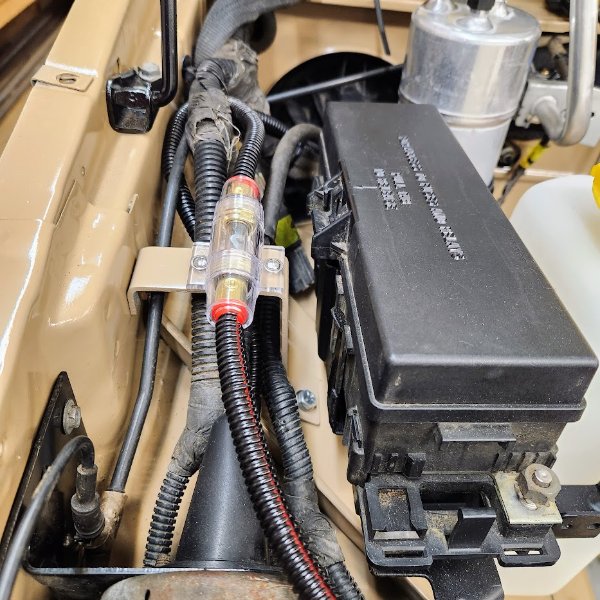
Happy New Year! Rang in the new year hanging out with the shop cat while working on Scuzzy. installed a new AC accumulator and a little bracket to mount the amp fuse holder.. Pretty basic stuff....
-
sorry I missed the post before now. Just bought a copy.
-
(jeff351 likes this idea)