

jeff351
-
Posts
323 -
Joined
-
Last visited
Content Type
Profiles
Forums
Gallery
Everything posted by jeff351
-
just got back from a week of backpacking up in northern Maine. Spent a night at this pond. Love being miles and miles away from any other human.

-

Project Morris: The 89 to 99 Comanche Long Bed
jeff351 replied to RuBacon's topic in Member Projects: Your Comanches
before you get rid of the shell, don't forget to cut out the door striker sections so you can get the 97+ doors to latch shut. -
yes, for now its just a blank space. Unsure if I should fill it in, or use it for something else. Thinking if I set up for camping in it, I could install a power receptacle in there.
-
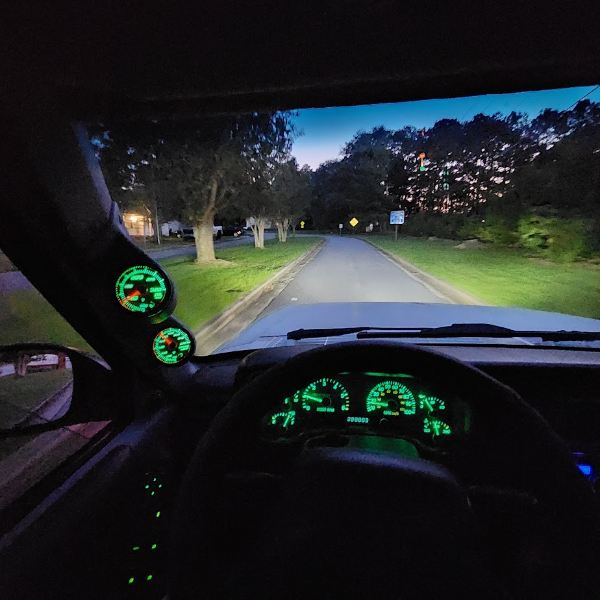
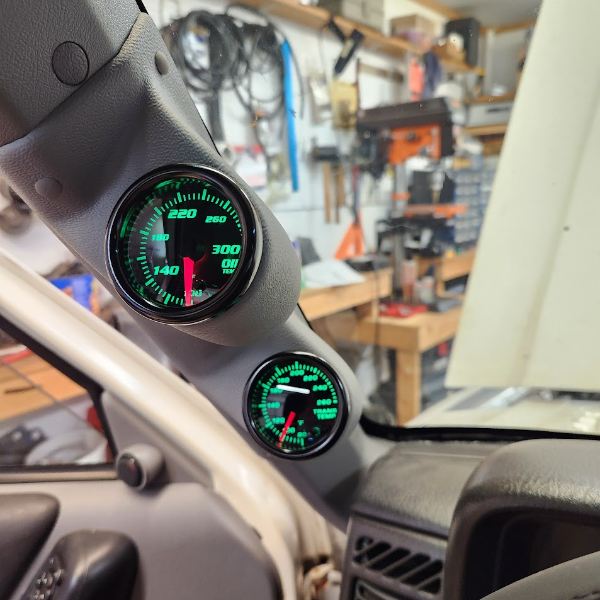
Hard to get my phone to focus on the gauges, but it looks pretty sharp at night. Temps right where they need to be, so just a piece of mind nothing is amiss
-
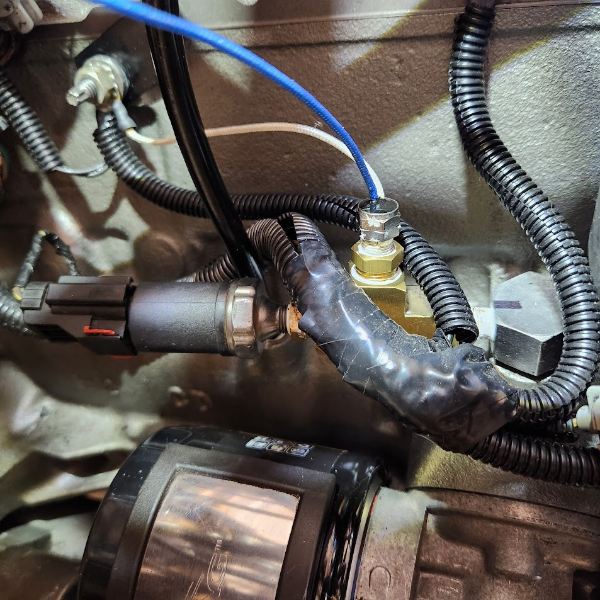
With the newly rebuilt engine, I was good on oil pressure but wanted a better way to keep an eye on temps besides popping open the hood and checking things out with an IR thermometer gun. I looked around at options where to mount a gauge and decided on this Autometer pod. Its a little overpriced as it required a little sanding to get the gauges to fit, and I ended up using some adhesive to hold them in. I used these for the oil temp gauge and transmission temp gauge. Really simple to install; Mock up where you want it, drill a few holes, paint, and then install your gauges and run the wiring. For the oil temp, I used an old brass tee I've had kicking around at the oil pressure sensor, and for the transmission temp I installed a tee in the transmission cooler outlet line. Connection-wise, I previously installed a dedicated ignition-on fuse block under the hood for the daytime running lights, so I ran the power wire from gauges to that.
-
1992 Jeep Comanche "Maria"
jeff351 replied to MariaManche's topic in Member Projects: Your Comanches
I used a set of wood chisels to get that stuff off. If you are lucky, most of it is hardened and comes off somewhat easy. It gets messy when it has the consistency of chewing gum on a hot sidewalk. Then its time to break out the acetone, wire brush and brake parts cleaner. -
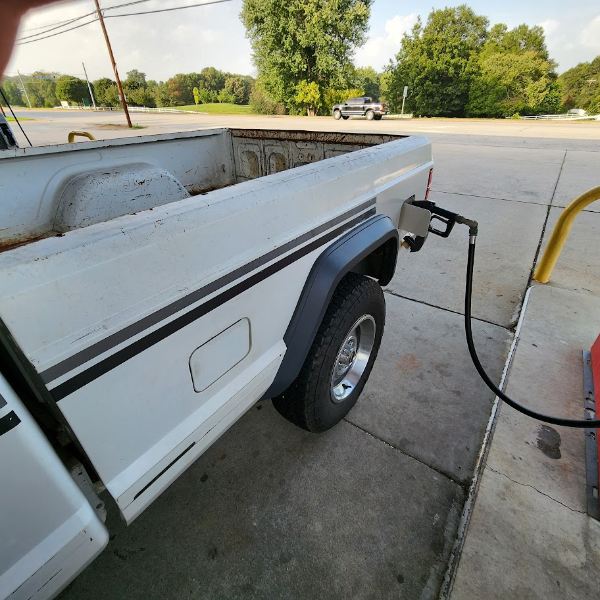
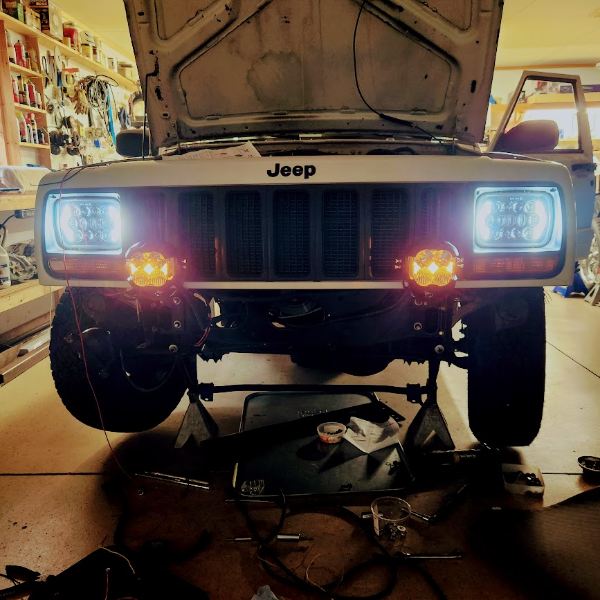
Took it to the fuel pump for the 1st time since the conversion. Funny using the 'new' gas door location. Then ran some errands making a run of scrap metal to the local recycler, and later took it for late night for a cruise - those HF lights up front are very impressive. Next week I have an appointment with a local shop to check the alignment and charge the A/C system. Not much left to wrap up on this!
-
Yup. If you are going through the work of changing the front clip, you might as well change the fenders. Thats the easiest part of a 97+ conversion!
-
I'm using a Boostwerks transfer case linkage and for whatever reason, the turnbuckle was only 2" long and it needed to be 3". I fixed that by cutting it in half and welding in an extension. Then we did a 10 mile 'official test drive' down an empty country road so I could bed the brake pads and do the 'smell/noise' test. Scuzzy did great, other than 3 minor issues. 1. the speedo is way off, I'm assuming because i changed the axle ratios (3.07 to 4.10) 2. passengers door doesn't lock. 3. windshield wipers don't work now. They did recently, so I need to dig and see if I blew a fuse. At some point I need to remove the Cherokee logo from the doors
-
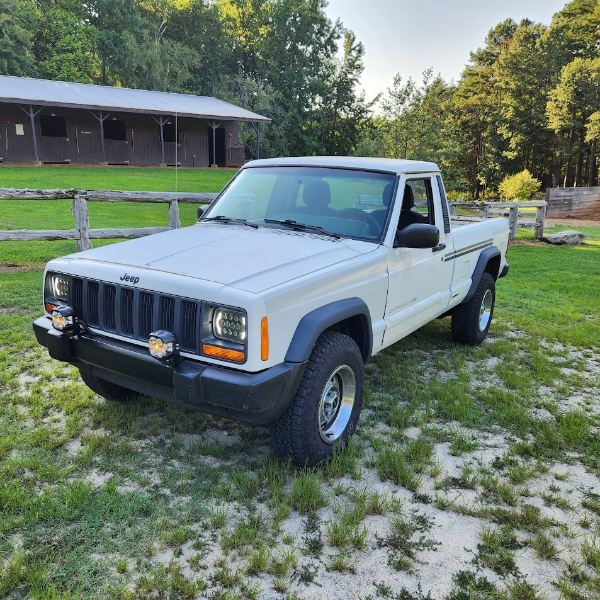
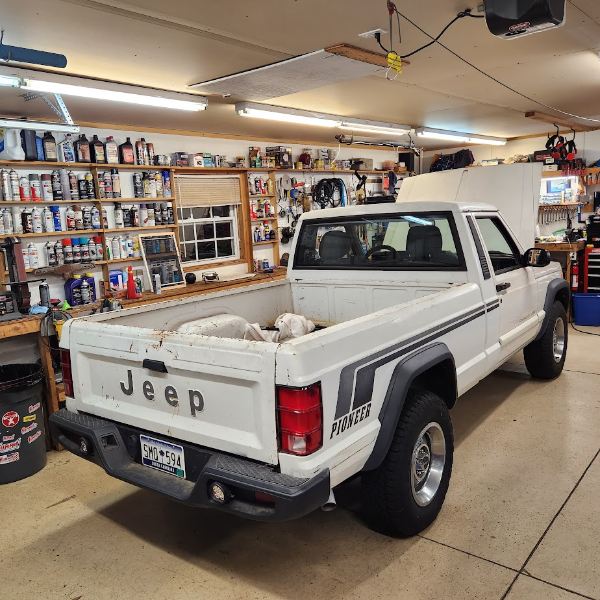
Scuzzy lives again! Did a final crawl-around checking lug nuts, fluid levels and any tools I may have forgot...then fired it up and did a loop around the neighborhood. Only drama was the transfer case linkage needs adjustment and kept popping into neutral. Otherwise it runs/drives like a 'normal' Jeep. Looks weird being parked in a different direction in the garage. Somewhere on a different post a person asked how long to expect for a 97+ conversion to take. Mine was 2 years and 4 months!

-
More wiring; I picked up a set of lights from Harbor Freight after reading some good reviews, and I admit they are pretty nice. Amber daytime running light and high/low beam. I already had the wiring somewhat complete so I skipped on their $70 harness and made my own..although with my OCD it took me a couple of weeks to get it done where there wiring looks presentable (aka not a rats nest) and the circuits are labeled During this I discovered the headlights that came with my donor XJ also had the DRL feature in them, so I got them wired up. (they really aren't blue like they look here)
-
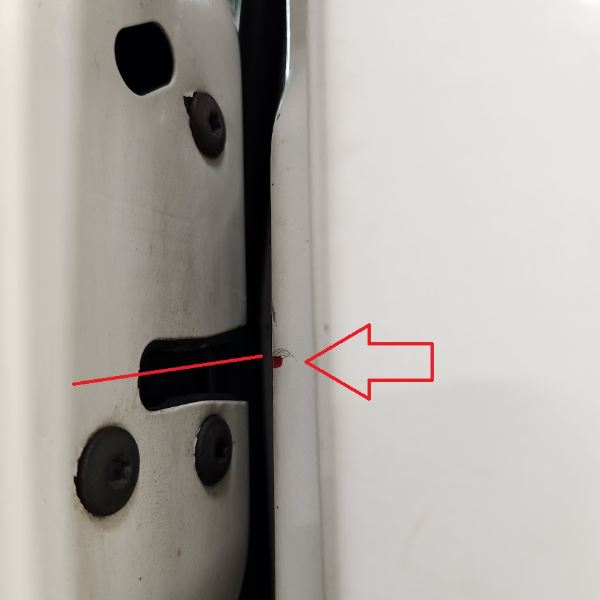
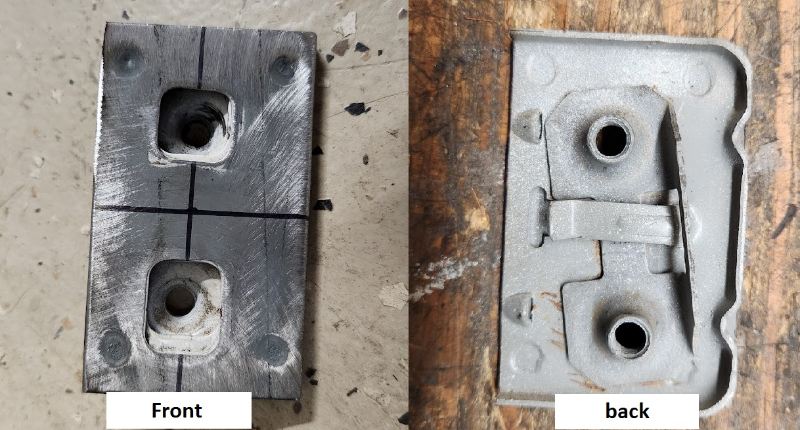
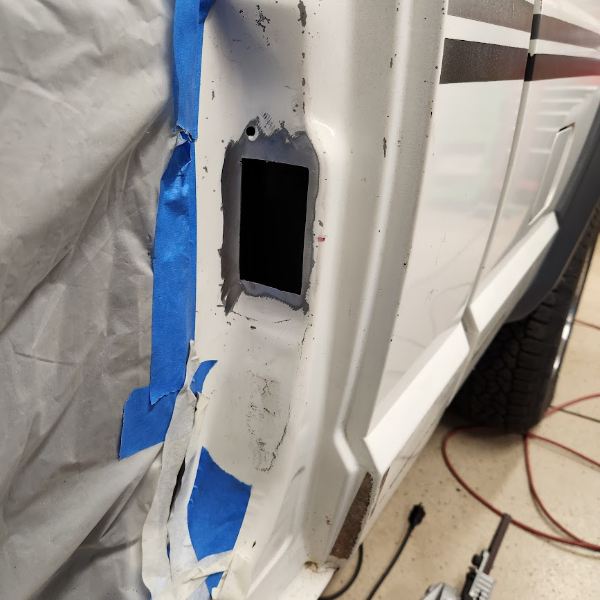
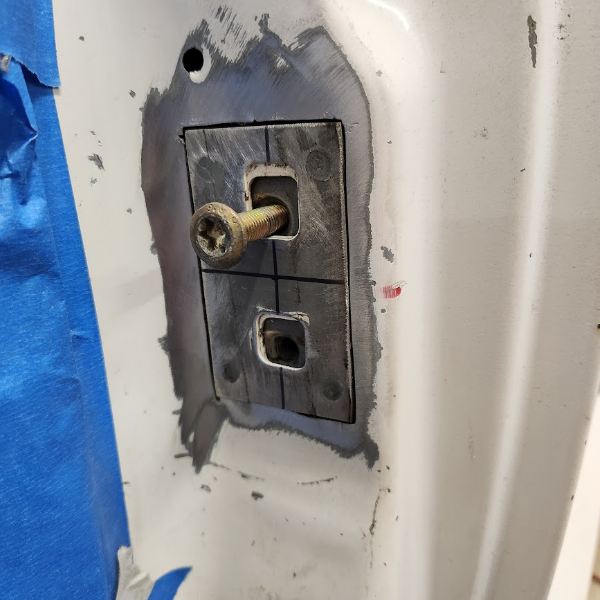
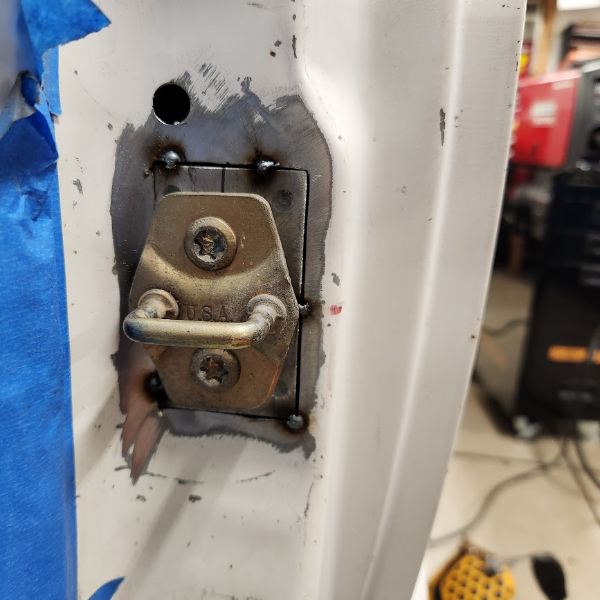
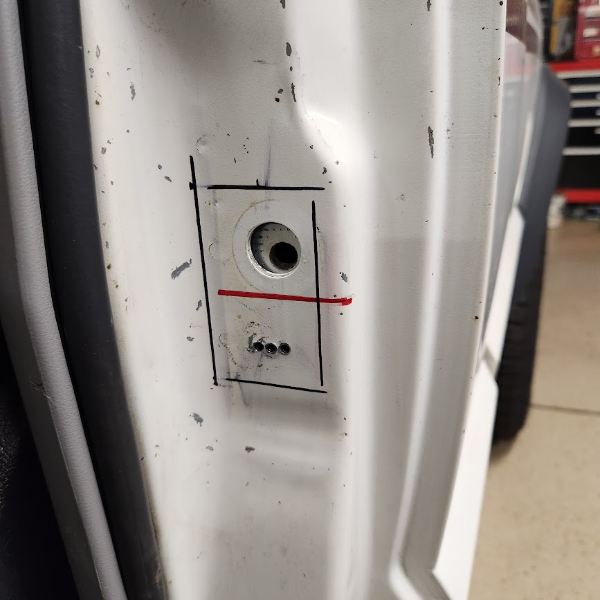
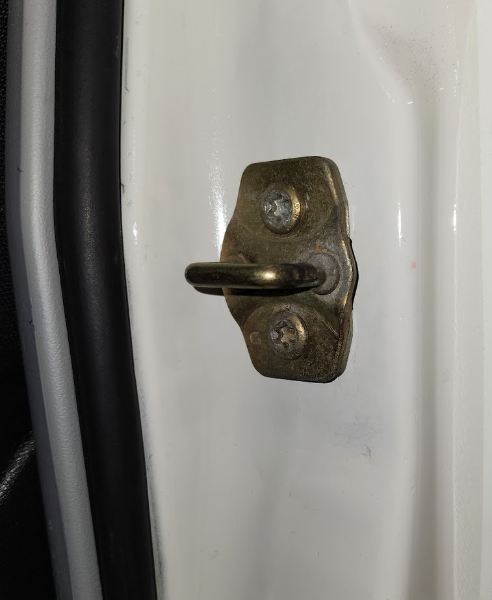
So you decided to swap over the doors from a 97+ XJ to your MJ. Simple enough, unbolt, lug over, bolt back on. Other than the trivial details like wiring and shimming to get it lined up, the main challenge here are the door strikers; MJ used the pin-style, and the XJ uses the modern U-style catch and they are not compatible. Step 1 - remove the MJ striker and install the XJ doors. Step 2 - once you get the doors adjusted where there is an even gap all around, you need to find the centerline of the new striker position. Lean down and get your eye level with the latch mechanism in the door. Close it as much as you can, then take a marker and put a mark on the body of the MJ centerline where the latch will catch the striker. Arrow here points to the sharpie mark on the body. Step 3 - You now need to set your depth of where the striker will mount. 2 ways: measure off the body of the donor XJ, or drill a few holes and attach the striker temporarily using sheet metal screws (this is how I did it.) You have a little wiggle room as the XJ striker allows a good 1/4" of adjustment up-down-in-out. The red line below is my center line from step 2. (below picture also shows after I also traced where to cut) Step 4 - cut out the striker from the XJ. Give yourself plenty of extra material to work with. Once you get it out, you can find-tune it. You want to trim the new striker as narrow as you can since you have limited space to work with in this area on the MJ. Step 5 - since i drilled a few holes and found a spot where the striker was lined up pretty darn close, I then drew a cross-hair on the striker to get it lined up with the correlating drill hole in the body. Then hold the cut-out piece on the body and trace it with a sharpie. Next you just cut out the area where this will weld into. It gets tricky here since there isn't a lot of room and you don't want to cut more than you need. I had to get creative with my tool choice. Step 6 - Fine tune the hole size with a metal file so it fits with a very fine gap; the body sheet metal here is super-thin 22 gauge so you have to be careful and not put a lot of heat in when welding it up. Step 7 - tack weld it, bolt in the striker, and give it a test. If all goes well, all you have to do now is finish welding it up. If you didnt remove your interior, take it slow and let it cool in between spot welds; you don't want to melt your trim. In this picture you can see where a spot weld fell out above the hole, so I just drilled it out and welded in a plug. Step 8 - grind the welds down and do a little finish work and DONE!
-
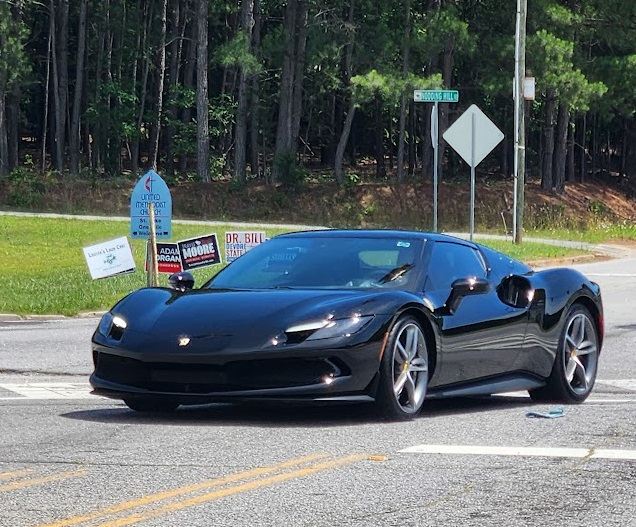
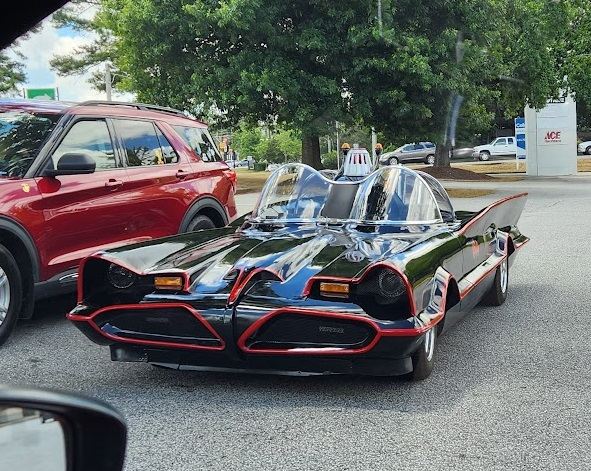
The neighborhood around the corner has much deeper pockets than the one i live in; this is one of the multitude of exotics over there. The Batmobile is just plain cool...fewer of those on the road than some regular ole' Ferrari, so i guess its an exotic
-
now THAT is funny....I see one being put on a friends truck without his knowledge. Payback for when I finally noticed a pair of 1/2" nuts hanging under my hitch by some string.
-
Are you referring to vapor canister from the 97+ donor? I put mine under the bed where the gas tank used to be, which physically matches the location where it was on the XJ. Lines hooked right up after that.
-
Funds sent
-
Thanks for the replies -I do have a SnapOn scan tool, I didn't think about using that for this issue, so I'll find time to check it this weekend and see what shows up. I also wonder if i have a small vacuum leak somewhere..I'll disconnect a few things and plug them to see what happens. -The throttle return seems strong enough, however after I gave the TB a good cleaning I don't think I lubricated the valve after. Will do that.
-
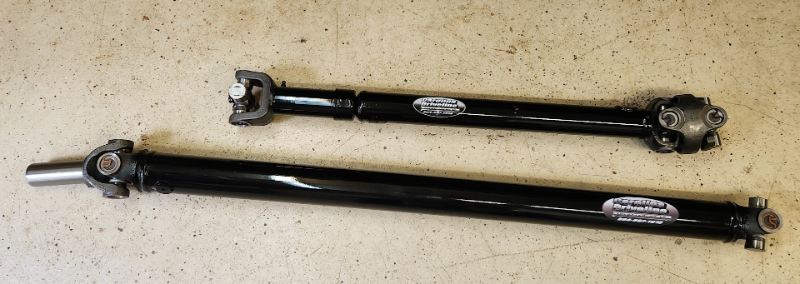
another milestone.... Carolina Driveline built me new driveshafts that bolted right up. Price came out to about $950 for the pair.
-
Muffler update - this sounds pretty good. I'm impressed with the sound quality with it being a $38 muffler. Even in my garage I can have a conversation while this is running. 20240601_154157.mp4
-

-
forgot to mention...98 XJ conversion into my 89 MJ. Funny thing is when i was driving the XJ, the idle was a little high back then also, but virtually every part of the engine/ignition/fuel system has been either rebuilt or replaced since then. Wondering if once I break it in with some driving if the idle will come down.

-
92532006_20240601_160131(1).mp4
-
Freshly built 4.0 with about 30 minutes of run time on it (driveshafts not done yet, so i haven't driven it) (.030 over pistons, factory compression ratio, 2.5" exhaust) Fires right up with no issues. Initially I tried a larger throttle body but had a very high idle.. I swapped back to the factory throttle body, and while at it replaced the IAC and TPS. After that, the idle wasn't as high, but it was rough. I replaced the MAP sensor which fixed the rough idle part. Now the idle is still a bit high, see below video. If I rev it, it slowly returns to the (high) idle. Checking if you all have any ideas how to get the idle down. Does vacuum look alright? While it was idling I took a propane torch (not lit) and pointed it at all the vacuum lines I could get to, with no change to the idle. 20240601_154413.mp4
-
Scuzzy lives again! Did a quick once over to see if I missed anything, got my fire extinguishers and garden hose posted 'just in case' and gave it a crank. Fired right up. Has a super high idle which wasn't intentional but perfect for a 20 min break in period. Kept it between 3000-4500 rpm, temp sat right at 210, and no leaks or surprises! I think the high idle is from me screwing around with the IAC previously. I have a replacement I'll pop in tomorrow and see what happens. But the anticipation of worse-case scenarios is over 20240526_150859.mp4 20240526_150538.mp4
-
ahhh...you are correct! Long gone.