

eaglescout526
-
Posts
12178 -
Joined
-
Last visited
-
Days Won
13
Content Type
Profiles
Forums
Gallery
Everything posted by eaglescout526
-
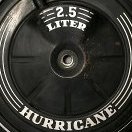 https://www.ebay.com/itm/335678443415?mkcid=16&mkevt=1&mkrid=711-127632-2357-0&ssspo=P5stATT4Rwm&sssrc=4429486&ssuid=n7myxbO3SYC&var=&widget_ver=artemis&media=COPY Neat find.
-
Chunk, A 1984 XJ
eaglescout526 replied to eaglescout526's topic in Member Projects: Other Cool Stuff
I got this cool gem the other day
-
Ok so yes the 55 in pounds is correct torque. Now if you reallllllly want to get to the nitty gritty. Theres an 84-86 procedure and theres an 87-88 procedure. And I love the 87-88 as it says this "1987-1988 Install the cover on the cylinder head Tighten the mounting bolts to 6.2 Nm (55 in-lbs) torque."
-
I’ve never trusted Haynes or chiltons manuals for anything other than basics and when official material isn’t available. But I would still run both gasket and RTV on the plastic as I’ve had gaskets get a little squished even though there torqued to spec and for the aluminum guys, probably just the gasket will do just fine as they don’t run a huge risk for warp. I’ll get the details this evening from my 2.5L book.
-
I mean it’s not wrong. It covers both the rockers and valves. Actually that 55in pounds might be more correct. I’ll need to double check with my 2.5L book. I can only speculate I got 11 as the numbers being the same. Im surprised a manual like that would recommend RTV all the way vs getting the gasket and some RTV unless the text is based on the assumption you have the gasket and to put some RTV on the cover.
-
I would start there unless you have a lead on an aluminum cover and everything else for the swap. What I did was get a genuine valve cover gasket, don’t think Chrysler has them anymore, put some RTV on the cover and put the gasket with the RTV to make alignment easier and then mount the cover. Now the cover does have torque specs so you don’t crack or warp it. It’s about 11 ft pounds.
-
So with the 2.5L and what I learned over the years is the plastic remake from crown is an absolute pile of dog crap. Do not buy it and stay as far away from them as possible. now that my rant is out of the way. Stick with OEM on the valve cover. AMC and Chrysler used a harder thicker plastic that crown doesn’t seem to know. Either they’re too cheap to make true restoration parts or have never worked on an XJ or MJ. I still run the original hard plastic valve cover and have little to no issues with leaks what so ever. As long as you have the right gasket and some RTV. Now the hard plastic covers are supposed to have a reusable gasket so you don’t have to use RTV with the separate gasket that you get but I’d expect that gasket to be old and failing Now to aluminum covers. Id use one but they don’t have the AMC logo and appeal entirely to the aesthetic I want. Now you do have to do some vacuum rerouting to use the aluminum cover. Oh and you have to get the bolts for the cover too. Can’t reuse the old shoulder bolts from the plastic cover. No. You don’t have to be worried here at all. The valve cover is meant to prevent the oil from leaking out of the top from the rockers. The vapors from oil then get sucked up by the throttle body and thrown into the combustion chamber. Be next to near impossible to blow your head gasket from a sealed valve cover.
-
Idiot lights gauges 1986 COMANCHE 2.5L
eaglescout526 replied to SLOTMAN's topic in MJ Tech: Modification and Repairs
So heres the two numbers for the temp for 1986/87 J3242662 8953004981 Oil sensor 8953004550 which should supersede to a later Mopar number, I forget what it is. -
Chunk, A 1984 XJ
eaglescout526 replied to eaglescout526's topic in Member Projects: Other Cool Stuff
Anddddd trailing behind that surprise of low fuel was a nasty one of a failing fuel pump. What a chase that was and damn near exhausted me while almost running out of ideas. Swapped to a different sending unit with an original AMC pump that believe it or not, still works. I want to go back to the 86 unit and I probably will when I get the right pump as this unit holds a smaller than what were used to seeing pump Funny enough, this is the unit that came with the fuel tank and I didnt do a damn thing to it other than swap the pump to a different unit and then back and then swapped the float reader to find the pump failing. Also got cruise control finally dialed in. I found a pic online of an 86 MJ with the 2.5L and it had cruise control. So this gave me an idea to move the servo to match the location of where AMC mounted it using the correct mount, I actually happen to have two of to my surprise and put it on along with using a 4.0L cable. Finally a 4.0L part I can use! Haha.
-
Idiot lights gauges 1986 COMANCHE 2.5L
eaglescout526 replied to SLOTMAN's topic in MJ Tech: Modification and Repairs
Oh crap yours is an 86. There’s two different sensors for the temp in the head. I’ll get you some part numbers this evening but the oil sensor is pretty straight forward. MoPar still makes the oil sensor and would be the wisest route to go for that sensor. Otherwise everything is plug and play. -
Seal is the same for both windows.
-
Not sure if you’re on any of the Facebook pages but try there too. The only problem I see with this is the glass is becoming increasingly rare unless you know someone who can either make the solid pane or the three panes. And then it boils down to the aluminum frame on the sliders. Dont get me wrong, I’m all for this. The newest pieces is about 32-25 years, depending on how long Chrysler serviced the rear glass. I just think that’s something to consider.
-
Yes it is. Jeep uses a different switch too. I’ll get you a part number. But the stalk being droopy makes me think that the screw holding the switch to the turn signal switch assembly is loose inside and thus you’re having a tremendous amount of issues with that area.
-
IT WAS THE FUEL PUMP!!!!!! HAHAHAHA! @Eagle_SX4 Thank you for your chime on the fuel pump!! I owe you a 4 pack of glass bottle Dr.Pepper!
-
There is, its a nonstandard size cause AMC and Renault. I can either get the dealer tool which not many out there that are complete or I can cobble something together using the right size threads and adapters to a gauge. I recall someone somewhere did this. Butttttt I think youre on the right track. So I took my TB off, found out that my stupid over excited self put the TB on with left over gasket still on the mating surface. Cleaned it off, put a new gasket on and now my idle is more correct at 1K RPM vs the 13-1500 RPM I was at. Ok one problem solved. I also looked at the regulator while I had it off and its good, clean and not ripped. Which brings me to my test drive. I drove it successfully for half a mile. Made it half way down my street before it started sputtering. I got it back into my driveway and remembered what you had to do with your eagle. So I primed the rail about 5 times. On the 5th time, I cranked and got it started and revved it like there was no issue at all. Typically if I got it started, it would have issues revving past 2k. So I think youre right about the fuel pump my friend!
-
Annnnnd there’s nothin in this kit that will work. Damn.
-
Interesting. I found the kit. I’m gonna see what pressure looks like.
-
My thoughts too. I’m gonna go get this kit. But what’s odd to me is if I compare the spray pattern of the injector on both my engines. They look the same. But I guess if to the naked eye they look the same but perhaps on the atom scale, it isn’t.
-
I put thoughts on that and when I examined the wiring and pin out for both wiring and ECU of 86 and 87-90, I came to the conclusion that I’d would be fine to run the older ECU as it won’t see the WOT switch but would see it at the power steering. Now I did unplug that while testing and didn’t see any difference at all.
-
Grounds are good and clean. That was one of the first things I did before completing the swap and making sure there wasn’t any resistance. I’ll probably double check them for sanity but grounds to me wouldn’t be a huge cause of it running and driving right until it reaches closed loop or operating temp conditions to just behave like this.
-
Idiot lights gauges 1986 COMANCHE 2.5L
eaglescout526 replied to SLOTMAN's topic in MJ Tech: Modification and Repairs
No problem. As for 84-86 clusters, the thing I’d worry about is the printed circuit. The early ones are notorious for delaminating and separating due to age. Now this doesn’t mean you can’t find one in great shape. Now the pros to the early cluster is gauges are easy to swap and the tach has two versions. One for the 6 and the other for the 4 cyl. And the speedo cable is easy to remove while the cluster is installed. At least for me on my 84. Cons: delaminating printed circuit, engine specific tachs and limited availability of gauge parts. 87-90 cluster pros, adjustable tach, volt, oil and temp gauges swap out with 91-96 years and a little bit more easily found. Cons, 87-90 Renix years with the fuel gauge as HO ones will not swap, cluster has to come out to pinch and pull speedo cable off. Just some food for thought. -
RADIATOR 1986 COMANCHE 2.5L MANUAL 5 SPEED
eaglescout526 replied to SLOTMAN's topic in MJ Tech: Modification and Repairs
I recommend staying far the hell away from the aluminum radiators with plastic tanks on both ends. Crown makes a damn good drop in replacement radiator that I’ve been running with no problem and I’m in AZ and using a mechanical fan. Course I don’t do any crawling. But if I were, I’d look into keeping both mech fan and put an electric fan on the front of the radiator. But the 2.5L also doesn’t run incredibly hot and doesn’t take up 95% of the engine bay real estate to mess with air flow. Biggest thing is making sure the original fan shroud is in great shape and not in pieces. -
Ok so the 84 XJ(89 engine harness with an 86 ECU) has been acting up. Badly and Im nearing my wits end with this one. So this problem surfaced after the fuel sending unit swap. I was able to drive to work just fine but driving home was a challenge as in I started losing engine power. It has since progressively gotten worse to where I can not drive more than a 1/4 of a mile from my house without sputtering as if its getting no fuel, spark or air. I have done rigorous testing, swapping some sensors with new ones I have. I at first thought it was the sending unit again. All logic pointed to that cause it drove fine prior to the swap, no reason it shouldnt drive right going back right? Well I swapped the float to the original assembly and then put it in and guess what? No change. Tested CPS, was below voltage, new one is below voltage, no absolute change. Both even have the same starting pattern. Starts, drives fine, sputters, turn off, restart, starts, dies, restart, no start, wait, restart, starts, runs, dies, wait, restart, starts, drives like nothing happened then the cycle starts over. Tested TPS and plugged in a new one. Same as above. Tested MAP, found it below voltage spec running, hot, idle. Same as CPS. Funny enough, REM told me I had a barometric error. Some change but not alot. Examined spark plugs, rotor, cap, all fine and within normal parameters. Saw nothing in the cylinders. Compared spray patterns of the injector to my MJ, same exact patterns at idle and wide open throttle. Tested O2, same, either unplugged or plugged in and REM shows good vitals for it. The only thing I can think of is fuel pump is dying, yes swapped relays, no change, or the pressure regulator is or has failed and I have no way to check that as I still need to figure out a gauge set up for the 2.5L fuel rail. But theres no fuel leaks, no fuel leaking into the TB, tested damn near every ignition related component and am damn near at a loss. Thoughts? My guess from all this, its something thats getting heat soaked and failing or its something else that I physically can not see.
-
New Door Panel Cards
eaglescout526 replied to ghetdjc320's topic in MJ Tech: Modification and Repairs
Agreed. i was gonna do this as a side business if making door cards and making new ones, washing the material and putting them back together. But that’s been on hold for years. -
New Door Panel Cards
eaglescout526 replied to ghetdjc320's topic in MJ Tech: Modification and Repairs
Thanks! I had been looking for the right size staple for a while but never got the chance to find such.