ghetdjc320
-
Posts
5079 -
Joined
-
Last visited
-
Days Won
1
Content Type
Profiles
Forums
Gallery
Everything posted by ghetdjc320
-
Is your goal to replace or upgrade steering components, suspension or both? There is no “kit” that includes ball joints with steering linkage. Best to piece these parts together so you can get good quality parts.
-
Gotcha. That makes sense.
-
Would you keep it after you fix it or get rid of it? If your keeping it just take the head off and get it milled flat while it’s out. Maybe valve job and seals too if it’s original. Throw in a good MLS gasket like a Cometic or Mopar Performance gasket. If you just want to sell it then a gasket swap only I guess but no telling if you have any warpage that will blow it again.
-
How did you do that??? Did you just lift it an inch or so?
-

91 Eliminator 83K miles refresh with NOS parts
ghetdjc320 replied to Red Mistress's topic in Member Projects: Your Comanches
I like the look of that! Looks better than the two imo -
Crushed Dowpipe from Factory?
ghetdjc320 replied to kryptronic's topic in MJ Tech: Modification and Repairs
Quite true -
replacement for stock trim screws
ghetdjc320 replied to Jesse J's topic in MJ Tech: Modification and Repairs
-
replacement for stock trim screws
ghetdjc320 replied to Jesse J's topic in MJ Tech: Modification and Repairs
Most sizes are #8 and #10 with a few others thrown in for kicks lol -
replacement for stock trim screws
ghetdjc320 replied to Jesse J's topic in MJ Tech: Modification and Repairs
Youll end up needing more screws eventually so a good multipack kit of sheet metal pan-head screws comes in handy. Just don’t get the countersink Sheetrock style heads as they will split your plastic trim. The washer head screws are also really handy and most auto parts stores carry a variety. Most screws are between 1/2-1”. 5/8 or 3/4” will fit 90% of your interior trim spots -
Yeah, their stuff seems like the best thing out there. Only trick is it’s a shop install and I don’t trust any of the shops here to do a good job lol. Basically I’m looking for that product but in a diy format
-
Before choosing your axles, you need to determine tire size. The whole purpose of swapping axles is to swing bigger tires. Bigger tires are the only way to gain clearance under the axle itself. However, bigger axles are just that, bigger. So you need more tire size again to compensate for the size of the diff. Larger tires means deeper gearing and thus the death spiral starts. Another important factor here is unsprung weight. In other words, how much does everything below the springs weigh. Bigger axles and tires can dramatically increase this number. Asking what the best axle is is like asking for the highest number you can think of. Given the amount of lift and trimming needed to fit large tires on an MJ I’d stick with 37’s if it will ever see pavement. A built lp 44 and above can handle 37’s without much fear. But then again anything can be broken. Some get by on a super D30 and others are braking high 9’s on the same setup. Consider though that an HP 30 on 35’s can be a very competitive setup given that, to run 37’s, you are likely going to have to run an axle with less ground clearance. In other words, there is always a trade off.
-
Some companies make a truss with built in TJ/XJ/MJ brackets. I’m thinking Artec and maybe TNT have some. You can see what axles they have them available for and pick your axle accordingly. I know you can go with a JK D44 front with one of those kits. You’ll still have to cut off all the brackets and a lot of welding will be involved. Pretty much the case with any upgrade axle swap.
-
1991 Eliminator Resto-Mod
ghetdjc320 replied to ghetdjc320's topic in Member Projects: Your Comanches
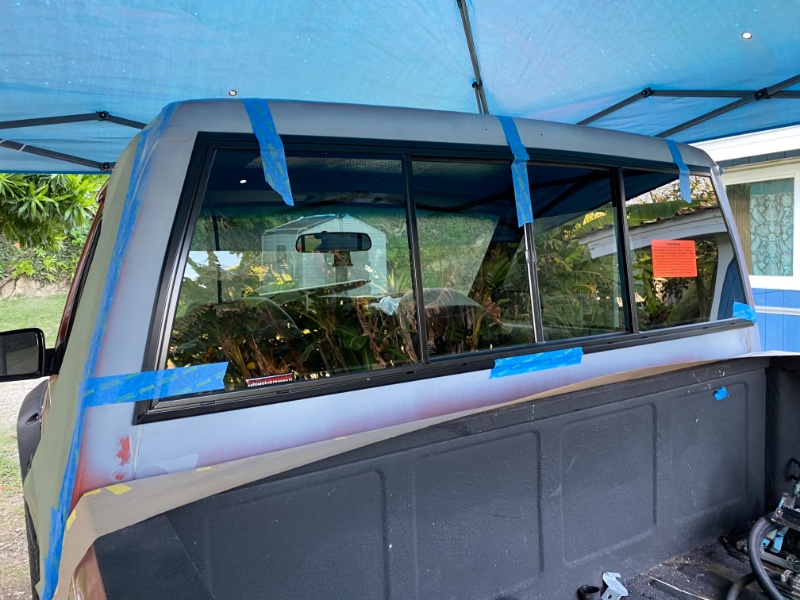
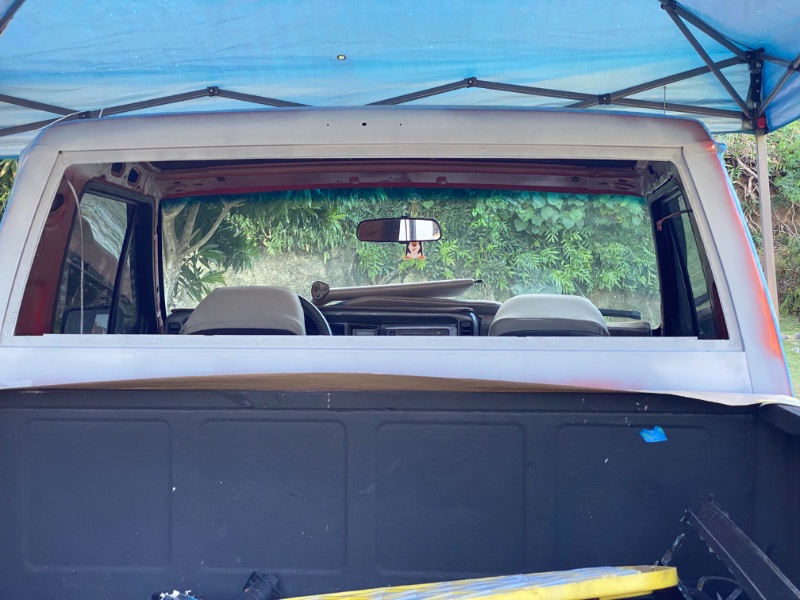
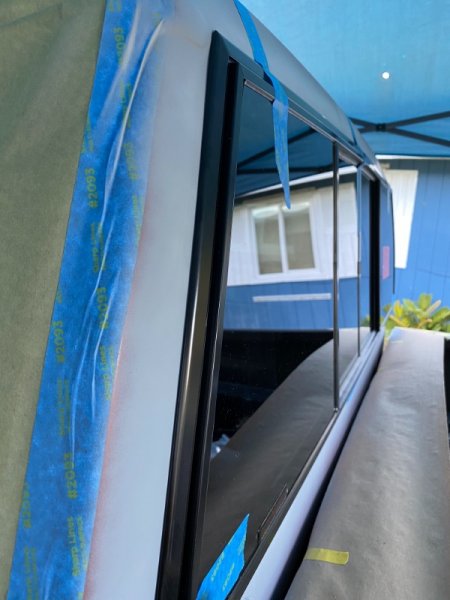
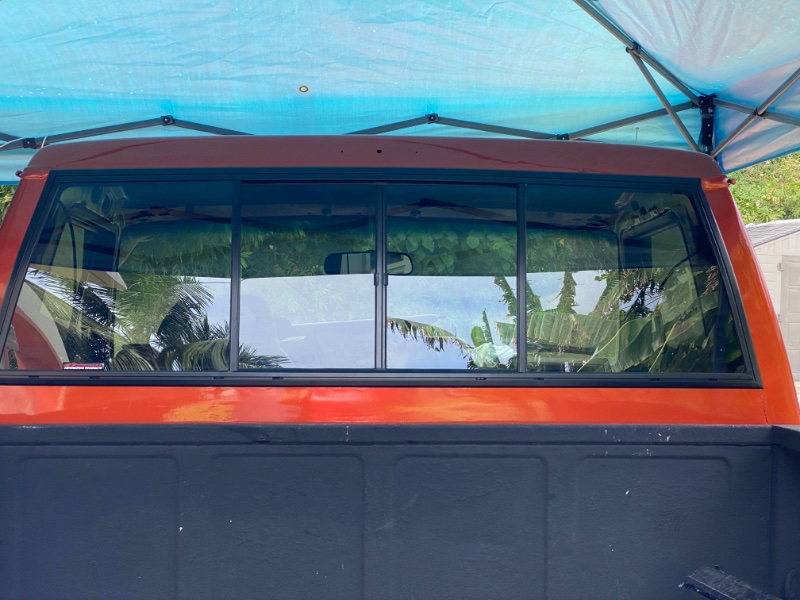
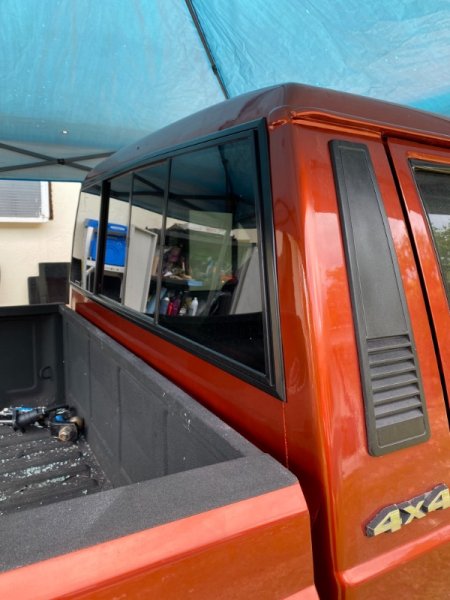
Well I can verify that the CR Laurence sits perfectly flush if you take your time and set it up per the instructions. It does not urethane in as the original did. It comes with some nice butyl tape. You need to make sure your pinch seam is nice and straight also. I used 2 passes of butyl tape for a nice tight fit. You then install 6 screws from inside the cab through the pinch seam and into the new window frame. Holds awesome. Completely sealed even from a power washer and has a much larger viewing area than oem. Very pleased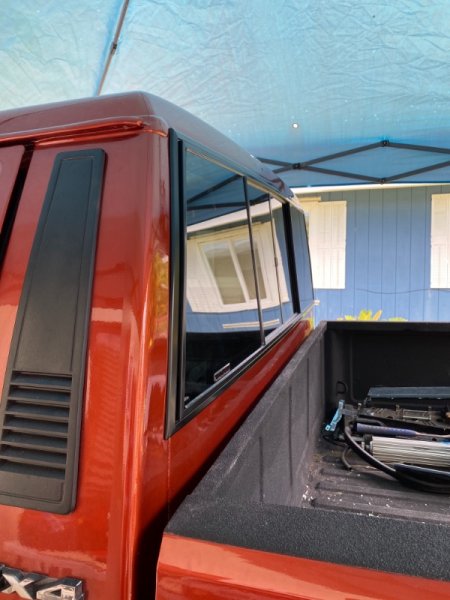
-
1991 Eliminator Resto-Mod
ghetdjc320 replied to ghetdjc320's topic in Member Projects: Your Comanches
Yeah they are a great filler. Only problem I have is the set time is too short. I have about 120 seconds in our weather. I’ve tried reducing the hardener significantly but it either doesn’t set or sets too fast. Just learned to work fast and have everything ready with the filler. -
I also run a mig 180 Lincoln back at my folks place stateside. The 180 is a awesome machine as is the 140 (which can run on 110). For welding in a controlled environment (no wind or breeze) I’d use mig. However, if welding outside, my little flux core can do 90+ percent of what my 180 can do. I would definitely use it in autobody. If you plan on welding 20 gauge or thinner though skip mig all together and go tig or braze in the panel. This little welder will only do about 18 gauge minimum if your very careful.
-
1991 Eliminator Resto-Mod
ghetdjc320 replied to ghetdjc320's topic in Member Projects: Your Comanches
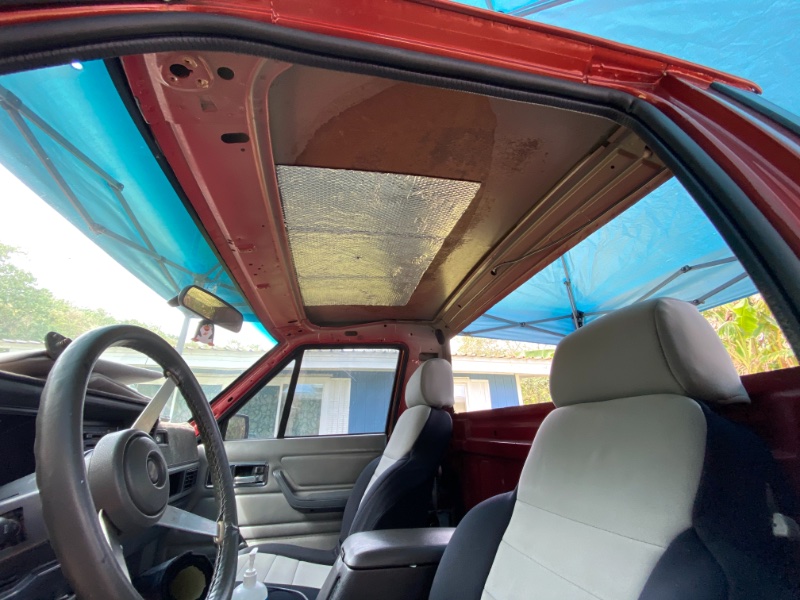
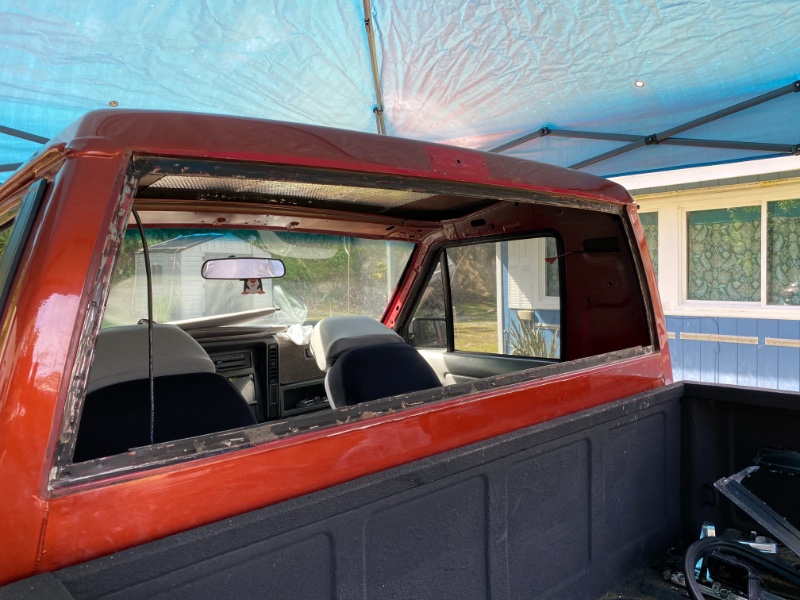
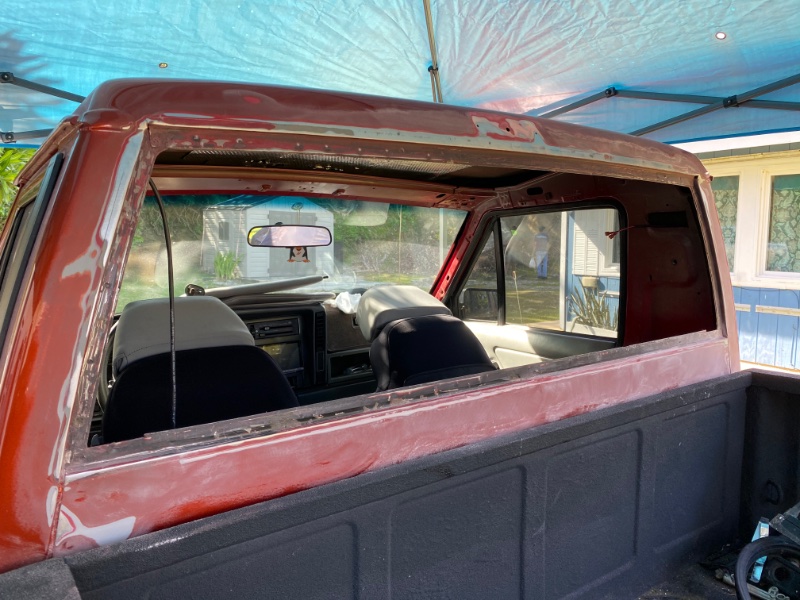
Every drop of rust was sanded to bare metal and any pitting was acid treated then acid primed. Followed by a touch of rage filler to fill any pinholes. Also replaced all the seam sealer in the groves with 3m dripcheck sealer. -
1991 Eliminator Resto-Mod
ghetdjc320 replied to ghetdjc320's topic in Member Projects: Your Comanches
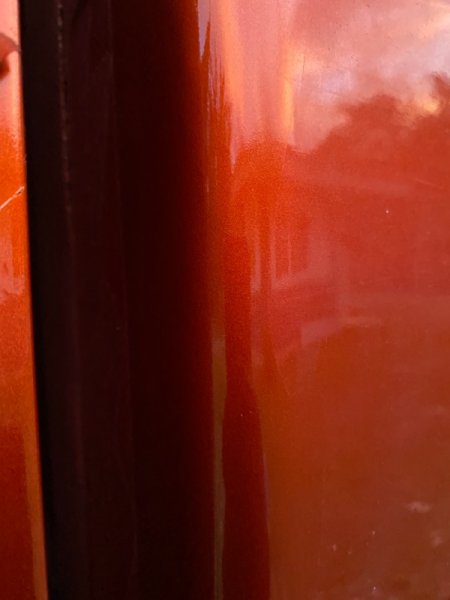
Finished the filler to get every spot perfect (Evercoat RAGE). Sanded with 320 then second skim of filler then 320, sealer, primer then 400 grit by hand. 3 coats of base then 3 coats of mixed clear/base. Moved tape line back 1” then hit it with mixed clear. Final pass was with acetone to “melt” the cots together followed by lots of air. It’s a tough technique but has great results. I do hate doing this all outdoors though. Letting everything cure overnight then will install rear window tomorrow. Also going to polish the cargo light inside and out and refinish it.

-
NOS grey 3 spoke steering wheel
ghetdjc320 replied to Pete M's topic in Craigslist/eBay... i.e. Not Your Stuff
Never mind. Turned on my vpn and it works -
NOS grey 3 spoke steering wheel
ghetdjc320 replied to Pete M's topic in Craigslist/eBay... i.e. Not Your Stuff
I can’t see any of these Facebook marketplace ads due to geo restrictions. -
The cigarette outlet isn’t on the same circuit. All the dimmable illumination is on the same one. Probably just a few bad bulbs. The hvac uses a “74” bulb. @Minuit will definitely know what the radio uses and can probably provide more info on those circuits.
-
Rear shock recommendation
ghetdjc320 replied to Scottybbythesea's topic in MJ Tech: Modification and Repairs
Bilstein makes the 5100 universal series that you can lookup based on distance eye to eye and valving. https://cart.bilsteinus.com/Portals/0/PDF/BILSTEINORCatalog2020_WEB.pdf Page 20 5125 or 5165 custom eye to eye applications. Just measure what you need and select the valving you want -
I’m originally from Austin and can’t believe how cold it’s getting there right now though it’s still a far cry from most of you. Going to change the landscape quite a bit. Lots of plants and trees don’t bounce back from that kind of weather.
-
I’m a native Spanish and English speaker. Few other languages also. My parents moved to ecuador when I was 2. I’m also a certified language instructor.
-
Thanks for the link. Looks like most on here are using some hybrid wax/ceramic coating. Has anyone used an actual ceramic coating? I may go with a hybrid option as noted above but the elements here eat up most finishes really quick. Really looking for something more durable
-
1991 Eliminator Resto-Mod
ghetdjc320 replied to ghetdjc320's topic in Member Projects: Your Comanches
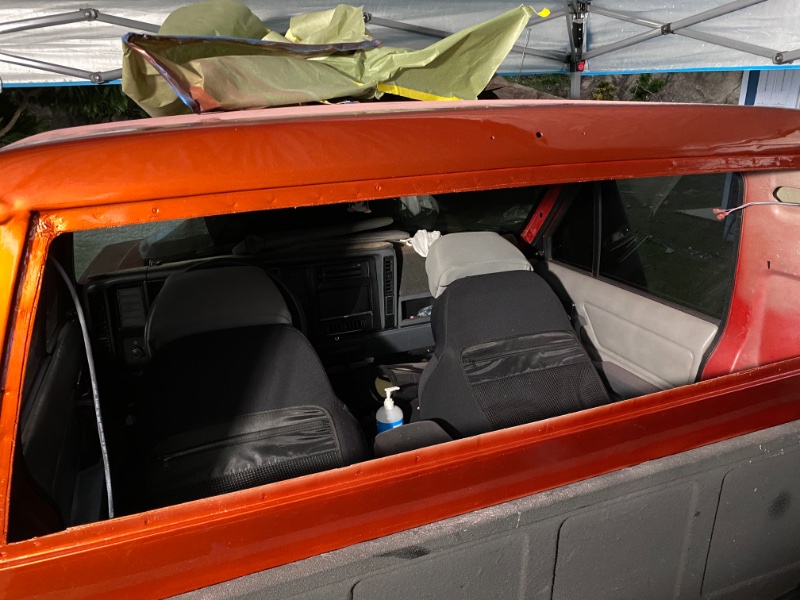
Yanked out the old rear window today. Then when through the painstaking process of straightening the opening around the window and eliminating all rust spots. All down to bare metal followed by a coat of acid primer and 2 coats of regular primer. I also swam sealed all the seams in the frame. Waiting for everything to cure overnight then will prep and pint tomorrow. Spot painting is so much more work than panel painting. Will be fading in the clear coat into the original using a fast reducer. Trial fit the new cr Laurence window and it fits extremely well. Will be a perfect fit when I’m done with it. This window is screwed in from the inside and uses butyl tape to seal it. Not sure why everyone says it doesn’t sit flat. The window confirms very well and the top has a built in curve.