
kryptronic
-
Posts
825 -
Joined
-
Last visited
-
Days Won
11
Content Type
Profiles
Forums
Gallery
Everything posted by kryptronic
-
 These look excellent. Excellent work. Thank you!
 -
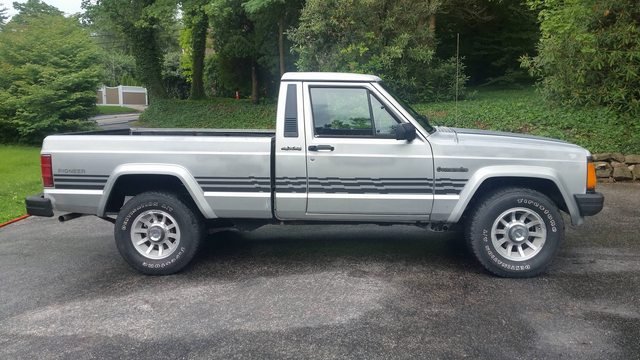
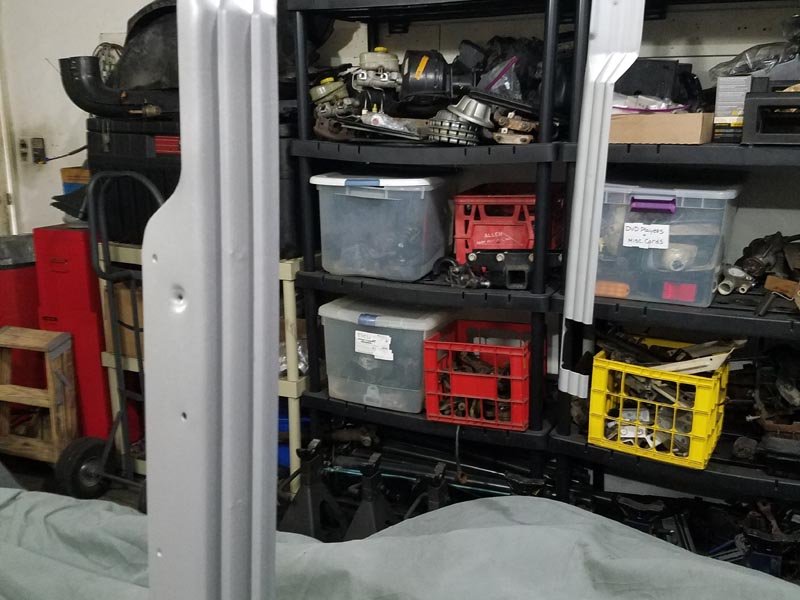
SWB roll bar dimensions
kryptronic replied to fiatslug87's topic in MJ Tech: Modification and Repairs
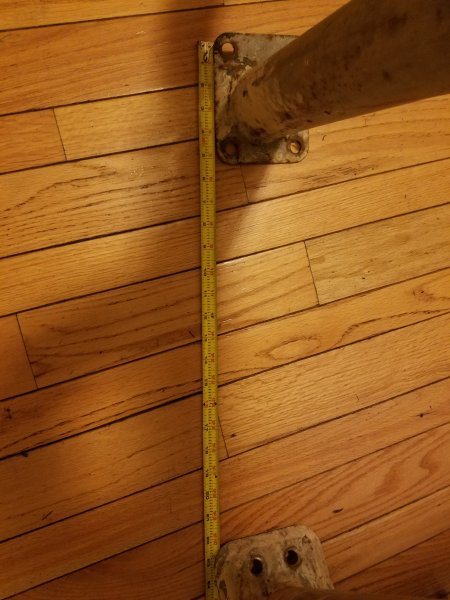
18.5" rearmost front bolt center to frontmost rear bolt center 22.25" front leading edge to rear leading edge. Yes, this is a fatory SWB rollbar, and it is in fact in my breakfast room. Along with a rollbar for my YJ. No space in the garage.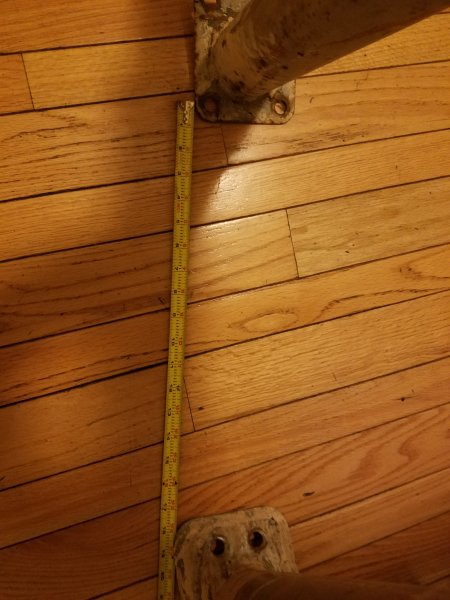
-
HVAC Vacuum Line Routing
kryptronic replied to kryptronic's topic in MJ Tech: Modification and Repairs
Thank you for taking the time to look. If I recall, that line may have dumped to a check valve previously. It looked like the PO tried to fix it incorrectly once or twice and I was guessing because reference pics are non-existent, and the FSM and diagrams I've reviewed are no help with this one. Maybe somebody else with an HO can chime in, perhaps provide a decent pic of how it looks. Basically there are two lines coming out of the HVAC, one white and one black. Anybody know where the black one goes on an HO model? -
HVAC Vacuum Line Routing
kryptronic replied to kryptronic's topic in MJ Tech: Modification and Repairs
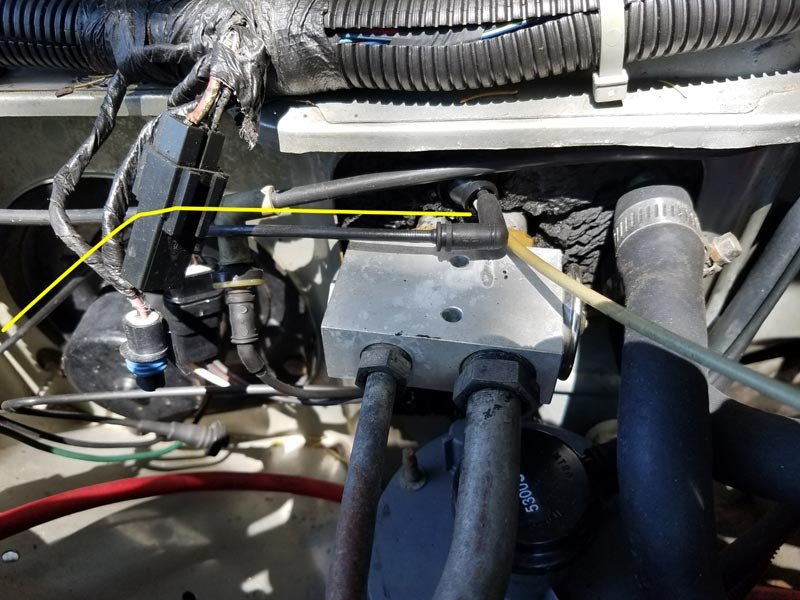
Here's a bigger shot from just before I fixed it. Shows more of the heater hoses. Yes, the hot water control valve is plumbed into the heater hoses. Would definitely like to know what that's for, though. Doesn't show up on my YJ. As far as cruise control, the steering column had a cruise control selector, but the wire was cut at the stalk when I got the truck. I have not fully verified all cruise control components are gone, but it is the intention to remove that option entirely if there are any remnants of it. I just haven't gotten there yet.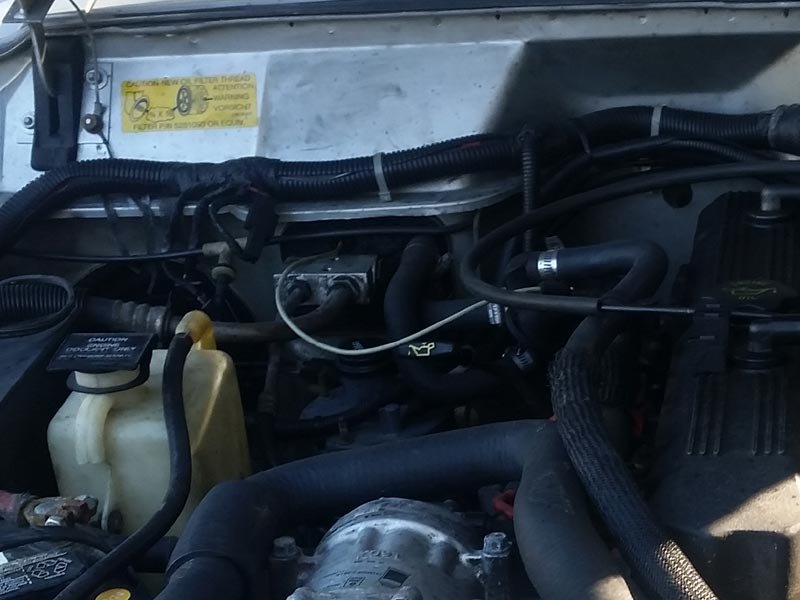
-
Silver Star 1991 Pioneer Build
kryptronic replied to kryptronic's topic in Member Projects: Your Comanches
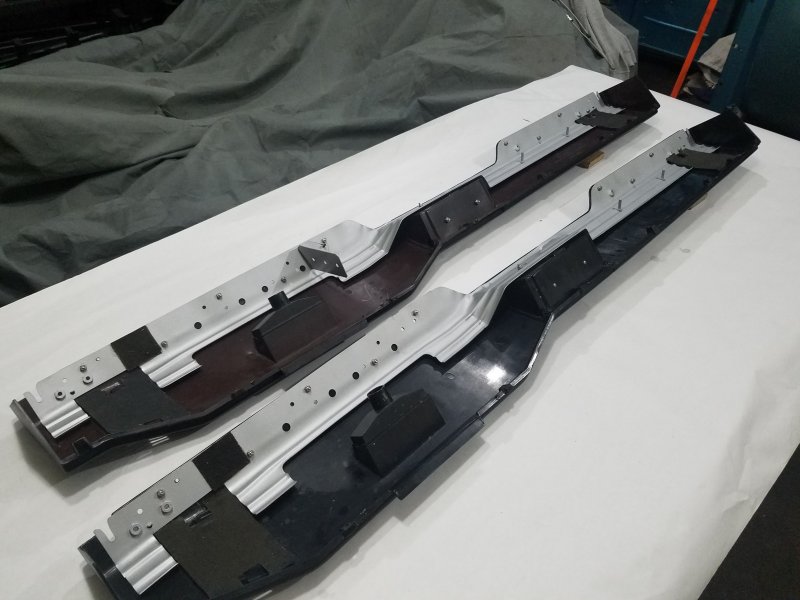
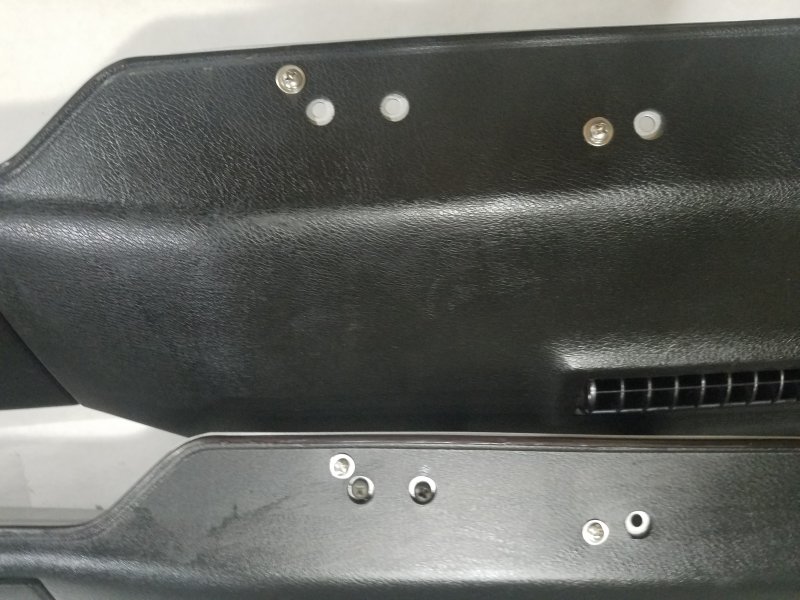
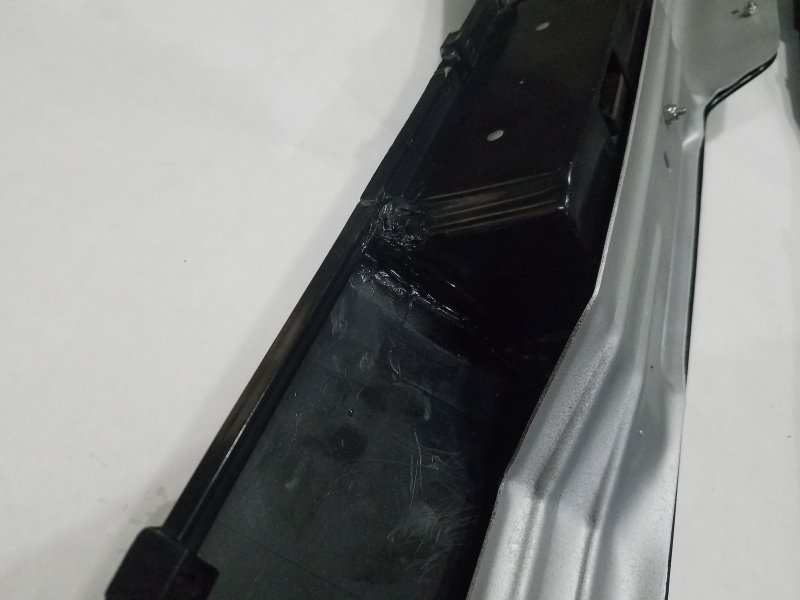
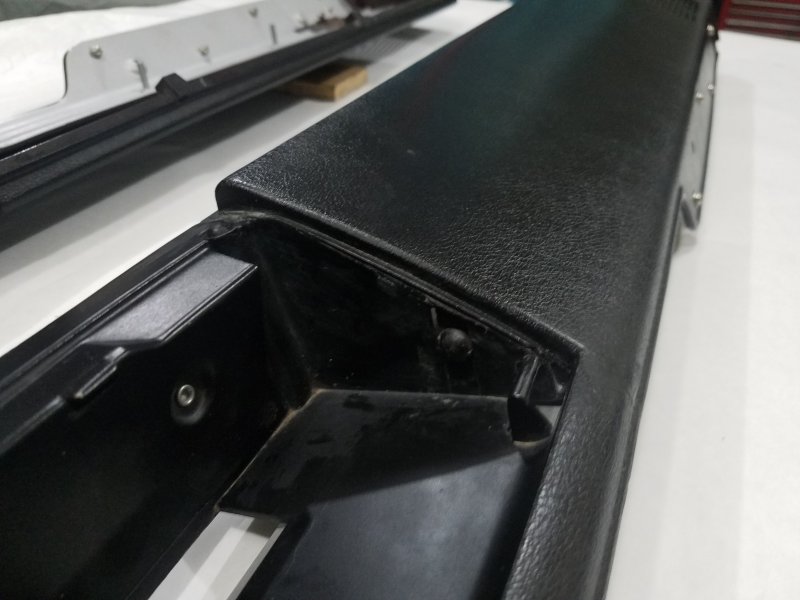
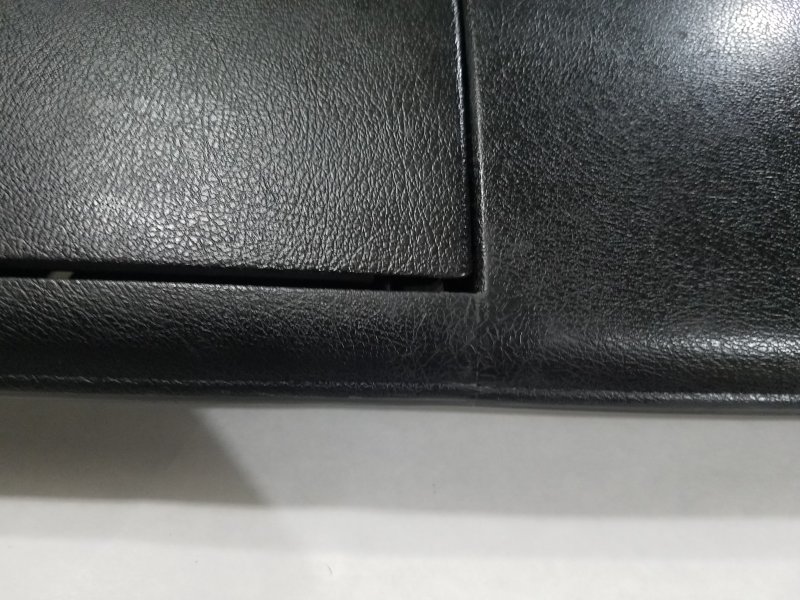
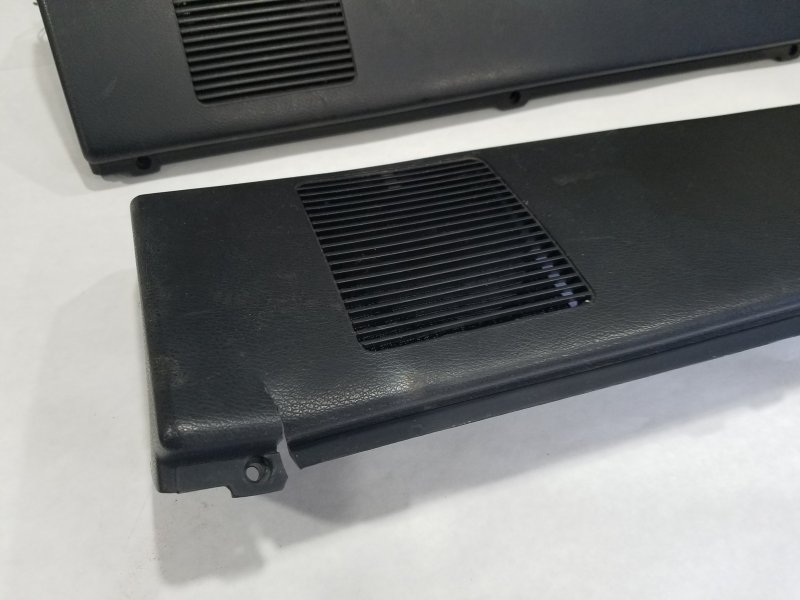
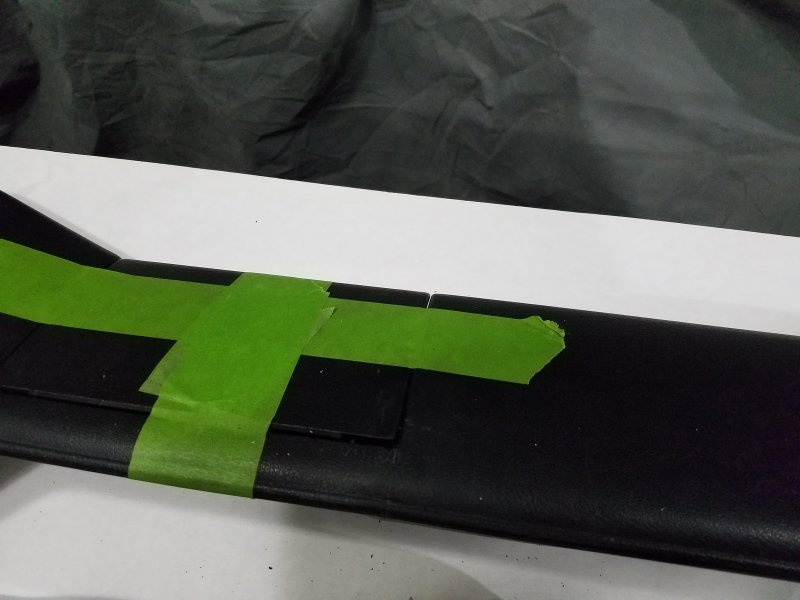
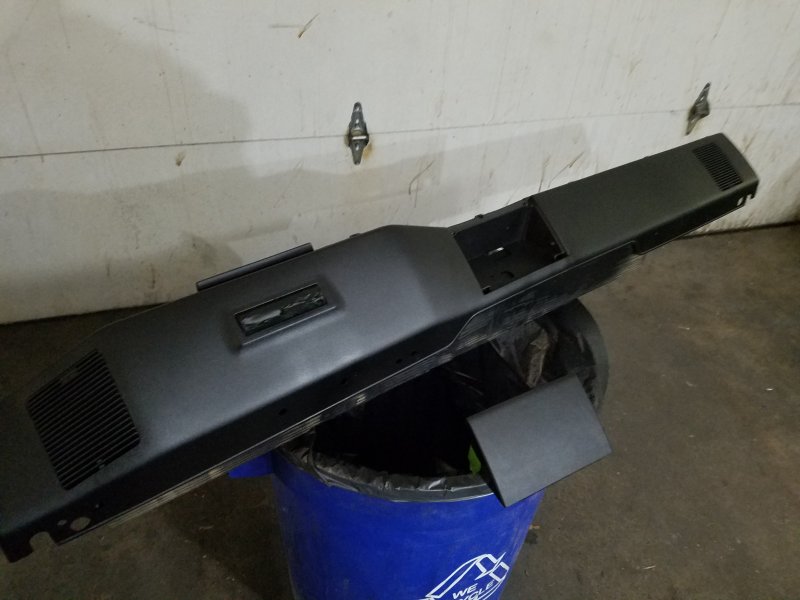
May 2018: Lower Dash Panels Finished So I've got spring fever and have been finding excuses to work on various Jeep projects. Yesterday I finished assembling the lower dash panels. Here are a few more shots. I used stainless steel hardware instead of rivets to put everything back together. I decided the true black panel didn't need paint. I then located an old bottle of Armor All. I gave both panels a good coating. What fading there was present on the black panel went away, and the originally burgandy panel developed a sheen that matched the factory black panel perfectly. They're nearly identical at this point. I used headliner adhesive to reattach the speaker fabrics and velcro. Notice the burgandy panel has the extra relay bracket attached, as that's the one that went back in the truck. The black panel went into storage for when the interior actually gets converted over to black. That relay bracket looks to be specific to the HO models. The burgandy panel (bottom) had two additional holes not present on the AMC panel (top, showing holes drilled). I realized I didn't provide any close-up shots of the black panel seem. I had taken the better two halves of two black panels, cut them and sealed them together to create one good one. Here is the backside seem, covered in a nice layer of JB Weld Plastic Bonder. And the frontside seam, which is barely visible at the top of the ledge that forms the ashtray. This shows off the visible portion of the seam. It turned out great. Replicating the factory leather pattern on the plastic was a time consuming process that was done with the plastic bonder and a utility blade. It's practically invisible. I'm stoked I don't have to paint this panel. And here's a parting shot of the painted burgandy panel installed back into the MJ. It's not the best look with the rest of the burgandy, but it will do for now. I painted it mainly to see how closely the SEM Color Coat Landau Black matched the factory black. It's dead on, so that's good news if I do end up having to paint any interior panels. I might have to paint my center mini console as the black one I have isn't in the best shape, and will require repairs.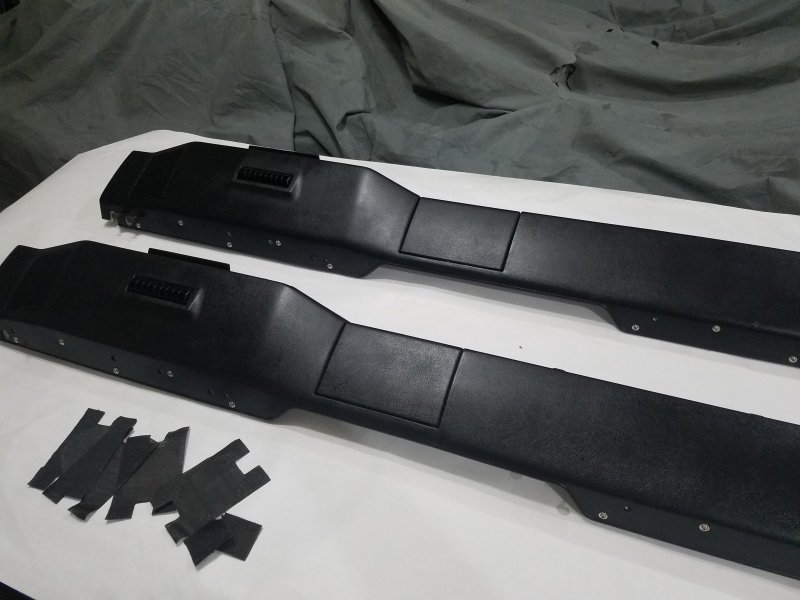
-
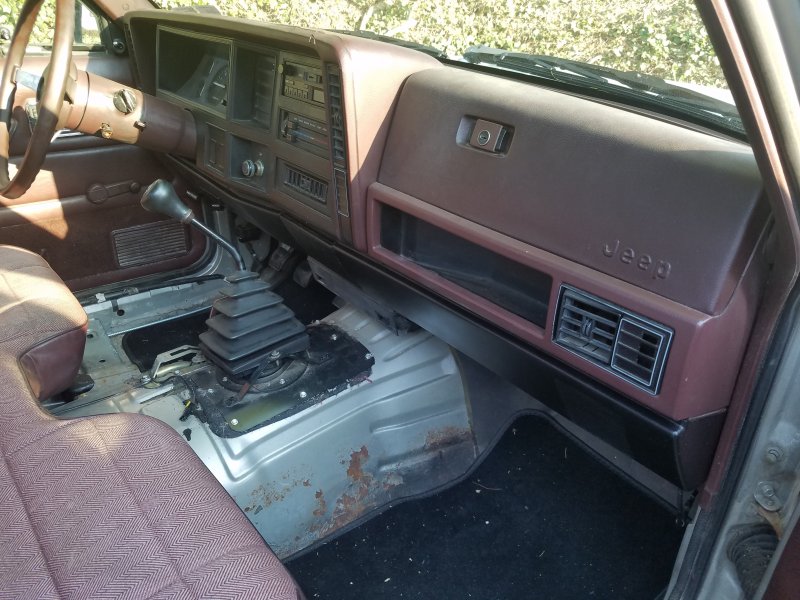
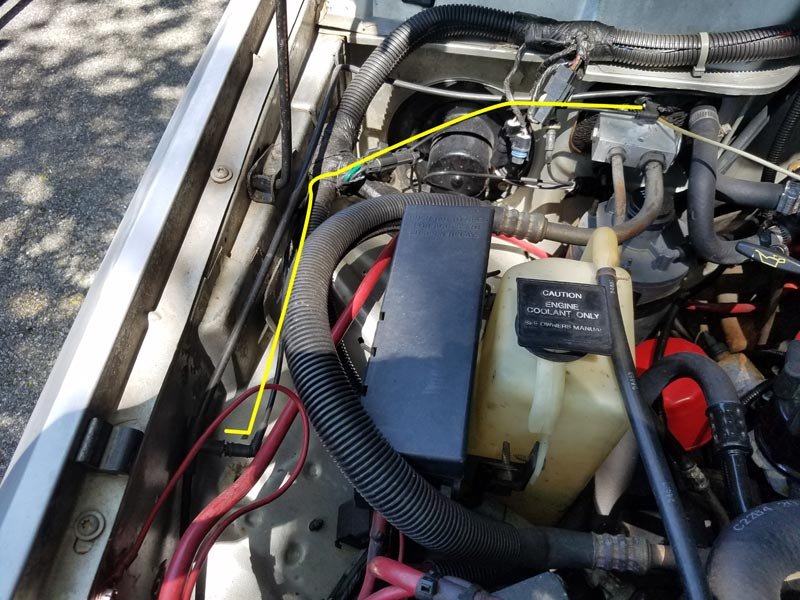
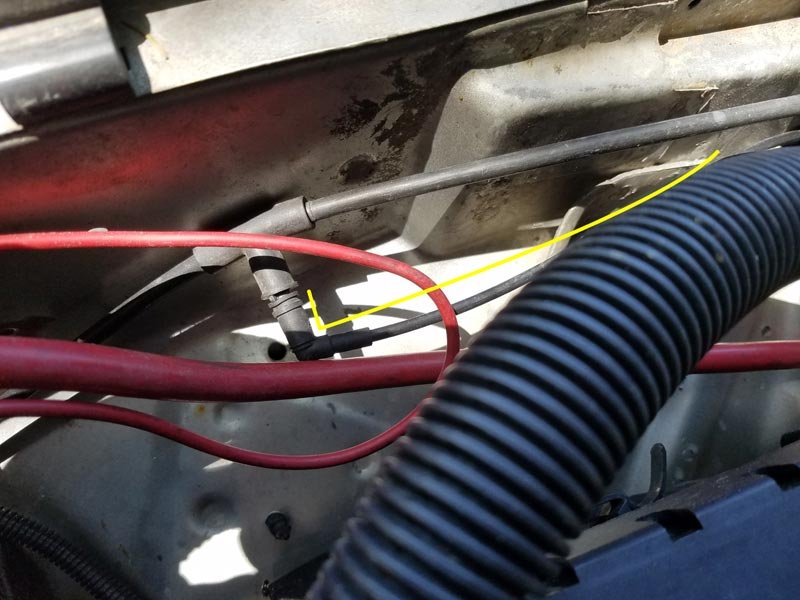
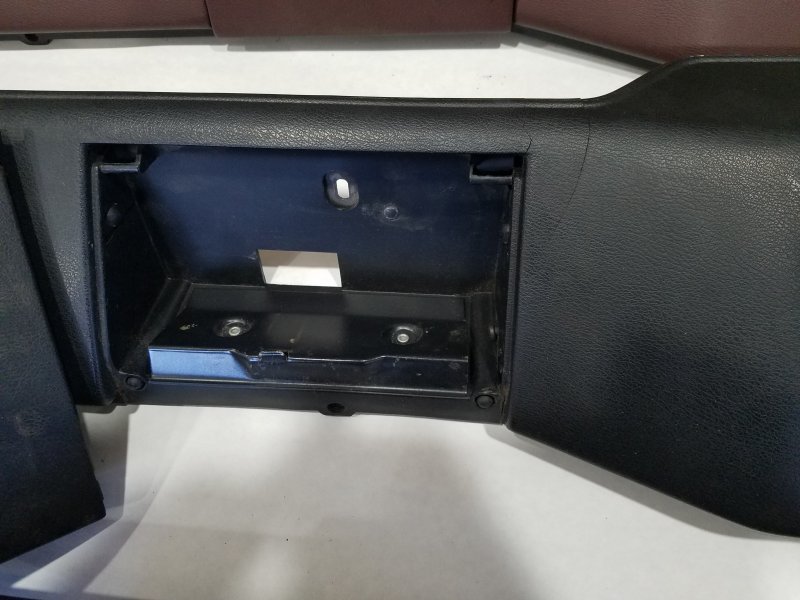
When I first got my truck there was a broken vacuum line routed through the firewall to the heating and air conditioning unit in the dash. Here's a pic, outlined in yellow. It was broken off where you see the boot I added near the firewall. As you can see, I routed it to a t fitting that routes to the football canister behind the front bumper. Here are some close up shots, in case the image above isn't clear. I did a lot of research and a lot of pics before doing this, but there wasn't any clear info on where this line actually should have gone. So I picked what I thought was the best option. The question is, where does it really go? Anybody have any good shots? 91 HO electronics. Thanks.
-
Silver Star 1991 Pioneer Build
kryptronic replied to kryptronic's topic in Member Projects: Your Comanches
I regret a not having a a second panel to ship you. Luckily one made it and turned out great. If I come across another I'll be sure to let you know. -
HO Catalytic Converter End of Life?
kryptronic replied to kryptronic's topic in MJ Tech: Modification and Repairs
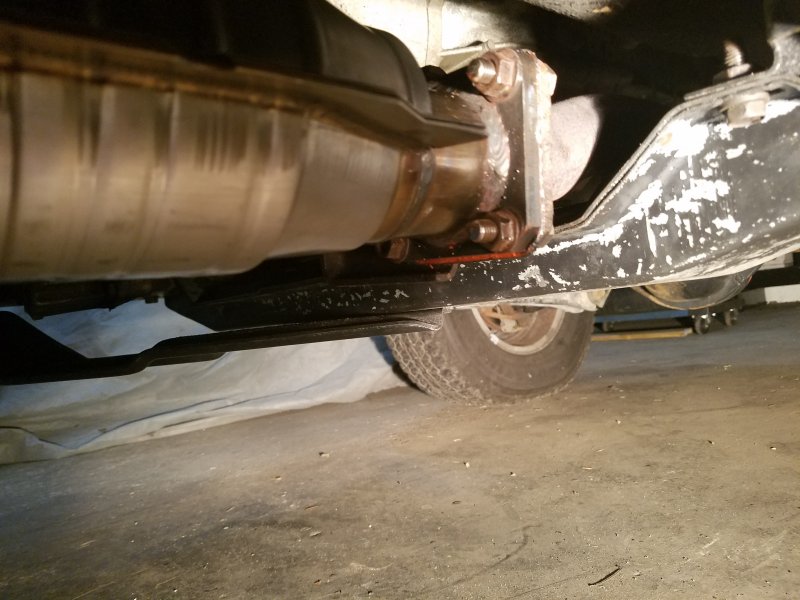
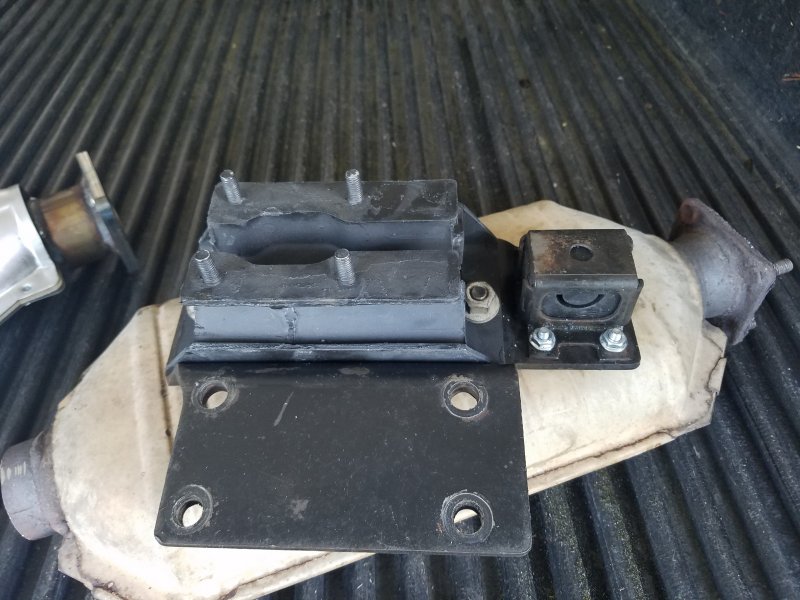
I just wanted to thank everybody for your insights on this one. I replaced the catalytic converter (Magnaflo w 23229) over the weekend, along with the transmission mount (Mopar 52002334) and exhaust insulator (Crown 53000101). As noted the catalytic converter's internals were destroyed. Likely cause was a worn transmission mount allowing the downpipe to contact and vibrate against the transmission crossmember. Noises reported were likely a combination of the guts of the catalytic converter rumbling around in addition to the downpipe rattling against the transmission crossmember. More pics and specifics in my build thread, but here's a pic installed. Thanks again.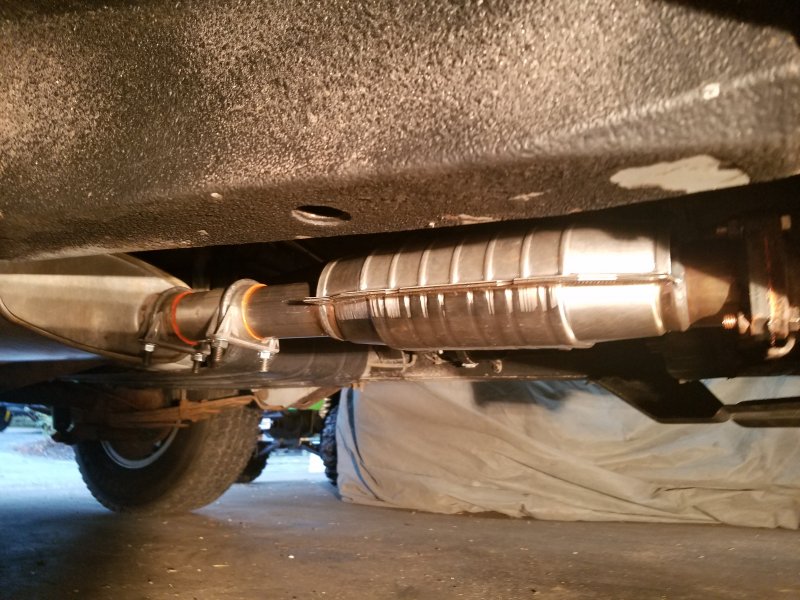
-
Silver Star 1991 Pioneer Build
kryptronic replied to kryptronic's topic in Member Projects: Your Comanches
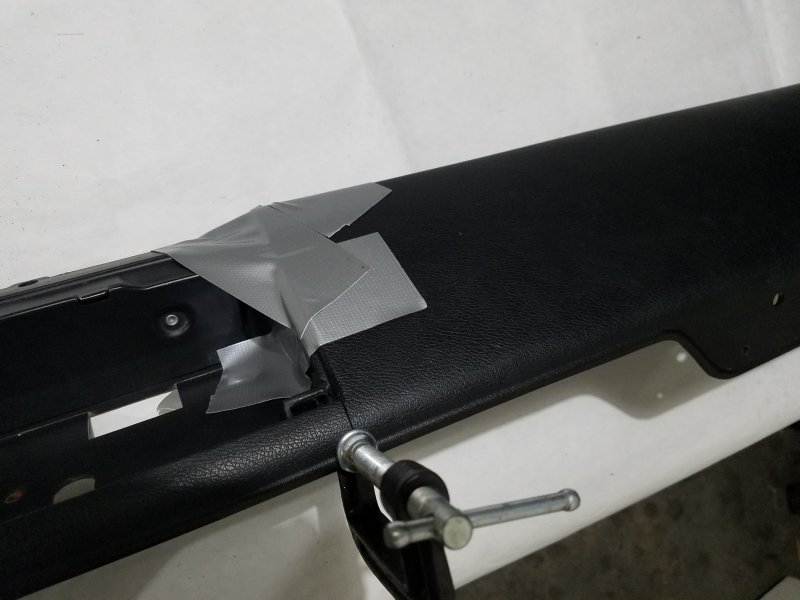
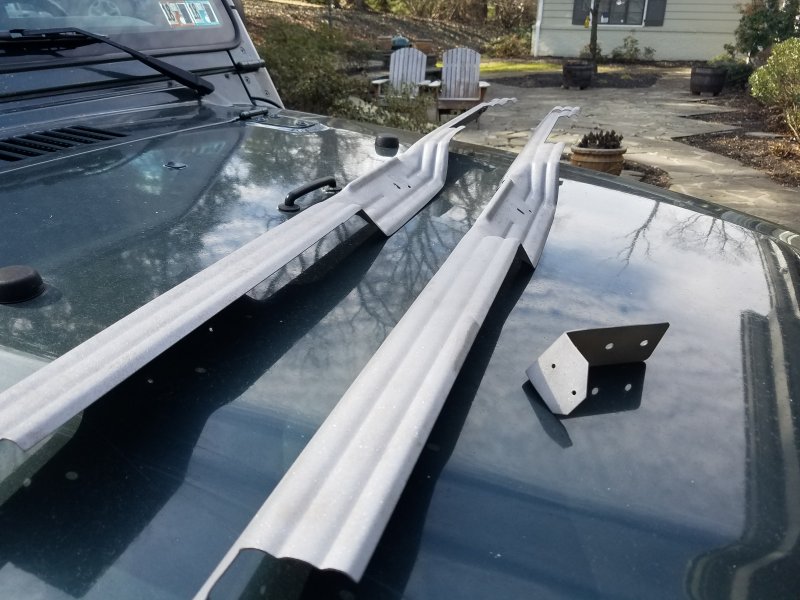
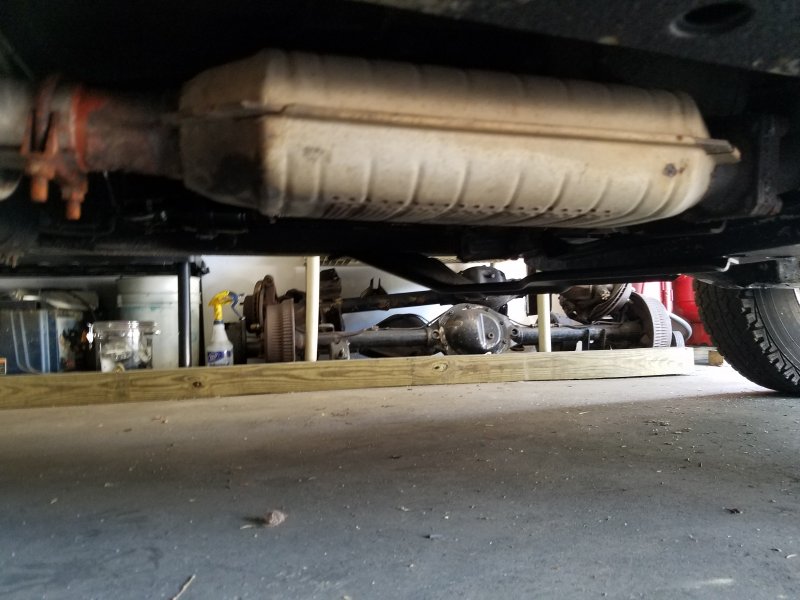
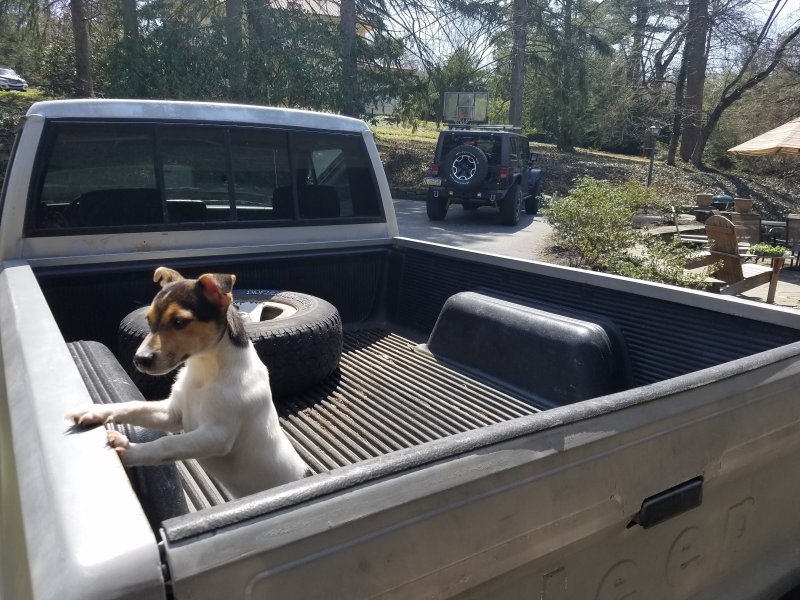
April 2018: Playtime with Lower Dash Panels and More Exhaust Work So I got sidetracked from my YJ build working on lower dash panels for the MJ. I needed a good winter project, and this fit right in. I had the MJ's original burgandy lower dash panel, which was cracked at the bottom of the ashtray and up along the side and at the top as well; and two AMC black panels, one severely cracked at the bottom of the ashtray and both top corners of the ashtray, and one panel cracked and bent at the top right corner, but otherwise perfect. All of them suffered from rusty backing plates. Here they are before disassembly. I disassembled all three panels, then blasted the backing plates with medium grit coal slag, and then coated them with Chassis Saver Sliver-Aluminum by Magnet Paints. I love this stuff. It's virtually indestructible. I've used it on a lot of various stuff on the YJ. Blasted clean: Coated in Chassis Saver, which actually has aluminum flake in it to help fill any rust-pitting. Unfortunately, after a lot of work, neither of the black lower dash panels were going to be salvageable. Which is a shame, because they're very rare. With each crack repaired on the one, another crack formed. Trying to bend and heat the corner on the other wouldn't remove the distortion from the bend entirely. It was an exercise in frustration. So, I had a crazy idea and decided to surgically cut them both in half, and use the good half of each to make one whole. I cut along the top along a factory mold line, then through the thickest part of the side of the ashtray, and minimized the visible cut on the bottom. I found the best way to bond the factory hard plastics was to use regular old Krazy Glue, then cut a channel along the seam on the back with a Dremel and fill generously with J-B Weld 50139 Plastic Bonder. In the end the panel feels stronger and stiffer than it did from the factory. I've put the black panel away for now, and will finish reworking what's left of that seam, and assemble it when I get to the MJ interior. For fun, I decided to paint the burgandy panel black, so I did that as well. SEM Color Coat 15013 Landau Black is a perfect match for AMC black. And it goes on more like a dye then a paint, very thin. Great product. I've still got to install it. Since I've owned the MJ there has been an intermittent sound (vibration noise, rattle, clunking all at once) typically heard/noticed at idle, especially when warming up. It's been irritating, and trying to pinpoint the source of it was problematic. It sounded like it could have come anywhere between the bottom end of the engine and the catalytic converter. I finally posted something in tech about it and got a common sense response. I noted in my post that I thought the catalytic converter was the culprit, and at over 230k miles, everybody agreed it was likely time to replace it, even if it wasn't the culprit. That's what I was looking at. After inspection, it looked like most of the noise was probably coming from the downpipe rattling against the transmission crossmember. The transmission mount looked deflated and the exhaust insulator was worn. They guys in tech were very helpful with part numbers, so I ordered a new transmission mount (Mopar 52002334) and a new exhaust insulator (Crown 53000101). I also ordered a new high flow direct fit catalytic converter (Magnaflow 23229). Our MJs have an exhaust flange on the downpipe, making the direct fit catalytic converter pretty much a requirement. Upon removal I discovered the interior components of the catalytic converter were destroyed. Chunks and bits of elements everywhere. Sounded terrible when shaken. With it removed I verified there was substantial play in both the transmission mount and exhaust insulator. In hindsight, I think the mount on the transmission wore out, and at which point the downpipe started contacting the transmission crossmember, it literally shook the catalytic converter to bits from then on. The install went very smoothly and in the end, I'm very happy to report this solved my intermittent noise/vibration issue. Here's the transmission mount assembled with the new rubber: There was about 1/8" clearance between the bottom of the downpipe and the transmission crossmember with a lot of play before installation, after adding the newer rubber, the clearance is 1/2" and has no real play in it. I had to use an extension pipe (Walker 42477) cut to fit to connect the catalytic converter to the muffler. I think it would have fit without it if I didn't have to cut the old catalytic converter off the muffler for install. I'm guessing a new muffler would not require the extension. After spending some more time under the truck I'm beginning to seriously question as to whether I should completely tear it down to do a frame-up restoration or not. It is so clean underneath, like no Jeep I've ever seen. So glad she came from the south. She's southern by the grace of God, I suppose. So still debating on that. Got a new friend. He likes hanging out in the bed of the MJ. I'm going to enjoy the MJ for a bit while I continue work on the YJ project. So just planning on little things here and there for the MJ over the next few months.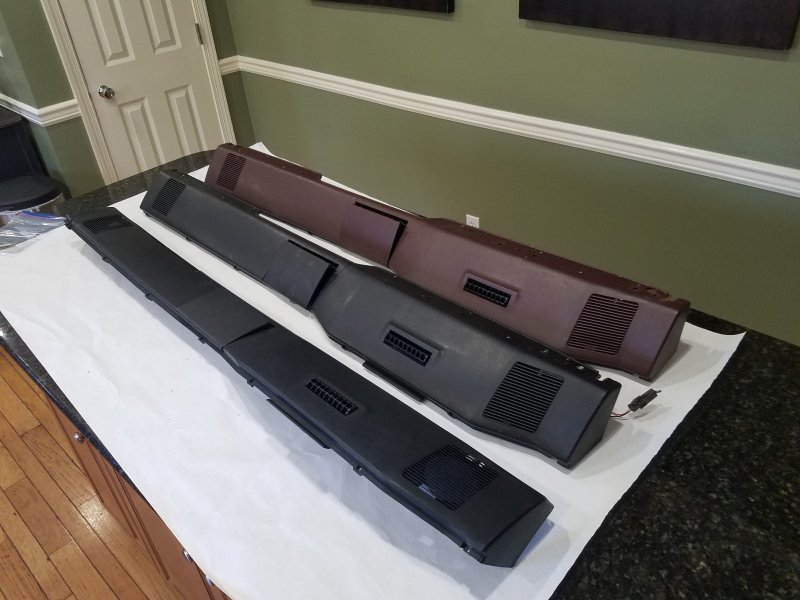

-
Reference this thread in regards to the Tapatalk error:
-
MJ to YJ Conversion Q's
kryptronic replied to gilman711's topic in MJ Tech: Modification and Repairs
Plus most of the engine accessories and brackets are different XJ vs MJ. All of what was said above by DirtyComance I'd agree with as well. -
This is what I would need to remove/swap that I'm having trouble finding info on. Plus the controls. Which pieces are different A/C vs non-A/C? Thank you.
-
The manche is going to be a three season vehicle, sitting in the summer. A/C takes up alot of space in the engine bay, and I'd eventually like to go with electric fans and reduce the number of pulleys and accessories on the front of the motor. Maybe run more of a setup like a YJ with 5 pulleys and the alternator up high, if the battery can move elsewhere. Just pre-build thoughts and planning at this point.
-
R12. All the new components I put in will run either, as far as I know, though. I have some of the newer R12 substitute to charge it with, but never did so.
-
It's all there, mostly new components. Never charged since reassembled. So I assume it would work great if it was charged.
-
I'd like to remove A/C from my 91. So same question, just the inverse. Thanks.
-
HO Catalytic Converter End of Life?
kryptronic replied to kryptronic's topic in MJ Tech: Modification and Repairs
I got excited when I heard a delivery arrived via UPS today. It should have been a Magnaflow 23229 catalytic converter. Received a Flowmaster muffler. What the hell, Amazon? Still waiting on the trans cushion and downpipe isolator so not a big deal. But still. -
Rear Disc Brake Conversion
kryptronic replied to Keyav8r's topic in MJ Tech: Modification and Repairs
ZJ brackets are drilled for a c-clip D35. I used new backing plates available from Crown designed to work with both D35 variants, the D44 and the Chrystler 8.25. So they're all somewhat similar in profile I would guess. -
Rear Disc Brake Conversion
kryptronic replied to Keyav8r's topic in MJ Tech: Modification and Repairs
Yes, it will be correct. If everthing doesn't line up perfectly, there's something wrong. -
Rear Disc Brake Conversion
kryptronic replied to Keyav8r's topic in MJ Tech: Modification and Repairs
Is it a non-c-clip D35? I assumed it was c-clip, thinking non-c-clip stopped in the 80s. My 91 has a stock c-clip D35. Regardless of what it is, I think you're right about the bolt holes needing to be enlarged/moved during any future swap to a D44. When I actually start my MJ build I'm going to research this heavily. OME is excellent with their R&D and they are known as the best of the best for the applications they support, and that's led me to pick them for three different generation wranglers (JK, TJ, YJ). Now you've got me thinking on OME rear springs for the MJ. Need to expand my thinking. I had an 88 Land Cruiser FJ62 with OME springs. I loved that beast. It was the "when you absolutely, positively have to get the serum to the villagers" model. They might just have a similar truck application. Alcan has a very detailed quote process I was impressed with. Seems like those are tuned to the truck as well as what you do with it. Hells creek knows MJ springs. The general MTs are proven. There are good choices out there. Truly sorry for the thread hijack. -
Rear Disc Brake Conversion
kryptronic replied to Keyav8r's topic in MJ Tech: Modification and Repairs
For the D44 swap the backing plate may just need need to be grinded out a bit to fit the larger D44 tube, maybe not, depending on the plate. Plus he'd need TJ axel retaining brackets for a disc D44. Everything else swaps over. When I get the YJ on the road, I'll let you know how it rides. It has 036R springs on all four corners, which are listed as rear heavy duty leafs. They are giving me about 3.5" of lift. Drivetrain and frame are 100%. Working on the tub now. I'm a huge OME fan, and am equally disappointed they don't have an MJ rear spring. Will likely use OME fronts and Hells Creek or Alcan rears on the MJ. I just put an OME lift on my JKUR and it rides way better than stock. Like butter. Soo good that I just bought one for the TJ, pending install. Ok, back to ZJ disc brakes... -
Rear Disc Brake Conversion
kryptronic replied to Keyav8r's topic in MJ Tech: Modification and Repairs
Here's a pic of my setup with the ebrake cable off.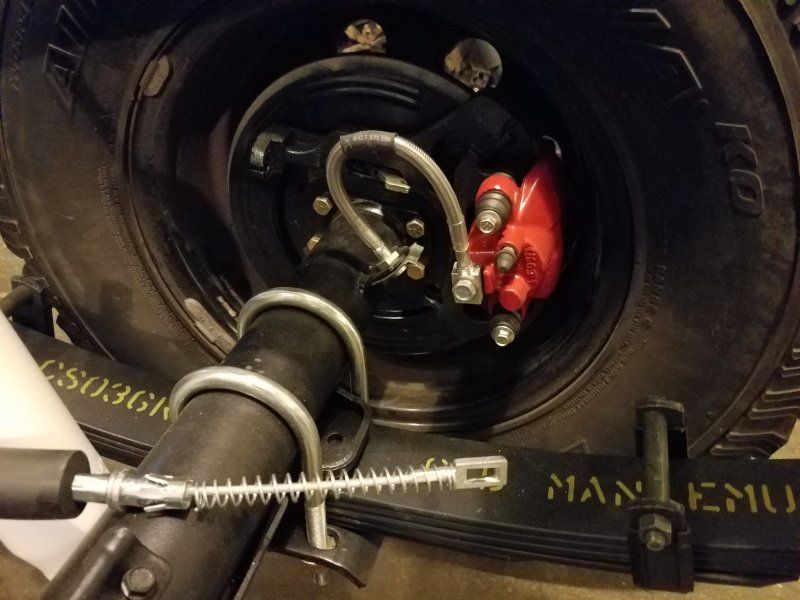
-
Rear Disc Brake Conversion
kryptronic replied to Keyav8r's topic in MJ Tech: Modification and Repairs
I've done the ZJ disc conversion on a 95 YJ with a D35. I used new components and matched to a 1996 ZJ when doing it. Ithink all years work fine, you want a non-ABS setup. You need longer wheel studs. I have no idea about swapping the axle shafts but assume that would work. The stud length and size you need is identical to what's on the front brakes. I used front studs on my YJ axle and it worked great. Studs press/hammer in and out easily. Crown makes new ebrake cables with the right ends on them in various lengths using the RT Offroad brand name. -
Me too, and I ended up picking Chassis Saver as well. Great stuff. Give it a solid 7-10 days to fully dry and cure. A little less if it's still cold where you are.
-
HO Catalytic Converter End of Life?
kryptronic replied to kryptronic's topic in MJ Tech: Modification and Repairs
I almost wrote that you are a gentleman and a scholar instead. But got lazy. I appreciate the part numbers. There's a bunch of conflicting info on the web as to what works and what doesn't, so you posting the right numbers here is great. I picked up the part number for my SWB emergency brake cable in another thread and it was dead on. Sometimes I don't even know the proper name for what I'm looking at.