
Dzimm
-
Posts
3580 -
Joined
-
Last visited
-
Days Won
11
Content Type
Profiles
Forums
Gallery
Everything posted by Dzimm
-
It would work but won't fit tight everywhere and all the holes and creases won't line up. It will definitely fit the bill as carpet but won't have a nice tight factory fit.
-
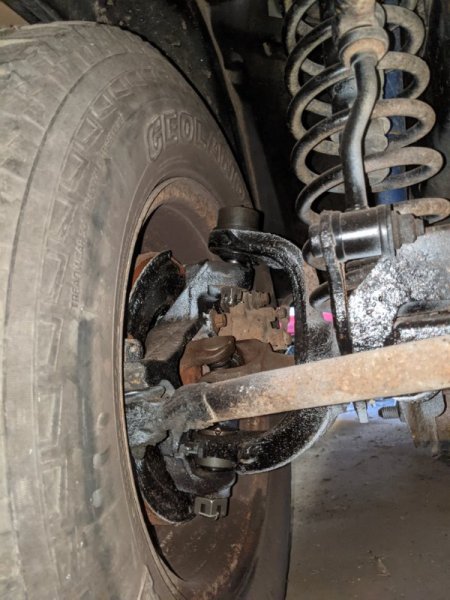
Welp.. it's broke! A couple weekends back we had a day on the farm with all the toys, spent many hours racing around and such. The last jump of the day the Suzuki came down perfect but as I was driving away I got a grinding/rubbing noise that I could faintly feel as well. It would get worse with speed and my initial thought was transmission. Yesterday we transferred it out to my house so I could work on it and when strapping it down I noticed the problem.. Diff housing exploded as well as chipped at least one pinion gear tooth. Time to find a new diff!!

-
Snapped a picture of it, definitely a broken tooth on the pinion gear. Time to rip it apart!

-
Just for future reference I put one of those new fan shrouds I got online on my 95 XJ and it suprisingly fits like the OEM. The upside is the plastic isn't brittle so it is much easier to install without breaking. Only thing I didn't like was some of the edges were kind of sharp.
-
As it always goes!
-
So we got the Suzuki hauled to my house today so that I can start doing work on it and while strapping it down I spotted the problem.. Picture to come The front diff housing exploded! These are aluminum diffs and they seem to be prone to breaking. There is a steel upgrade I may look into unless I can find a cheap stock replacement. I'm hoping it didn't destroy the gears but we'll see how bad it is when it's torn apart. Also thinking it may be a good time to regear for more torque since it's pretty sluggish off the line. It can outrun the side by side at speed but gets destroyed by it off the line.
-
Yeah unfortunately I don't think there is anything you could really do at this point. Maybe you could have a lawsuit against the trooper for falsifying a report or something but I think that's reaching. What about dash cam footage from the stopped trooper? Some have rear facing cameras if the accident happened behind them it may still have been picked up on camera. Your best option that doesn't cost you more would be to contact the truck driver and see if he'd be willing to help correct the report however as this is his lively hood, I wouldn't expect him to admit fault for fear of losing his job. More than likely your best bet unfortunately is to just eat the $1700 before it gets any higher from continuing to fight it. And quite honestly, you may be better off keeping insurance out of it because if you make a claim your rate will go up, especially if it was deamed your fault.
-
Crazy there's still multiple OG members still around!
-
If you happen to have a halfway beatup tailgate I can make a patio bench from (not looking for a great one) and JMO413 ends up buying one of your SWB beds that's a single stop for you in Iowa. I'm sure we could drive a bit to meetup as well if timing works out.
-
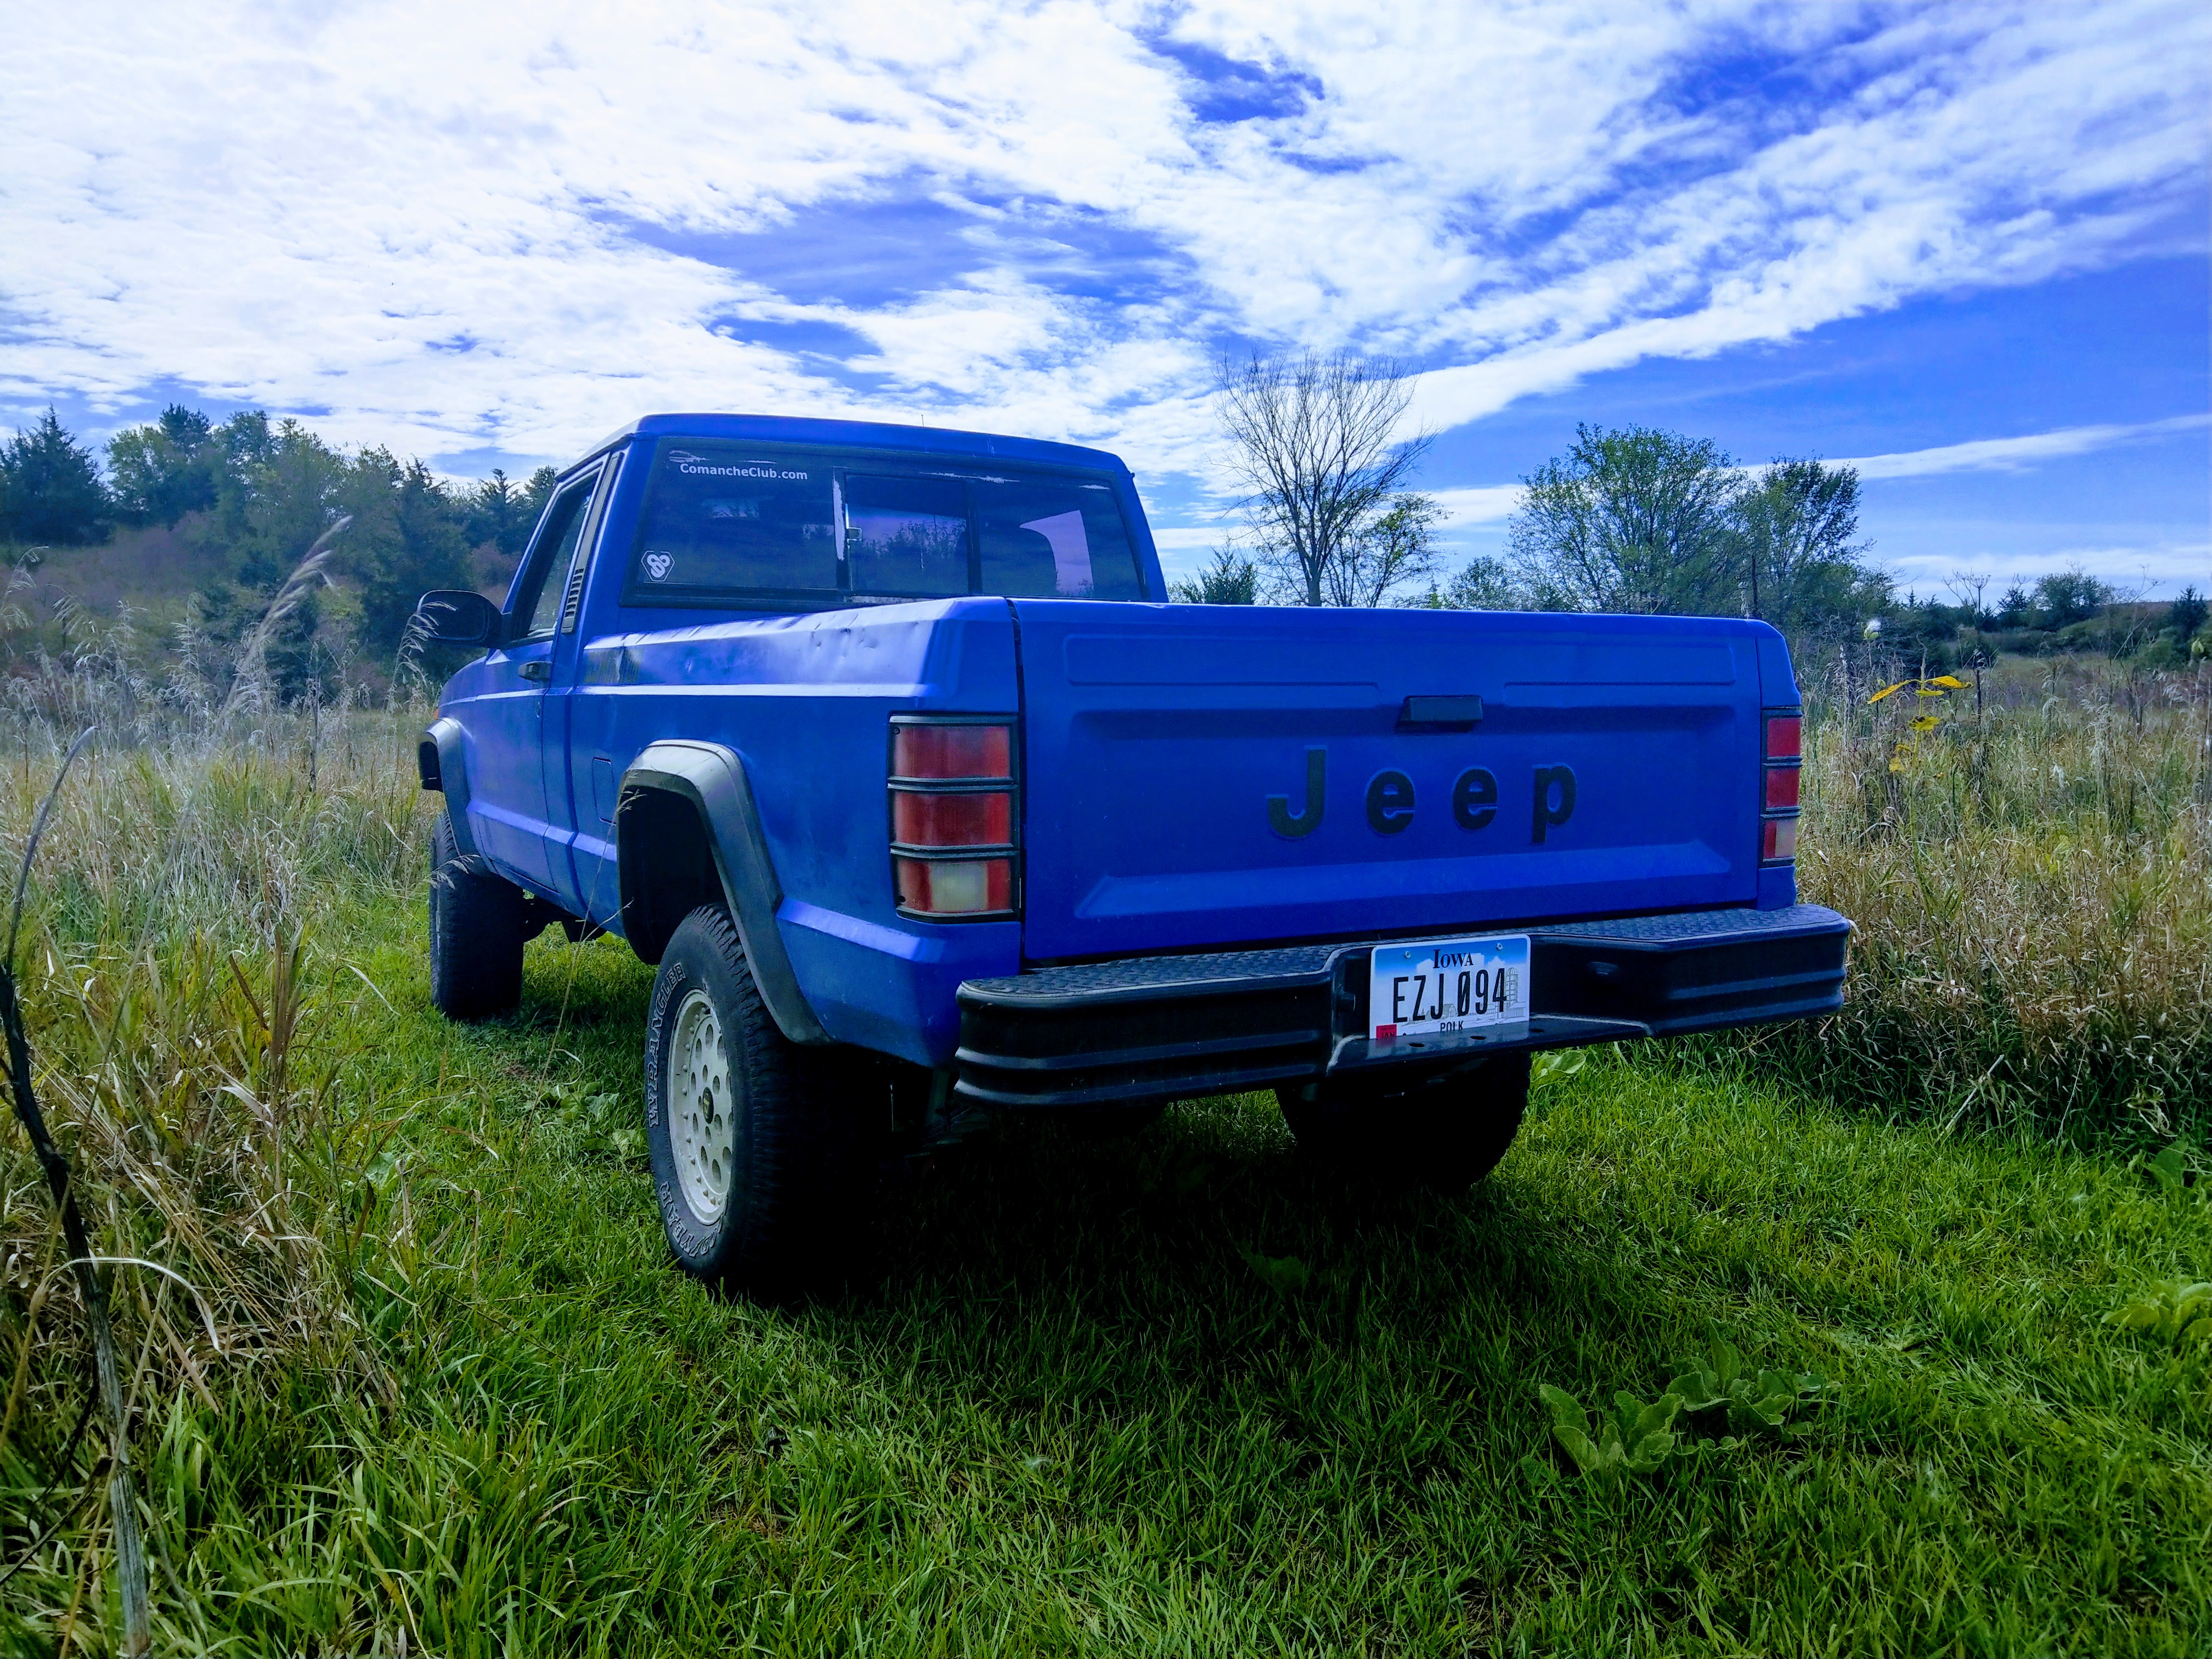
Thanks for sharing, I hadn't heard of it. Wish I would have know of it before I painted my blue truck, would have saved me hours of sanding off the very poor rattle can job that was on it.
-

95 XJ Winter Daily/Beater/Rust Bucket
Dzimm replied to Dzimm's topic in Member Projects: Other Cool Stuff
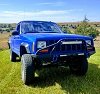
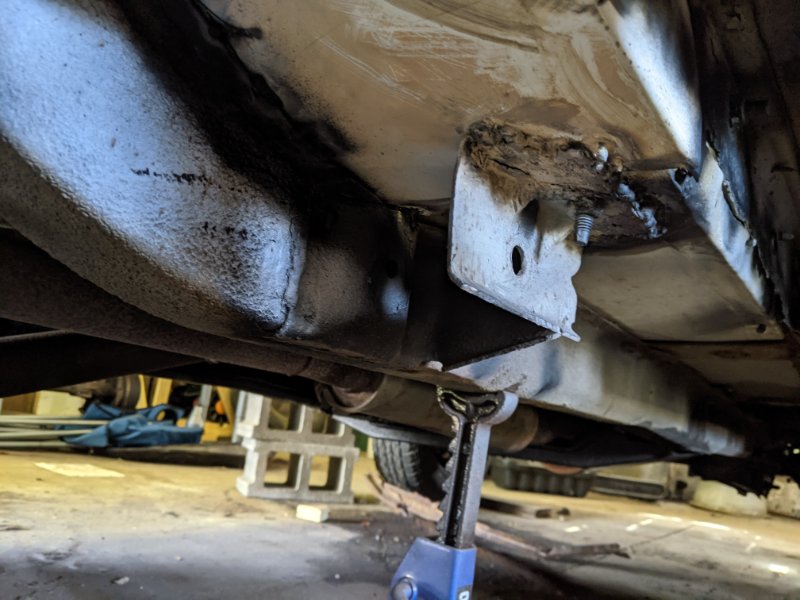
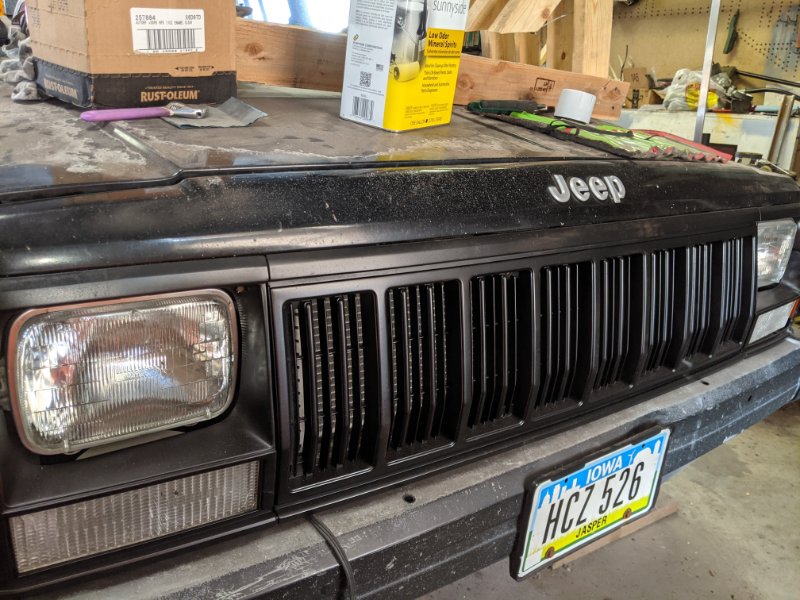
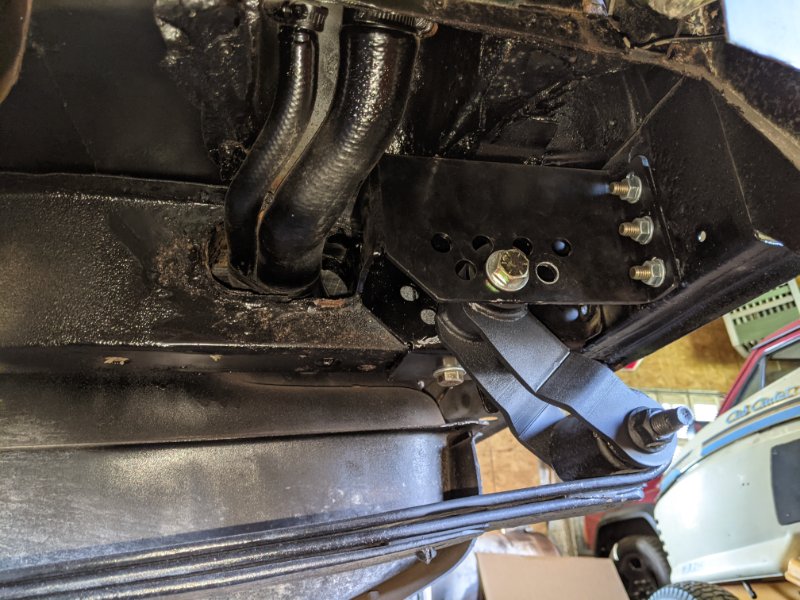
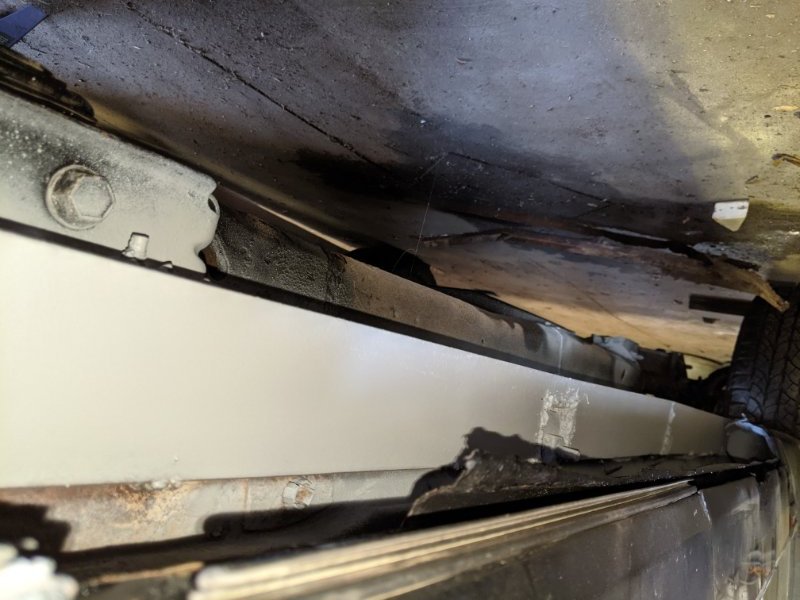
Well turns out I never finished editing and uploading the last video... I've got too much going on to do that right now but I finished up the head install and drove it for about a year without issue. The end of last summer I was out at the farm doing some work and went to turn around in the ditch and heard some popping in the front end and some not so nice noises.. turned out my front u-joints were so beyond rusted that the needle bearings were fused together or completely crushed into powder on both sides. What was a simple u-joint replacement turned into a bunch of work that has been going on since the end of last summer, I'll go through it briefly. Replaced the u-joints, then figured I'd do the ball joints since I was in there, also ended up doing new hubs, and new sway bar links. I also decided to paint the front grill and headlight surrounds. Had to replace one of the surrounds because one was broken. Looks great now, just need to paint the bumper to match. I then discovered that my rear spring mounts were much worse than they previously were. I had made some repairs to the floor in that area but it wasn't great. I finally decided since the front was completely rebuilt, I'd do the rear too. I got some ironman off-road rear shackle boxes because mine were starting to rust and were flimsy. They take some work to install but are great. They've got 8 bolts holding them in to the frame, floor, and rear brace and they can be welded. I also rebuilt the rear springs with an extra main that I cut the eyes off of to fix the sag. With the modified springs, ironman shackle mounts, and ironman shackles I ended up with about 1.5" over stock lift in the rear. Idk why but a couple pictures turned upside down when I upload to CC, not sure what's going on there.. The driver side is completely done including a 1/4" thick piece of angle iron I ran front to back to fix the floor seam. That needs more welding but it's good enough for right now. I cutout and replaced the floor pans over the front spring mounts again and got them welded good to the mount and surrounding metal so it should be just as strong as it was originally. Need to go back through and seal up all the seams so it doesn't start rusting again. The passenger I just have to assemble the spring, drill the holes to mount the shackle box, then assemble it all. The floor seem isn't destroyed yet on this side so it's not getting angle iron. Grease the shackles, get the taillights, rear bumper, and hitch back in and it'll be back on the road! Still more sheet metal work to do, namely the rear quarters and have to reassemble the interior but I can at least start it up and move it for the first time in like 8 months her soon.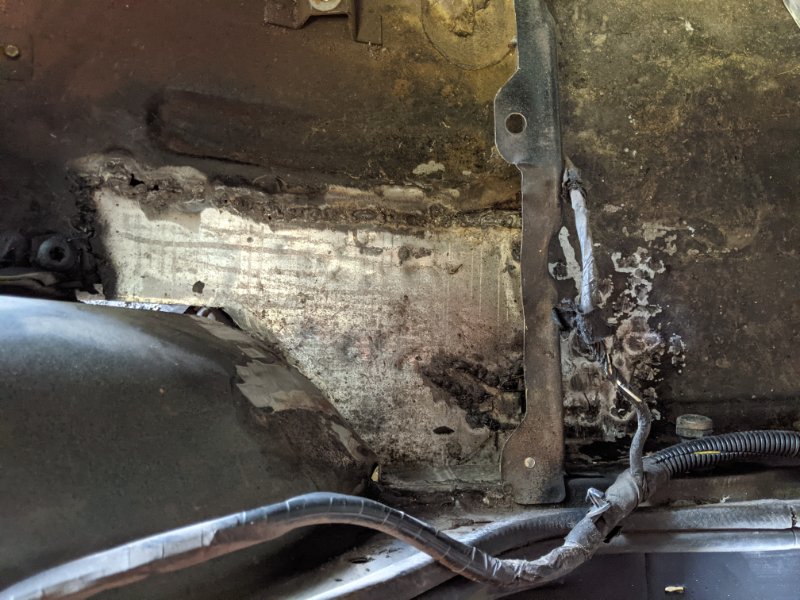
-
Looking for a new rear bumper, any suggestions
Dzimm replied to EverGear's topic in MJ Tech: Modification and Repairs
There are usually factory ones floating around for sale. Most can be had for cheap and sometimes free but they are almost always bent slightly. If you want something new and affordable, FEY makes a universal step bumper and mounting brackets specific for the MJ. Bumper part numbers are 63000 for black and 73000 for chrome. The MJ mounting brackets are 97900. Search around a bit and you can find a deal usually. I got mine for around $100-$120 on sale. I think O'reillys had it cheapest last time it came up but you can find it at many different retailers and online stores so you'd have to look around for the best deal. There are also limitless custom/off-road bumpers for the MJ. Those you'd have to look around at what's available from different fab shops and such and see what you like. -
One thing to know about silicone, that nasty vinegar smell you get when it is curing is actually a chemical it's offgassing that can cause heavy rusting. You can get silicone that doesn't have this chemical, typically it's designed for aquariums and also I think GE silicone II. But as Pete mentioned, something automotive grade would be best.
-
If the rollbar attaches to the front slope of the wheel well, it's a factory bar. If it attaches to the top of the wheel well it is aftermarket. If it's not on the truck just look at the rear mounting points and you'll be able to tell how it mounts to the wheel well.
-
I've seen people tuck the wire beneath the rubber windshield gasket and run it down into the fender then into the engine bay but if you have the factory metal trim still that won't work. Best bet in that case would be to drill a hole in the roof for a clean install, just have to seal it up really good. As far as wiring yeah you'd tie it into the running lights.
-
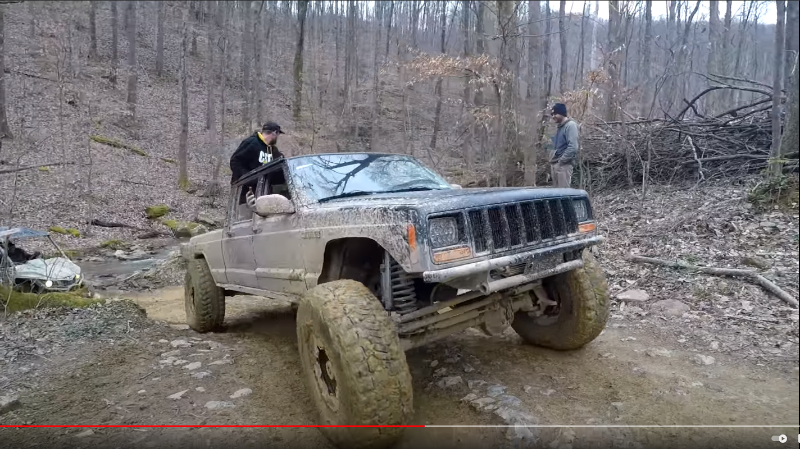
I just came across this video. It's an outsider perspective on offroading but features a Crewmanche. I have never seen a video of one nor have I seen this one in particular before. Its a good watch.
-
It wasn't terrible to drill, just step the drill bit size up. On page 7 of my build thread near the bottom of the page there are more pictures and info on it. https://comancheclub.com/topic/56220-92-turbo-autocross-mj/page/7/#comments
-
I welded both sides with a flux core. You'd be fine with doing the same but I'd use the stick welder since you have it. It's also really hard to get the mig gun in there to get a good weld.
-
Well here's hoping it turns out to not be transmission related. It was running fine all day until that last jump so I figured it has to have broke due to that. I didn't do any real troubleshooting yet, was trying to limit damage and it was the end of the day so we were packing up. I'm going to see about getting it to my house so I can get it cleaned off and spend some time with it. Thanks for the input! I'll try to get out there again soon and do some testing in other gears just to see what it does.
-
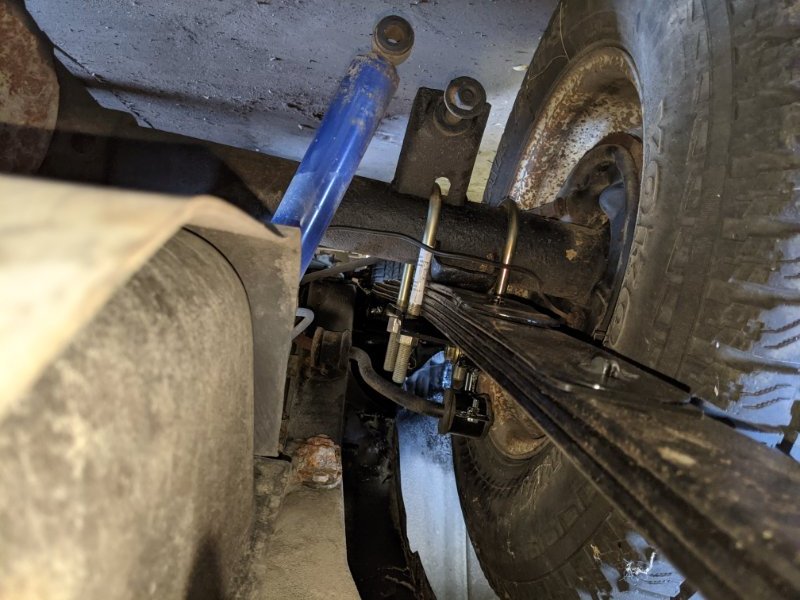
Yes it worked great. I put it on one of the spring plates for the bottom of the shock. I got it tight, then welded it, then had to cut a small notch in the nut to fit the u-bolt through the plate.
-
Anyone here familiar with the internals of an automatic trans? Specifically for a 98 Suzuki Sidekick or Chevy Tracker. I was at the farm today having a blast with the family on the off-road toys. Went off the ramp for about the 20th time that day and flew real high and far, came down nice and level, felt like all wheels landed together. As I was driving away from the landing I could hear a grinding noise. It still drives normal but once it gets above about 15mph it starts to make a terrible grinding/rubbing noise that you could almost feel as well. It sounds like it's the transmission and I couldn't see anything obviously wrong underneath, granted it was caked in mud and I didn't completely crawl under it. Any ideas on what else it could be or what kind of damage could be going on in there? I'm also curious how rebuildable it would be with a grinding noise or would I be better off sourcing a replacement?
-
I have not yet but it's on the list! My current big project is however taillight related so keep an eye out for that.
-
I run into that myself, I think we all do. The way life goes unfortunately.
-
Do it! It's not as hard as you think to do some complex modeling, just lots of simple stuff put together. The more of us making parts the better!
-
So far it has sustained itself which is the goal. Maybe someday it'll become profitable lol. I'm just glad to make parts available that people need and it's quite fun for me to do.