coheed
-
Posts
595 -
Joined
-
Last visited
Content Type
Profiles
Forums
Gallery
Everything posted by coheed
-
Having sold 2 cars for a family member overseas I can tell you the thing that makes it the easiest is a vehicle specific power of attorney. That way your point of sale person can just sign off the title for you and you don't have to worry about certified mail or any of that garbage.
-

Help figuring out Gear Ratios
coheed replied to MississippiComanche's topic in MJ Tech: Modification and Repairs
2.8 with an AX5 and 31s on mine and the switch from 3.55 to 4.10s was great. Without the 5 gear anything over 60 would be real buzzy, but I use 4th up until 60 95% of the time. If you decide that swapping axles will be easier then I'd also upgrade to a beefier axle while you're at it. Unless you can find an MJ or XJ that already has both to swap over. -
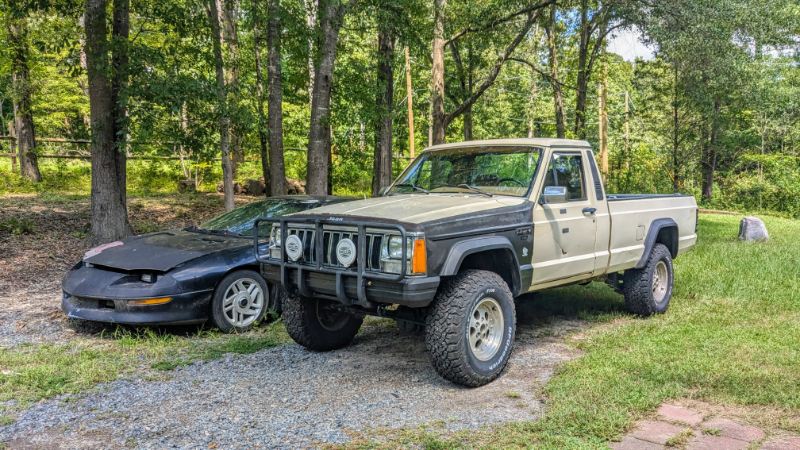
I'll just leave this here
.png.798a90bcd14dcfe4c9265844689df2fc.png)
-
head liner again but different
coheed replied to Aussiemj's topic in MJ Tech: Modification and Repairs
Also, there's the alternative of grabbing one from an XJ and modifying it like @ThatJeepGuy did. This is what I'm planning on doing next time I find a good one in the junkyard. -
Off Road/Grid Comanche Camper Project
coheed replied to Airborne Janitor's topic in Member Projects: Your Comanches
Man every time I see another MJ trailer with a cap on it I like it more. You've done a great job with this build. The weight balance on mine is also skewed to the rear and I can get it almost vertical by lifting the tongue. I currently have my generator living on the tongue and it helps a lot. -
Are there other problems that come with the 207 I don't know about? I mean my speedo has been inaccurate since I bumped to bigger tires, but it's better with the 3.55 to 4.10 swap, other than that I've had no issues and my truck is lifted and the aforementioned. Though there may be issues with the 207 in the XJs I don't know about.
-
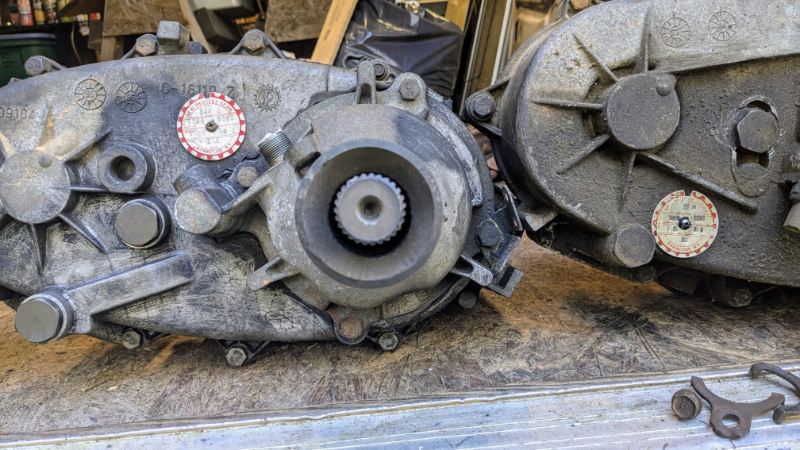
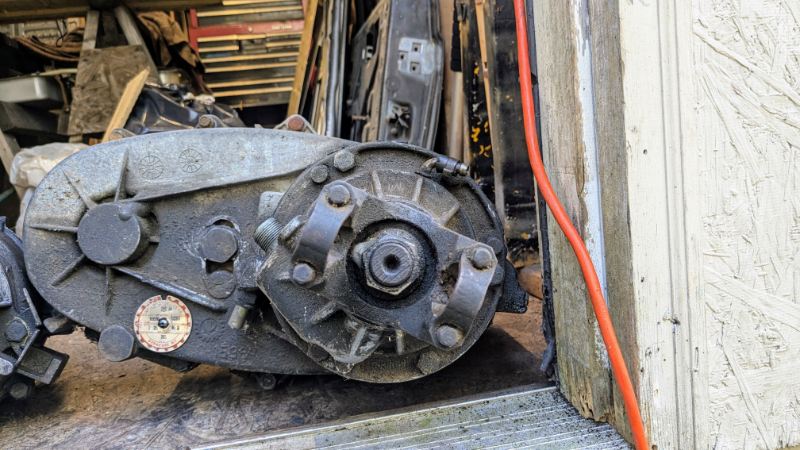
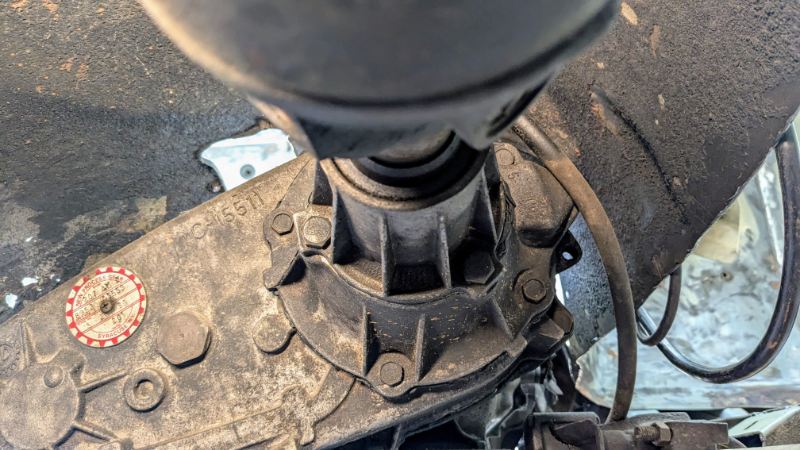
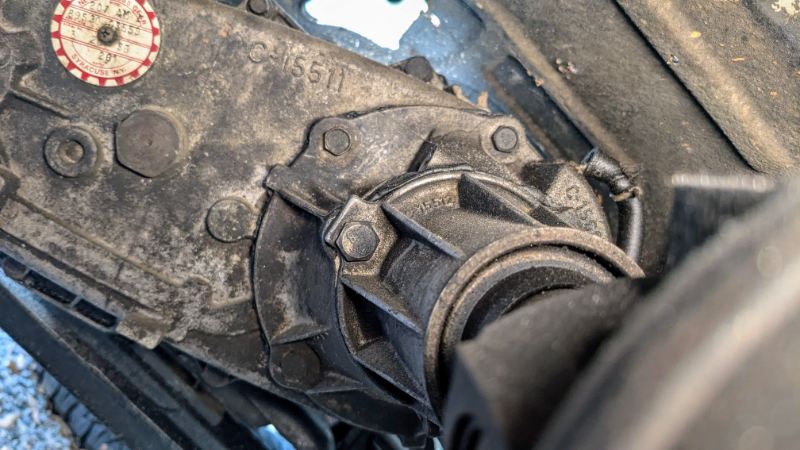
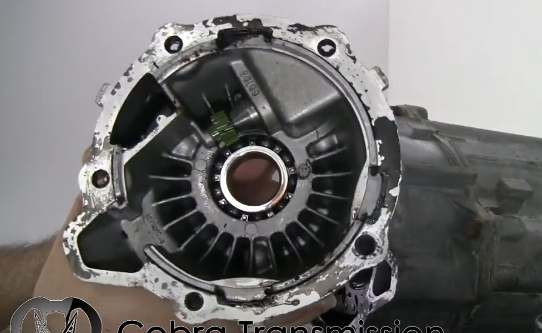
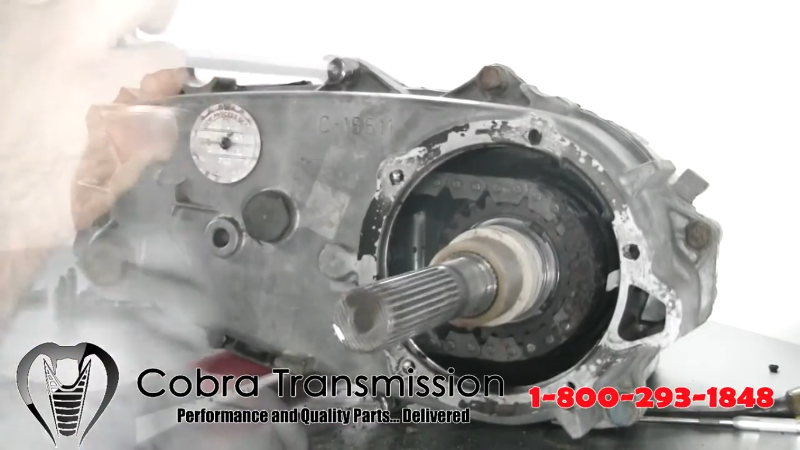
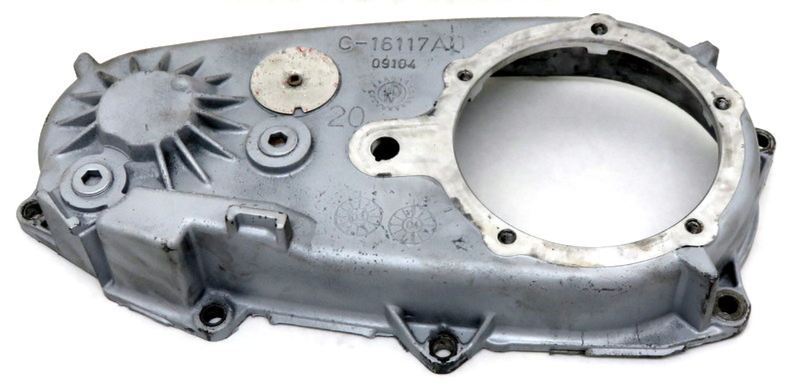
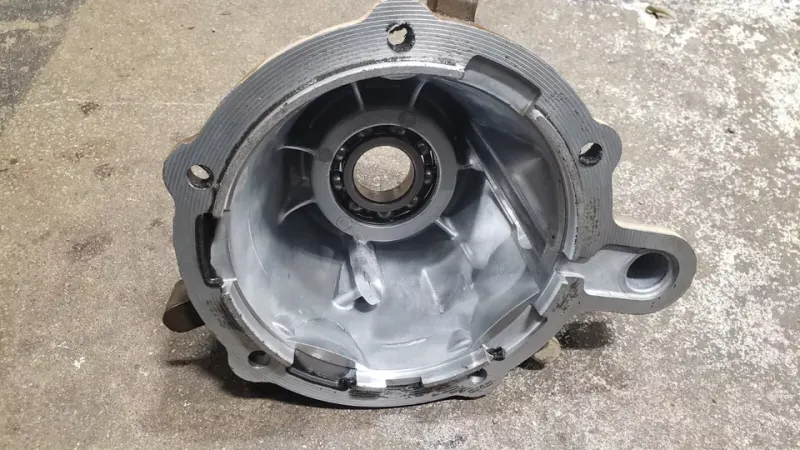
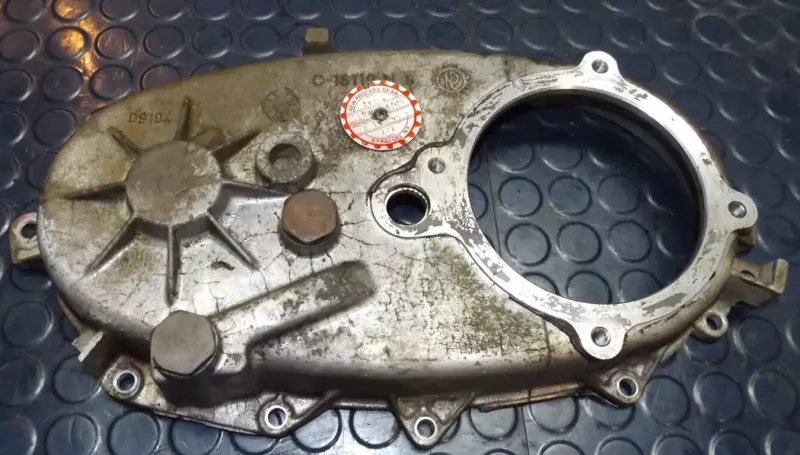
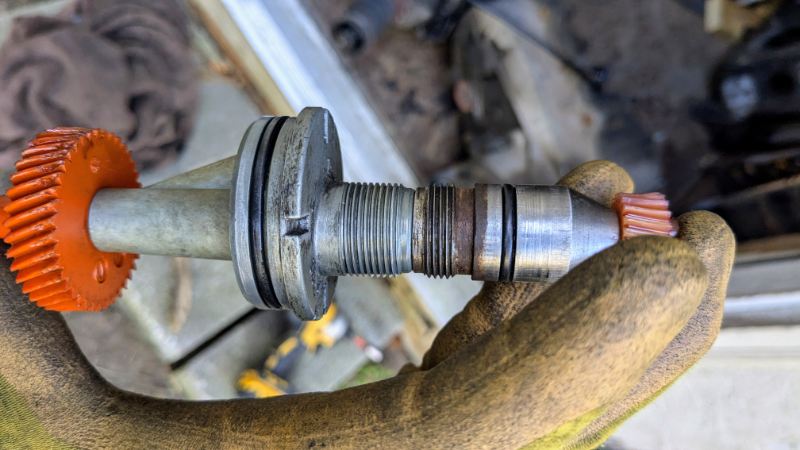
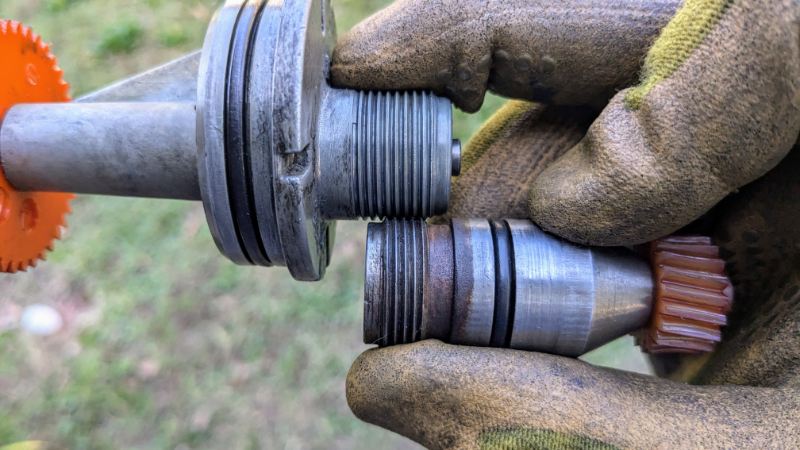
@eaglescout526 Here's some pics I took today and some I grabbed off the internet. I was wrong, only the speedo gear housing is the same from the 231 to the 242. Np228 Np242 Np207 Here it's obvious that the tail housing couldn't be swapped as that bulge on the right side of the housing is open for fluid to pass through presumably. Np231 So, as we know the speedo gear housing is the same in pretty much all the transfer cases aside from the 207, but the threads are the same on the 228/231/242 and the 207 housing. So, obviously any cable that'll attach to one will attach to the other. If the only problem is the speedo gear TH350 gear are readily available and are the same size as the 207 ones. You can even get full kits with a variety of gears, the corresponding gear that goes on the output shaft, and a new housing TH350 Master Speedometer Gear Kit 7 8 9 10 Drive 17 18 19 20 21 22 Driven | eBay

-
I have a 207, 229, and a 242 (same as 231) all on hand and could pull and compare tomorrow if people were interested.
-
The cutting an x is a good idea. I'm using a small Dremel with a cutoff wheel for the tiny parts I can't get my regular grinder into and I may do that. Cutting the spot welds out is more work and more tedious up front, but in theory less work down the road. The tricky part for me will be up at the wiper cowl. Luckily for me the seams where the spot welds are are solid. It's the panels next to the seam that are crazy rusted.
-
On this patch panel did you end up cutting the spot welds out from the fender side? I'm currently doing this section and all the way up to the top of the firewall and I'm debating how exactly I want to go about it. I believe the body trim was dealer installed. Either way whether it was stock or not, if you don't like it take it off. You can use fishing line or dental floss and just fish it behind the trim and basically "saw" it off.
-
Squirrelly Dan: Coheed's 86 Custom
coheed replied to coheed's topic in Member Projects: Your Comanches
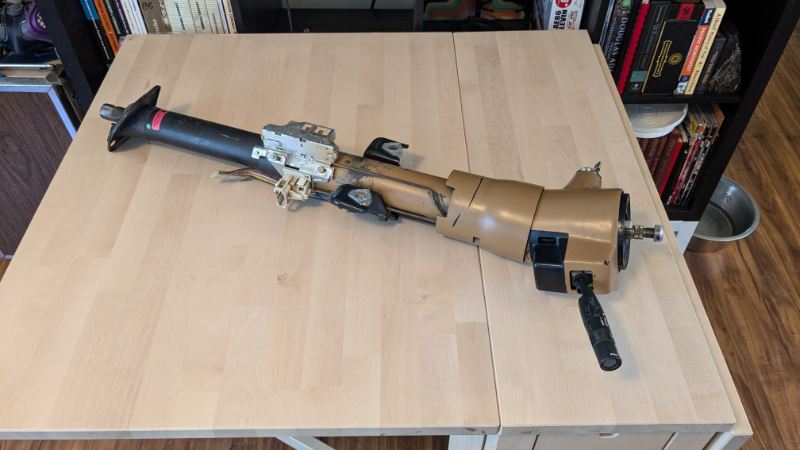
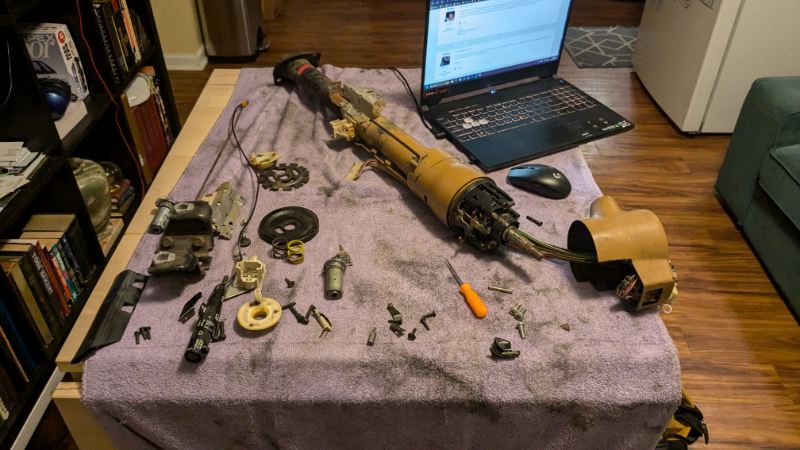
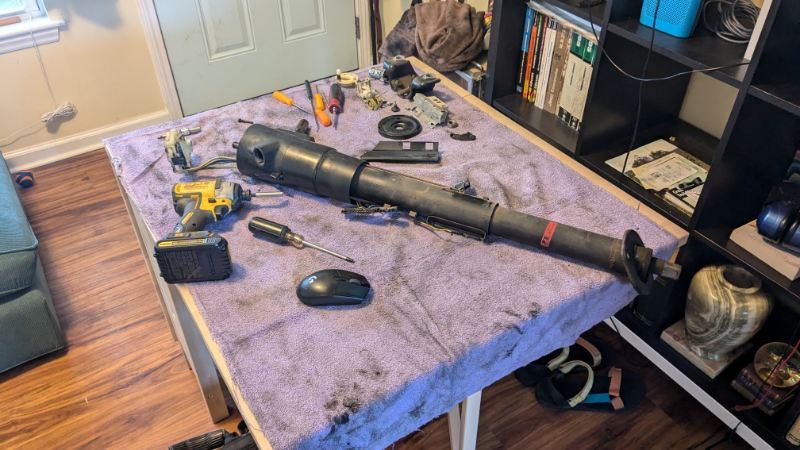
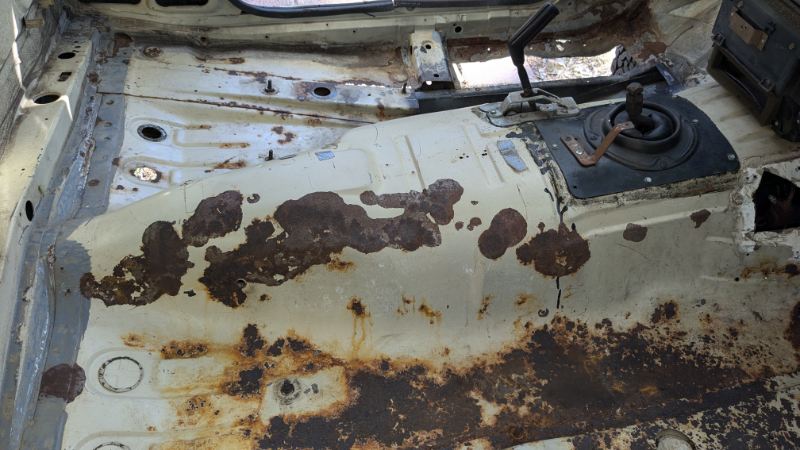
This week I spent my little spare time tearing down the steering columns I have to make one good one. Now I have a freshly cleaned and greased tilt steering column to go back in the truck. Also, removed the shift interlock so I don't have to worry about that. I'll also gain intermittent wipers with this swap. Last night I got the pass side 99% cut out. Will need to drop in the new pan and mark where to trim on the tunnel. Gonna devote all of tomorrow to that and getting the drivers side out.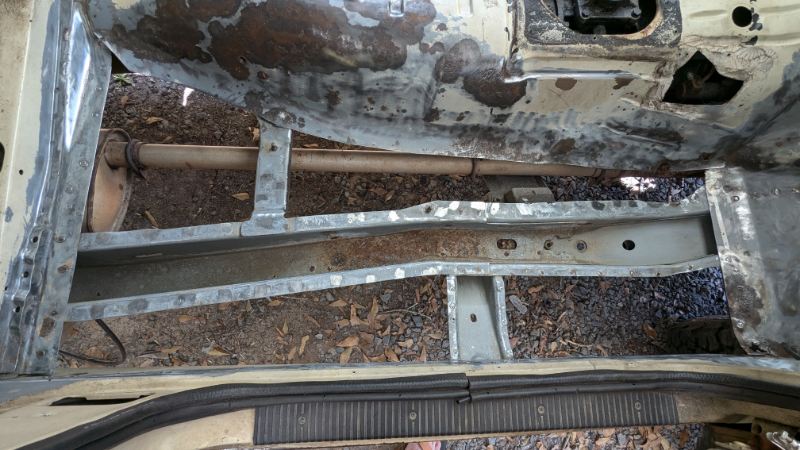
-
turn signals don't work when headlights are on
coheed replied to trppy7's topic in MJ Tech: Modification and Repairs
I would also switch to an electronic flasher just to see if it makes a difference. However there's very mixed results of whether you need them or not with the Oracle tail lights. I have them on my truck and I'm still using the same thermal flashers with no issues and I've heard other people say the same. But there's also quite a few people that say they needed to switch. Seems Oracle may be inconsistent with whether they put resistors in the tail lights or not. -
Yeah I'd be interested if it's good and you're willing to cut it out.
-
Yeah I've already got both full pans and the braces from them. I'm just trying to save myself some time if someone had a truck they could cut some good pieces out of.
-
Seeing if I can make my life easier than recreating these sections of my firewall. If anyone has a parts truck I'd like to get basically the whole driver's side from the floor pan to the cowl between the frame and the A-pillar. The passenger I'd just need the corner bit under the blower and coolant line areas and the like corner spot where the floor pan meets the firewall and A-pillar.


-
Squirrelly Dan: Coheed's 86 Custom
coheed replied to coheed's topic in Member Projects: Your Comanches
Well it's been missing carpet since I've owned it. That's why I drive it more in the cooler months. Which admittedly is kinda lame since I live in the South. The firewall patches are gonna be interesting with all the complex curves on them. Luckily I actually cut that section of trans tunnel out of my grandad's truck before the rest went to scrap so I have an OE piece to throw over that particular one. Yeah, I've been cutting with them dry and that's probably not helping. I may get some cutting fluid from work and see if that helps. I got a pack of 3 of the blades on eBay for $12 with 2 day shipping so that should more than get me through this job. -
Squirrelly Dan: Coheed's 86 Custom
coheed replied to coheed's topic in Member Projects: Your Comanches
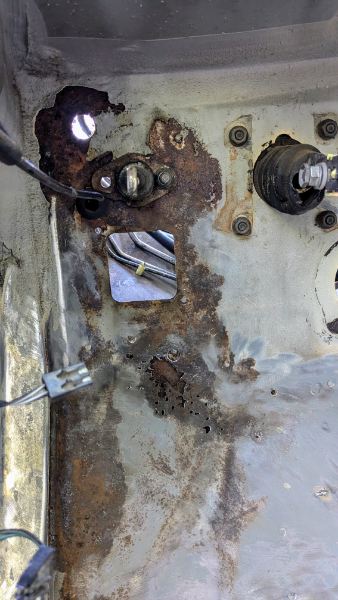
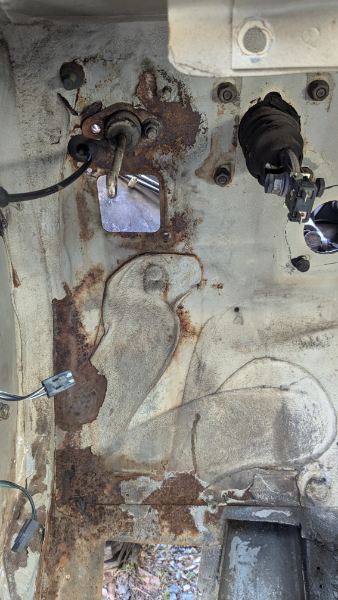
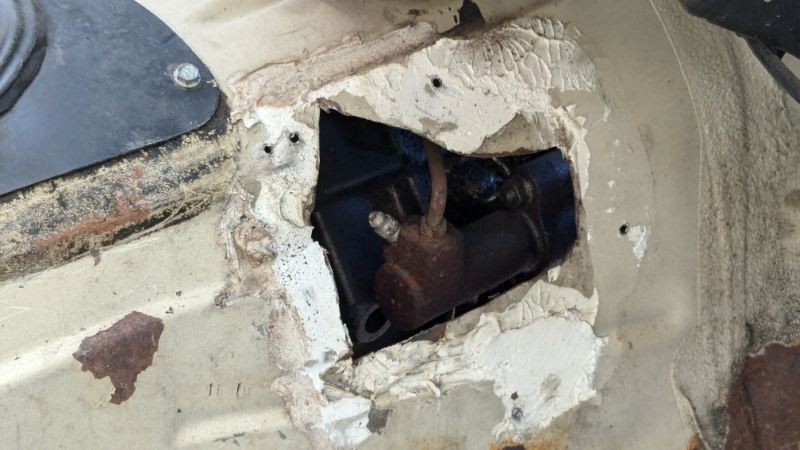
From what I know this truck used to be an estimator truck for a roofing company. So I'm not all that surprised lol The patch over the slave cylinder access hole was glued in place with dicor. -
Squirrelly Dan: Coheed's 86 Custom
coheed replied to coheed's topic in Member Projects: Your Comanches
Yeah, when I first got the truck the blower was wired to a house switch. At least they also put it in a box lol -
Squirrelly Dan: Coheed's 86 Custom
coheed replied to coheed's topic in Member Projects: Your Comanches
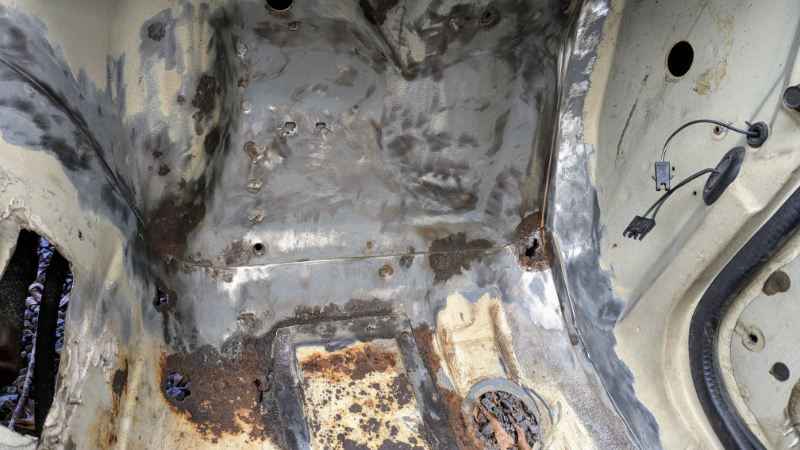
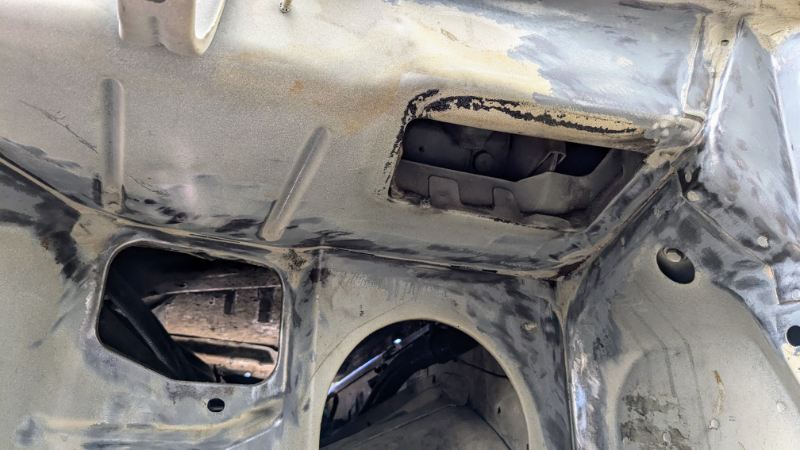
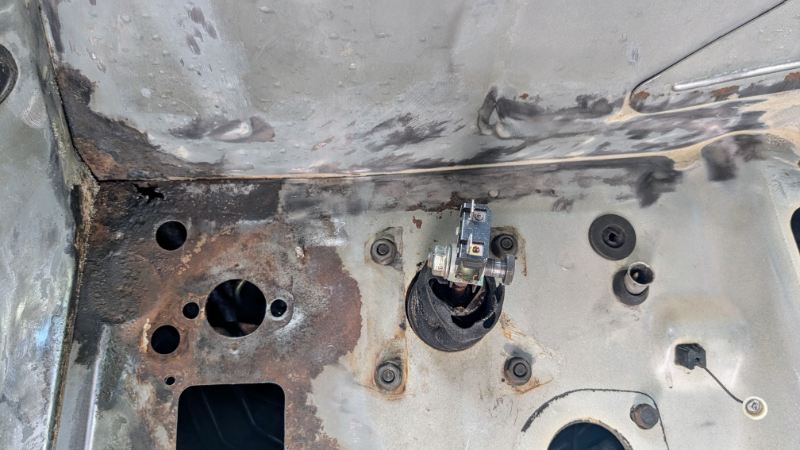
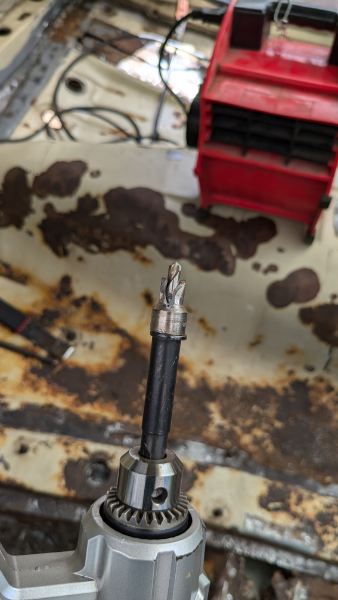
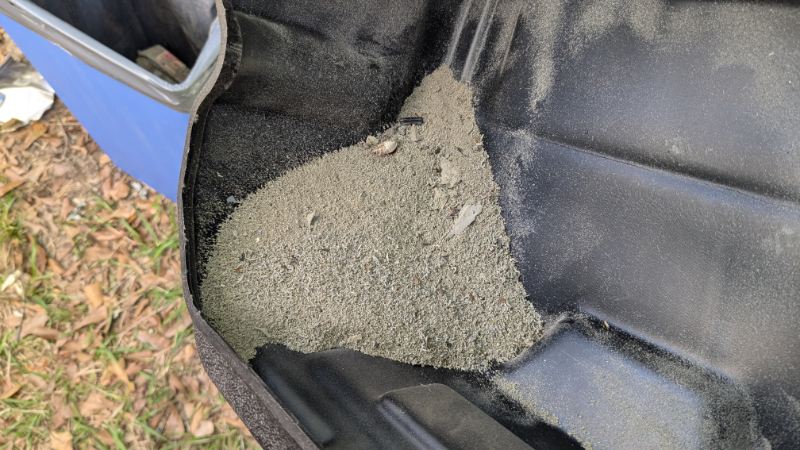
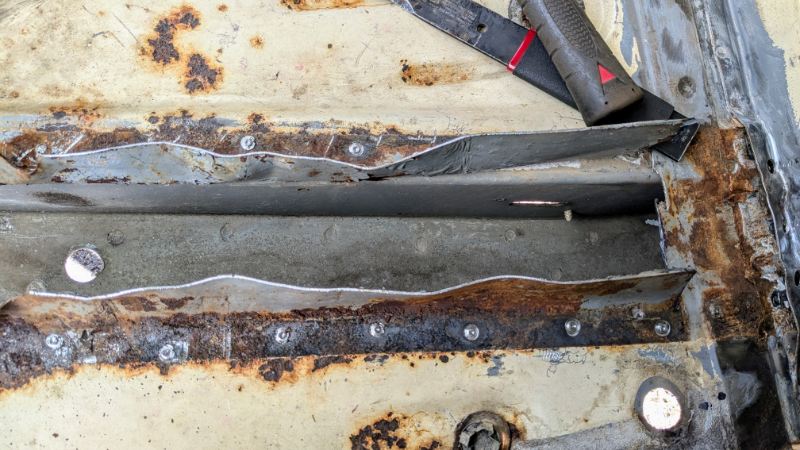
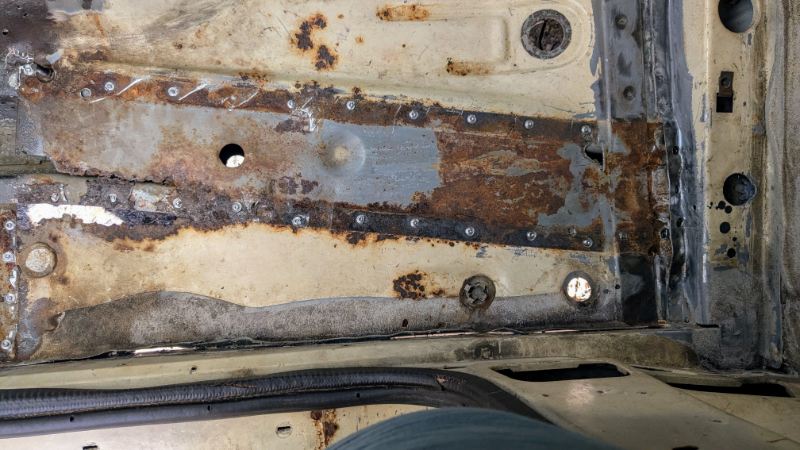
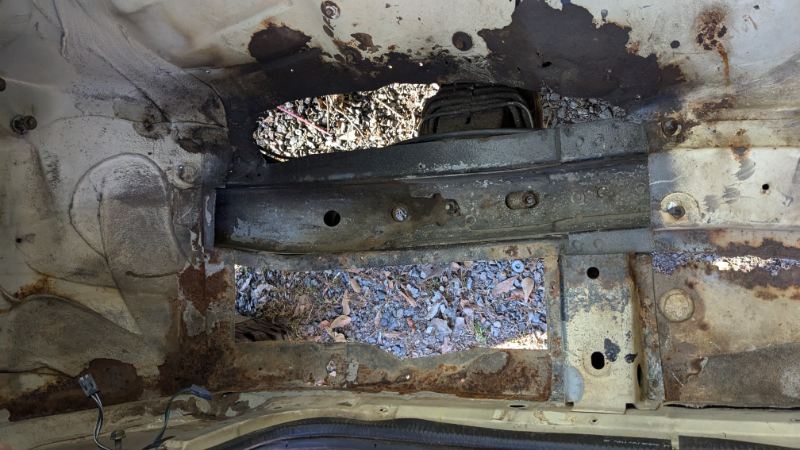
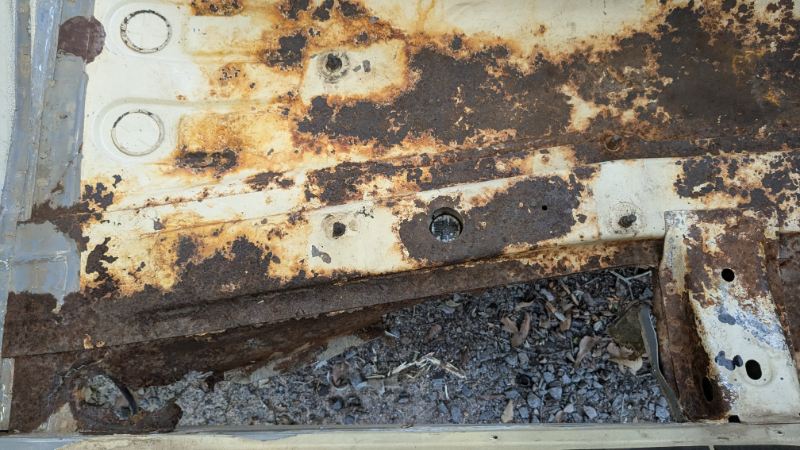
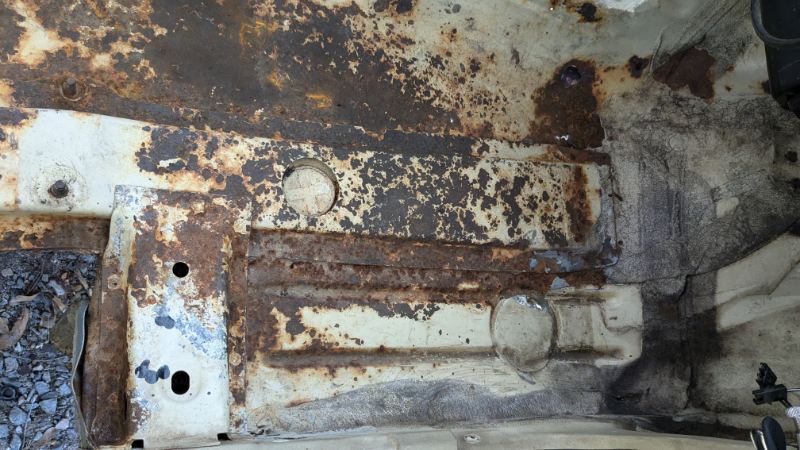
Well, I think it was the same person who wired the blower motor to a house light switch so I usually don't give em too much grace lol I love the way the ARB looks, but I don't want to pay ARB prices and the used ones disappear real quick. Aside from that I think the factory is the best looking bumper. Well, I guess I spoke too soon and put my foot in my mouth. All that heinous seam sealer was hiding rot. Went searching for firewall patch stuff to see how others did it and stumbled on this thread from earlier in the year. This made me want to remove every bit of seam sealer and check every crevice for rust. I really only want to do this once. Good thing I did. There's rot up to the cowl on the drivers and rust is starting on the passengers. I poked a bore scope into the cowl and looks like there's no rust up there so I'll spray a good bit of the Eastwood internal stuff into the cowl and it should prevent it in the future. In addition, there's a rust hole underneath the heater core inlet, a hole in the bottom corner of the pass firewall and a big patch of rot under the fuse block bulkhead. The firewall also has a sizeable crack next to the clutch master mount holes. Not sure if I want to just weld over that or patch it. I think I may just weld it since I'll be going auto with the 3.4 swap. Would really like to have a nice discussion with the person responsible for deciding this truck need this much seam sealer. I did manage to get both braces off the drivers side and the inside of the frame looks great. Yay for small victories. Using the Blair spot weld cutter and these things like to skip around a lot. I was wedging the cold chisel in between panels and when the cutter got deep enough it usually gives a little pop. Unfortunately, I didn't realize I only had one of the cutter bits. It got me through the drivers side braces, the small one on the pass, and about half the big pass brace before losing all the teeth. So, here's where we wait for a bit.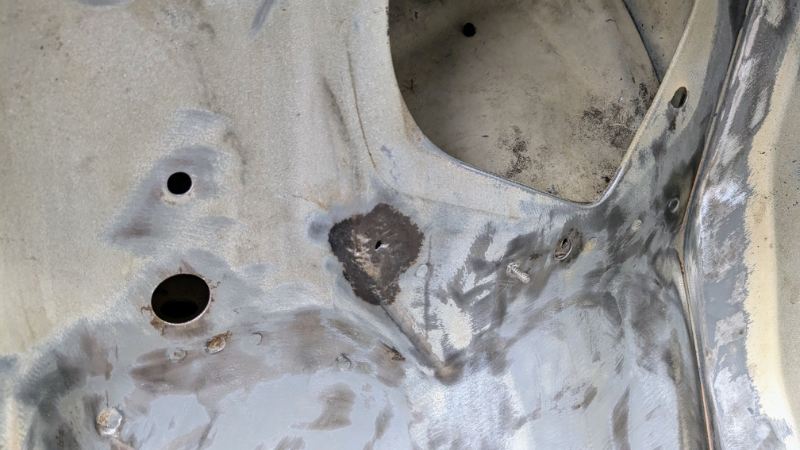


-
Custom Gaskets for HVAC
coheed replied to H3ADBANG4L1F3's topic in MJ Tech: Modification and Repairs
Definitely interested in a set of these since my truck is stripped for floors anyway. -
Squirrelly Dan: Coheed's 86 Custom
coheed replied to coheed's topic in Member Projects: Your Comanches
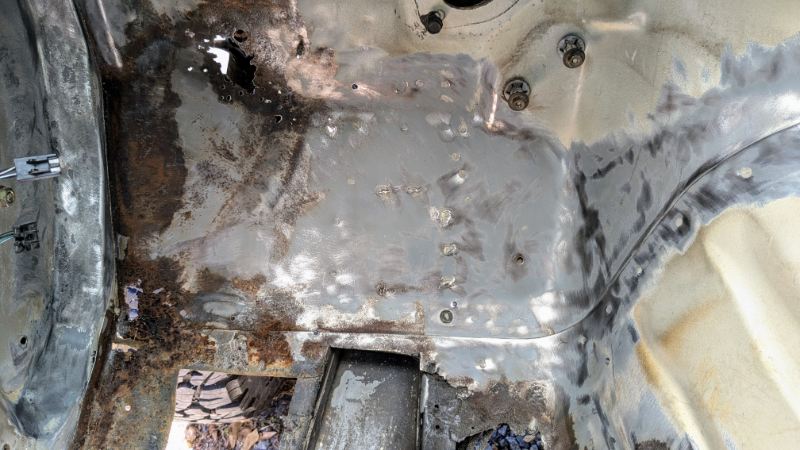
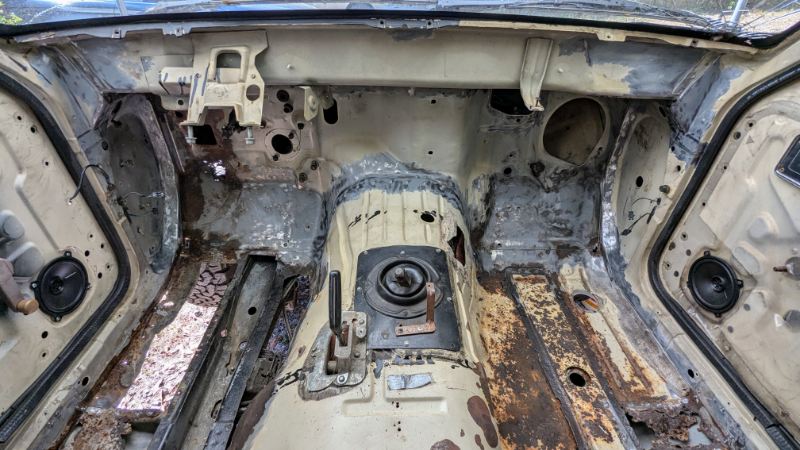
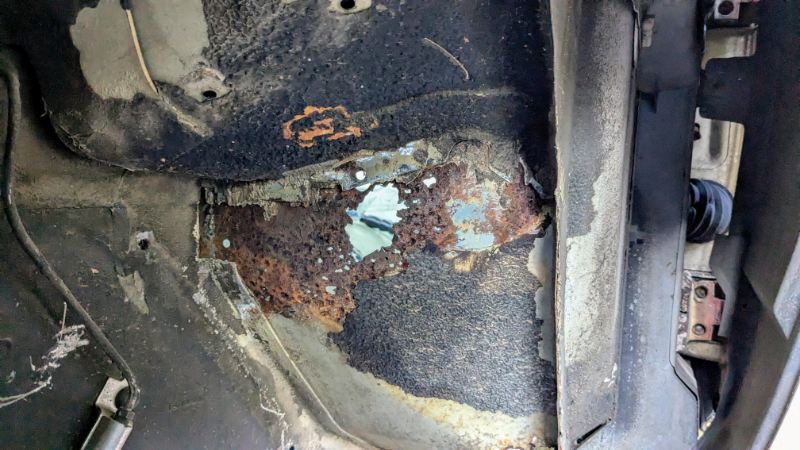
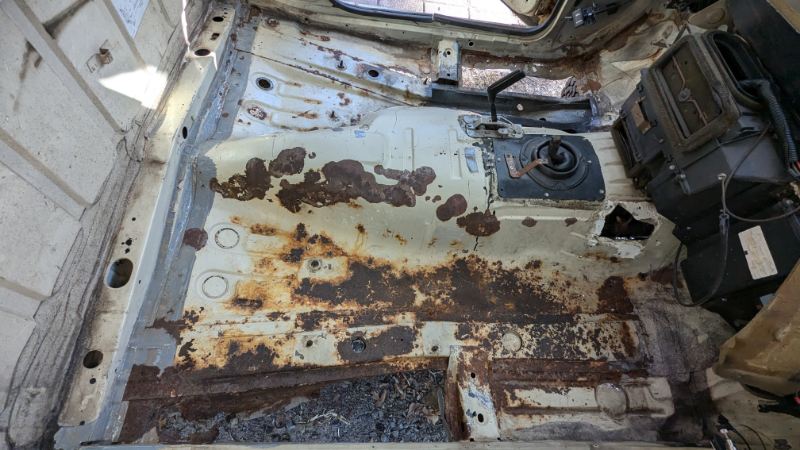
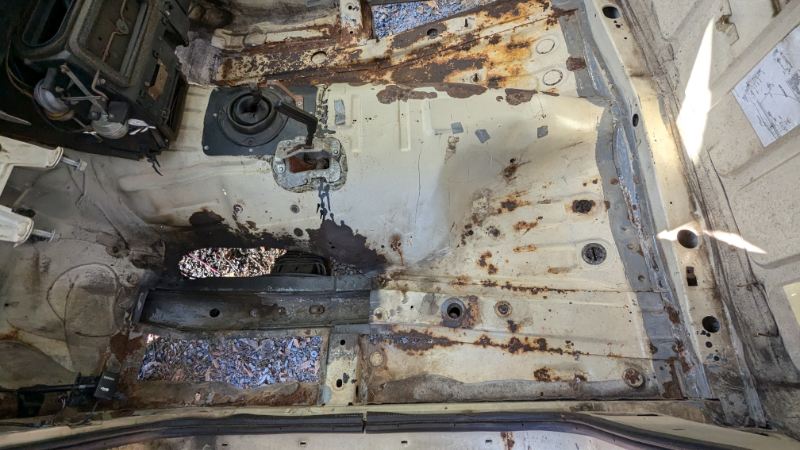
Not onto the floors. They're pretty rough. The front drivers has been missing for a while now and the rear of the passengers was so rusted a few whacks with a mallet broke the spot welds. And for some reason a previous owner thought it was a great idea to make an access hole to the slave cylinder on the pass side The clutch master has leaked in the past and messed up the firewall a bit, but it looks salvageable. May not have been if I waited longer. . The pass side is also rough but from what I've uncovered so far the rockers and the frame is unscathed. I've got pans and braces from Keyparts, some AC Delco seam sealer, a few cans of Eastwood internal frame coating, por15 for the inside of the cab (may redo that later but time will tell), and some Mastercoat for the underside of the cab. I'll be rebuilding the tilt column I have and disabling the interlock since it was out of an automatic and swapping it for the non-tilt in the truck. Will also be looking into 3.5mm Bluetooth receivers since I was lucky enough to get my radio rebuild and an aux put in from Jeremy years ago.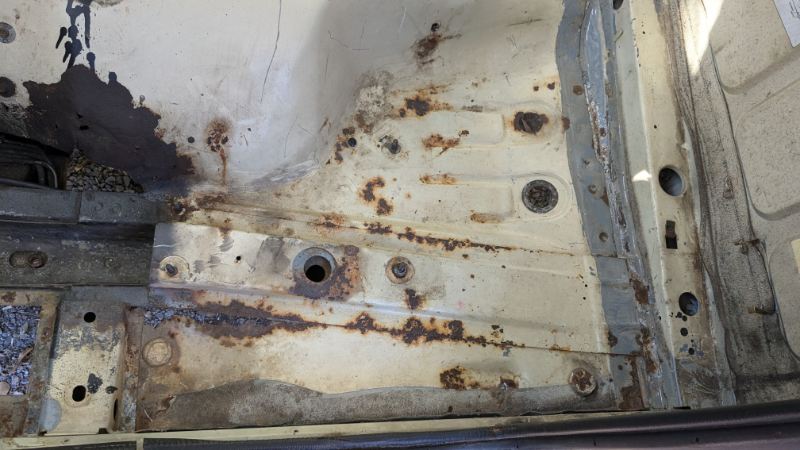
-
Squirrelly Dan: Coheed's 86 Custom
coheed replied to coheed's topic in Member Projects: Your Comanches
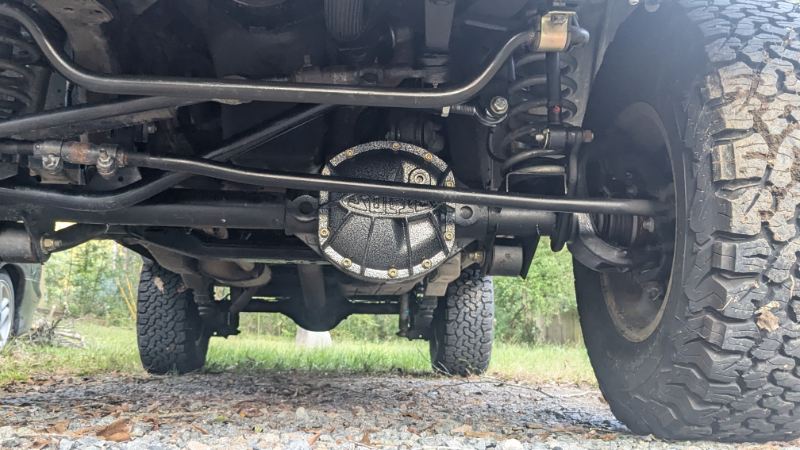
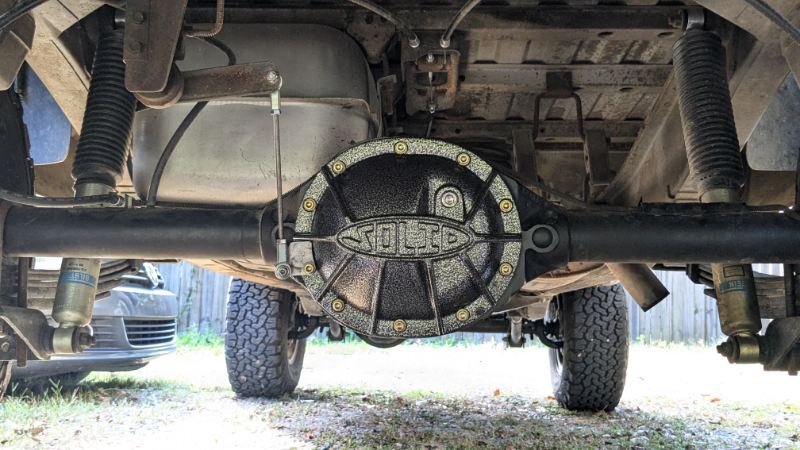
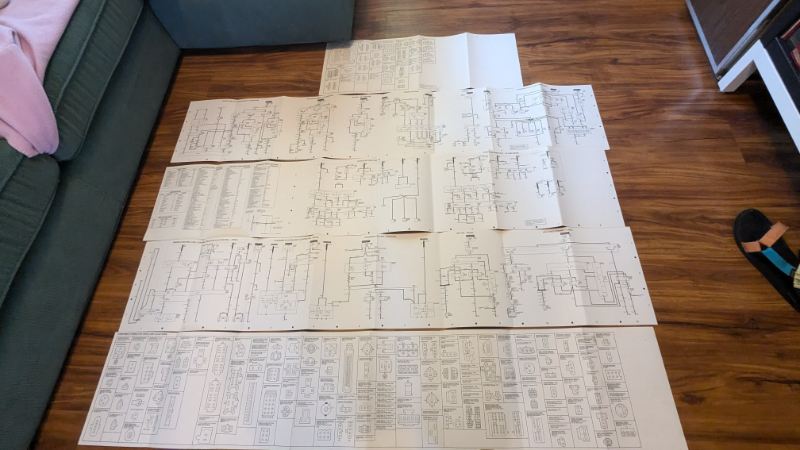
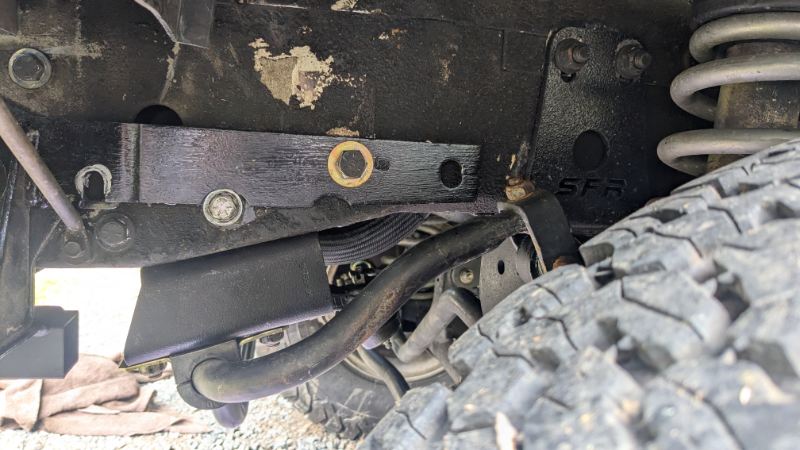
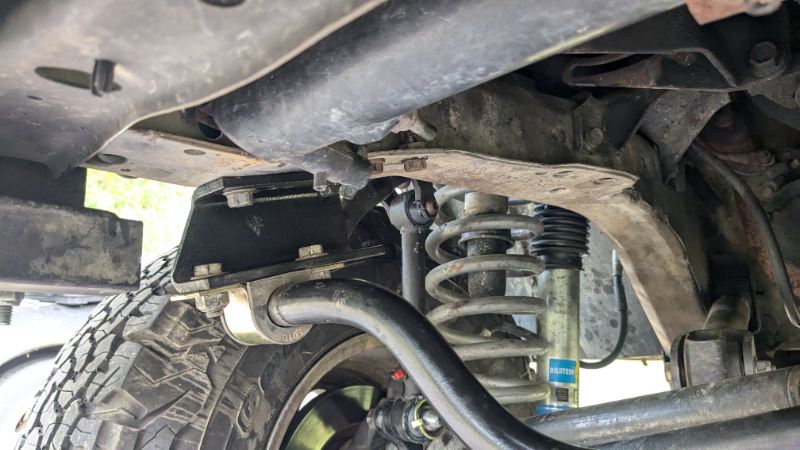
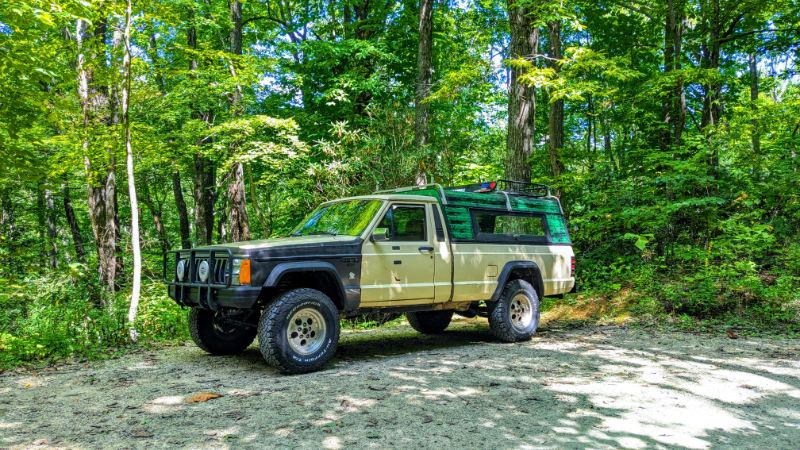
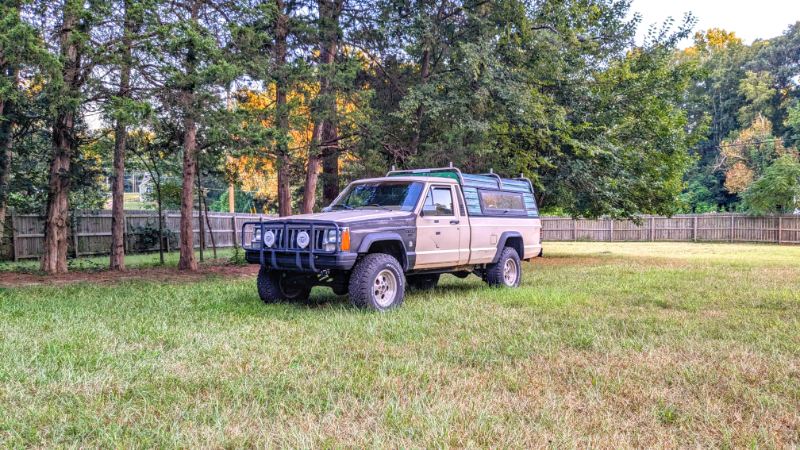
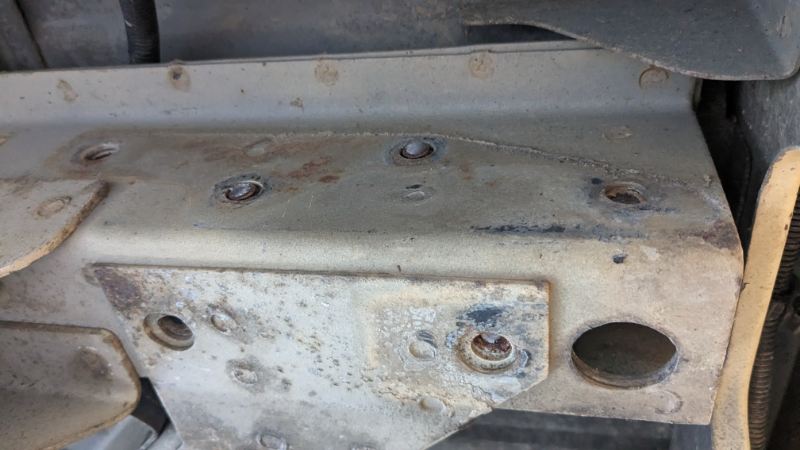
Haven't done a whole lot with the truck this year aside from use it to go up in the mountains hiking and hauling stuff around, but with what Helene did I'm sure I won't do that for a while. So, the truck is getting torn apart for new floors currently. Before that some other small things. I decided I just didn't like the winch bumper look and swapped the factory one and the brush guard back on. Bought a hitch from krusty and 6 of the bolts holding the bumper on snapped off even with a penetrating fluid soak. Tried all the tricks; ez outs, welding nuts to the bolts, etc. Ended up just cutting the nuts out of the frame with my air hammer and holding new ones in place with a wrench while putting the bracket bolts back in. Gave the inside of the frame a coat of Eastwood internal frame coating for good measure and put anti-seize on the bolts. Installed the swaybar drop brackets I had so the bar doesn't rub the radiator. Not an ideal angle, but eventually I'll get the smaller aluminum drop brackets so the angle is better. Scored a great set of dealers wiring diagrams for the 86 model. Grabbed a set of solid diff covers on FB for cheaper than just the D30 one new. Guy bought them for his TJ and never ended up using them before he sold it. Had to do some steering stop adjusting with washers so the ZJ tie rod doesn't hit the front cover. Guess I'll need to look into steering with better clearance at some point.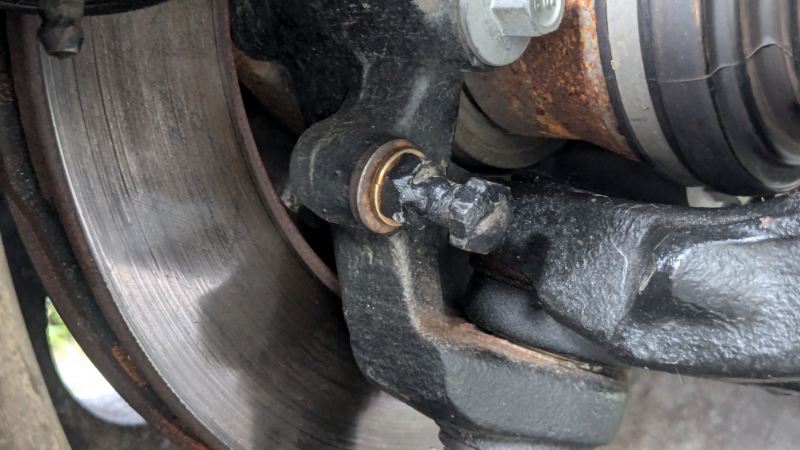


-
Buying General Springs Leaves to lift my 2wd MJ
coheed replied to jakesmog's topic in MJ Tech: Modification and Repairs
No, I think it's generally accepted around here that general is just making them incorrectly. These are not lift measurements as compared to the springs that were on the truck previously, they are compared to the measurements the FSM says they are supposed to be leaving the factory with. It's just a convenient accident for some that they give you a lift. -
So what kind of lights are you running?
coheed replied to Spinnakerblue89's topic in MJ Tech: Modification and Repairs
I've been running the Wagner H6054BL for a few years now. They're xenon instead of halogen. They're a good bit brighter than the halogen versions, and you don't have to worry about any kind of different beam pattern or changing your aim. So far the earliest failure was two and a half years, not sure how many hours though. I also have a no name headlight relay harness that I swapped some factory connectors onto. The set of Hella 500s also help, but I'm thinking about swapping to some led fog lights instead.
-
Buying General Springs Leaves to lift my 2wd MJ
coheed replied to jakesmog's topic in MJ Tech: Modification and Repairs
This is with very used set of Rubicon Express 3.5" springs, the metric ton springs from General, and a zone offroad shackle (effectively 3/4" lift). It has the factory rake with this setup. The front is 3.25"ish over factory and the rear is a just over 4" unloaded. If you want it to sit level with a true 3" coil you probably won't need a shackle if the standard springs give close to what the metric ton springs do.