

coheed
-
Posts
626 -
Joined
-
Last visited
Content Type
Profiles
Forums
Gallery
Everything posted by coheed
-

Squirrelly Dan: Coheed's 86 Custom
coheed replied to coheed's topic in Member Projects: Your Comanches
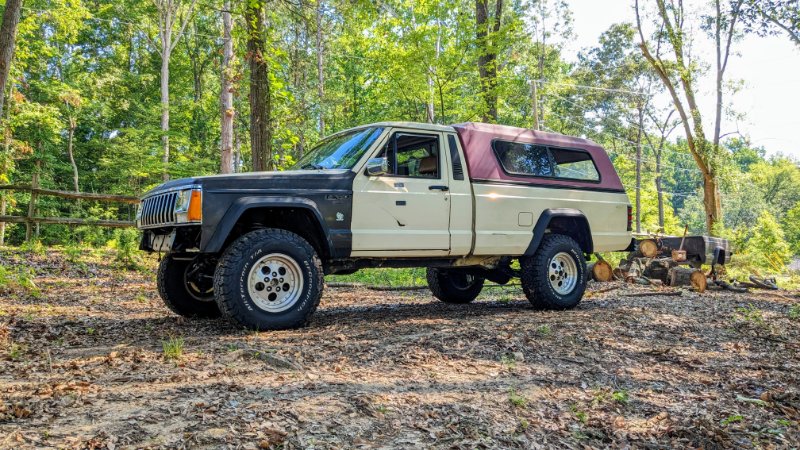
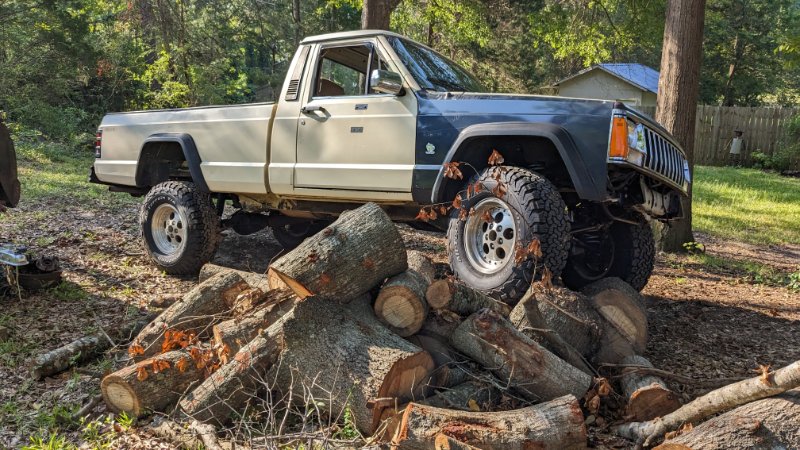
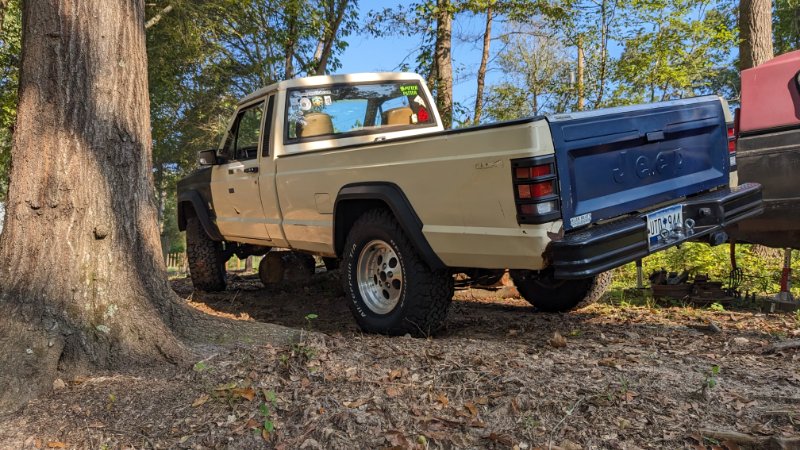
It's just something about a long bed with a camper top that really gets me. Also screwed around in the yard on the trees that power company cleared before I put the top back on. Even with the sway bar still connected, the 4.10 gears and the flex from the leaves makes it so much easier to get up stuff.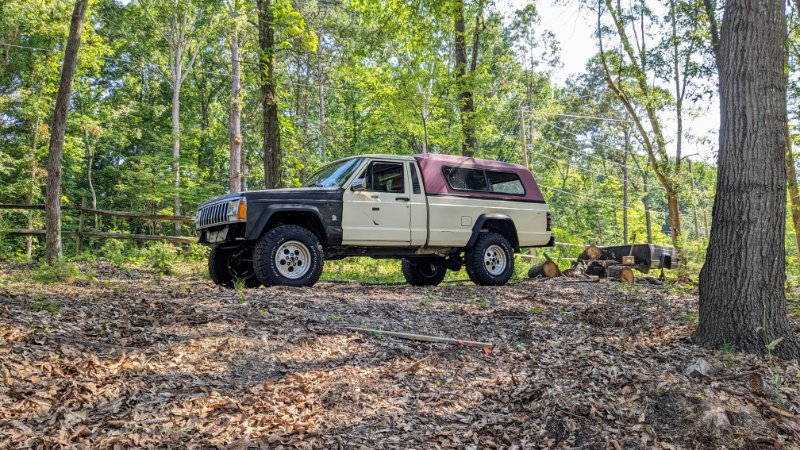
-
Squirrelly Dan: Coheed's 86 Custom
coheed replied to coheed's topic in Member Projects: Your Comanches
I feel like the only tops I've seen where the carpet sits flat and looks good are the newer tops that are completely smooth on the inside, or people who do it to their aluminum tops. How warm does that Mr heater keep the truck? The coldest camping I've done in mine got down to maybe 15, and my insulated pad and sleeping bag were enough to keep me warm. But I've thought about getting one of their little buddies to heat the back. -
Sealing Glass on Wing Window
coheed replied to Drahcir495's topic in MJ Tech: Modification and Repairs
Both of mine do the same thing. Whatever the factory used to seal them to the bottom metal part has deteriorated over the years. I thought about cleaning out the channel and using windshield urethane to reattach them. -
Squirrelly Dan: Coheed's 86 Custom
coheed replied to coheed's topic in Member Projects: Your Comanches
Thanks. Your truck was one of a few that made me fall in love with the long bed and camper top look. I like the swb, but something about the lwb and a topper just gets me. Personally, I think @howeitsdone has the best camping setup though. -
Squirrelly Dan: Coheed's 86 Custom
coheed replied to coheed's topic in Member Projects: Your Comanches
Got the factory sway bar put back on with rebuilt JKS disconnects. Bedded the new brakes on the neighborhood street and took it for its first spin back out in the real world. Getting up to speed isn't the awful experience it was with the 3.55s. It loses a lot of steam about 50mph, but that's where most of driving maxes out anyway. The difference of all new brakes front and rear is astounding as well. Before it struggled to lock the rears up in heavy braking. Now it'll lock all four up if I want it to. Next will be getting new hardware for the front bumper and getting the camper top switched back over.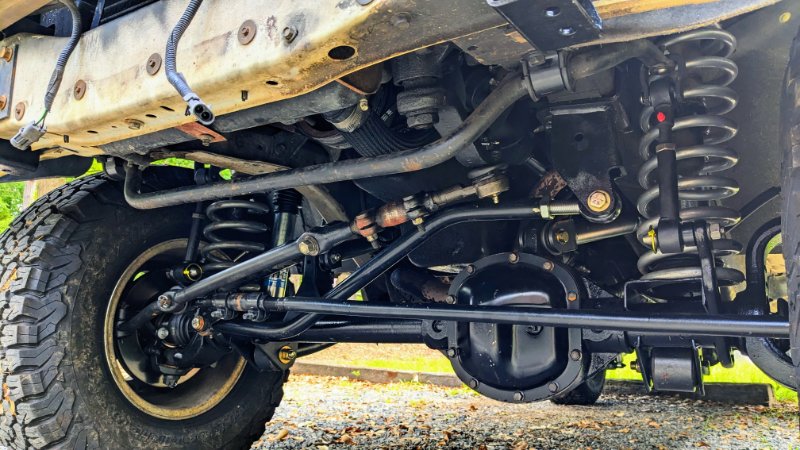
-
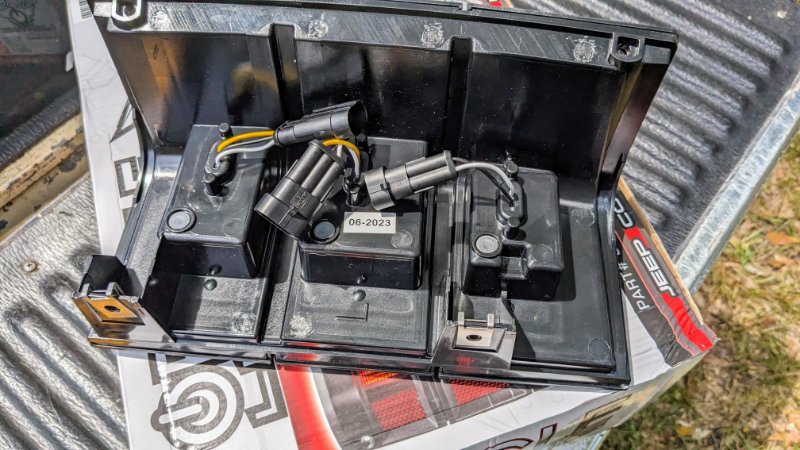
With the way they are made, not easily. I suppose if they go out outside warranty you could open the housing and replace the Leds. The top 2 look like custom sized cob panels, and the reverse one looks like a 3x2 or 4x2 panel. It also looks like the lense is separate for each light instead of being one piece like the factory tails.
-
Squirrelly Dan: Coheed's 86 Custom
coheed replied to coheed's topic in Member Projects: Your Comanches
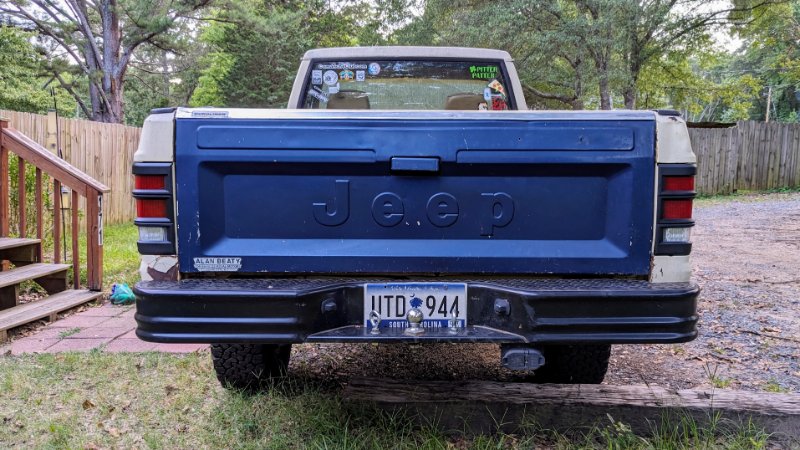
Well, new wheel bearing solved the issues. I shouldn't have tried to cheap out and do them later. I went with the Mevotech's from rockauto because they had the best warranty at the time, and they were fairly cheap. Also, replaced the mounting bolts with some Dorman ones. Took it for its first official spin in the neighborhood being "fixed" and.. HOLY CRAP!! The switch from 3.55 to 4.10 is astounding. It feels like a whole different truck acceleration wise. Granted, I only got to third since I live on a small dead-end street, but the difference in get up and go is worth all the effort. I can only imagine how much difference it would make with a 4.0 or a more powerful engine. My rpm at highway speeds is something to keep track of, but Squirrelly Dan doesn't really see much highway anyway. Also installed the Oracle tail lights from the pre-order. Significantly brighter than stock, and my rear harness was already hacked up, so I didn't feel bad changing the connectors.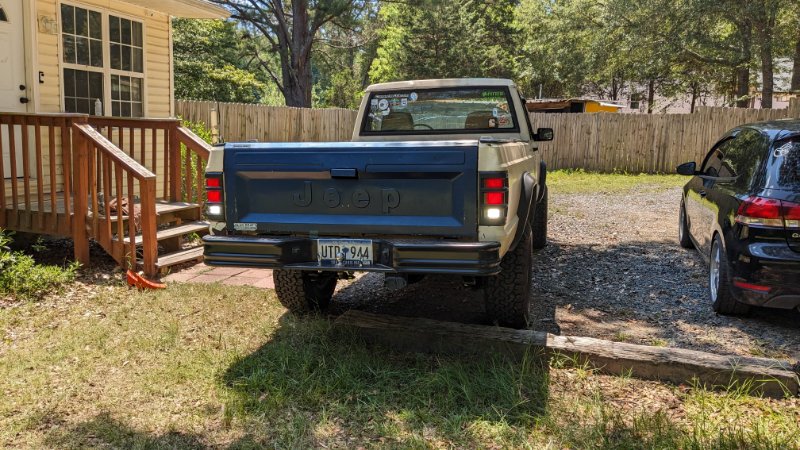
-
Oracle LED tail lamp harness
coheed replied to eaglescout526's topic in MJ Tech: Modification and Repairs
I don't need anything from them now, there was an issue and I got an automated email about my pre-order. When I emailed them about it I got no response, even after 3 separate emails. More of just an anecdote of how they didn't attempt to communicate with a customer who had just spent a few hundred dollars with them. -
Oracle LED tail lamp harness
coheed replied to eaglescout526's topic in MJ Tech: Modification and Repairs
From my experience, good luck getting them to reply to anything. -
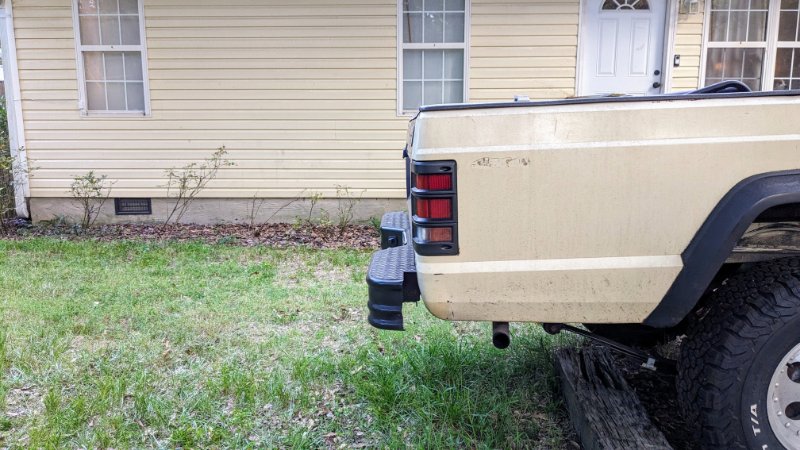
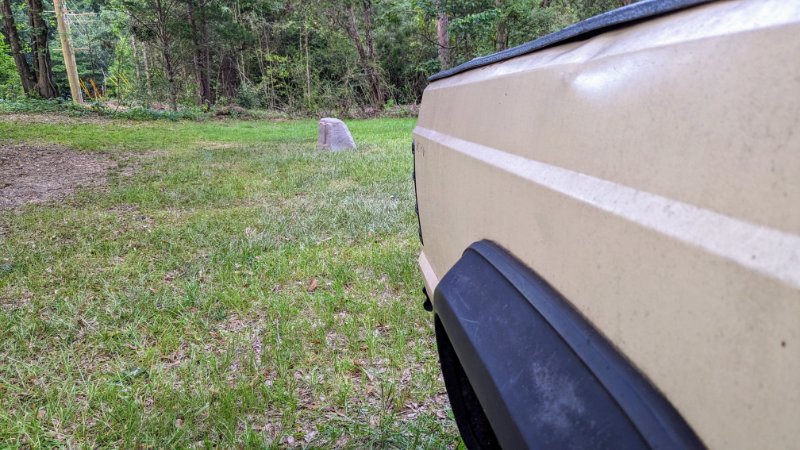
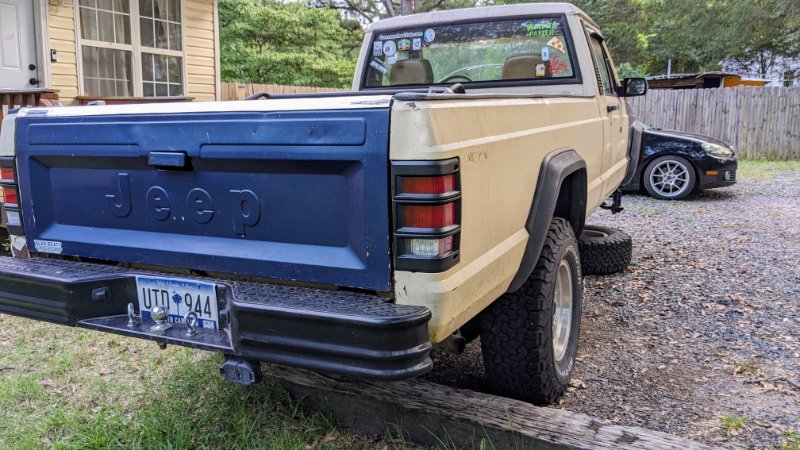
Disclaimer: my truck has been hit on both sides, so the bed is a little warped around both of the tail lights. That said I wouldn't use the fitment on my truck as a testament of how they fit on a straight body. Haven't done the wiring yet cause I just wanted to see how they looked on the truck. They lined up with the mounting points on the truck well, and came with new captured nuts for the body side. They sit pretty flush against the body in both directions. Over all I like them. Only a year warranty, so hopefully they hold up well for a good while.
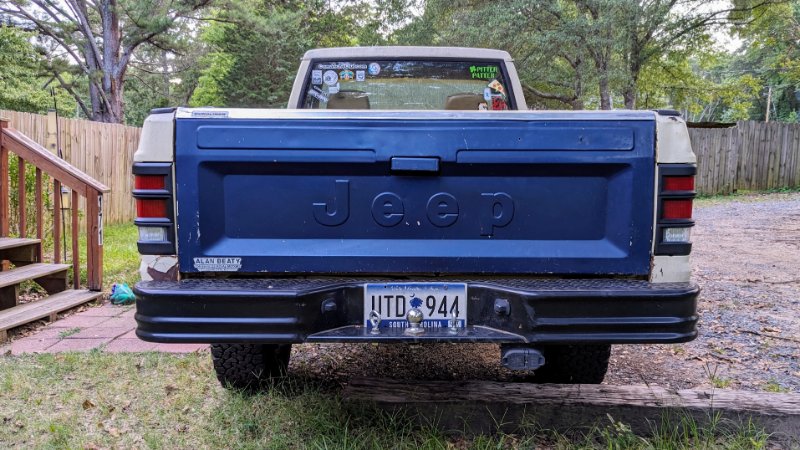
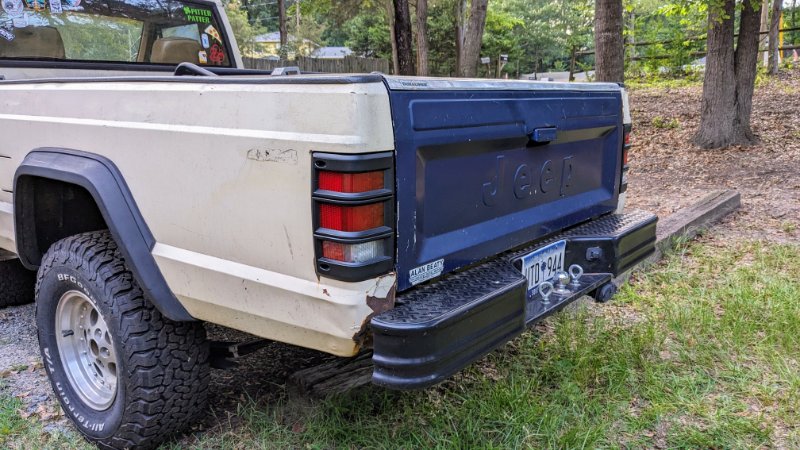
-
No reflectors on the rear. No DOT stamp on them or the packaging though, so they aren't claiming to have any.
-
They do have side reflectors.
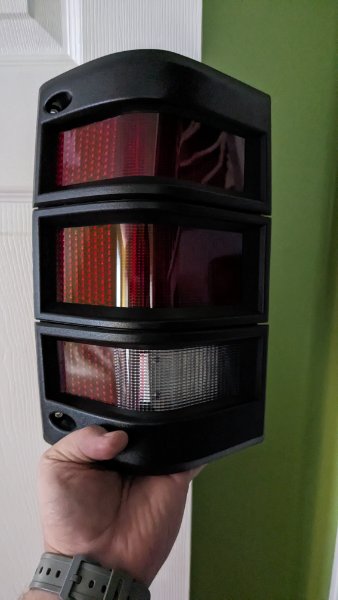
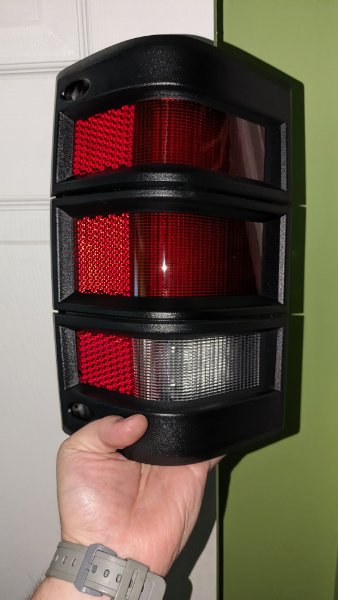
-
Squirrelly Dan: Coheed's 86 Custom
coheed replied to coheed's topic in Member Projects: Your Comanches
No more jacked up than anyone else who has a hardtail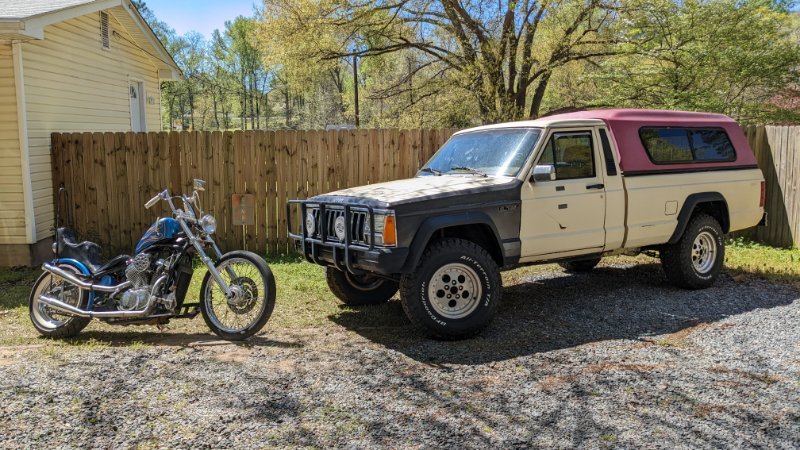
-
Squirrelly Dan: Coheed's 86 Custom
coheed replied to coheed's topic in Member Projects: Your Comanches
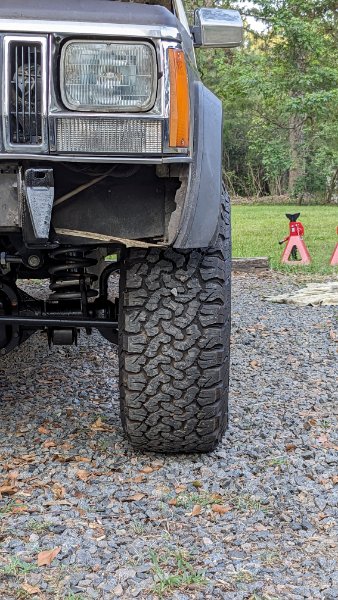
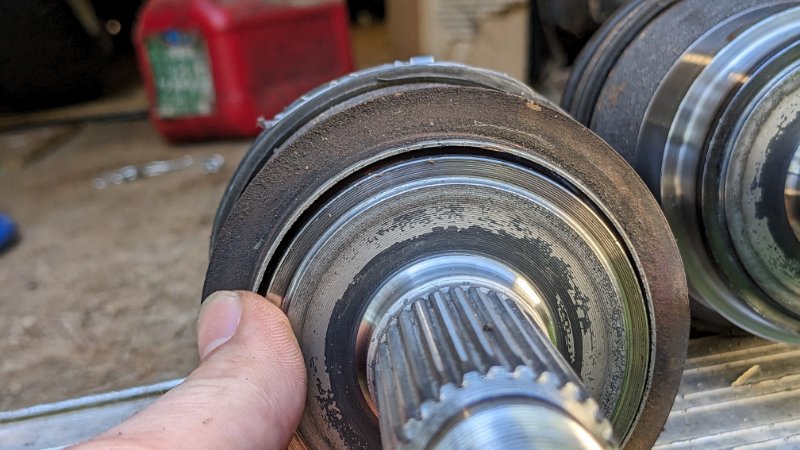
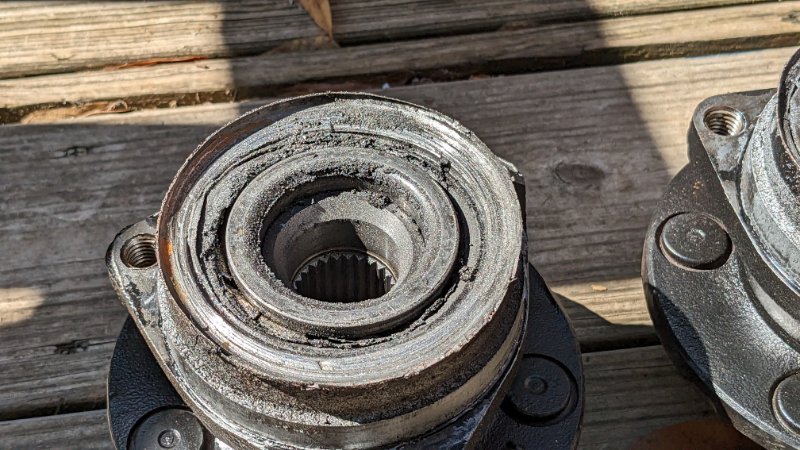
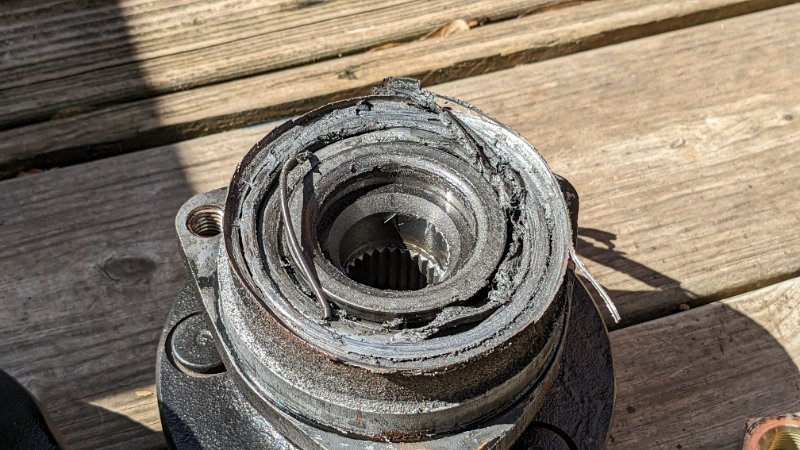
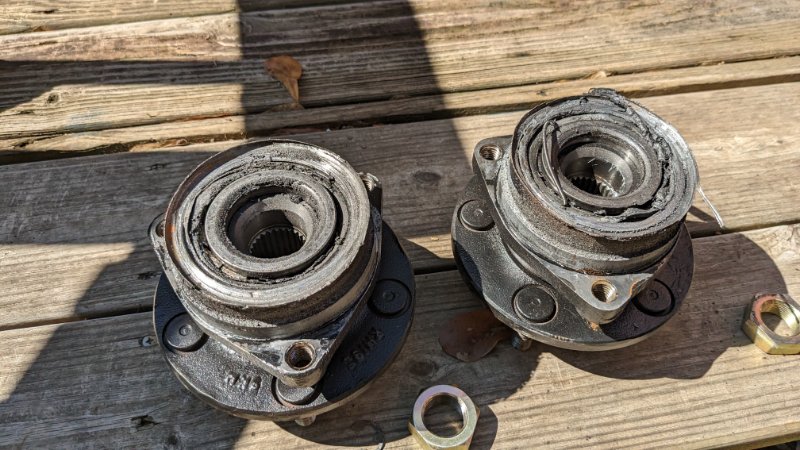
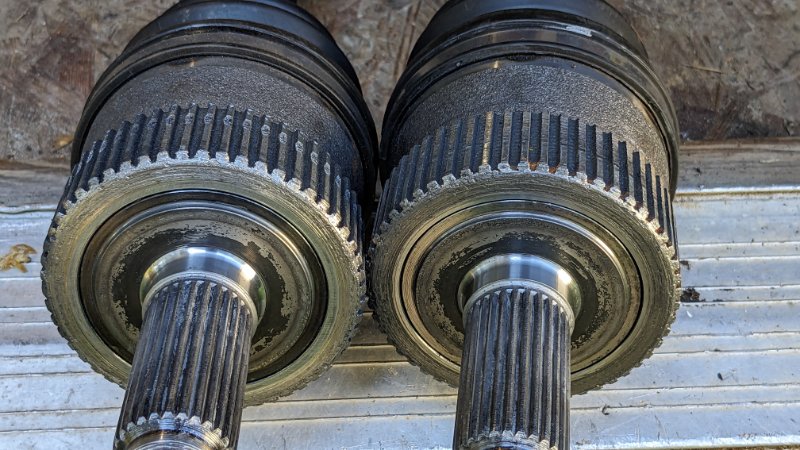
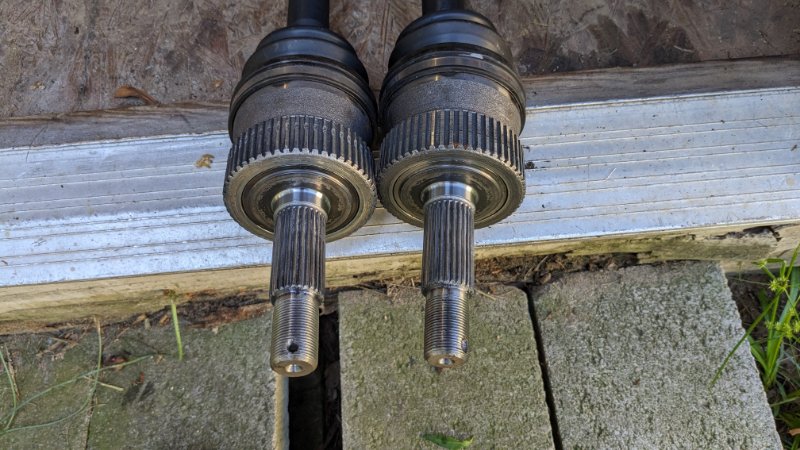
Well, some sour news. I was gone most of July for a trip to Japan, so I had to delay working on Squirrelly Dan. When I got back, I buttoned up the little loose ends, and bled just the rear brakes. Then I took the truck for a test drive up and down the neighborhood. Immediately I knew something was wrong. Even in 4 low it took a good bit of effort to get the truck moving. Once in motion there was a horrible oscillating screech. I originally thought it was the rear brakes, maybe I had over adjusted the brand-new drums and shoes. I pull back in the driveway and notice that the front wheels have a massive amount of positive camber, and it's different on both sides. _ Obviously, something's wrong with the hubs since the ball joints are brand new, and my alignment math can't be that wrong. I am then reminded of Eagle_SX4's thread about swapping in different axles and how they interface with the hubs. The CV axles I installed are billed to fit ZJs, XJs, and MJs, as such they come with an ABS tone ring on them. I didn't think about taking the tone ring off as the back of the hubs/bearing out of my axle was completely flat. Well, they didn't play well with each other. Luckily, it seems the only things that suffered permanent damage are the hubs and the tone rings. These were torqued to 175lbs/ft while rotating the hub. Although I did notice that during installation I couldn't use the provided washers or nuts as they were too thick. Once they were installed there was not enough thread exposed to install the locking cap and cotter pin. Also, when looking at Eagle_SX4's thread they talk about swapping the sealing flange from the old axles onto the new ones. Well, the I.D. of the flange is about 2mm too big to install on the CV axles. Looking at SKF, Timken, and other bearings spec'd for the pre 89 knuckles they have a pressed in seal on the back that seems like it would fit over the end of the CVs. Debating on if I should just order some Mevotechs from Rockauto, as they have the best current warranty policy and I've used some of their components on some the harder to find parts for Toyota's I've owned, or if I should try to get my hands on something local.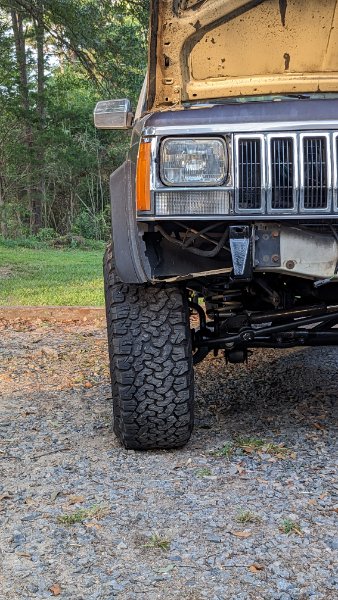
-
Finally received an email at 10 this morning that the lights were ready to ship from the pre-order. I paid my balance, so now we wait
-
Internal view of the rear leveling valve.
coheed replied to coheed's topic in MJ Tech: Modification and Repairs
That's a fair point. I forgot brake fluid is non-compressible so the pressure is the same throughout the system. Also, even with the opened valve in hand I'm still not sure how the fluid gets through the valve. -
Internal view of the rear leveling valve.
coheed posted a topic in MJ Tech: Modification and Repairs
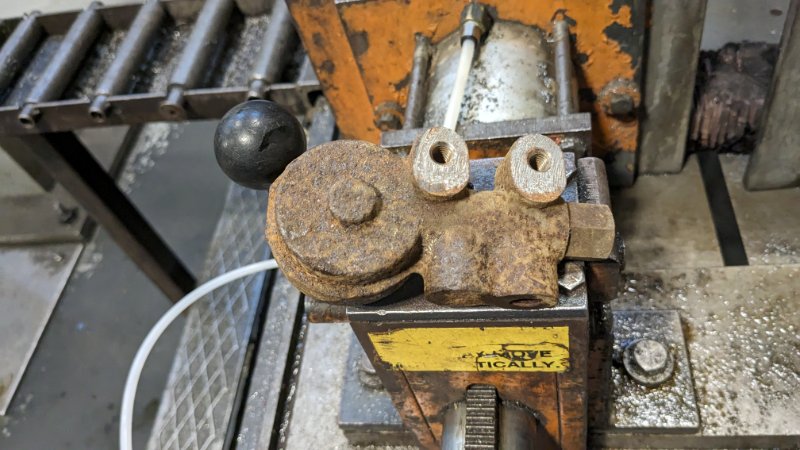
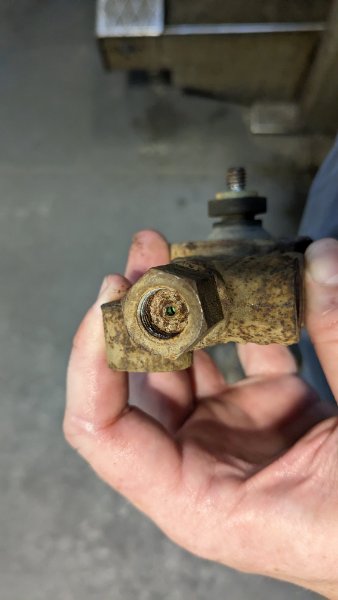
As I mentioned in the thread I made about just bleeding the rear brakes I had a crappy old leveling valve that wasn't really worth keeping. Today I took it to work and cut it open on the bandsaw. I didn't realize the blade guides were loose so the cut was a little crooked, but it's still a pretty decent cross section of the valve and all the bits therein. I'm pretty positive that the little green valve piece is oriented the way I did it in the picture, but someone more knowledgeable of brake valves may correct me. If it is oriented that way it has about 3/32 of back and forth that would change how much pressure is let through. The spring got absolutely destroyed and that was the largest piece I could recover.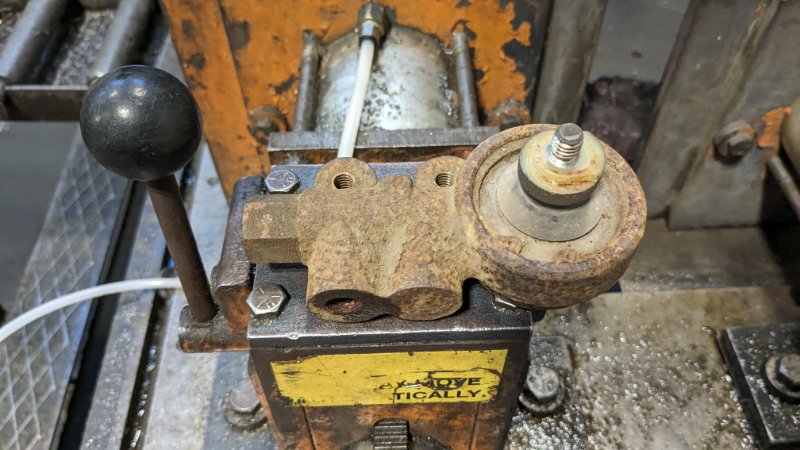
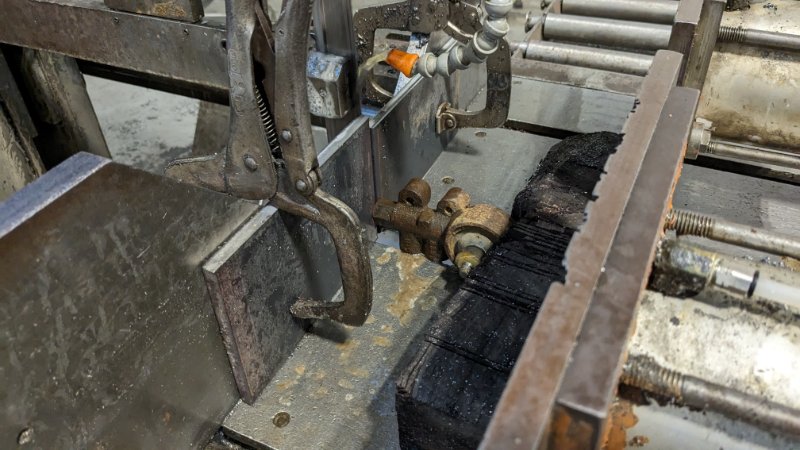
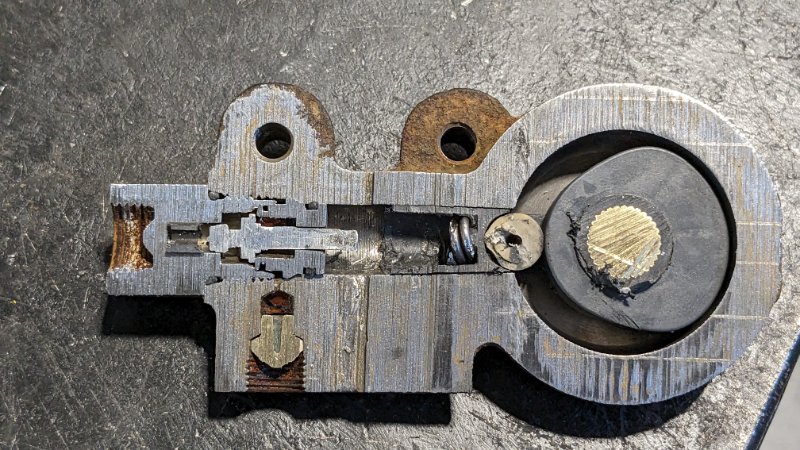
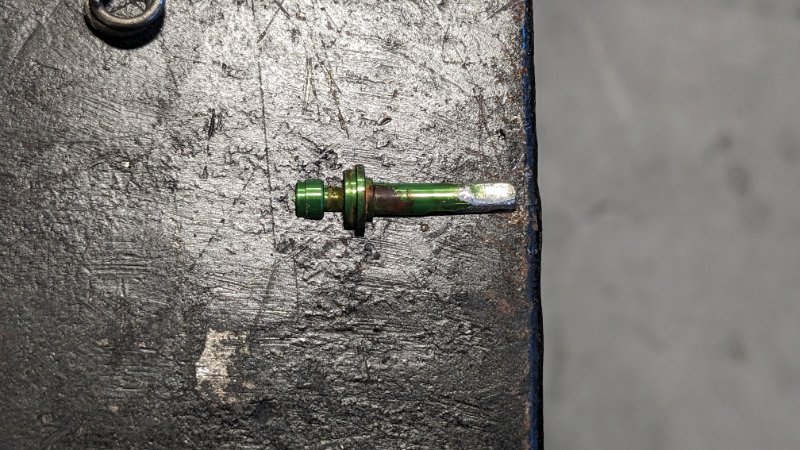
-
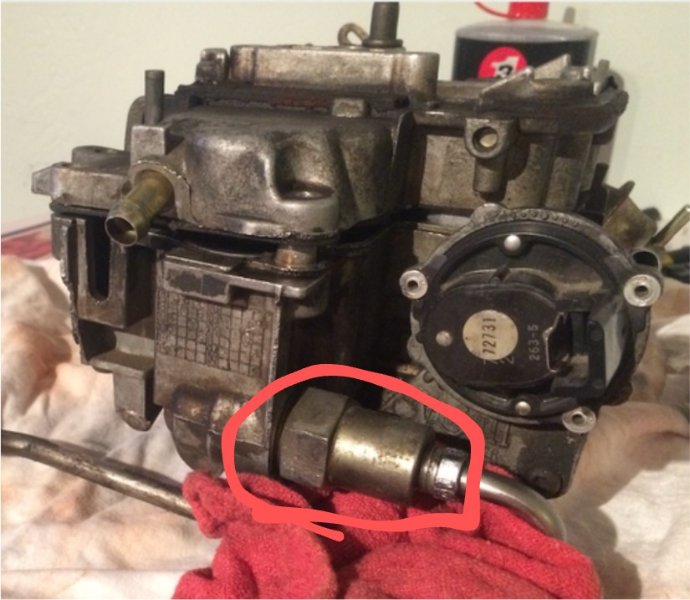
It's on the bottom of the carburetor facing the driver's fender. If you undo the steel line coming from the fuel pump on the block, you can unscrew the entire housing the line goes in.
-
Can I bleed just the rear brakes?
coheed replied to coheed's topic in MJ Tech: Modification and Repairs
No need man. It's something inquiring minds want to know. I have an old crappy rear valve I could try and slice open on the band saw at work I noticed a lot of debate about the emergency line in my googling and we might be able to figure something out that way? Or would we need to cut the front block open? -
Can I bleed just the rear brakes?
coheed replied to coheed's topic in MJ Tech: Modification and Repairs
I disconnected at the wheel cylinders if that makes a difference. And clamped the rear rubber line while doing all the work so I would lose as little as possible. Is there a way to check if the emergency line has air in it aside from tripping it or doing the factory procedure? -
As the title states I'm wondering if I can just bleed my rear brakes without having to do the entire complicated procedure from the FSM. Reason I ask is I just recently bled all of my brakes when I had to replace my rubber lines, then I disconnected just the rear during my axle swap. Hoping to avoid doing all of them again. Edit: I should have mentioned that I do still have the rear prop valve installed, and don't want the extra hassle of removing it at the moment.
-
https://www.ebay.com/itm/115801642492?hash=item1af650d5fc:g:eTEAAOSw26NkXQgK At this point the new Keyparts ones are a better deal than used ones.
-
So wait, you guys are getting emails from them? I haven't received a single email since I put in the pre-order and got a confirmation for it.
-
I'm using Centric 15067054 and 15067053 for the fronts and 15067318 for the rear. Great fit and finish. You can see them installed in this post.
-
A College Students V8 Comanche
coheed replied to 88mjsally's topic in MJ Hardcore Tech: Epic Journeys to Greatness
Sad to see. Always an awful day when someone you've spent so much time and effort in gets wrecked. If there's no frame damage you could link the rear? If there is you could build a truggy