


coheed
-
Posts
626 -
Joined
-
Last visited
Content Type
Profiles
Forums
Gallery
Everything posted by coheed
-
Small 4 cylinder diesels should be significantly more available than they are in the US. Most people don't need top end HP, they need torque to get up and go in traffic. They're usually way better on fuel too. My MK6 Golf averaged about 40 doing almost completely city driving.
-

Squirrelly Dan: Coheed's 86 Custom
coheed replied to coheed's topic in Member Projects: Your Comanches
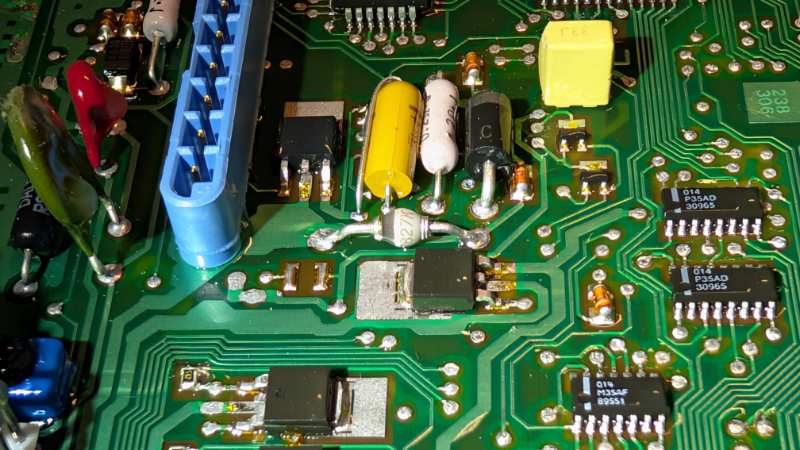
Well, after working on vehicles and equipment for 21 years, I pulled off a first today. I fried the PCM for the 3.4. I was using tunercat to lower the fan kick on temps and turn off the EGR since it's throwing a code, and in the middle of writing the files my laptop decided to close a different program and it interrupted the process. There're warnings all over saying that these PCM's are super sensitive to interruptions during reading/writing, but I didn't think that windows closing a different program would fry one. Pulled the PCM apart and the only thing I found that looked suspect was what I think is a Zener diode. Planning to unsolder it and test and if it's good, I'm not sure what to do with this PCM. Luckily, I bought a spare on ebay a while back, so the truck is still drivable.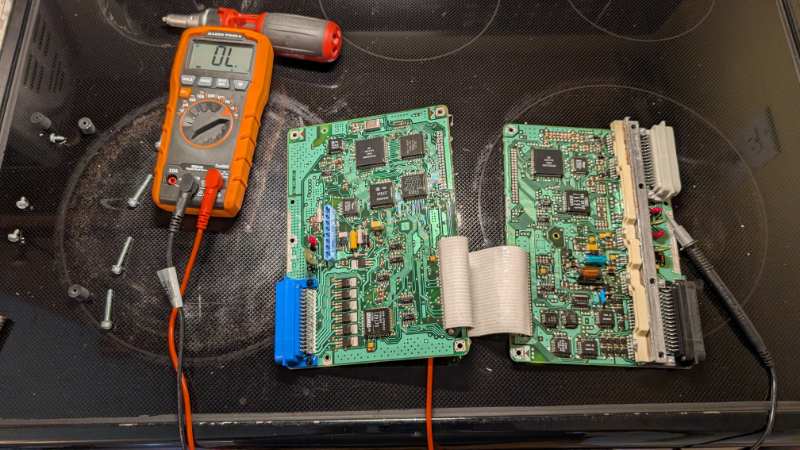
-
Squirrelly Dan: Coheed's 86 Custom
coheed replied to coheed's topic in Member Projects: Your Comanches
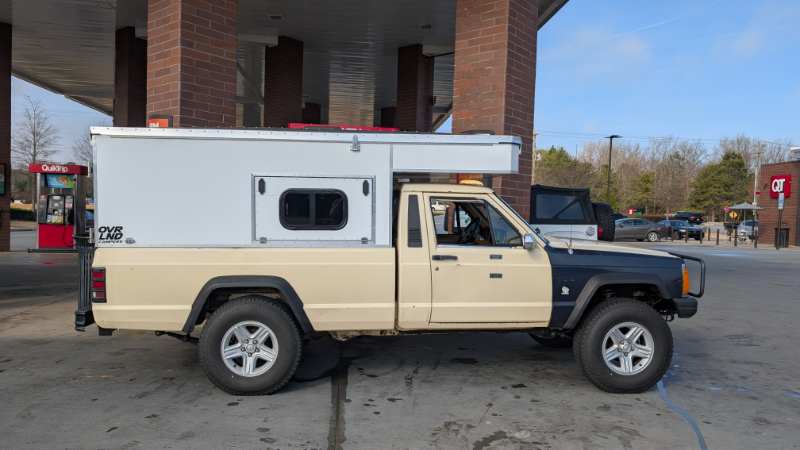
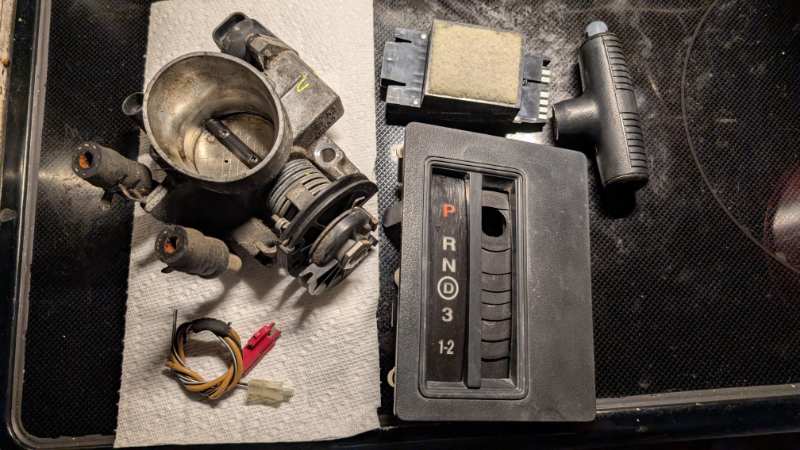
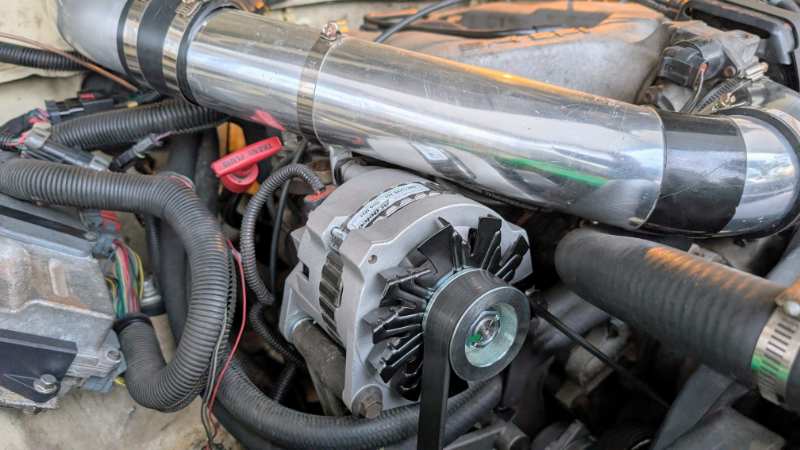
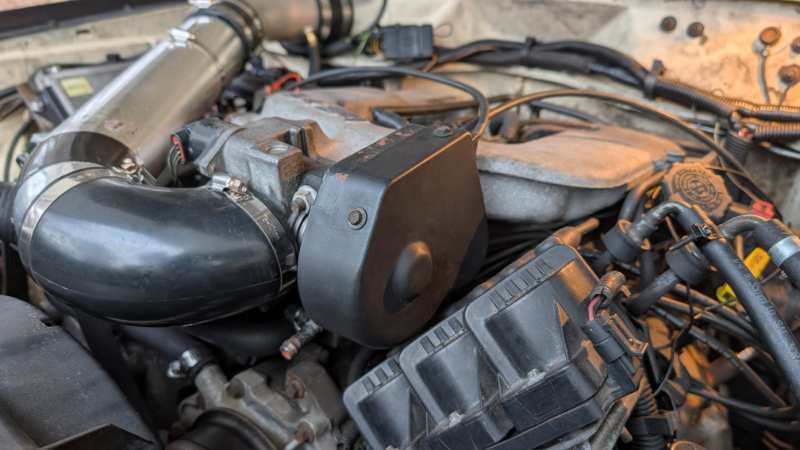
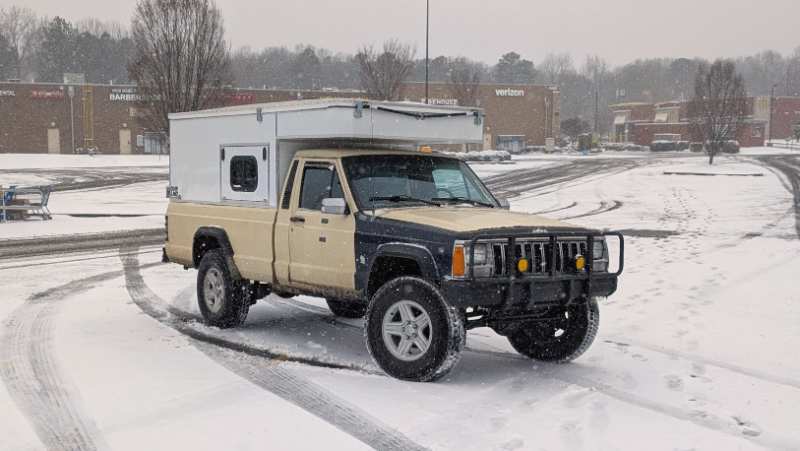
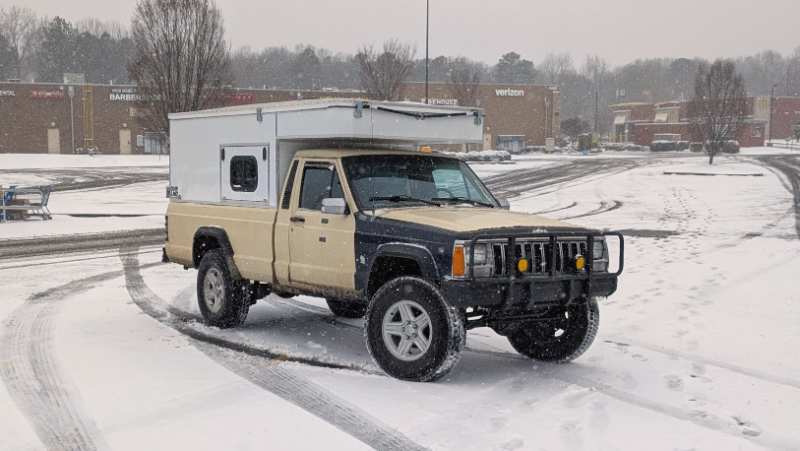
Not a whole lot of updates for this truck. Just been ironing out small details with the motor swap. I had thought the gauge cluster was causing the parasitic draw, so I got a full cluster from @eaglescout526. Turns out I didn't pay enough attention and had the exciter from the truck harness routed to the constant on the alternator. Oh well, at least I have a tach in the cluster now. Need to get a signal converter to make it work with the Camaro PCM. Got a chance to try out the truck in the snow. Even in 2wd it did admirably. I'm decently impressed with the Sumitomo Encounters. Also found out that the regulator in the original alternator had gone bad as well. Would charge over 1000rpm, but not at idle. I got a new AC Delco one, but there are parts readily available to rebuild the original at least for now, so I kept it and will put new bearing, brushes, and a regulator in it at some point. Made a trip to the local pull a part because they had an 88 XJ and 2 3.4 Camaros. Managed to get a spare throttle body, a throttle cable cover, a spare impossible to find 24x crank sensor, and an automatic shifter bezel and knob for just the price of the throttle body. Tore the old 2.8 apart to take to scrap and am completely amazed it made it well over 300,000 miles. Took the engine and a bunch of other metal to the scrap yard this morning. With a 345lbs camper and 700lbs of scrap in the back it squats just a hair. Thinking I need to get a little longer shackle in the back to even it out when I have a buildout in the camper. The truck weighed in right at 4000lbs with a full tank of gas, basic tools, and spare fluids without me included. Not too shabby for a LWB with a camper.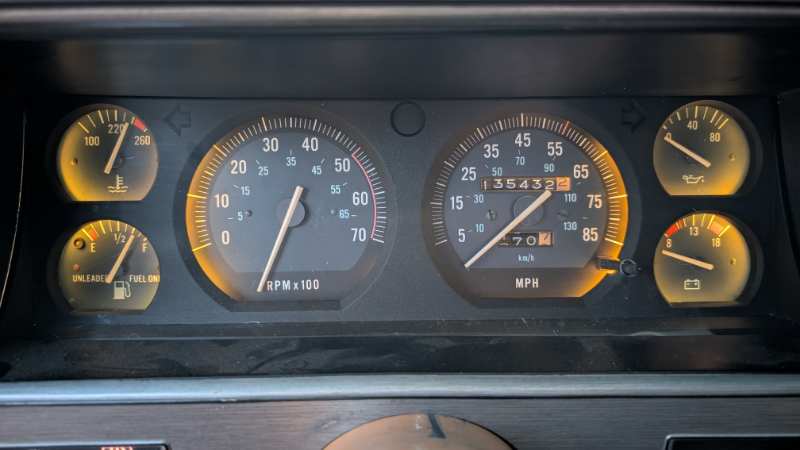
-
My most recent one
-
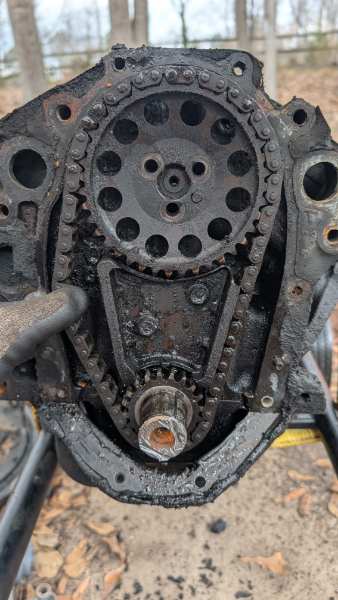
I read somewhere that 10° of slack when you rotate the crank vs the cam was acceptable. This one had about 20°. I'm flabbergasted that this engine only failed to start once, and it was because I flooded the carb.
-
You would think with phones getting bigger it would be easier to type on them. Maybe my fingers are just getting clumsier.
-
The thing I find really funny is when I picked up my camper last year, the couple that runs and owns the company had just finished putting a camper on their brand new 25 tundra, and the campers had essentially the same amount of room inside them. And the tundra has a lower payload capacity than the Comanche with metric ton springs
-
Right? And that van was a 2wd, low top roof, with smaller tires than mine. An old coworker has a 4wd high top on I think 31s and it's enormous.
-
It's possible that in the 330000 miles it got swapped out, but it says 2.8 on the block and it doesn't have the telltale red tag that GM would put on their rebuilt blocks. Regardless if it's the original it's amazing it made it as far as it did. And I drove that engine across the country twice. I am too. Especially so given how known these engine were for having oiling issues.
-
Yeah it is. Well chalk that one up to the Y and the T being next to each other on the keyboard lol
-
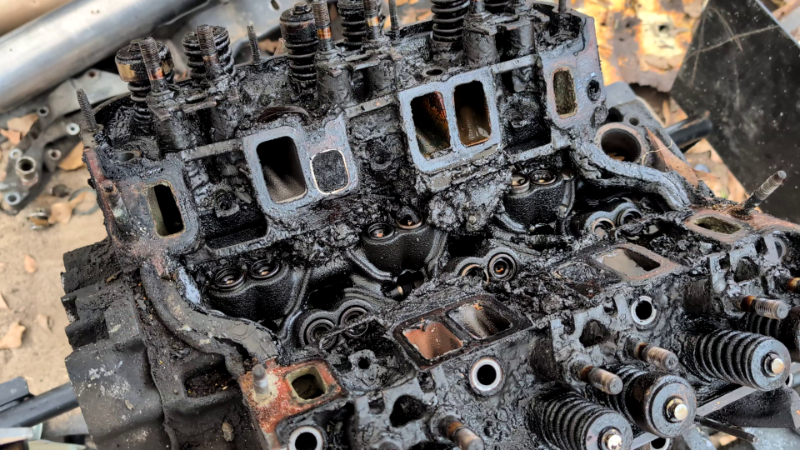
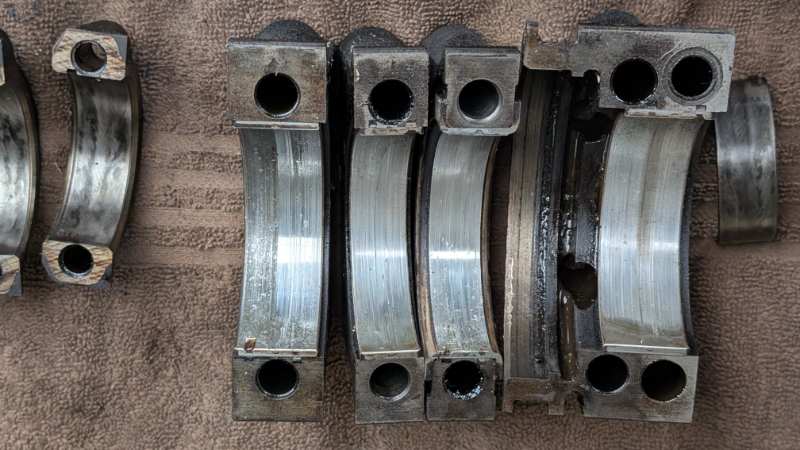
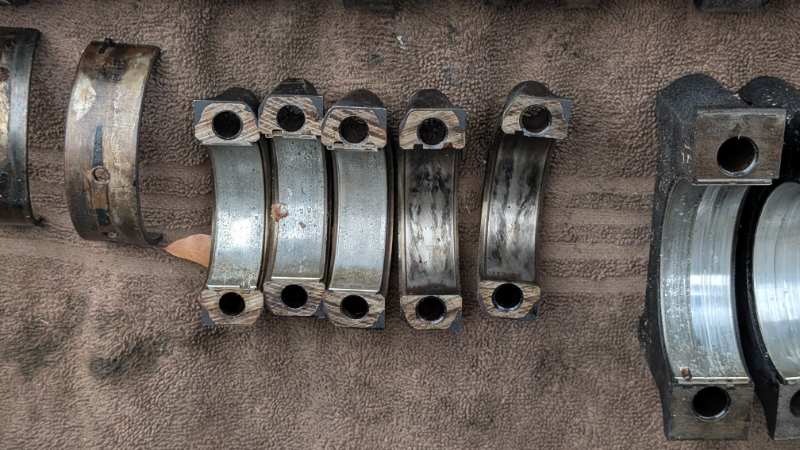
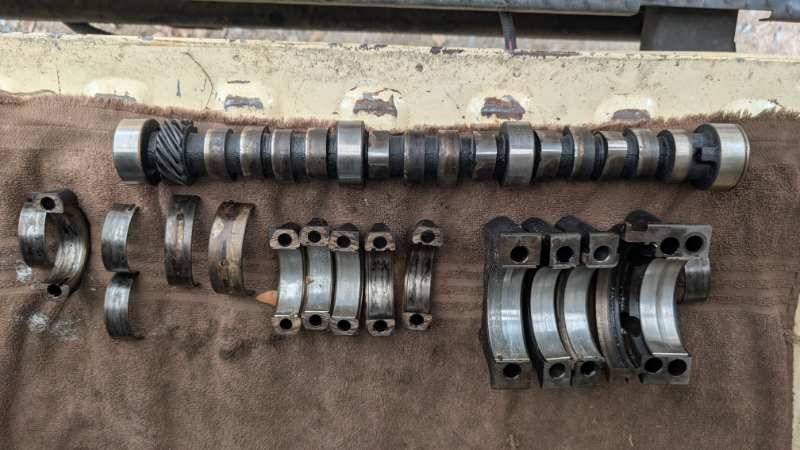
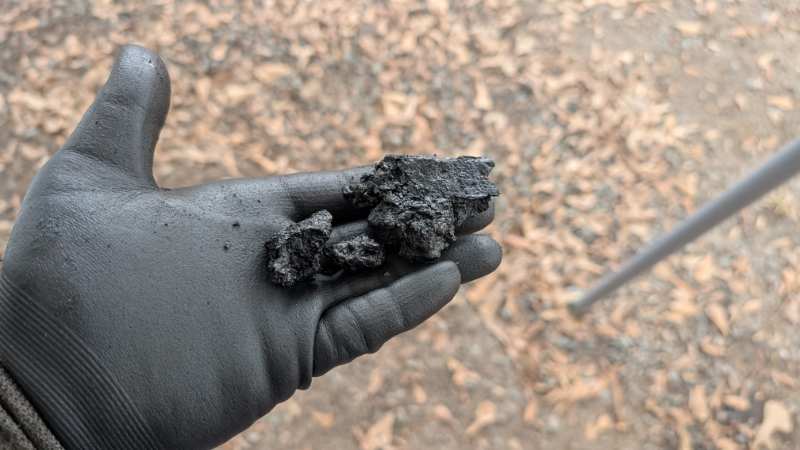
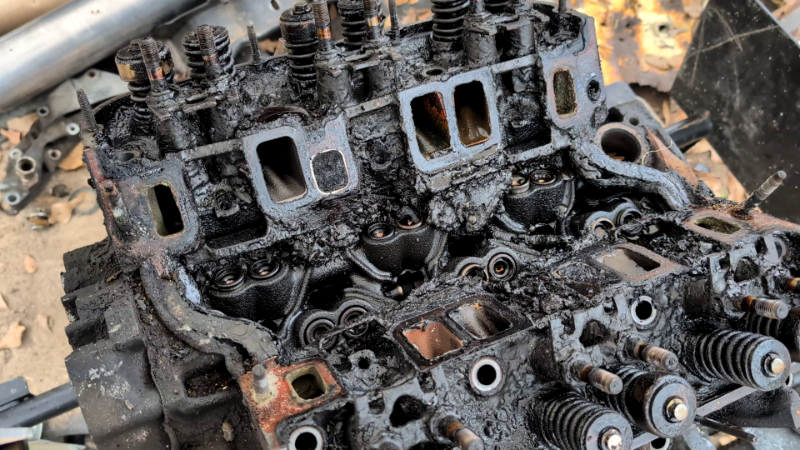
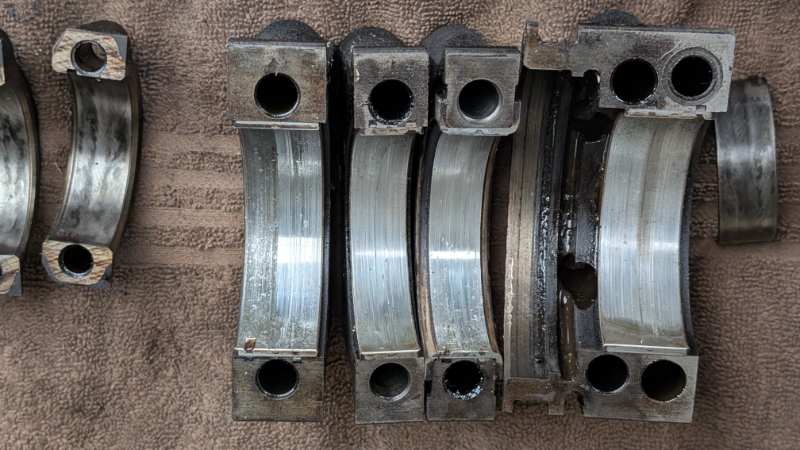
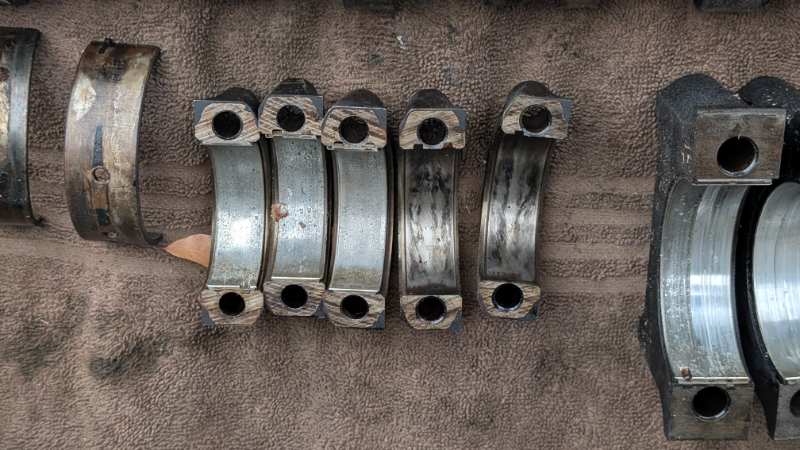
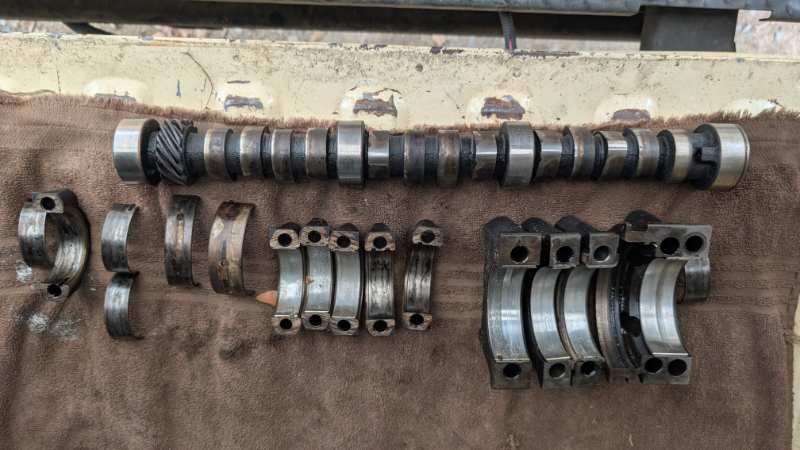
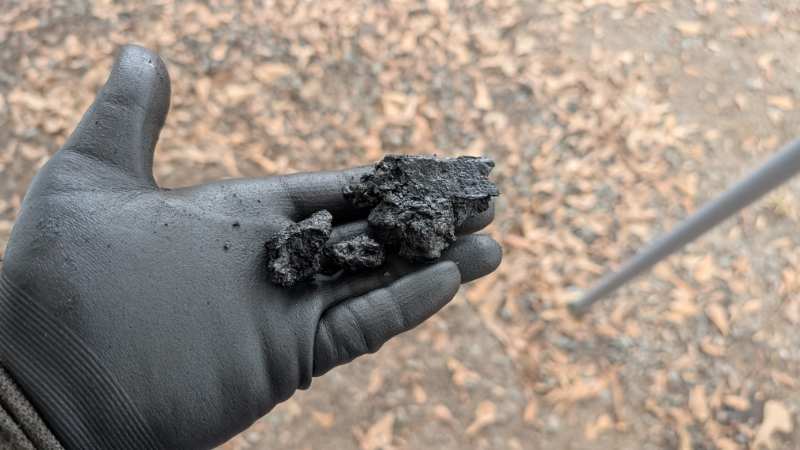
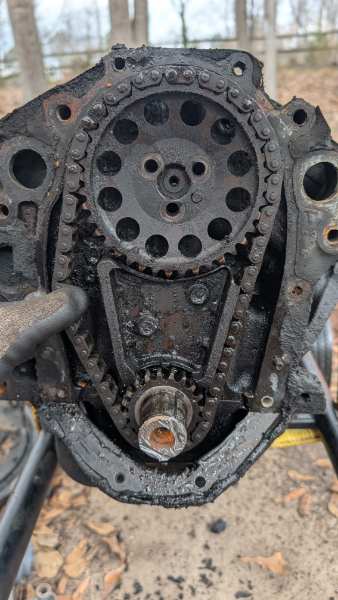
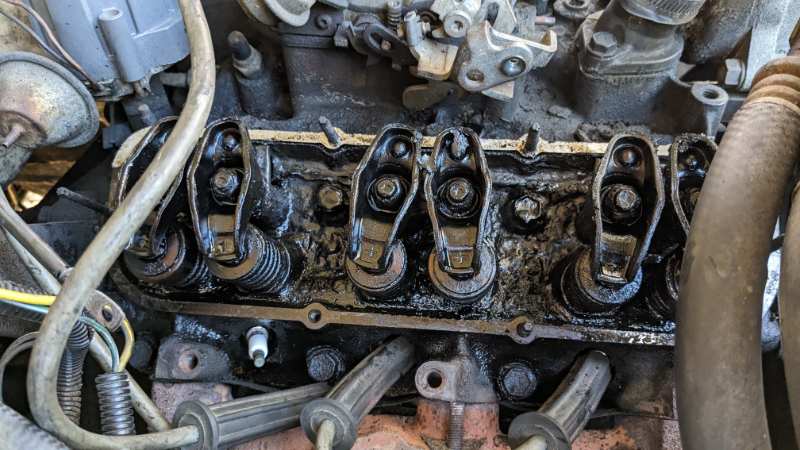
Figured some of y'all would get a kick out of this. I finally got around to tearing apart the 2.8 that I swapped out of my truck to take to scrap and honestly, I'm more amazed that it lasted as long as it did after seeing the internals. This engine had 330,000 on the odometer when I bought it in 2019, with the speedo cable unhooked mind you, and I put around 30,000 on it before I swapped it out. Every bearing and surface has deposits and galling, and the galley under the intake was almost solid with carbon and gunk deposits. I'm amazed it was able to lubricate itself as long as it did. And the timing chain had stretched so much I was almost able to get it off the cam gear without unbolting anything. Maybe I should go buy a lottery ticket
-
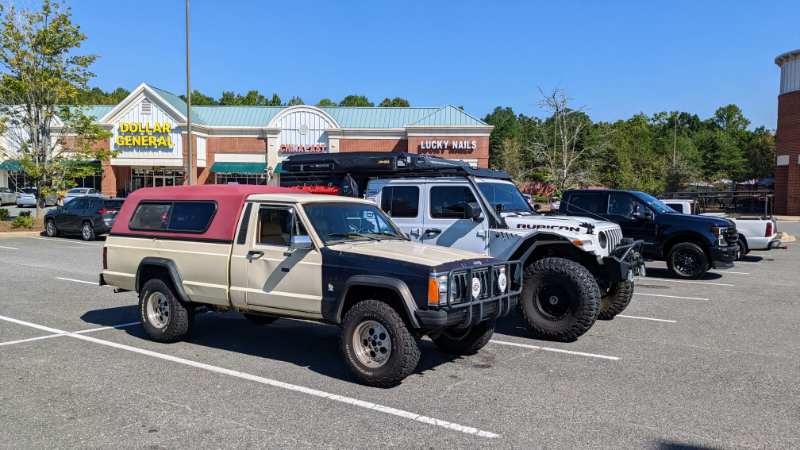
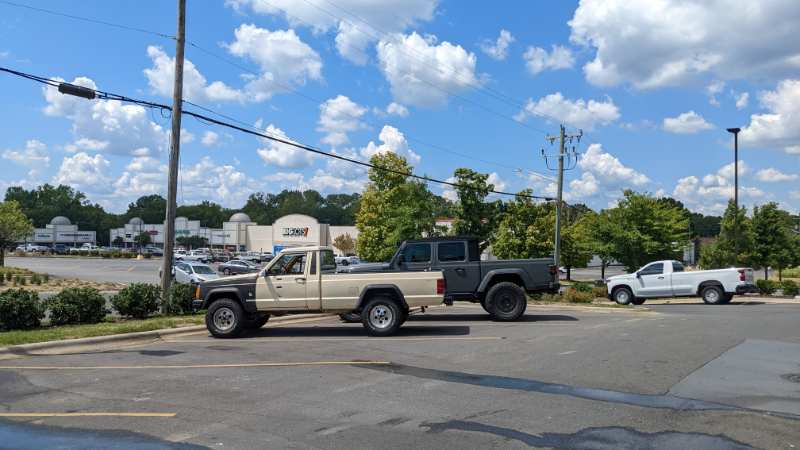
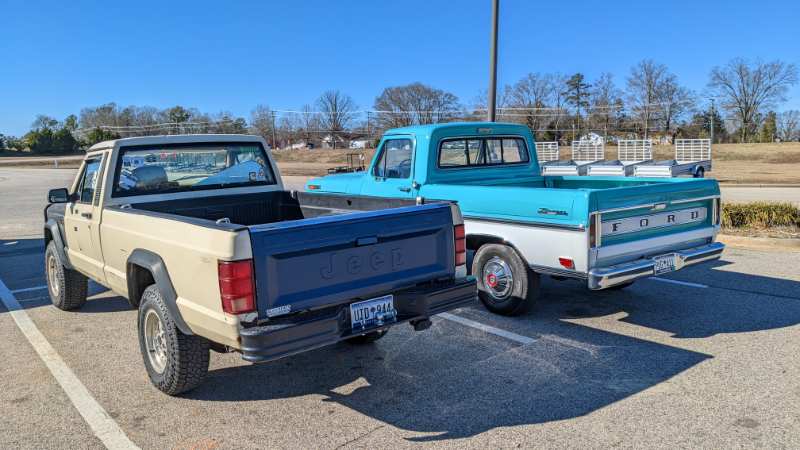
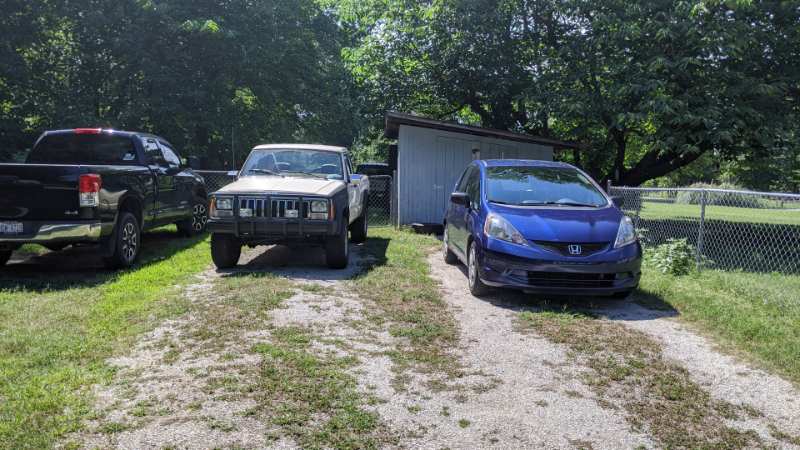
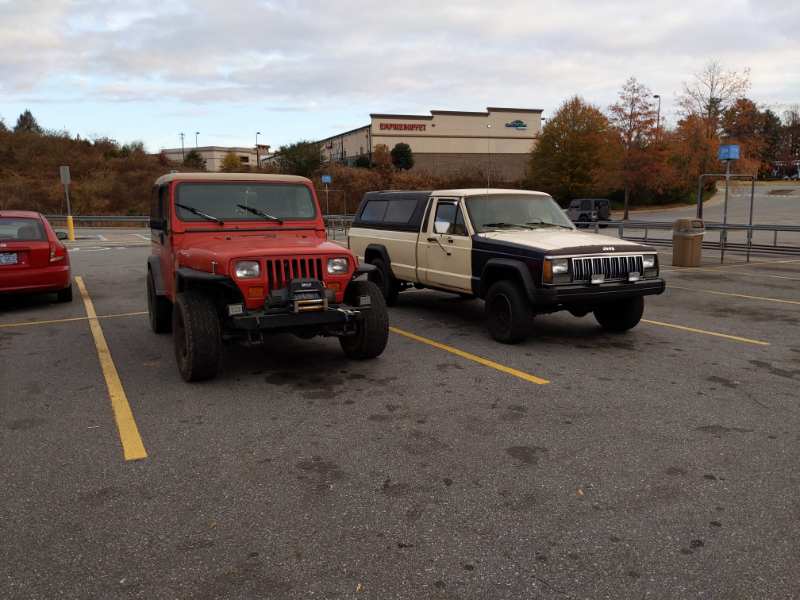
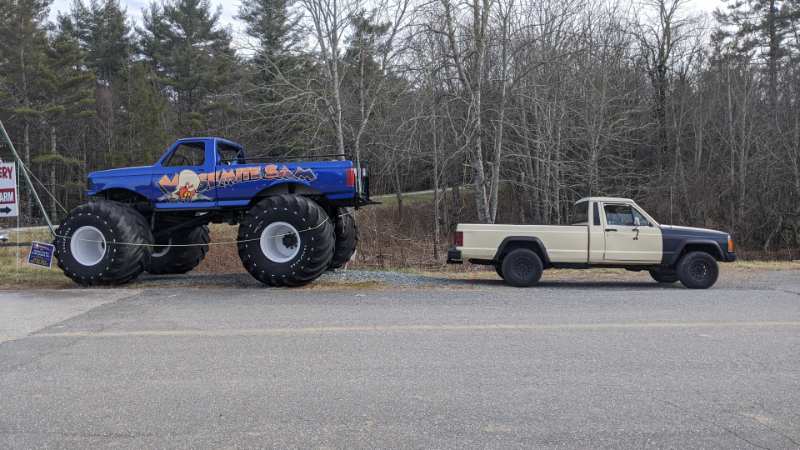
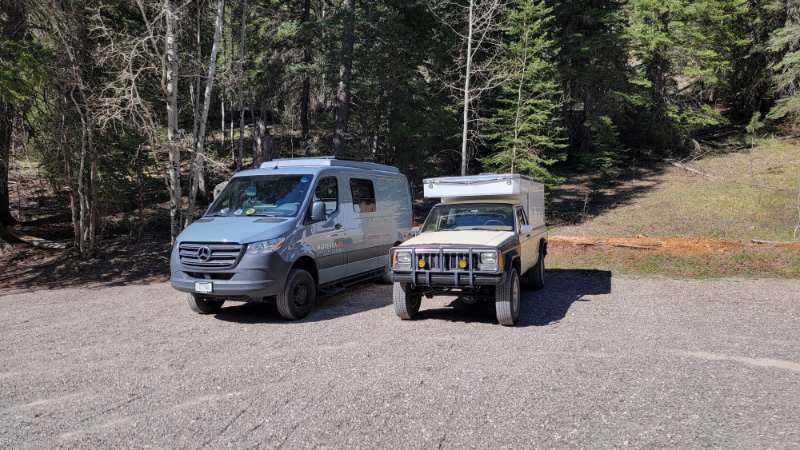
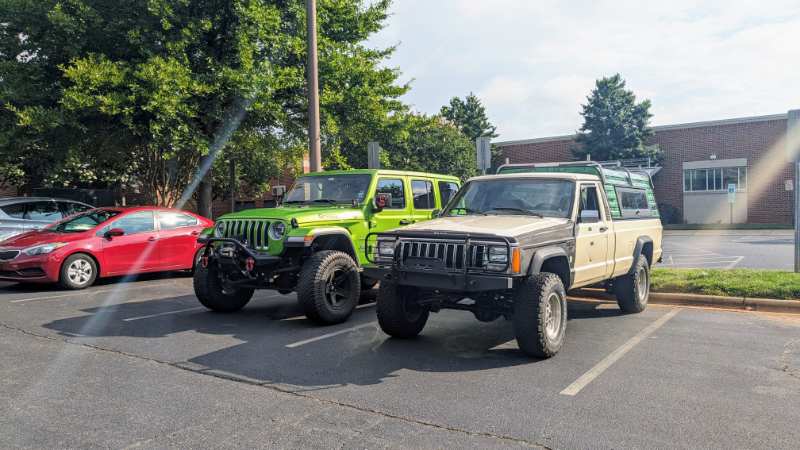
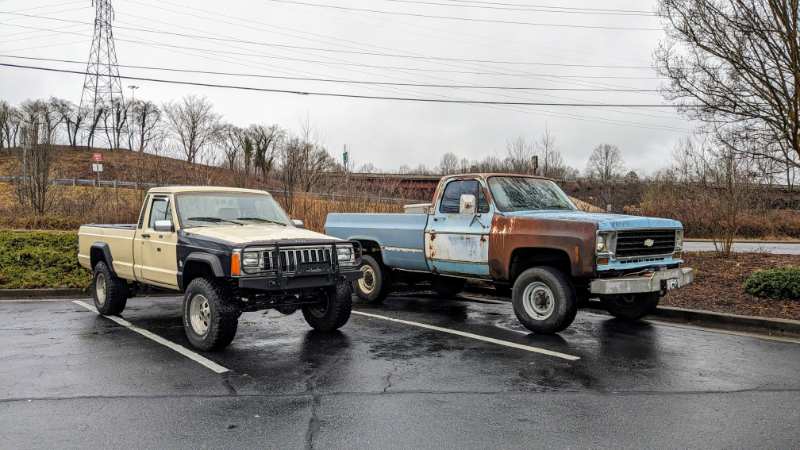
Next to my ex's 2010? Tundra Next to some massive Gladiators. Not quite the same comparison, but my truck lifted 3" on 32s with a 7.5' camper that has a full queen bed next to what's considered a medium sized sprinter van. These always amazing me at how big they are. Another fun one. Comparing an old TJ to a newer Wrangler. Even without the 35's they've ballooned up quite a bit. And compared to what was considered a full-size truck when the Comanche was new. And one for fun. Without the MASSIVE tires the F150 isn't much bigger than a lwb MJ.
-
Ok, so everything that seems like it may fit given what parts were on the truck has a decent chance of being the original option? Could the seat code have corresponded to the higher end seats? Because it did have the highland check with vinyl winged bucket seats.
-
Do either of you guys happen to know which codes got reused over the years? I'm curious as to how this truck (my grandfather's) was originally optioned from the factory. Like would the RAF code mean that the RX135 that was in the truck was ordered with the truck, or the code got reused and it was a different option at the time?
-
Front Driveshaft Lengths | NAXJA Forums - North American XJ Association I found this thread over on Naxja, and it seems accurate because the front I have from a 2.8/AX5/NP207 combo is 25.5" collapsed. Yoke to yoke with the 4L60e/NP242 is 29.5", so the first one on the thread should be just the right length.
-
A 700r4 would've made my swap easier for sure. I went with the 4L60e that came in the Camaro and used a Novak adapter to run a NP242 on the back of it. Unsurprisingly that adapter was the most expensive part in the whole swap lol. You never know, you may end up finding a 3.4 in a yard and could yank the injection system off of it. Idk what the actual power difference between a well tuned Weber 38/38 or a Holley vs the FI is, but one of the reasons I wanted it was going camping in the mountains and driving across the country the big elevation differences always killed what little power the 2.8 put out. Climbing up pikes peak a few years ago made the truck feel like it had 25hp, and obviously I'll have less of that with the FI.
-
Unfortunately, the closest shop that'll be under $300 is a 2 hour drive, that I've talked to so far anyway. And I don't trust myself enough to weld up a driveshaft lol. This isn't a bad idea. I may call a few of them tomorrow. Man, 84-86's around here seem even rarer than finding a Comanche in a yard.
-
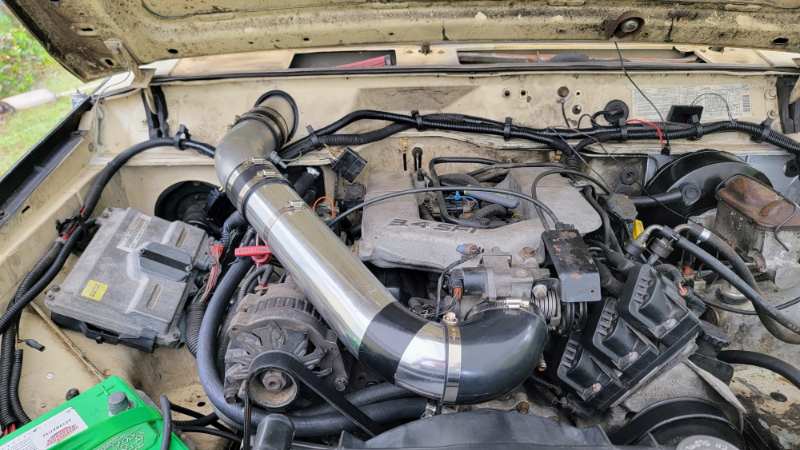
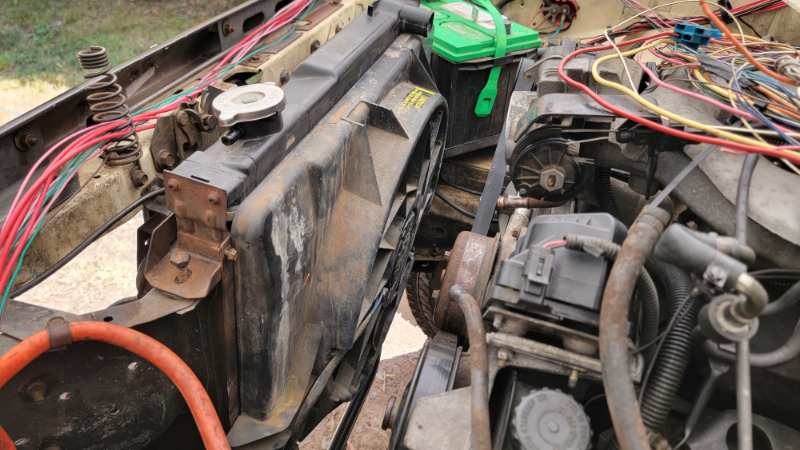
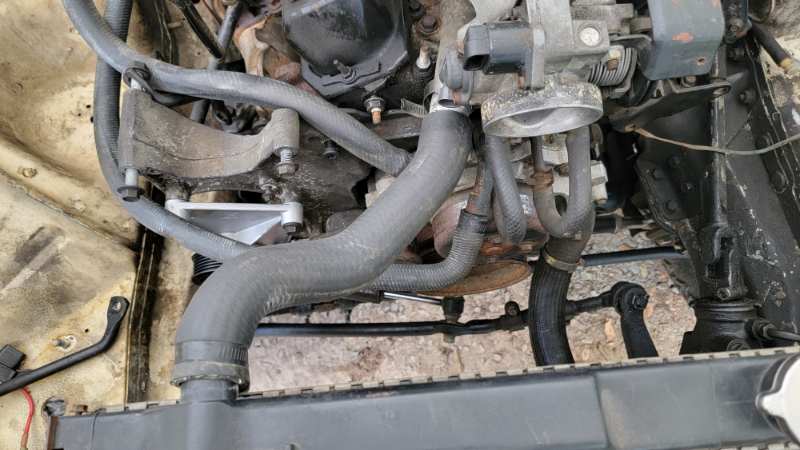
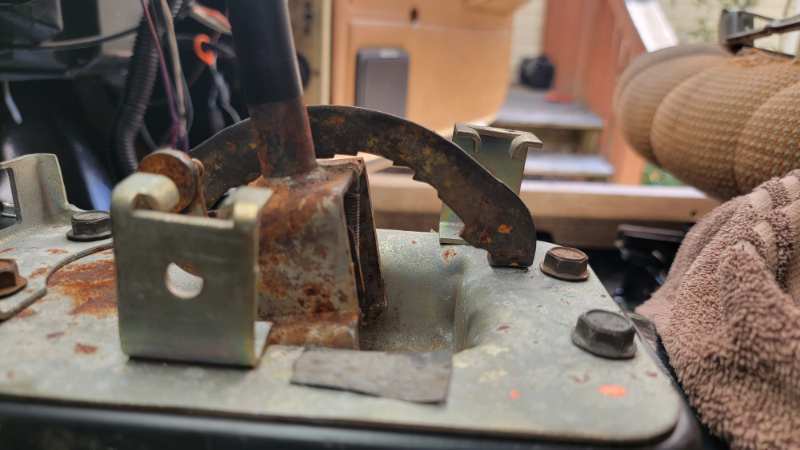
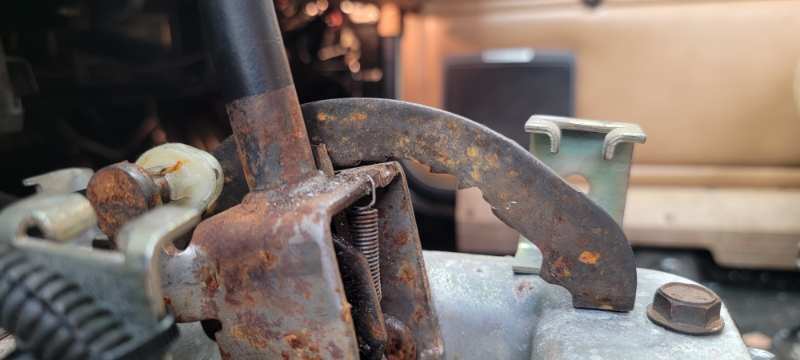
There’s very little info on what wiring is needed from the CamaroBird platform to run the 3.4 fuel injection in another vehicle using the stock PCM. These swaps are also very popular for MG’s, to the point that there’s one company that will make you a harness from scratch, but I could never find a list of what needed to be kept, so I made one. All of this applies to the wiring associated with 86 trucks and 94-95 automatic Camaros, as later trucks may have different colors and pin locations for the wires and the 93 Camaro has a transmission that isn't electronically controlled (though most of this info is similar if not the same). Below are the connectors, how to identify them, and what wiring you need to keep from each one: C100 black 10 pin, located in the top pass side of engine bay near the PCM Cavities: A: pink- power feed for injectors B: dark green w/ white tracer- A/C relay control * C: dark green- A/C clutch solenoid feed * F: brown- power feed from coolant fan fuse G: pink- power feed for ignition H: dark blue- coolant fan relay control K: pink- power feed for injectors You can eliminate the C200 connector but keep the following wires. Located behind dash in the firewall (this looks like a bulkhead connector, but it isn’t, it's just epoxied into the firewall opening) A1: dark green w/ white tracer- VSS input to cruise control module ** Any wire that feeds the under-hood fuse block and interior fuse #5 when the ignition is in the run position. C210 black 4 pin, located behind pass kick panel A: purple- theft deterrent relay to starter solenoid B: black w/ white tracer- ground for ALDL port C: orange- PCM 12v constant D: gray- fuel pump prime connector C215 black 11 pin, located on steering column J: gray- w/ black tracer cruise resume/accel ** K: dark- blue cruise set/coast ** L: gray- cruise on ** C220 white 10 pin, located behind pass kick panel A: red- power feed from cluster to alternator exciter (hot in run only) G: dark green w/ white tracer- VSS for cruise ** J: dark green w/ white tracer- fuel pump relay control C230 blue 10 pin, located behind pass kick panel B: brown w/ white tracer- check engine light (switched ground from the PCM) C: white w/ black tracer- diagnostic request signal for ALDL port D: white tachometer- signal to gauges **** E: dark blue- VATS 55mhz signal wire (wire bypass to this if not tuning VATS out of the PCM) F: dark green w/ white tracer- A/C request signal * G: pink- power feed from PCM ignition fuse H: light blue w/ black tracer- brake signal input to TCC *** And obviously any wiring attached to the engine, transmission, and fuel pump needs to be kept. If you connect the 10ga yellow wire feeding into the theft deterrent relay (the relay that stops power going to the starter due to VATS behind the passenger kick panel) to the purple in that same relay connector going to C210 connector, you can bypass the theft deterrent relay. You can then pull that relay and all associated wiring. The yellow comes from the crank position in the ignition switch that will replace the factory green wire that goes to the starter relay on the MJ. I extend the wire for the #5 interior fuse for the fuel pump relay into a slot that is powered with ignition in run/start in the engine bay fuse block from the Camaro. I also extended the wire for the #4 interior fuse for the PCM constant power and shortened the feed from the fusible link into the engine bay fuse block. Doing this completely eliminated the interior fuse panel. No other interior fuses need to be kept. I chose to connect the dark green with a white tracer for the A/C request signal on the 3.4 harness to the light green with a black tracer from the truck harness. This is the wire the Comanche uses to send 12v to the low-pressure switch on the truck system and can trigger the Camaro PCM to turn the A/C compressor clutch on. With a little trimming a PT Cruiser electric fan fits the 2.5/2.8 radiators pretty well. They have 2 speeds and you have to wire both power feeds together to get the high speed. Some of the OE style replacements are advertised as pulling over 2000 cfm, so a good one should keep the truck plenty cool. Also, if you use a program such as TunerCat you can lower the fan turn on/turn off temps. The stock fans come on at 228° and that seems like asking for issues given the cooling issues these trucks can face. Also, if you get a upper radiator hose for a 2.8 with A/C you can trim it to fit perfectly from the 3.4 t-stat hosing to the 2.8/2.5 radiator. J, K, and L from the Camaro C215 will get plugged into yellow, red, and green on the MJ C215 connector respectively for cruise control commands. The NP207 shifter is a different shape than later shifters, so I chose to get a later shifter from a junkyard and found a Novak cable kit used on FB as it was way easier than figuring out the math on a linkage since I was ditching the 207 for a 242. The A904 shifter is a linkage style shifter, so I also decided to get a later style auto shifter and cable from a junkyard and use it instead of doing math. The shift distance is almost the same between the 87-95 MJ/XJ and the Camaro, however you’ll need to trim some on the backstop of the shifter to be able to reach the first gear position of the 4l60e throw. And because the 84-86 auto shifters are linkage based, the firewalls don’t have a hole for cable shifters. You will also need to cut and weld the cable brackets from both the AW4 and 4L60e to attach the cable to the case. My truck was not wired from the factory to have a functional check engine light in the cluster, but I know some 86s were. As such, I just spliced a power tap for the 12v feed to that bulb and plugged it into the fuse panel and spliced the switched ground from the Camaro PCM to the other contact. I have not figured out how to turn the reverse lights on the truck on with the new shifter. The previous AX5 had an internal switch, and the Camaro uses the PRNDL switch attached to the shifter. Still trying to figure that one out. *: not needed if using MJ wiring for A/C **: not needed if not keeping cruise control ***: not needed if using a manual transmission ****: only needed if using a tachometer
-
So, since swapping in the 3.4 and 4L60e I haven't had 4wd because the stock front driveshaft is too short. I was looking through driveshaft lengths, and it looks like a front from a 2.5 auto would be the right length for what I need. How long would I be waiting to find a 2.5 automatic 4wd XJ to pull a driveshaft from? Thinking it might make more sense to pony up the money to get one made from Tom Woods.
-
I don't see why not. If someone knew what plastic to use it's just copper laminated with plastic. I mean if someone really wanted to I suppose you could scan it and cut out new copper and then laminate that, having essentially a brand new one. Yeah, that's true. Maybe they were just wanting to update things and got lucky. I mean the mid 80s weren't that far away from major changes between year models. And I know the newer ones will work, I just prefer to keep this one for the reasons I mentioned above if I can. I found a full 86 cluster on ebay for $165, which I suppose isn't unreasonable. I messaged the seller about the circuit paper on the back since the photo's don't show it very clearly. But if someone on here has a 3/4 cluster in decent condition here, I'd rather go that route.
-
Yeah I know I could make a newer one work, but I'm used to how the older gauges look lol. Plus this one is out of my grandfather's truck and if I can keep it working I'd prefer to do that.
-
Yeah, looking at clusters on eBay the newer clusters look like the boards are made differently. Not surprising with the ownership change I guess.
-
Thanks guys. I've been looking at info on repairing these old circuit papers, and I may try that, but it can't hurt to have another cluster on hand.
-
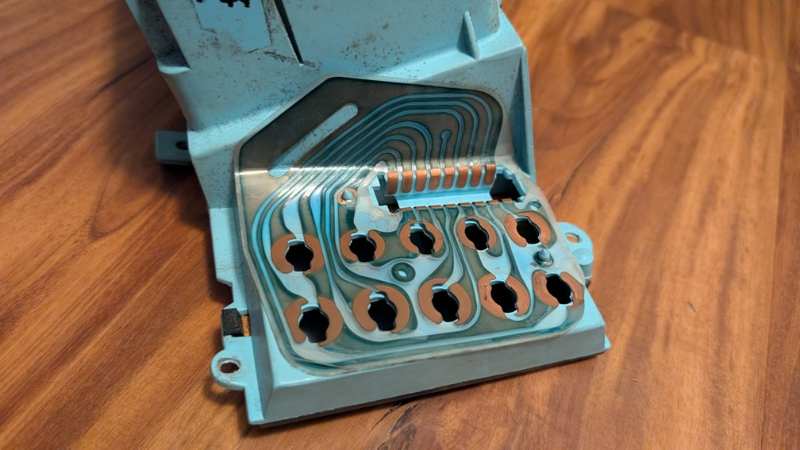
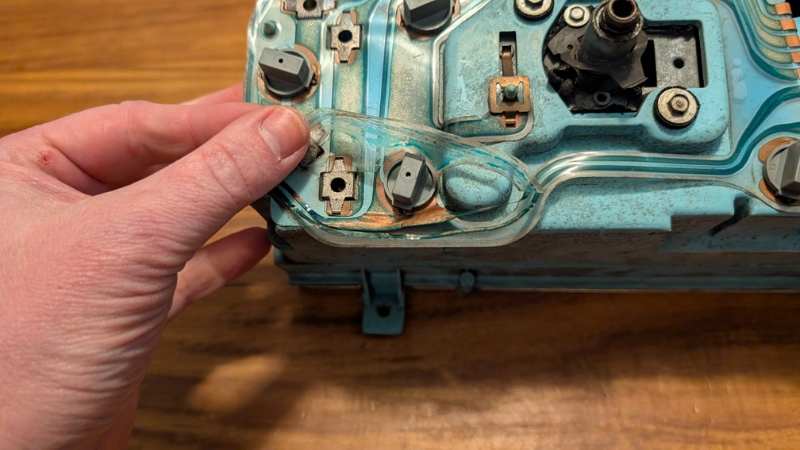
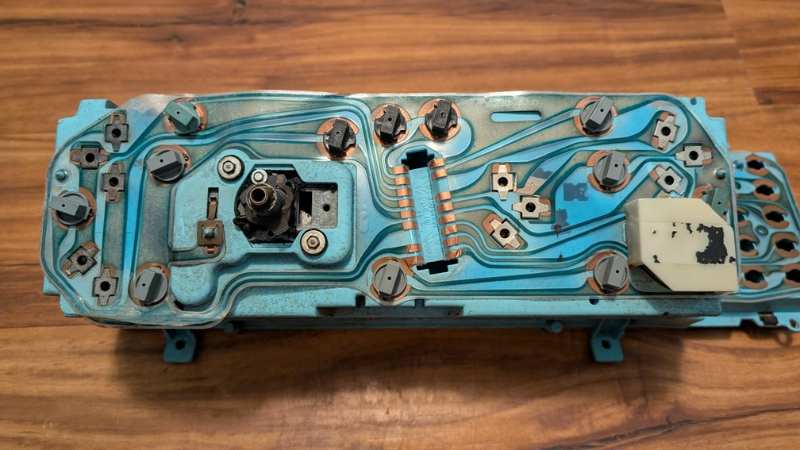
Been tracing down a parasitic draw on my truck for a while now and believe I've isolated it to the gauge cluster. Looking to buy either the circuit paper by itself, or a cluster. The issue seems to be isolated to the indicator light side, but the other paper is in worse condition. If I'm buying a full cluster I'd like to get one with a tach, but a 3/4 like I have now is fine. I don't know if later years circuits are the same or not, but if anyone knows and can verify if they do or not, the info would be appreciated.
-
1992 Comanche - North Charleston SC
coheed replied to scguy's topic in Craigslist/Marketplace/eBay... i.e. Not Your Stuff
I saw this one. If my daily wasn't in such good condition body wise this would make a good V8 swap candidate.