boxyjeep Posted May 1, 2022 Author Posted May 1, 2022 22 hours ago, Pete M said: no pics of your truck at the show to share? Didn’t get a chance to take any pics, but you can kind of see it at the end of the row ~10:50 in this video. They have the show every week, so I’ll be sure to take some pictures the next time I’m there.
Salvagedcircuit Posted May 7, 2022 Posted May 7, 2022 Curious, did you keep the Brown Dog engine mounts installed or did you go back to an oem engine mount? Thanks.
boxyjeep Posted May 7, 2022 Author Posted May 7, 2022 15 hours ago, commissioneranthony said: Curious, did you keep the Brown Dog engine mounts installed or did you go back to an oem engine mount? Thanks. I kept the Brown Dog mounts (frame side). I purchased the engine-side mounts, but didn't end up using them. The welds weren't amazing and I couldn't justify ~$350 for that, so I returned them. The frame side mounts are still doing well, although the rubber bushing is definitely a bit rough.
boxyjeep Posted May 7, 2022 Author Posted May 7, 2022 I just wrapped up my brake upgrade. I installed new front rotors and calipers, stainless steel lines, and upgraded the brake booster and master cylinder to a WJ model. I also ditched the rear load-sensing valve and installed a Wilwood adjustable proportioning valve. I haven't taken it out yet, but pretty happy with the brake feel after bleeding the system. New master cylinder, booster, and prop valve installed: Before and after boosters (WJ on left): New rotors, calipers and SS brake lines: I didn't replace anything in the rear other than pulling out the load-sensing valve and installing a longer stainless steel brake line. I may do a disc conversion at some point, but for now this should be fine.
Salvagedcircuit Posted May 11, 2022 Posted May 11, 2022 Oooh. Very nice. I plan to install a WJ master cylinder & booster, and do a ZJ rear disc swap into mine. I like the Wilwood adjustable proportioning valve, I think I may have to copy you if you don't mind
boxyjeep Posted May 11, 2022 Author Posted May 11, 2022 15 hours ago, commissioneranthony said: Oooh. Very nice. I plan to install a WJ master cylinder & booster, and do a ZJ rear disc swap into mine. I like the Wilwood adjustable proportioning valve, I think I may have to copy you if you don't mind Haha, I haven’t road tested it yet, so results are still pending. That said, the pedal feel is much more solid after bleeding. This is the guide I followed for the rear prop valve delete (obviously modifying for the Wilwood valve).
boxyjeep Posted June 27, 2022 Author Posted June 27, 2022 Just made a how-to write-up on installing 2014+ Jeep Cherokee KL seats into my truck:
boxyjeep Posted August 18, 2022 Author Posted August 18, 2022 Been making some slow progress on the truck trying to figure out some air/fuel ratio issues. I'm running an ATK 4.6L stroker that I installed in March, however due to needing to pass CA emissions, I am severely limited in any other (noticeable) modifications that may cause me to fail visual inspection. Most notably, I need to have a functioning EGR system which necessitates a RENIX intake manifold, exhaust manifold, intake, cylinder head, etc. I have a bored throttle body and removed the venturi in the stock airbox, but otherwise the truck "appears" original. I tried running the stock 19lb injectors (Bosch P/N 0280155702), but those were slightly too lean and would encounter fuel starvation issues under load @3000k RPM. I took some bad advice from one of the stroker forums suggesting 24lb injectors (Bosch 24.7lb P/N 0280155715), but those were too rich for RENIX engines and "mild" strokers. I thought 23lb (Bosch P/N 0280155703) would be correct, but those were too rich after the truck warmed up (the ECU wouldn't enter closed loop). At this point I stopped playing "swap-a-part" and started looking into how to adjust the fuel pressure at the rail, but it looks like it's only possible with an adjustable fuel pressure regulator. Hesco sells one, but they are currently backordered with no end in sight. After waiting a few weeks and doing a bunch more research on injectors, I determined that 20lb or 21lb would be sufficient and ordered some Bosch 20lb'ers (P/N 0280155909). Still waiting a few more days for those to come in. In the meantime, here's a nice pic I took recently in Dana Point CA overlooking the harbor.
Pete M Posted September 22, 2022 Posted September 22, 2022 huh. I thought I've read somewhere that the 24# worked ok. though maybe those particular guys didn't notice or care about a rich mixture (meaning they weren't in a sniffer state).
boxyjeep Posted September 23, 2022 Author Posted September 23, 2022 21 hours ago, Pete M said: huh. I thought I've read somewhere that the 24# worked ok. though maybe those particular guys didn't notice or care about a rich mixture (meaning they weren't in a sniffer state). Ugh. Finding the right size injectors has been painful. I spent a bunch of time trying to verify that my fuel pump was supplying enough fuel. Fuel pressure would be at 31# to the rail at idle, but under load it would drop to the mid 20# range. I also tested voltage to the pump and found a 0.5v drop (14.4v at battery, 13.9v at pump), which seemed acceptable to me. During one of my cross-country shipments of the truck the tank was run dry, so I was already somewhat suspect of the fuel pump. On top of that, the tank would leak when filling up, so it was time to pull the tank and pump to inspect everything. After getting it out, I found the vapor valve seals on the top of the tank were bad and it was also rusting on one side. The fuel pump had a loose terminal and very tight hose bend (greater than 90*). I ordered a new pump, tank, and seals and got those installed. After getting that situated, the AFR was improved, but simply could not hit the desired +/- 2.5v O2 sensor read-out with 20# injectors (best I could do after warming up was ~2.7-2.9v). Much improved from the super-rich 23# injectors, but too lean to run long term. This was also with an adjustable MAP sensor cranked up to ~6v (stock is 5v). Being close to the end of my rope, I ordered a new NTK O2 sensor, Accel 21# injectors, and a new set of plugs (as the current ones could be fouled from various injector testing). Should be able to get everything installed early next week. Hoping that this solves the air/fuel ratio mystery and I can finally get this thing running well.
boxyjeep Posted October 6, 2022 Author Posted October 6, 2022 I finally have some good news after a few weeks of toil--I was able to get the truck running well enough to pass CA smog (only took 3 tries!). The first test failed with super high NOx values. These are typically due to high combustion chamber temps (i.e., engine running lean). I also had some concerns about my catalytic converter. It was 3 years old but also had a bunch of oil/coolant passed through it with the prior engine that blew. Here's what I did to get it to pass: Colder plugs (ZFR6F-11 gapped to .030") 21 lb/hr Accel injectors (likely didn't need these, but these are well worth the $75/injector price tag) New O2 sensor (the old one was shot and wouldn't go below ~2.6v) New Catalytic converter (was able to get Advance Auto to honor a warranty replacement of the old one that I bought in 2019 for $250. If I had bought a new one it would be $1200 ). Tested EGR valve and found it was stuck halfway closed. This contributed to rough idle and other issues. Cleaned and replaced with an old OEM unit w/ transducer. Don't use "AIRTEX / WELLS 4F1899 (EGR4350)". It doesn't work. Blocked hot air mixer flap in the airbox to prevent any hot air from entering intake. Removed and cleaned IAT sensor and relocated to airbox. Temp readings decreased from ~150*F to ~90*F (massive improvement here). New MAP sensor and fixed discovered vacuum leak. Cranked up MAP voltage to 5.5v. Forced electric aux fan to run for the entirety of the test. Passed with flying colors (went from ~1500 NOx PPM to 0--yes, ZERO!): New Accel 21# injectors and FPR: Engine bay looking clean: Very happy to ditch the out-of-state registration... Front end looking good: As far as next things to do on the build: The engine runs great when cold, but after driving for 30+ minutes there is definitely some heat soak that contributes to diminished performance. I'd like to heat wrap the exhaust manifold, but don't want to pull the intake out to do so. I am also encountering a slowdown around 2800 RPM's. I don't know if the engine needs to break in a bit more (only about 450 miles on the stroker), or if that just the nature of a Renix stroker with stock intake/exhaust. Oil pan gasket has a few leaks. Not super happy about this as I had the shop that swapped the engine install a new Fel-Pro blue gasket (which is typically great). I'm going to pull it and replace when I change the oil for the first time. AC isn't working. Need to verify the electronics and ensure it has refrigerant. SOA and long-arms are in my future. I bought a set of 33" BFG A/T's to replace these tires and plan to lift it a bit more to fit them (likely only 2-3" higher than current height). HP D30 build -- will be grabbing a non-disconnect axle from the junkyard and building up with locker and WJ knuckles/brakes before installing the lift.
Pete M Posted October 9, 2022 Posted October 9, 2022 yay! does Cali have any sort of age cutoff for emissions tests? I can't imagine a whole lot of 1950s cars can pass one.
fiatslug87 Posted October 9, 2022 Posted October 9, 2022 1976 and newer require smog testing, it used to be a 30 year rolling exemption.
Pete M Posted October 9, 2022 Posted October 9, 2022 ahhhh... from a percentage-of-total-miles-driven-each-year it seems to me like a 30 year exemption would make more sense. how many late 70s rigs can there possibly be still on the roads?
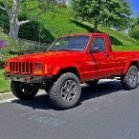
boxyjeep Posted October 9, 2022 Author Posted October 9, 2022 1 hour ago, Pete M said: ahhhh... from a percentage-of-total-miles-driven-each-year it seems to me like a 30 year exemption would make more sense. how many late 70s rigs can there possibly be still on the roads? You'd be surprised. Cars survive a very long time out here with no rust, etc. I believe you can register vehicles over 25 years as a "classic" if it meets a few criteria, but it still needs to pass the sniff test (but can bypass the visual and emissions equipment checks). It also requires classic insurance, limited mileage, etc. I took the truck to South OC Cars and Coffee yesterday. It was a huge turnout with a lambo club showing up and at least 200 other cars. Got a ton of questions about the Comanche. Most folks were interested in the seat swap and the 4.6L stroker engine. Sadly I got there kinda late and got stuck between two Fords...
boxyjeep Posted October 22, 2022 Author Posted October 22, 2022 Been making some headway on the truck over the past few weeks. Finally found a good donor HP D30 non-disconnect axle locally and started building it. I'll be doing new ball-joints, WJ knuckles and brakes, and an OTA track-bar mount (CavFab). For steering, I'm planning to do 1-ton Chevy TRE's with custom aluminum tie rod and drag link. New axle: Huge mess pulling out the old ball joints (I believe they were original) and UCA bushings. I had to cut out a few of the ball joints. Not fun. Cleaned up: Stock trackbar mount removed and CavFab OTA track bar mount installed: Primer (don't worry, it will be gloss black when I'm done). I ended up using Rustoleum brush-on oil-based paint. I've heard this is much more resilient than spray paint on axles. Also a bit easier to apply--no fumes or overspray: I had initially purchased CavFab's WJ knuckle swap steering kit, but decided against running it as I'm not a huge fan of heim joints. Will be going with 1-ton TRE's instead. Also, started re-doing my headliner and visors. I installed an SMS headliner kit about 4 years ago right after I got the truck. It's a decent product but not the same fitment as stock (it is a bit too large and hangs down over the front and rear windshields a bit). I found an original headliner backer board and will be repairing and re-upholstering that instead. I also pulled down my visors and split them open to reupholster and quickly discovered why they smelled like dirt. Also did some painting of a few interior bits that didn't match or needed to be replaced (a-pillar trim, visor mounts, screw covers, etc.): I know everyone here suggests SEM plastic/vinyl dye, but I ended up using Dupli-Color Charcoal Gray to match the rest of the interior that I already painted. Remaining to-do's: Finish front axle build and get ready to install (w/ 5.5" RE coils and Core4x4 adjustable CA's. SOA swap rear D44 axle to match front. Reupholster headliner and visors, and install along with other freshly painted pieces. Swap in proper spark plugs (ran super cold plugs to pass smog--it's not starting/idling great right now). Swap out BrownDog motor mounts for OEM. They are great quality, but way too rough for me. After I have all this done, I'll likely be scheduling some time for a shop to do 4.56 gears, front locker, alignment, and mount up my new wheels and 33" tires. Then it should be "done"... for now.
Gjeep Posted October 22, 2022 Posted October 22, 2022 Looks good. Glad you figured out smog. I’m in CA also and looking forward to getting to smog fun. Mine has Chrysler era PCM as is 92 MJ. Know that Hesco FPR is for High Output era only. Don’t think that they have one Renix era.
boxyjeep Posted October 23, 2022 Author Posted October 23, 2022 22 hours ago, Gjeep said: Looks good. Glad you figured out smog. I’m in CA also and looking forward to getting to smog fun. Mine has Chrysler era PCM as is 92 MJ. Know that Hesco FPR is for High Output era only. Don’t think that they have one Renix era. You're lucky to have a 92--no EGR and there are AFPR's available. Hesco does advertise a Renix AFPR, but they don't actually make them. I placed an order and waited 3 weeks before calling for them to tell me it's not something they had. Let me know how it goes--very interested to see if you'll pass with the Edelbrock head and Borla header.
Gjeep Posted October 23, 2022 Posted October 23, 2022 Both edelbrock and borla are CARB certified. Hesco actually was the one who engineered/ built the aluminum head first and it didn’t sell. Mainly because they didn’t advertise and they did not CARB certify which was why I didn’t purchase. They sold it to edelbrock who tweaked it a bit, CARB certified, and marketed the hell out of it. Makes a difference. Won’t be an issue passing smog with these. I have the needed CARB stickers on my radiator shroud.
boxyjeep Posted November 6, 2022 Author Posted November 6, 2022 Been making some additional progress--got the new axle painted, ball/joints and knuckles installed, and pulled the entirety of the existing front suspension out of the truck: Will be cleaning up the frame rails and wheel wells and hitting them with some flat black paint. Then will be installing a pile of parts that I've been accumulating for some time: HP Dana 30 w/ WJ knuckles/unit bearings/brakes CavFab OTA track bar and RE mount Rubicon Express 5.5" Coils and extended bump stops Core4x4 Adjustable Upper + Lower Control Arms (short arms) 1 Ton steering (using standard offset TRE's and likely solid aluminum links--need to measure once everything is installed). Rebuilt front driveshaft and axle shafts with new u-joints Quadratec 17" Hard Rock wheels (same style as I currently have, but wider with less backspacing) 33" BFG A/T's -- The 32" BFG M/Ts I'm running right now look aggressive but are way too loud on the street I don't have shocks picked out yet--still debating on what I want to do there. Need to measure once it's all put back together. I don't want something too stiff, but also would like good on-road manners. Also need to figure out sway bar mounts. I had to cut the existing ones off to fit the WJ steering. Once the front end is done, I'll be doing a "low SOA" on the rear to level it out with the front.
Gjeep Posted November 6, 2022 Posted November 6, 2022 For the brown dog motor mounts I’m guessing you got poly. They use to have a rubber mount option that doesn’t vibrate any different than factory. I’m running those. It’s just a different bushing to buy. Bought them probably close to 10 years ago so not sure if options changed.
boxyjeep Posted November 6, 2022 Author Posted November 6, 2022 4 minutes ago, Gjeep said: For the brown dog motor mounts I’m guessing you got poly. They use to have a rubber mount option that doesn’t vibrate any different than factory. I’m running those. It’s just a different bushing to buy. Bought them probably close to 10 years ago so not sure if options changed. I was running the rubber bushings (P/N "CU2572-0K2, Motor Mounts, Ultra-Flex Rubber"). I figured they would smooth out after a few hundred miles but they were still jarring to me. OEM mounts ended up being so much smoother, but now I'm hearing all the wind noise ;-)
Skylynx Posted November 6, 2022 Posted November 6, 2022 On 8/7/2021 at 11:05 AM, SoCalJeepComanche said: Up next was the engine bay. I wanted to paint it black while I had the head off to be replaced and also clean up the insane amount of wiring that comes with the Renix electrical system. I hated the relay center, fusible links, and how there was wiring routed out and around the radiator instead of along the firewall. There was also a leak coming from somewhere in the cowl/engine bay that was leaking into the passenger floor. Used a bunch of black silicon to seal up where the blower motor mounts. After that, things were off to a good start, but got a little out of control. I ended up installing a relay/fuse box on the driver's side to power the headlights (high & low), fogs, and horn. This allowed me to simplify a lot of the wiring inside the cab as well (and ditch the horn relay). I also made the decision to replace the fusible links with a 97+ PDC. It came out looking pretty clean. Gosh, i'm in the process of doing the exact same thing, do you happen to have taken notes of what you did/keep/ditch? i'm not the most savy person electrically and just looking at that Renix mess makes me shiver in fear, i'd rather just follow on the steps i know someone already took.
Limeyjeeper Posted November 7, 2022 Posted November 7, 2022 Brown dog mounts are not for the faint of heart. NVH takes on a whole new meaning!!!

Recommended Posts
Create an account or sign in to comment
You need to be a member in order to leave a comment
Create an account
Sign up for a new account in our community. It's easy!
Register a new accountSign in
Already have an account? Sign in here.
Sign In Now