Minuit Posted October 1, 2020 Posted October 1, 2020 2 hours ago, A-man930 said: So, you're planning on only weld-thorough primer on the entire flange surface? I would recommend looking into weld-through primer's adhesion properties (or lack thereof). What I have read indicates that what makes the stuff "weld-through" also greatly diminishes how well the stuff protects from corrosion on the long term. This is what led me to mask off for a tiny heat-affected-zone around each plug weld area and apply the good stuff to the remaining surface. What I am unsure of is whether to spray the weld through on these masked off areas right before welding. But I've not seen much to indicate that the weld itself gains any corrosion resistance from the primer. I need to read up on this topic again. See, this is why I haven't actually so much as struck an arc on my truck yet - I spend way too much time being indecisive. I am aware that weld-through primer has poor adhesion, hence my attitude of "use it only where it's absolutely needed, use real primer everywhere else" but I'm still undecided as to whether it's better than just leaving the mating area bare.
89 MJ Posted October 1, 2020 Posted October 1, 2020 7 minutes ago, Minuit said: See, this is why I haven't actually so much as struck an arc on my truck yet - I spend way too much time being indecisive. I am aware that weld-through primer has poor adhesion, hence my attitude of "use it only where it's absolutely needed, use real primer everywhere else" but I'm still undecided as to whether it's better than just leaving the mating area bare. If you have access to a sandblaster, sand blast the surface before using weld through primer. That is what my dad's restoration shop does.
A-man930 Posted October 1, 2020 Author Posted October 1, 2020 1 hour ago, Minuit said: See, this is why I haven't actually so much as struck an arc on my truck yet - I spend way too much time being indecisive. I am aware that weld-through primer has poor adhesion, hence my attitude of "use it only where it's absolutely needed, use real primer everywhere else" but I'm still undecided as to whether it's better than just leaving the mating area bare. When you say "mating area" are you referring to the entirety of the flange, or just the welds themselves? 1 hour ago, 89 MJ said: If you have access to a sandblaster, sand blast the surface before using weld through primer. That is what my dad's restoration shop does. Has he had any opportunities to study the long-term effectiveness of this?
89 MJ Posted October 1, 2020 Posted October 1, 2020 4 minutes ago, A-man930 said: When you say "mating area" are you referring to the entirety of the flange, or just the welds themselves? Has he had any opportunities to study the long-term effectiveness of this? Yes he has. He did a 71 GTO Judge with this method and it has held up for about least 14 years (not 100% sure how long). The owner stores it in a closed up I heated building in the winter and looks the same as it did when the car was finished. And the car gets driven a lot.
A-man930 Posted October 29, 2020 Author Posted October 29, 2020 Completing the floor found it's way to the back burner; I guess I was just getting bored with it and wanted to do something more fun.
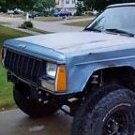
A-man930 Posted October 31, 2020 Author Posted October 31, 2020 21 hours ago, Pete M said: I hate fixing stuff. but I loooove upgrades! See I'm actually enjoying the repairs, but they're going. so. slow! I just needed some visual progress.
A-man930 Posted October 31, 2020 Author Posted October 31, 2020 I needed to have the transfer case installed to ensure the new control arm brackets weren't in the way, and that led me to pretty solidly decide on engine placement. The trans mount is sitting about 2" forward from factory (OE crossmember is in place for now) and the adapter is clocked full-passenger. As-is, the factory Jetta turbo/manifold (VNT15) actuator won't clear the extra A/C compressor's fittings, but it's not impossible to re-clock. Otherwise it fits! I was assuming I wouldn't have the option to use it. LATER DISCOVERED BOTH COMPRESSOR SIT TOO CLOSE TO AXLE FOR MY COMFORT Track bar clearance (or lack thereof): Gonna make a new mount and flip it
A-man930 Posted October 31, 2020 Author Posted October 31, 2020 Not sure if it's tilted as far as in the Jetta, but it's the same direction. Clearance to the steering shaft:
A-man930 Posted December 15, 2020 Author Posted December 15, 2020 (edited) Progress update: Configuring the left engine mounts. Mounts themselves are non-hydraulic (cheap) versions of a Passat (B5?) part. I figured if the thing shakes obnoxiously then I can upgrade to the expensive version of them. Still some gusseting, trimming, and minor adjustments needed, but this is the basic idea. Edited December 15, 2020 by A-man930 One more picture
A-man930 Posted December 15, 2020 Author Posted December 15, 2020 Right side is similar (don't have the frame-side bracket completed yet)
A-man930 Posted December 21, 2020 Author Posted December 21, 2020 This is the closest to it's final position I'll be able to figure at this time. Besides the minor concern with the compressor to axle distance, fits like it was meant to be there!
89 MJ Posted December 21, 2020 Posted December 21, 2020 13 hours ago, A-man930 said: minor concern with the compressor to axle distance Is it time for more lift or is the compressor going to get relocated? I suppose you could always get longer bump stops to limit your up travel too.
A-man930 Posted December 21, 2020 Author Posted December 21, 2020 2 hours ago, 89 MJ said: Is it time for more lift or is the compressor going to get relocated? I suppose you could always get longer bump stops to limit your up travel too. Short answer: I'm not sure yet. Long answer: I'm gonna remove the springs and see exactly how much up travel this clearance allows at the tire; if I'm unhappy with it I'll look into what fitment is like with the upper arm on the other side. If I move the upper arm to the passenger side then I can cut away the mounting ear on the housing. I don't think I want more lift at this point...
A-man930 Posted May 5, 2021 Author Posted May 5, 2021 (edited) Been taking bites out of the elephant lately. This is a Boostwerks Engineering Comp. Mount with the outer plates of a JCR steering box brace kit welded onto it. Also welded in some T&M Fab steering box stiffener plates. Edited May 5, 2021 by A-man930 links
A-man930 Posted May 5, 2021 Author Posted May 5, 2021 The "frame" up front was modified a wee bit as well:
A-man930 Posted May 13, 2021 Author Posted May 13, 2021 Engine mount brackets are "done" besides final cleanup and paint. Engine and drivetrain get pulled now to resume work on floors, frame plating, suspension mounts, etc.
A-man930 Posted May 27, 2021 Author Posted May 27, 2021 Tool of the hour: needle scaler. Seriously, this thing is a lifesaver!
A-man930 Posted June 1, 2021 Author Posted June 1, 2021 What a long process this has been. Here's hoping what I apply onto this surface does as good a job as what I removed
A-man930 Posted June 1, 2021 Author Posted June 1, 2021 With the upper control arm brackets removed, there is now room for some bracing.
A-man930 Posted June 2, 2021 Author Posted June 2, 2021 I'm confident the welds have excellent penetration and I don't see any porosity or other "technical" problems, but they sure aren't pretty One thing I'm getting out of all this welding is plenty of practice with a flap disc!
Pete M Posted June 6, 2021 Posted June 6, 2021 On 5/26/2021 at 11:40 PM, A-man930 said: Tool of the hour: needle scaler. Seriously, this thing is a lifesaver! where has this been my whole life!

Recommended Posts
Create an account or sign in to comment
You need to be a member in order to leave a comment
Create an account
Sign up for a new account in our community. It's easy!
Register a new accountSign in
Already have an account? Sign in here.
Sign In Now