
500 MJ
-
Posts
3241 -
Joined
-
Last visited
-
Days Won
2
Content Type
Profiles
Forums
Gallery
Everything posted by 500 MJ
-
If you guys are still looking to sell each of the single ones, I'm looking for them as well and I'll buy them from each of you separately. Let me know your price in a PM and I can shoot you a check ASAP. My address is: Brent Marsh 1986 Wendt Road Fitchburg, WI 53575 414-750-6433 Thanks Much!
-
Thats really something. 4wd is an upgrade here because of the snow and all the woods/backroads. Its so easy to change one over though that I am not afraid of buying a 2wd, and really I could just leave it that way for the easy winters here.
-
We're in the market for a used car for my fiance and I've found myself looking at XJ's. I'm wondering if the MPG ratings were significantly different for the 2wd versions. I've found a '97/2wd/Auto that I am interested at looking into further. http://wausau.craigslist.org/cto/2082632473.html I can't stand working on the '96 Honda Passport she has now, its time to start looking...
-
The dream is finally coming true. ;)
-
There are no markings that I have seen. I just centered mine with a quick measurement and drilled it.
-
I've got a complete 2wd front axle. I would want to sell you the whole thing if I sold it, I've been saving it for a parts axle for my 2wd. $100. I will be heading back to Wisconsin on Sunday morning (11-28). Axle is currently here at my Parents house in Reed City, MI. - Brent 414-750-6433
-
I've seen worse MJ's than that still on the road. It doesn't look that bad. Did you get the drip rail guards? They look like they were black? Looks like a good time was had by all. I spent the whole day in Dad's wood shop making picture frames. It was a very relaxing day. I spent my black Friday money too, got a JCR Offroad 1-ton OTK Steering Setup for the '88 on sale.
-
Love that shift knob! Good Luck!
-
Project "Eliminator"
500 MJ replied to 89eliminator's topic in MJ Hardcore Tech: Epic Journeys to Greatness
Lookin good Bossman! Did you end up folding the steel over on the box where you cut it (to give it some rigidity) or did you just cut it off? -
"suspects"... :roll:
-
2wd or 4wd?
-
When you go through and pressure wash today, don't be afraid to get "closer than normal" to the paint on the panels. IF it has been repainted in the past and the painter did a bad job of prep work, their paint will blast right off of the truck. I know it seems sort of counter-intuitive, but it will be better for you to find it now rather than two years down the road when you get a little close to the paint when you pressure wash it then. Blast Away!
-
Good Luck. :popcorn:
-
You're welcome. Thank You!
-
I will. Like I said in the prior posts, I never did get a welder when I hoped to earlier this fall. I can't make any promises on how soon that will happen. I will post up here if/when I get one. - Brent
-
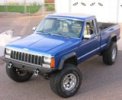
Nice grab! You can't go wrong with a "$500 MJ"...
-
Its the elite side of the MJ world - The '88 MJ Club.
-
Project Utility Comanche. The Saga Continues
500 MJ replied to JeepcoMJ's topic in Member Projects: Your Comanches
I had a black truck once. Never again will I go that route. They are SO hard to keep clean. -
Didn't see this until this morning. I'll be leaving for Robs in about 30 mins. Plan is to be there at 9 am. Taking my phone with me, call me if you want.
-
what style VC do you want? the '96+? I have two of them, complete with PCV elbows. $10. I'll take one.
-
So glad to hear that everything keeps looking up for you Rick! Like I said in the PM, all the stuff I sent your way was extra stuff I had. Its yours, please don't send it back my way. Most of the pieces were given to me by friends who replaced their tools or were old tools from the Railroad that I work at. All that stuff was too good to pitch, but I didn't know exactly what I would use it for when I got my hands on it over the years. When I saw that you needed a hand, the answer to my "old tool pile" was clear. Now its time to start compiling the new "old tool pile." :cheers:
-
Sounds like you are on the right track... Someone who can teach you the ropes and borrow tools like that is invaluable! He's right when he says do it right or don't do it at all.
-
More work for Pat! When are you gonna just say enough is enough man?!? :D
-
Yessir. ;) I'm happy to help when I can. I just wish I would have taken more pics of the process when I painted my truck.
-
Maybe while your down to grab the Renix stuff, you could give me some pointers... I would like to do it myself, but I think the time has come and passed if those are the conditions you KNOW it requires. Rob L. I'd be happy to share what I've learned with ya when I see ya this weekend. Here is some food for thought: - A good spray gun can run lots of cash, if you plan on using it often, it can pay for itself quickly. If not, you can try to sell it or just eat the cost and keep it around. - How much cash do you want to spend on the job, it will be cheaper to have it done somewhere else if you don't have the tools and equipment to do it. Start-up cost for this type of work can be pretty high. - Becoming a good friend of an area body-shop is your best bet if you want to get your hands on some discounted paint. You can buy it through a dealer or some other parts house, but you can spend up to 400% on paint this way vs. getting it through a body-shop and still giving him his cut. I bought a quart of paint and clear-coat once at a parts house, and it cost me the same price for a gallon from the body shop. They had already mixed it and then told me the price, there was no turning back for me. - Spraying it yourself requires a clean environment. Bugs, dust, grease and other things can all ruin a paint job. How are you going to manage to keep this stuff out of your paint? - Last thing, and I can't stress it enough. Just like a good weld, a good paint job is 90% in the prep work. Once you finally get to spraying the paint, you'll be happy to reach that step. If you think you are happy with the body on the truck as it sits right now, here are the prep steps you will need to do to get the show on the road. First you start with a general scuff up of the paint that is already there. This can be done with a brillo-pad type abrasive pad, 3M makes them and they work good. I use them all the time on small rattle can jobs. Once you have the paint scuffed up, meaning all of the shiny clear coat is gone, then you spray all the pieces with 2-3 coats of primer, each primer layer should be a different color. Let it dry a few days and then start to wet sand it down with very fine sand paper and lots of water running out of your garden hose onto the panel (wetsanding is another GREAT reason to do it during the summertime, its actually fun at times in sandals and swimtrunks). The different layers of primer will sand through and show you your high and low spots in each panel. If you are happy with the high and low spots on each panel, then you move on. If not you then go backwards and into the body-work stage (a whole other article) until you are happy with the way the steel lays. The next step is to spray a sealer coat on all of the panels. This paint can be bought in large quantities and is usually pretty cheap. It is very thick compared to other paints because it is meant to seal over all of the different colors beneath it. Spray 2-3 good coats of sealer on all of the panels and then let it dry a few more days. Then its back to wet-sanding with fine grit (450-600) paper and then finishing with VERY fine grit paper (1000). Make sure you don't sand through the sealer, if you do, you have completely ruined what you set out to accomplish by having all underlaying paint colors sealed over. It will feel like you are sanding with newspaper, it takes a LONG time. After this final wet-sanding is done, the surface of the sealer will be very smooth. Now you are getting very close to spraying paint. Redo all of your masking paper, wet-sanding has ruined the stuff you had on there before, you'll want it to be fresh for spraying paint. Then its time to break out the tack-rags. Tack-rags are pieces of cheese cloth with some very tacky stuff on them, I think its some sort of de-natured thinner. Either way, their purpose is to get all of the fine dust pieces off the panel before you paint. Run them over the entire panel once really good, we'll do this again quickly before you spray. Wait for the weather to be right. Go over to your bench where your $500 worth of paint is waiting patiently. Get a good clean piece of card-board, a stack of dixie cups, your respirator and some latex gloves out. Turn on your air-compressor and start to mix your paint with your thinner and hardner by using the latex gloves to dip the dixie cups in to the paint cans. Have a trash can ready to throw the used cups away in. Once the mix is in the gun, stir it up with a paint stick before sealing the gun. Now its time to spray. Play around with spraying on a few scrap panels first to make sure things are looking good. Keep the gun close to give a good coverage, but far enough away to keep from letting the paint run. Speed up or slow down to regulate this. Pick a distance away from the panel and stick with it. Before you pull the trigger on the first panel, make your motions over the panel with the gun and give yourself a good "dry run". Make sure to paint all the edges and seams good too. I like to do edges and seams first and then do the panel. Remember that last run over with a tack cloth? Now is the time to do it. Wipe all the panels real quick and then start to spray. What you are aiming to lay down is a "tack-coat" on the first coat. You aren't looking to cover it all in paint right away. Go quickly over the panel, you should be able to see the sealer coat at about 50% showing through. It will dry quickly. Once it is tacky (test by touching some of your masked out areas), then you can put the second coat on. Second coat and consecutive coats can get to be more coverage. Slow your rate of spray down a bit and focus on making continuous passes over the panel, don't stop half-way through and restart. These passes are the bread and butter of your paint job. I usually do 4-6 coats of color, use up your paint while you are in the process of painting, you can keep some for later but it will go bad if you don't use it in time, so use it up. Let the color get really tacky and then its time to spray your clear coat. This is the same process as the color was, only the clear coat is harder to see, therefore your really gotta watch your runs. Start with a tack coat again and then build it up by making multiple passes. Clear coat gives the shine to the paint, some of the last passes you make you can slow down and start to spray them heavily on. The paint will look wet on these passes, that is what you want, just watch for your runs. Once you are done, CLEAN YOUR GUN. Get out the old toothbrush and thinner and go at it. Take it all apart and clean each piece. Spray some straight thinner through the gun, make sure it is still clean and then store it with the can 1/3 full of CLEAN thinner. Wait a few days, and then remove your masking tape. The paint will still be "green" for a month or so, be careful with it. It will cure up over time. Don't wash it until its fully cured. I really have to thank my Dad and our family friend Frank (he ran the body shop in town for years) for teaching me all of this stuff. They both have learned these things from years of experience and from their Pops who passed it onto them. I've already learned a few things myself the hard way. It can be fun, and it is VERY rewarding to know that you were the guy who made that car look so good. I enjoy it for a hobby, but there is no way that I would do this for a living, WAY too much stress.