
Parei_doll_ia
-
Posts
200 -
Joined
-
Last visited
Content Type
Profiles
Forums
Gallery
Everything posted by Parei_doll_ia
-
This gave me a great idea. I had a couple triple square bolts left over from doing the clutch on my VW. Also cut it down a little.
-
Monstaliner is good stuff. I still have an extra gallon of black, but nothing to use it on.

-
I'd be looking at the wires to/from the fuel pump or ignition. It sounds like a loose connection or intermittent short
-
Speaking of bass, new Primus! This ones good to blast too, as every Gojira song is
-

-
The AvGeek in me really wants to get that engine running again. Turbine go brrrrrr
-

Grabber Blue Eliminator
Parei_doll_ia replied to Parei_doll_ia's topic in Member Projects: Your Comanches
Comet 550s with the yellow fog beam, I really like them -
Grabber Blue Eliminator
Parei_doll_ia replied to Parei_doll_ia's topic in Member Projects: Your Comanches
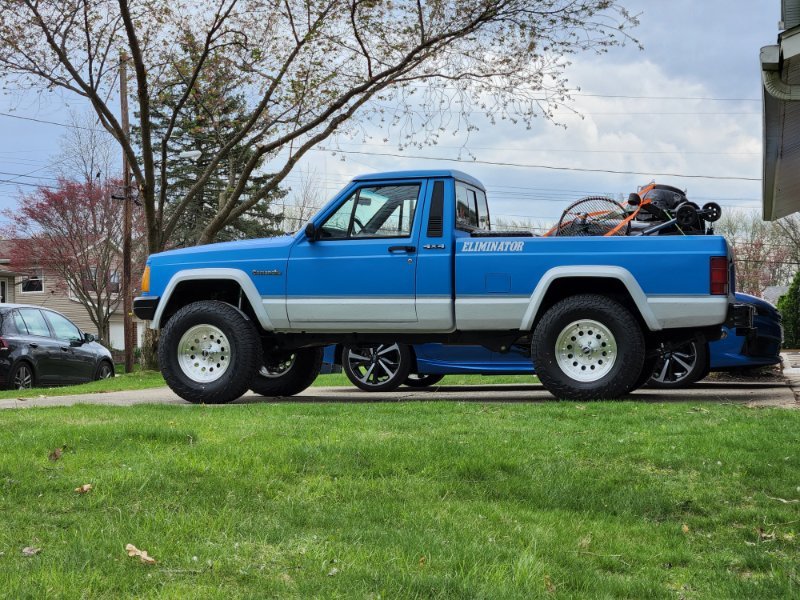
New wheels in, also finished 1 of the center caps in ABS And a picture outside loaded down with 600lbs of scrap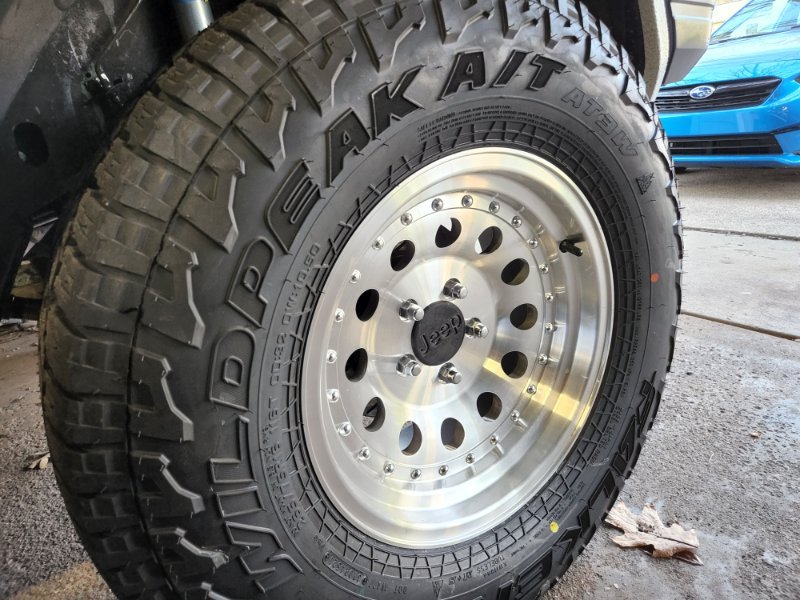
-
[Renix] EGR Tube Fix
Parei_doll_ia replied to Parei_doll_ia's topic in MJ Tech: DIY Projects and Write-Ups
It seems good so far. I'm going to San Diego, don't know exactly when yet -
The manifold plug is m22x1.5
-
Wideband O2 Through REM
Parei_doll_ia replied to Parei_doll_ia's topic in MJ Tech: Modification and Repairs
That was the heater circuit on the sensor that had 5 Ohms actually. Gray to black is open loop. The new sensor is heated through the AFR gauge circuit so it doesn't really matter anymore. After a few drives, my LTFT hasn't budged from 126 which is perfect I think doing a stroker is why Nick did the work on this. Mine is completely stock apart from the headers and 746 injectors but it's been running great so far. I think the UEGO in the AEM gauge is the same Bosch sensor as the o2 sensors on my mk6 TDI. -
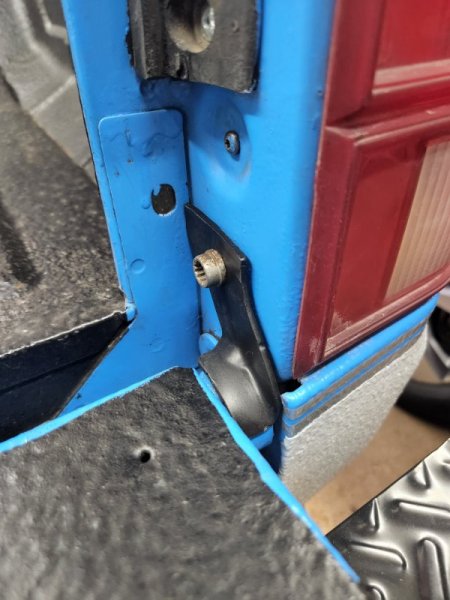
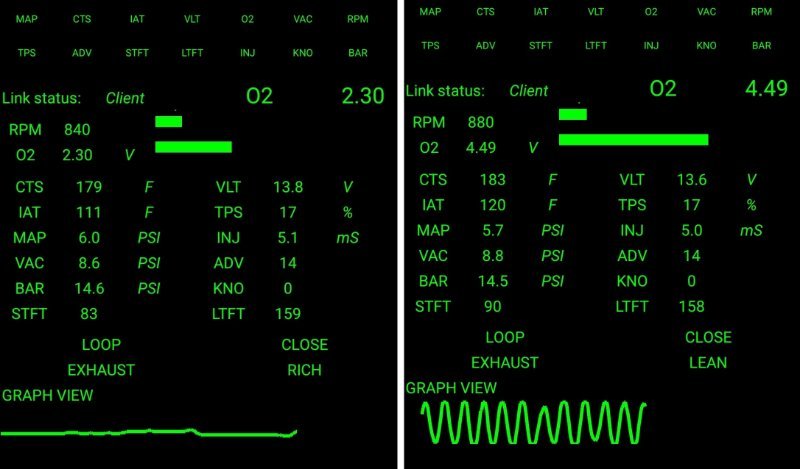
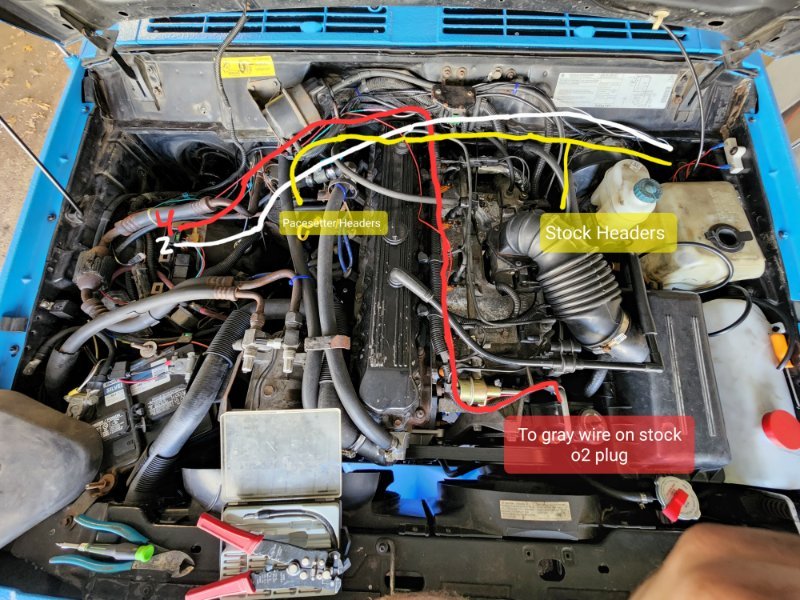
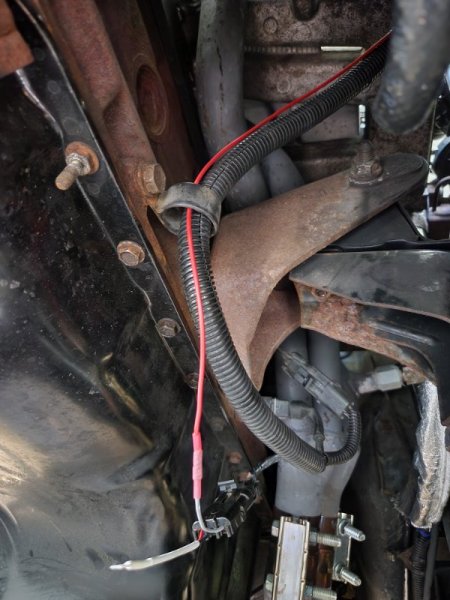
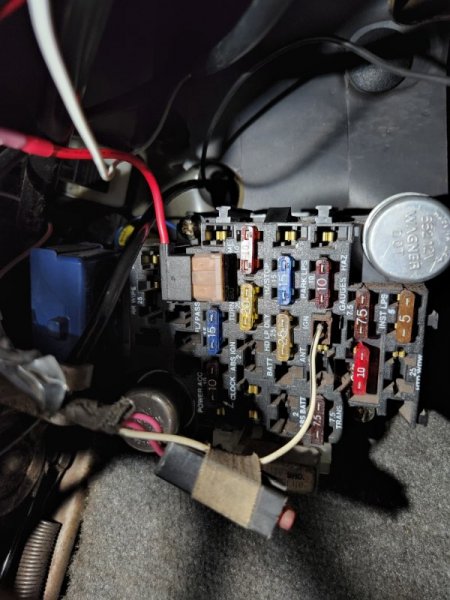
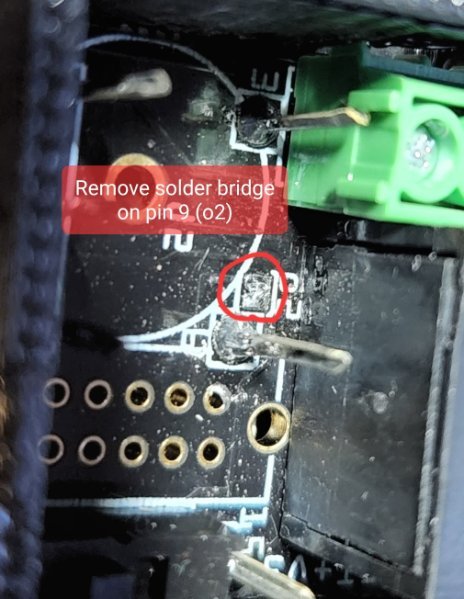
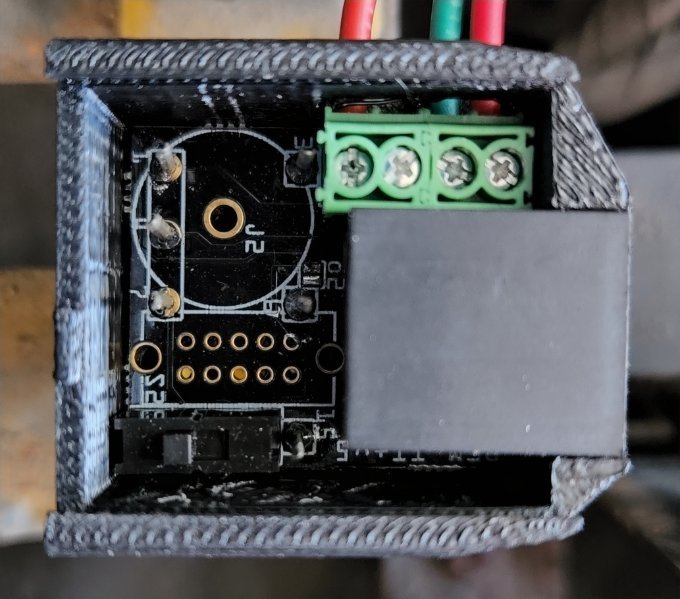
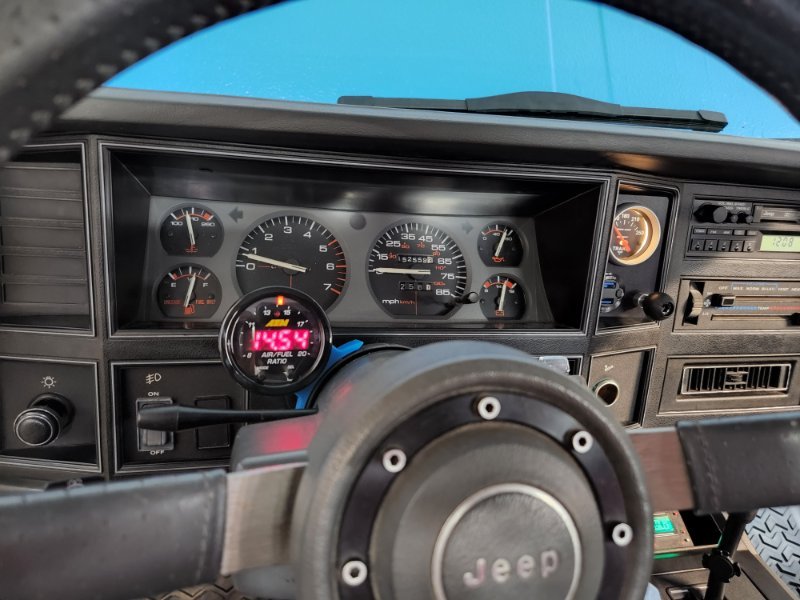
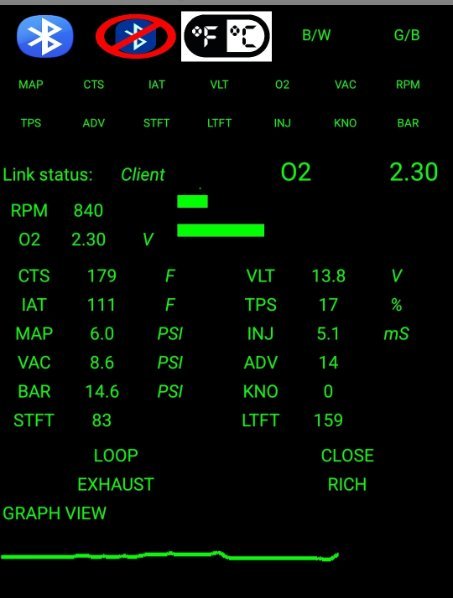
There doesn't seem to be any good replacement Renix o2 sensors available anymore unless you get lucky and find a NOS Mopar sensor on Ebay. My less than a year old NTK sensor has never really performed well, (LTFTs were usually in the 140s, not too high but still using more fuel than needed) and recently it started failing closed loop repeatedly and only swung from 2-2.5 Volts. Luckily, Nick already did the hard work with his Renix Engine Monitor, and it's possible to use a wideband AFR gauge to send a signal to the REM where some math gets done and it replicates a narrow band signal to send to the ECU. Shoutout to him answering my emails on a Saturday night after I didn't fully understand his web page and the RPMs shot up to 2500 on startup. He got me squared away, so I'm writing this to help anyone else who wants to do this. Here is my data stream before and after setting this up. After resetting the ECU and driving it around today, it's running better than it ever has, and LTFT is at 126. I used the same AEM gauge that Nick did, AVM-30-0300. It has a 0-5V analog output on it which is perfect for sending to the REM. Wiring it is pretty straight forward, you must ground both the black and brown wires on the gauge, the brown is the ground for the 0-5V output. I used the grommet in the corner next to the brake master, I think this is used for the clutch master in a manual vehicle. My O2 bung is further downstream than stock with the Pacesetter headers, so I went over the engine with the wideband harness [yellow]. The white wire on the AEM goes to pin 2 of the REM adapter, and a wire [red] will be run from pin 4 and down along the harness to the stock O2 connector. Cut the end off of an old sensor and attach this wire to the gray wire on that connector. Ground the black and brown wires in the cab, and attach the red wire in the cab to keyed power. I used an add a fuse on the radio fuse. ^ Fill the grommet with RTV when everything is done You must remove the solder bridge on the adapter. Not doing so will send the o2 heater relay voltage to the sensor wire and it will rev to 2500RPM on startup. REM Setup Nick's site is a little confusing here since the numbers on the switch are upside down. Leave pin 2 up, and switch pin 4 down. My pin 1 is down to control the e-fan. Go to Options>More>Settings>Wideband and select Pin 2 on Wideband Pin to tell the REM were the signal is coming from. Select the output range for your gauge, the AEM is 8.5: to 18:1 for 0-5V. Key on with the wire removed from port 4, select AFR on the REM gauge screen and ensure that you see the same number on both gauges. It may take a few seconds for this to match since the computer shows a scaled TPS voltage as o2 voltage at first when the key is turned. If the numbers match, start the engine and run the wideband sync test in the Test menu. If you pass that, then re connect pin 4 to send the AFR signal to the ECU. Switch Wideband Tune to Y. If everything is done correctly, it will enter closed loop and begin to use the new signal. This opens the door to minor AFR tuning by adjusting the target ratio (at the bottom of Pages), but too much will just cause closed loop to fail. There is also a closed loop helper mode to help keep it closed if it pops out sometimes. Mount the gauge wherever you like. I printed a pod that I taped to the column with double sided foam tape.


-
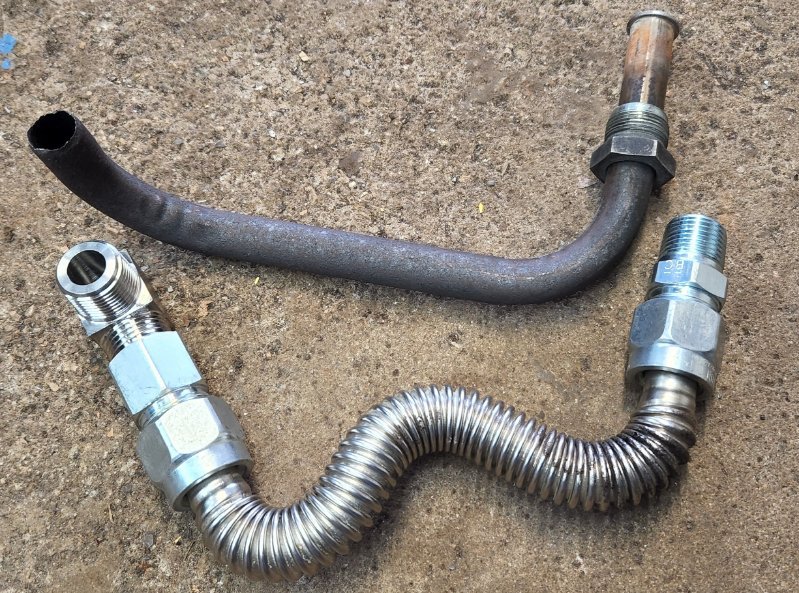
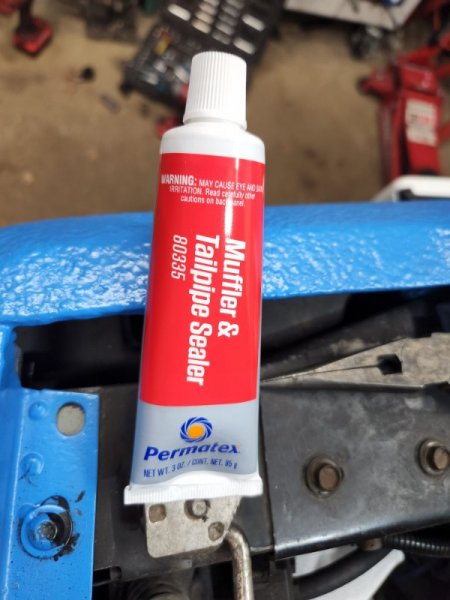
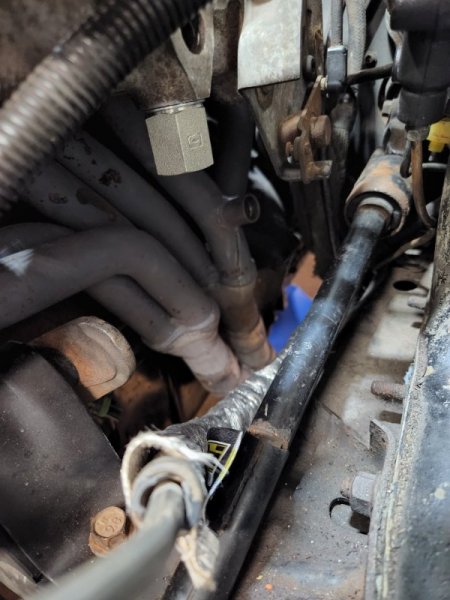
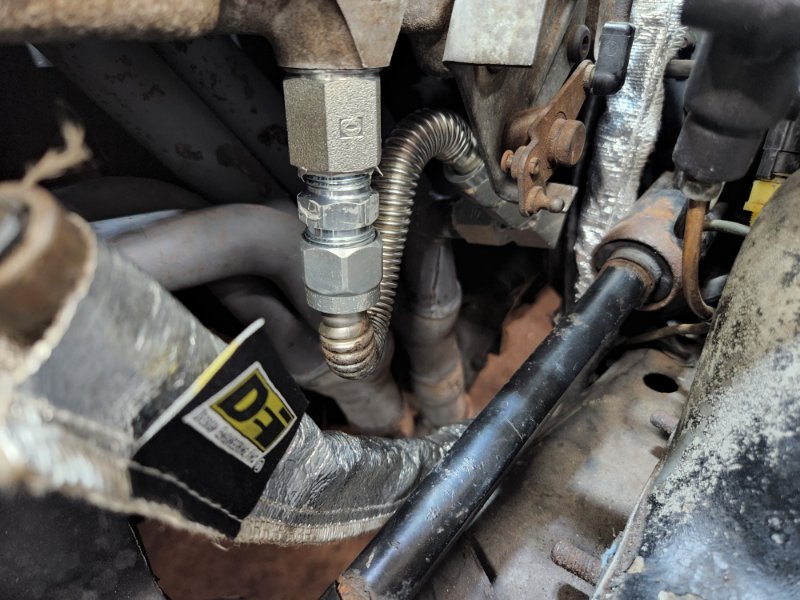
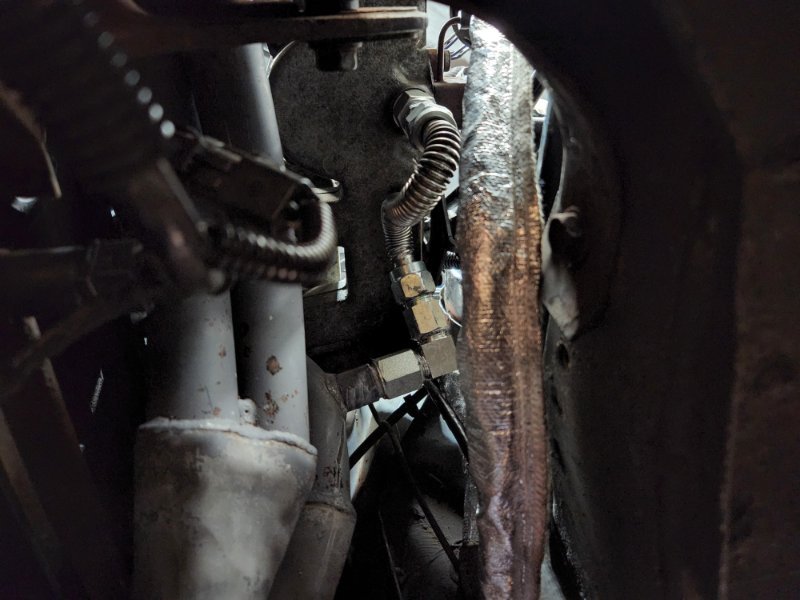
I installed Pacesetter headers back in 2019, and when I pulled the stock headers out, I discovered they were cracked in 2 places and the EGR tube had rusted away to nothing on the exhaust side. Since I didn't have to worry about emissions in Ohio, I blocked it off and had no issues. Now that I'm finishing school and accepted a job in CA, I needed to figure out a way to fix it. First I tried a used one I found on Ebay. I found out the hard way that the Pacesetter's bung is in a slightly different spot than it's supposed to be, and I couldn't get the tube to fit and ended up destroying it. Then I came across this Miata EGR reroute and figured I could make this work on the Comanche. https://miatafied.com/projects/posts/engine/flexible-egr-tube-reroute/#comment-4322 Parts needed: 1. 2x m22 male to 1/2 npt female adapters https://www.threadtoolsupply.com/m22-12-npt-steel-thread-adapter.html 2. 12" flexible gas line https://www.homedepot.com/p/BrassCraft-ProCoat-1-2-in-FIP-x-1-2-in-MIP-x-12-in-Stainless-Steel-Gas-Connector-5-8-in-O-D-180-000-BTU-CSSC54-12/205217437 3. 1/2 npt male 90deg elbow https://www.amazon.com/gp/product/B07QLD8ZJY/ref=ppx_yo_dt_b_asin_title_o01_s00?ie=UTF8&psc=1 4. high temp exhaust sealant https://www.summitracing.com/parts/ptx-80335 Optional: 3/4" heat sheath for the fuel line. https://www.summitracing.com/parts/dei-010403 (It is closer to the lines and I had the fuel system open to replace the manifold gasket, so I added some insulation to be safe) Step 1: Remove the paint from the gas line. Aircraft paint remover works great, and I soaked the ends in some MEK that I had left over from painting my truck to get the paint out of the flares. If you have the stock tube, mock it up close to what you'll need to make it easier to install. Step 2: Remove the air box to gain access, install the intake m22 adapter with the O-ring it comes with, since that shouldn't get too hot. Install the exhaust side adapter and fittings with some of the sealant on the threads. Install the flare nuts without sealant or just some antiseize. They're flared, so they don't need it and should be easier to remove later down the road without it. Step 3: Let the sealant dry for 30 minutes, then run at idle for 10 and leak check. Open the EGR valve with a flathead and the truck should sound like it's going to stall. We'll see how long it holds up now. I have a 2300 mile drive ahead of me soon, so that should be a good test. I'm keeping the plugs on me just in case though.
-
Grabber Blue Eliminator
Parei_doll_ia replied to Parei_doll_ia's topic in Member Projects: Your Comanches
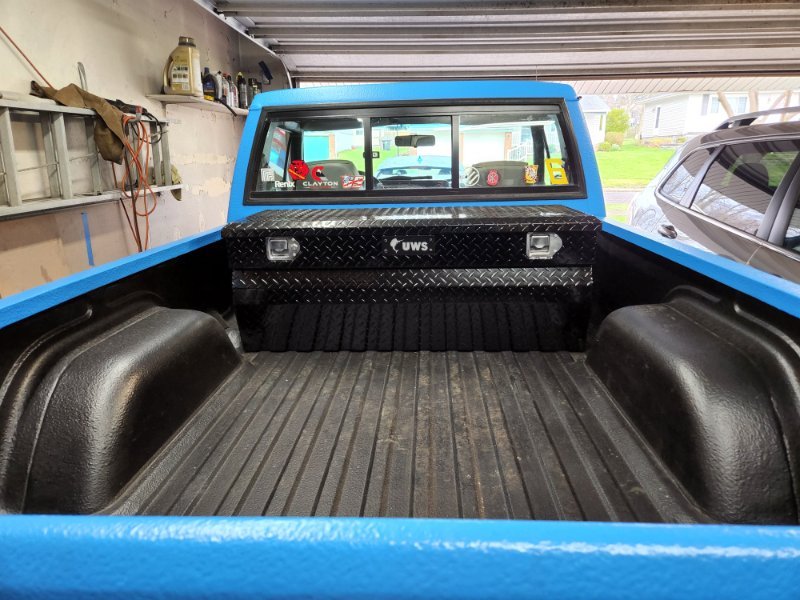
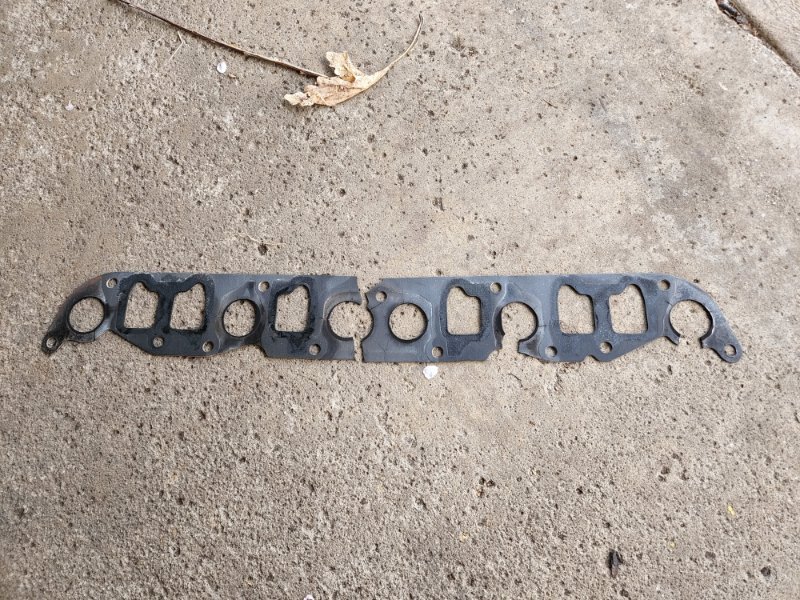
I bought some new wheels and 265/75r16 Falken Wildpeaks, I've never been a fan of American Racing's big center caps, so I made a prototype cap that should make these wheels look a lot like the 10 hole Eliminator wheels. I stuck it in the AR wheels that I have currently since they should have the same center bore dimensions. They also work as hub centric rings. I also fixed the paper gasket on the headers that I never should have installed, replaced it with a multi layer steel one. In preparation for moving to California, I re installed the egr tube by using some metric adapters and a 12" flexible gas line. It was still failing closed loop sometimes, so I added an AEM AFR gauge and sent the 5v output to the REM to send that to the ECU to replicate the narrow band signal. I'm still cleaning up the wiring for that, but seems to be working. I also put a 48" UWS toolbox in. I centered it to still have good access to the tie downs.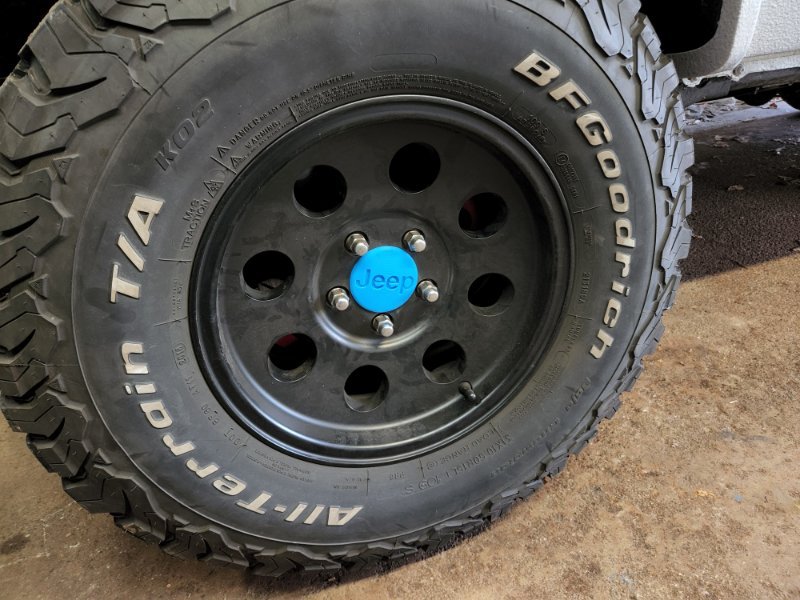


-
Wideband O2 Through REM
Parei_doll_ia replied to Parei_doll_ia's topic in MJ Tech: Modification and Repairs
I guess I'm the only one then. I live right next to Summit Racing, so I went ahead and did it. It wasn't too hard, but also confusing in spots. With some emailing Nick back and forth a few times, I got it sorted out. I still have to clean up the wiring before I drive it, but it was swinging much better at idle. I'll probably make a writeup in a few days.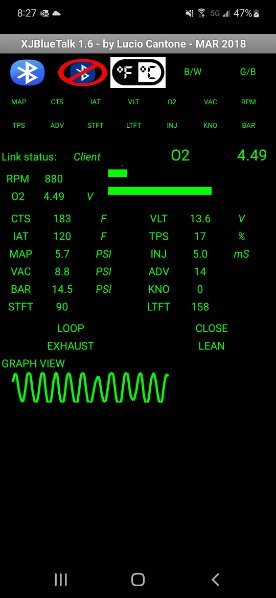
-

-
April 2022-The Grabber Blue Eliminator
Parei_doll_ia replied to 89 MJ's topic in Comanche of the Month (MJOTM)
A wire from the 1st aux pin on the REM connector in the engine bay to the relay. Then select that pin in the REM to be fan #1 and select the temp range -
Is anyone using a wideband UEGO and sending the signal to the ECU through the REM? (Like Nick's video https://www.youtube.com/watch?v=YujtUYPJikA&ab_channel=NickInTimeFilms) I'm considering it because there doesn't seem to be any replacement Renix O2 sensors that actually work anymore. (I got a NTK last year, but it's the exact same metal body sensor as the Bosch that doesn't perform well) I just bought an OMIX sensor from Quadratec hoping that it's old stock that has a ceramic body, but I'm returning it if it shows up as metal bodied. I'm getting a loop fault lean code on the REM at the 1st closed loop attempt and when I accelerate for an extended period. (not WOT, just normal driving) The ST climbs up to 255 and CL fails. LTFT is around 160. vO2 doesn't swing much, just sits at 2-2.5V. Ground seems good, and the sensor has 4.6 Ohms. I thought fixing the busted paper manifold gasket that the Pacesetter headers came with would help, but had no change. The only OEM sensor that I have pegs lean immediately and constantly.
-
Closed Cooling System
Parei_doll_ia replied to Phjoshuy's topic in MJ Tech: Modification and Repairs
It's probably a good time to flush the system anyways -
Missing an oil pan bolt
Parei_doll_ia replied to brucecooner's topic in MJ Tech: Modification and Repairs
You're going to want a lb*in wrench for that. 13 lb*ft = 156 lb*in. Most larger torque wrenches only go down to 20 lb*ft and their calibration is less reliable in the lower 20% of the scale. -
April 2022-The Grabber Blue Eliminator
Parei_doll_ia replied to 89 MJ's topic in Comanche of the Month (MJOTM)
Thanks. I've been trying to get as much as I can out of my Solidworks edu license before I lose it here in a month or 2. -
Underhood light restoration?
Parei_doll_ia replied to vanquishings's topic in MJ Tech: Modification and Repairs
Replace the rivets with small bolts and nuts for when it inevitably gets stuck again and you have to do it over. -
Interior Screw Covers
Parei_doll_ia replied to JimiGibbs's topic in MJ Tech: Modification and Repairs
https://www.thingiverse.com/thing:4649685 I made these a while back to 3d print, just have to find a filament that matches your interior. Or go to an 96 or older XJ at the pull a part and take them -

-
I was taking some pictures in preparation for selling my car before I move. This new S22 that I bought takes really good pictures on 3x zoom, better quality than 1x if you can keep the phone still. I had an S8 for 5-6 years so this new phone is lightyears ahead.