

eaglescout526
-
Posts
12138 -
Joined
-
Last visited
-
Days Won
13
Content Type
Profiles
Forums
Gallery
Everything posted by eaglescout526
-
If no one has sent you a PM about them, I’ll take them.
-
Try finding the darker blue from 84-85 and nutmeg Interior.
-
My 1992 Comanche Pioneer Rejuvination
eaglescout526 replied to Jlindsey86's topic in Member Projects: Your Comanches
Hmmm. I’ll see what I can do. I think I still have the emails from the guy who was gonna get it done. -
My 1992 Comanche Pioneer Rejuvination
eaglescout526 replied to Jlindsey86's topic in Member Projects: Your Comanches
I haven’t heard anything since I last spoke to the gentleman about getting them done. OP, you can call Phoenix graphics and see if they have them yet. Or I can tomorrow. -
Chunk, A 1984 XJ
eaglescout526 replied to eaglescout526's topic in Member Projects: Other Cool Stuff
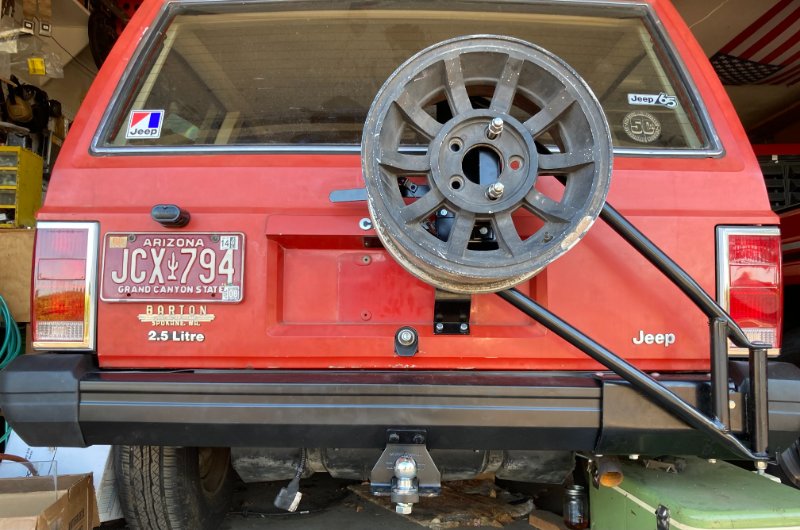
And the most nerve-racking part of the install is done! The only things left to do in the rear is tie in the harness to the trailer harness, load leveling sensor and swap the shocks.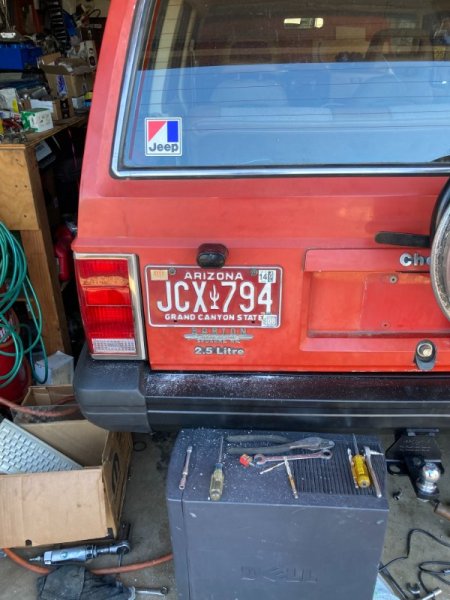
-
Yes. Bypass it. All it does from the factory is “quiet” the pump down for XJ owners as they claimed to hear the pump inside the Jeep. MJs don’t need it and it causes problems like what you’re having right now. If you plug the two wires together, you should have your fuel delivery again.
-
88 might have the fuel pump resistor on the drivers side by the air box. Bypass that and see if it changes anything. It’s a white bar with two of the same color wires plugged in.
-
Chunk, A 1984 XJ
eaglescout526 replied to eaglescout526's topic in Member Projects: Other Cool Stuff
NOS? Or refurbished? Either way I f-ing love how well this turned out. So damn glad I would snag the touch up paint that Chrysler would say to toss. Damn glad one of many I did matched damn well.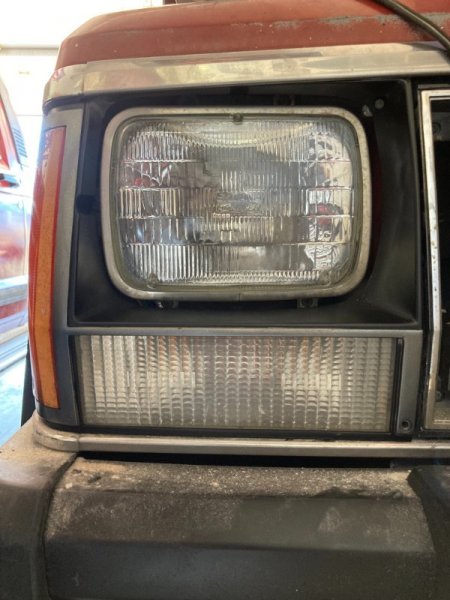
-
Chunk, A 1984 XJ
eaglescout526 replied to eaglescout526's topic in Member Projects: Other Cool Stuff
It is on!!!!!!!!!!!!!!!!!!! And of course a mock up with a spare turbine I need to take the paint off of Oh and theres a OEM accessory hitch on now that you can't see very well. Tomorrow I will make the holes for the license plate and lamp. Oooo now I can put my NOS license plate lamp block off plate on too! Now that the rear is mostly done minus the trailer harness that needs to be tied in, I can focus back to the front.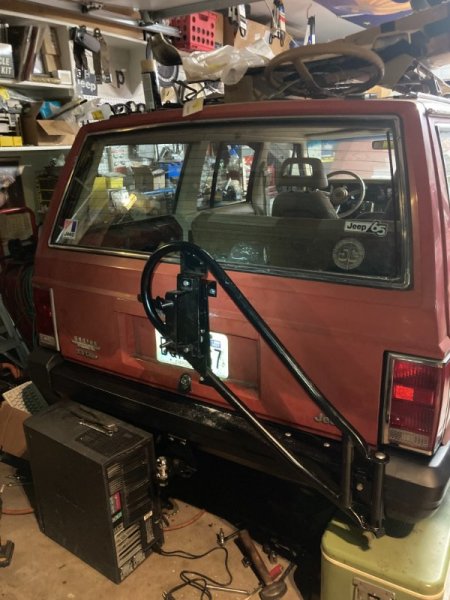
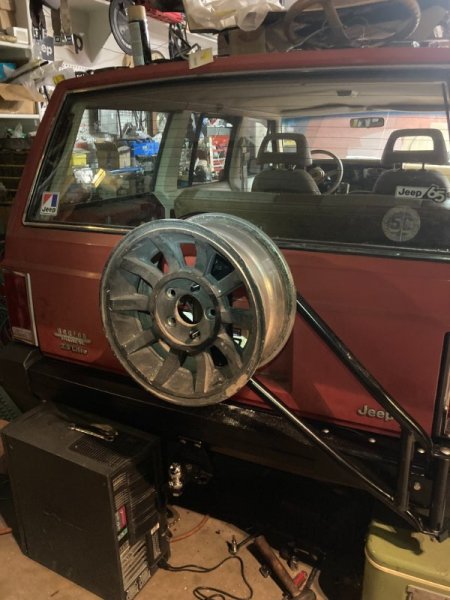
-
Interior colors/paint
eaglescout526 replied to eaglescout526's topic in MJ Tech: DIY Projects and Write-Ups
I updated this thread to show the latest match for the headlight bezels with the darker silver accent trim. -
Chunk, A 1984 XJ
eaglescout526 replied to eaglescout526's topic in Member Projects: Other Cool Stuff
Good call!! I was gonna do a simple DIY thread if it’s own. -
I feel like you could’ve gone as far as making a Monty python and the holy grail reference here.
-
The all high and mighty Pete.
-
Chunk, A 1984 XJ
eaglescout526 replied to eaglescout526's topic in Member Projects: Other Cool Stuff
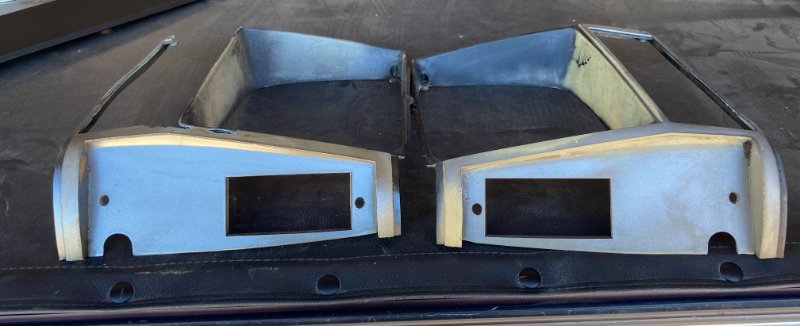
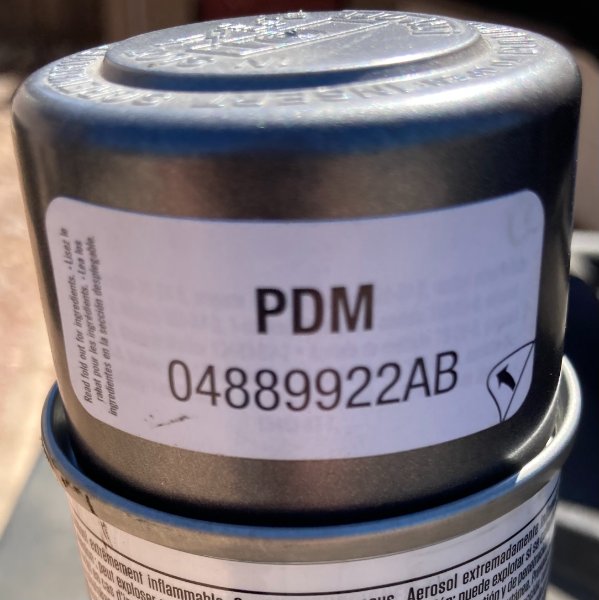
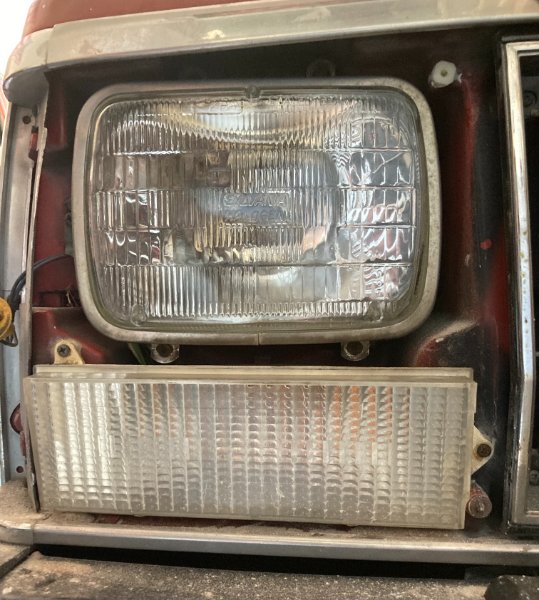
Ive been plugging away at the bumper/hitch/spare tire carrier install. Its a pain because its three things at once haha but its nice as its all in one shot ordeal. Bumper is on as is all the hitch stuff, now its just to get the carrier pieces on. As I painted the bumper and waited for it to dry and cure I decided to address a couple things. One was the annoyance of the front header. All the screws were broken off. I remembered someones post about solving the issue once and for all and I did such today. Love the results! Drivers side is done too. Then I decided that if I am gonna go this far, I am gonna address the aging headlamp bezels. And I aim to keep the origianls....or at least what is still good. The drivers side is toast, its done, I broke it, it already had a piece missing but the pass side is still useable. So I recall the issue of finding the right paint color for the darker shade of grey for the bezels. Well I remembered I had a can of mopar touch up that was a bit dark and probably the right color and sure enough! It was a dead on match that I am happy with As you can see the condition of the drivers side is on the left and the pass is on the right. The drivers side got painted as a test for this color and on the right is still not painted but enough is left to check for a match. Belive it or not with that age, I see a perfect match! Now I need to find a drivers side bezel, I think I have one laying around. Here is the color code and part number of the paint: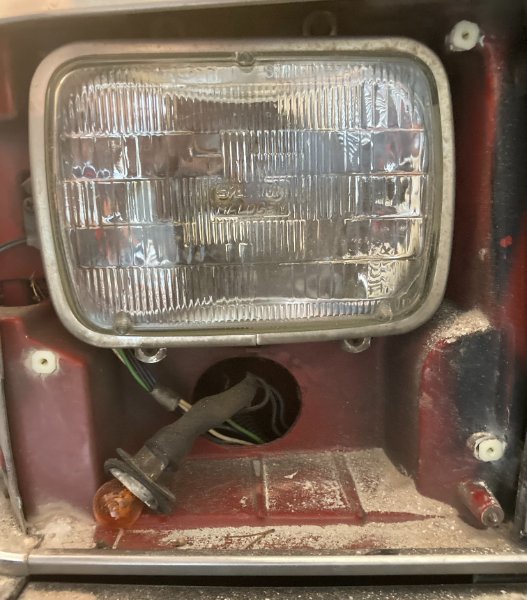
-
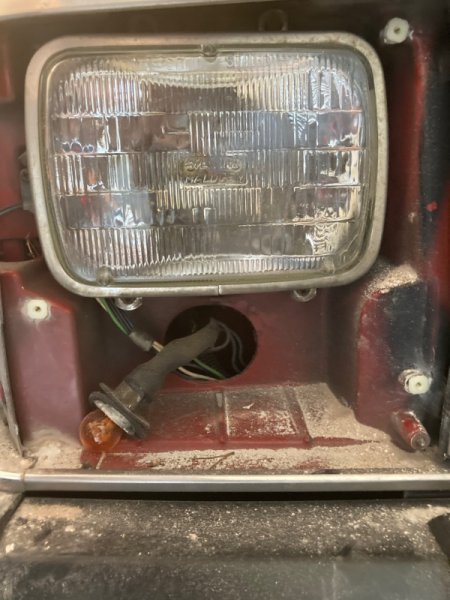
3/4 isn’t bad. I'm not touching that last one. With a drill to make the holes and then a small dremel file to make the hole bigger to pull the screw out and make the nylon nut fit into the hole, I say thank you for the idea! Now chunk won’t have the front parts hanging on by a thread.
-
If you can, locate a Siemens CPS, they are an OEM manufacture for the CPS. They made them during the Chrysler era and probably during AMC's time too.
-
Interior plastic paint… worth it?
eaglescout526 replied to Elwiscon's topic in MJ Tech: Modification and Repairs
Yes. I even did a whole thread on the colors that match the absolute closest or exact to our interior. Even SEM interior paint does damn well on exterior pieces as well. -
If I wasnt so damn good with parts, I would buy that that bumper is factory. That being said, anyone seen this bumper before?
-
Yes. It will fit just fine. It is the biggest you can go without trimming or lift. That being said, make sure your suspension is up to snuff otherwise it might run.
-
Chunk, A 1984 XJ
eaglescout526 replied to eaglescout526's topic in Member Projects: Other Cool Stuff
By far the best sending unit I have ever seen. Besides the NOS unit in LR haha. SU is original too! Tank is clean inside too obviously lol. The outside is much better on the bottom than the original tank but its not leaking which is a big plus to me. The tank did have a dent in it, I hammered it out and threw it all back together. Used the sending unit I put together to syphon the gas out of the old tank and into this one. This should go pretty smooth. Currently working on the bumper area now. Got its issue sorted and should have a spare tire carrier on soon.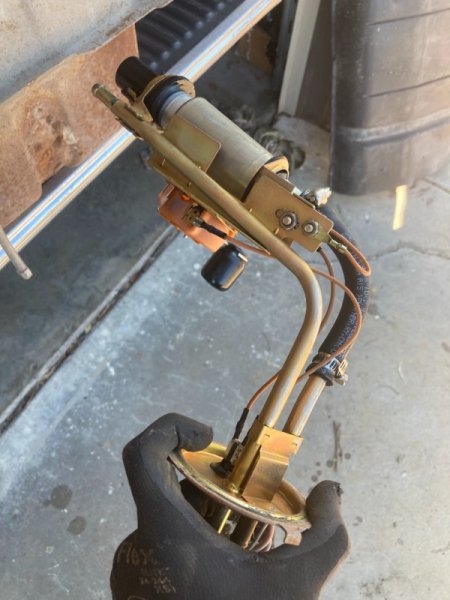
-
Washer and dryer panels. Thicker than normal sheet metal and are already coated.
-
Chunk, A 1984 XJ
eaglescout526 replied to eaglescout526's topic in Member Projects: Other Cool Stuff
As always cactuscomanche got me once again! Got the gas tank from the 86 XJW with sending unit. Some rust on the bottom but looks mostly surface and is the same capacity. I will repair the original and put it back in one day or keep it out and put the original sending unit with it so both never get lost. Also got a rear OEM bumper. Needs a slight fixin but other than that it should suit me well vs the pushed in and dented bumper I had. This one is pushed in at the pass end cap but the spare tire carrier might rectify that. -
86
-
September 2023 - JZLAJeep's 89 Field Find
eaglescout526 replied to 89 MJ's topic in Comanche of the Month (MJOTM)
Glad you guys were able to take some time to meet up too! Was a fun time chatting with you guys and getting the parts y’all needed. congrats! -
Chunk, A 1984 XJ
eaglescout526 replied to eaglescout526's topic in Member Projects: Other Cool Stuff
Rust hole. I’ve known about the leak prior to cleaning the tank but it wasn’t bad enough for me to get a new tank then.