ghetdjc320
-
Posts
5079 -
Joined
-
Last visited
-
Days Won
1
Content Type
Profiles
Forums
Gallery
Everything posted by ghetdjc320
-

Project “Tomahawk”
ghetdjc320 replied to ghetdjc320's topic in MJ Hardcore Tech: Epic Journeys to Greatness
Sounds good, thanks -
Project “Tomahawk”
ghetdjc320 replied to ghetdjc320's topic in MJ Hardcore Tech: Epic Journeys to Greatness
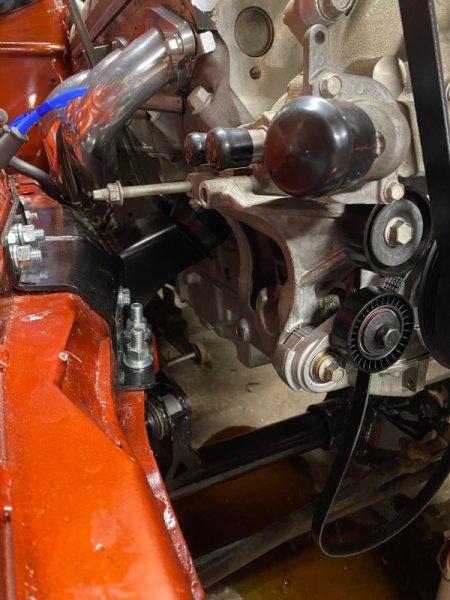
That’s the dampener I have on it right now. I think perhaps the stock corvette compressor is too large. Going to checkout those part number and see what the dimensions are on the compressor and bracket. Thanks! -
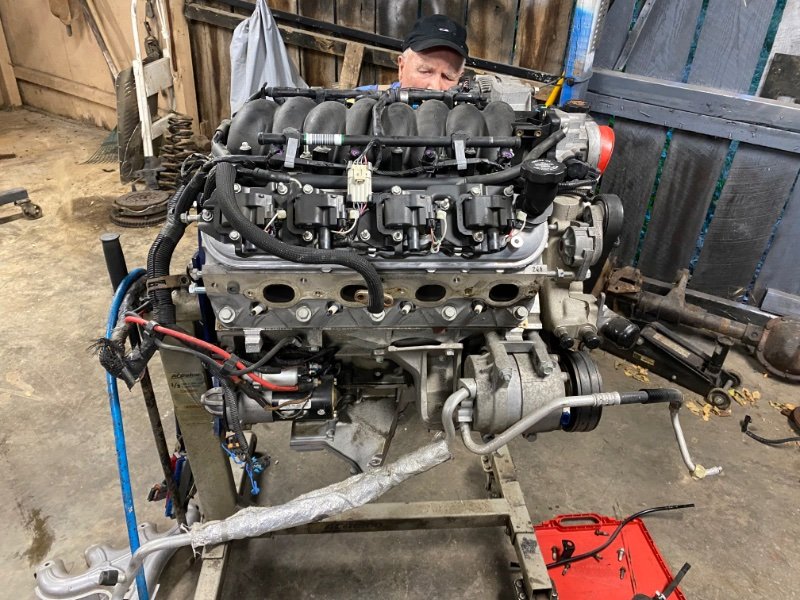
Project “Tomahawk”
ghetdjc320 replied to ghetdjc320's topic in MJ Hardcore Tech: Epic Journeys to Greatness
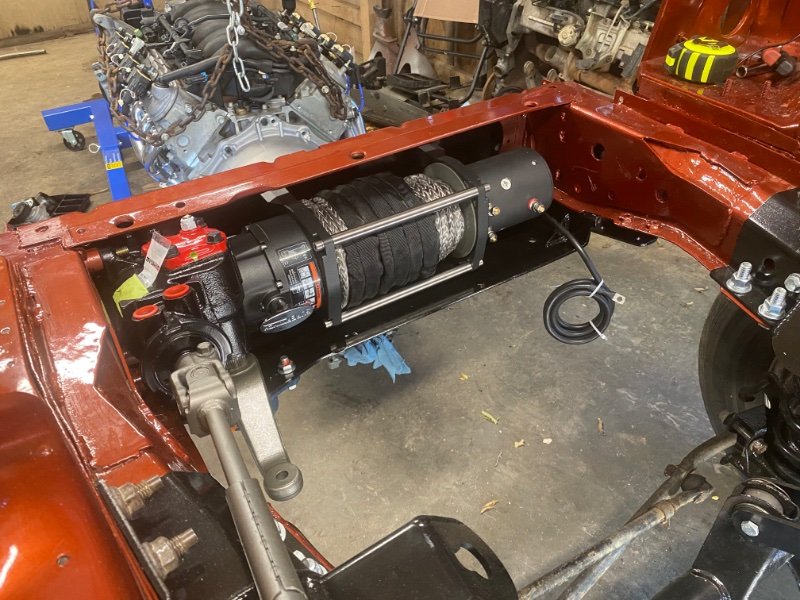
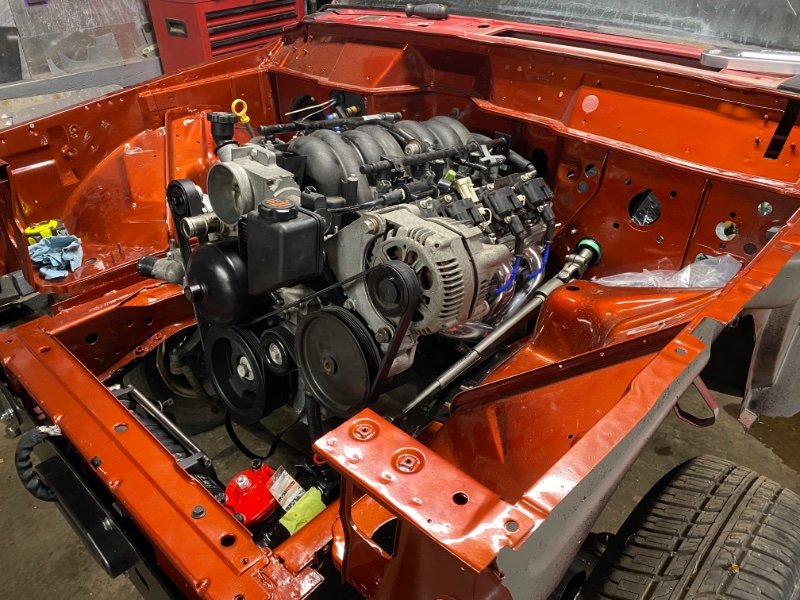
Engine is in along with Superwinch TS9500SR. Perfect fit with the winch. Took a lot of maneuvering on the engine especially with the quick draw bellhousing. Had to use the center hole in the Novak engine mounts. It’s lined up perfectly now though. I could not get the stock corvette ac compressor to fit with the mounts. Going to tag @Limeyjeeper & @75sv1 to provide any insight as to how to get the ac to fit down in that area. Perhaps a smaller compressor? Pictures attached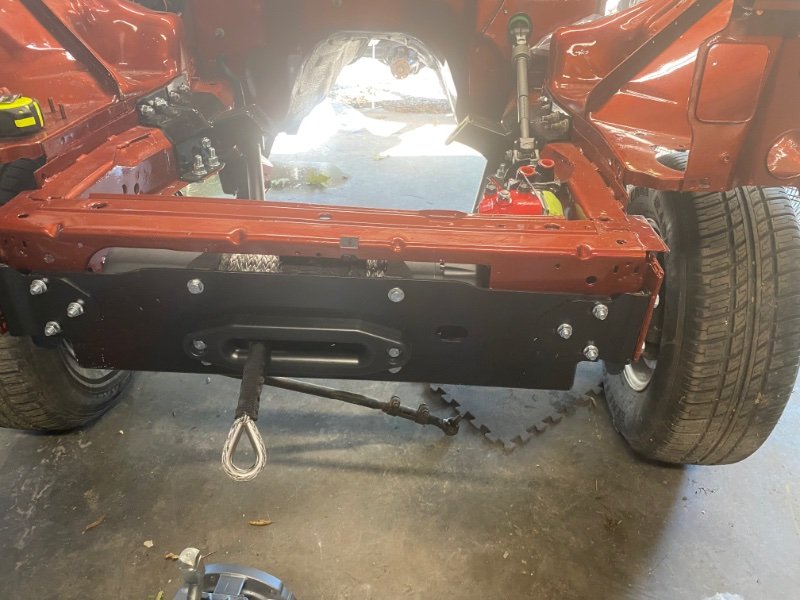
-
Project “Tomahawk”
ghetdjc320 replied to ghetdjc320's topic in MJ Hardcore Tech: Epic Journeys to Greatness
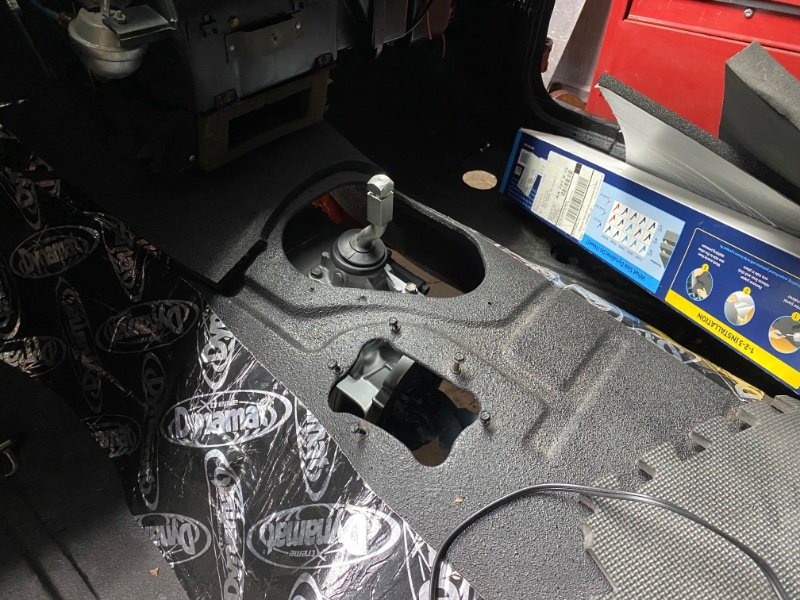
Haven’t gotten around to much since but rebuilt the shifter with nice kit from Allstate gear. Changed plugs and wires also. I had a Superwinch Talon 9.5sr I had planned on installing but it would not fit (dumb mistake ). After measuring thoroughly, went with a Superwinch TS9.5SR. I’ve run this winch in the past in it’s a beast. Build quality Is very high, brake is in the gear box and it uses a series wound motor. Compared it thoroughly to an M8000 (which is backorded until October). They are very comparable but the Superwinch saves a bit of space on the clutch side of the housing. Probond dampener, new belt drive with pulley and tensioners and a few odds and ends will be in tomorrow. Hope to intall the engine tomorrow.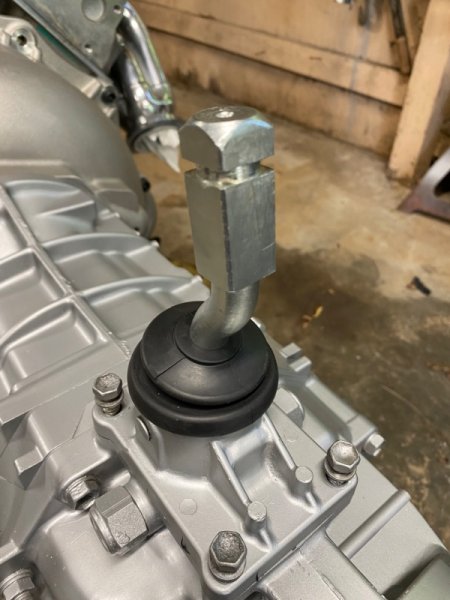
-
Which harness are you looking for? An aux input or the wiring plug for the radio side?
-
Camper Shell mounting rubber source?
ghetdjc320 replied to pago cruiser's topic in MJ Tech: Modification and Repairs
Looks like that should work. You can also checkout foamfactory.com they have pretty much any type of seal material imaginable. -
And once the above are all done, store the vehicle indoors as much as possible or at least under a carport/canopy, I personally used Fluid Film Black and coated all the insides of the frame rails and crevices once they were clean and dry. The factory application of seam sealer was also quite poor. If you ever do a full tear down of your rig, be sure to replace and add seam sealer as appropriate. On my current build I have por-15’d the entire fram and underside of the cab the coated with raptor liner. This was a lot of work… The insides of my frame have been thoroughly cleaned. I will use Eastwood internal frame coating followed by cavity wax/fluid film black.
-
Project “Tomahawk”
ghetdjc320 replied to ghetdjc320's topic in MJ Hardcore Tech: Epic Journeys to Greatness
New pan, dipstick and headers installed. Flywheel and clutch are from a 6.0 based gmc truck. Using the quick draw bellhousing which uses the 94+ Jeep external slave, fork and throw out bearing. Slave has been adapted to -3 an fitting as has the clutch master. This is a Luk rep-set clutch. The whole assembly is now ready to be installed in the engine bay. Just need to prep the cross member and the brackets I restored previously. On another not, I confirmed that this is a rebuilt tranny. Every single synchro, bearing, gear and seal I could inspect are pristine. New belts, tensioners, idlers, plugs and plug wires will be in shortly. My winch didn’t fit so I have to go with a slightly smaller unit. Settled in the Superwinch TS9500SR. They are witching about 1/4” of an M8000 but have a gear box brake vs having it in the drum. I’ve had great success with them in the past. I may hold on to this Talon 9.5SR for future use. It’s a beast of a winch. On the engine: I replaced the rear main and rear access plat gaskets just to have that covered. Even though this is a very low mile engine and was super clean inside, the rear main seal was updated and is better than the one it came with now. Also going to upgrade the dampener.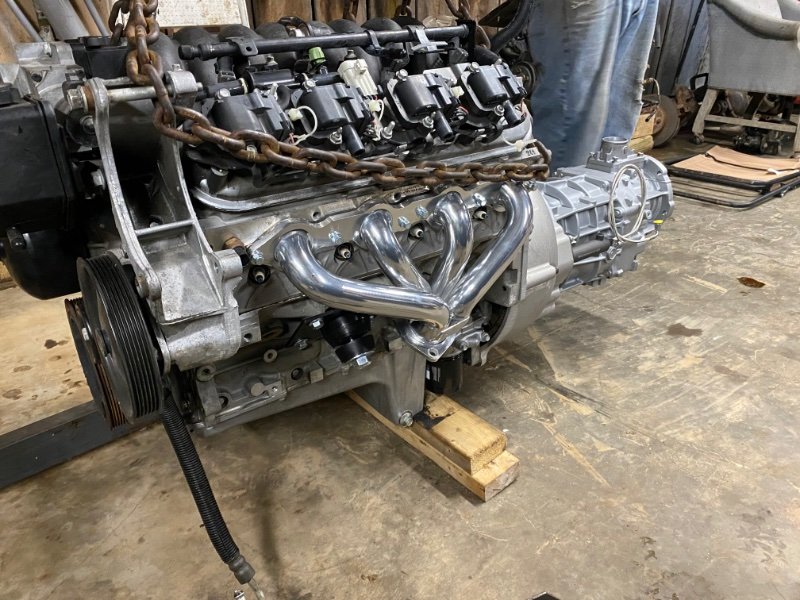
-
Power Rear Window Slider - PWR Slider
ghetdjc320 replied to Big_Mark's topic in MJ Tech: Modification and Repairs
That link is for the duo pane sliding window. The unit the OP has is the powered unit. Don’t see too many of those. -
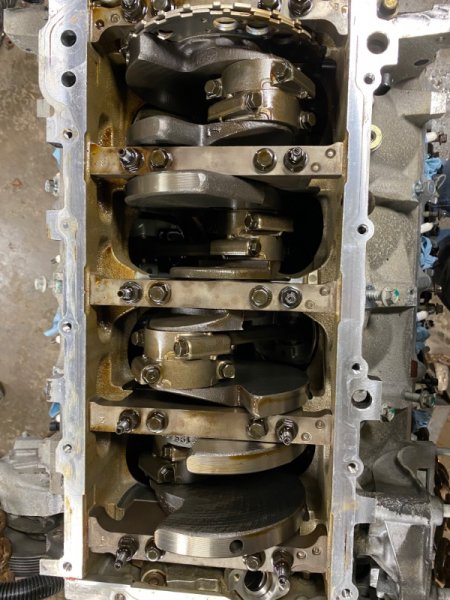
Project “Tomahawk”
ghetdjc320 replied to ghetdjc320's topic in MJ Hardcore Tech: Epic Journeys to Greatness
Tranny prep finished and engine prep begun. This engine is very clean inside. 60k original miles and it shows. Crosshatching is still clearly visible in all cylinders. It’s really nice to work on an all aluminum engine. Much easier to maneuver and zero rust to deal with.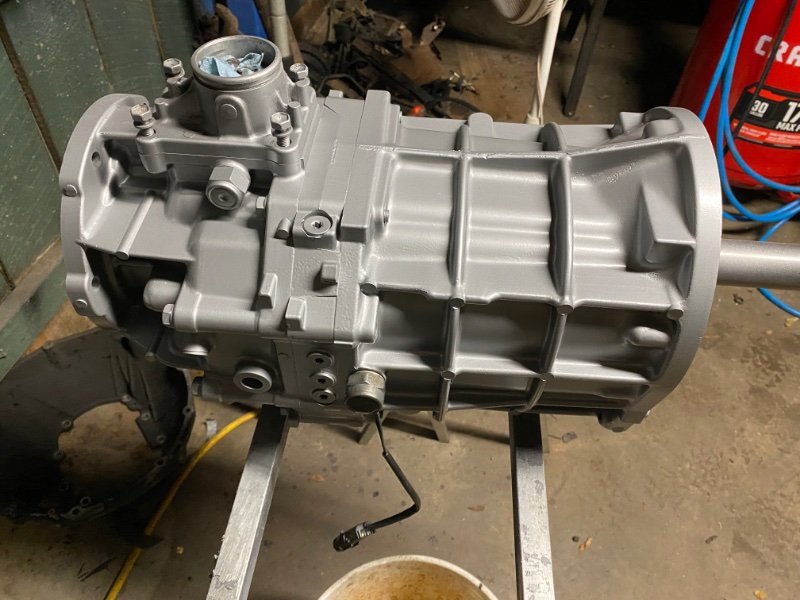
-
Project “Tomahawk”
ghetdjc320 replied to ghetdjc320's topic in MJ Hardcore Tech: Epic Journeys to Greatness
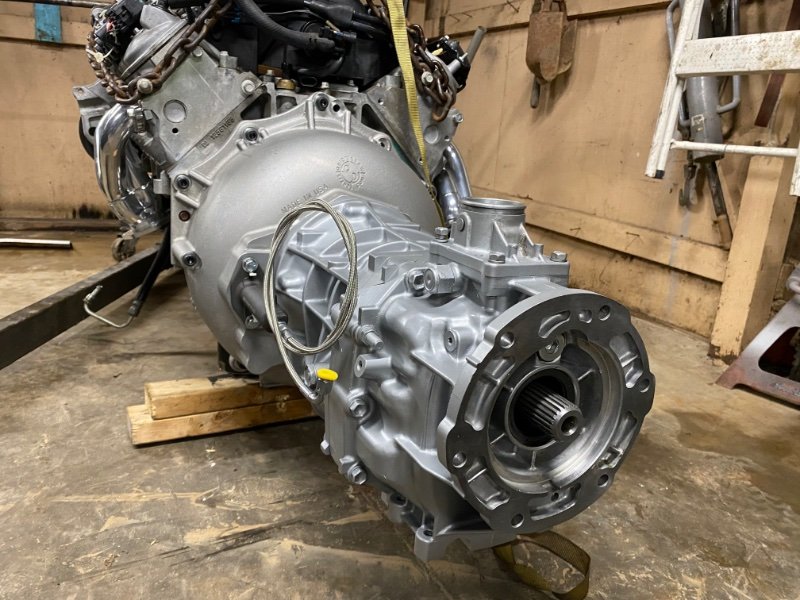
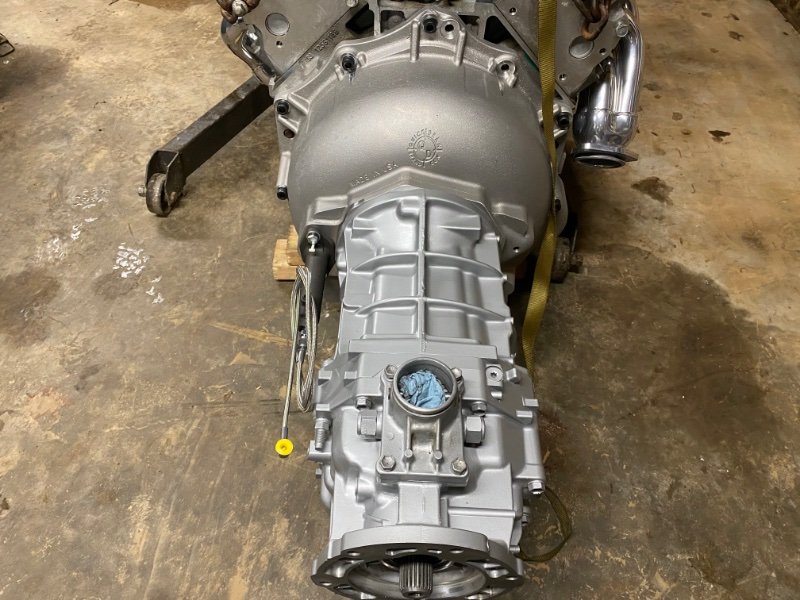
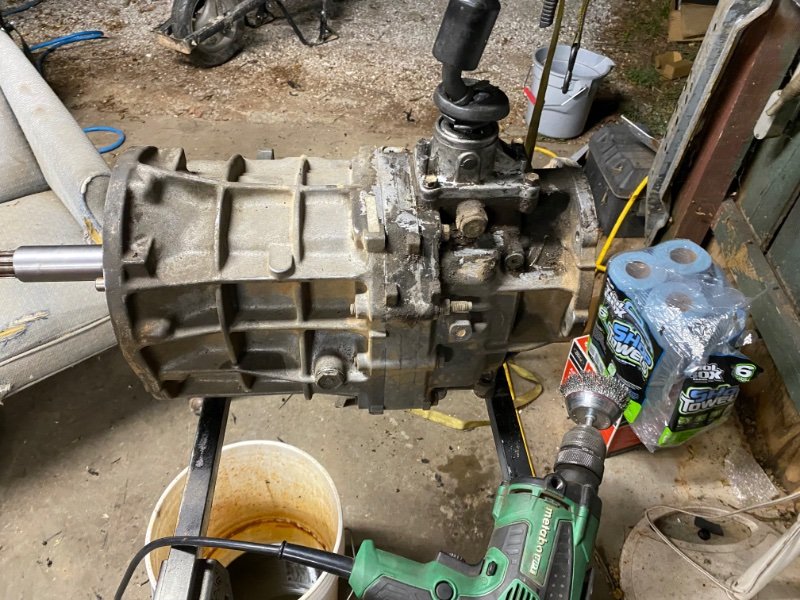
Transmission polished and clear coated.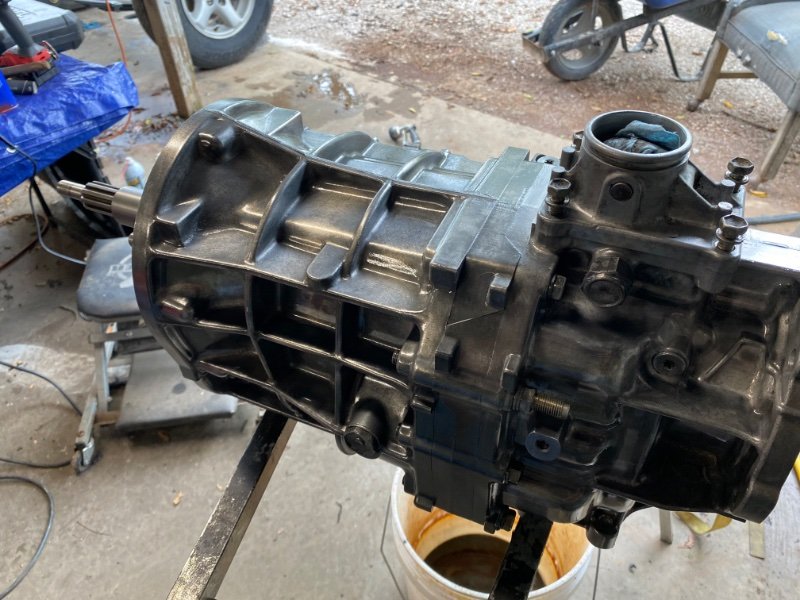
-
Project “Tomahawk”
ghetdjc320 replied to ghetdjc320's topic in MJ Hardcore Tech: Epic Journeys to Greatness
That’s rough! It’s a sad day indeed when a project can’t be finished. -
Project “Tomahawk”
ghetdjc320 replied to ghetdjc320's topic in MJ Hardcore Tech: Epic Journeys to Greatness
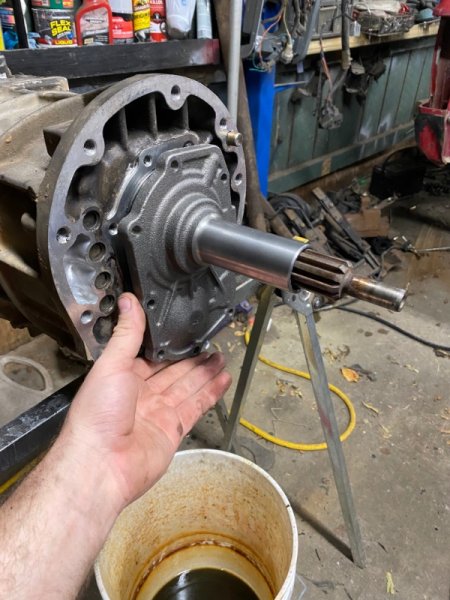
Been cleaning up the ax15. I’ve been contemplating sending it in to MarlinCrawler for a rebuild with the chromo thrust washer and full contact billet shift forks. After doing considerable research on these granny’s over a few years, it does not appear there is any difference in the gearset itself over the years. Even new models seem to use the same gear composition. It’s also worth noting that torque handling figures are with a gvw of 7200. This MJ should be about half that or or less. The oil was clean with zero metal flake or particles. Main bearings under the retainer also look great. I think I’m going to clean it all up, replace the seals flush out the inside and run it with some redline mt90. I have a sneaking suspicion that it may have been rebuilt as it just looks too clean inside. It shifts very smooth with clear positive engagement. If it fails, I’ll send it off to Marlin but it just seems like a waste at this point. Plus only 90k original miles and the suspension, gearing and tires were all stock. Plan on polishing up the case and clear coating it. Same goes for the np242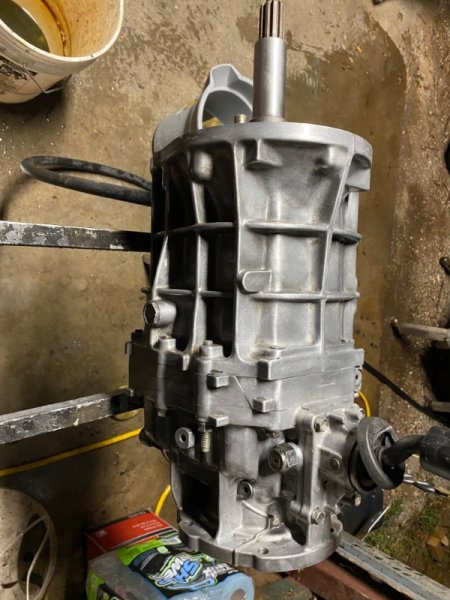
-
Project “Tomahawk”
ghetdjc320 replied to ghetdjc320's topic in MJ Hardcore Tech: Epic Journeys to Greatness
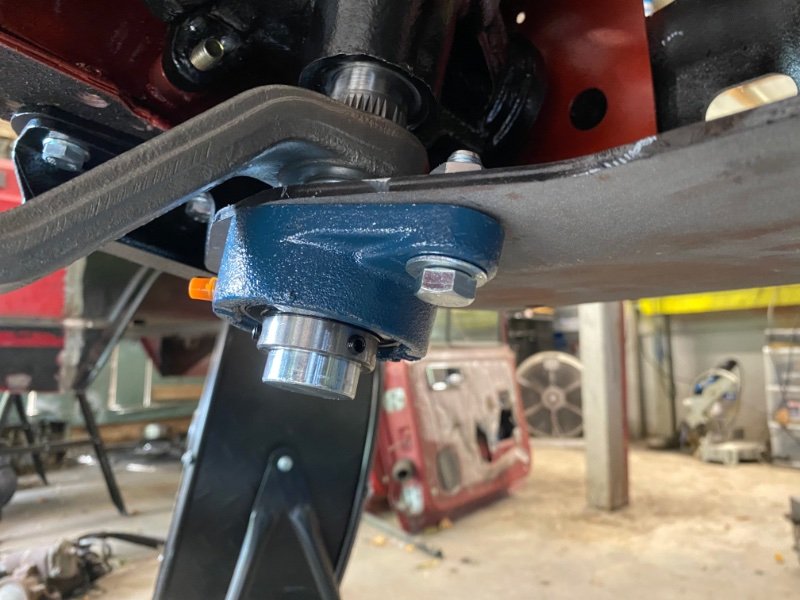
This is actually part of the boostwerks hidden winch setup. That is one amazingly well build piece of kit. I wish he was still making them. I had the Ironman kit on the last MJ. If everything else has no play, it feels like a good rack and pinion system. That’s why I’ve been spending so much time restoring and designing the steering and brakes. Trying to have the best road handling possible with very respectable off-road performance as well. -
Project “Tomahawk”
ghetdjc320 replied to ghetdjc320's topic in MJ Hardcore Tech: Epic Journeys to Greatness

-
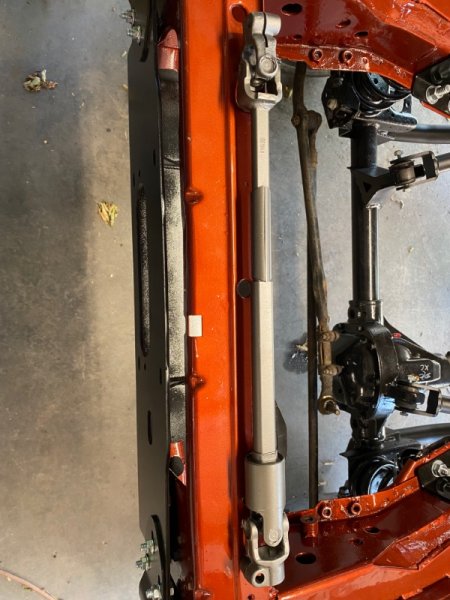
The critical thing is that the mounting points for drag link and track bar, if adjusted, are done so equally. In other words, if you drop the track bar frame side mount, then get a drop pitman that equalizes that drop for the drag link (not that I’m recommending drop pitman arms but they have their place). If you raise up the track bar mounting point on the axle side then raise up the drag link on the knuckle. Looking at how bars “look” parallel is irrelevant. I would never install a bolt on bracket on the axle side of the track bar. Think about this, the frame side track bar mount had 4 large grade 10.9 bolts holding it to an area with significant reinforcement. The axle side should be just as strong. The stock track bar mount metal was far too thin for rigorous use. We often see track bar bolt holes wallowed out even with stock track bars with clevite joints. Now imagine a heim joint with almost zero give. It will put even more stress on those bolt holes. The steering stabilizer mount is the same thickness metal but has far less welded contact area and is not a suitable place to mount a bracket that will take an equal or greater pounding than stock. Properly welding on a correctly engineered ota track bar mount is the way to go. Imagine your track bar bracket shearing off when your doing 55 around a corner. Not worth the risk imo. If there was a simple bolt on approach for the axle side, then you would see the more reputable companies selling competing products.
-
Project “Tomahawk”
ghetdjc320 replied to ghetdjc320's topic in MJ Hardcore Tech: Epic Journeys to Greatness
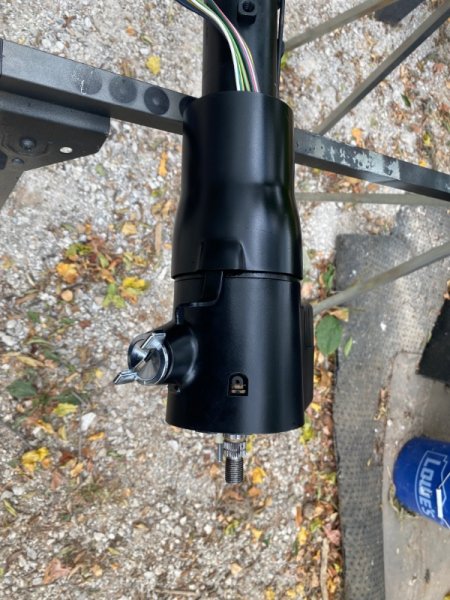
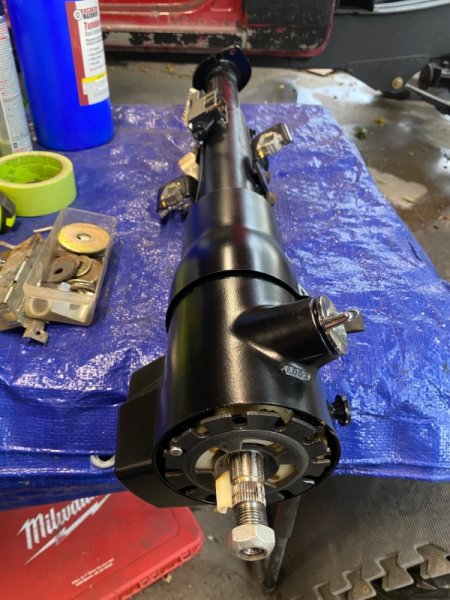
Steering column and shaft restored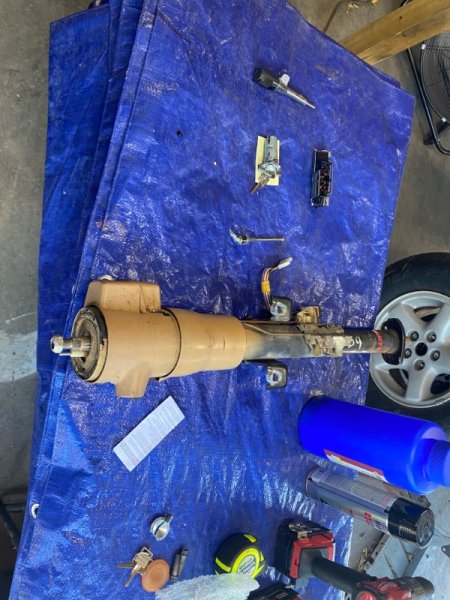

-
Rough country would be bottom of my choice for a track bar. Their reputation for sub-par joints on an item as critical as a track bar is a non starter for me. And that tie-rod style adjuster sleeve on that thing seems like a horrible design. Are you wanting to ditch the oem track bar bracket at the frame side? If so, I’d look into the core4x4 track bar kit. They have a version for stock ride height from what I’ve seen. The design is similar to the rough country version but without an adjuster sleeve (which does not belong on a track bar). Core has a good reputation for strong well built components. Whichever model you go with, keep in mind that although the length of the track bar may work with no lift, the bracket may require a lift to clear. And you also need to be sure that your drag link and tie rod are parallel. Many aftermarket brackets lower the mounting location at the frame side.
-
RPMs swing wildly on actron ODB1 scanner
ghetdjc320 replied to Lewis E's topic in MJ Tech: Modification and Repairs
Keep in mind that there are very few devices that can accurately pull data from the sbec2 diagnostic port. There was an older model otc scanner that had a pretty decent Chrysler emulator on it. Otherwise, I’d take all the data you pull with a grain of salt. -
RPMs swing wildly on actron ODB1 scanner
ghetdjc320 replied to Lewis E's topic in MJ Tech: Modification and Repairs
I’d just ignore the scanner if it’s running smooth. If your ais and tps remain steady then the rpm reading is somewhat irrelevant. It’s nice you have readings on the rest. Just use your dash tachometer or a timing light to know your true rpm. -
Under dash courtesy lights
ghetdjc320 replied to Whitaker717's topic in MJ Tech: Modification and Repairs
https://teamcherokee.com/courtesy-lamp-bracket-oem-set-cherokee-comanche-1984-1996/ -
Project “Tomahawk”
ghetdjc320 replied to ghetdjc320's topic in MJ Hardcore Tech: Epic Journeys to Greatness
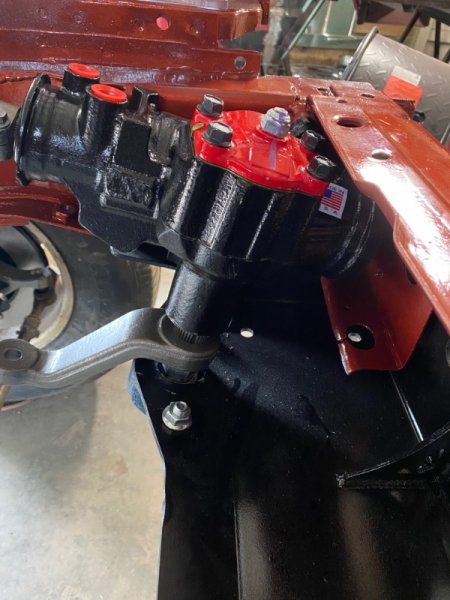
12:1 Redhead steering gear. Love the little note of assurance lol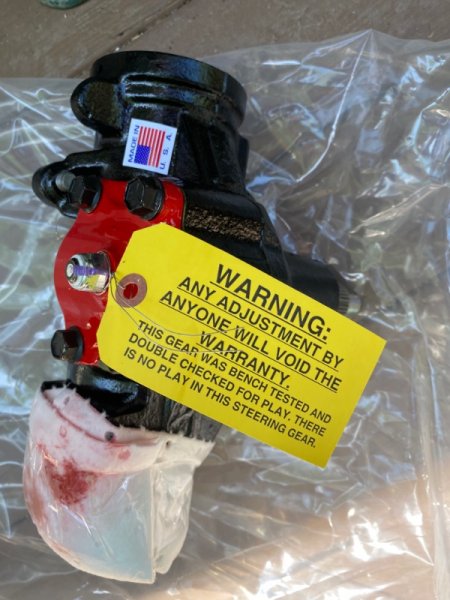
-
Project “Tomahawk”
ghetdjc320 replied to ghetdjc320's topic in MJ Hardcore Tech: Epic Journeys to Greatness
-
Project “Tomahawk”
ghetdjc320 replied to ghetdjc320's topic in MJ Hardcore Tech: Epic Journeys to Greatness
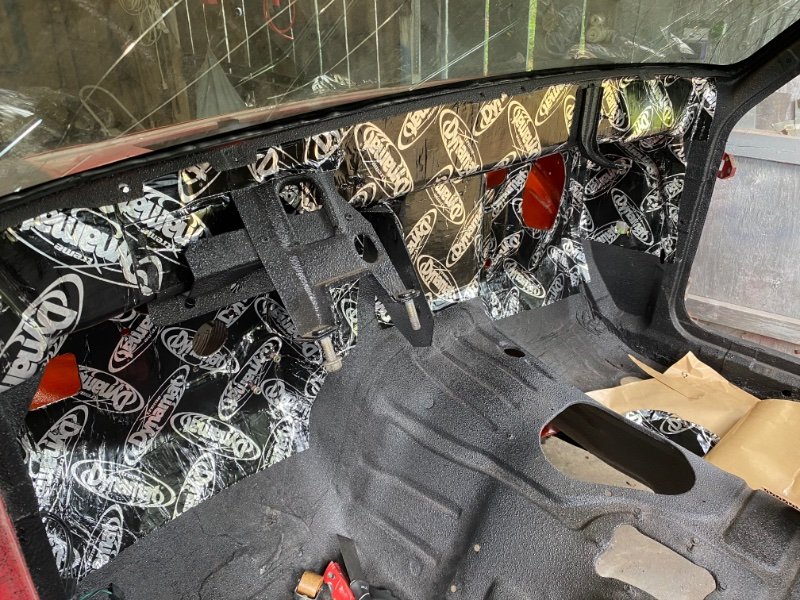
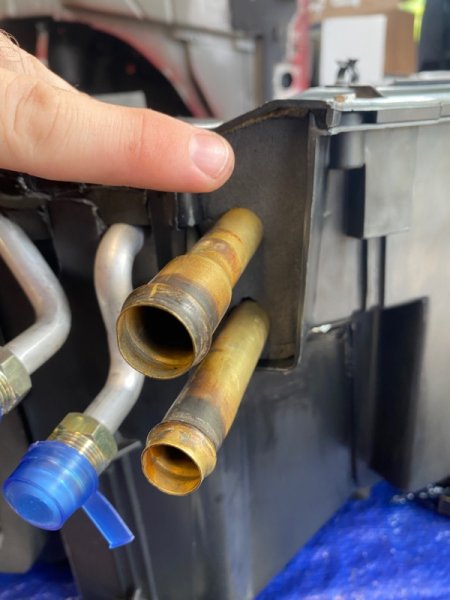
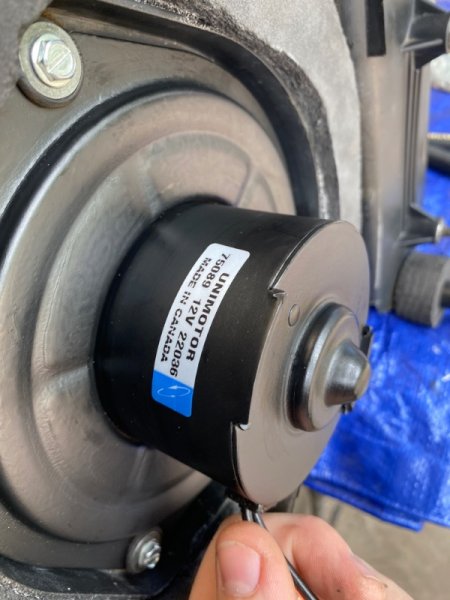
Dynamat and 1/2” dynaliner finished on firewall. Will also be doing dynamat and liner on the trans tunel. The horizontal floor surfaces will get no dynamat but will get dynapad below the carpet. I don’t want anything that can ever trap water under it. Not that this Jeep will list ever leak in the next few decades but it’s peace of mind. Last time I dynamatted the floor it was a disaster to clean up. Hvac box is also back in place. It has zero air leaks now and should be ice cold and plenty hot on demand. I will be using a nos heater valve as the stock hvac box design does not provide a barrier between the heater core and the evaporator core when the blend door is open to just cool. Obviously, no air gets blown through the heater core when the blend door is open on the ac side but since there isn’t really any barrier, radiant heat will warm your ac system a bit. The heater valve is a bit problematic but it does the trick. As a side not if anyone is following parts: the four seasons blower is a very nice unit and has an updated fan design with more blades. It also has the opening for the fan to blow into the motor to keep it cool during extended use. The evaporator core is also a four seasons unit for a 90 Comanche. It is an updated plate and fin design but is not a drop in fit. See previous pictures to note the extensive foam work required to seal the evaporator and get the air forced through it. As for the heater core, the stock unit is copper. If you can save it it’s probably better than most repop units out there. I did and acid flush through mine and flushed it with clean water several time along with compressed air. Zero leaks and a perfect oem fit.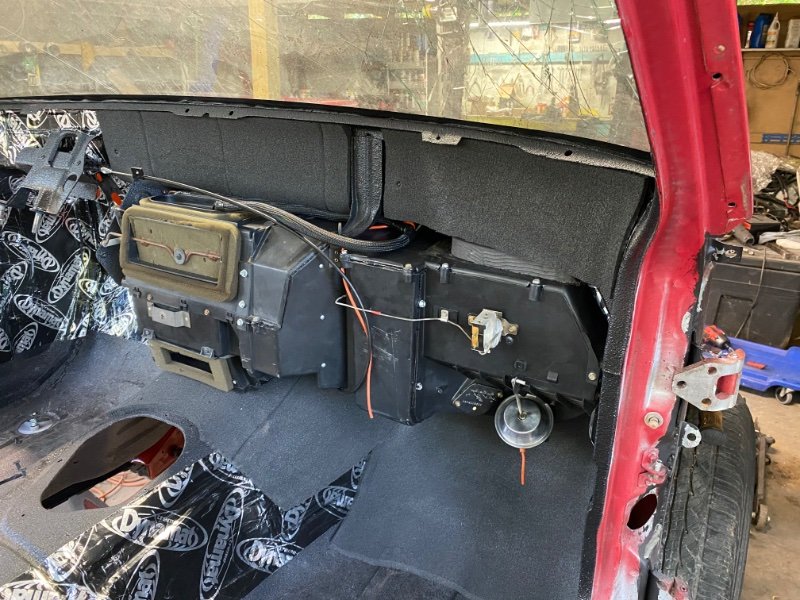
-
Project “Tomahawk”
ghetdjc320 replied to ghetdjc320's topic in MJ Hardcore Tech: Epic Journeys to Greatness
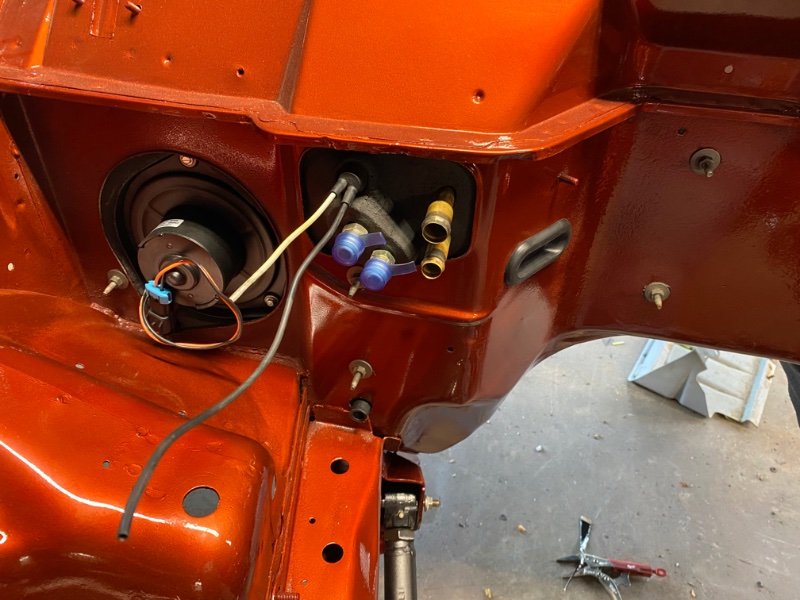
There are a few strategic places to add a 5/8” number 10 sheet metal screw to hold the heater core to the ac housing better. Firewall is coming along.