


ghetdjc320
-
Posts
5212 -
Joined
-
Last visited
-
Days Won
1
Content Type
Profiles
Forums
Gallery
Everything posted by ghetdjc320
-
Checkout Allstate gear. They use all nachi bearings, and synchroking synchronizers. They also offer most all small parts including the 5th gear update kit. Depending on the year of you ax15, you’re likely going to need a different synchro for 3/4 than what comes in most kits. I posted up some of the synchro differences and pictures in my build thread (pages 24-25) along with some upgrades that can be done at the same time. I’m not sure if I noted this or not in my posts but I ended up removing the “new style” synchro with different tooth design and replaced it with the correct tooth design which should perfectly match the synchro hubs.
-

Project “Tomahawk”
ghetdjc320 replied to ghetdjc320's topic in MJ Hardcore Tech: Epic Journeys to Greatness
Following up on the TSB posted before, it appears that this TSB came out in 2003 and the 2004 and later valley covers remedied this by raising the little flange on the top of the valley cover a bit higher to prevent water intrusion. I just check my new valley cover and sure enough it has a more pronounced "ridge" than the original. -
Project “Tomahawk”
ghetdjc320 replied to ghetdjc320's topic in MJ Hardcore Tech: Epic Journeys to Greatness
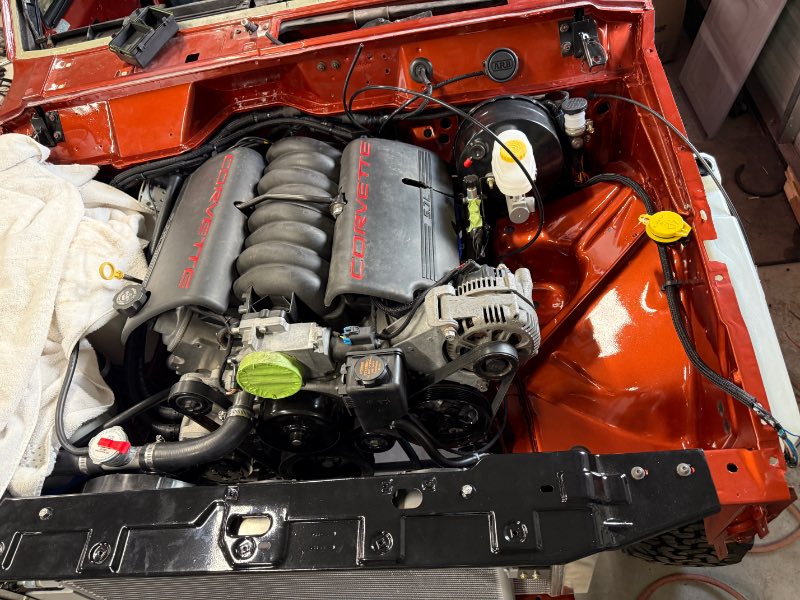
Coming along…. I am really liking how clean the wiring is when routing it all behind the engine. This has taken a painstaking amount of planning and routing, making sure no circuits are missed. There are many connections that need to be added to the painless harness but ultimately it seems to be a good solution for replacing all the factory wiring.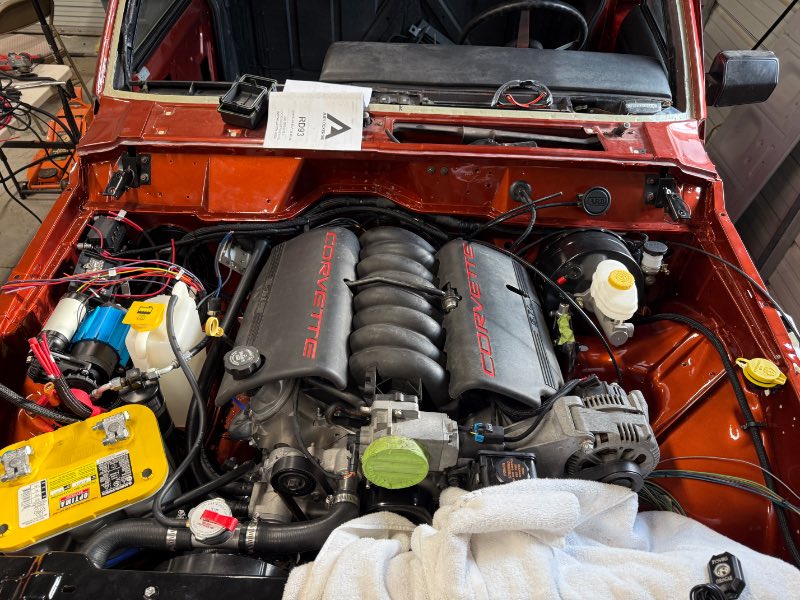
-
Project “Tomahawk”
ghetdjc320 replied to ghetdjc320's topic in MJ Hardcore Tech: Epic Journeys to Greatness
Sounds good, that’s what I got. Apparently on the corvette programming, the ac request on pin 17 is a ground request. Painless and psi both advised using a 12+ but that appears to only apply to truck and f body programming. -
Project “Tomahawk”
ghetdjc320 replied to ghetdjc320's topic in MJ Hardcore Tech: Epic Journeys to Greatness
Good to know. Do you happen to recall what pin you sent the AC request to on the pcm? For vss, I’m using a Dakota digital 128k sender that I modified to fit the Jeep sender. So the ecu will see 128k ppm just like the stock t56 put out. Then using the Speedo output from the pcm which is supposed to be 8k ppm just like stock Jeep. I have the Dakota digital box if needed to convert frequencies but I’m hoping it won’t be used. -
Project “Tomahawk”
ghetdjc320 replied to ghetdjc320's topic in MJ Hardcore Tech: Epic Journeys to Greatness
Here is the TSB referenced above: https://www.corvetteforum.com/forums/attachments/c5-general-103/what-would-you-pay-for-this-c5-3680571/02-06-04-023a-47899884d1436760407 -
Project “Tomahawk”
ghetdjc320 replied to ghetdjc320's topic in MJ Hardcore Tech: Epic Journeys to Greatness
That’s a good point! I’ll add some good sealer there. Couple of questions I wanted to ask you also: What did you end up doing for ac idle up signal? And did the 411 pcm tach output wire work for your tachometer signal without any other mods or was a pull up resistor required? TIA -
Glad to see those caliper mounts welded into place
-
Project “Tomahawk”
ghetdjc320 replied to ghetdjc320's topic in MJ Hardcore Tech: Epic Journeys to Greatness
So after having spoken with painless and seen other posts from psi conversions, they are both saying to provide pin 17 on the red ecu connector with the ac clutch signal for idle up. According to the factory diagrams for the corvette, that will need to be a ground signal not a 12v + signal like the ls1 f body vehicles had. Also will be adding an rpm cutoff logic board. The 12v coming from the ac control deck will go to the logic board which will be N/O. The logic board will close the switch below 500 or so RPM and above 4000 RPM. This 12v wire will then continue to one side of a relay trigger. The ground signal will go through the trinary pressure switch, then splice into two and feed the ground side of the relay trigger along with pin 17 on the red 411 ecu connector. The second trigger output from the trinary pressure switch will provide a second ground source for the fan relays. With the AC on, all the fan relays will activate. -
Project “Tomahawk”
ghetdjc320 replied to ghetdjc320's topic in MJ Hardcore Tech: Epic Journeys to Greatness
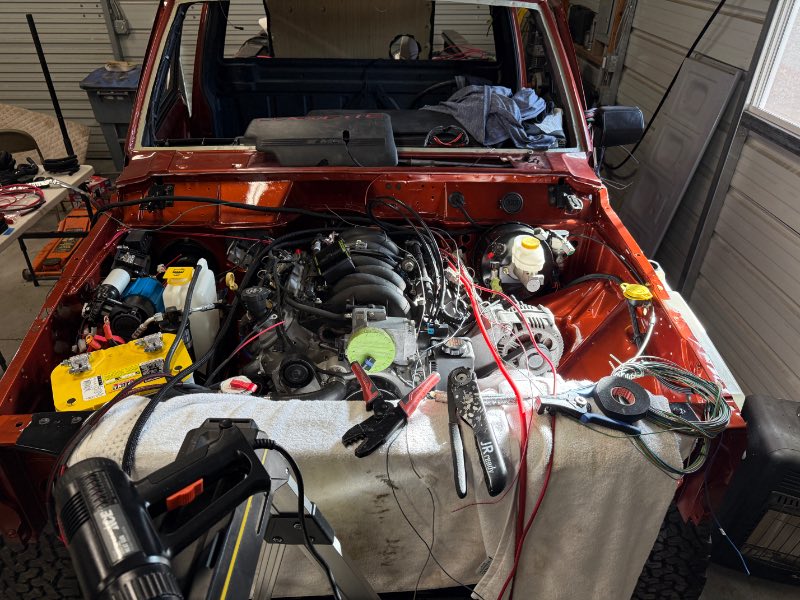
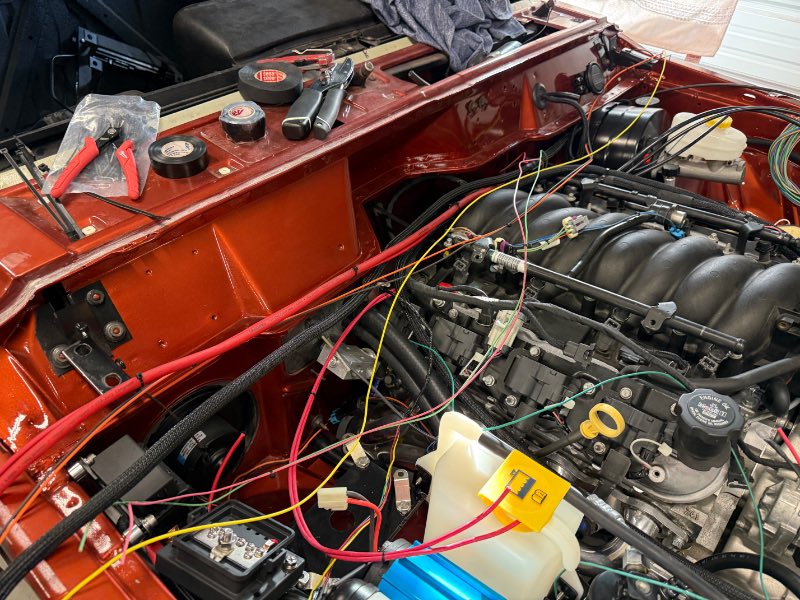
-
Project “Tomahawk”
ghetdjc320 replied to ghetdjc320's topic in MJ Hardcore Tech: Epic Journeys to Greatness
Lines running from each item to the breather -
Project “Tomahawk”
ghetdjc320 replied to ghetdjc320's topic in MJ Hardcore Tech: Epic Journeys to Greatness
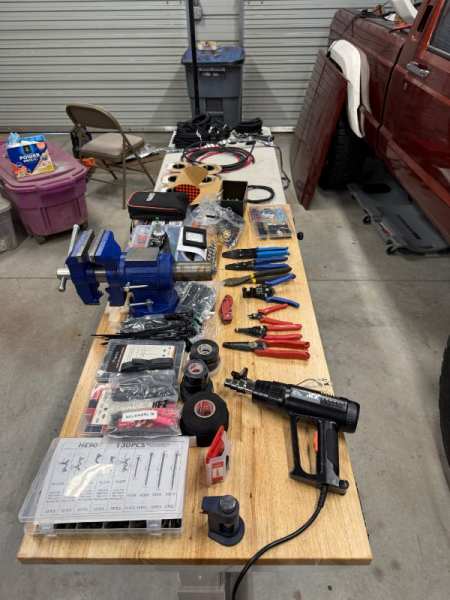
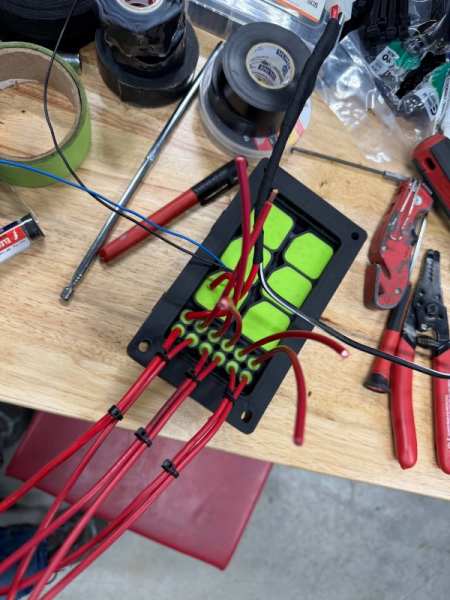
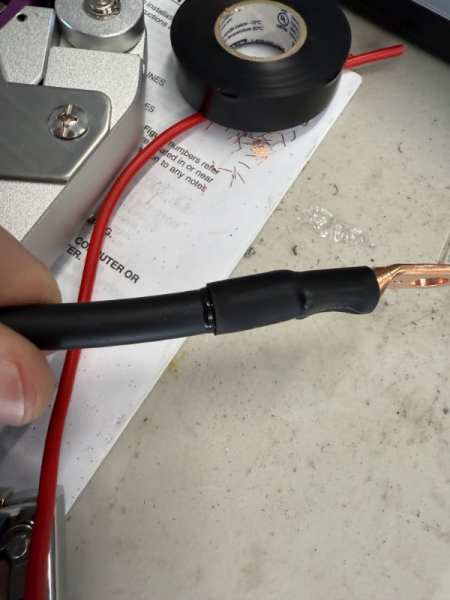
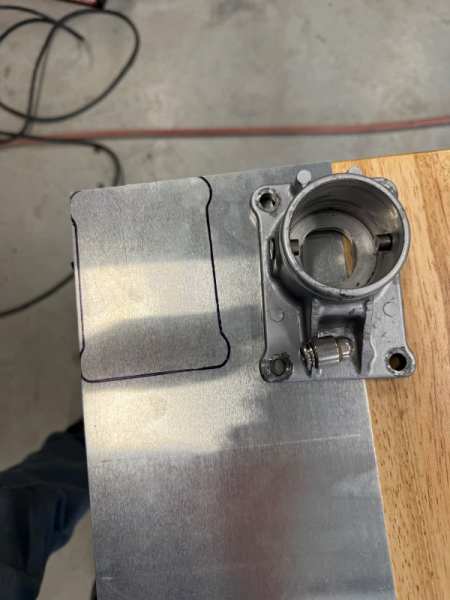
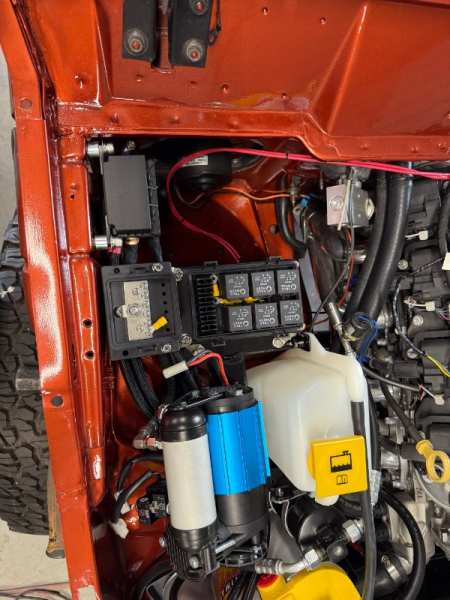
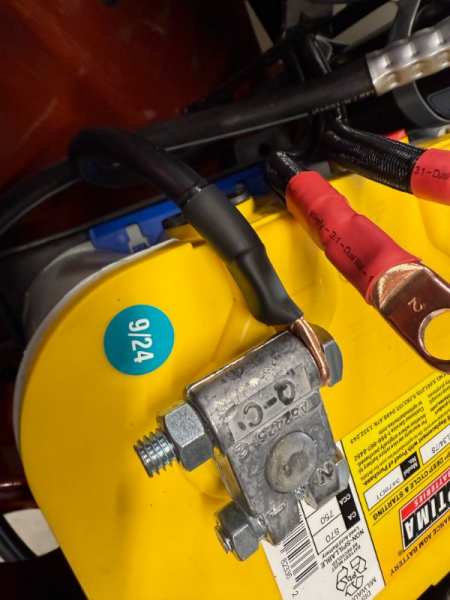
Mountains of electrical and final fitting of mechanical components coming together little by little. Tcase linkage is finished. Also finished assembly of the transmission shifter. I made a thin aluminum plate as a baffle like the nv3550 had in later years to prevent oil slosh from entering the new vent I installed. The ARB breather is now mounted and will vent both axles, transmission and transfer case. Finished up the winch solenoid wiring and got everything routed and terminated. Used 2awg welding cable and copper lugs then installed marine grade heat shrink tubing that is adhesive lined to keeps things sealed. Routing lines, cables and hoses is very time consuming but well worth the effort. I’m also ditching the arb relay and fuse and integrating them into my fuse/relay box and power distribution. The winch control switch wiring, arb harness, and all engine wiring is routing through the old renix ecu firewall plug. The painless bulkhead connector is handling lighting, wipers, horn, oil/water sensors and a few accessories such as the rock lights. Didn’t get many pictures taken today.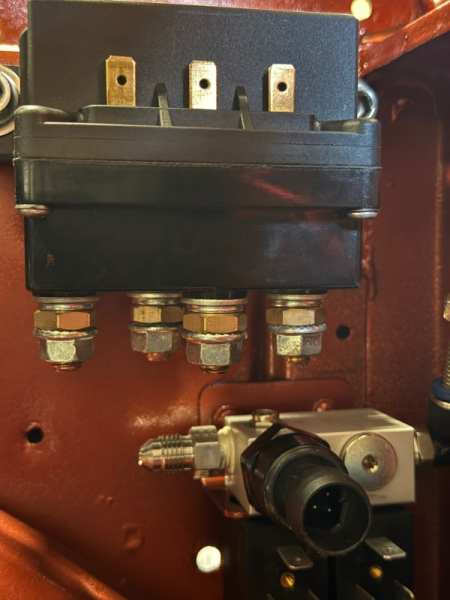
-
Well I decided to go with two high side ports, one at the compressor and one at the expansion valve. That way I can more easily diagnose a future AC issue. For the low side, I will be installing it on the expansion valve suction side. Should make servicing very simple with easy access. The 1990 AC system uses all standard o ring fittings in sizes 6, 8 and 10.
-
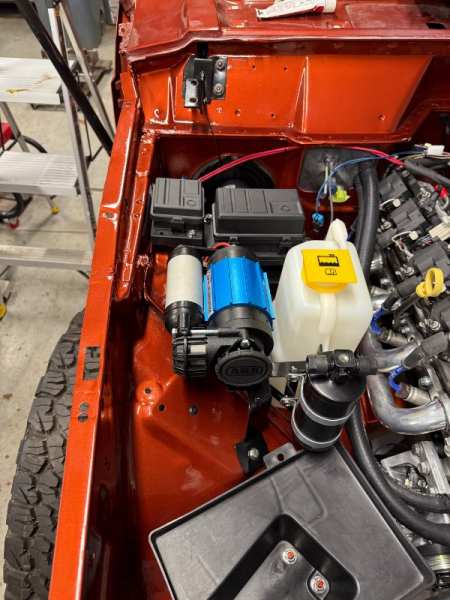
So I’m designing all new AC hoses and lines for my engine swap. Any thoughts on the ideal location for the high and low side service ports? I was liking the idea of installing them near the expansion valve to make them easy to access but not sure if that is an ideal location for taking readings. My ac compressor is a low mount block hugger setup so although I could technically put the fitting by the compressor, they will be tough to access. I mounted my dryer on a bracket near the battery. for my evaporator core, I’m using a newer plate a fin style along with the 91-92 MJ expansion valve for R134.
-
Project “Tomahawk”
ghetdjc320 replied to ghetdjc320's topic in MJ Hardcore Tech: Epic Journeys to Greatness
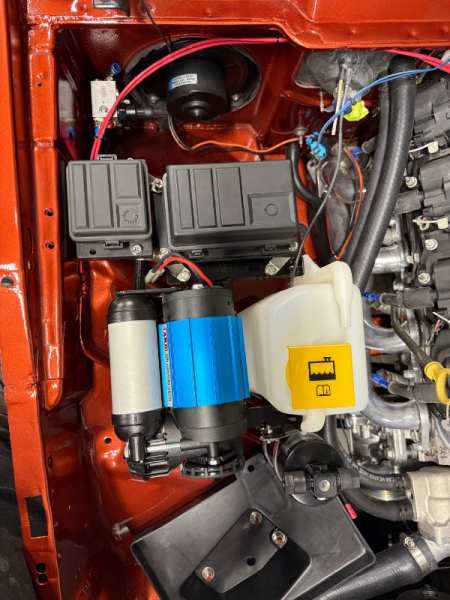
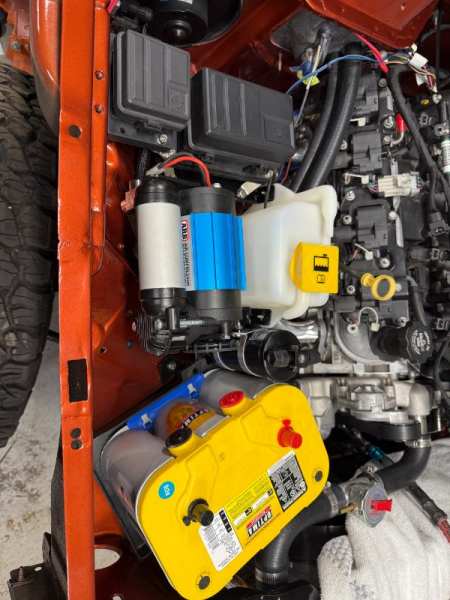
That was just a test fit. Took a lot of tweaking to get that bracket configured for all the accessories. It now holds the radiator bottle, compressor, ac dryer and relay/fuse box -
Project “Tomahawk”
ghetdjc320 replied to ghetdjc320's topic in MJ Hardcore Tech: Epic Journeys to Greatness
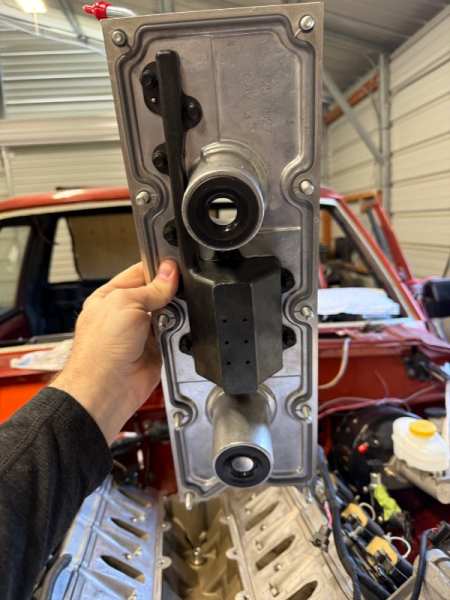
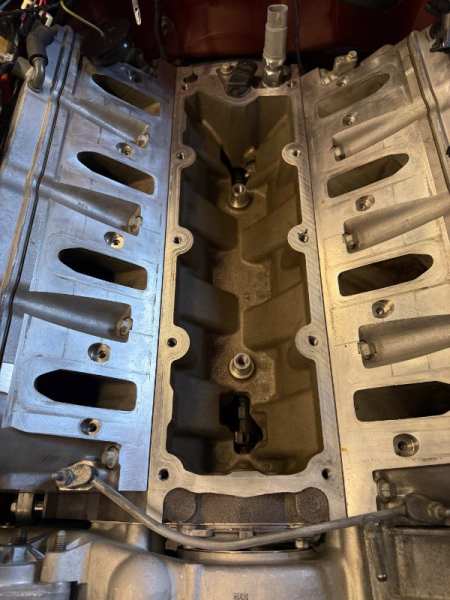
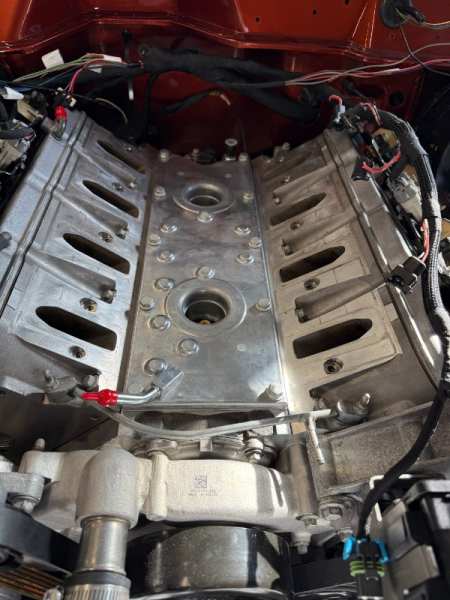
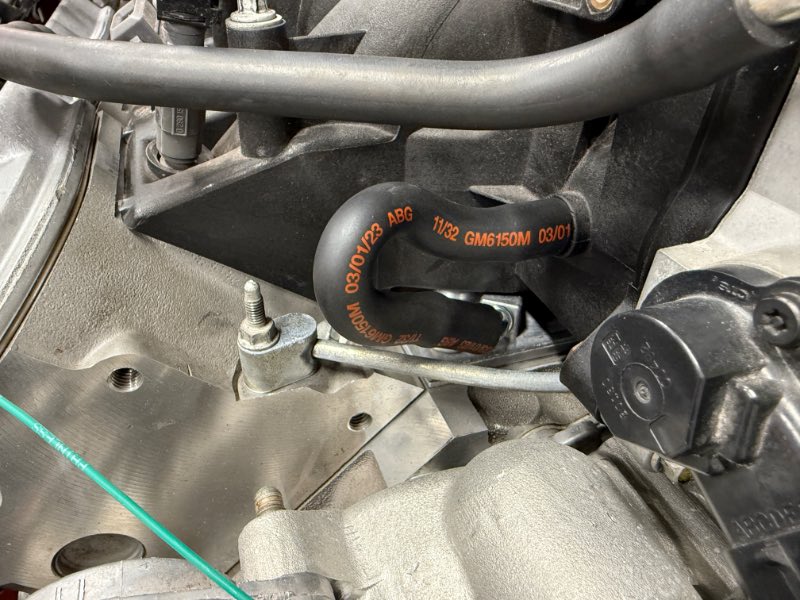
Mounting accessories. This process is tedious but I’m liking this layout. Also swapped to the 04 LS6 spec PCV valley cover and eliminated all the older style system. This will keep the intake much cleaner.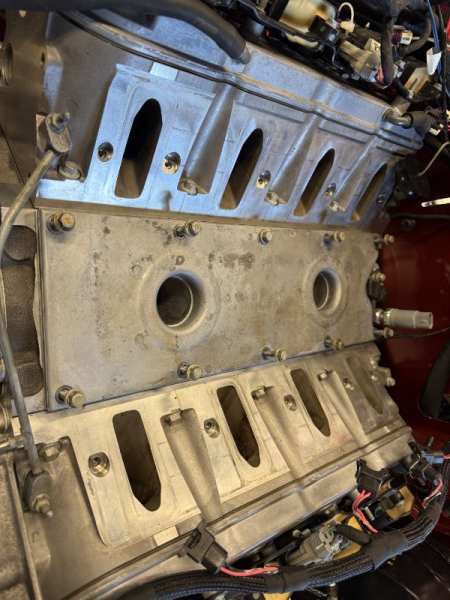
-
That’s the same wheel I had in my YJ. I picked up one as well from an MJ but the horn button didn’t have the little “rivets”. Was the rivet horn button exclusive to a particular trim?
-
I forgot the name of the yard but it’s in Ft. Smith Arkansas
-
Project “Tomahawk”
ghetdjc320 replied to ghetdjc320's topic in MJ Hardcore Tech: Epic Journeys to Greatness
Was able to source a NOS 04 LS6 valley cover which has the pcv built into the cover itself. This has much less oil exposure and keeps a cleaner intake. Also eliminates all the pcv hoses that circle the manifold. May do a catch can a well but perhaps down the road as it’s a simple bolt on. -
Project “Tomahawk”
ghetdjc320 replied to ghetdjc320's topic in MJ Hardcore Tech: Epic Journeys to Greatness
Interesting tidbit of info, the Corvette LS programming in the ecu’s monitor the oil pressure in the data stream and use a nice 5v reference sensor. So I’ll keep the corvettes oil pressure sensor connected and run the Jeep gauge sender off of the oil cooler ports using an adapter. I don’t believe the corvette programming actually uses the data for tuning purposes but I’d like to leave it there for reference and perhaps data logging -
Project “Tomahawk”
ghetdjc320 replied to ghetdjc320's topic in MJ Hardcore Tech: Epic Journeys to Greatness
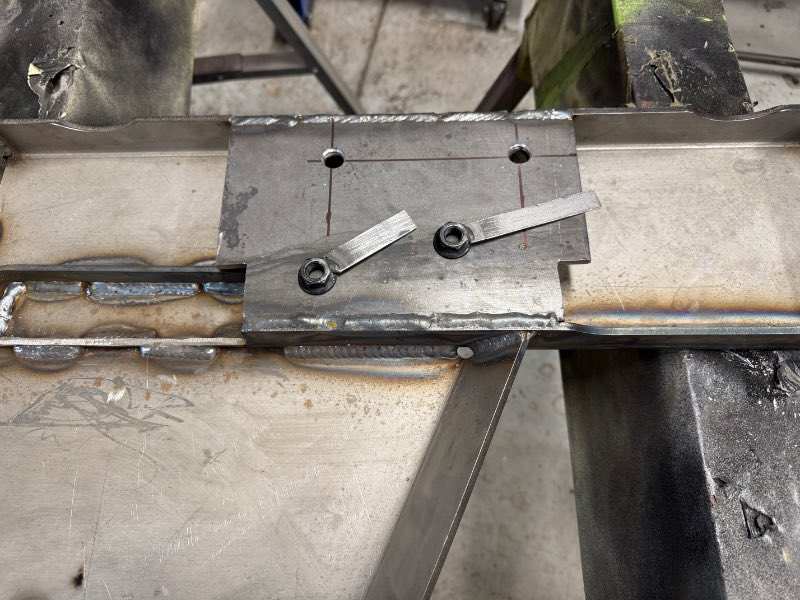
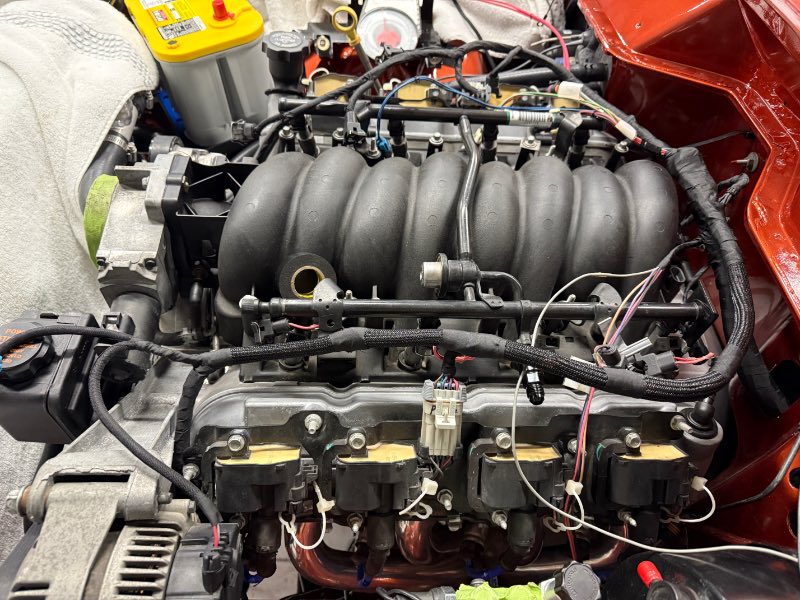
Modified the SFR crossmember/skid for the swap. The shorter length of the drivetrain does make it tricky to get some items lined up properly. But with enough modification and adjustments it works out nicely. On the sfr crossmember, I removed a section for the transmission mount, then I cut a custom piece from 1/4” plate and welded that in. Then I mocked it up and drilled out the mounting holes for the Novak tranny mount. Made a pair of flag nuts to make it easier to service later. Had to add a nutsert to the MJ frame hole for the factory tcase skid. The sfr unit uses that same factory mounting position. Everything aligned nicely. Need to add a 1/4” spacer to the transmission mount but it’s otherwise all finished. Started on engine wiring as well and got about a third of the way through. I’m keeping the ECU, TAC module, fuse block and relays all under the dash inside the cab. The engine bay looks much cleaner this way. Routing cabling and planning it all out takes time but is very rewarding.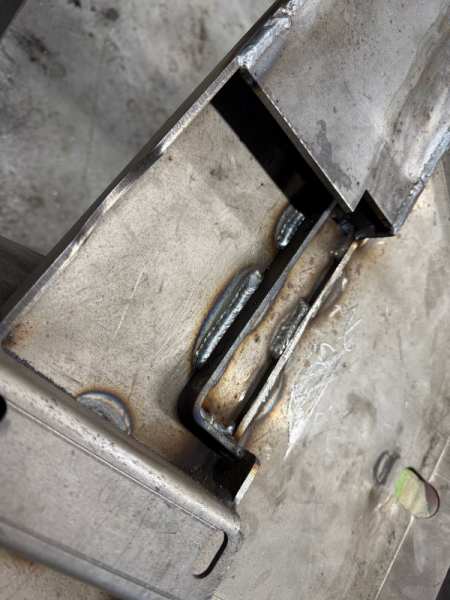
-
My experience was just the opposite, gained a solid 2.5” lift with the 1250 springs. But this was on springs from 2019. Keep in mind, the spring rate doesn’t ultimately determine lift. 1700lb springs simply have a 1700lb rated load capacity. The free arch is another factor on the lift. When last I saw, the free arch of the 1250 and 1700 were the same. But perhaps they have updated that since. General Spring posts on here once in a blue moon and it’s been difficult to nail down the exact springs that are currently available for our trucks. So far the spring packs that have been reported on are: General spring 4 leaf 1250 spring 5 leaf 1700 spring 5 leaf “military wrap” metric tons Hells Creek lift spring pack for sua Rustys lift spring pack for sua & various add a leaf setups and designs from other manufacturers mostly based around XJ leafs.
-
Project “Tomahawk”
ghetdjc320 replied to ghetdjc320's topic in MJ Hardcore Tech: Epic Journeys to Greatness
Slight mods to the ps reservoir bracket to gain some additional clearance. Lowered the reservoir by 3/8" and moved it back towards the throttle body by 5/16". also shaved off 3/16 from the outer edge. May not seem like much but gave me 5/8 more clearance overall between the fans and the reservoir. I also dug up the maf sensor and can confirm that it is for 3.5" tubing. The OD measures out to 3.6". To reduce turbulence and get the best readings, I'm going to mount the MAF about 2" back from the filter then try to keep a pretty straight shot of at least 12" back to the TB where it will use a 3.5-4" bending reducer. The goal is to use plastic or carbon fiber tubing to reduce heat absorption in the tub itself. Also made a small wire frame for the intake area and will try to fab some sort of heat shield and duct. I did look at doing the camaro -2 spacing on the puller to use the holley low mount setup. But I would have lost almost and in of clearance between the radiator and belt drive. And, all the kits that mount the alternator down low on the drivers side of the block tend to use the small case style which I don't want to run. The corvette reservoir location is also quite ideal from the standpoint of fluid delivery to the PS pump.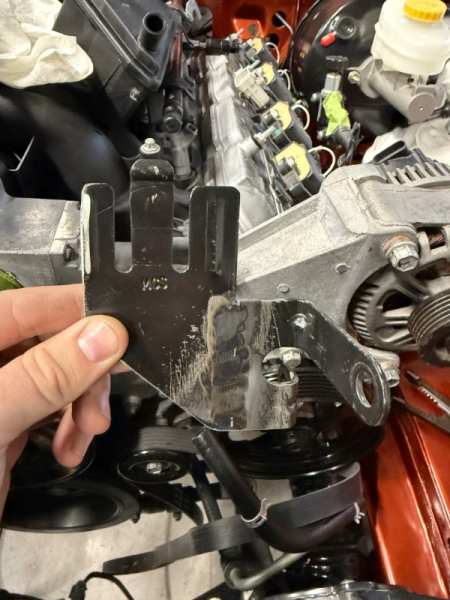
-
Any cover that has a threaded fill plug will be a bit thicker. For Dana 35’s that’s mostly 89 and earlier. 8.25 and 8.8 covers are thin. The rodeo and passport Dana 44’s have a nice finned aluminum cover that is quite thick and very strong due to the ribbing. All the Dana 30’s I’ve had use the same cover and seem like the same thickness. A diff guard will be a nice upgrade though if you’re hitting the axles that hard.
-
00-01 XJ Cast Iron exhaust manifold swap
ghetdjc320 replied to 89 MJ's topic in MJ Tech: Modification and Repairs
The banks and all the knock off copies really gave 4.0 headers a bad rep. That and missing the exhaust hanger near the crossmember. Too much weight and running lean can lead to stress cracks quick. If all the hangers are in place and the engine is not running lean, the stock manifold with the bellow tubes work just fine. Obviously they aren’t the best for performance though.