


ghetdjc320
-
Posts
5212 -
Joined
-
Last visited
-
Days Won
1
Content Type
Profiles
Forums
Gallery
Everything posted by ghetdjc320
-
I've searched through some of our older threads but haven't clearly identified which seat belts fit in a Comanche (aside from the originals). Will 4dr or 2dr XJ belts fit and function correctly? some manufacturers list belts as fitting the Comanche but always seem to require some mods to work or fit correctly.
-
 This is the way
-
Would you mind posting some pics of the install?
-
Project “Tomahawk”
ghetdjc320 replied to ghetdjc320's topic in MJ Hardcore Tech: Epic Journeys to Greatness
Future post hold -
Project “Tomahawk”
ghetdjc320 replied to ghetdjc320's topic in MJ Hardcore Tech: Epic Journeys to Greatness
I believe so. Will scope it out with the shop and see what can be done. With the x pipe, I'm not terribly concerned about keeping things equal length. -
Project “Tomahawk”
ghetdjc320 replied to ghetdjc320's topic in MJ Hardcore Tech: Epic Journeys to Greatness
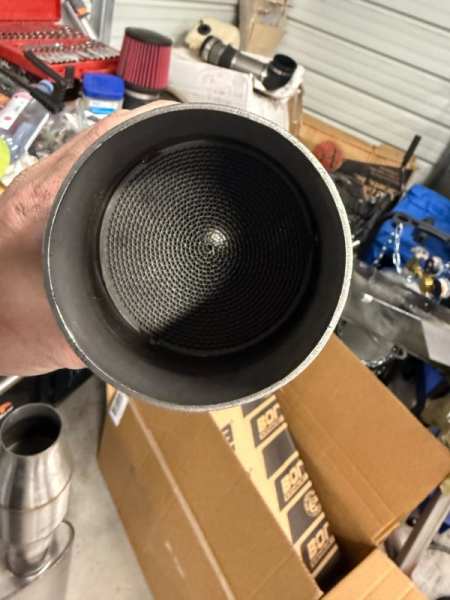
Dual 2.5 is the plan. Picked up a borla dual in/out muffler with internal x pipe, a pair of stainless spun cats and some o2 bungs with heat sinks. Once exhaust is wrapped up I’ll do the final touches on electrical to get the engine running. -
Project “Tomahawk”
ghetdjc320 replied to ghetdjc320's topic in MJ Hardcore Tech: Epic Journeys to Greatness
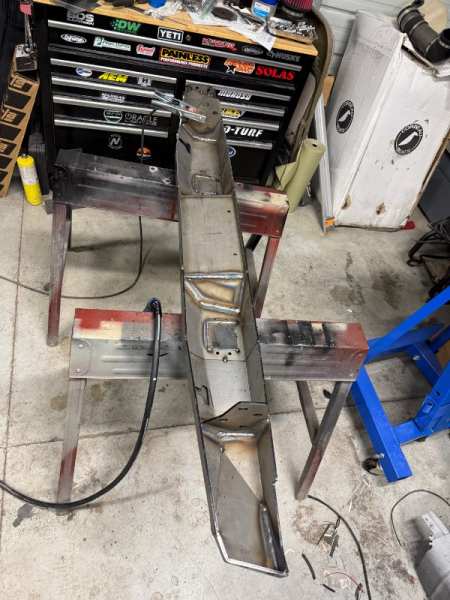
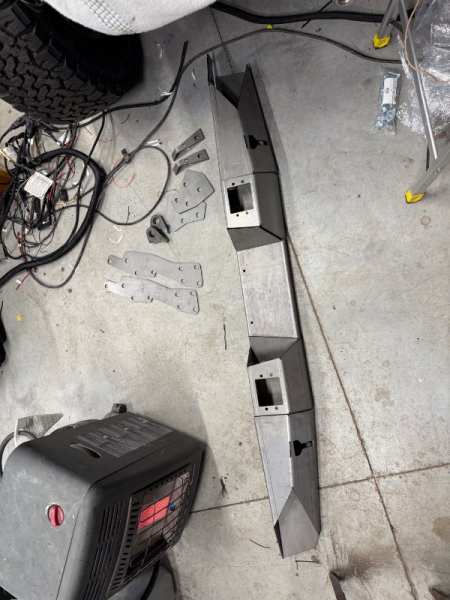
Some brief updates: added a clutch switch that will act as both a starter safety and a clutch signal to the ls pcm for fuel and spark table triggers. The switch I found from my local oreiolys was for a Hyundai Elantra of all things. I’m sure it fits multiple years but I went with 2006. The switch has a normally open and a normally closed set of contacts. The normally open will be for the starter so the circuit will close when pressing the clutch. The other set of contacts is what the ls PCM is looking for and opens the circuit when the clutch is pressed. Fabbed up a little bracket with some 16awg sheet and bolted it to the clutch pedal bracket. Added a small stack of washers as shims to set the proper switch depth. Works very nicely. The jeep is headed down to the exhaust shop tomorrow so I finished installing the front and rear driveshafts and dialed in the front suspension. Also fit up the rear bumper just so they can see what brackets will be on the frame. You can see how I modded this bumper. I cutout some 3/16 plate and welded shut the bumper lights and the various accessory bolt holes they drill into these. All in all I guess this is currently the best option now that JCR isn’t producing the rear bumper anymore. I do like how this turned out (still have some additional welding and grinding to do) but it was a lot more work. I set my upper and lower control arms as well. Lowers are at 16” plus a 1/8” shim in the control arm adjuster in the frame side. Uppers are set to 15” eye to eye. That gave me a caster of 10* which is quite nice. I do like how you can get these nice specs with these lower lifts.


-
I’ve had to straighten my pinch seam in a few places as well to get a better seal. Let us know how they turn out for you. If you wouldn’t mind, post up in that thread as well for future reference
-
Is your truck lifted?
-
Project: Slippery Slope – a ’91 MJ runner
ghetdjc320 replied to Gjeep's topic in Member Projects: Your Comanches
I can say from my experience that those springs do not settle much. They are simply out of spec for stock replacements. But they are excellent lift springs . -
MTS sells new Renix MJ sending units
-
Renix CPS is a VR sensor. But as stated above, the coil output is what the tach receives and it's the same for HO models. If you swap to the HO cluster, you can use either a fuel level conversion module or just grab an MTS sending unit for a 91-92 MJ.
-
Oh nice! Is that a factory switch then?
-
I know MJ’s didn’t come with a clutch starter safety switch but has anyone ever added one? If so, what did you use? I’m in need of one for my engine swap as the clutch signal activates the decel/coast fuel and spark tables on my pcm.
-
I’d suggest the 1280 springs unless you’re some major weight in the bed. Both springs offer the same free arch and provide basically the same lift.
-
Project “Tomahawk”
ghetdjc320 replied to ghetdjc320's topic in MJ Hardcore Tech: Epic Journeys to Greatness
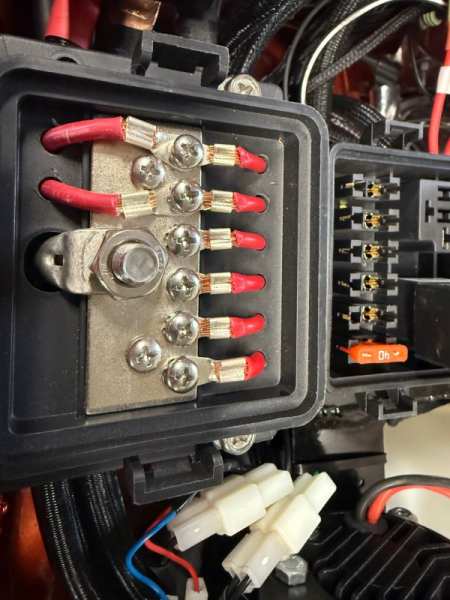
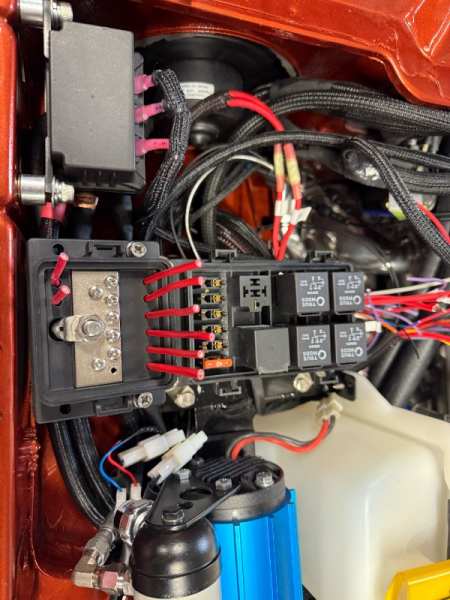
Well, what a day with wiring. Couldn’t figure out what was going on with my power to the pcm. When the key was off the pcm ignition was on but went off when the key was on. Turns out painless wired the relays all wrong and stuck the ign power on the N/C side of the relays. Took several hours to rewire but I’m happy to report that it’s working perfectly now. Was able to test engine circuits now and they are working great. There has been countless mods along the way such as wiring in a normally closed relay into the brake circuit to provide the pcm with the necessary signal to deactivate the cruise control. Also wired in the Dakota digital signal converter and set it up to provide the 8k ppm signal for the jeep speedo. I gave the pcm the correct 128k ppm signal along with the appropriate speedo gear for the ratio and tire size. I’ll calibrate the pcm further if needed so it sees the exact speed along with the speedometer. All the wiring, PCM and TAC module fit under the dash using the modified renix ecu bracket though it is a painstaking process. Was also able to mock up the air intake and it’s a perfect fit. I used a 4”-3.5” bending reducer, genuine carbon fiber tubing then a 30* coupler which I shortened then the maf/oat and filter. The errant relay system ridiculousness


-
Project “Tomahawk”
ghetdjc320 replied to ghetdjc320's topic in MJ Hardcore Tech: Epic Journeys to Greatness
Tidbit of tech info for posterity: the Tom woods np242 sye kit shift rail plug thread size is 5/8-18 and approx 1/2” long. This is also a common automotive oil pan plug size. This also fits the switch port on the NP242. -
Project “Tomahawk”
ghetdjc320 replied to ghetdjc320's topic in MJ Hardcore Tech: Epic Journeys to Greatness
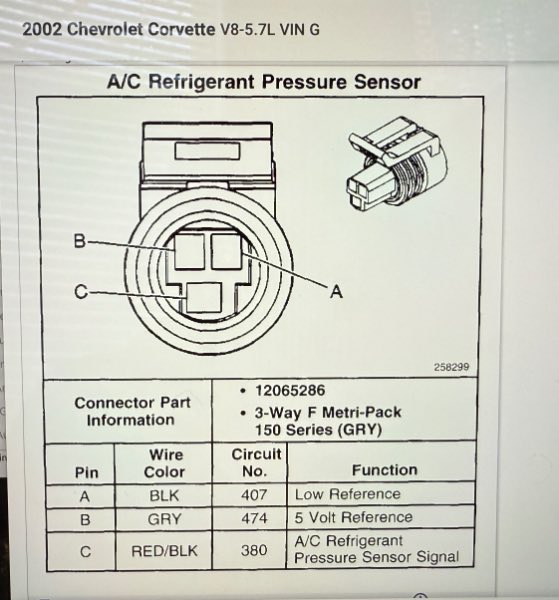
Added the correct wiring for pcm control of the ac system. Should be a factory like integration now utilizing the GM pressure sensor. The trinary switch has been eliminated. Will still be using the oe freeze switch for the evaporator core as well. Also swapped over the correct 38 tooth Speedo drive gear so the pcm will read the correct speed which is relayed through the Dakota digital 128k ppm sender. The 4k ppm output from the GM PCM will be sampled and up converted to 8k to run the 120mph Jeep speedo through a Dakota digital signal processor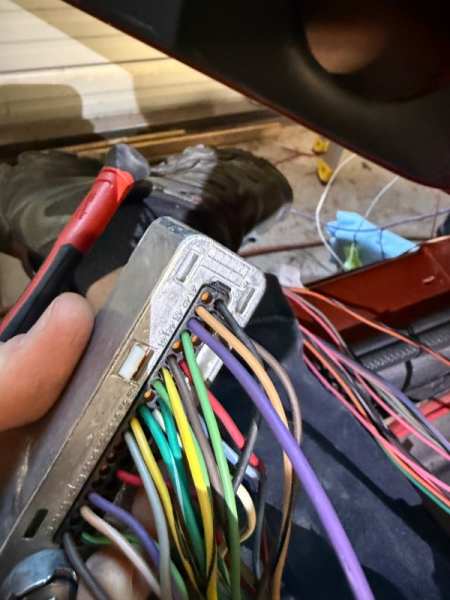
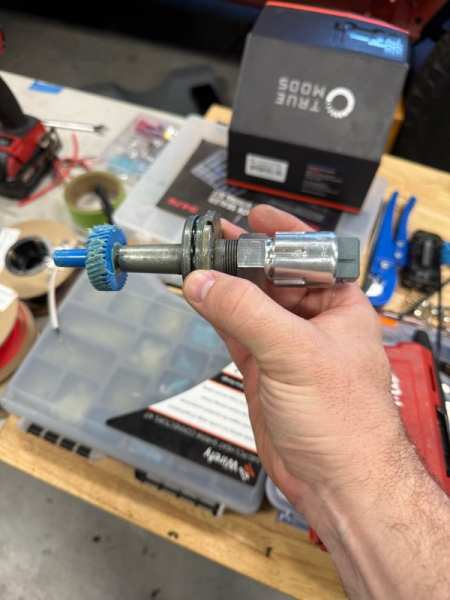
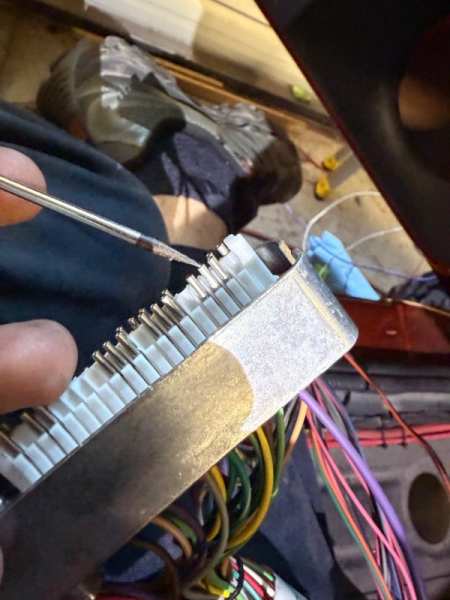
-
Project “Tomahawk”
ghetdjc320 replied to ghetdjc320's topic in MJ Hardcore Tech: Epic Journeys to Greatness
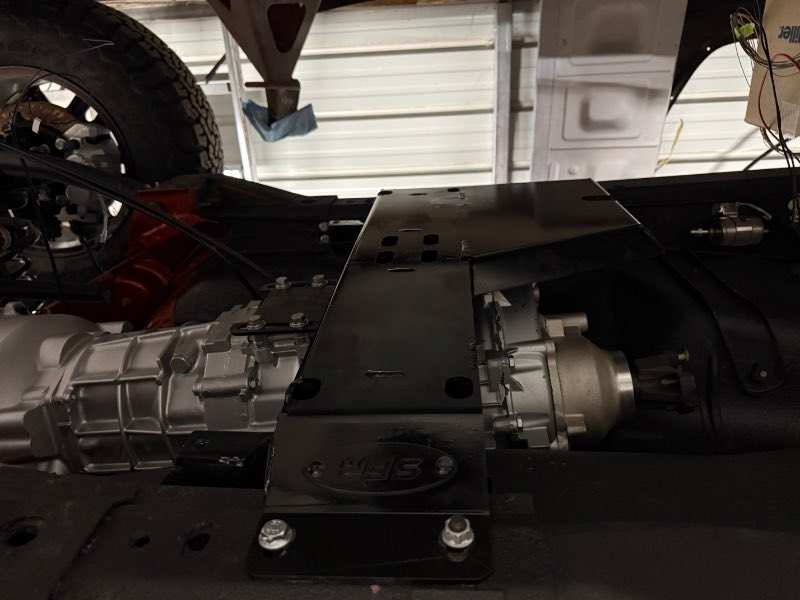
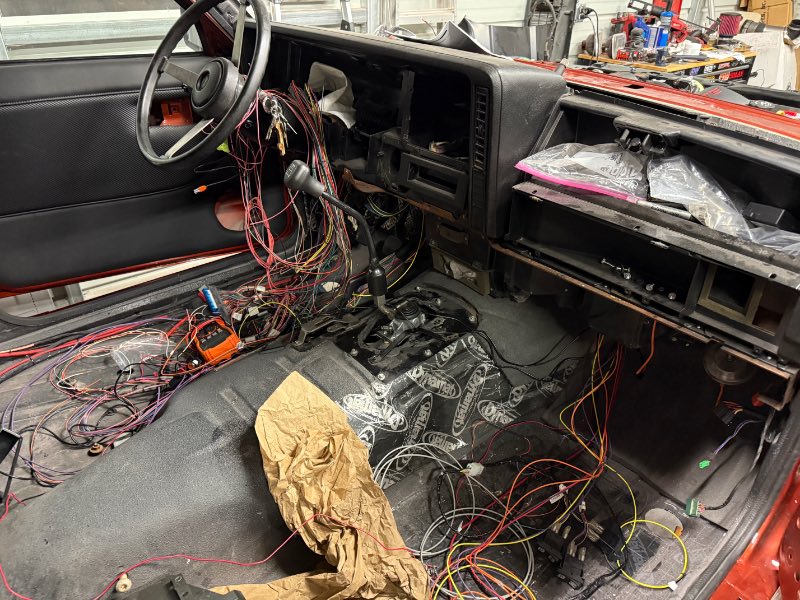
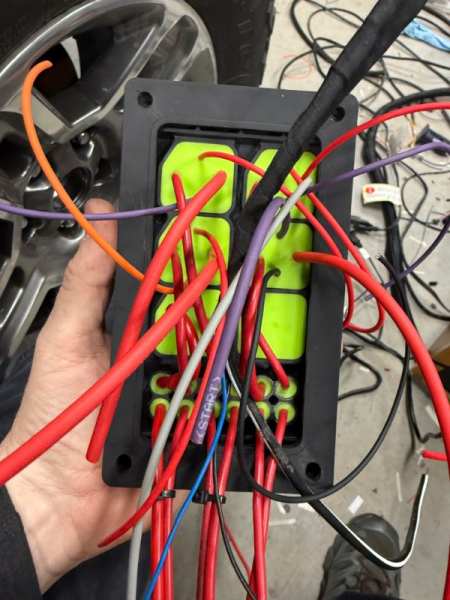
Under hood wiring is now complete with all circuit installed and tested. Everything works excellent. onto the interior side now. Also with the unneeded tabs removed from the np242, I was able to keep the SFR tcase skid/crossmember tucked up neatly. There is exactly a 1/4” gap between them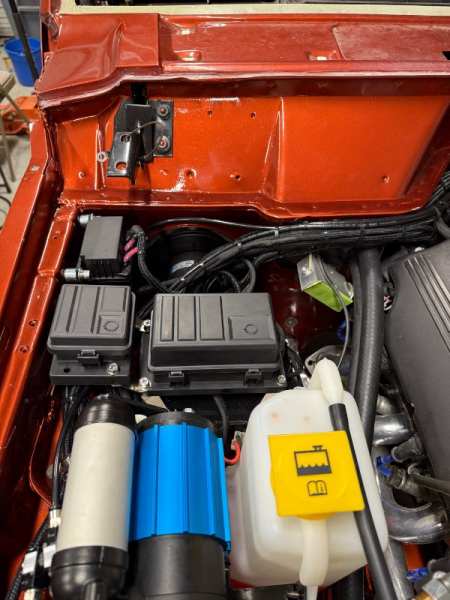
-
Project “Tomahawk”
ghetdjc320 replied to ghetdjc320's topic in MJ Hardcore Tech: Epic Journeys to Greatness
Pure wiring madness. Took a break from electrical and started assembly of the rear bumper. I wanted the diy version as I wanted to do a few mods to it for a cleaner look. Here is a glimpse of my exhaust system as well. Lots of meticulous parts selection and test fitting. The cats are stainless spun vs ceramic core.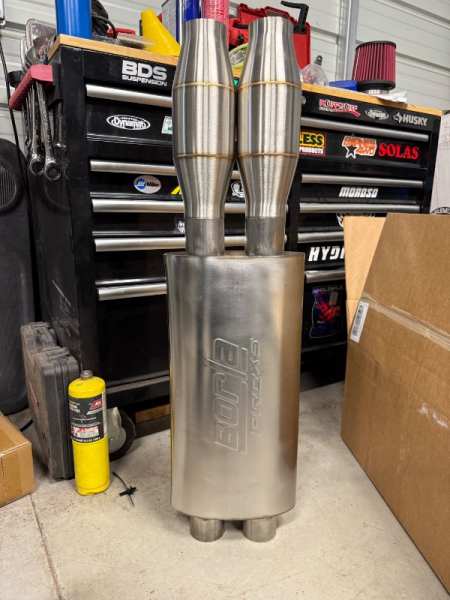
-
The dog would probably love it
-
Project: Slippery Slope – a ’91 MJ runner
ghetdjc320 replied to Gjeep's topic in Member Projects: Your Comanches
Looking great! -
Project “Tomahawk”
ghetdjc320 replied to ghetdjc320's topic in MJ Hardcore Tech: Epic Journeys to Greatness
So, I've decided to do a little writeup on the Jeep A/C system and how it pertains to an LS swap, particularly a C5 corvette LS1/6 swap. For a little back history, The Jeep HVAC control deck sends a signal to the ecu known as A/C select. The Jeep ECU then receives a signal on another terminal that is routed through the A/C pressure switch and the evaporator thermal sensor known as A/C request. The ECU may have some logic processors that will account for such things as engine coolant temp or other criteria before it triggers the A/C clutch relay, but it doesn't account for much. Now onto the LS side of things. The 411 PCM had many different programs that could be flashed to it. The C5 corvette programming had two versions of AC control. One was called "manual" and the other "automatic". This has to do with the climate controls or HVAC deck. For the version that had "automatic" controls, there is a serial data line that goes into the PCM that contains some of the HVAC control deck logic functions. The "manual" AC systems had an "A/C request" signal that goes to pin 17 on the red connector. This was a 12v- or ground connection. It is noteworthy that this is not the same programming as the F body cars or any of the trucks as those mostly had a 12v+ signal on this pin. It can get to be annoying and confusing when people refer to "ls" engines and "411" PCMs as if they were all the same for Gen 3 engines. Most references I see from wiring harness manufacturers and aftermarket PCM tuners are using and referring to f body or Camaro programming on the PCM. Back to the C5 corvette programming on the 411 PCM; In regard to the AC system, the corvette uses a 5v A/C pressure sensor with a female M10 sensor port that goes on the high-pressure side of the system (between the drier and expansion valve high side for most Jeep applications). The GM PCM receives the ac request ground signal, checks the ac pressure signal and integrates all of the logic algorithms such as engine coolant temp, throttle position, RPM, engine load (MAP), and vehicle speed to determine when the compressor will be triggered and when fans 1 and 2 will run (on a Jeep triple fan setup, Novak recommends running the driver's side and center radiator fan as "fan 1" and the passenger side radiator fan as "fan 2"). The PCM also receives confirmation that the A/C clutch has received an activation signal by sensing voltage on pin 18. I've attached a diagram below of the way this is all wired. I have thoroughly subscribed to the guidance Novak has provided to "make the engine think it's still in its original application" to the extent possible. I'll post up how I will be wiring my system shortly but i'll be following the GM layout as much as practically possible. Note the diagrams for the ac system and the connector view for the ac pressure sensor Air Conditioning - Compressor Circuit 2002 C5.pdf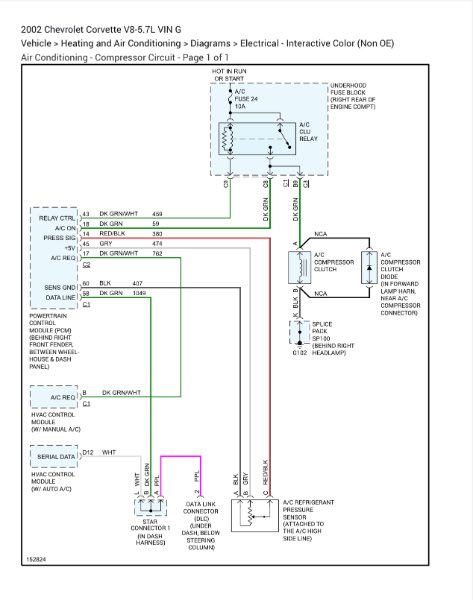
-
It is the 3/4 gear synchros that are the problem in most newer kits. Grab an extra pair of 1/2 synchronizers and use those on 3/4. You could probably get away with reusing the 3/4 synchros if they are in good shape. Pay attention not just to the synchro teeth but also to the cone surface on the back side. That is the portion that provides the needed friction for proper spin up and gear engagement. Here is the link to the proper earlier ax15 3/4 synchronizers: AX15 R151 1-2 Synchro Ring TOY-14C - AX5 5 Speed Jeep Repair Part
-
I would add on an extra pair of synchros as well as the ones they sent had the wrong tooth design. I don’t recall if it was the 3/4 or 1/2 that were incorrect. I believe it was the 3/4. I’ll check my notes