


ghetdjc320
-
Posts
5212 -
Joined
-
Last visited
-
Days Won
1
Content Type
Profiles
Forums
Gallery
Everything posted by ghetdjc320
-
Two ways I can see going with an MT that would be neat (just my opinion though). 1. Restore the MT numbers matching and keep it pristine. 2. Resto mod and go with the MT theme. It was supposed to be a more serious hauler version of the MJ so I’m thinking maybe 2-3” lift with factory rake and a diesel. That would be unique! I just wouldn’t use a long bed off-road without bobbing the bed. Maybe it’s just coming from the wrangler world to the MJ world but the departure angles are already tough on my swb. Still dreaming of an 88 chief build though. Maybe one day if I’m stateside again
-
Just keep in mind, this will not be a “cheap” swap. Even with a free engine tranny and tcase, there will be some decent expense to get it to work in an MJ
-
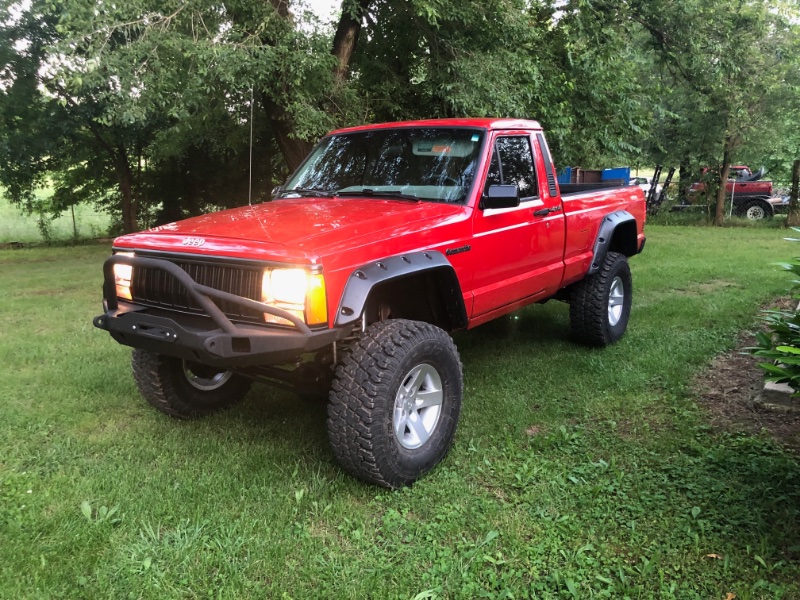
Looks just like mine used to
-
A stock 4.0 should have ni overheating issues though on a good functioning oem system. All radiators are not created equally though. Also, high volume water pumps need to be part of a high volume cooling system or else they flow the water faster than the radiator can efficiently cool it. Switching from a high volume flowkooler to an oem pump actually made my Jeep run cooler. But my engine is by no means stock
-
I had a 5.9 ZJ with those vents actually. Vents and scoops need to be strategically placed to do any good since there are high and low pressure spots on the hood. All of that becomes somewhat mute though when crawling since there is little to no airflow over the hood. Hyline off-road had some panels that were similar to some other ones you posted here but they had some portions venting and other scooping in air. I run a Mach1 hood scoop on my mj but there was significant bodywork involved to get the lines just right.
-
Pics please! My box was pretty rusted out also but I was able to patch and braze in multiple panels to get it repaired. First started with media blasting to see the extent of the damage.
-
Use @derf’s calculator with your tranny, axle and tire specs. It is seriously an awesome calculator.
-
Beautiful work! I was thinking of using the autometer invision. It looks like it would fit the opening.
-
Bought it off of Amazon just searched for “receiver hitch license plate”. There is also a mount for a license plate on the d ring tabs from quadratec.
-

Welding axle perches to an 8.8
ghetdjc320 replied to rylee144's topic in MJ Tech: Modification and Repairs
did the same with my 8.8’s and 44’s -
Yes they do . Np 205 I believe is a bolt up to the sm465 otherwise I suppose an adapter to a 231 would be needed. Wonder how a 205 tcase would fit. Fabbing up a new crossmember would be in order I’m sure. The sm465 is short though so the 205/465 combo probably wouldn’t be any longer than the stock drivetrain
-
Just a thought though too, efi on any sbc is super simple. There are such a huge amount of stand alone efi systems now that provide much more reliability and performance than any carb can offer. Fuel tech and Holley snipers are meant to replace a carb and give you step by step instructions that make the process very simple. Plus they can offer timing control. I like carbs on cars but after running 6 different carb setup off-road I switched to a Holley sniper setup and never looked back
-
What year MJ is this going in? See what the psi requirements are of your carb and select a pump appropriately. I’d recommend and in-tank pump of the right pressure rating. Other alternatives are in-line and mechanical block mounted pumps. The in-line fuel pumps can be quite noisy. The best in-line I’ve used is the Edelbrock quiet-flow.
-
He probably uses them just to “stage” the truck like when they fully furnish a model home in a new neighborhood. Not saying it’s a bad build but when someone is building for the sole intention of selling it corners tend to be cut
-
It was done on the side of cheapness. Hack n tap sye RC lift kit Core arms (probably the cheapest versions) 3.55’s on what appear to be 33’s very obvious respray you can see rust through the passenger rockers no emblems cheap front bumper Looks like they swapped on the newer doors. If the wiring is super clean and everything was professionally done it may be worth the money but it looks to me more like a flip from someone who does this for a living.
-
Brake and turn signal lights issue
ghetdjc320 replied to Not's topic in MJ Tech: Modification and Repairs
Double check your bulbs and sockets also. It is very common for the contacts to get fouled or shorted and cause these problems. I went LED’s then switched back to conventional bulbs for all but the reverse lights. Didn’t like the brightness in a set of nos taillights. Made it look a bit odd but I wasn’t using the red/amber LEDs which would have probably looked much better. @MiNi Beast is right, you need an led flasher or you can also use an led ballast resistor to increase the load. Note that an LED flasher is not the same as just an electric flasher which most parts stores have on the shelf. The led flasher is a digital mechanism that doesn’t rely on the load of the circuit “flash”. -
Definitely agree. I run the JCR built rear bumper and use a receiver hitch license plate adapter. Works great and my clearance is much better than most.
-
Checkout the painless 10111 harness. It used the same fuse panel and bulkhead connector and is very universal. Made for an 87-90 YJ
-
There are so many options here. For one, all you need to do is get the engine to run “stand alone”. There is very little from the original harness that will need to be connected to the new engine. You’ll want to connect the oil presssure gauge, water temp, and oil pressure. Other than that you just need 12vto the coil while in the crank and run positions and a fuel pump for low pressure. The fuel system will be a bit of work.
-
Welding axle perches to an 8.8
ghetdjc320 replied to rylee144's topic in MJ Tech: Modification and Repairs
If using a stock style driveshaft, the pinion should be parallel to the transfer case output. If using a double cardan style aftermarket shaft it should be pointing 1-2* below the transfer case output. Read this for info: https://4xshaft.com/blogs/general-tech-info-articles/tail-shaft-conversion-kits -
Your floor mats will fit better without the braces lol
-
Heim joint steering components
ghetdjc320 replied to rylee144's topic in MJ Tech: Modification and Repairs
-
Heim joint steering components
ghetdjc320 replied to rylee144's topic in MJ Tech: Modification and Repairs
Yep you got it. Those would work for the bottom of the tie rod/knuckles. You’ll need some safety misalignment spacers for the top though since the joint needs to flex quite a bit. I picked up the parts from ruff stuff and they’ve been perfect for 7 years now. Just make sure not to use additional hardware like extra washers or spacers where they aren’t needed. The ones in your pics are a bit cobbled together and the bolt length will put a lot of sheering force on it that could be greatly reduced with an appropriate shorter hardware stack like the diagram above. -
Heim joint steering components
ghetdjc320 replied to rylee144's topic in MJ Tech: Modification and Repairs
For the safety misalignment spacers and related parts, look at the components in this kit: https://www.ruffstuffspecialties.com/34STEER-REPLACE.html there are Lin’s to the individual pieces. I would assume your are running 3/4” heims which would use a 5/8” bolt through the pitman arm and knuckles. 5/8 is the largest straight bore the stock knuckles can safely handle. -
Heim joint steering components
ghetdjc320 replied to rylee144's topic in MJ Tech: Modification and Repairs
Interesting to see the drag link on top of the pitman arm. Probably done that way to keep it Parral el with the track bar. You can keep the drag link on top of the knuckle and the tie rod below like you have it in the picture but you need to add some safety washers to that setup. The safety washers will be a cone shaped washer that is about the same size as the heim OD. That way if the heim joint should fail, the steering linkage will still remain in place. I’d also use all new shorter grade 8 bolts with new grade 8 locking nuts and lock washers. Here is a simple diagram about how your combo would be setup:
