


ghetdjc320
-
Posts
5212 -
Joined
-
Last visited
-
Days Won
1
Content Type
Profiles
Forums
Gallery
Everything posted by ghetdjc320
-

GM 3.8 Supercharger on a 4.0
ghetdjc320 replied to 89 MJ's topic in MJ Tech: Modification and Repairs
Yeah, it’s a big increase but not too much given the displacement of the engine in the first place. You may have already seen these but here is a link to the guy building turbo manifolds and kits for 4.0’s: https://www.ebay.com/itm/Jeep-cherokee-XJ-20g-turbo-kit-1991-2001/324284305882?hash=item4b80d9d1da:g:GTQAAOSwq9ZfUmVa He’s been here on the club before and own skankfoot racing. Boostwerks also makes a nice turbo manifold and turbo unit. I run a TJ JBA downpipe so the turbo downpipe would have to be fabbed up on my case. The turbo does fit nicely under the intake manifold and keep the engine bay pretty clean. Cleaner looking install than a supercharger imho. And if all your looking for is additional fueling than a rising rate fuel pressure regulator with a boost reference port will work fine. That and an AFR gauge for sure. One with logging like a zeitronics would be best. -
GM 3.8 Supercharger on a 4.0
ghetdjc320 replied to 89 MJ's topic in MJ Tech: Modification and Repairs
6-8lbs is not bad on a good running engine. Good for about 75-100hp -
GM 3.8 Supercharger on a 4.0
ghetdjc320 replied to 89 MJ's topic in MJ Tech: Modification and Repairs
The boosted tech setup just uses an auxiliary injector controller form split sec to add fuel in boost. The split second device has a built in map sensor that gets connected to the manifold to sense boost and fires an auxiliary injector that is mounted to the supercharger inlet side. They feed fuel to the injector using the Schraeder valve on the newer style fuel rails. It’s a very simple setup but they’re leaving power on the table by only adjusting fueling. -
GM 3.8 Supercharger on a 4.0
ghetdjc320 replied to 89 MJ's topic in MJ Tech: Modification and Repairs
Yep. Splitsec.com very simple but overpriced devices -
GM 3.8 Supercharger on a 4.0
ghetdjc320 replied to 89 MJ's topic in MJ Tech: Modification and Repairs
You can use a rising rate fuel pressure regulator for the most basic fuel increase under boost. Superchargers have a fixed boost to rpm ratio so they are a bit easier to tune imho. Skankfoot racing makes a nice little turbo setup also. Stand alone efi is what I’ve done in the past but there are several tuning options. Boosted tech has kits for the Renix and obd1 MJ’s and use a split second auxiliary injector controller. It has a built in map sensor and adds fuel in boost. No timing control though and not much tuning. -
1991 Eliminator Resto-Mod
ghetdjc320 replied to ghetdjc320's topic in Member Projects: Your Comanches
Little sample . biggest difference I noticed (other than the noise) was the 3k+ rpms. Much harder pull at higher rpms which is how this engine was built. The stock intake was chocking it. Would have been ok with a stock 4.0 though. FullSizeRender.mov -
1991 Eliminator Resto-Mod
ghetdjc320 replied to ghetdjc320's topic in Member Projects: Your Comanches
Finished the Thor intake today. Love the amount of room I picked up under the hood but I can hear that engine a little too clearly. I think it’s probably the bored throttle body. Thinking about getting one of the painless ones down the road but a turbo or supercharger would also negate the sound lol.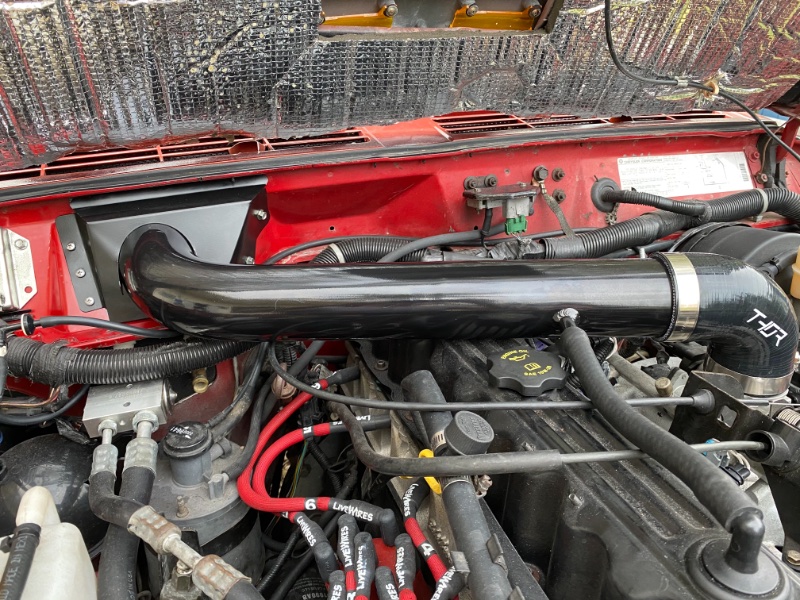
-
Which Battery Operated Impact Do You Own?
ghetdjc320 replied to Tex06's topic in MJ Tech: Modification and Repairs
X2 corded impacts are great and super powerful. To me, the cord is more convenient than a compressor and hose -
Which Battery Operated Impact Do You Own?
ghetdjc320 replied to Tex06's topic in MJ Tech: Modification and Repairs
Same here but I have the newer octane models. They’re pretty close to the same now -
1991 Eliminator Resto-Mod
ghetdjc320 replied to ghetdjc320's topic in Member Projects: Your Comanches
23’ lift plus very heavy trailer, I like how the truck sits level under load. The squatting dog look of those leveled trucks is pretty nasty.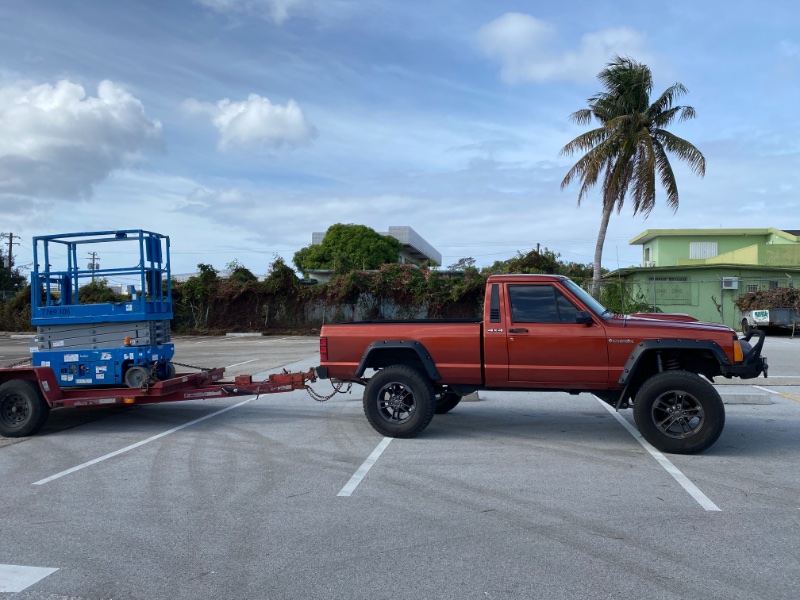
-
1991 Eliminator Resto-Mod
ghetdjc320 replied to ghetdjc320's topic in Member Projects: Your Comanches
They didn’t remove the bed or doors. They did a decent job spraying since it’s PPG Dimzler paint and has a huge amount of pearl in in. I’ve been going around myself and painting trim pieces one at a time for parts they missed. Really happy with how all the little details are turning out but it is very time consuming, especially all the plastering and trim restoration. At some point I’m going to tackle the engine compartment and make it a show truck under there with braided look and a stellar paint job. Been debating whether or not to turbo/supercharge it also. Once I get a direction there I’ll see what can be done. Brake work is next on the list for now. I frequently pull my jet ski through the mountains here and brakes are decent but I want brakes like I had on my wrx. Pulled a scissor lift for work the other day (2+ tons with trailer). Brakes were atrocious for that. -
1991 Eliminator Resto-Mod
ghetdjc320 replied to ghetdjc320's topic in Member Projects: Your Comanches
THOR intake coming soon along with front wilwood brakes and rear disks. -
1991 Eliminator Resto-Mod
ghetdjc320 replied to ghetdjc320's topic in Member Projects: Your Comanches
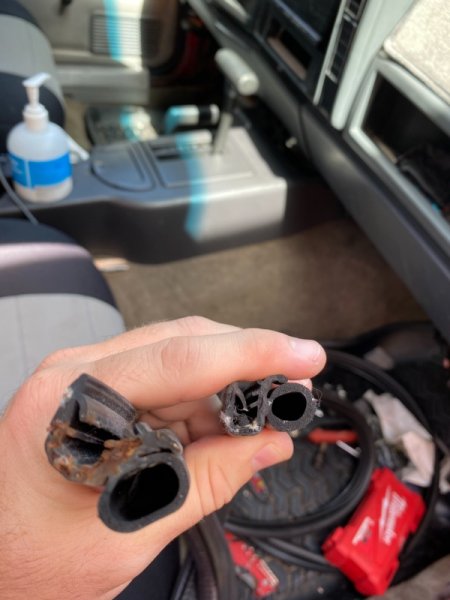
Time for some more updates. I had originally installed some aftermarket weatherstripping for the doors but I just ordered and installed new Mopar weather stripping and the quality and fit is unbelievably better. Also been working on repairing and restoring every piece of cracked or damaged plastic trim in the truck. Will be adding some more audio down the road so I took the time to track down all the little rattles and noises from the doors. Super quiet now!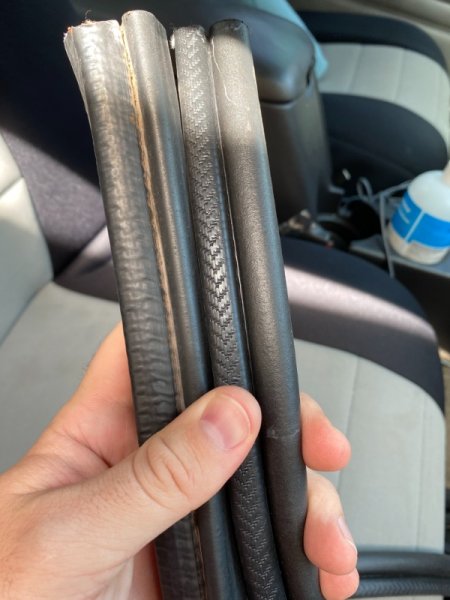
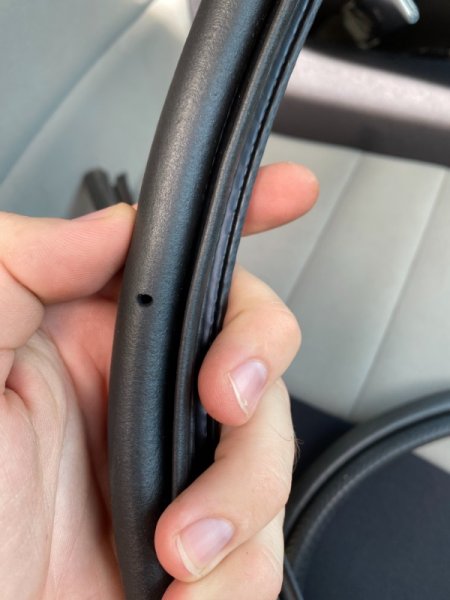
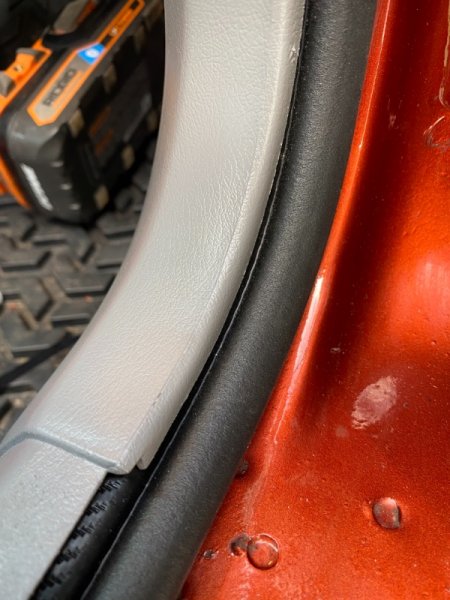
-
89 Comanche Kosse TX
ghetdjc320 replied to sammisox's topic in Craigslist/Marketplace/eBay... i.e. Not Your Stuff
Sent the info to my fam in Austin -
Will not start, Fuel pump problem
ghetdjc320 replied to Tyson Josh's topic in MJ Tech: Modification and Repairs
-
It would be neat to have a virtual comanche car show. Maybe someday it can be arranged in person
-
@Pete M, so would you be averse to the idea of a special discount or coupon from like quadratec or dirt bound off-road etc? Some cc merch would be neat. I’m thinking just a regular monthly mjotm going forward. Basically a virtual car show. If mjotm is not a good platform how about mjoty? It’s just a thought. Something that wouldn’t cost the club anything nor promote any particular vendor would be nice. Even so, I believe some of our vendors give us discounts for being members. DBO comes to mind as does Hells Creek but I might be wrong
-
Yep I used those bolts before too. No nobody cares about the light here. Never had an issue with it in Austin either
-
I know the mjotm section doesn’t seem to get much love. Has anyone tried to reach out to a vendor and see if they may be interested and sponsoring an mjotm or maybe mjoty prize? That would probably generate some interest and make for a neat perk. Nothing extravagant but just a little prize might be neat. I wouldn’t mind throwing in some switch trim covers maybe once or twice a year to the winner. Just a thought
-
Yeah I noticed all his posts were gone from the classifieds. Figure one of the mods may have removed them. The ranks all make sense it just seems odd that it’s based off of posts in any section of the forum (classifieds, pub etc) vs the mods/tech and build sections if that makes any sense. I suppose it all works out in the end.
-
A recent post from Minuit got me thinking about this. Most times if I’m new to a forum I look at the number of posts from users to help give an idea on the feedback received. However, some posters here have posted great tech but only have a few hundred posts. Others can reach thousands of posts with “that’s cool”, “I never thought about that” and so forth. Is there anyway to rank based on the actual word count or sections where someone posts vs just a post count? For instance, tompeter is no more but had several hundred posts somehow confined to the classifieds section. Not sure how that happened since you have to have some other posts to make it into the classifieds section. Just some ideas
-
I’ve got an extra license plate in the cab lol. Plus here on island many vehicle don’t even have plates so theft hasn’t been an issue. You could use the safety nuts also like I use for my KC lights
-
Keep forgetting to post up a pic of my license plate setup:
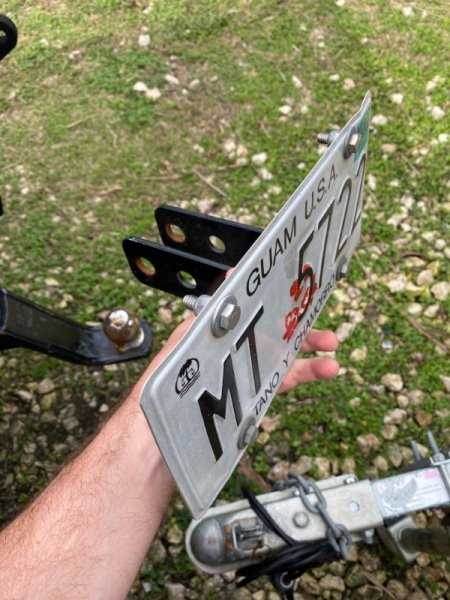
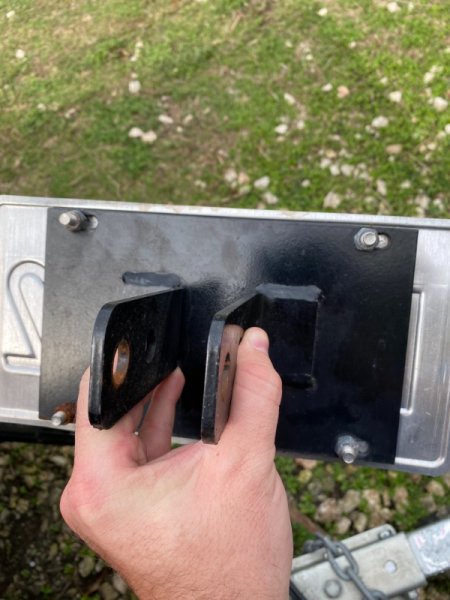
-
I should add, I’m big into pwc’s so throw in a new Seadoo rxpx and rxtx.
-
I’d have two garages, one for projects and one for drivers. project garage would have Jeep’s lol drivers garage: McLaren and Aston Martin