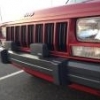
1989 Eliminator Posted May 17, 2017 Posted May 17, 2017 Hey all, Here is the model and information you need to know about my Jeep. 1989 Jeep Comanche Eliminator, 4.0L Straight 6, Automatic Transmission, 2x4, I have A/C and cruise control. I have managed to complete my closed to open cooling system conversion. I did not spend a lot of money and I also did not go the cheapest route. I shouldnt have to replace any more water pumps or worry about cooling ever again. Here is a list of components that I bought: //////////////////////////////////////////////////////////////////////////////////////////////////// 2-Row Radiator - $100 https://www.amazon.com/gp/product/B01EVWTXLY/ref=oh_aui_detailpage_o09_s00?ie=UTF8&psc=1 Quality: 8/10 Functionality: 10/10 Comes with elbow and straight radiator cooling line fittings. Radiator Cap - $35 https://www.amazon.com/gp/product/B01F93S3E2/ref=oh_aui_detailpage_o00_s00?ie=UTF8&psc=1 Quality: 9/10 Functionality: 7/10 It is very hard to turn on and off the radiator. 4' of 5/8" Black Heater Hose - ~$15 total Autoparts store 4' of 3/4" Black Heater Hose - ~$15 total Autoparts store (2) 5/8" to 3/4" Hose Adapters - ~$15 total Autoparts store One Gallon of Concentrate Coolant - $15 Autoparts store One Gallon of Distilled Water - $3 High Flow Thermostat Housing - $33 http://www.hesco.us/products/7882/cooling-system/133247/hi-flow-thermostat-housing-hfth2#.WRuBvWjyuwU High Flow 180deg Thermostat - $19 http://www.hesco.us/products/7969/thermostats-and-housings/43013/hp--gmfordamcjeep-thermostat-180-degree-4364#.WRuIYGjyuwU Thermostat Housing Spacer - $37 http://www.hesco.us/products/7969/thermostats-and-housings/43017/thermostat-housing-spacer-hesths#.WRuIiWjyuwU High Temp Blue Silicone Gasket Maker - $12 Autoparts Store Hi-Flow Water Pump w/ Gasket - $87 https://www.4wd.com/p/flowkooler-high-flow-water-pump-natural-1747/_/R-GNLS-1747 Hose Clamps - ~$10 Autoparts Store 6' of 5/16" Hose for Radiator Vent - ~$10 Autoparts Store (1) 5/16-18 by ~2" long (1) 5/16-18 by ~1-1/4" long *Not exactly sure on length because I gave up on using the housing spacer (I will explain later) *The housing spacer and thermostat housing comes with gaskets. Total: ~$396 Well worth it, will never have a cooling issue. Works like a charm. My Jeep is preventing global warming from happening. //////////////////////////////////////////////////////////////////////////////////////////////////// A few pictures of stuff I bought... Start taking off parts... I had to take off the supports on top of the radiator, loosen the belt, and accessory fan. See photo below. NOTE: See the square rubber supports on top of the radiator? You need to reuse those. Take them off and put them on the new radiator so you do not forget... :doh: At this point I drained the coolant and took off all the hoses and transmission cooling lines. There is no pressure in the transmission lines so no fluid should leak out! Here is my old radiator taken out of the truck. This also shows the fitting types for the transmission lines. See the bottom elbow transmission fitting? My new radiator came with a replacement. The stock one is one piece and not a swivel fitting like the new fittings. You MAY have to grind, file, sand, etc. the diameter of the new elbow fitting so the plastic quick disconnect fitting will slide on the new fitting. Either that or you can file the plastic piece like I did. See below. ^^ That plastic piece goes on the elbow fitting ^^ I found that there was two holes that did not line up to support the radiator...Both sides. So I zip tied them on. Not too important since there are other brackets supporting the radiator on the top. First issue I found with the housing spacer... The belt comes pretty close the to lower housing bolt. See below. Also you can see two brass inserts. That is a 1/4" plug on the right (wrapped in teflon tape) and 3/16" plug on the left. Normally sensors go there on the newer jeeps. The Renix older jeeps have the sensors elsewhere. Second issue because of stupidity (Halfway my fault). Hardware store worker said the housing bolts were M8-1.25. They are not... They are 5/16-18. So I stripped out the holes and the bolts. I said screw the spacer and used original bolts. Bad luck for trusting the hardware store kid. :fs1: A little fabrication was needed for the radiator cap on the support bracket. It comes pretty close. Also, the vent hose is a 5/16" hose. I re-purposed my coolant reservoir bottle for my overflow tank. I forgot to take a picture but the two heater hoses go straight into the heater core. This shouldn't affect the A/C as the heater valve is open when the A/C turns on. This info is straight from the Jeep service manual I have. Heat comes out of the vents when the blower fan isnt on which is the only case which could be bad... Heat could build up without the blower fan on and melt/overheat things in the HVAC. Other helpful things to note: Make sure to put fan belt shroud/cover on before the new radiator is in. Make sure to put the rubber supports from the old radiator onto the new radiator. !!!!!!!! LET THE SILICONE CURE BEFORE FILLING THE SYSTEM WITH COOLANT !!!!!!!! Feel free to message me for any questions about my experience with this upgrade. :cheers: :rock on: :clapping: :waving: . :MJ 2: .
kill_burst Posted May 18, 2017 Posted May 18, 2017 How did you wire the electric fan? I know this seems to be an issue. Also, how did you repurpose the old coolant bottle? A lot of folks get a newer one but seem to have issues getting them to fit correctly.
1989 Eliminator Posted May 18, 2017 Author Posted May 18, 2017 How did you wire the electric fan? I know this seems to be an issue. Also, how did you repurpose the old coolant bottle? A lot of folks get a newer one but seem to have issues getting them to fit correctly. The electric fan is stock wiring. The fan +12V wire comes from the secondary fan relay. The ground wire from the fan goes to ground. The coolant temperature switch located on the radiator is what switches the relay on/off. To re-purpose the coolant bottle, the 5/16" line coming from the radiator overflow line by the radiator cap was routed into the bottom of the bottle. I managed to find a rubber grommet that fit in the bottom of the bottle and was about the same outside diameter as the hose. So, I inserted the 5/16" hose into the grommet with some Seal-All and then pressed all of that into the bottom of the bottle.
kill_burst Posted May 22, 2017 Posted May 22, 2017 awesome, thanks for the information. This is my next project, had an idea to repurpose the overflow bottle. Just wasn't sure how to go about it. did you install a vent tube?
Goatman Posted May 24, 2017 Posted May 24, 2017 Have you guys been having good luck with these radiators? I haven't perused a Jeep forum in a long time and wonder how these radiators are doing? Great price if they last. I need a radiator right now, just blew one out today.
HOrnbrod Posted May 24, 2017 Posted May 24, 2017 Doesn't sound like a radiator I'd buy. The filler neck is too short and the mounting brackets don't line up. There are plenty of better choices out there. I like this one from Fluid Dynamics on Ebay. Installed one back in 2011 and it's still doing great. But it costs more..........
1989 Eliminator Posted May 24, 2017 Author Posted May 24, 2017 Agreed. Two of the outer mounting brackets do not line up but the mounts using the rubber grommet lines up just fine which is enough support for the radiator. My Jeep hasnt had any issues with this setup.
rokinn Posted April 4, 2018 Posted April 4, 2018 On 5/18/2017 at 9:40 AM, 1989 Eliminator said: The electric fan is stock wiring. The fan +12V wire comes from the secondary fan relay. The ground wire from the fan goes to ground. The coolant temperature switch located on the radiator is what switches the relay on/off. To re-purpose the coolant bottle, the 5/16" line coming from the radiator overflow line by the radiator cap was routed into the bottom of the bottle. I managed to find a rubber grommet that fit in the bottom of the bottle and was about the same outside diameter as the hose. So, I inserted the 5/16" hose into the grommet with some Seal-All and then pressed all of that into the bottom of the bottle. On 5/21/2017 at 11:52 PM, kill_burst said: awesome, thanks for the information. This is my next project, had an idea to repurpose the overflow bottle. Just wasn't sure how to go about it. did you install a vent tube? Reviving this thread for my open cooling system conversion. I'm looking to repurpose my stock coolant bottle also. Did you install a vent tube or was it unnecessary? I assume the side hole was just capped off somehow?
PIKE Posted April 7, 2018 Posted April 7, 2018 You don't need a new radiator to go open. Mac's expasion tank + Jeep 2.5 coolant bottle = Open system http://macsradiatorshop.com/replacment-jeep-radiator-fill-tanks.html Clean and simple. The mounting holes are already there for the 2.5 bottle.
WahooSteeler Posted April 7, 2018 Posted April 7, 2018 1 hour ago, PIKE said: You don't need a new radiator to go open. Mac's expasion tank + Jeep 2.5 coolant bottle = Open system http://macsradiatorshop.com/replacment-jeep-radiator-fill-tanks.html Clean and simple. The mounting holes are already there for the 2.5 bottle. Ok you got my attention, care to expand in detail on this approach? Definitely curious.............
PIKE Posted April 7, 2018 Posted April 7, 2018 Sure, The Macs tank will replace the stock plastic tank. The difference is it uses a standard radiator cap and it has a hose barb for an expansion tank. The 2.5 had an open system and the bottle they used will bolt into the stock location. Then all that is needed is a hose from the macs tank to th 2.5 bottle. Open system is complete. https://www.quadratec.com/products/51216_02.htm
WahooSteeler Posted April 7, 2018 Posted April 7, 2018 Pike, assuming this is your setup, got any pics you can post?
rokinn Posted April 7, 2018 Posted April 7, 2018 16 hours ago, PIKE said: You don't need a new radiator to go open. Mac's expasion tank + Jeep 2.5 coolant bottle = Open system http://macsradiatorshop.com/replacment-jeep-radiator-fill-tanks.html Clean and simple. The mounting holes are already there for the 2.5 bottle. I considered the Mac's tank and 2.5 overflow tank until my stock renix radiator started leaking. I have already purchased 91+ open radiator and have considered which way to install an overflow tank. While I like the 2.5 tank, it means relocating the ballast resistor (which is easy) but also the EGR. The EGR system is all new and I intend to keep it. Not only for emissions testing but because I think it serves a valuable function. Some differ I know. I picked up a Tracker bottle that fits in the 2.5 tank location but I still have to move the ballast resistor and EGR, but only slightly. The Tracker bottle just barely fits (backwards, maybe). The easiest thing to do is to run the overflow to the existing renix bottle and location. QUESTION: does an overflow bottle need to be vented to work properly? Anyone? If not, then I'm good to go. If so, then I still have some thinking to do. Thanks. Pike, I like your solution. And such a clean engine bay.
HOrnbrod Posted April 7, 2018 Posted April 7, 2018 1 hour ago, rokinn said: QUESTION: does an overflow bottle need to be vented to work properly? Anyone? If not, then I'm good to go. If so, then I still have some thinking to do. Thanks. Pike, I like your solution. And such a clean engine bay. The overflow bottle needs to be vented. On the HO open cooling systems coolant is released when hot through the radiator pressure cap via a hose to the overflow bottle. The liquid then goes down a tube inside the overflow bottle and is discharged under the existing liquid; i.e. it's a bottom feeder. Any pressure bubbles up and escapes through a pinhole in the overflow bottle cap. As the system cools, radiator pressure goes down and coolant is sucked back into the radiator from the bottom of the overflow tank through the radiator cap. Best explanation I've found: Originally Posted by 2002TJ The recovery tank is actually more what you might call an "expansion tank" In the days before recovery tanks, you left an airspace above the water line in the radiator..You NEVER filled a radiator to the top like today...In fact many radiators had a raised reference line stamped into the upper rad tank showing where water level shoud be on cold engine....As engine heated up, pressure in rad would increase and level rise as water swelled in volume...if initial level was too high, then rad cap would lift and relieve excess water to ground via simple rubber hose. Today, if equipped with recovery bottle, you first fill rad to top, then fill recovery bottle to cold mark.....Once engine is heated up to normal temps the level in recovery tank should read well above cold water line and raditor still max full. Cold or hot, with a recovery bottle installed, the radiator should always be full to point water spills over spout neck when you install rad cap And yeah, like the guy said, the system needs to be air tight or it won'twork properly. As designed, and with tight system and full radiator, as engine warms the rad cap lifts and sends heated-expanded excess water to recovery tank via hose from cap neck to recovery tank...Then when engine cools and tank pressure decreases, excess water from hot rad captured in recovery will be sucked back into radiator via same cap thru and hose on cap neck. So therefore, when operated and maintained properly, the raditor will always be totally full and level in tank will never be dry when cold, nor above full mark when hot....Thats why recovery tank is vented whereas radiator is not...The level in recovery tank is expected to change and should as engine water temp changes.
PIKE Posted April 7, 2018 Posted April 7, 2018 You are correct about the ballast resistor and EGR. If you look close in the picture you can see where i moved the ballast resistor. I have deleted my EGR system so that was not in the way either. HOrnbrod, I am replacing the ballast resistor with the Standard Motor Products RU13 per your specifications. Thanks, to both of you.
rokinn Posted April 7, 2018 Posted April 7, 2018 HOrnbrod & Pike, thanks. I might see if I can find a venting cap for the renix bottle that fits??? but at least I know what's needed now.
specauto Posted November 18, 2018 Posted November 18, 2018 Nice write up, this is a popular topic on a lot of forums. I would add another suggestion on re-using the old tank and also the hoses. You can use the old tank by making a plug for the bottom nipple and drilling and tapping a MIP fitting with a 1/4" barb to attach a hose to the nipple just under the cap on the late style radiator. And modifying the cap so it won't hold pressure. See attached photo. Also, I did not like all the plumbing on that heater valve, so when I replaced the thermostat housing, I bought a set of 97+ heater hoses and reversed them on the heater core. If you watch bleeping Jeep, he will explain that the hose sizes flip from the thermostat to the heater core, he spliced them and made them work that way. I wondered why the coolant flow could not be reversed, so I tried it. Photo attached. I think it looks a lot cleaner that way. Some people speculated you can get air in the heater core, but I did this a year ago and it works perfectly. Good heat and the vehicle never runs hot.
murdamanche Posted December 3, 2018 Posted December 3, 2018 what about this one.. cheaper but not all "metal" https://www.mishimoto.com/1991-2001-jeep-cherokee-replacement-radiator.html
mbpete Posted December 16, 2022 Posted December 16, 2022 I recently did the open cooling conversion and eliminated the old tank, replacing with an expansion tank from the 2.5. It's a super clean install but I had a hard time finding a cap for the new tank. I'm sure they're out there but my googling didn't find them. If anyone needs to know, the cap is a 48-400 size. I had to order a pack of 72 so if anyone needs one, send me a message and I'll mail one out, I have plenty of extra.
Pete M Posted December 16, 2022 Posted December 16, 2022 2 hours ago, mbpete said: If anyone needs to know, the cap is a 48-400 size. I had to order a pack of 72 so if anyone needs one, send me a message and I'll mail one out, I have plenty of extra. Lol. Be sure to post in the classifieds.

Recommended Posts
Create an account or sign in to comment
You need to be a member in order to leave a comment
Create an account
Sign up for a new account in our community. It's easy!
Register a new accountSign in
Already have an account? Sign in here.
Sign In Now