GirsMJ86 Posted March 17, 2007 Author Posted March 17, 2007 got my fog and flood lights finished up the other day. had a blown flood light so i needed a new bulb, but ended up having to buy two because the bulbs that were in them were 100w and all i could get were 55w bulbs. the only thing that isnt right is that i can't get the light in the factory fog switch to work right, i also need to find a factory switch for my floods. i made it so both sets can be turned on whenever i want, rather then the fogs going off with brights and stuff. but for my first time running wire, i think i did pretty good. Alex
feerocknok Posted March 17, 2007 Posted March 17, 2007 got my fog and flood lights finished up the other day. had a blown flood light so i needed a new bulb, but ended up having to buy two because the bulbs that were in them were 100w and all i could get were 55w bulbs. the only thing that isnt right is that i can't get the light in the factory fog switch to work right, i also need to find a factory switch for my floods. i made it so both sets can be turned on whenever i want, rather then the fogs going off with brights and stuff. but for my first time running wire, i think i did pretty good. Alex Can you find the 100 watters anywhere?
Pete M Posted March 17, 2007 Posted March 17, 2007 I usually buy 55watt lights and then upgrade the bulbs (which you're not supposed to do :D )
GirsMJ86 Posted March 19, 2007 Author Posted March 19, 2007 Can you find the 100 watters anywhere? nope, can't get 100 watters anywhere around here. i don't know where the PO of the bar found em, but being in chicago had to help. i went ahead and fixed the one bulb that was messed up and put it back in along with the other one, now they both work. so i now have 100w bulbs back in and the 55w bulbs are sitting as spares for when the 100s blow. now all that is really left to do to this thing is fix the dent, repaint it, put the compass/temp gauge in along with a headliner, and get the rear bumper on once it gets here. it could use a few other little things but nothing that really matters. Alex
beaterjeep Posted March 19, 2007 Posted March 19, 2007 Looks good Alex, I still think I shoulda stashed the rollbar, although it's a SWB one, so it wouldnt work. The 86's grille looks good on there.
GirsMJ86 Posted March 31, 2007 Author Posted March 31, 2007 I just got done putting the XJ OHC and lighted mirrors up. but since i don't have the temp sensor or the mounting brackets i used a cheap senor for now and duct tape. :cheers: also since i do not have my headliner up yet it is pulled up and not in the right place. it works great and does everything but dims, it got so dim you could hardly see it. Alex
ejndssn Posted April 3, 2007 Posted April 3, 2007 what year xj did you get the overhead console frm and how much did you have to cut also would like to see the final when said and done but then again are we ever done :brows:
GirsMJ86 Posted April 3, 2007 Author Posted April 3, 2007 what year xj did you get the overhead console frm and how much did you have to cut also would like to see the final when said and done but then again are we ever done :brows: this style is from an older waggy xj. like early to mid 80s. i trimmed it off right behind the last storage compartment because i wanted to have some headliner behind it. but you could take it off right before the back set of lights and make it go all the way to the back of the cab. i should have my liner up this summer, and this time i will take pics along the way since so many of use are without liners and the way i did my other two trucks (both of em black), it keeps them cooler then a silver car in the summer sun. and no jeepers are never done. :cheers: Alex
GirsMJ86 Posted April 4, 2007 Author Posted April 4, 2007 ok a ton of members have been asking about the metal bars that went behind the flares and held onto the bolts. well on all 3 MJs i have done they were so rusted up that they bent like pieces of taffy. so i set out to fix this problem once and for all on my second MJ. here is what i did. i went to lowes and got some SS (stainless steel) bolts, fender washers, and nylon lock nuts. i got rid of the metal bars and the inner fenders for the rear flares, i no longer saw a point in keeping mud and stuff out of there since SS isn't going to rust up. i also cut that part off of the front inner fenders, just the part that covers the gap between the body and the flare. just cut along the line right below all the holes that the bolts would go through. this is how it turns out, these are older pics and since these i have replaced anything not SS with SS and put the trimmed inner front flares in. any questions just ask. i will be doing this yet again this summer on my new 91. Alex
JeepcoMJ Posted April 4, 2007 Posted April 4, 2007 hahaha, i just put the passenger flair back on my new 87...and I reaused the metal pieces. we have a small drill press here so i just drilled out the broken bolts, and welded in a 7/16 SS bolt. then painted it...so now all that will rust is the head of the bolt, and I painted them anyways, so if it does rust then it'll brake off inside... :D
beaterjeep Posted April 4, 2007 Posted April 4, 2007 Ya know Alex, I coulda gotten pics of it too. Even though they wouldn't have turned out that nice.
GirsMJ86 Posted April 4, 2007 Author Posted April 4, 2007 Ya know Alex, I coulda gotten pics of it too. Even though they wouldn't have turned out that nice. eh, i had em on hand still from when i took those ones for ya, so i used em. once i do my 91 like that i will get better pics. Alex
GirsMJ86 Posted July 14, 2007 Author Posted July 14, 2007 Well, it has been awhile since the 91 has just been sitting in the drive and can't go anywhere. But today I finally got my decals from Spencer, not his fault, mine. I took forever to order em. Anyways, it looks great. Black MJ with reflective white decals. I am going to take some more pics tonight once it gets dark, then I will post em. You all loved this thing before, but now this gives you more reason to love her again. Alex
GirsMJ86 Posted July 16, 2007 Author Posted July 16, 2007 Pics are in!! Enjoy! Next step: replace bed. cab corner/rocker, and doors. Then paint the bottom 3/4 white and stick my chrome side trim on. Then make a bed cover, and it will have a custom stock look to it. Alex
beaterjeep Posted July 16, 2007 Posted July 16, 2007 All I can say is :eek: . Nice job so far Alex. Temporary hijack. I should be having pics of how the old 86 is looking now on Tuesday or Wednesday. We now return you to the regularly scheduled thread.
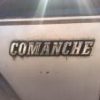
JeepcoMJ Posted July 17, 2007 Posted July 17, 2007 comanche decals on fenders shoulda gone on the bottom edge of doors.... It looks GREAT though. and now I know just how much to cut off the truck at the junkyard for your cab corner.
GirsMJ86 Posted July 17, 2007 Author Posted July 17, 2007 comanche decals on fenders shoulda gone on the bottom edge of doors.... It looks GREAT though. and now I know just how much to cut off the truck at the junkyard for your cab corner. Doors are getting replaced, so I stuck em on the fenders. And they are not going to replace my badges... just make it so it can be read at night. :cheers: Plus the bottom 3/4s of the entire truck, once the new bed and cab corner/rocker gets put on, will be white. tryin to stay close to factory elim paint with some custom stuff thrown in. Yea, that is a good shot for the corner... the rocker is smashed almost clear to the front though, sort of hard to make out. Alex
beaterjeep Posted July 18, 2007 Posted July 18, 2007 Pics are in!! Enjoy! Next step: replace bed. cab corner/rocker, and doors. Then paint the bottom 3/4 white and stick my chrome side trim on. Then make a bed cover, and it will have a custom stock look to it. Alex I just noticed this, but, what happened to the door lock, it seems to be MIA.
GirsMJ86 Posted July 18, 2007 Author Posted July 18, 2007 I just noticed this, but, what happened to the door lock, it seems to be MIA. Yea, my bad... sort of. I ordered new doors locks, pass side was diff from drivers side, for a 91 MJ. I got home, yanked that one out (and man are they hard to get out with all that window crap behind the cyls), then realized that the doors were from an older MJ/XJ. I only had the key to the drivers side so i didnt stick that one back in. Sides, once I find some new doors (that match i hope with keys) it will be fixed. lol. So in short, they also changed lock cyls in 91, made em smaller. so they wouldnt work in place of older locks. I plan on swappin over to the 97+ style doors anyways, i just can't seem to find any that still have the interior door panel that are gray and complete manual locks/windows. Alex
feerocknok Posted July 18, 2007 Posted July 18, 2007 http://www.partsamerica.com/ProductDeta ... 22&PTSet=A
GirsMJ86 Posted July 18, 2007 Author Posted July 18, 2007 http://www.partsamerica.com/ProductDetail.aspx?MfrCode=GPS&MfrPartNumber=LC331&PartType=522&PTSet=A yep, those are what i was given from auto zone. but get this, they had the chrysler star on the keys like my ignition one does. but those things where way too hard to get out and try to actually replace for some doors that are shot anyways. the pass door will be up for grabs, along with the drivers one, once i swap to 97+ doors. the drivers one is bashed up from when the truck got hit. and I'm going for a show truck so I'm just going to replace em both. other then that, i think its coming along nicely. Alex
GirsMJ86 Posted September 21, 2007 Author Posted September 21, 2007 Got my custom plates on the thing, and it has it's first carshow on sunday. I wish the dent was gone for it but I figured WTH. Might be getting a cherokee for next to nothing. No clue on year/shape/model yet. So if I can use the doors/interior/grille parts it is mine and the rest is for parts/scrap. Will get some pics with the new plates, and maybe some more from the carshow sunday. There were some neat things there last year so there should be some good pics coming up next week. Alex
GirsMJ86 Posted November 4, 2007 Author Posted November 4, 2007 Well, it has been awhile since an update so I thought one was needed. I spent yesterday painting the bottom of it white like the factory eliminators were. I can't find the "fader" pinstripes that goes above it all so it look weird. I also will not be putting my chrome side trim on for the fact that the dent won't let me do that and I don't want to add more tape to the back for when I get a new bed, doors, corner, and whatever else. And for reference this is what the factory eliminators had on em. Image Not Found And keep in mind, all that white was just done with rattle cans after prepping the paint below it. And the black paint was painted by maaco so it was all orange peeled, I think the white sort of smoothed it out. Only down side is that all the rust can be seen easier. Alex
ejndssn Posted November 4, 2007 Posted November 4, 2007 girsm86 where did you get those decal's from Pete :dunno: i do like the 4.0l inside sticker just wondering if they had a 4.6l or are they special order of one's choice btw ur truck is looking goood mainge . If there is a link please provide thanks (mainge latino for man)

Recommended Posts
Create an account or sign in to comment
You need to be a member in order to leave a comment
Create an account
Sign up for a new account in our community. It's easy!
Register a new accountSign in
Already have an account? Sign in here.
Sign In Now