
Limeyjeeper
-
Posts
930 -
Joined
-
Last visited
-
Days Won
6
Content Type
Profiles
Forums
Gallery
Everything posted by Limeyjeeper
-

Comanche Dawn
Limeyjeeper replied to Limeyjeeper's topic in MJ Hardcore Tech: Epic Journeys to Greatness
I have a Boostwerks engineering hidden winch mount with an M8000 Warn winch as part of the build. -
Raptor liner is awesome stuff. So easy to lay down. Looking really good!!
-
Comanche Dawn
Limeyjeeper replied to Limeyjeeper's topic in MJ Hardcore Tech: Epic Journeys to Greatness
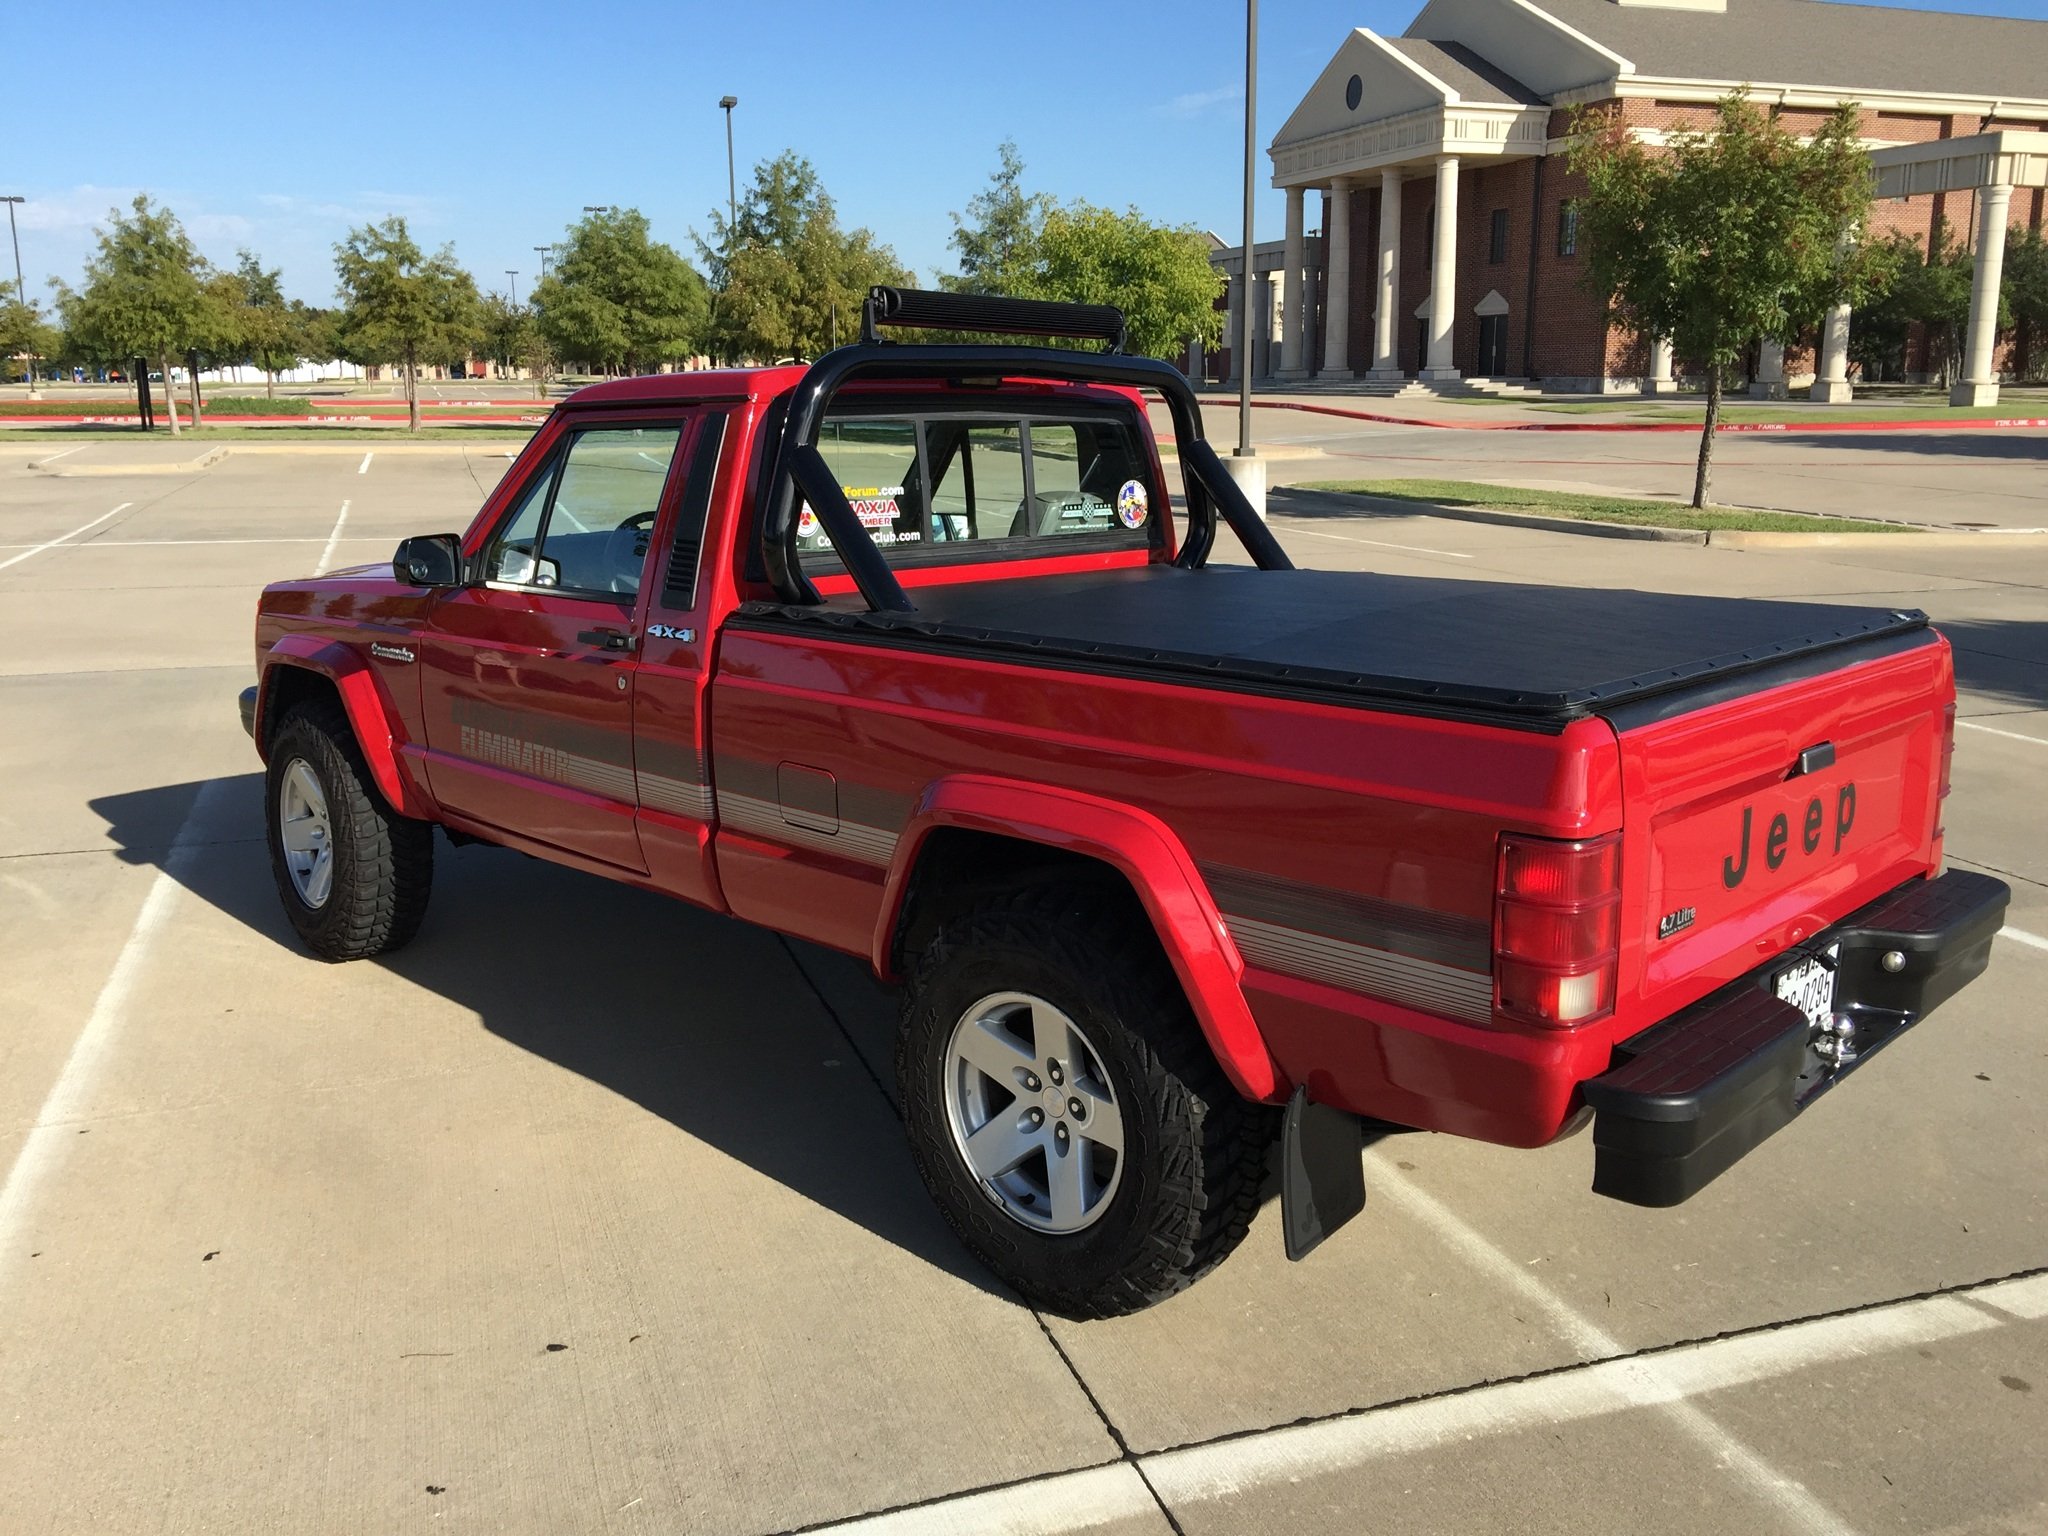
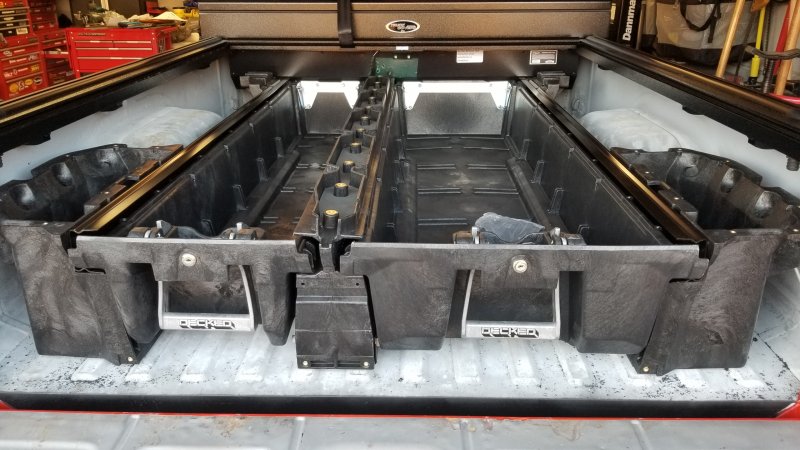
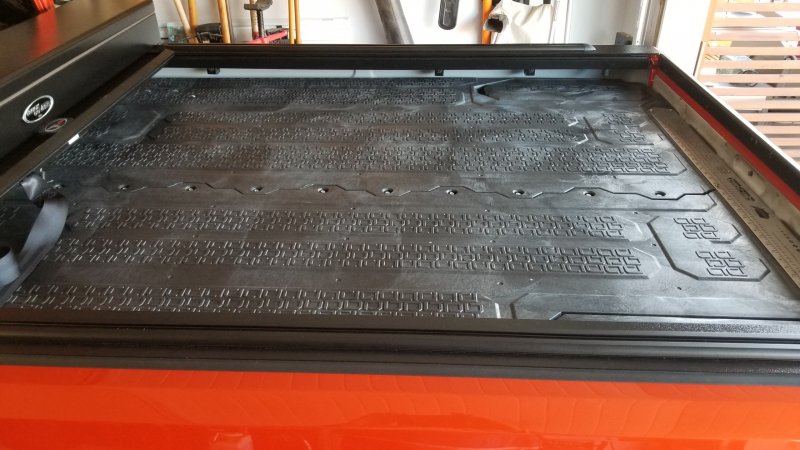
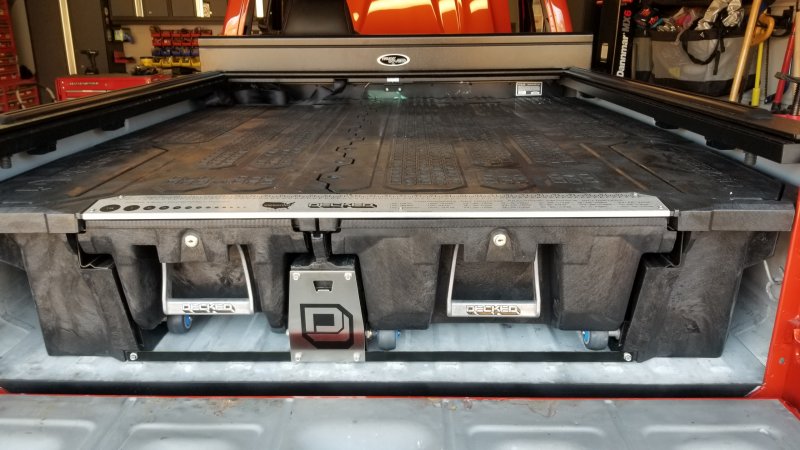
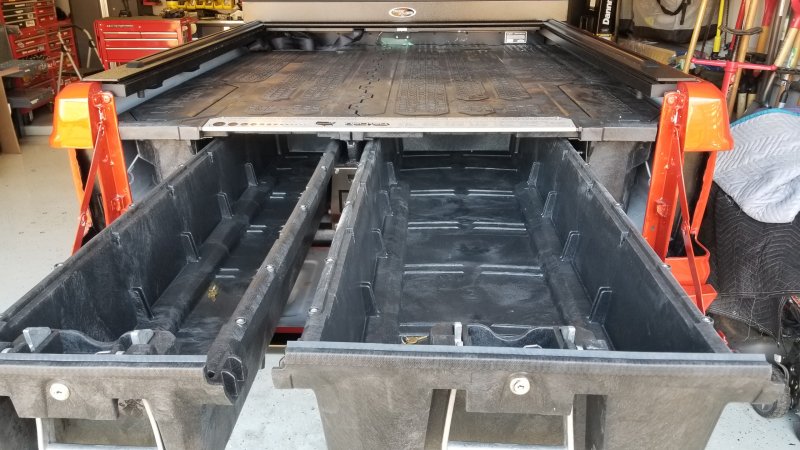
The decked system came this week. A very cleverly designed kit. I am using the Toyota Tacoma version. I had to massage it a lot due to the tonneau cover canister. I decided on the 6' 2" system verses the 5ft as I didn't want the gap at the end of the bed. Turned out pretty good Also decided to dump the gigantic Warn Winch controller box and just mount the sealed Solenoid. Takes up much less space. With cable covers it will work fine. Needed the room to route AC lines. .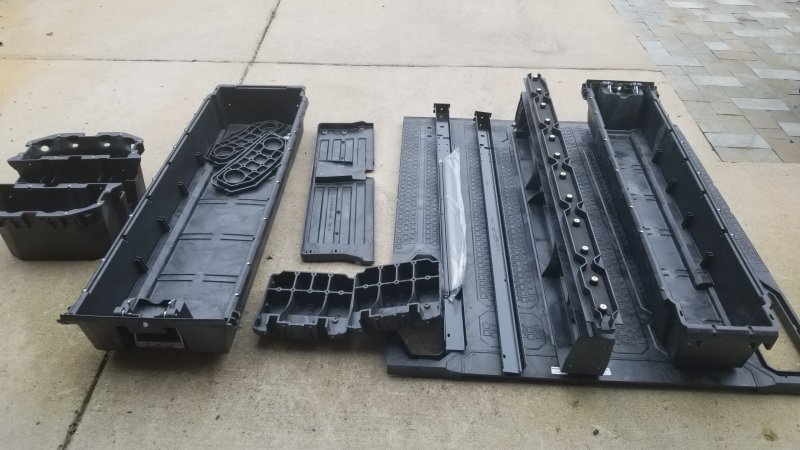
-
ISO AX15 Manual Transmission Mount Bracket
Limeyjeeper replied to CapitalCityPioneer's topic in Wanted
Novak has one that works https://www.novak-adapt.com/catalog/rear-mounts/rmax15-rear-mount -
Looks like it has good bones. "Minimum rust" is the most important thing. The rest can easily be fixed.
-
Comanche Dawn
Limeyjeeper replied to Limeyjeeper's topic in MJ Hardcore Tech: Epic Journeys to Greatness
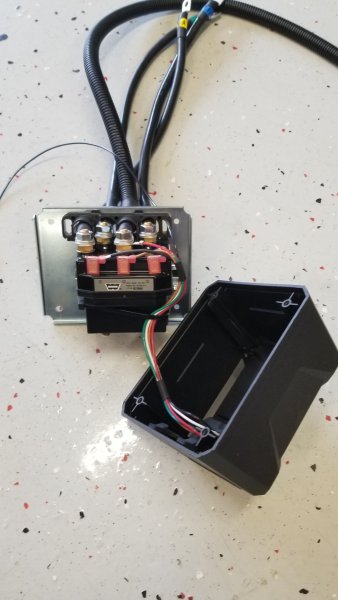
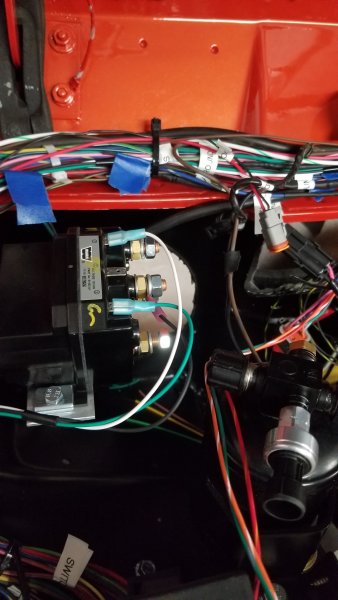
Finally did a test fit of the engine harness. I had a few issues that I can now fix. The drivers side LS injector harness needed to be repositioned further to the drivers side of the vehicle. Just need to extend a couple of wires. The alternator wire is too long. The ECT (Engine coolant Temp) sensor is a three pin. The harness is setup for 2 pin. I am using the Camaro 3 pin sensor so I can use the third pin to drive the temp gauge in the cluster. I extended the Warn controller wires into the cab so I could mount the plug in the dash. Now able to get those wires the correct length. Also was able to get the High/Low pressure switch wiring the correct length. This is needed to give the PCM the correct inputs to run the AC. Got the right length for the Oil temp sensor, 2nd fan connection and starter motor trigger. Figured out where to place the Cruise Control module so I can get those wires to the correct length. I am going to have to create a hybrid cruise control cable using a cruise cable from a 2000 truck 15734164 and an accelerator cable from a Monte Carlo AC Delco part no 12554160. The accelerator cable used is the stock Camaro cable 12565560 Now I need to make the changes and do a full bench test before final install. I won't be wrapping the harness until the engine and gauges are running correctly. I am sure I will need to fix something.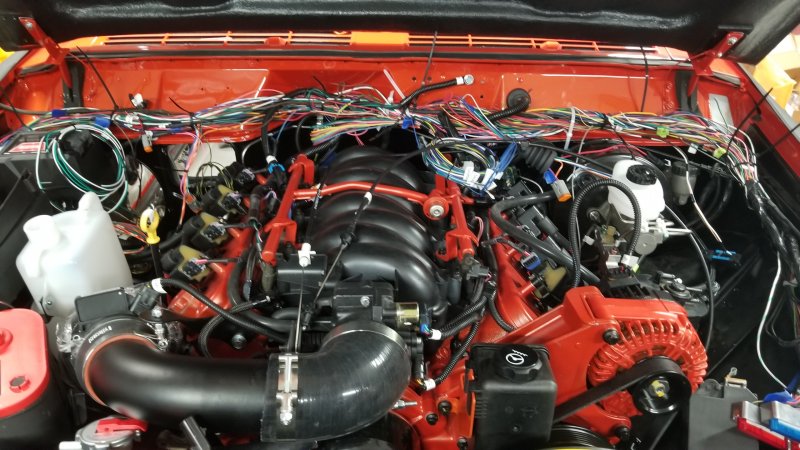
-
An AX15 weighs 97lb. If you can package it in less than 30x47x82 and if it weighs less than 100lbs you can ship it Greyhound. Usually much cheaper than UPS or LTL carrier. Rough estimate it would cost about $235 to ship both. Maybe less. With a box with a max length of 38". The AX15 is 24" long.
-
My 1989 Cheromanche
Limeyjeeper replied to AZJeff's topic in MJ Hardcore Tech: Epic Journeys to Greatness
It does look incredible. Love the Comanche decal on the door. Gonna steal that from you if you don't mind!! I think flat decals on the orange looks so clean. -
I heard about it from a Fourwheeler show with Ian Johnson. It seems like a pretty awesome product. He used it for the 5.3 he put in his cage Jeep LJ.
-
Check out the new Edelbrock Pro-Flo LS management system. I would have used it on my L33 swap if it had been around. It has a much smaller ECU, fully tunable, has self learn capabilities and only about $900 with the harness. The LS1 intake fits just fine on the L33. You can close the hood with the LS1 intake no problem.
-
91 Eliminator 83K miles refresh with NOS parts
Limeyjeeper replied to Red Mistress's topic in Member Projects: Your Comanches
Was this also a factory option, or just aftermarket? -
Comanche Dawn
Limeyjeeper replied to Limeyjeeper's topic in MJ Hardcore Tech: Epic Journeys to Greatness
Thank you. In for a penny in for a pound as they say back in the mother country!! -
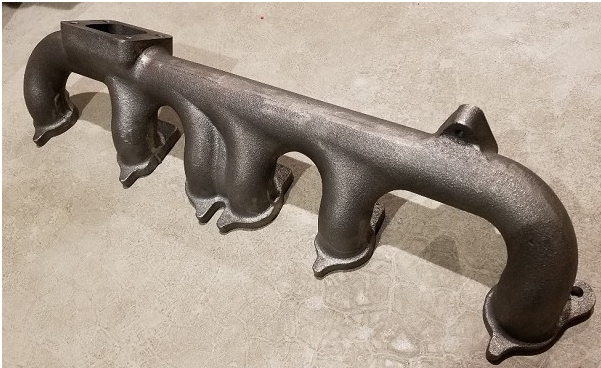
Boostwerks have finally released their cast iron turbo exhaust manifold for the 4.0 engine. Looks pretty cool I would think even a T3 turbo would liven up a 4.0 pretty good. http://www.boostwerksengineering.com/40L-Turbo-Manifold-_p_17.html
-
Comanche Dawn
Limeyjeeper replied to Limeyjeeper's topic in MJ Hardcore Tech: Epic Journeys to Greatness
Correct it has part no 55002154 and RH stamped on the back. The drivers and passenger bezels are different. The slot for the handle is shorter than the slot for the lock lever, and there is a slot in the back of the molding for the lock lever stop. The driver bezel is part no 55002155.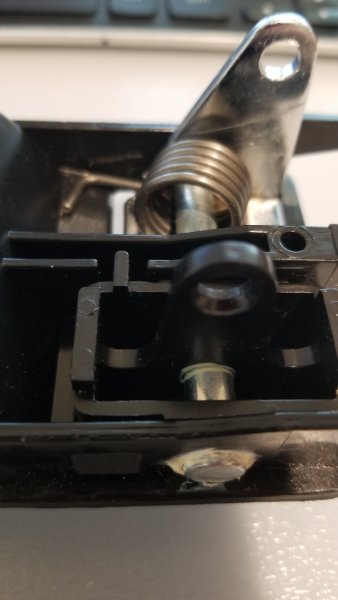
-
Comanche Dawn
Limeyjeeper replied to Limeyjeeper's topic in MJ Hardcore Tech: Epic Journeys to Greatness
The level of knowledge on this site never ceases to amaze me. I actually put that switch in off another NOS door switch. -
What Color To Paint!?!?!?!
Limeyjeeper replied to boxyjeep's topic in MJ Tech: Modification and Repairs
That is made by Baha Fiber in California around $270. -
What Color To Paint!?!?!?!
Limeyjeeper replied to boxyjeep's topic in MJ Tech: Modification and Repairs
They are made by Quik-latch. They are way too expensive for the quality of the product. But I needed lockable. There are some cheaper knock offs on Amazon -
What Color To Paint!?!?!?!
Limeyjeeper replied to boxyjeep's topic in MJ Tech: Modification and Repairs
How about Chevrolet Inferno Orange?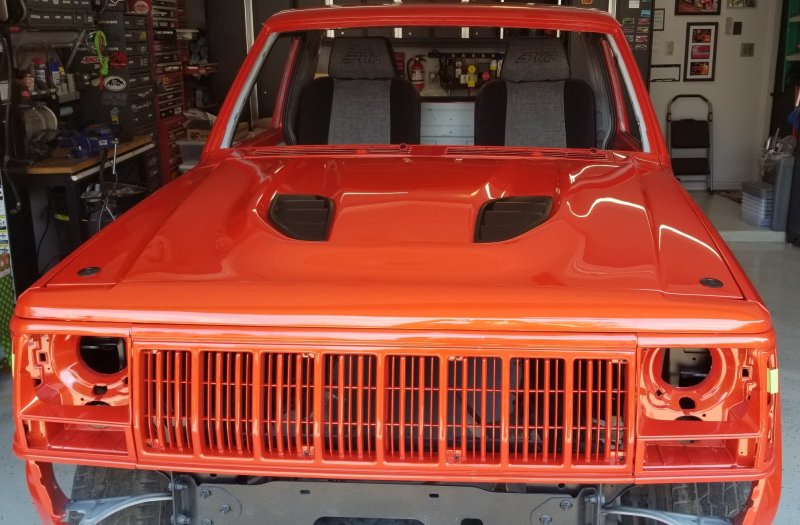
-
It is on my research list.....
-
Can this mechanical fan be salvaged?
Limeyjeeper replied to Drahcir495's topic in MJ Tech: Modification and Repairs
However well you bend the blades back it will be out of balance and put a lot of stress on the pump bearing. For $20 just grab a used one from the junkyard. -
Comanche Dawn
Limeyjeeper replied to Limeyjeeper's topic in MJ Hardcore Tech: Epic Journeys to Greatness
It is an addiction that I am proud to own lol!! The first Comanche I did in 2007 was much easier. Still a lot of parts available. Not so much anymore. -
Comanche Dawn
Limeyjeeper replied to Limeyjeeper's topic in MJ Hardcore Tech: Epic Journeys to Greatness
Ebay about 3 years ago. I have been picking up stuff for this build for over 4 years!! Sad really lol -
I agree. If you don't want the toolbox or the rails it is about $1,600 shipped. It is a pretty complex piece of kit
-
I got it from http://www.qmisharp.com. I am not sure if they still have them. I debated the toolbox. It has great locks. Actually looks pretty good. It is low slung
-
There are water channels inside the rails with drains. You attach short hoses to them and drill holes in the side of the bed to let the water escape. No I already had the trim cap Cover locks to its own side rails not the gate. I am trying to figure out if that could be possible with some kind of hook mechanism on the bottom of the cover rail