
hgeranium
-
Posts
593 -
Joined
-
Last visited
Content Type
Profiles
Forums
Gallery
Everything posted by hgeranium
-
I just redid my HVAC/cruise vac lines! Here are the diagrams if you need them. Cruiser's Tip 5 and Tip 6 sound right up your alley for what you want to do (if you haven't already done it.)
-

Renix Engine and fuel control
hgeranium replied to NorJeep's topic in MJ Tech: Modification and Repairs
You could try cleaning the connectors of the ECU just to eliminate that possibility. Plus it's a pretty easy fix. Cruiser's writeup is here. Good luck in your hopefully short journey to get it running! Keep us posted. -
-
What are y’all’s preferred ways of cleaning the engine bay without it being completely meticulous and slow? I find that there’s too many old and brittle wires and lines to think about using a hose or pressure washer. Everything just looks either dusty, dirty, oily, or all of the above. The right side of the engine bay (dizzy side) seems especially problematic with the gigantic mess of wires and lines.
-
Vacuum line routing from canister (HVAC/cruise)
hgeranium replied to hgeranium's topic in MJ Tech: Modification and Repairs
Good looking out, sir! I'm excited to pick up some fresh vac line tomorrow morning and fix it up. -
Vacuum line routing from canister (HVAC/cruise)
hgeranium replied to hgeranium's topic in MJ Tech: Modification and Repairs
Very good to know lol. I will be extra cautious when setting everything up again. Thank you so much! -
Vacuum line routing from canister (HVAC/cruise)
hgeranium replied to hgeranium's topic in MJ Tech: Modification and Repairs
That makes so much more sense! To confirm, the CC side of the canister goes to the servo, then the other side goes to one of the lines to the firewall and the other firewall line feeds direct to the heater control valve? -
Not my picture, but this is the style canister that I have. I understand that there is the big line that goes to the intake manifold, then a line for CC and a line for HVAC. My question is: from those two HVAC vac lines (that come through the firewall, positioned vertically from each other), are there supposed to be two separate vac connections? And are they supposed to both come from the canister? If that's the case, I must be missing a pretty crucial splitter or T connection. Also, where is the vacuum source for the heater control valve supposed to come from? I noticed that the line was completely broken off and was the source of my heat coming out of the defrost and air going to defrost upon acceleration once I hooked it up to the canister by 'borrowing' the line meant for the CC servo. I'm worried it's supposed to come from a place in the dashboard or something. If so, I'd rather rig something up to properly get it hooked to the canister. This is where I'm more confused. I need vacuum for the CC servo, two(?) for the HVAC, and one for the heater control valve. But there are only two vac lines (apart from the supply line) that come from the canister. Does anyone have a picture of the vacuum routing on theirs? I haven't been able to even find a vac diagram that showed the heater control valve's vacuum source. Like I mentioned, I figure I'm missing a crucial splitter to spread the vacuum love around, but can't find any good reference pics. I've seen the official diagram, which is sort of useful but doesn't answer the questions about how many lines I need and the question about the heater control valve. I want to end up redoing all of the lines with fresh hose and stick it under the coolant bottle.
-
34-Eliminating the Heater Control Valve
hgeranium replied to fiatslug87's topic in Cruiser54's Renix MJ and XJ tips
Guys! In doing some research I have found what seems to be cruiser's writeup on tip #34 if someone was still interested on doing it. Here it is: # 34 Eliminating the heater control valve in XJs/MJs Why would you want to? This valve is unnecessary and a source of leaks and complications. Jeep eliminated it as time passed and so can you. With the valve gone, radiator water flows to the heater core all the time, but your hot/cold door position blocks it when heat is off or when on AC. Your call if you must remain original for your year. In which case you probably haven’t eliminated the front axle disconnect either. Jeep also did away with that! Here is what the control valve looks like; four hoses to and from the radiator, and to and from the heater core, AND a vacuum line which controls the valve. Pull off the vacuum line and plug it securely before you forget. Your engine will tell you if you forgot! Now pull the hoses off the valve. These can be discarded, EXCEPT you likely will need some of the hose going down to water pump so, leave it in place until you decide if and how much you need and where to cut it. A big caution: be careful when you remove the hoses from the core inlets going through the firewall. The hoses will be frozen on, and excessive force could damage the heater core causing you big problems! Suggest you cut the hoses close to the core inlets, then peel back a little hose at a time and gently cut with a utility knife until you can easily twist it off. Note: the core connectors are different sizes as shown! Bottom about 5/8” and top close to ¾”. I purchased two Gates hoses as shown for a ’97 XJ, Gates numbers 19039 for the longer and 19038 for the smaller. Inspection suggests these are right—good fit! The bigger and longer hose connects from the thermostat housing, top, front of the engine and the larger connector at the firewall. The smaller hose goes on the smaller core connector and comes back to join the hose going down to the water pump. Note: this smaller hose only reaches back to the AC compressor because Jeep brought up a metal pipe in later models alongside the AC. You probably won’t have that but, you did leave the hose going down there in place, right? You just need to connect the 19038 up with that hose using a barbed, 5/8” connector, brass or PVC. You may need to cut the 19038 to fit based on the positioning of your barb connector. All you need now is to install and tighten clamps. Couple issues: Some claim the PVC connectors fail in time. I have never experienced that, but I needed a new one and bought brass (easy to find—standard garden hose 5/8” connector). Secondly, there is an argument about air bubbles and water flow with some suggesting that the larger hose 19039 coming from the thermostat should go to the smaller heater core connector on the firewall. Well, the smaller hose coming up from the water pump is pressurized, so going to the lower and smaller heater core connection seems right to me. Also, if you feel the need to switch them, then you have to cut both hoses and downsize one and upsize the other on the heater core end! For me, I just install where they logically fit by size, big end to big fitting, and they look the cleanest with nice parallel hoses. DONE! -
November 2025 - An MJ Named Jessica
hgeranium replied to 89 MJ's topic in Comanche of the Month (MJOTM)
Amazing build! That thing looks like wicked fun on the trails. Congrats on MJOTM! -
That thing is beautiful. Would make for a perfect daily rig once it's up and running. I've seen tow mirrors like that on a few XJs and MJs. Were those a factory option?
-
Here we go again! A 1986 Eagle.
hgeranium replied to eaglescout526's topic in Member Projects: Other Cool Stuff
Lol is that the kitchen oven? I wonder how safe that is -
That thing looks awesome! I love the public works decal. Always good to see a truck doing truck things
-
I’ve heard some nightmare stories about the condition that previous owners have left their Comanches when passing it on. The more I look around and try to preventatively maintain, I realize that one of the people that owned this jeep really cared for it and was also a big fan of cruiser54. A ton of cruisers fixes that I’ve gone through have already been done I knew I had some sort of aftermarket injector but finally got close enough to see that he had put the Bosch 746 4 hole injectors in, which saves me a few hundred bucks. They switched to the HO air box to simplify the vacuum tree set up and delete the EGR at the same time. R134a conversion already done. The list goes on. It’s sad to see that they weren’t a member of this forum though. I would love to be in contact with the owner that did all this work. The guy that I bought this Jeep from originally got it for his daughter as a first car, but she didn’t like it and wanted a white wrangler. He got her the wrangler and sold the truck to me. Super unfortunate story there but not surprising lol.
-
Good points. I'm going to install that IAC today but if things are still looking fishy then I'll follow in your footsteps and get those splices fixed up. No time like the present to learn how to solder
-
Looks great and good luck on the fix working! I hate an intermittent problem because you never know 100% if it's fixed, just that it hasn't happened again lol. I need to do cruiser's tip 6 just to get that out of the way like you did. I've tested the sensor grounds for resistance and never got any but who knows what lies beneath that split loom.
-
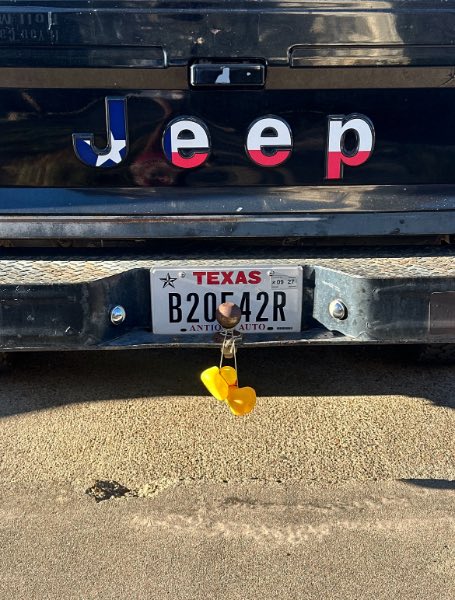
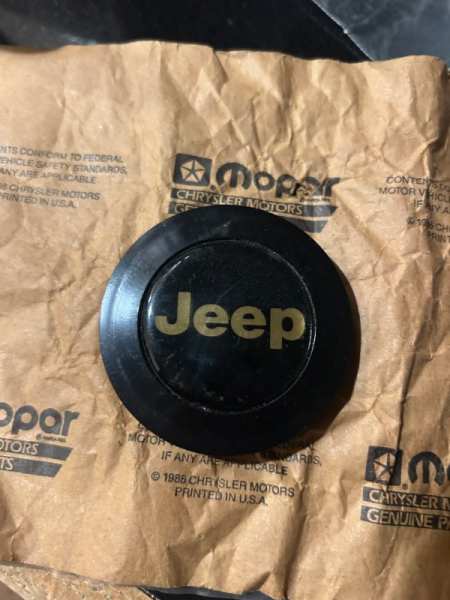
Humble beginnings, but here is my official first NOS part! I just need to find 2 more to get a matching set of 4 on my wheels. Thank you to @JolietJEEP'84 for the part.
-
Restoring 10 hole eliminator wheels
hgeranium replied to hgeranium's topic in MJ Tech: Modification and Repairs
Awesome, thanks for the recommendation. How much did that run you? -
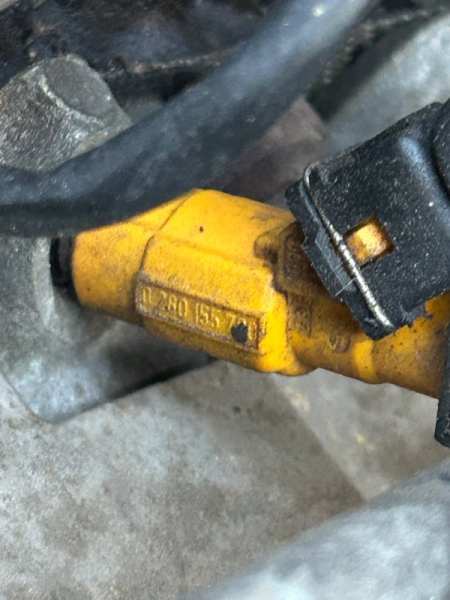
What are yalls opinions on dropping the ~$118 to get a Mopar IACV? (83503643). I can get a standard ignition one for just under $30 on Amazon (which is what I’ve done), or I can get it from O’Reilly for $80 with lifetime warranty. I’m about to be on my fourth IACV: original from PO, 2 that I have replaced myself, and 1 that comes in tomorrow. The warranty would be nice but I hate the idea of still having to constantly troubleshoot idle issues and frequently replacing the part if it’s bad out of the box or goes out after a few weeks like it’s been. If I’m paying $80, I feel like I’d rather just pay an extra 30 to know that it’s a genuine Mopar and not need the warranty because I know it’ll be quality. For a crucial part like the IACV or the CPS, I feel like it’s totally worth it for peace of mind alone. But what’s y’all‘s mileage with it? I know some people get lucky with the aftermarket brands but I clearly have not been. It’s become a red herring. You install a new part assuming that it works, and when the problem persists you logically move to the next likely source, not really knowing that the new part either never worked, or only worked for a short time. The intermittentness and difficulty of testing the IACV specifically just exacerbates this problem.
-
Did you test the voltage and align the TPS when installing?
-
Clicking Power Steering Pump, Belt, Pulley, or...?
hgeranium replied to NickyV's topic in MJ Tech: Modification and Repairs
In regards to belt tension, get the Gates Krikit II tension gauge. I found that, when eyeballing my belt tension without it to what I 'thought' was tight, was actually about 80ft/lbs when a broken-in belt needs to be at 150ft/lbs! This is the only tool you'll have to buy ever for this purpose and it's super easy to use. Other than that, my bet would be on one of the pulleys being off. The vehicle will drive fine with an under/overtorqued belt but can cause things like the alternator to not produce enough voltage (undertorqued) or prematurely wear out pulleys/bearings/pumps/alternators (overtorqued). A single $35 investment is worth it for the peace of mind. Even with my belt being almost half of the correct tension, there was ZERO audible whining, clicking, etc. It may be anecdotal evidence, but I think a sound like that is more likely to come from a pulley than the belt. If the belt is old, then you might as well replace it, but I highly recommend getting the right tool to tension it. With a brand new belt, you'll want to tension it to ~180ft/lbs as it'll stretch out and will loosen up to the 150ft/lbs that you want. You should check it after a week or two of regular driving. I think the most logical course of action is trying a new pulley wheel since it seems like an easy fix. If it's not too much work, it would definitely help to try to get it started without the PS pump just to isolate whether or not it's a problem. -
I may be completely off base but have you tried replacing the flasher? I had an issue where my brake lights in the back would work, but when I used my right turn signal, the right taillight suddenly turned off and wouldn’t flash nor show the brake lights. Turning on my hazards also made all 4 lights work somehow. I replaced the flasher out of desperation before I chased all the wiring and it solved my problem. Worth a try for ~$10
-
I may just have to start searching for an Eagle once I move into my new house. Everyone on the forum with one is making it look preeetty cool.
-
I’ve had a few people ask me if the MJ was an old gladiator haha
-
I’d have to agree with you there!