
hgeranium
-
Posts
606 -
Joined
-
Last visited
Content Type
Profiles
Forums
Gallery
Everything posted by hgeranium
-
Quartz clock stuck at 1:00, not blinking
hgeranium replied to hgeranium's topic in MJ Tech: Modification and Repairs
That’s so unfortunate. I love that clock. I guess I should be grateful it even shows a time but it makes me sad. Is there a person or group that rebuilds them? It’s sad knowing that if I were to buy a replacement, it’s just as prone to a failure as any other. It would be a good opportunity to find a clock panel REM though -
On the way to work today I noticed my clock was frozen at 1:00 and wasn’t blinking. I think a blown fuse would cause the clock to not power at all, so I’m worried something more serious happened. The buttons that change the time do nothing. My only clue is that, when replacing my fuel pump, I ended up taking off and putting on the negative battery terminal a few times.
-
Unable to post in Classifieds, even a Private Message
hgeranium replied to JSAM's topic in Forum Issues, Ideas, Testing
Hello! I assume because it’s a brand new account? Mods need to verify it I believe. I suppose you could shoot your question here or just make a post on any of my threads. -
Getting the filter attached to the pump with a deep socket and extension is much smarter and simpler than whatever I was imagining. Thanks!
-
I think my truck has this. Are you talking about, with the HVAC set to OFF, there will still be air coming out of the vents (especially moving highway speed)? I can even control the temperature of the vent air with the slider even with the fan not blowing/set to vent.
-
The Comanche has failed me
hgeranium replied to hgeranium's topic in MJ Tech: Modification and Repairs
Yep, not greasing the O ring is probably where my issue lies. I put some fresh gas in it so it wasn't dry but I was naive to think that it wouldn't have problems setting without actual grease. -
The Comanche has failed me
hgeranium replied to hgeranium's topic in MJ Tech: Modification and Repairs
This job also seemed quite advanced and daunting for my skill level so I'm still happy with myself that I was able to get as much done as I did. I'm pretty good at removing and disassembling/reassembling the fuel pump assembly after doing it so much. Just gotta practice getting lock rings on I suppose lol. Again, this is my first fuel pump EVER, so everything I was doing was brand new. My muffler and driveshaft being right in front of the mounting hole did not make it easier on me. I was having to wrap my arms around my muffler for a sweet embrace to get my hands in the right position to pull the things out and brass punch the lock ring on/off. Just a product of my stubbornness. I want to take the truck to a shop as seldom as possible, so only having to take it in for 1-2 parts right at the end of the job is pretty decent for me. I'll never be the type to give up and take it to a shop before I even try. The only way I'll learn is to actually attempt it. The truck still is very drivable, you just can't fill it up past half a tank, which was too risky for me to take it on a road trip back home. But that new pump is awesome, it's startups are exceptionally smoother and power delivery is fantastic. I can't wait to get it back to full strength and check the fresh MPGs. Thank you @Eagle_SX4for the recommendation on the Bosch. -
The Comanche has failed me
hgeranium replied to hgeranium's topic in MJ Tech: Modification and Repairs
Well at the very least they don't need to do anything with the assembly itself. All that works great. It's just the lock ring and probably a new o-ring. We'll see what happens though. Ideally it should just be: lock ring off, new o ring on, mount assembly, then new lock ring on. -
The Comanche has failed me
hgeranium replied to hgeranium's topic in MJ Tech: Modification and Repairs
Update: truck runs good but I realized the lock ring was not fully secure after $30 worth of gas got dumped on the ground. I’m going to end up having to take it in somewhere because I cannot get it seated properly. I think the grooves on the tank have been dinged up by previous owners doing work or something. At least I did all the hard work, but I bet that shop will still charge for full labor for a fuel pump on a 2 minute job with the right tools -
Not the roof!
-
The Comanche has failed me
hgeranium replied to hgeranium's topic in MJ Tech: Modification and Repairs
Goodness. The job is finally all said and done and the Jeep runs great (so far). I took it for about a 15 minute spirited highway drive with no signs of issues. Fuel pressure is also perfectly pinned at 31 at idle and 39 without the FPR. The worst part of that was having to redo the job three times because by the time I got the lock ring back on, one of those quick connectors for the pump slid off (likely due to vibrations from getting the lock ring on) and the fuel pump had no power. So I went through the same song and dance until I finally got so good at it that I pulled it out and reinstalled it in like 15 minutes and got everything buttoned up with no problems. like my previous post, the fuel and the tank is pretty clean and the pump was just missing a strainer. The old fuel filter also still looked good, it was pure clear gasoline that came out with no particles. I bet it was just a matter of the pump that the previous owner put in failing. And thank you to those who helped guide me through this, I don’t think I would’ve had the confidence to do it without you. -
The Comanche has failed me
hgeranium replied to hgeranium's topic in MJ Tech: Modification and Repairs
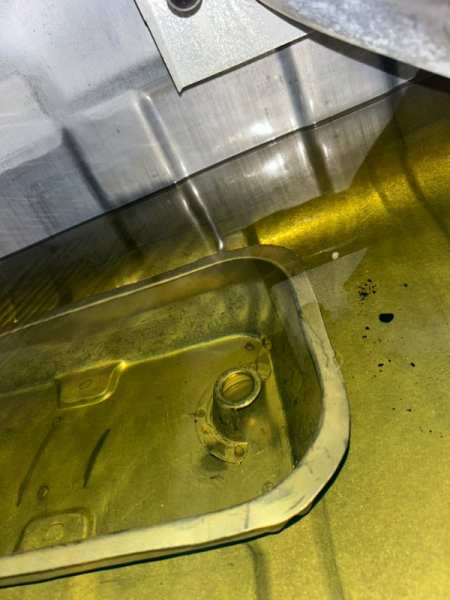
I may have found the issue. Pump was replaced like I thought, but PO did not install a strainer at all on the fuel pump. Fuel tank on the inside honestly looks great. I wouldn’t be surprised if it was replaced at some point. I’m thinking the pump is good but my filter is getting clogged. Still good to put in the new Bosch, strainer, and a new wiz fuel filter. Taking out the pump was easier than I expected. I didn’t need to remove the driveshaft either which is nice.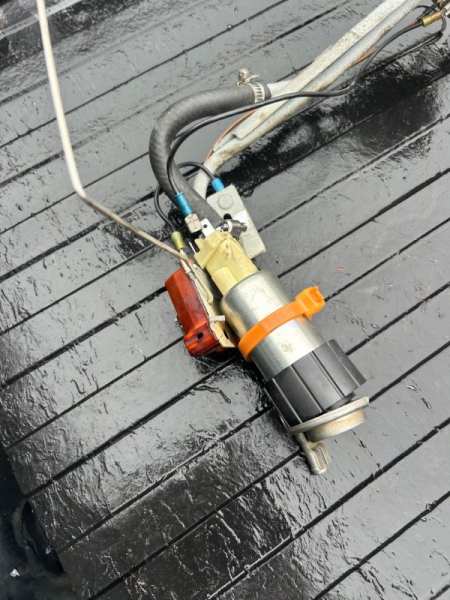
-
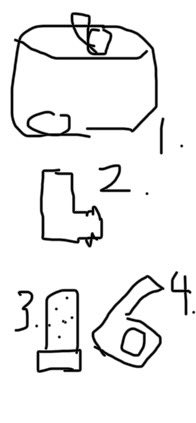
2 questions: Anyone know why there would two identical connectors for the washer pump right next to each other? They both go into the harness. Plugging my new pump into both does nothing when testing. I don’t hear the pump run at all. Second, does anyone have a picture of the order for how the washer components need to come together? Does the filter need to screw into the washer pump from inside the tank? It makes sense but I have no idea how to achieve that 1. Washer tank 2. Washer pump 3. Filter 4. Bracket with grommet
-
The Comanche has failed me
hgeranium replied to hgeranium's topic in MJ Tech: Modification and Repairs
If I had the time and money I would. I had to do a 3 hour drive last night to fix the truck and drive it back home today because I have classes tomorrow. Once MTS comes out with the new hanger assembly, it was already my intention to put in a new tank at the same time. I’m sure there’s plenty of varnish at the bottom already. But yeah once I do something like that I’ll never have to worry about it for the life of the truck. At the very least I’ll be dosing it with a proper fuel treatment with my first fill up to hopefully clear any gunk out of the lines. -
The Comanche has failed me
hgeranium replied to hgeranium's topic in MJ Tech: Modification and Repairs
Just got back into town. Just checked it on first cold start and I’m getting ~28psi and then ~35psi with the vacuum line off the FPR. Just posting an update. I’m getting to work on it first thing in the morning so I can’t do a warm pressure test but I think that’s low enough to more or less confirm that the fuel pump is at least partially the cause, but most likely the full culprit. I’m also thinking my strainer has clogged/disintegrated and is blocking the lines and clogging my filter. That would explain why my filter catastrophically failed a few months ago and the new one may be getting clogged again. Would also explain my huge increase in MPG for a few weeks after replacing my fuel filter only for it to go back down I can hear the fuel pump priming but with the pressure numbers I’m sure it’s just weak and gets weaker with heat. -
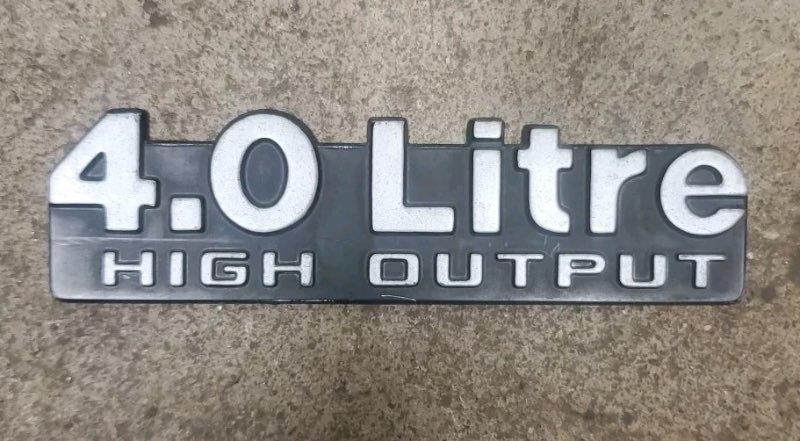
The fact that AMC decided on using litre instead of liter on the 2.5 and 4.0 badge is so amusing
-
-
Manifold gasket failure?
hgeranium replied to eaglescout526's topic in MJ Tech: Modification and Repairs
Agree. I think Eagle_SX4 was the one to tell me the same thing. Really not that much more expensive than the OEM style too. -
Sunroof!
-
1986 - The Jim Oshel Edition
hgeranium replied to neohic's topic in MJ Hardcore Tech: Epic Journeys to Greatness
Good luck on the sale and good luck on raising your college funds! Hopefully it goes to another good home. -
Oil dipstick strangeness
hgeranium replied to hgeranium's topic in MJ Tech: Modification and Repairs
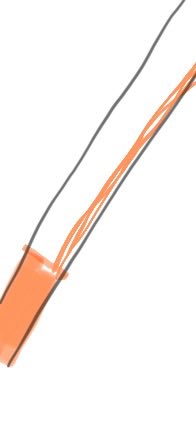
Thank you guys! Good to know this is a common thing with the weird wonky dipstick tube shape. I appreciate the glowing reviews on my drawing! It was all done with my finger on my phone lol. -
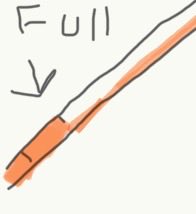
My dipstick when pulled, wiped, and pulled again always has this weird line of oil extending far past the actual oil level. Please excuse my crude drawings. I’m not with the Comanche until Sunday. Sometimes it’s more or less obvious than others but it’s still annoying to try to find where the actual level is, and I’m worried it may not be fully accurate. Also, the backside of the stick reads at a completely different level. About a quart lower than the side with lines. I worry that if I put in the dipstick the opposite direction, then that quart low reading will apply to the side I’d be reading and overfill it by a quart. Two questions: 1. How can I remedy the extraneous oil above the actual level reading? I’ve never had this issue with any of my other cars. Again, it’s not too bad at times but sometimes it’s near impossible to see where the oil level actually is. 2. Should I be worried about the inconsistent reading between the front and the back? Or should I just always put in the dipstick right side up and don’t worry about the backside? I want to make sure my readings are accurate because I’m dealing with some crankcase pressure issues and blow-by so it would be nice to have a more confident time trying to check the levels. Maybe the blow-by is what’s causing this? Enjoy my 2nd drawing of the back that I no longer have a use for.
-
one in a salvage yard
hgeranium replied to jdog's topic in Craigslist/Marketplace/eBay... i.e. Not Your Stuff
All those header trim pieces look to be in great shape. I wish I was closer by to get ahold of that bumper and the caps. -
What a strange thread I have stumbled upon
-
I doubt many Comanche owners were listening to Phish but it’s always fun to listen to period correct music. Junta (1989)