
Gojira94
-
Posts
718 -
Joined
-
Last visited
Content Type
Profiles
Forums
Gallery
Everything posted by Gojira94
-
I bought the regular price one from the same seller about a year ago. I messaged them asking for confirmation that all the pieces needed to swap the shorter turbine pump were present. They responded quickly and sent me pics of everything, which I was impressed with. What came was a NOS genuine Bosch pump in a Carquest box. I think they (and some others) jumped on the big sell-off from Advance/Carquest cutting back operations in 2024-2025. https://www.ebay.com/itm/176281211480
-

Control Arms that fit!!!!???
Gojira94 replied to NC Tom's topic in MJ Tech: Modification and Repairs
The arm pockets do squeeze in a hair when the bolts are torqued during (the last) installation. You can use a prybar and a scrap of lumber to open them a little and then install the arms. Get the bolts just snug and put her back on her feet before torquing to spec. -
Minor update - I swapped injectors today to some Bosch EV6 I haven't seen anyone try yet. These are spec'd as: 0280155702 | EV6 | Long | Jetronic |4-hole | 200cc/min | 16 Ohm (very dark grey) I checked the resistance and found them all to be 16.8 - 17.2 Ohms. Not a bad thing necessarily, was shooting for 16 - 16.3. I ran them at 31psi confirmed fuel pressure. The STFTs at idle show just a touch fat at 110-114. I'll need to drive it a while to let the LTFTs set themselves but it looks like a solid winner for my particular rig. It's like a tiny bit smaller version of the 746. I'd like to see real world Ohms resistance on a set of 0280155700. If they're 'real-world' above 15.2 Ohm, I'd pronounce the 'Volvo 700' the most ideal injector possible, bar none. I say this because my motor is HO, 7120 head, bored TB, 2.5" exhaust and it still doesn't seem to really want more fuel than a stock Renix, except possibly above 3500RPM, where the better head flow makes a bigger difference. Renix and 91-95 HO cams are identical. What I took out were the ones that were in the motor from the 93 YJ, old Bosch-for-Ford 20#: 0280150943 | EV1 | Long | Jetronic | 4-hole | 210cc/min | 14.3 Ohm I had to turn those down to 24psi fuel pressure and it still smelled rich, and the oil was getting fuel-contaminated.
-
I'm not trying to be an a$$/ 'that kid' but some clarification is in order... In a nutshell, all we're trying to do is replace an old injector with a new one that acts electrically like the old one, very close to the effective flow rate of the old one and can be had reasonably easily. Better atomization from an updated spray pattern is just a post EFI stone age bonus. We're not looking for more power, that won't happen without more displacement, head airflow or both. Or altering the Renix calibration, which we can't do at this time. To start, if the latency/ Ohms resistance of a chosen injector is too low, the injector flows fuel before the intake valve is open enough to ingest the fuel, and as much as 33% of the fuel puddles on the back of the intake valve. In response, the long term fuel trim goes up, asking for more fuel via a longer injector pulsewidth, wasting more fuel than it would with a vacuum leak, smelling rich and running erratically. Engineers who write the calibrations, including the Renault/ Bendix engineers, know exactly how the injector behaves and literally build the 'tune' around that. These days, we alter more modern cars' calibrations with characteristics of the chosen injector with things like HP Tuners, TunerPro RT, QuarterHorse, standalone systems, etc. Ohms resistance determines how long it takes the injector to start to open and get fully open. The original Renix injector has a resistance of 16 Ohms +/- 5%. A 12 Ohm injector will start to open and get fully open in only 75% of the time it takes a 16 Ohm to do the same at a given voltage, delivering fuel too early in the 'suck' phase of the cycle for a Renix calibration. That's why, even before looking at the flow characteristics, we need to consider Ohms resistance. I did a huge amount of work some years ago with getting "Bosch for Ford" data from multiple injectors into GM calibrations so modified LT1 F, Y, B and D body cars could run better injectors (that have substantially more resistance/ latency) in place of the 12 Ohm Rochesters. For those cars I could easily modify the calibration ("tune") to change everything related to injector characterization. Since we can't modify the calibration for Renix computers, we have to use an injector that behaves electrically like the original and flows an appropriate amount of fuel, that the Renix computer can set a usable long term fuel trim for. The original Renix single hole injector 53003956 has bench flowed as much as 240cc/min in the real world. But as it's used by the Renix computer, its pulsewidth/ on time (duty cycle) isn't very long except in power enrichment. So most of the time it acts like a much smaller injector (19lb/hr or so) and atomizes decently well for what it is, at lower pulsewidths. And it met the emissions standards of its day, when gas was about $1.30/gal, and wasting some portion of the fuel with first generation injector design wasn't a big deal. Any injector swap that initially makes the engine happy or seem to pick up some power is because it's running rich, in the 12.5:1 - 13.4:1 AFR range where more power (and higher emissions) is expected. The computer sees that at the O2 sensor and tries to adjust the long term fuel trim to where short term fuel trim can yield 14.6-14.7:1 and it runs like it did before the swap (if the injector isn't too big to begin with). So shorter pulsewidths are the computer's solution to an injector that's too big, but just small enough to manage. Long term fuel trim will be below 128, maybe well below for an injector that's too big. And injector duty cycle will be very, very low. If it's too big to manage, the computer likely won't stay in closed loop. It smells rich, and fuel economy suffers accordingly (Neon injector 0280155703). Now, to flow rate, number of holes and connector - we already have widely reported great results with the "Bosch for Ford" injector 0280155700 (14.2 Ohm - 191cc-192cc/min.) and "Bosch for Volvo" 0280155746 (15.9 Ohm - 208cc-209cc/min.). Both are 4 hole injectors with a plug and play Jetronic connector we already have in our Jeeps. Both of these injectors are manageable by the Renix and 91-95 Chrysler SBEC computers. They're more efficient at atomizing fuel, so more of each pulse is mixed and burned, and the computer gets to its target AFR with just a smidge less fuel than with the Renix 53003956 or 91-93 HO 33007127. The 0280155700's slightly shorter latency does mean that some fuel (12-13%) is delivered early, but the 'early' fuel is atomized/ suspended well enough to be almost entirely ingested as the intake valve gets above .100" lift. 12 hole injectors are almost 100% exclusively going to be equipped with USCAR connectors, which means an adapter is needed (though fairly cheap). But I don't see any substantial benefit with a 12 hole (yet) until everything good with 4 holes/ Jetronic connector becomes scarce. 12 hole does fully atomize the fuel a little closer to the injector nozzle than the 4 hole does, suitable for cars with the intake valve extremely close to the injector boss. I suppose the 4.0 does seem to fit that category... Disclaimer: A fair amount of the fine detail data for Bosch injectors isn't available outside what Ford does for their performance injectors made by Bosch. Things like High Slope, Low Slope, Breakpoint, Minimum Pulsewidth, Battery voltage offset compensation, etc., the last 3 being the most important for idle stability/ idle AFR. Other car makers have this data and usually don't publish it, but they most certainly do use it to write their calibrations. Even the Renix calibrations are going to have a couple of offset and battery voltage compensation tables to handle adding some pulsewidth time at/ near idle based on the original Renault/Bendix characterization data for the 53003956. But that's a whole 'nother discussion. IF you have an adjustable fuel pressure regulator, you can turn a smaller injector up a bit or turn a larger one down. IF you have a REM II, you can tweak pressure until your long term fuel trims are within a couple points of the median value of 128. Warning - too large an injector at lower pressure may lose its good atomization characteristics. Better to turn up a smaller one, but there is a point of diminishing returns there as well. If you don't have an adjustable FPR (most of us) you need to find out where fuel pressure is with a gauge as a starting point. Injector work needs to follow established healthy fuel delivery at expected (or manageable) pressures. P.S. - Stay away from anything Bosch with a V-spray pattern. They're for 2 intake valve applications.
-
First, welcome to the forum! Second, update your signature with year, engine, trans and trim level when you get a chance. Third, add your VIN to the registry - https://comancheclub.com/forum/28-comanche-registry-vin-decoding/ And to your question- I've done an enormous amount of research on this subject for the 87-90 and 91-up 4.0. Much of it applies to the 2.5, though slightly smaller due to its shorter stroke/ smaller displacement per cylinder. For an 87-90 ("Renix") era 4.0 I recommend an injector that has 4 characteristics: 190-196cc/min flow rate as measured at 3 bar/ 43.5psi (approximately 18lbs./hr.) Is a Bosch "long" style EV6 injector with a Jetronic injector harness connector, for a direct swap on length and connection to the wiring harness 4-hole nozzle- sometimes description will include the term "conical spray" pattern, which is fine Impedance/ resistance of 14.5-16 Ohms For a 91-92 Comanche or 91-96 Cherokee 4.0, recommendation is as follows: 196-208cc/min flow rate as measured at 3 bar/ 43.5psi (approximately 19lbs./hr.) Again, is a Bosch "long" style EV6 injector with a Jetronic injector harness connector, for a direct swap on length and connection to the wiring harness Again, a 4-hole nozzle- sometimes description will include the term "conical spray" pattern, which is fine Impedance/ resistance of 14.5-16 Ohms I use a number of sources for reference but the deepest library I've seen is at https://www.injectorplanet.com/. You can search part number and get specs for a specific injector. I like to sort by flow rate and see everything they've cataloged that matches the characteristics above. I've never bought from them but they have an Ebay store with 99.7% positive feedback. I've encountered about 2 dozen great candidates, more if you include standard length, which you can use with an adapter. Also a good number that have the USCAR harness connector, with a Jetronic to USCAR adapter. I've done business with Injector Rehab, they're fine. Avoid anything that's been "rebuilt, with improved flow." Cleaned and rebuilt and flow-matched is what you want. Bosch 0280155700 is an excellent injector for 87-90. Bosch 0280155746 is an excellent injector for 91-96. It's the most talked about "Volvo" injector but its popularity has made it somewhat scarce. Give us some specs on your MJ and we can make some recommendations of what/ where to get it without dealing with knock-offs.
-
91-96 Clutch Master Issues and Maybe a Fix
Gojira94 replied to Gojira94's topic in MJ Tech: Modification and Repairs
Thanks for the confirmation. I found one locally for only $10 more than the cheapest price I saw on Amazon. It only has about .4-.5mm slack at the rod. I said screw messing with the parts house master, I'm returning it for a little more than I paid for the LuK master.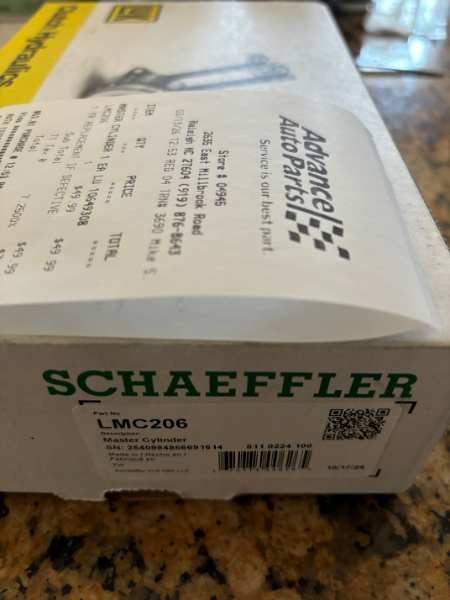
-
Limited through programing, not a mechanical governor. So they really screwed the pooch with a horrible tune method. Someone worked really hard on that and only succeeded in endangering lives. SMH…
-
Mechanical governors that limit throttle travel are incredibly stupid for exactly the reasons you stated. However, maximum speed settings in a PCM/ECM/ECU work VERY well. No effect on acceleration capabilities, just a fuel cut when a speed value in hexadecimal is reached. One example - GM speed limited their 93-02 F-Body cars to 117MPH with zero negative effects unless you wanted to go past that 117MPH barrier. They used 2 values for fuel cut and fuel resume. All the ones I've tuned I set the value to 255, the hex & binary max values, so no limit. But it could easily be set to 130, 90, 85, whatever. Still holds true for almost any EFI car/ truck sold today.
-
Side marker lens keeps falling out
Gojira94 replied to hgeranium's topic in MJ Tech: Modification and Repairs
For a quick fix, try plumber's tape on the screws to give them a touch of extra bite in the worn out holes. To fix it for good, you can fill (JB Weld epoxy) and re-drill the mounting holes in the header panel behind the bezels. I had to do a number of screw holes for my lower dash panel screws this way. -
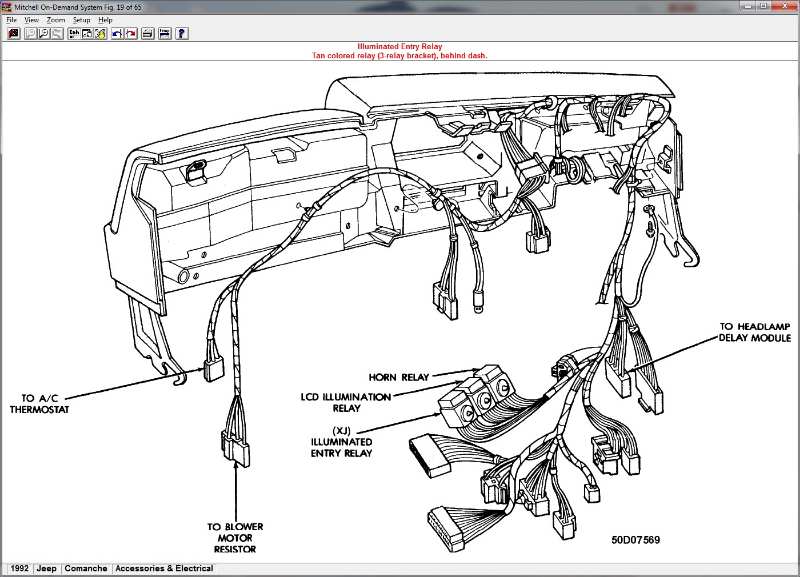
It may not have one, not all were equipped with it. We have lots of documentation on 87-90 stuff, not as much on 91-92. Some stuff is the same but some is different. This pic is from an old copy of Mitchell and it does show that the connector is next to the wiper switch connector like it is on 87-90. Also shows the 3 relay sockets including the horn relay. I can post up some wiring diagrams if you want. Someone might have a FSM for 92...
-
Why is my eagle overheating?
Gojira94 replied to eaglescout526's topic in MJ Tech: Modification and Repairs
I think I read carefully enough not to miss any mention of the heater core. I know relatively little about the 258 setup in an Eagle, but does it have a heater control valve? And if not, it could be restricted enough to cause issues. If you bypassed it and it ran noticeably cooler, that might be telling. And I agree that the old rad may be a restriction as well. -
Here's a good writeup and explanation on where it is and how it works:
-
Forgot to mention, @eaglescout526 hooked me up with replacement gauges for temp and oil pressure. Thanks again!
-
It's been a while, 2 jobs and life stuff taking most of my time. A couple weeks ago, I tackled the pulsing lights at idle issue with the Durango alternator/ external regulator issue. Wrote that up on the DIY section. This past weekend, I got the fire extinguisher mounted under the passenger seat, using existing holes in the front bracket. I'm satisfied with it, easy to remove for vacuuming and reminds you to check the date when you do... Made by Shield, right here in Kings Mountain, NC. The bed hasn't been empty since I started pulling it apart back in April of 2022. Feels good. There are 3 small dents in the rear wheelhousings I'm going to work out soon. I have a ton of odds and ends for sale locally on CL. I have a tiny handful of Renix-specific stuff I'll post in our classifieds. It now has a temporary tag and is legal to operate on NC roads. I want to iron out the clutch master to 100% confidence vs warm restarts/ difficulty getting into 1st and reverse, and I need to tweak the toe adjustment. I found my custom fasteners for the passenger fender liner right after I ordered more. It hasn't been over 40MPH yet and lots of stuff needs to be tested/ verified at higher speeds: - Cruise control testing/ adjustment - Death wobble testing - Road feel with fairly little caster/ higher rear end than I like - headlight & fog light aiming/ adjustment - Overall engine performance/ driveability under differing loads & conditions Oh, and my personalized plate will read: 87-99 MJ
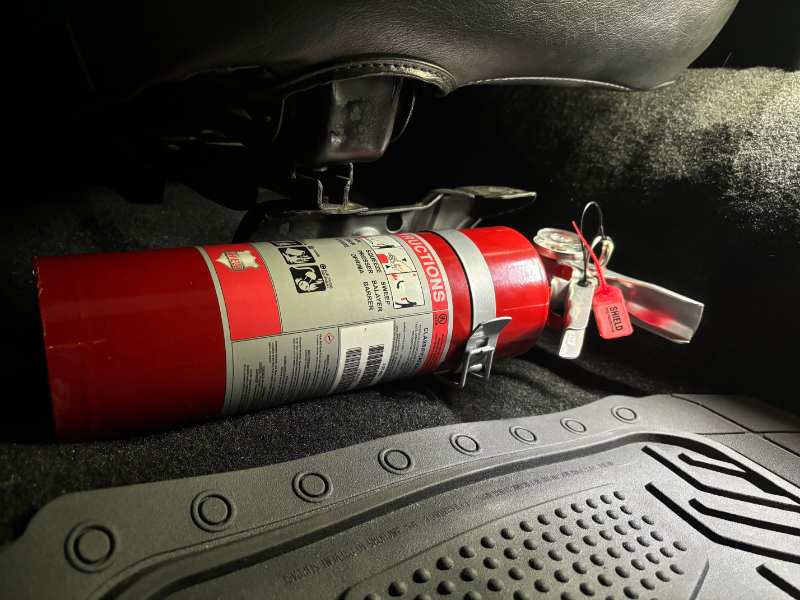
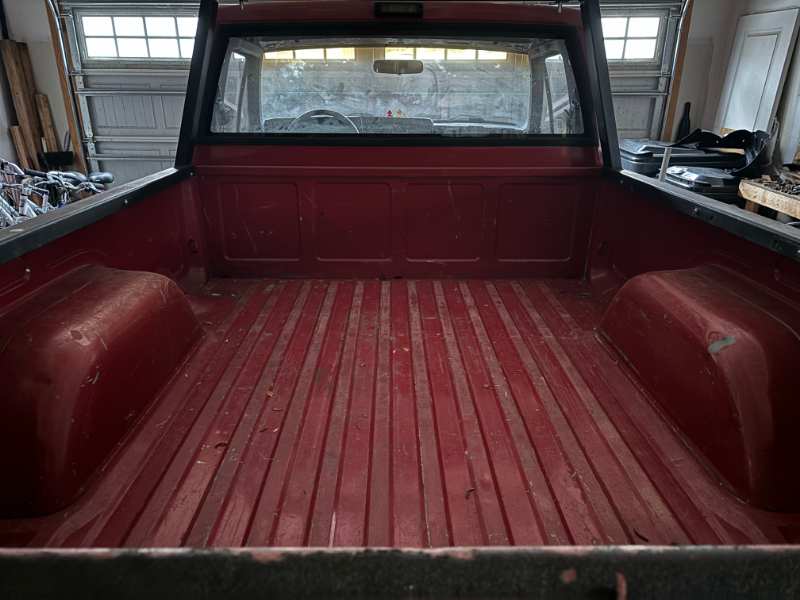
-
Dodge Neon Injectors
Gojira94 replied to Salvagedcircuit's topic in MJ Tech: Modification and Repairs
The Ford Modular V8 (4.6L) is Bosch 0280155700. It's 192cc/min. I want to say a couple guys on here have gotten those from Trevor as well and had great results. Those should be easy to find in the US boneyards. Mustangs, Crown Vics, some Explorers, Expedition, F-150, E-series vans, to name a few. They're a yellow EV6 long size body with Jetronic connector. Around 14.5 Ohms, good choice. -
Right, with the horn relay removed the horn slip ring and ‘switch’ are out of the equation so there’s something else in the mix that’s shorted. The headlamp delay module essentially functions as a relay itself. Headlight switch pin H ties to headlamp delay module pin 6 and high beam select pin C. Headlight switch pin R goes to the chime module. Headlamp delay module pin 8 goes to the chime module pin A4. If 91-92 also had direct loading of the headlight switch like 84-90 the headlight switch is also in question and deserves a look.
-
Have you tried pulling the headlamp delay module to see if it stops blowing the fuse? It also looks like there is some common wiring between headlamp delay module and chime module. You might try pulling the headlamp delay and chime modules. If the fuse stops blowing and the horn works, add the modules back one at a time and see if the fuse blows again.
-
Dodge Neon Injectors
Gojira94 replied to Salvagedcircuit's topic in MJ Tech: Modification and Repairs
Not too common in the boneyards these days. Mid-90s 960 would be one. Cruiser54 used to mention Trevor at Skankfoot Racing for reconditioned flow-matched sets. Injectorrehab.com is one I’ve dealt with before, they do the same and include a flow report card. Hard part is the 746 is in short supply these days, but these might be the ones: https://injector-rehab.com/product/87-98-jeep-4-0-upgrade-19lb-set-6-copy/ -
Dodge Neon Injectors
Gojira94 replied to Salvagedcircuit's topic in MJ Tech: Modification and Repairs
Those Neon injectors are Bosch 0280155703 and flow about 242cc/min. And that’s too much by quite a bit. Stock Renix or early HO running 31-39psi run best with injectors between 196-220cc/min. The Bosch injector from Volvo 2.4 & 2.9L motors is 0280155746 and flows 208cc/min. (Flow rates are based on 3 Bar/ 43.5psi) -
Control Arms that fit!!!!???
Gojira94 replied to NC Tom's topic in MJ Tech: Modification and Repairs
That pic clearly shows whatever manufacturer is supplying the brands he’s bought thus far are installing axle bushings in the body side of the arms. -
2002 Durango 5.9 160 Amp Alternator Wiring
Gojira94 replied to Gojira94's topic in MJ Tech: DIY Projects and Write-Ups
Both halves of the 91-98 XJ alternator bracket need to be clearanced, yes. The mounting hole spacing on the Denso style alternators is the same; 91-98 XJ, 93-98 ZJ and 01-03 Durango. There should be adequate room between alternator case and frame rail on the passenger side, as the mounting holes in that location are basically at 6 and 12. -
Driving light wiring help....
Gojira94 replied to JimiGibbs's topic in MJ Tech: Modification and Repairs
Relay has power and ground, so that's good at C175 relay pins 85 & 86, and C102 pins 2 and 5 (10-way connector behind left headlight). (Convenient time to check/ clean C102 pins for good measure) C102 pin 6 should read hot at all times. Relay C175/ pin 87 should send 12V to C370 & C371 pin B with the headlights and fog light switch on. A single splice feeds power from relay pin 87 to both fog lamps on their pin B. Check incoming power on pin B A single splice provides ground for both fog lamps on their pin A. Check continuity from C370 & C371 pin A to body ground G103 in the inner LH fender panel. -
I’d almost kill for one of the left side fog/cargo covers. If you run across that box some time…
-
I don't think that's piston slap. (shiny oil)
Gojira94 replied to brucecooner's topic in MJ Tech: Modification and Repairs
Not to throw more to consider into the mix, but the timing chain guide might be worn out and adding some of the noise. Like not really the problem, of course, but adding the mix to confuse and possibly misdirect. -
Found my interior leak, where does this lead?
Gojira94 replied to hgeranium's topic in MJ Tech: Modification and Repairs
Yep.