
Gojira94
-
Posts
677 -
Joined
-
Last visited
Content Type
Profiles
Forums
Gallery
Everything posted by Gojira94
-
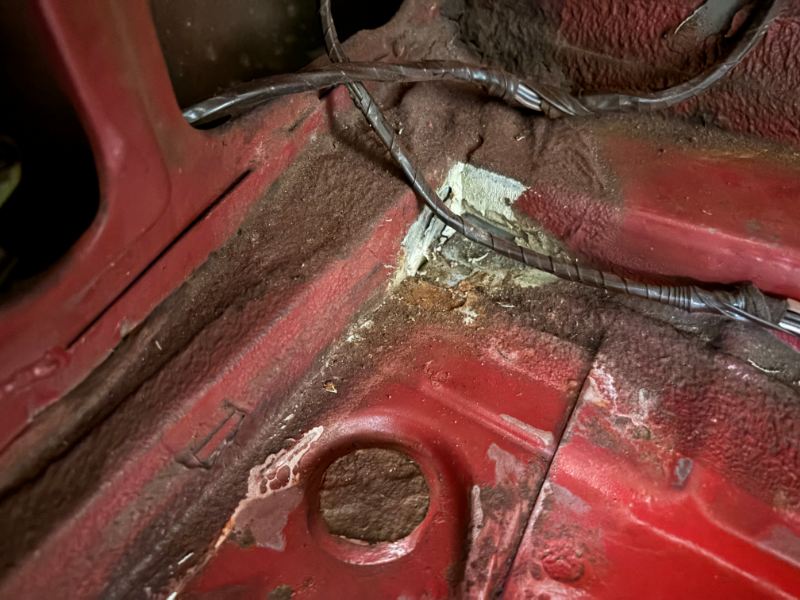
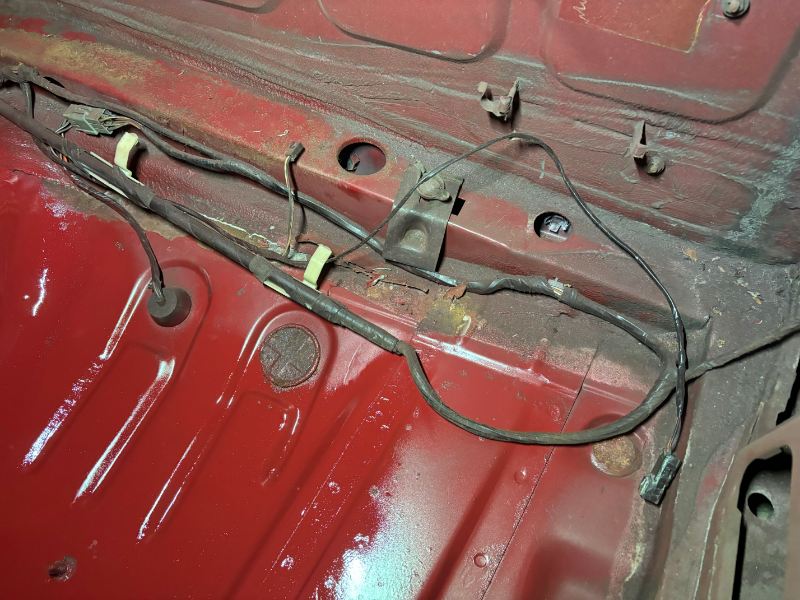
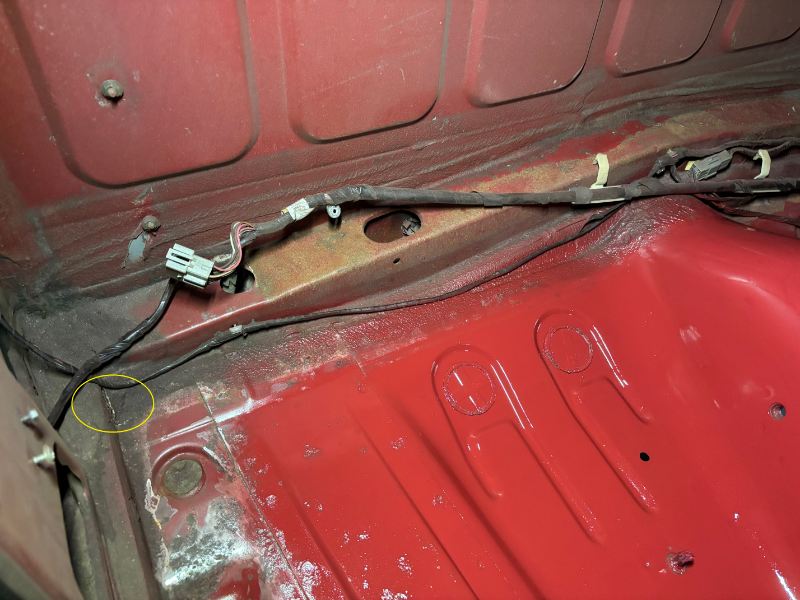
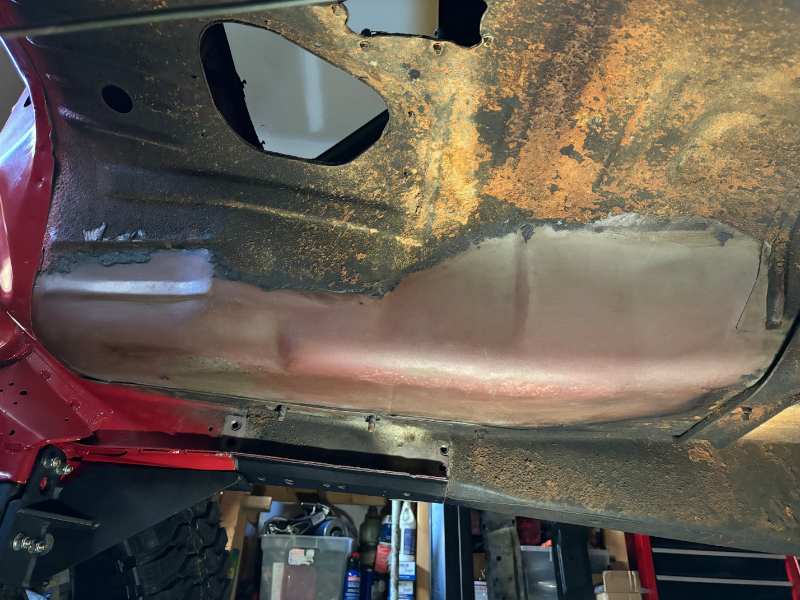
Thankfully nothing horrible going on in the passenger or driver rear corners. But I'll want to clean and reseal the floor seam on the bottom rear. Looks like the rust is crawling up from below on the rear edge of the floor panel behind the driver's seat...
-
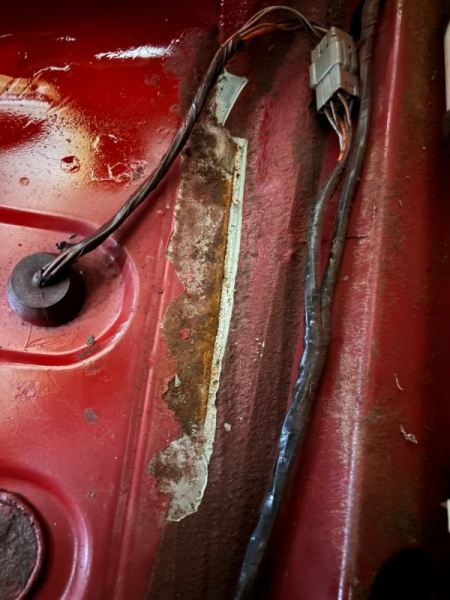
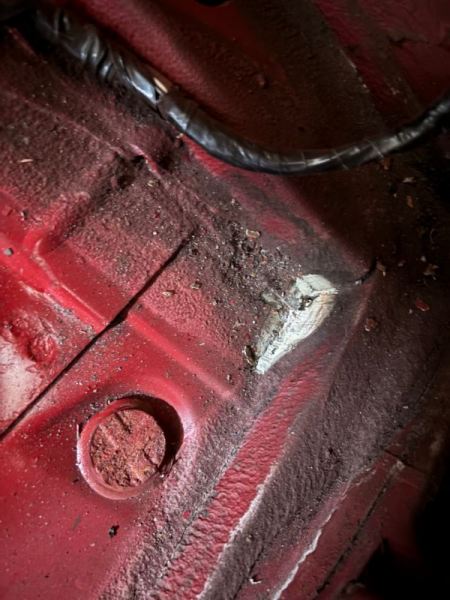
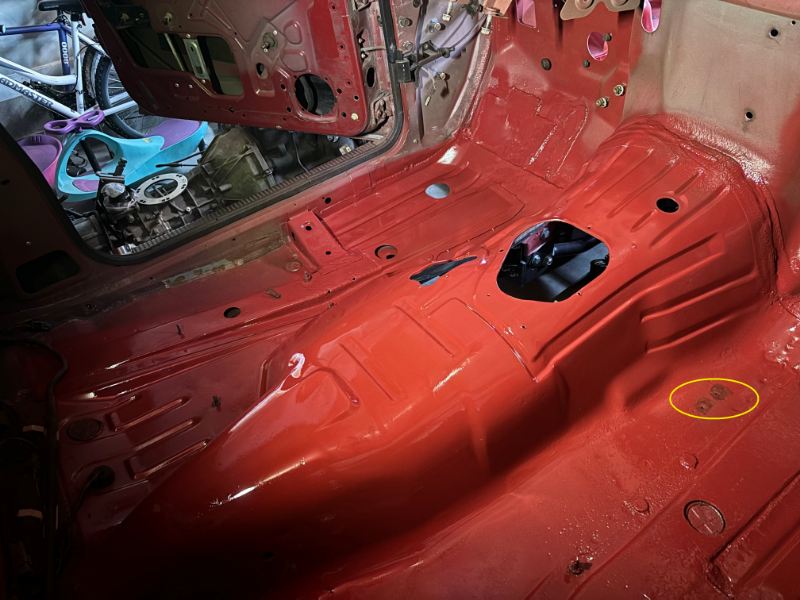
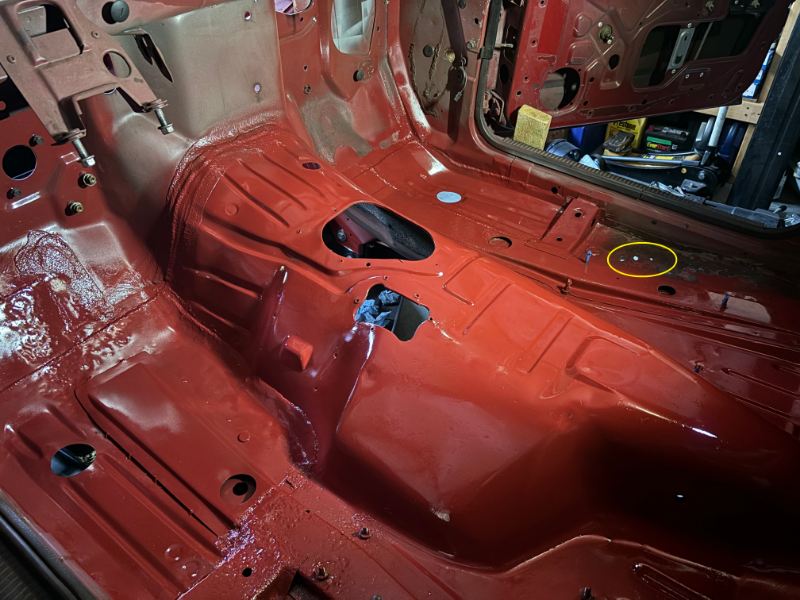
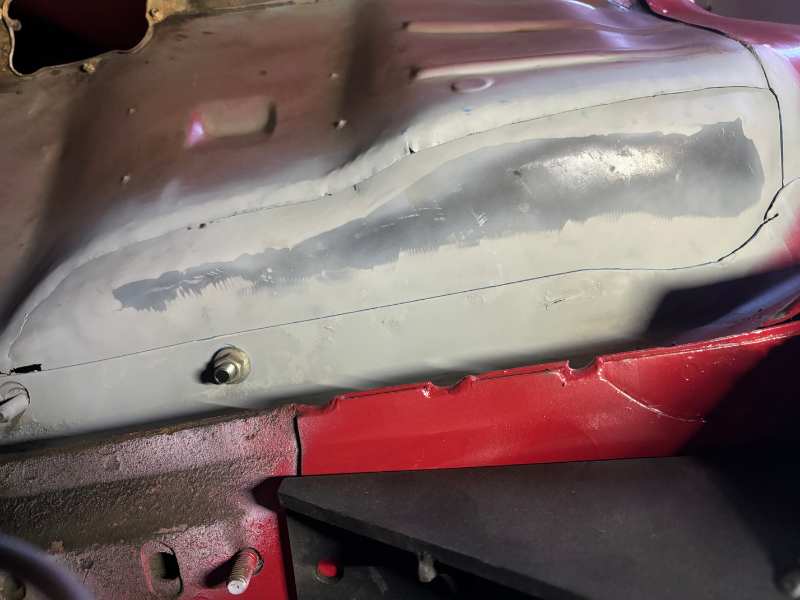
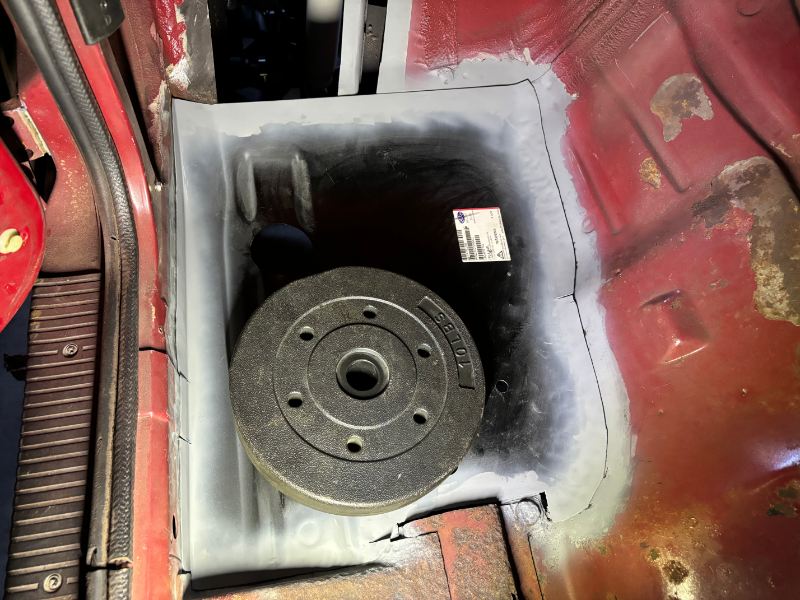
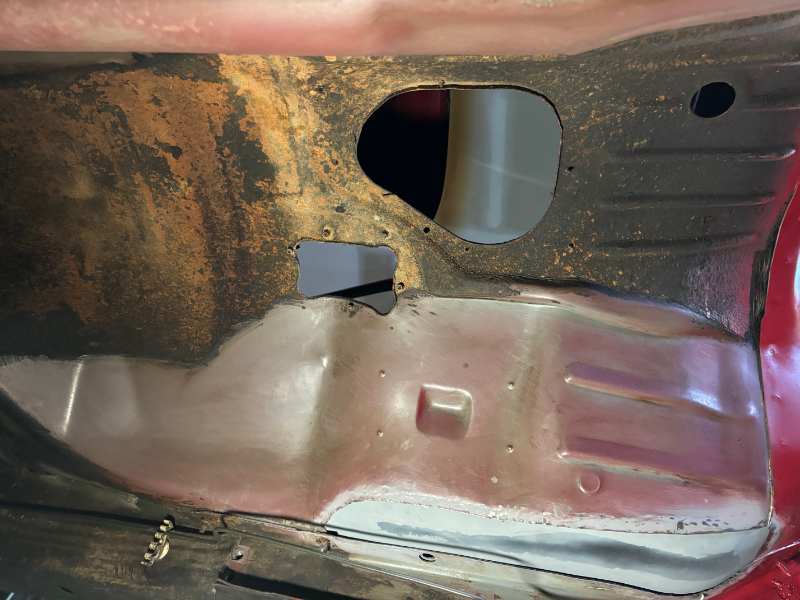
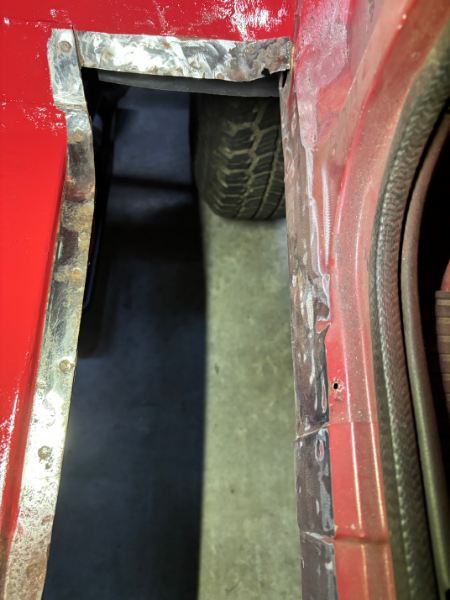
Floor, top side progress... inner rockers still need some attention in a few spots, nothing major. Two pinholes I reamed out a bit to address on the passenger side footwell. Found water intrusion in the passenger rear corner that did this next to the passenger inner rocker. I'm just going to patch it with a small piece of steel and JB Weld epoxy, as the metal's too thin to weld where the 3 holes are: Rear corner on the passenger side- all that seam sealer needs to come out to assess what's what. The circled spot is where the water's been coming in to rot the passenger side: Rear driver's corner also needs some digging in and addressing:
-
Start with hoses, accumulator/drier and o-rings. Then vacuum it down and see if it holds. If it does, then you can see if the compressor is good. One thing to look for in a bad compressor, in the absence of refrigerant leaks, is low side pressure too high/ high side too low/ shifting back and forth (inner seals compromised). Consider renting a flush gun to clean out the evaporator, and if possible, the condenser. Go back in with 30-32oz of R134a and use PAG 100 oil. If you can get all the oil out of the compressor and the rest of the system, complete fill is about 7.5oz.
-
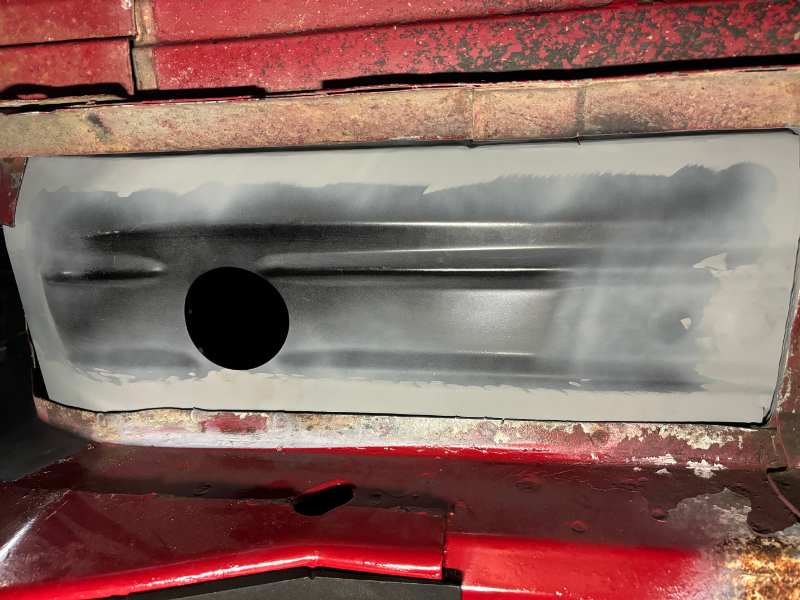
Thanks! Finally done and ready to start burning them in. I haven't welded since the end of the 90s, working at a shop that had equipment. One of the kids that works for me at job #2 has a prodigy friend and I've seen his work. I'm having him do it. Driver's side: Passenger side: I see 2 places I missed I need to go back and strip off the black paint on the patches, now that I'm looking at it again (pics 2 & 5).

-
Oops... fixed.
-
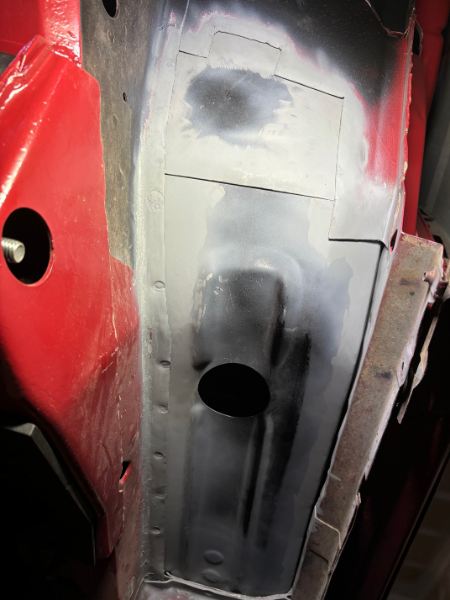
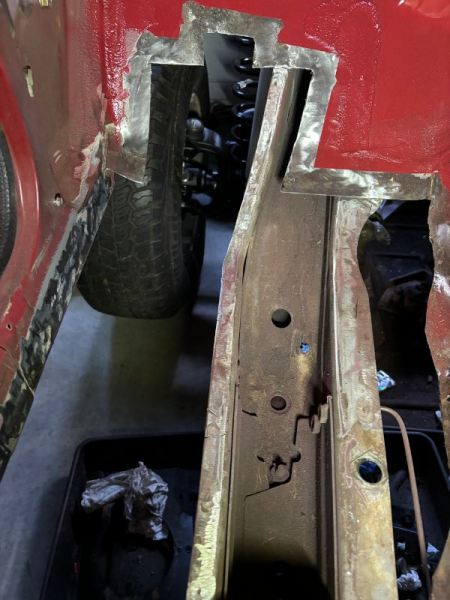
More progress on the floors today. Still have to patch the longitudinal brace but I’m almost ready to burn stuff in…
-
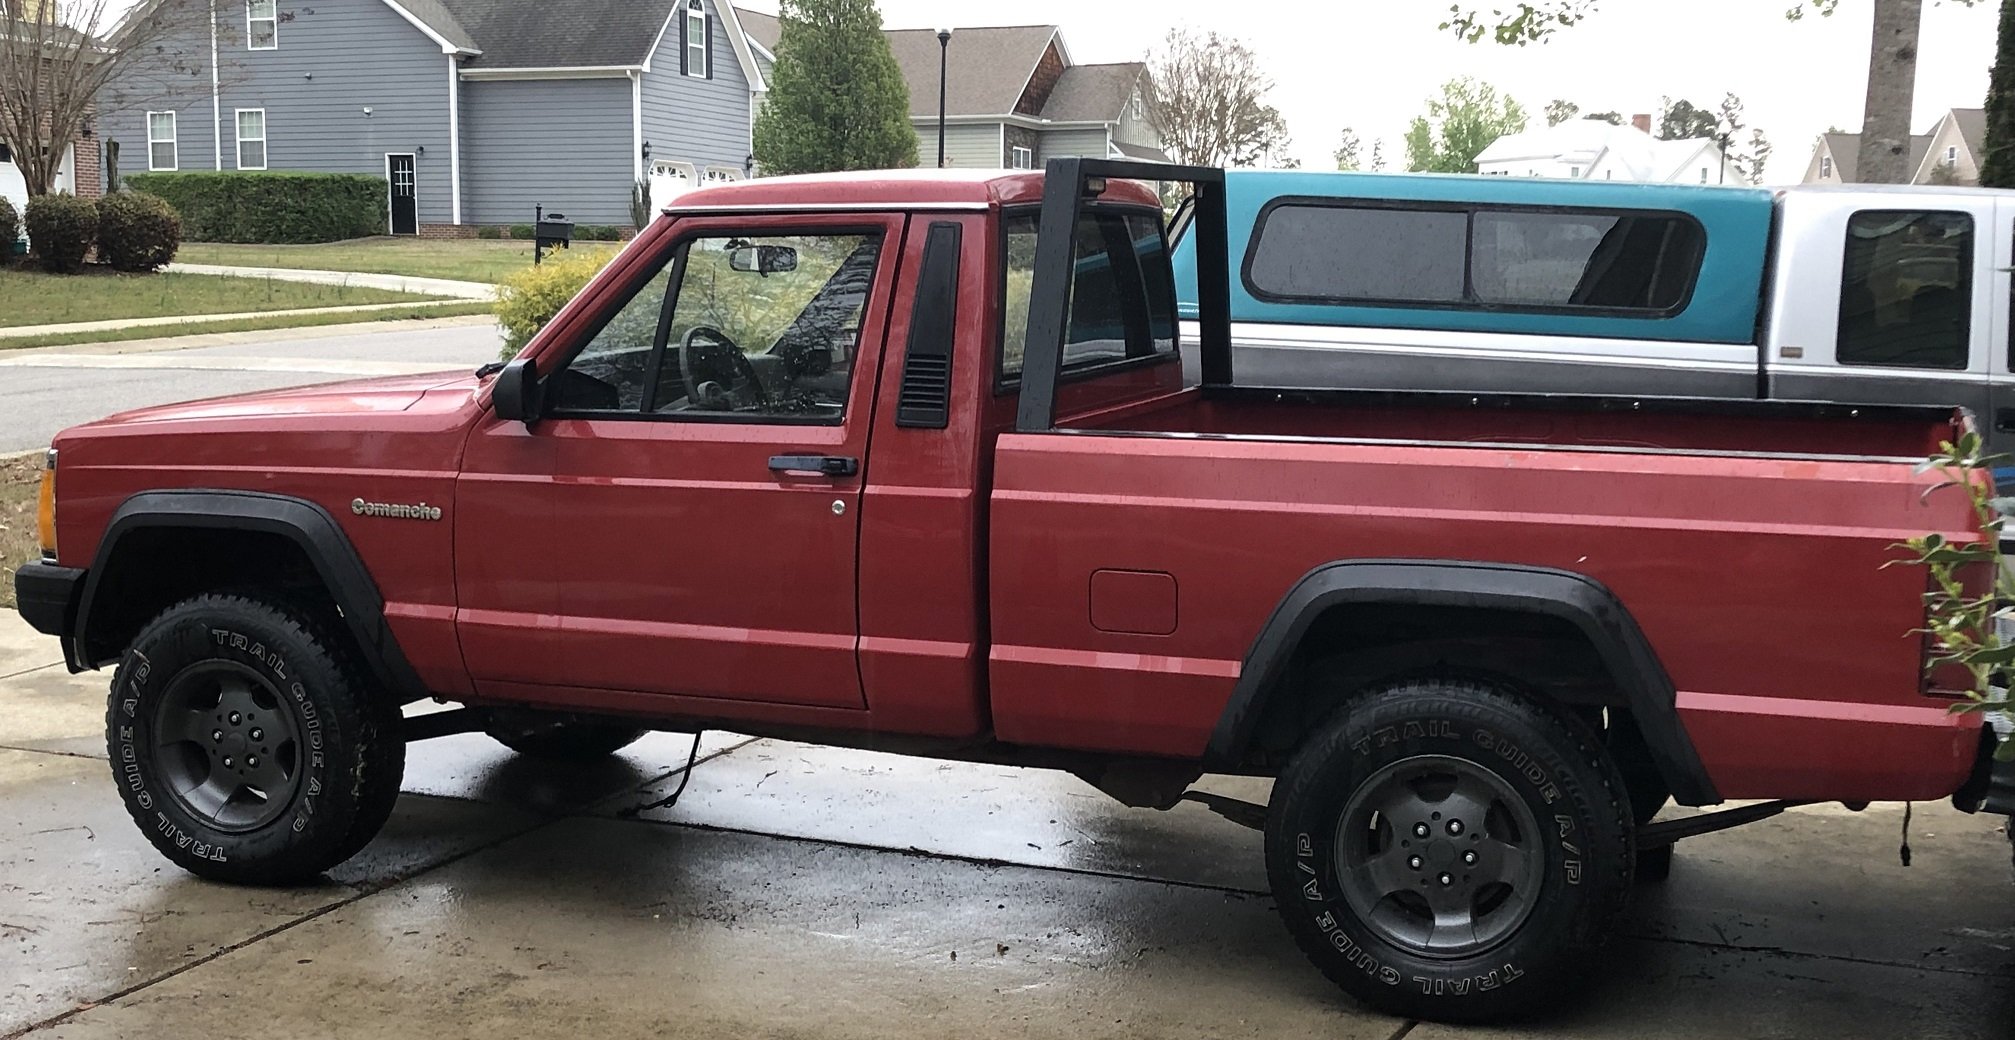
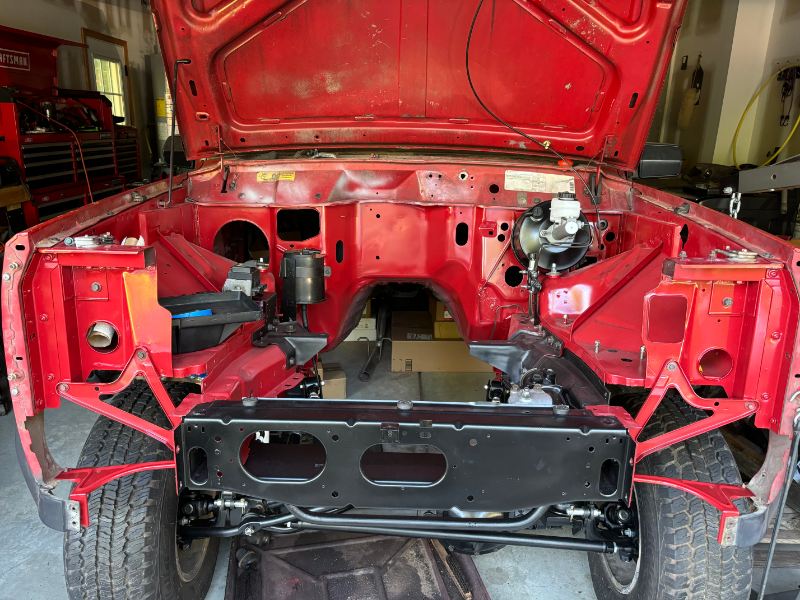
 How about a pic from the front of your rig? Curious as to what all the angles look like.
 -
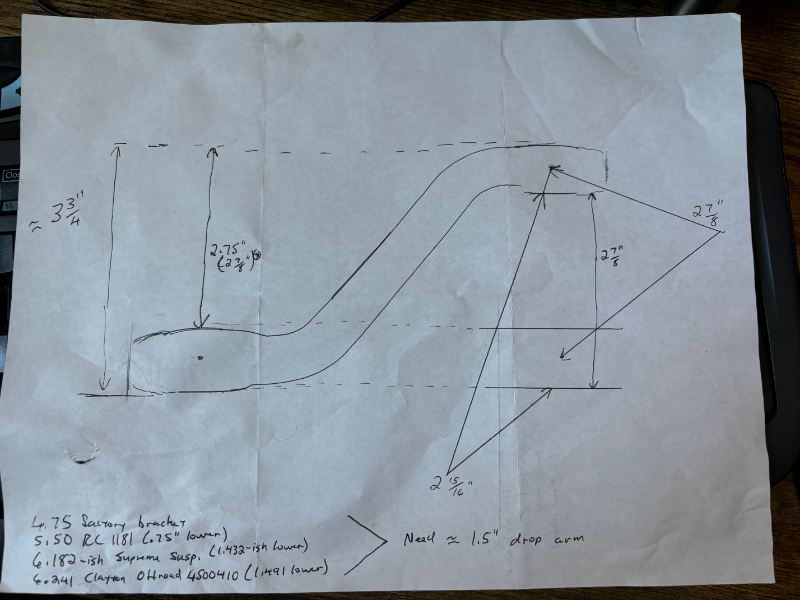
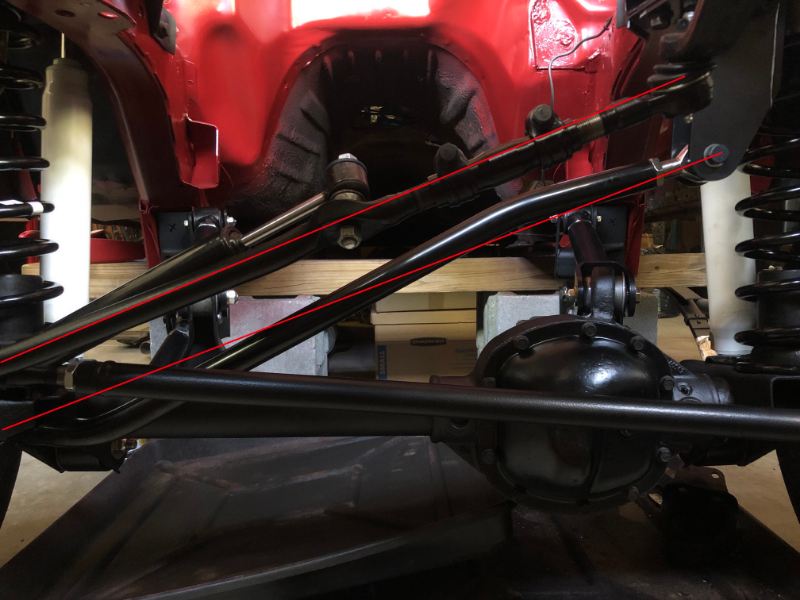
I traced my stock Pitman arm a while back, trying to answer some questions without a bunch of 'buy and try' for my lift. Here's the measurements and notes I took: This measurement from the bottom of the frame rail to the mount point is 4" +/- 1 RCH I also have a double shear track bar and accompanying bracket. Drop from the frame rail to the bolt hole is 6 1/4." At least with the suspension not loaded with engine weight, I'm parallel with the STOCK Pitman arm. I thought I'd need a drop Pitman arm and grabbed the lowest of the low I could find, a white box version of the RC 6610. It was way too low. My setup with the stock Pitman arm:
-
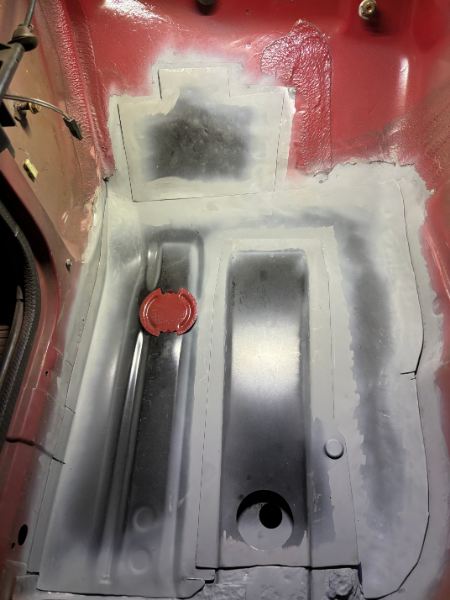
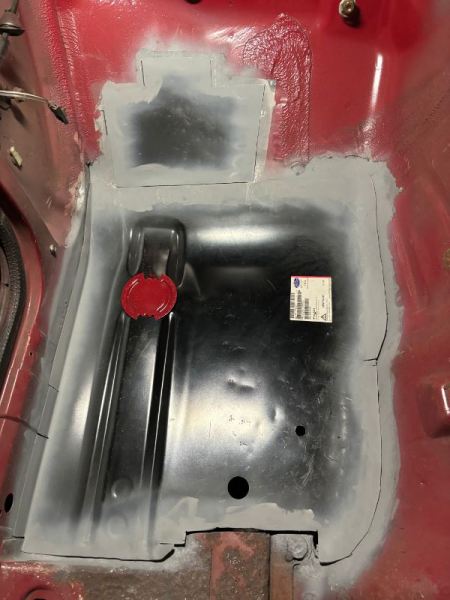
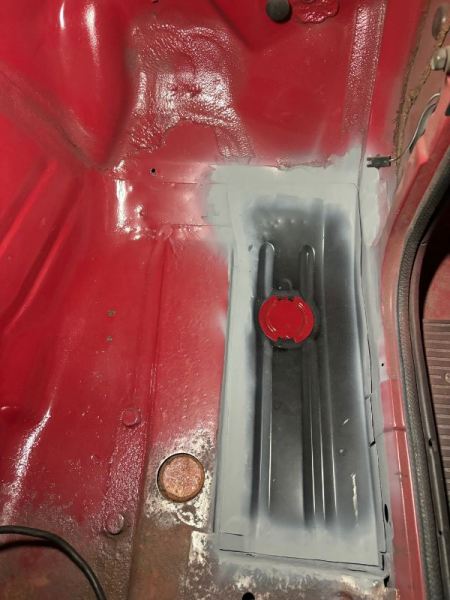
Floor patch fitting and under cab cleanup underway in earnest. I ordered the C2C XJ front halves quite a while back, before Keyparts started making the MJ versions. So I knew there would be more than minor modification to make them work. I did get the Keyparts longitudinal floor support, so there's that at least, for the section I need. Driver's side main panel is almost done. Made a template for the section above it, so much rot from the previous clutch master. Still some weld-through primer prep to do on the bottom side, but it's close to ready. Cab bottom side- A blunt flat blade screwdriver to remove the overburden of crud and old undercoat, followed by a generous wash with odorless mineral spirits.
-
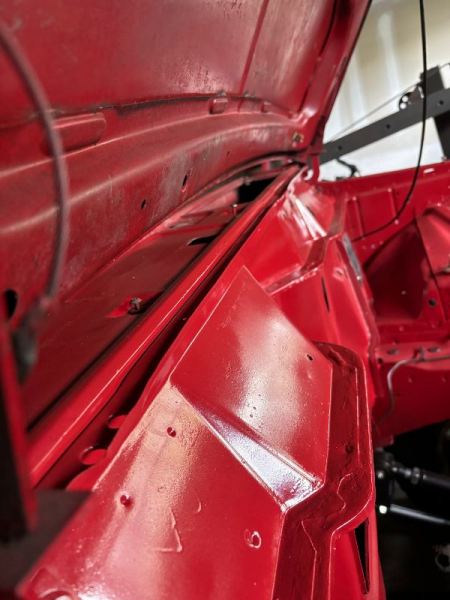
Lower cowl and hood seal track done.
-
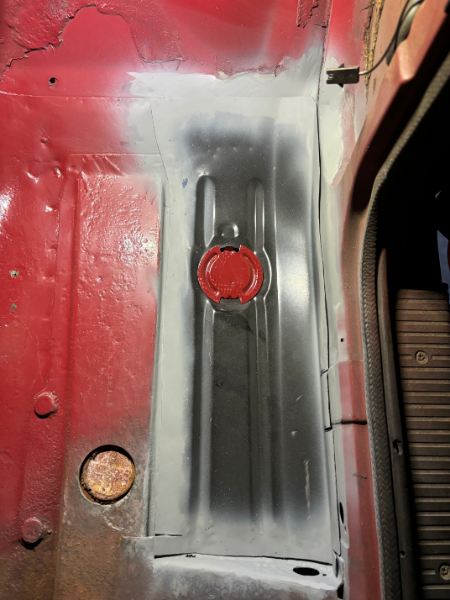
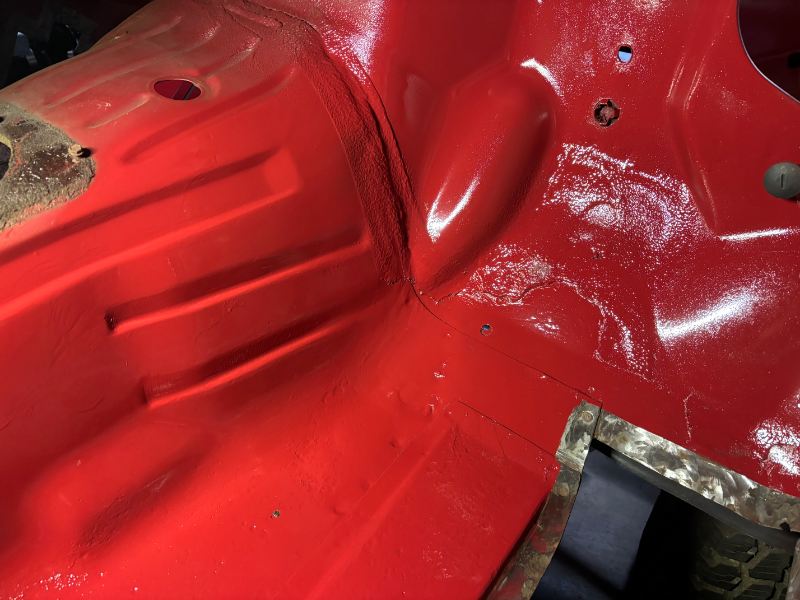
Passenger side, kind of the same, working my way back.

-
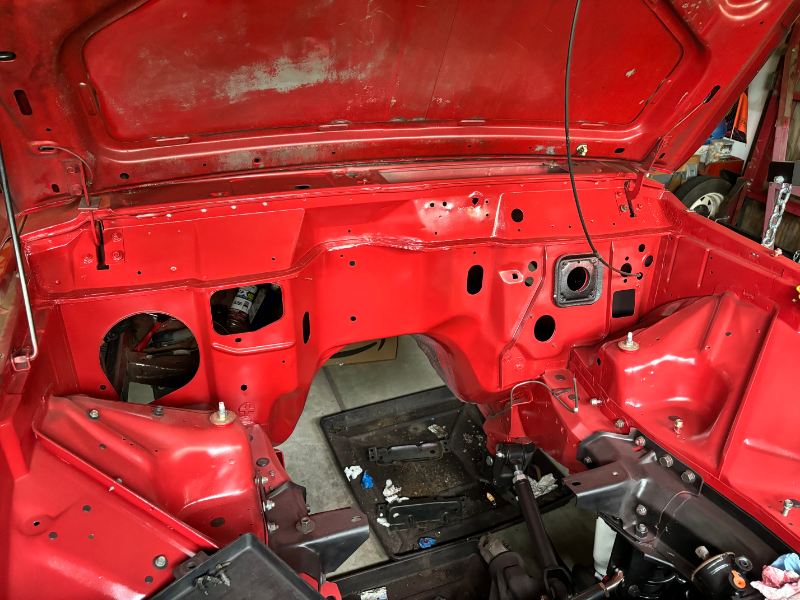
Getting the interior of the firewall sorted out. Got all the rust out of the area below the clutch master and shot paint on everything above the foot well. Kind of sloppy with runs, I got a little heavy with it. Exposed edges are getting another cleaning and dressing with weld-through primer.

-
87-90 Comanche speedometer cable
Gojira94 replied to Ken Seymour's topic in MJ Tech: Modification and Repairs
I think this is what you're after: Pioneer Speedometer Cable CA-3116 Notes: Speedometer Cable. 77" Length. Without Cruise Control. Plastic clip in at speedo head $45.99 at Autozone Listed at Autozone for 4.0 / 4WD but parts house websites are often wrong by application. There's also this one: Pioneer Speedometer Cable CA-3068 Notes: Speedometer Cable. 94" Length. Without Cruise~Control. Plastic clip in at speedo head (I'd guess this one is made with extra length to fit both 2WD and 4WD) $36.99 at Autozone -
Oh snap. That's awesome.
-
Yeah, the clock is ticking for me. A clutch hose for 91-93 internal slave XJ is unobtanium from what I can see. Dorman doesn't even make one. Used parts are kinda sketchy most of the time. And the $700+ for the conversion kit I need to put elsewhere right now lol.
-
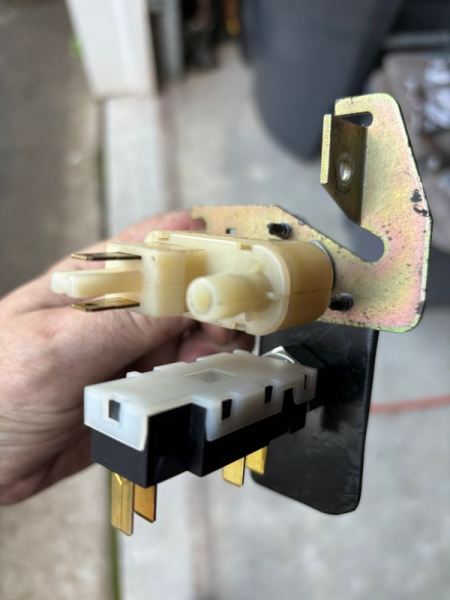
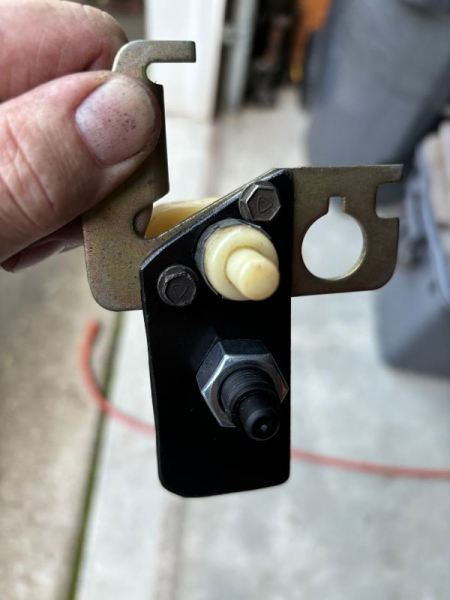
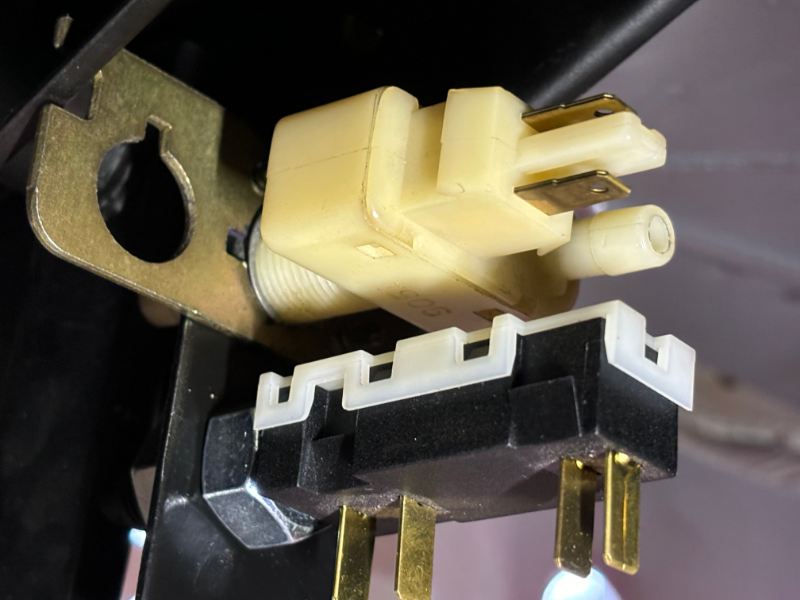
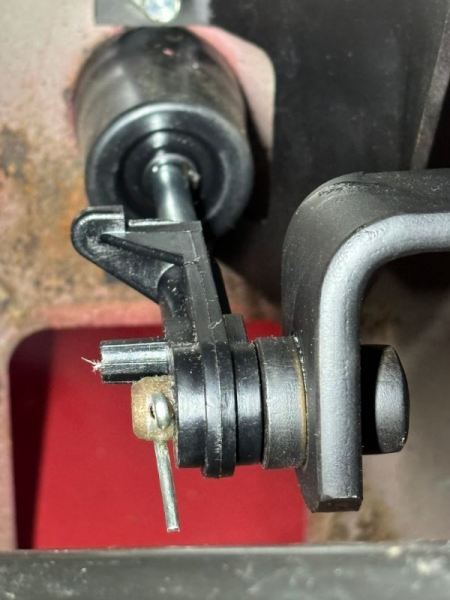
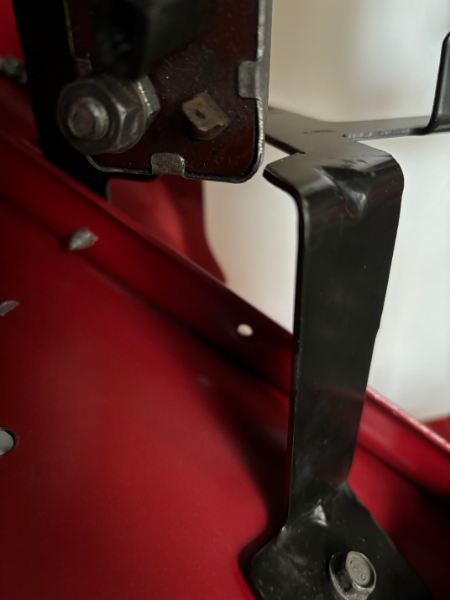
Modified cruise vacuum dump valve bracket. I used a leftover scrap of the HO PDC/ coolant bottle bracket to accommodate the GM style switch for cruise system power and brake light (95-96 brake booster setup with no grinding on the rod).
-
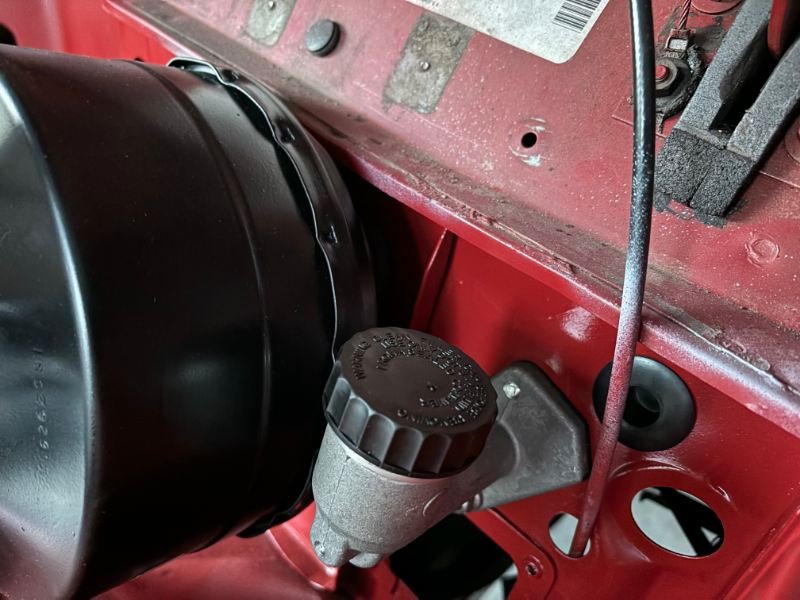
New clutch master- 91-96. Works with internal slave up through 93 and external through 96. I'm internal slave for now, with plans to go external at some point later. The 91-93 clutch hose works for this and I've already got one in great shape, though it's from a YJ and I can make it work pretty easily. HO has a .011" larger bore than the Renix .688" It also has the rubber sleeve all the way through the firewall and has a positive stop. Perfect fit and rod angle on the Renix clutch pedal assembly.
-
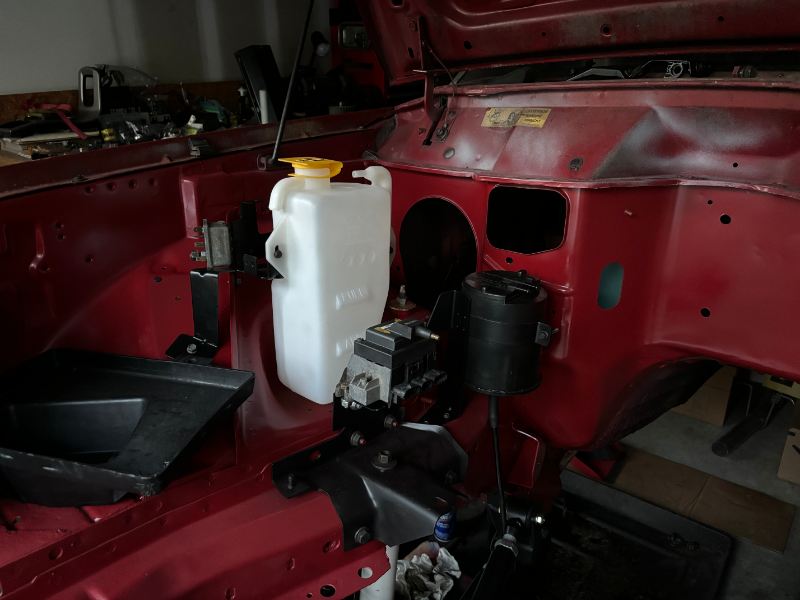
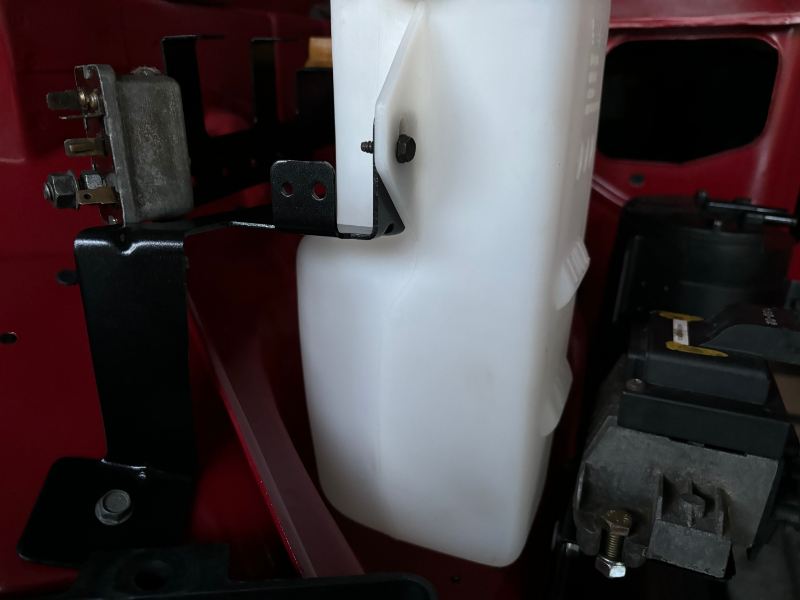
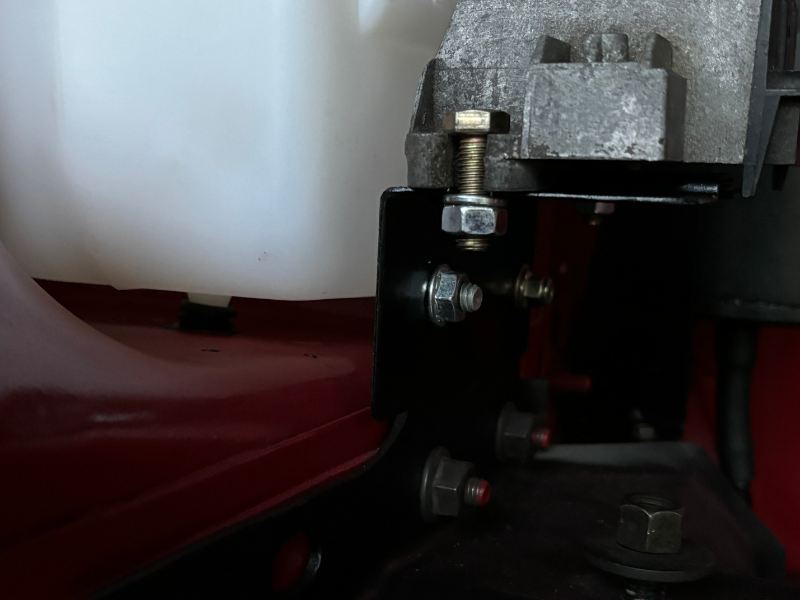
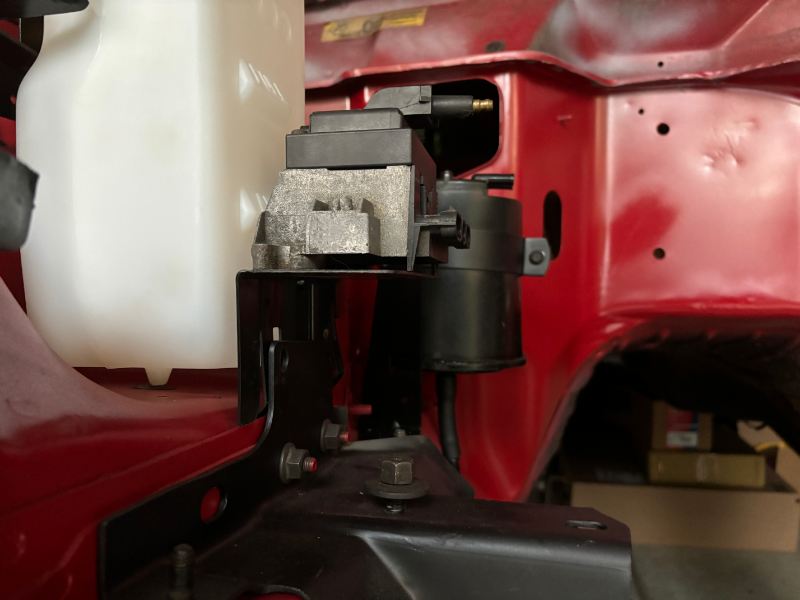
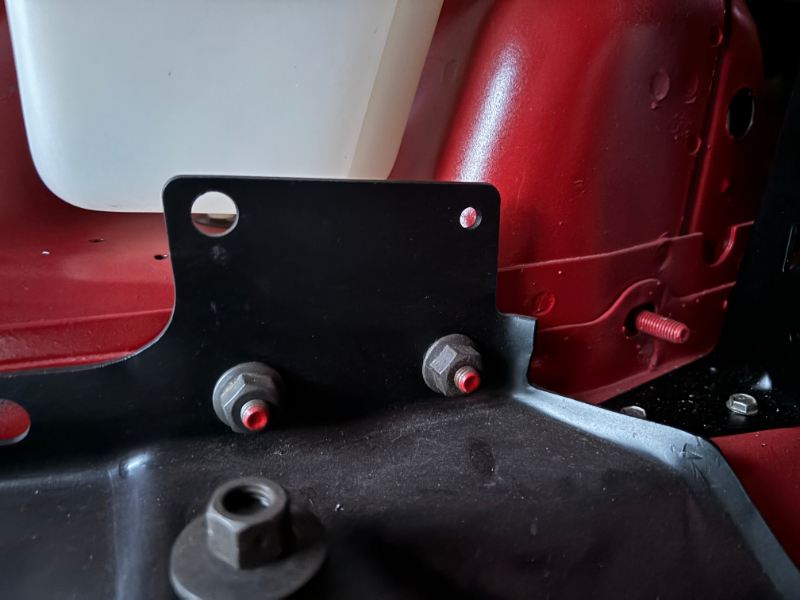
I finalized the brackets for Renix PDC, coil/ module and HO coolant bottle. In HO models, the locator nipple on the bottom of coolant bottle fits in the hole to the upper coil spring mount. Renix years these are capped off. Every HO XJ I've ever seen in the boneyard has a ton of moisture and crud jammed down in there, which traps moisture in the void above the bumpstop mount. So I mounted the bottle a little higher in its bracket with the hole capped underneath it and used a rubber grommet as a cushion. The coil bracket is a piece of the PDC bracket reused and bolted to the pass, side engine mount bracket. All the metal got cleaned up and painted with engine enamel.
-
First, welcome to the forum, glad you're here! If this is your first MJ, or if you've had Comanches or Cherokees before, this forum is one of the best around in terms of experience and know-how. Congratulations on your recent acquisition. Universally, we suggest going through the thread Cruiser54's Renix MJ and XJ tips for a lot of things to improve reliability and driveability. Beyond that, ask lots of questions before buying parts!
-
Switching From Renix to OBD11 ~Staying RENIX~
Gojira94 replied to Drahcir495's topic in MJ Tech: Modification and Repairs
If Renix computer 87-90, and all associated sensors it needs/ understands - Renix flywheel to make the proper signal with the crank sensor. Plus Renix harnesses. If HO era computer 91-01 (all flavors), and all associated sensors it needs/ understands - HO flywheel to make the proper signal with the crank sensor. Plus HO harnesses. To run a complete 91-01 HO setup in an 87-90 MJ/XJ: HO flywheel, change out all the sensors to the ones HO computer needs/ understands, HO computer/ harnesses for the matching year(s), including VSS setup/ instrument cluster/ cruise control system, if applicable. EDIT: Also need to make fuel system delivery changes as noted above by ghetdjc320. To run that 97 HO 4.0 on Renix: Renix flywheel, change out all the sensors to the ones Renix needs/ understands, Renix computer, Renix harnesses (preferably 89-90 to avoid C101 headaches), including VSS setup/ instrument cluster/ cruise control system, if applicable. I've got a 93 YJ drivetrain that I'll be running on Renix in my 87 MJ project. I've acquired the Renix flywheel and all the sensors Renix computer needs/ understands. Also got the Boosted Technologies version of the TPS adapter, so I'm free to run whatever throttle body/ intake combo I want. My rig came to me with a complete and intact set of 89-90 4.0 Renix harnesses and computer, so that drove my decisions on doing Renix control of an otherwise mechanically HO engine. Using the cable driven speedo and Renix era cruise control. -
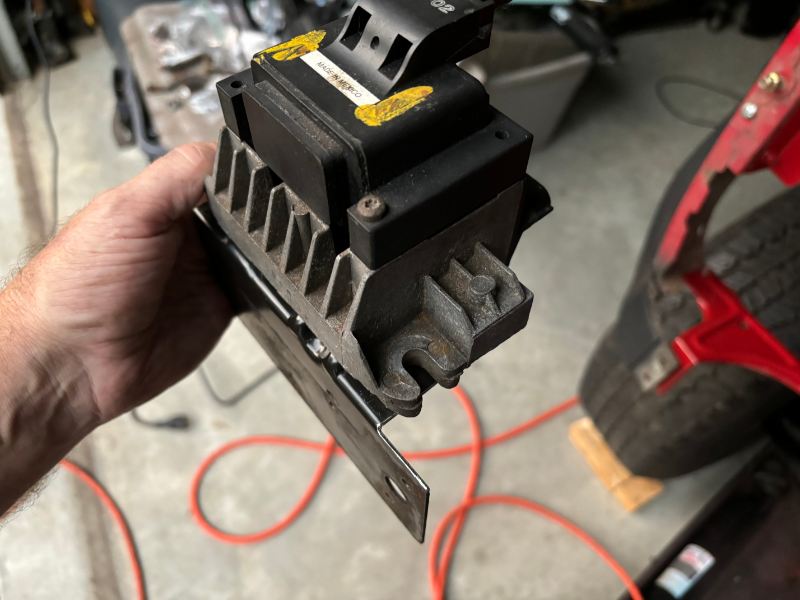
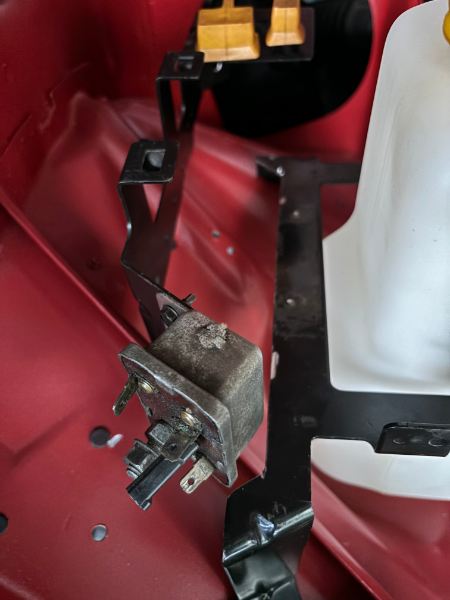
Then, what about the coil and module? There's the fuse block half of the bottle mount to work with, and bolt to the passenger side engine mount bracket: I can see I'll need to put a small rubber cup under the bottle's locator... nipple... and the coil/ module will sit kind of like this: Except flip it the other way and trim it first and then drill some holes for the module to mount to: Drill holes where it sits here, and bolt it to this plate, something like this: Then the other end can be drilled to fit onto these existing holes in the engine mount bracket, which I think are for the Renix coil/ module bracket anyway. I'll keep that original piece in a drawer... If I have to pull the coil/ module wiring out of the harness and split it off into its own loom I'm fine with that. Won't know until it's pretty much all in there. I think the wiring around the solenoid/ relays will be 100% fine without modification.
-
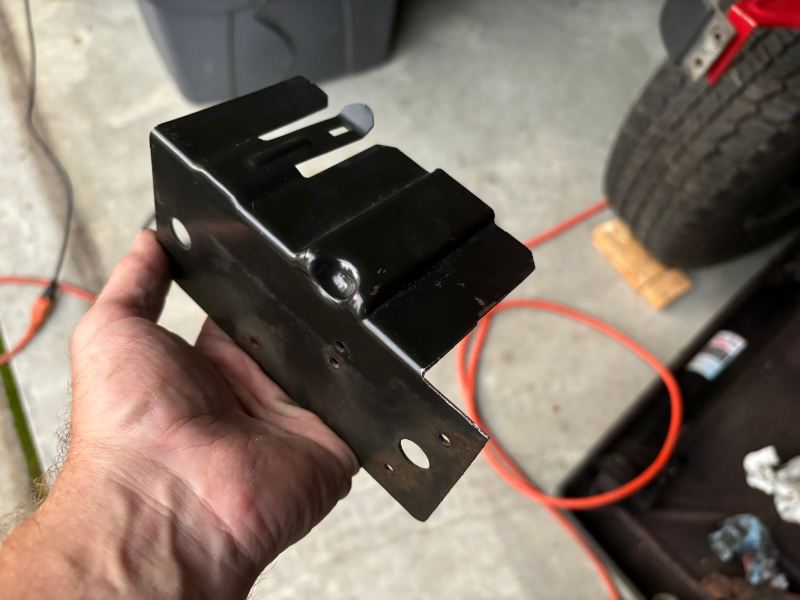
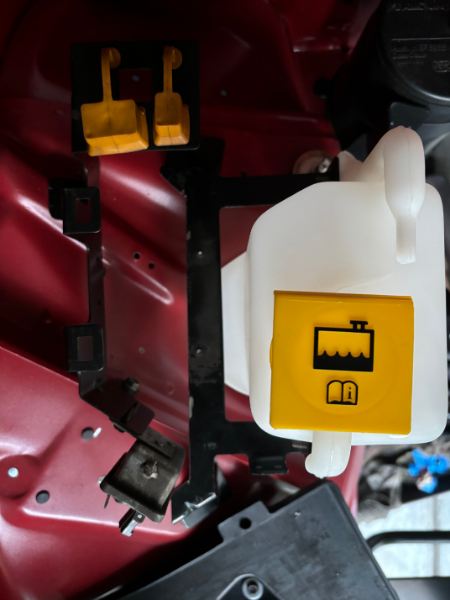
So... how to use an HO overflow bottle with the Renix relay and solenoid bracket? Easy. Cut up the HO bottle/ fuse center bracket and drill a couple new holes. I separated the HO fuse bracket into its 2 pieces (drilled out the rivets) and then cut out another section to keep just the bottle bracket and clear the Renix bracket. Then move the Renix bracket up the pinch rail thing on the wheelhouse panel about 2 1/2" - 3"and drill new holes for it.
-
Switching From Renix to OBD11 ~Staying RENIX~
Gojira94 replied to Drahcir495's topic in MJ Tech: Modification and Repairs
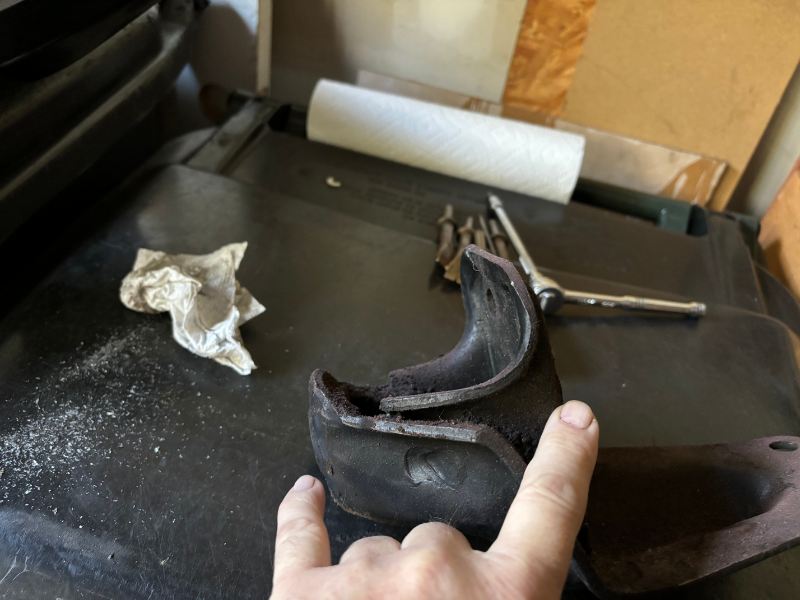
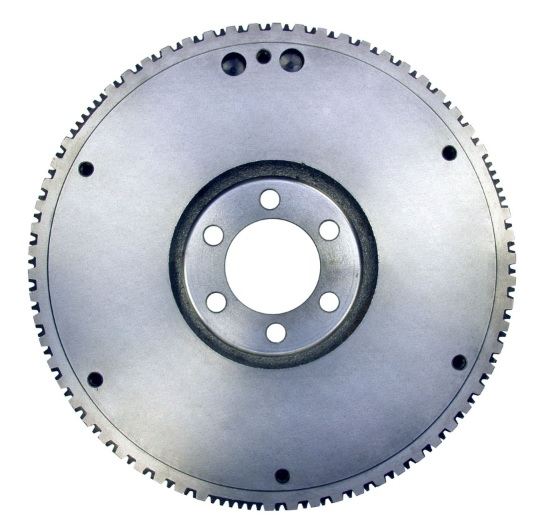
"Tone ring" -yes, the number and spacing of the voids in the crank sensor signal. Represent cylinder timing for fuel/ spark events (3 vs 12). Renix flywheel on the left, HO on the right: Flexplate for autos has the same tooth arrangement for Renix vs HO.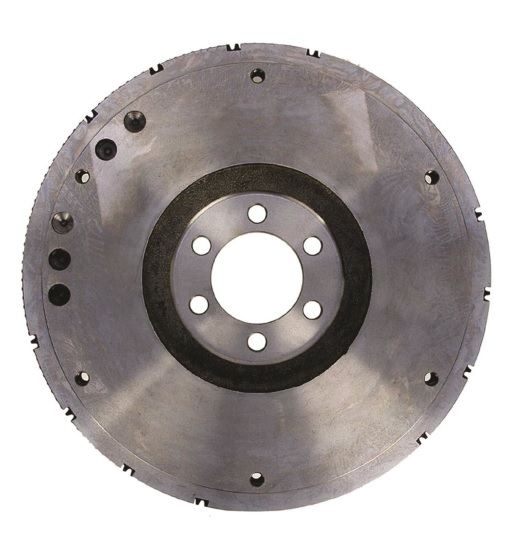
-
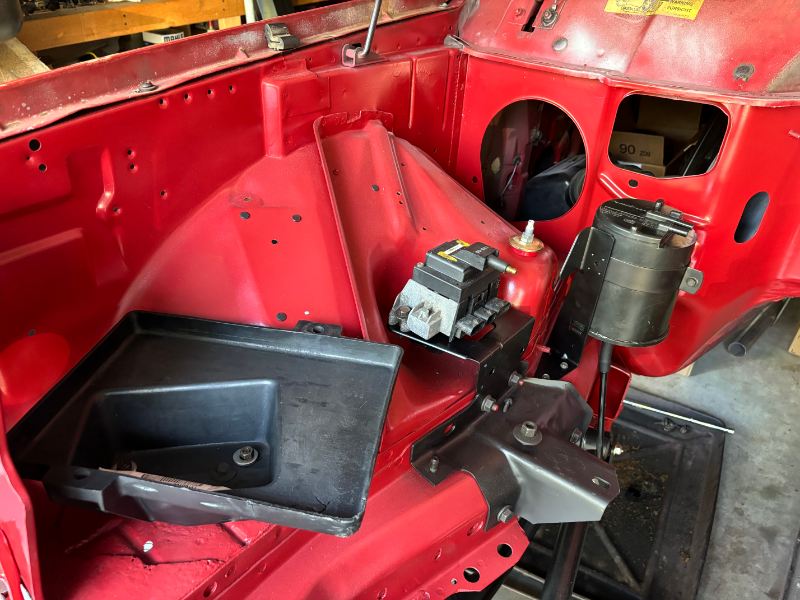
Couple more bits and pieces. Battery tray, new filter in canister and buttoned up, coil and module, front lower supports.
-
Thank you!