

White_Comanche
-
Posts
263 -
Joined
-
Last visited
Content Type
Profiles
Forums
Gallery
Everything posted by White_Comanche
-
'86 Comanche Badges on Ebay
White_Comanche replied to Boilermaker's topic in Craigslist/eBay... i.e. Not Your Stuff
Yes, they did a good job of slicing the old adhesive. With a little TLC, these will be golden. -
Replicating MJ Bumper Caps
White_Comanche replied to White_Comanche's topic in Vendors- members making products for MJs
Using t-nuts is probably a great way of mounting these. Thanks for the input guys. Yes, I intend to add some thickness to that bar for more support. The idea is to have that mid support completely flat. End user would ultimately dry-fit, mark and drill holes. This allows for slight variances in hole locations, bumper warp, etc. And gives flexibility on the chosen method of bolting them in. -
Replicating MJ Bumper Caps
White_Comanche replied to White_Comanche's topic in Vendors- members making products for MJs
Been getting help with a molding supply company on fabricating these. We're getting closer to identifying the best method. They're complex parts to mold, but I accept the challenge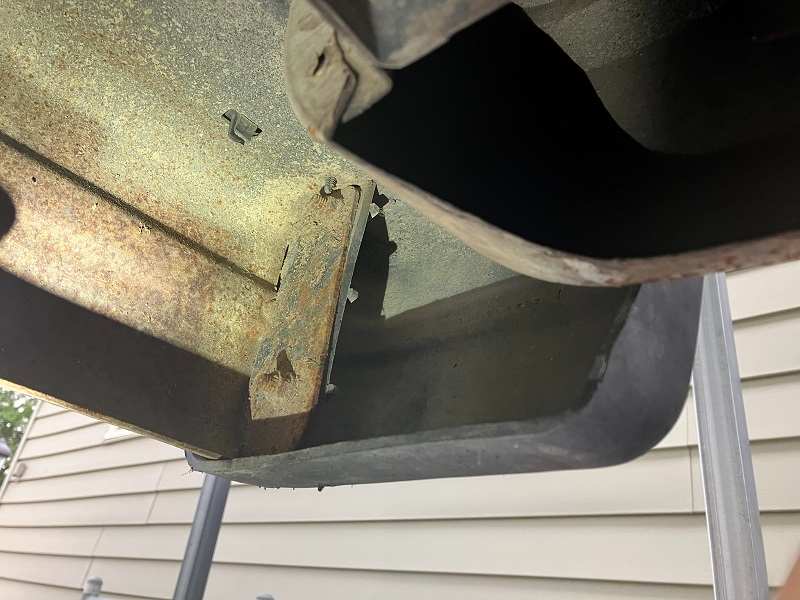
-
Mildly Rough Clutch Pedal
White_Comanche replied to White_Comanche's topic in MJ Tech: Modification and Repairs
Getting a little closer to replacing all the parts of my clutch hydraulic system. However, I still need to purchase both the slave and the line. Would this be the correct hydraulic line/hose to use on my 1986 2.5L? The two Mopar numbers (52000069 & 53004247) forward to this part. If correct will this line match up with my supposed factory line? Or will a tubing bender likely be needed? (links at the bottom) https://www.rockauto.com/en/moreinfo.php?pk=2888325&cc=0&pt=2332&jsn=502 https://www.dormanproducts.com/p-48395-h38270.aspx?origin=keyword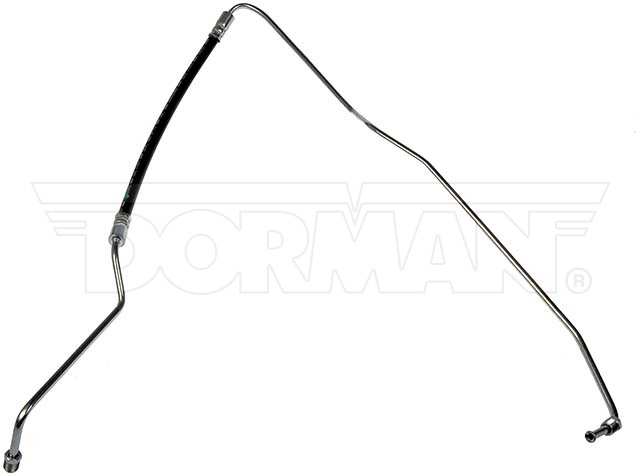
-
2.5L ISA Motor Rebuild
White_Comanche replied to eaglescout526's topic in Vendors- members making products for MJs
This is fantastic! Great to hear about offering ISA motor rebuilds. This small mechanical piece is quite important to the 2.5L. Sounds a whole lot better than buying aftermarket. Great service for little expense. -

-
Replicating MJ Bumper Caps
White_Comanche replied to White_Comanche's topic in Vendors- members making products for MJs
This is quite the nice pair I have. The lucky one(s) who might receive these will need to take some descriptive shots. This is one photo of several that I can share for those who think they have some caps. Direct message your pictures please.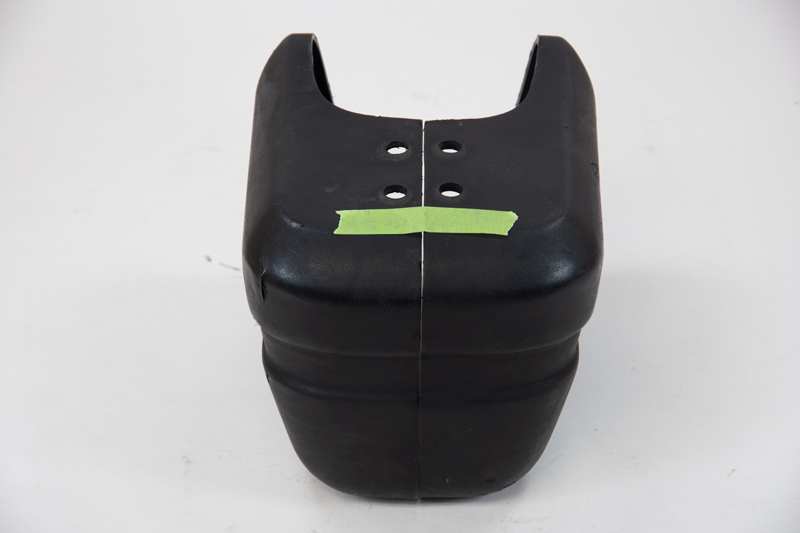
-
Replicating MJ Bumper Caps
White_Comanche replied to White_Comanche's topic in Vendors- members making products for MJs
Singles or Doubles will work, just as well. I'll send detailed pictures to anyone who has either. -
Replicating MJ Bumper Caps
White_Comanche posted a topic in Vendors- members making products for MJs
That pair from eBay arrived. The caps are just as described... straight, not warped, and not many imperfections. Molding and replicating these should be possible. Believe I'm almost there on how to go about mold making. Unfortunately, what ever pair I use, the studs will need to be sacrificed. I'll need to cut them out, and make that mid plastic spar flat. With that being said I am willing to exchange these with a pair that is equally MINT, but do not have the bolt studs for whatever reason. We both pay shipping, and detailed pictures will be sent of each pair. Administrators and frequent members of Comanche Club only respond please.
-
If I presume you mean your MJ flares... yes, try the Cerakote FIRST. Wouldn't want you to damage your plastic. It took me several attempts to understand how to blacken my CRV trim (permanently). No, I've not used that product, but have watched some videos, and heard some things about ceramic coatings. If I'd have to guess, its all about having it well washed and cleaned, while being in a cool area, and employing a smooth application technique.
-
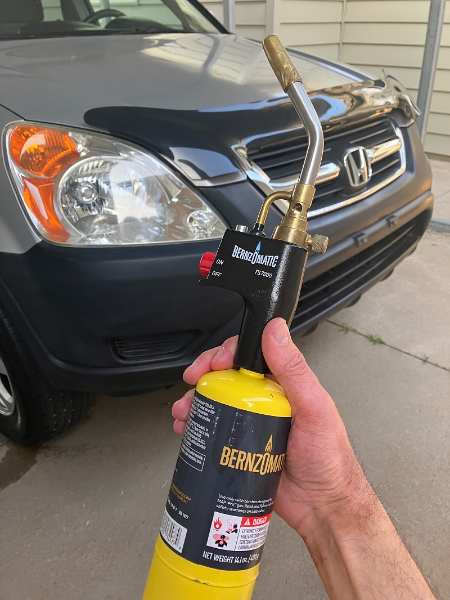
Thank you! Wish I knew this torch method years ago, because my front fascia is not original. The piece installed at the factory began looking very chalky so I replaced it with aftermarket. This method would have easily restored it back to condition.
-
Rear bumper end caps
White_Comanche replied to fiatslug87's topic in Craigslist/eBay... i.e. Not Your Stuff
Thanks for letting me know this. I'm the one who bought that pair on eBay. May very well reach out and see if I can use them. I'll start a new topic in the near future. Keep that pair handy please. -
Rear bumper end caps
White_Comanche replied to fiatslug87's topic in Craigslist/eBay... i.e. Not Your Stuff
Great, I'll start looking around for a suitable casting product. We should probably start a dedicated topic on this in due time. -
Rear bumper end caps
White_Comanche replied to fiatslug87's topic in Craigslist/eBay... i.e. Not Your Stuff
Just what I thought, figured the plastic was formed around some sort of a flat piece. There's gotta be a workaround to bolt these caps to the actual bumper. I'll take a look at my caps and start thinking of an alternative. There's ALWAYS a future MJ project to think of -
Rear bumper end caps
White_Comanche replied to fiatslug87's topic in Craigslist/eBay... i.e. Not Your Stuff
Guys, I just thought of something. Parts like these can easily be cast and duplicated. I have experience doing this. A pourable two-part product is surely available that cures into a semi-flexible plastic. Have not done any research, but there's gotta be something available. The question I have are these threaded metal pieces... are they actually embedded into the rubber?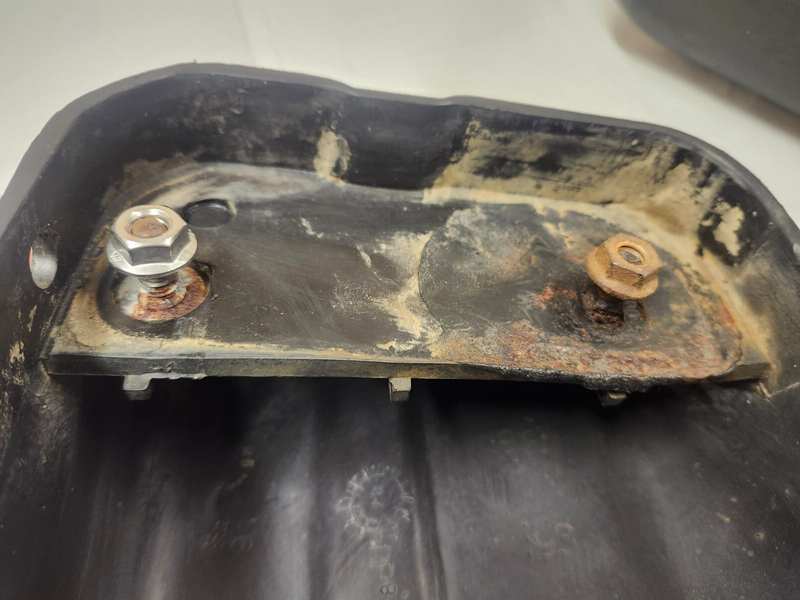
-
Rear bumper end caps
White_Comanche replied to fiatslug87's topic in Craigslist/eBay... i.e. Not Your Stuff

-
Rear bumper end caps
White_Comanche replied to fiatslug87's topic in Craigslist/eBay... i.e. Not Your Stuff
Then how bout Pete or somebody buys this pair, and we all pitch in 10 bucks. Seriously -
How to Straighten Bumper
White_Comanche replied to James92's topic in MJ Tech: Modification and Repairs
Yes, how could I have made that mistake? Would not trust Crown Automotive on such an integral part. -
How to Straighten Bumper
White_Comanche replied to James92's topic in MJ Tech: Modification and Repairs
Looks fantastic! Really wouldn't be worried about scratching it... Revealing the cost from your local area helps out too. Have been curious about that and the end result. I have an annoying doof on mine as well. Excluding the cost of powder coating, paying a shop beats what you can find custom on eBay. Some of the ones on eBay look cool, but the price doesn't. KEYPARTS & CROWN SHOULD TAKE NOTE ON MJ BUMPERS.
-
Thank you! This time I used a new product called PowerPlastic 4Lights by Mothers. Along with foam applicator pads, tape and elbow grease. I have needed to do this 2 or 3 times per year. This product is supposed to provide UV protection. Prior to this I just used a scratch remover intended for paint, and the lenses for sure yellowed in a few months. We'll see how they keep up now.
-
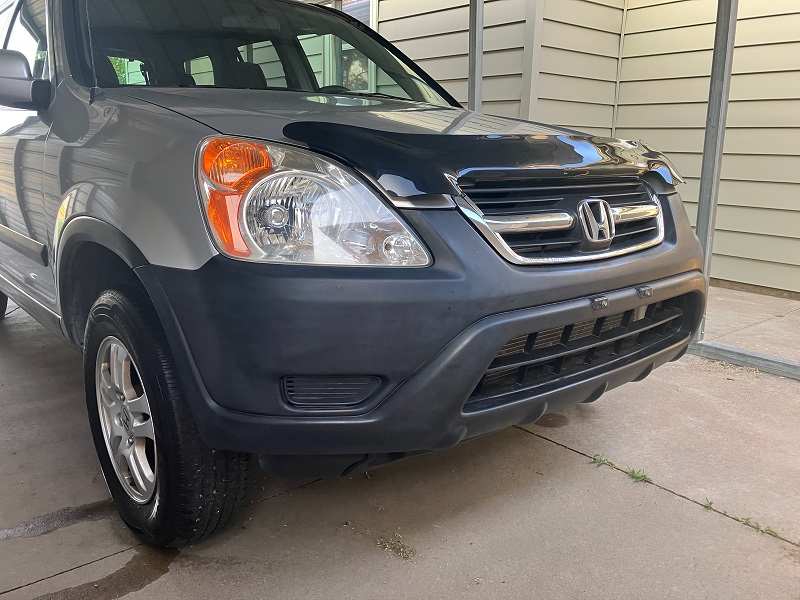
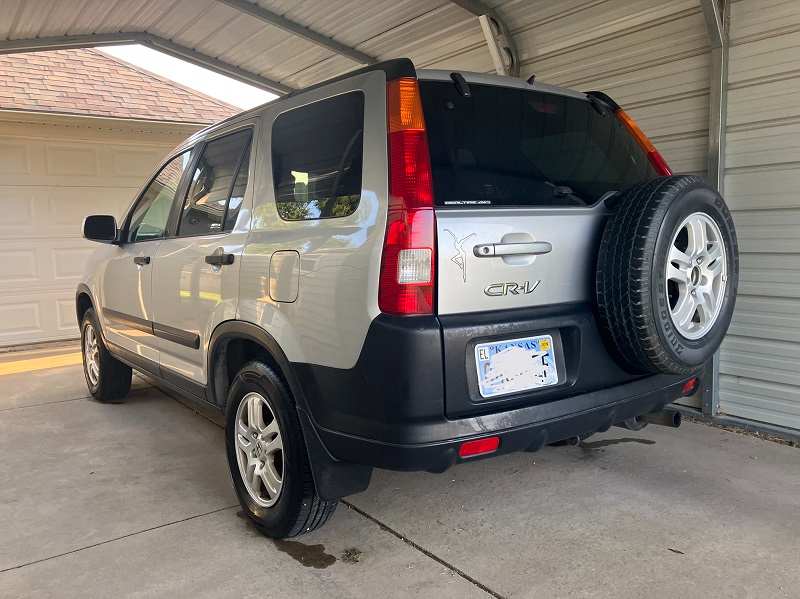
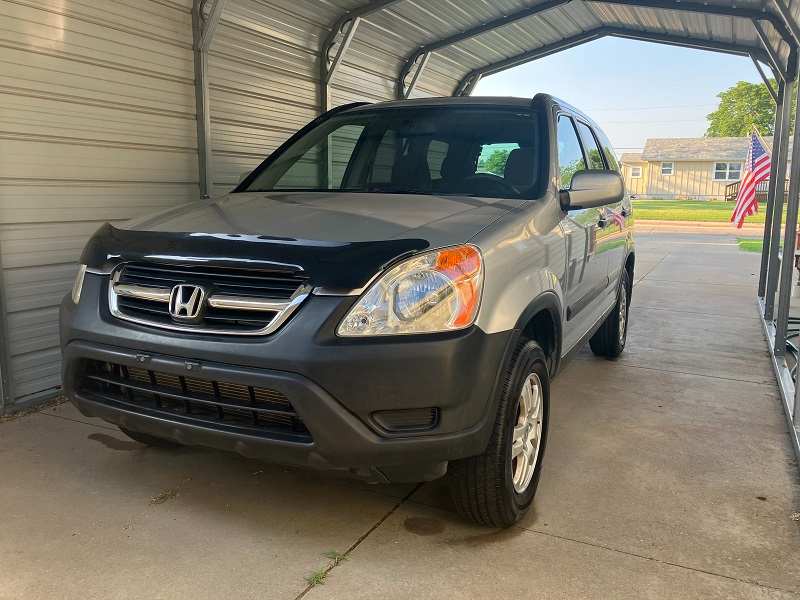
INTRODUCING A NEW COMMUNITY TOPIC Starting out, I gave my 2002 Honda CRV EX some much needed TLC. Spent most of the day cleaning her up. Thoroughly vacuuming, washing, detailing, etc. This time I rejuvenated all the black plastic with the torch method. All plastic that is now black used to be either light grey or almost white. Head light lenses were also restored with hand buffing. That's just bare black plastic... no protectant applied. It's a night and day difference.
-
Mildly Rough Clutch Pedal
White_Comanche replied to White_Comanche's topic in MJ Tech: Modification and Repairs
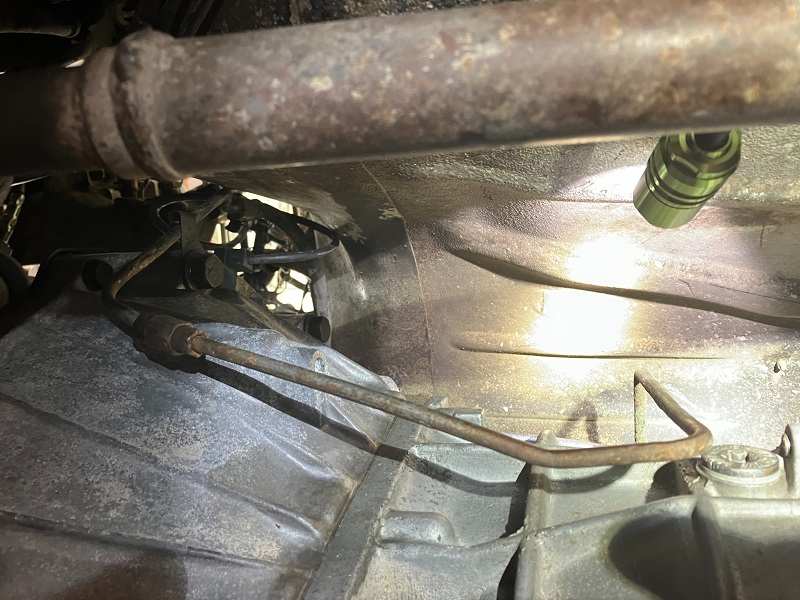
Yes, found out there's not much working room. A bit awkward really. A 10mm box end fits over that valve. I thought about getting something like this to help bleed the system. It's a brake bleeder wrench with a tube attached. There's a few styles of these around. Both with internal and external check valves. They create a positive seal apparently. A wrench like this could work in that tight space. I'm thinking of buying a NOS Mopar slave to keep things OEM. When looking at that bleeder valve it seems like it's just a threaded fitting. Is it simply loosening up the fitting until fluid begins to flow? I may ask about lowering the transmission in the future. I haven't done something like that before.
-
Mildly Rough Clutch Pedal
White_Comanche replied to White_Comanche's topic in MJ Tech: Modification and Repairs
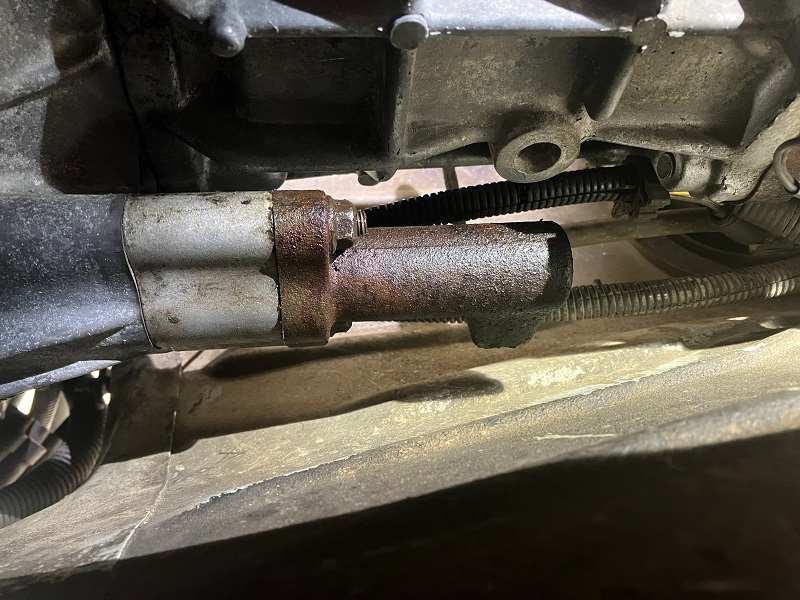
@eaglescout526 Initially, I had plans only to replace my clutch cylinder. But I know there's a leak somewhere, because I need to top off the reservoir every once in a while. Later this summer I plan to replace my entire clutch hydraulic system (clutch master, slave cylinder & the hydraulic line that connects the two). Got under the vehicle today and got a visual on everything. Think I should be able to tackle this. I own an official M.R. 277 manual for this 1986. I'm curious of what the manual says is the correct way of bleeding. Quote from the book is below: BLEEDING PROCEDURE • (raise vehicle and fill reservoir) • Remove the slave cylinder from the clutch cover housing and remove the push rod • Compress the slave cylinder plunger using tool J-24420-A or equivalent • (after this do the standard half-filled bottle bleeding procedure) Do I need to have the slave removed and somehow compressed to properly bleed the system... or can I have the part installed beforehand?
-
Hey man, we're interested in that jack setup you have! Shoot some photos when you got time.
-
YES, keep us up with your finds.