


pizzaman09
-
Posts
1506 -
Joined
-
Last visited
Content Type
Profiles
Forums
Gallery
Everything posted by pizzaman09
-
Another Battery thread, oh boy!
pizzaman09 replied to NC Tom's topic in MJ Tech: Modification and Repairs
I just put a group 34 Interstate in mine to replace the groupe 56 Interstate that was in it that has been on its last legs since the day I bought the truck three years ago. I usually buy the Walmart batteries but I had a horrid experience with trying to get a Warranty on one and wrote off ever doing that again. From a cranking speed standpoint, the new battery significantly sped it up but after a couple weeks it doesn't crank as fast as it had when the bat was fresh. I wonder if I'm not quite charging at a high enough voltage. My REM tends to show mid to low 13V when running. -
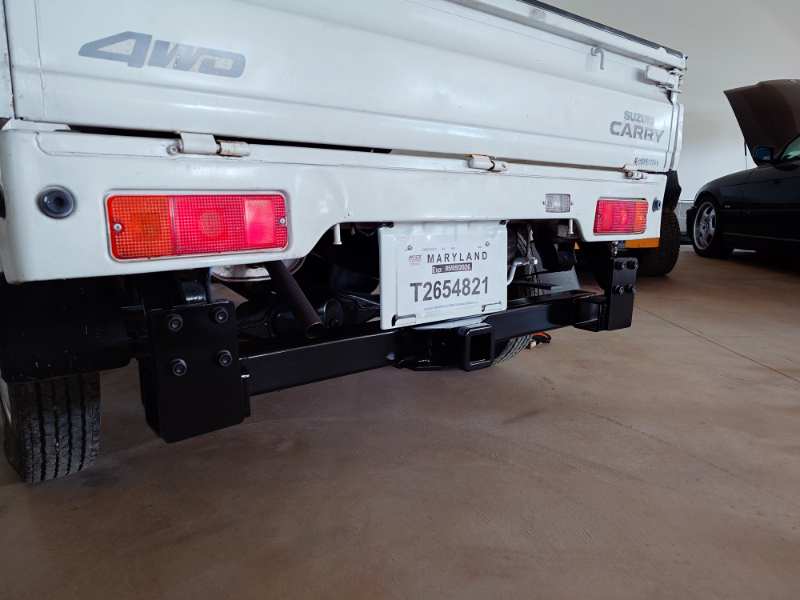
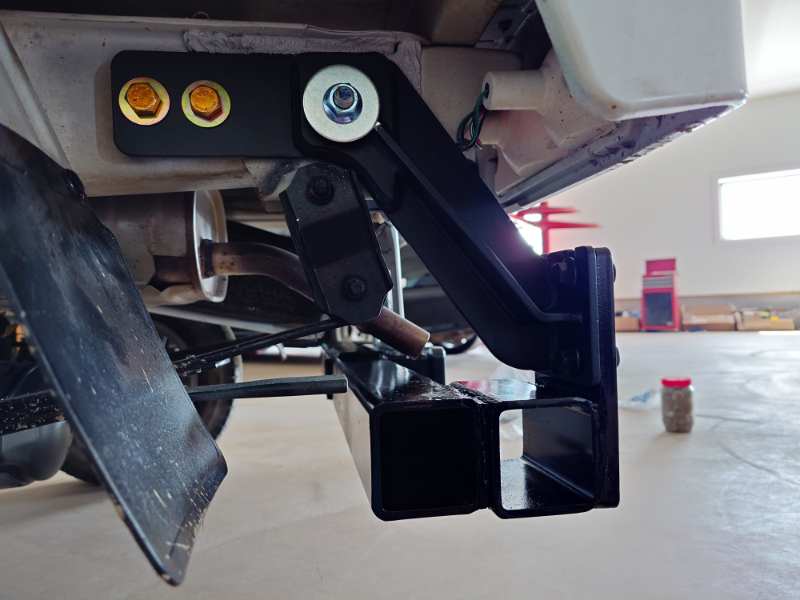
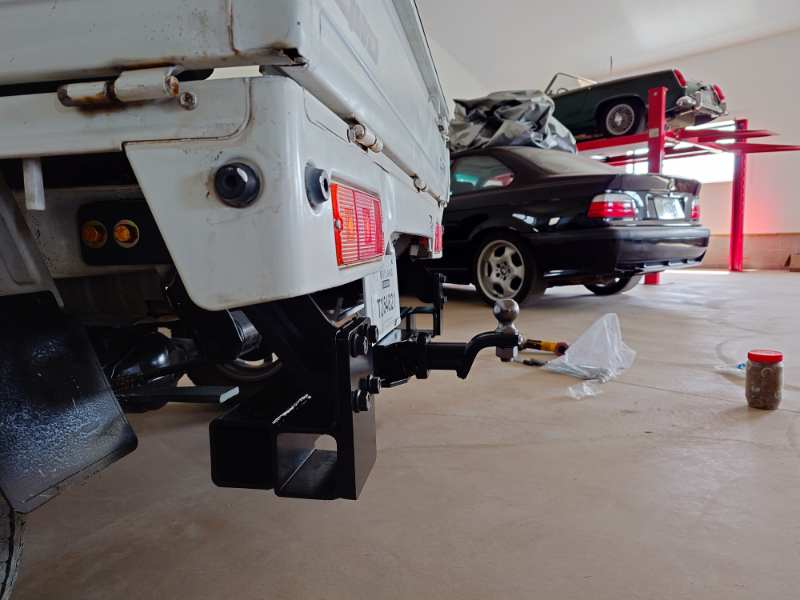
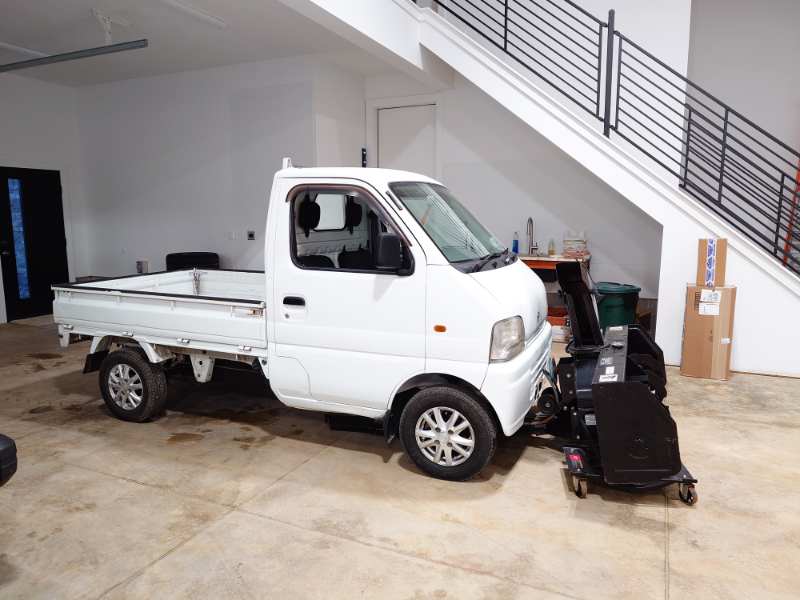
Built a rear trailer hitch setup for the snow blower build. The hitch assembly is a 16k lb hitch designed for an RV. The brackets that attach to the frame are from an online source called "Lucky's Fab Shop." They make all sorts of bumpers for Kei trucks and offer the bracks to fabricate your own bumper. we did cut about 1.25" off of the helper leaf springs to allow the hitch to be tucked farther under the truck. The goal was to get it as close to flush with the back of the truck as possible so as to not add much length to the truck and reduce the moment put on the frame when tongue weight pushes down on it.
-
If I was to buy a Jeep of that vintage, I'd seek.ome out with the overhead cam inline six. It's such a cool engine.
-
That's a nice little head unit! I'm usually a vintage head unit fan but I like that, it's clean and has a dedicated volume knob.
-
MayDay!! - Hard Accel Killed Idle
pizzaman09 replied to AnotherOldJeepGuy's topic in MJ Tech: Modification and Repairs
Yes, I did it with everything in place with the wheels on the ground. I may have used some sockets too, I don't particularly remember. I know I used a ratcheting box end wrench on some, and had to install a bolt in the back hole as the stud and nut had backed out completely and was missing. The front lower stud may be easiest to reach from above in front. -
MayDay!! - Hard Accel Killed Idle
pizzaman09 replied to AnotherOldJeepGuy's topic in MJ Tech: Modification and Repairs
I just laid under the truck with a box end wrench to get all of my bottom ones. That said I have long skinny arms, so that likely helped. It would be way easier to just remove the airbox and come in from the side. -
Nice! In the job market, it's often times who you know and having an in that gets you a first job. Having gone to a similarly large school, I have learned it's great being able to connect with so many others over a common topic.
-
That's logical. The one I've done just needed to be tightened and the anti rotation tab bent over on it to prevent it from backing off. It was in a full floating axle.
-
Swapping an 87 renix system into a 94
pizzaman09 replied to Rebel87's topic in Member Projects: Other Cool Stuff
I like this project -
On a nut like that, one could always use the old chisel method. That's what I did on the giant axle nuts on my Austin Healey Sprite, as did everyone else who has ever worked on it.
-
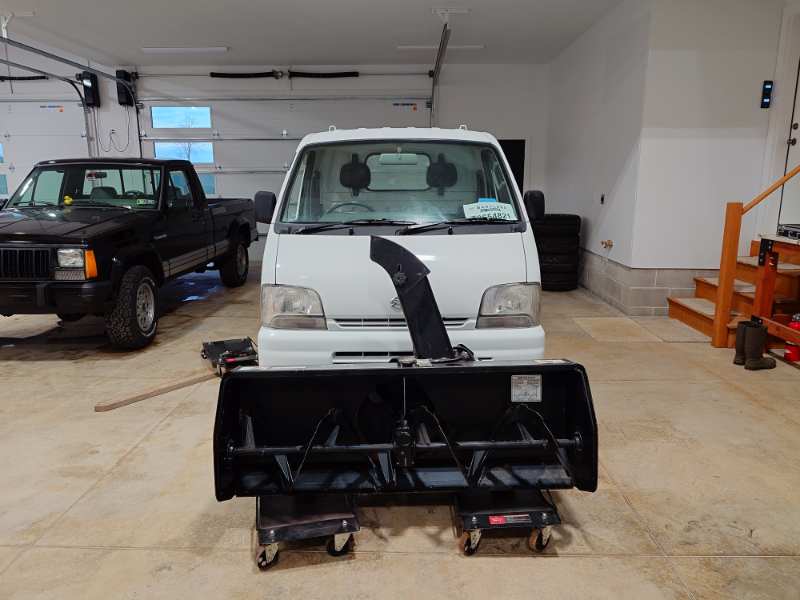
I just ordered some rear trailer hitch parts for attaching it at the rear. The blower is the perfect size. Will have to add some corner markers as you can't see the blower when sitting in the truck.
-
MayDay!! - Hard Accel Killed Idle
pizzaman09 replied to AnotherOldJeepGuy's topic in MJ Tech: Modification and Repairs
I'd spray some brake clean, starter fluidor even water around the possible vacuum leak locations to see if it reacts. -
Well done! What's the degree?
-
MayDay!! - Hard Accel Killed Idle
pizzaman09 replied to AnotherOldJeepGuy's topic in MJ Tech: Modification and Repairs
I'm very suspicious of the exhaust manifold, leak at the head due to jarring the engine hard one way then another. Check if your bolts are tight. The smoke is likely exhaust smoke. -
It was very simple, I drilled out the restrictor orifice in the back of the valve cover as large as I could safely do, I'll have to measure the dill but I used. Then I replaced the small factory vacuum line with a 1/4" vinyl tube, it fit perfectly. It still idles right where it always has at 650 to 700 rpm. The rear grommet used to leak oil profusely, the oil cap leaked and so did the front breather port. The engine now actually has vacuum on the block at idle rather than blow back into the air filter.
-
No issue! I'm actually questioning if I need to change my pan gasket like I had claimed. A few weeks ago I modified my vacuum line between the intake and valve cover to have less restriction. I had oil leaking from all three valve cover ports. Now the valve cover is dry on top and there is far less of possibly no oil leaking from under the truck. I'm still awaiting all of the latent oil to stop dripping from where it was stored like the transmission cross member and transfer case skid plate.
-
It's a very easy job.
-
87 MJ D44 axleshaft endplay?
pizzaman09 replied to jpnjake's topic in MJ Tech: Modification and Repairs
Woohoo! Glad you got it sorted out! I've been disappointed so many times by cheap parts that anymore, I try to get the best name brand part I can find. Particularly bearings and suspension parts. -
Steering Gear for ‘87 2.5
pizzaman09 replied to Porquer's topic in MJ Tech: Modification and Repairs
My understanding is a later ZJ steering box can be a nice upgrade as they are faster compared to what came in an MJ. -
I had an Oldsmobile Eighty Eight, 1999 the final model year with a front bench. It was phenomenal. With it being FWD, the floor was nearly flat and thus have center seat passengers plenty of room. It was a true 6 seat car and we used it that way plenty of times.
-
Oh definitely a good lesson! I have a friend with a Suzuki Samurai who did not get a clip fully seated and lost a bearing on the driveshaft while driving. It got violently shaky in his words.
-
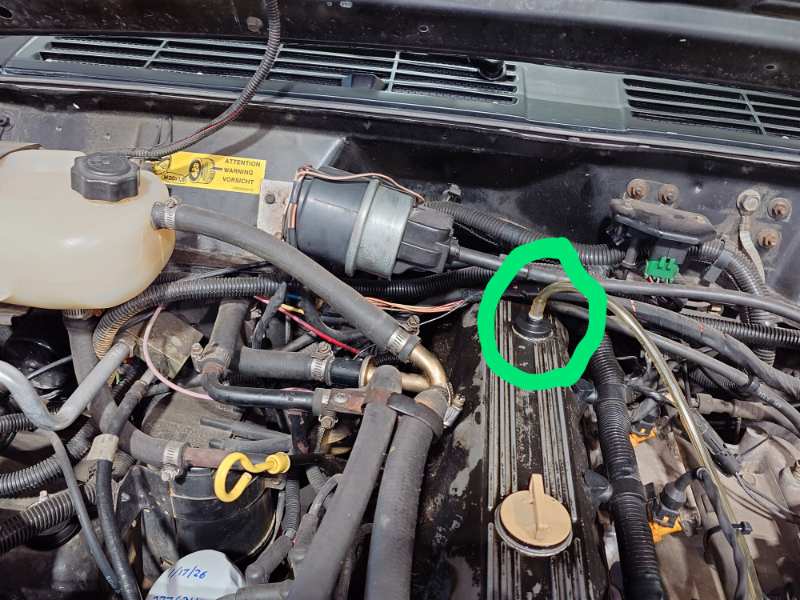
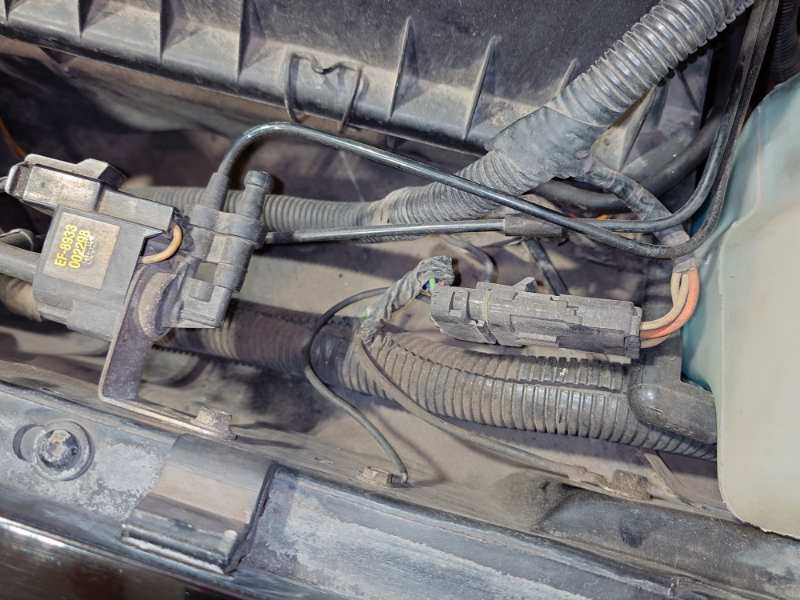
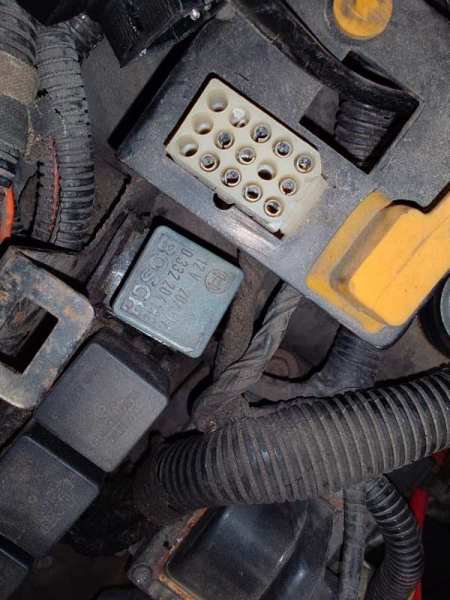
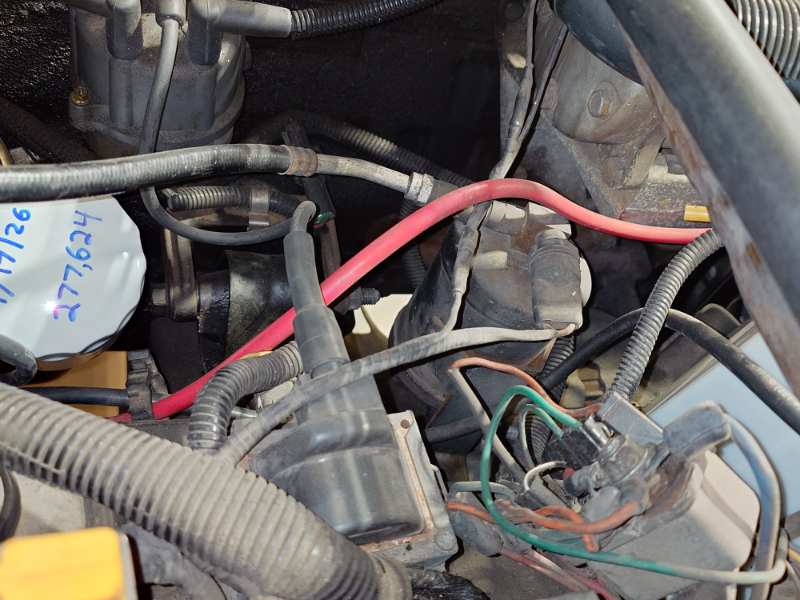
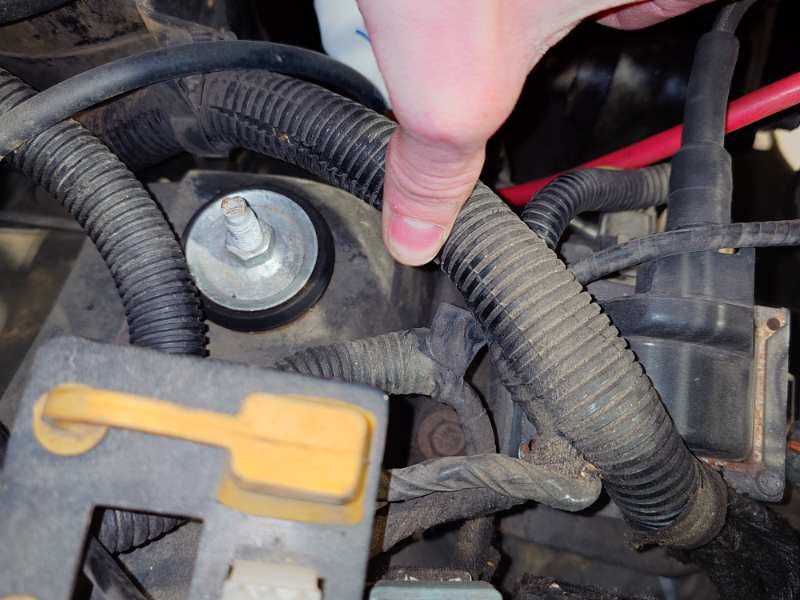
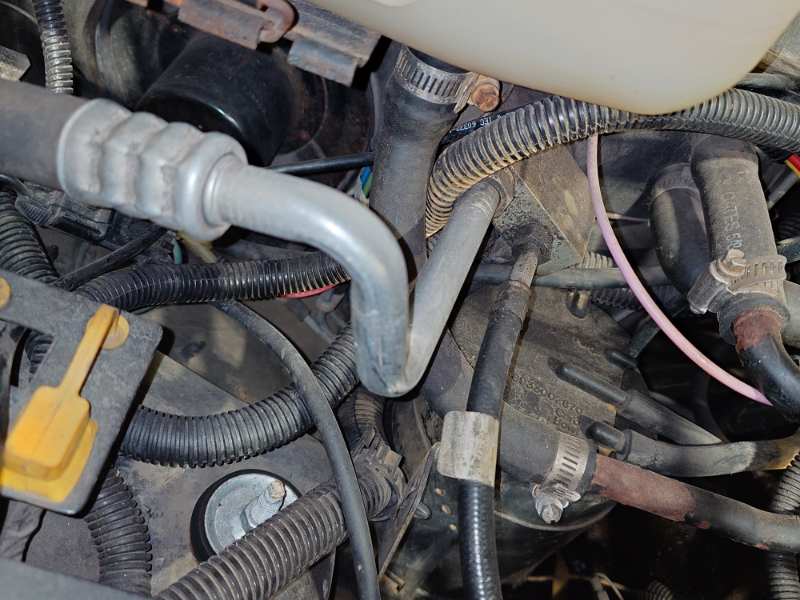
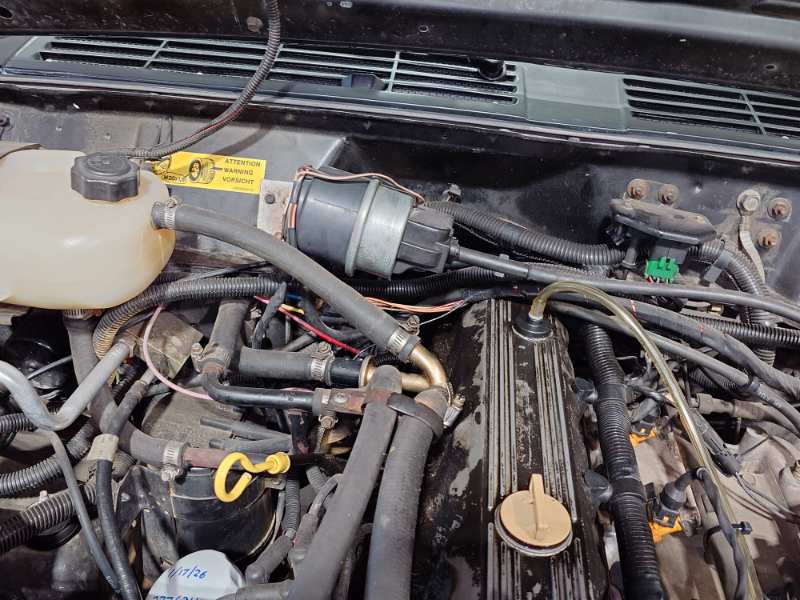
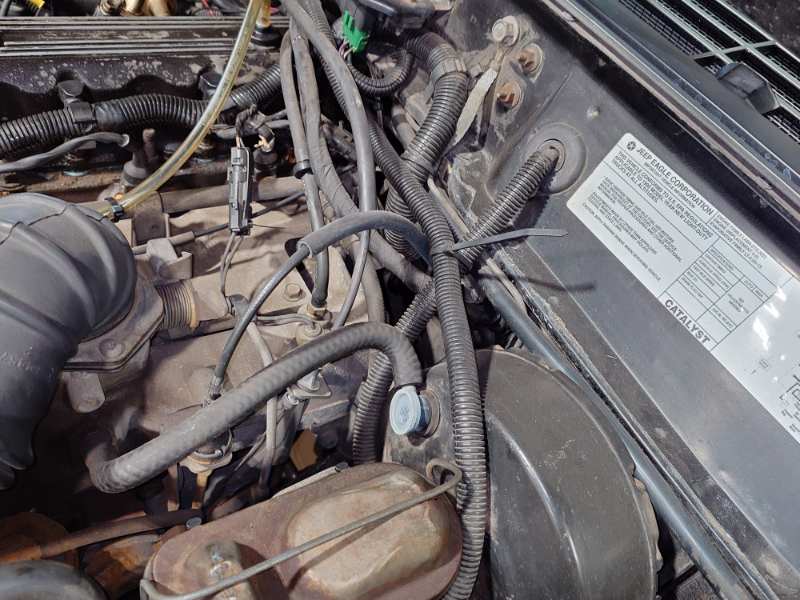
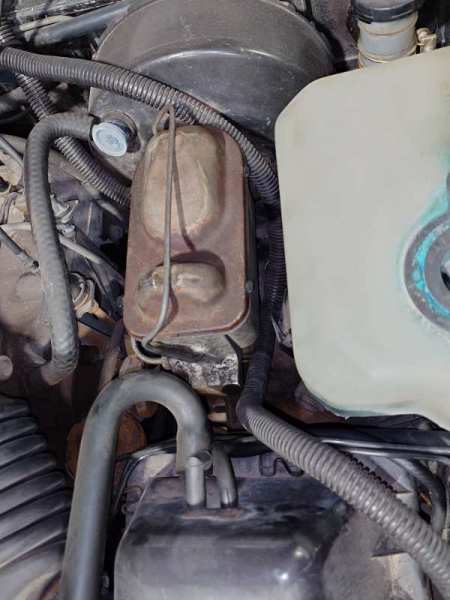
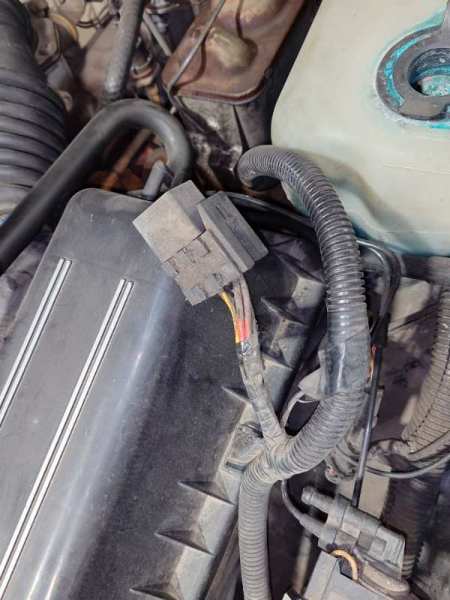
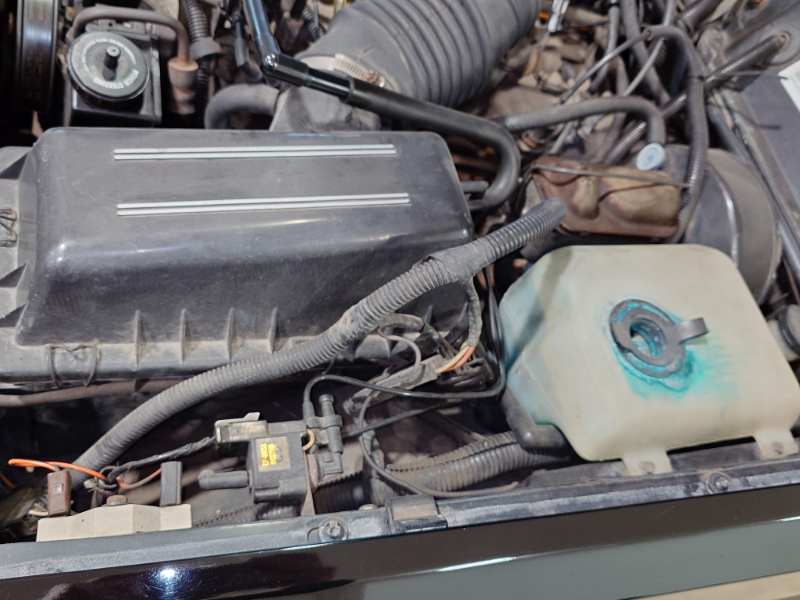
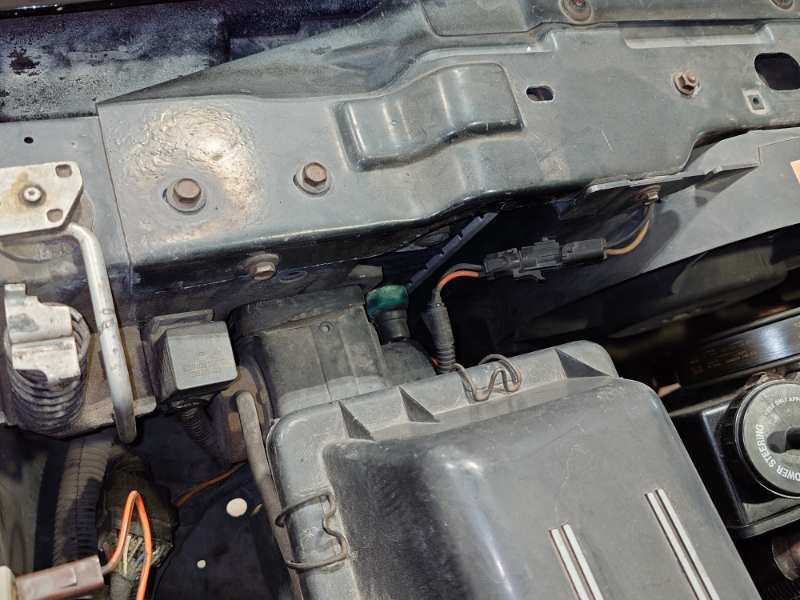
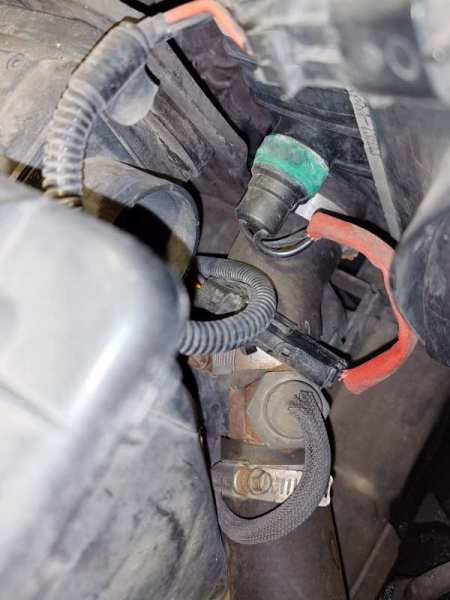
My truck has dealer installed AC. A forum member asked for how it was routed and where everything hooked up. I decided to post this for reference to anyone that might be trying to add AC. I took photos of the entire engine side harness. I started at the temp sensor and ended at the compressor. You can actually see two temp sensors in the photo below, the dealer spliced into the lower radiator hose and put the sensor in that has the black braided wire covering. This was done because stock radiators without AC didn't come with a threaded port for this. As my Comanche had a newer radiator with the port I put in the other sensor which is now crusty green and has the red wire. Both are valid approaches. Another wire from that end of the harness goes to the electric fan. The harness was routed under the front of the air box to run near the driver's side of the engine bay. It's the corrugated plastic covered line I pulled up beside the air box here. Near the back of the air box there is a relay plugged in. Detailed photo of said relay. 86 Yellow wire 87 Red and Red w/ black tracer 85 Both black wires 30 Gray w/ black tracer and Orange 87a no wires connected The yellow and gray w/ black tracer wires goto to the radiator temp sensor. One of the black and the orange wires goto the electric fan Right near this relay is where the dealer AC harnesses plugs into the truck harness. The truck harness is the big bundle of wires that runs over the drivers wheel well. Looks like it is grounded at the fender here too. The part of the harness that goes to the other side of the engine bay is routed around the brake booster. Up across the cowl, one zip tie held it to a wire harness it crosses. It runs across the top of the rear of the valve cover and routes down right under the left edge of the expansion tank between the heater core hose and the bottom expansion tank hose it's the wire harness that has crusty yellow coolant on it under the expansion tank. It then routes near the relays that are behind the ignition coil. Right in the center of this picture the harness splits off two ways, one section goes down to the relay that is how in the next picture, the second leg goes across the ignition coil output over to the compressor and pressure switch. The Bosch relay I just mentioned is mounted to the left of the other relays on the relay bar. You can see the wire that goes over the ignition coil splits and one connector goes to the pressure switch and the other goes up the back of the compressor. The compressor wires come up between the high and low ports and connect to the front of the compressor.


-
Good information on the shocks, I'll have to do that. I had not done that when I did this last, I wasn't sure what part of the suspension was preventing the movement of the axle down. I'll definitely try that this time.
-
Cps no spark slow crank
pizzaman09 replied to mbred0609's topic in MJ Tech: Modification and Repairs
Getting spark is a big step forward, congratulations! -
I had play like you describe on mine. I chose to change the tail housing bearing, it was actually pretty easy to do if you own a hammer and a wide variety of sockets to match the diameter of the bearing. I'm not sure it made a lot of difference but the new bearing did get rid of some of the wiggle and reduced my launch shudder.