

AZJeff
-
Posts
1312 -
Joined
-
Last visited
-
Days Won
1
Content Type
Profiles
Forums
Gallery
Everything posted by AZJeff
-
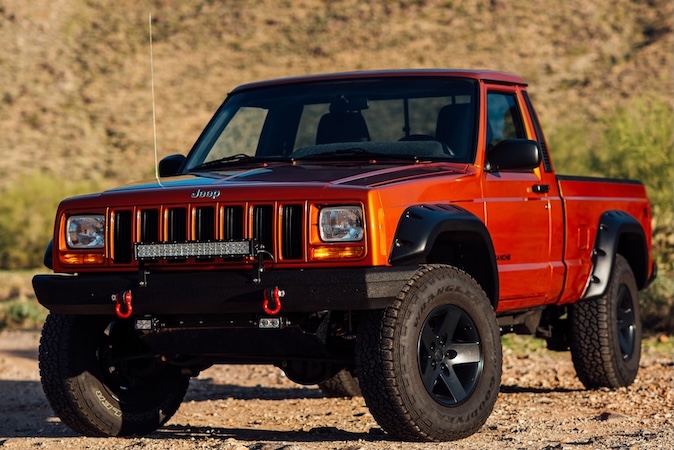
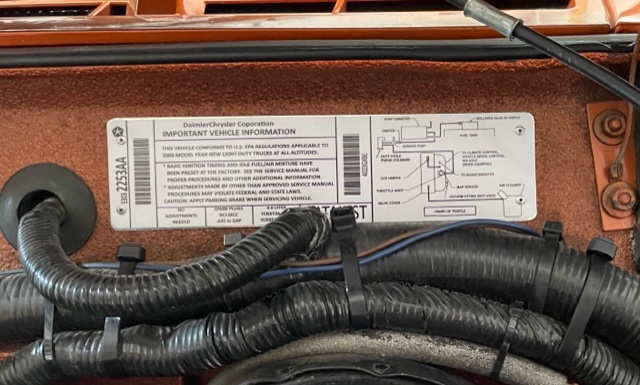
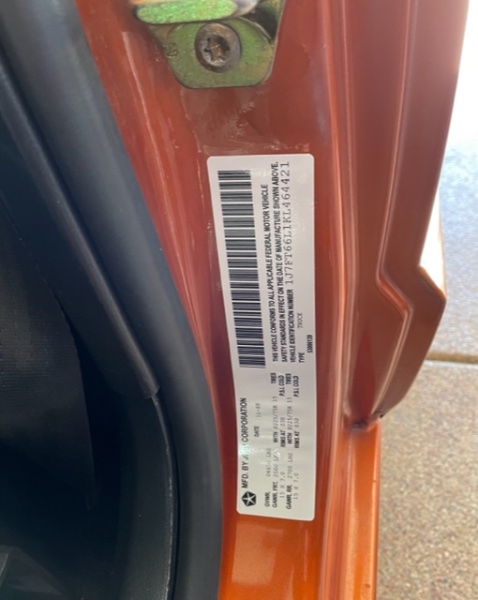
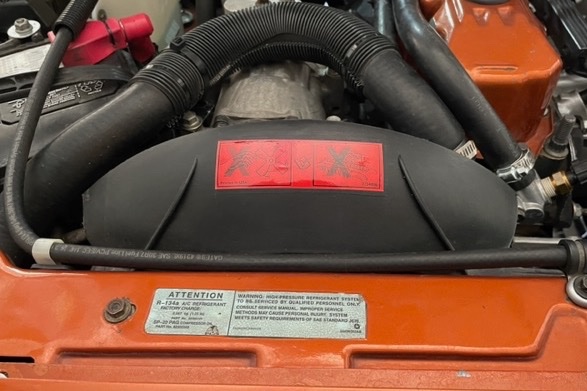
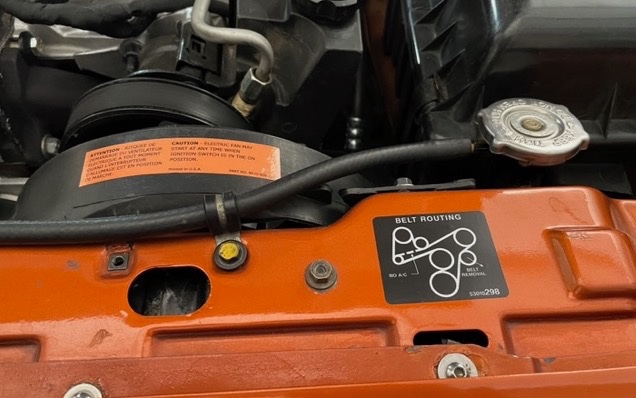
SoCalJeepComanche hooked me up with my semi-custom set of decals/stickers for my MJ. Mine is slightly unusual in that I have a 2000XJ's driveline in it, so my underhand "emissions" sticker should reference the 2000XJ information, but the rest of the stuff would be for the actual MJ chassis, which is from 1989. Here are the results in place. I did have to do something a bit unusual for my emissions sticker because the engine compartment is coated in bed liner, which a conventional sticker with pressure sensitive adhesive won't like. What I did was to attach the sticker to a sheet of thin aluminum of the same size as the sticker, and then pop rivet this assembly to the firewall in the appropriate spot. The rivets are almost unnoticeable, and thus the sticker looks OEM in appearance.
-
Our man in Guam is correct---an OEM one made from copper would be best. That said, they are like unicorns, so good luck. The next best choice is to go on to Rock Auto and look at all the aftermarket brands out there. I tend to try to choose heater cores from someone who has been in the aftermarket biz a while, and thus isn't just pushing out crap to make a quick buck and then fold their tent and move on. When did mine a few months ago, I chose one from Four Seasons, mainly because they have been providing aftermarket HVAC parts for a long time, and probably have at least decent suppliers for their cores and evaporators.
-
DO NOT USE URETHANE. Urethane is harmful to acrylic lenses. I did a bunch of research on this before I redid my taillights, and my initial plan was to use urethane, since I have experience with it as a retired engineer. Once I found MULTIPLE sources that said that urethanes and acrylics don't mix, I dropped it from my list of candidates for bonding the lenses. I would steer away from many RTV's due to UV stability issues. I live in AZ, and the sun here can be IMPRESSIVELY strong. That would make me worry about RTV longevity when exposed regularly to strong sunlight. (You should see my treated lumber trellises for the vines in my back yard...8 years old and due for replacement from sunlight damage.)
-
I used RTV, and found it bonded VERY poorly to the acrylic lens. I documented this in my write up. Based on my experience, I do NOT recommend RTV silicones for this application.
-
HERE YOU GO. MJ Taillight Restoration
-
I did a write-up a few months ago r on restoring MJ tail lights using née Key Parts lenses, and described the adhesive i used that is much more modern than the junky OEM stuff.
-
Used compressors are a crap shoot, and for that reason, I would consider them a last resort. reman compressors, in my experience, are worthless. I am 3 for 3 with failures of those. I HIGHLY recommend a new compressor if you decide you need one.
-
Could This Cracked Head be Fixed?
AZJeff replied to howeitsdone's topic in MJ Tech: Modification and Repairs
Given that 4.0 heads of that variation are a dime a dozen in junkyards, why spend the money to resurrect a cracked head? Remember, repairing cracked heads is a skill that not every shop is equally competent in performing. -
If you purge the manifold, contamination is nil. Pressures for R12 and R134a are such that one set of gauges are suitable for both.
-
The guages will be the same. What will be different will be the fittings on the hoses that connect to the fill ports on the vehicle. New fittings can be obtained to attach to the existing hoses. A new can tap valve is needed to connect a R134a can to the fill hose, and any auto parts store will have that.
-
It is considered good practice to replace the accumulator whenever the system is open to the atmosphere for any length of time, as yours will be. The accumulator contains a desiccant to trap any moisture left in the system, and when left open for long periods, that desiccant is trashed by that uncontrolled exposure to moisture. Accumulators are not very expensive, and a new one will insure best AC performance.
-
Keep in mind that if you are pulling parts from a junkyard, those parts are probably close to the same age as the ones currently in your vehicle. That means any refrigerant hoses and the blower motor are in a donor vehicle are aged. If I was re-doing the AC system in your vehicle, I would inspect my existing hoses for any signs of cracking or chafing, and replace with new as needed. For reasons I explain below, I would replace the blower motor and the blower motor resistor with NEW parts while I was at it. (The motors tend to draw more current as they age, and this taxes the blower motor switch more heavily, and possibly can cause it to MELT. There have been photos of this phenomenon on this board before.)
-
That is fine, buy how do you intend to get the same evaporator into the "good" heater box in your vehicle? I assume you are not planning on cutting THAT firewall, are you?
-
Yeah, you don't want to use R12 anymore unless you have NO other choice. R12 is HORRIBLY expensive, (typically between $30 and $50 for a 12 ounce can that most DIY guys would use). Also, you cannot buy R12 at normal retail outlets. You have to resort to the "gray" market on eBay. On the other hand, R134a is about $12 for a 12 ounce can at almost any auto parts store. Since you are already planning on disassembling your AC system to work on the heater box, the differential cost to do the conversion is going to be: 1. the two R134a adapter fittings that attach to existing R12 filling ports on the high and low pressure lines. (Figure this is less than $20) 2. the appropriate amount R134a compatible refrigerant oil (Again, that's $10) All the other things I described (accumulator and o-rings) you are going to need REGARDLESS of whether you convert to the more modern refrigerant. So if you spend about $30 up front, you will spend less than $24 to fill your system with R134a. (Assuming two 12 ounce cans to fill the system) If you keep with the R12, you will spend $80 to fill your system with R12. (again assuming two 12 ounce cans to fill the system) And if a leak shows up during your fill, then you are back to spending much more for any further refrigerant you will need if you stay with R12. As I Pete said, it makes little sense, economically, to stay with R12 on an MJ.
-
If your dad has refrigeration vacuum pump and a charging manifold (the 3 gauges and hoses), you can recharge the system yourself. Does you dad have experience in evacuating/filling auto AC systems?
-
I assume you are transplanting the 97+ interior from an XJ into your MJ, correct? If you are going with parts transplanted from an XJ that had an R134a system, you will need to get the AC compressor from that system as well, and all the various AC lines. The expansion valve used on the R134a systems is totally different than that used on the old R12 system (better, actually), and thus the old lines and compressor would not be compatible with the newer evaporator and expansion valve.
-
That is correct. I would cover the hoses with either tape or plastic baggies. (If you use tape, clean any adhesive off when you install the new o-rings.) Be sure to lubricate the new o-rings with refrigerant oil when you install them.
-
NOT TRUE. I have converted several systems that were designed for R12 into operating on R134a. One just has to follow a bunch of special "rules" when doing so. It IS true that some conversions loose some performance, and that the converted vehicle won't get as cold using the AC with the new refrigerant as it did with R12. However, in the case of an MJ, the HVAC system was designed to cool and heat the interior volume of an XJ, so the little cab of the MJ pickup has much less volume, so the system is overdesigned for that application. That means any losses in performance by switching to R134a won't be noticed in an MJ cab. The important major "rules" to follow in the conversion are the following: 1. ALL old refrigerant MUST be removed by vacuuming the system. 2. A new receiver/dryer (accumulator) must be installed. 3. New refrigerant oil that is compatible with R134a must be added to the system. You get a lot of the old oil when you replace the accumulator, and, in the case of the OP, he is replacing his evaporator, so some more old oil comes out with that, too. (The remaining R12-type oil will not circulate with the new R134a, and thus will settle to the low places in the system, mostly in the condenser.) 4. ALL o-rings must be replaced with ones compatible with the R134a 5. The converted system should be charged with LESS refrigerant than what was called for with R12. The rule of thumb is to use a charge of 80 of what was called for my the factory with R12.
-
Don't bother to "immediately reconnect" the parts of the system. Once the system is opened even for a few seconds, the system is now "contaminated" by air and moisture, and must be evacuated before being refilled. The reason to cover all the openings you create in the refrigerant plumbing is to keep DIRT out, more than anything else.
-
Which brings up a good question to the OP—are you planning on converting to R134a while you are redoing your AC hardware? This is the BEST time to do so, as you can also flush the condenser to get most of the R12 oil out at this time.
-
I am assuming you know the cause of why your AC doesn't work and are fixing that as part of the process as well. BTW, if you are not savvy on AC systems, when you replace major components like the evaporator (or whatever), it's good practice to replace the accumulator (aka "receiver/drier") at the same time.
-
If you are going to open up the heater box to do any repair/restoration on it, I STRONGLY advise you to replace the heater core and the evaporator while it's apart. The parts are not that expensive, but if you choose to save money now, be aware that the labor to change them later means tearing most of the dash back apart again. (The same thing applies to the blower motor assembly.) Actual removal of the heater box is quite straightforward, with a few studs holding the box to the firewall. Of course, the coolant must be drained, and the heater hoses must be disconnected. Likewise, the AC system must be discharged and disconnected to remove the box. When you put it back in, if you do not have access to refrigeration service tools, you can take it to any shop that does have the tools, and tell them what you did. They can then evacuate and recharge the system to restore it's function. You have your MJ in a state right now that rebuilding the heater box would be a no-brainer, and when you are done, you will never have to worry about it again. If you need more tips on the finer points of doing this, I can provide more, as I just did this on my MJ back in November.
-
Oil pan removal on an MJ/XJ almost ALWAYS requires that the front axle be allowed to "droop" lower than what the factory design specifications allow. This applies even if the vehicle has up to about a 3" lift. Knowing this, here is the best way to get the pan off: 1. Jack the vehicle up until the vehicle is high enough that the front wheels are off the ground when the front shock absorbers are FULLY extended. Support the chassis of the vehicle in this position. 2. Remove the front wheels and place a jack under the axle in the middle of the span. 3. Lift the axle slightly to take the load off the lower shock absorber attaching bolts, and remove those bolts on each side. Let the axle droop lower by about 3 inches. SUPPORT the axle with jack stands in this position. NOTE #1--Be careful not to overstretch the brake caliper hoses when doing this. If they become stretched, remove the caliper from the axle, and hook it to the coil spring to keep the brake hose from being damaged. NOTE #2--The sway bar links (if equipped) may need to be removed from the sway bar temporarily to allow the axle to droop sufficiently in some cases. 4. Remove the starter from the vehicle. Be sure to DISCONNECT THE BATTERY before doing thi. 5. Once the axle is lowered enough and the starter is out, the oil pan bolts can all be removed, and the pan can be dropped and slid rearward out of the vehicle. The bolts that hold the pan to the block are two sizes: the smaller ones attach the pan in all locations except the four "corners" of the pan, where a larger bolt is used in those specific spots.
-
You can buy headliner material as some fabric/sewing stores. It’s more stretchy than regular fabric, and you might find it in a close match color.
-
official hvac seal replacement thread?
AZJeff replied to Pete M's topic in MJ Tech: Modification and Repairs
I bought my stuff from Grainger. You can get both open cell and closed cell foam in various thicknesses and then cut to shape with a knife or scissors. The downside is that the stuff is not cheap. But....it does do the job as well as OEM, and since OEM is no longer available, it's about the only solution. I have few pictures of what I did, if I search around for them.