rokinn
-
Posts
566 -
Joined
-
Last visited
Content Type
Profiles
Forums
Gallery
Everything posted by rokinn
-
My buddy is out of town next week, so, perfect
-
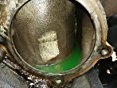
Thanks for the info. I seem to recall that big open chamber now from last time. I think the square hole is now round so extraction is likely what it will take. Just afraid I'd get half way through it and find myself stuck. I'm considering this thanks to Sinkrun's link. https://www.amazon.com/Thermocure-TC001-Coolant-System-Remover/dp/B00R74I5UY/ref=cm_cr_arp_d_product_top?ie=UTF8 Photo is of our engine in customer reviews. My concern is that I'll loosen up all that "structural" rust and have to replace my freeze plugs too.
-
I'm going to do a closed to open cooling conversion and do a chemical flush as well. I put in a new closed radiator 3 years ago which now has a small leak so it's a good time to convert. I was unable to get the block drain plug out then and it now appears to be pretty well buggered for any future removal. Hard to tell really since I can't really get a good look at it. When I did just a water flush last time the coolant bottle collected quite a bit of rust particles in the bottom of it. What I need to know is how to get all of the water out of the block once I'm done flushing. I don't have compressed air. I was thinking of trying to pump it out with a pump and a hose inserted into the water pump opening into the block. Not sure how the cooling channels are configured. Is this even possible? I'd rather not remove the water pump but will if necessary, but even then there is still water left in the block. I expect I can just leave it in there and just add antifreeze with that in consideration but I would like to use distilled water. Just once I wish something were easy on this thing. Thanks.
-
Closed to Open Cooling System
rokinn replied to 1989 Eliminator's topic in MJ Tech: DIY Projects and Write-Ups
Reviving this thread for my open cooling system conversion. I'm looking to repurpose my stock coolant bottle also. Did you install a vent tube or was it unnecessary? I assume the side hole was just capped off somehow? -
Another heater control issue
rokinn replied to coolwind57's topic in MJ Tech: Modification and Repairs
I'm in the process of switching to open system as well. What brand funnel did you buy? Did you get the direct connect hoses and if so, where? What are you using for an overflow bottle and where did you mount it? So many questions, I know Thanks, much appreciated. -
Bought the RU-13. Labeled on the unit itself as 1.6 ohms. Stock unit is labeled 1.1 ohms. Stock unit reads with my ohm meter (Craftsman) as 1.6. RU-13 reads 2.2 ohms. Any thoughts as to appropriateness of the "upgrade." Switching from closed to open cooling and looking to relocate as well as upgrade this unit.
-
I did a 2500 mile R/T this last fall towing 1400 lb popup trailer and a bed full of gear and water. My rig is pretty similar to yours . It's a slight gradual elevation gain from CO to WY and then strong head winds on I 80 west about as far as eye can see. 5th gear was pretty much a down hill only event and, 4th and sometimes even 3rd depending on the up grade and headwinds. When it started to rain as I got near to the end of the trip out it got even worse. This led me to believe I had a spark plug wire problem which I checked when I got to my destination. Sure enough my # 6 wire had begun to corrode at the spark plug. On the return I could cruise at 75/80 on the flat in 5th, uphill incline of any significance still required 4th gear but overall it was better. I may still have other items of performance to address but I've also concluded that the 3.07 just isn't going to cut the mustard so I intend to re-gear to a 3.54 or 3.73 in the D44 I have. I welcome any thoughts as to which might be preferable if anyone cares to comment (don't want to hijack the thread but perhaps it applies to OP also). I'm leaning to 3.54 given the type of uses and driving I do. Also I think it will be easier to find a front axle in 3.54 or 3.55 for later possible 4wd conversion?
-
More than one way to skin a cat, no? The springs aren't really springs per se. They're really just a lattice work of thick wire that has convexity in shape to it to sit on. There is only about an inch of space between each row of wire so there is really no penetration of spring into the foam to speak of unless the foam is totally disintegrated, and it's really pretty high quality foam at that. There was also some fabric between the spring and the foam. Not sure if this was standard or not. Of the two seats only one had it. Adding in the spring was a fair bit of work so adding in the plastic might be the way to go. Or not
-
Good time to run the seat covers through the washing machine too
-
A big part of the problem is that the springs under the foam aren't substantial enough and stretch and sag over time and use. The foam in it may well still be good. If you can acquire a second set of springs....this is what I did....copied from an earlier post. "I also got the two seating springs from each side. I zip tied the new springs overlaying directly onto the old one in my seat. I think I used close to 100 ct bag of the mini zips at every conceivable point it might shift out of alignment. I then used longer zip ties in an interlacing pattern so the convolutions in the double spring setup wouldn't allow for much separation between them. I then covered that with a heavy fabric, put the foam back and the seat covers on. The sag was reduced dramatically resulting in much better support. Finding the second set of springs for this is the challenge but I can imagine there are a few just sitting around left from those who have switched to buckets. Just another possible option for those wanting to keep a bench." I picked up the floor brackets from an MJ at the JY just the other day. I should have gotten the springs too I guess, but didn't need them myself. A pair of hog ring pliers and rings are handy for putting the fabric back on.
-
Advice...Torque Sensing LSD for MJ Dana 44
rokinn replied to rokinn's topic in MJ Tech: Modification and Repairs
Thanks, good to know. I was thinking that the bit of lift (as has been mentioned on CC before) I got from the new springs would compensate for the added length of the D44. -
Advice...Torque Sensing LSD for MJ Dana 44
rokinn replied to rokinn's topic in MJ Tech: Modification and Repairs
Thanks, you've validated my concerns about it also. Too bad. -
Advice...Torque Sensing LSD for MJ Dana 44
rokinn replied to rokinn's topic in MJ Tech: Modification and Repairs
I'm assuming this helical system is similar to the Truetrac??? -
I'm looking for advice and opinions on this Ring & Pinion and LSD carrier for my MJ Dana 44 rear axle. https://www.ebay.com/itm/Torque-Sensing-Dana-44-Limited-Slip-Differential-30-Spline-373-3-73-Gears/122839102736?hash=item1c99c7f510:g:CDgAAOSwkLhaIcrJ&vxp=mtr The axle currently has a 3.07 in it with a shot Trac-lock. I was going to go with 3.55 gears but 3.73 would be acceptable, especially at the price for this setup, assuming this is a fit for the MJ Dana 44. The truck currently has a D35 in it and I'm also going to go for new GS military wrap MT springs. Hoping this will allow me to keep the same drive shaft. Thanks in advance for any input.
-
My Stant thermostat failed not long after installing. Took forever to get up to temp but didn't stay there long depending on type of driving. Got a thermostat from the dealer and problems solved.
-
4 speed transmission?? Did the 91 HO come with a 4 speed or do you suppose this is replacement with an earlier year??
-
Every state is different. Some states require a certified paper trail of mileage. Just saying, you and your build don't have a problem in CO per state statute.
-
When I swapped in a full gauge cluster and reset the odometer to reflect the actual mileage on the original I checked the Colorado statutes. It is only illegal when there is an attempt to defraud.
-
Rear bumper opinions/options:
rokinn replied to Sir Sam's topic in MJ Tech: Modification and Repairs
No problem. I agree, there are probably better options as far as aesthetics and even construction if price isn't the limiting factor. It was for me. Good luck.... A Second for Colorado Baby! -
Rear bumper opinions/options:
rokinn replied to Sir Sam's topic in MJ Tech: Modification and Repairs
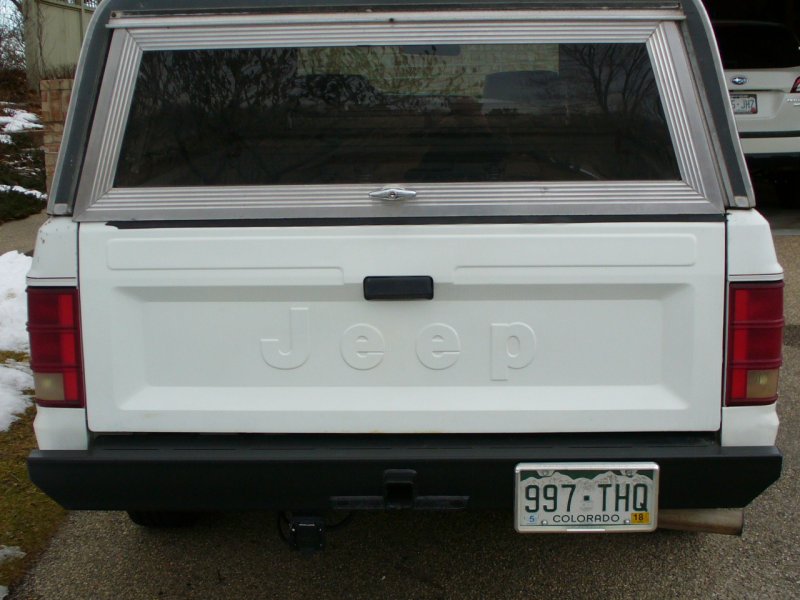
It's the play between the hole size and the bolt size as it attaches to the brackets that attach it to the frame that allows it to rotate a bit. It's not going anywhere. It's certainly stronger than the stock bumper for towing. IMHO I also showed it so the OP has the info to make a decision as to the possible detractors of this particular bumper based on my experience with it. Like I said, larger diameter bolts might take up the slack otherwise I may have to ream the holes for bolts with closer tolerances. Admittedly, not something I should have to do. It's my only complaint with the construction of the bumper. Otherwise it is quite soundly constructed. -
help with identifying axles
rokinn replied to motiusclyde's topic in MJ Tech: Modification and Repairs
The rear load sensing valve is also disconnected and hanging down. You'll need to deal with that to have proper braking response in the rear. -
Rear bumper opinions/options:
rokinn replied to Sir Sam's topic in MJ Tech: Modification and Repairs
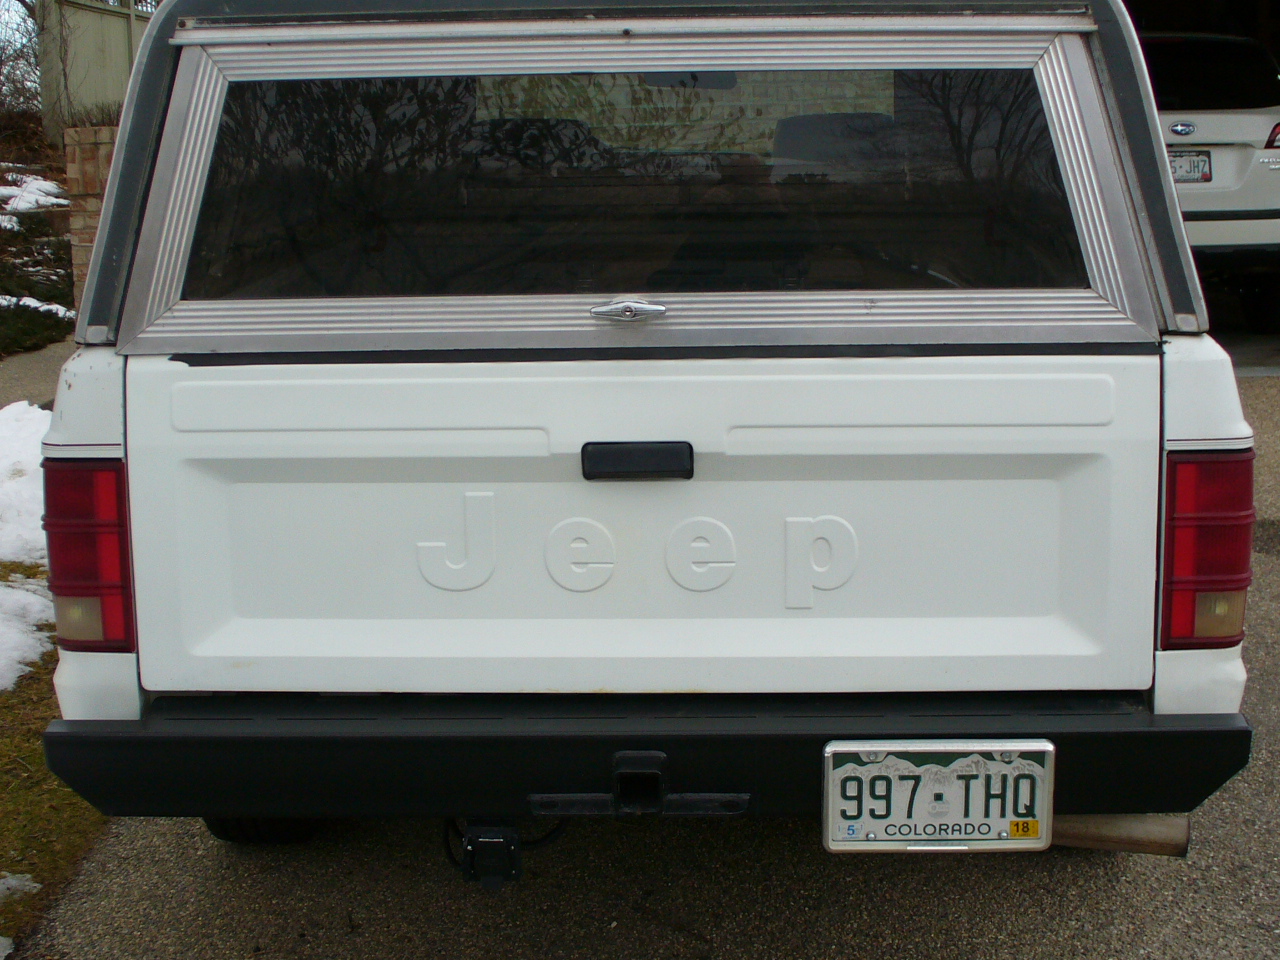
I bought a Nates and had it powder coated. This last fall I towed a popup camper (1400 lbs or so) and the bed loaded with camping gear and water on a 2500 mile trip to the W. coast and back. When I talked to Nate? about the bumper and towing capacity he said he had towed several thousand lbs with his. I don't remember the exact amount he quoted. The only problem I noted was the bumper tilted down (lowering the ball). It's still tilted down as you can see in the photo. I ended up buying a higher hitch on the way. I'm hoping I can prevent that in the future by using larger diameter bolts where the bumper attaches to the brackets. I wired in a led self lighting license plate bracket. The trailer light connector is mounted below and may be prohibitive for offroading but is plenty high for my purposes. I looked at mounting the connector on the body sheet metal behind the bumper but was concerned about it being too far for the trailer light plug to reach. Hope that helps with your decision.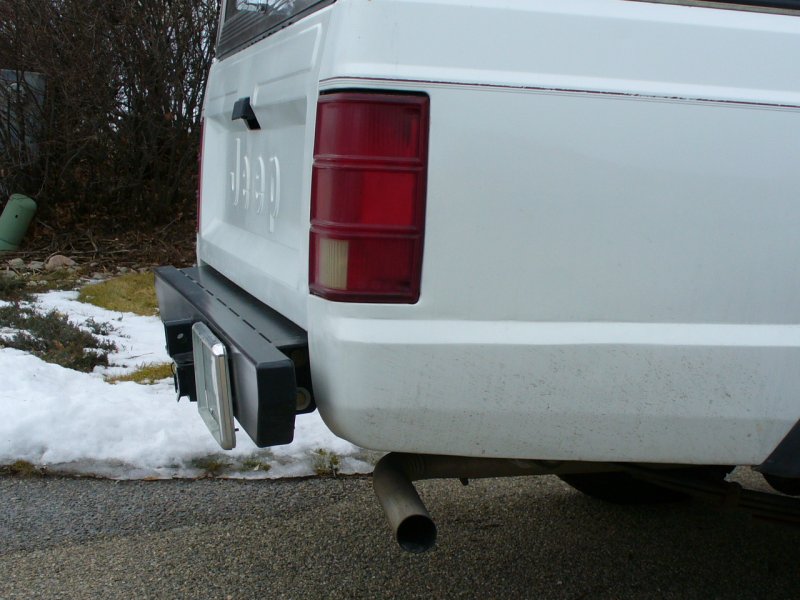
-
I should fit without any modifications if you put the oval end to the rear attached to the body. At least IIRC mine was that way. It needs cutting if you do it the other way. There is no performance difference with the oval to the rear. The uppers will need some cutting away of the rear bracket to get full range.
-
Condensation Problem.............
rokinn replied to Wild Comanche's topic in MJ Tech: Modification and Repairs
At one point in my life my wife and I owned a VW camper van. We occasionally slept in it in sub zero temperatures. On these occasions, between our bodies and our moisture laden breath we would awake to frost covering the entirety of the van. Once heat began to be produced by the heater the frost would turn to condensate and drip. This phenomena only happened when we were in there producing humidity. A kiln removes moisture from a substance and puts it out into the air (not to mention any other sources for ambient moisture). The cold condensation surface is eliminated by the insulation but the humidity is still present in the air. You have a source of moisture and higher humidity in the cab that condenses onto the cold surfaces of the cab and drips when there is enough build up. Eliminate the humidity source (whatever that may be) and you solve your problem. If it's not obvious then it's hidden somewhere. Like I said, the insulation under the mat/carpet can be a large reservoir of water from whatever source. Mine happened to be poorly sealing doors which would drip water down onto the floor as snow melted or it rained. Winter in eastern WA isn't the best time to be pulling up carpet but if that is indeed where the water is being held then your floor boards are rusting away. If you can leave your windows cracked open a bit (without allowing rain or snow in) then some of the humidity will escape the cab and not condense as much in the cab until you can get at the floor. If indeed that is where it is being stored. Of course, as always, I could be all wet... -
Condensation Problem.............
rokinn replied to Wild Comanche's topic in MJ Tech: Modification and Repairs
Is the condensation there when you get into the cab for the first time on any given day or does it develop after you start driving. About the only time I have seen condensation develop after starting to drive is when the vehicle has an air recirculation button to prevent outside air from entering the cab, which MJ's don't have. The temperature difference shouldn't be that great between the inside and outside unless you get a lot of solar gain, which may be the case. I would check underneath the carpet/mat to see if there is water being held in the flooring insulation material. If there is much water in it this would create enough humidity inside the cab to create condensation. Mine had a lot of moisture in said insulation when I pulled out the vinyl floor covering. It wasn't easy to get to dry either. Good time to mitigate the rust on the floor pan then as well.