


daking
-
Posts
387 -
Joined
-
Last visited
Content Type
Profiles
Forums
Gallery
Everything posted by daking
-
Is this a good multimeter ?
daking replied to Fernando87mj's topic in MJ Tech: Modification and Repairs
I've used that one, its fine. -
comanche after market tail light lens
daking replied to Richard Trafton's topic in MJ Tech: Modification and Repairs
If I recall, I paid ~$300 for the set I got. Not new, but very clean and newish. Check EBay every once in-awhile. Apparently there are "part investors" that release some of what they have when they need to pay bills or go on vacation. I do believe there are some tail light hoarders on this very forum... you know who you are! let some go, and stop being so damn greedy man. :) -
I've always had good dealings with USAA. I use USAA. I've had someone hit me, they had USAA, and USAA fixed me right up. I've hit people, and USAA has fixed them up. I can't recall having any negative experience. But I'm also realistic. I've had friends get in accidents, and they think they hit a gold mine. With that said, USAA is still an insurance company, and like ALL insurance companies, the goal is to pay out as little as possible. They are offering $3000? That does not seem too far off. How much do you need to be square, if I may ask? I do agree if your not happy, you should see what your insurance company will do with the offers. Or maybe get some estimates on your one for proper fixing. I'd also make sure they understand you have a restored classic vehicle. Harder to repair and unique parts. That rental deal sounds bad, I'd call USAA and make sure they pay for that. If they offered it, they need to pay it. (let make it clear, I'm not in accidents everyday, like my above statement may make it sound :) This is over a ~20yr time frame)
-
Oh, I forgot, I found a way to get the cable outside of the truck. I ran it out the cab vent, behind the doors. That way no new cab holes are needed. Also, on many MJ's there are holes on the floor broads. Rust holes, great place to bring in wires. :) (man, I'm just playing about that,,,,,,, most of the time the holes are too small for that) :)
-
I was wondering the same thing, but for C.B. Anti. From what I've read, center of vehicle mass is best. like roof, trunk or hood. I've read some articles where people are installing an Anti on a fiberglass boat, or wood home. They run a metal parallel to the base, I guess a wire or something. This provides a ground plane. i'm by no means an expert, quite far from it. With that said, and based on some of what I've read, it's important to have a good ground plane. Not sure if it NEEDs to be exactly center of the vehicle though. Example, same readings if the Anti is exactly center of roof, or if its on the edge. Again, I'm NOT sure of this, But that is how I made the decision on mounting mine. I decided it would be nearly the same if the anti was dead center, or off to the side. I was going to ask the same question as above a few months back. Here is where I mounted mine, Image Not Found The mount is on the inside of the roof mounted LED bar. Just a few inches below the roof line. I have 2 Anti, not used at same time. A short Fiberglass one, installed in this picture. And I have a 102" Whip with a 4" spring. Its TALL! The Whip Anti gets tied down to the bed when idle. Looks like a military tie down.
-
Lots of good info here. I've been holding off on doing any major work to my front 30. Debating on swapping in a 44. From what I've read here, I'll stick with the 30. Thanks
-
I was wondering about a Dana 44 also. So there are no direct swap ones out there? Anyone sell weld on brackets ? If so, then what other truck has a 44 that is ~ same width?
-
Tail light electrical locations
daking replied to daking's topic in MJ Tech: Modification and Repairs
yes, I did. the harness if from a 91 XJ. Probably should have said that, I'll bet the XJ and 91 N up harnesses are different then 90 N down MJ I cut all the rear wires, and found the tail wires, extended those to the rear, via a custom harness. -
Tail light electrical locations
daking replied to daking's topic in MJ Tech: Modification and Repairs
Humm, Guess I need to study the electrical diagrams then. I'm trying to figure out how that would be done. you have 4 feeds, (or 3 feeds, I guess) running lights brake turn/flasher brake W/ running But only 4 positive wires... 2 wires on each socket. One wire lights the bulb 100%, the other wire lights at 50%. I'll review the electrical manual again.. -
I re did my whole MJ rear electrical. Started a few years back, I have nothing of old harness. I got all new sockets and what not. Any who, on to the question, There are 3 locations on the tail light. TOP Middle Bottom The bottom one is the backup light, nothing special there. But the other two, TOP and MIDDLE. You have 4 options, two per socket, 2 sockets. --------------------- the signals that need put into visual - - brake Turn/flash running lights and brake W/ Running lights ----------------- I'm writing this, and I'm already confused... I got it to work, just fine. But I wonder how the factory MJ tail light works. Mine works like this : Top = running light, brake (running light ~ 1/2 bulb, brake 100% when running lights on) Middle = running light, Turn/flasher (running light ~ 1/2 bulb, turn 100%) Like I said, it works. But the braking lights are not that bright (not cause of an electrical issue, just cause it's only 50% of a bulb). Where as, the running lights are strong, as they are in both top and middle. I'm thinking I only need one running (say middle 50%), and brake on both middle and top. Man, I hope all this makes sense. Basically, can someone check to see what locations on the factory tail light do what? How many brake locations, how many running and turn? Thanks oh, yea, third brake light, recommendations?
-
Where did you order?
-
Yea, I'd like to see some of what you guys did too. I've seen at least 2 other trucks on here with some real nice bed armor. I'd like to add some rear, and lower bed armor too
-
jimoshel, you mean something like this? Image Not Found dunnc1991, I agree. a short trailer with one axle would be better for hard core off-roading. I won't be taking this trailer on extreme trails. Mostly sand around here, and the dual axles with 4 tires should provide great flotation. The trailer ideas I have are still very short. cruiser54, Those look good. I'll call them and get some numbers. Thanks Looks like most american based off-road trailers are short one axle units. However, in Australia, it looks like there are a few different builds with tandem axle off-road trailers. These are about the size I'm looking to build, maybe a tad longer. I was hoping someone on here had a trailer they would like to discuss the benefits and issues, ,and so on...
-
Who here has an off-road trailer? Pictures? I'm looking to build a tandem axle trailer. Using 33" off-road tires. The front part of trailer will look like many other single axle off-rad trailers. But I want a flat bed, to carry an ATV, or 2 bikes. Nothing too long. I'll do a state of the art drawing using the MS-Pant :) to give you all a visual of my idea. Just looking for ideas, or pictures of you all's current trailers.
-
I got a set from AutoZone Image Not Found A bit longer then stock. I think, less then $30 for the pair
-
Electric fan temp controller
daking replied to 88whitemanche's topic in MJ Tech: Modification and Repairs
I use any thermal controller, however, I always use a solenoid or huge relay. I use the Thermal controller to activate the continuous duty solenoid, That solenoid clicks on the actual power to the fan (s). I've used 160AMP solenoids on my other builds. WAY over kill, but I've NEVER lost one to heat or over loading. on My current JEEP build, I'm trying out some big 100AMP relays. They look like a normal realy, just ~50% larger in size. On my Jeep, I set up a triple automatic, dual redundant thermal control circuit. Using a normal adjustable thermal controller as the first stage. Set the activation temp low ~160 or so. That controller kicks on a 100AMP relay, that powers one of 3 fans. The second stage is using the factory sensor on the radiator. When it reaches temp, it grounds out. That ground goes to a second 100AMP relay, on the other end of the coil that's getting 12V power from a self resetting breaker. Well, actually, every circuit in my dual redundant thermal control system uses self resetting breakers. The second stage kicks on the other 2 fans (out of 3 total rad fans). Third stage is the factory computer that grounds a wire at a set temperature. That ground signal also kicks on the same relay with 2 fans. isolated with a diode. Finally, there is an in cab switch that will fire all 3 fans. I use 2 different sources of positive power. Each fan is grounded separately. Each circuit is protect by a self resetting breaker. Each Thermal control stage has an indicator LED on the dash, so I know the current state of cooling. I added another temperature sensor in the thermostat housing. There are 2 water temp gauges (after market and factory). And I will be adding an audible alert system shortly. The Audible alert will buzz for more then just over heat, it'll alert for low oil pressure too, as an example. The design of my thermal control system is to allow for many different types of failures and still have a fan or 2 run. Also, there is some manual by-passing that can be done to insure fan operation. -
http://humboldt.craigslist.org/rvs/4986649886.html Selling a slightly used Imperial II-class Star Destroyer. Previously (slightly) owned by a navigator of a spice freighter, this vessel has been sitting on my moisture farm and needs to be removed before next year's harvest. I just haven't had time to give this classic the attention it deserves and my loss is some-one else's gain! 1,600 meters in length this bad boy has a maximum atmospheric speed of 975 km/h and an acceleration of >2,300 g. It's got a Class 2 hyper-drive system still in working order with a backup Class 8. SFS I-a2b solar ionization reactor is in good to excellent shape. KDY Destroyer-I ion engine turns over on the first try but may need a new serpentine belt. As you can see by the picture provided, the deflector shield generator domes are intact. That is a state of the art ISD-72x. Fully equipped with LeGrange targeting computers, heavy ion cannons, Phylon Q7 tractor beam projectors, leather bucket seats, and a 15 disc cd changer. 36,000 tons of cargo capacity, this beauty was ran with a crew of 37,085 but you can pull it off with a minimum of 5,000 leaving you plenty of room to pack in a few extra AT-AT walkers, TIE starfighters, prefabricated garrison bases, Lambda-class shuttles, yards of soil, spool after spool of pipe, and jet skis. This superstructure is perfect for long road trips with the family, discovering new galaxies, picking up girls for dates, and general destruction of your enemies. Have you ever seen what a Star Destroyer can do to the surface of an unshielded planet? Stones run like water and sand turns to glass. With just a little TLC, this baby can be good as new. Brand new this beauty of the skies runs at about 145,670,000 credits, but do to some carbon scoring I can be flexible on the price. Realistically, I just need it removed from my property, so all offers or trades will be considered. Make me an offer, no mind tricks. First come, first serve basis. You are responsible for towing.
-
Well, I decided to resigned it again. Final product : Image Not Found Image Not Found Image Not Found Image Not Found Image Not Found Image Not Found Image Not Found
-
Hole in crankcase above starter?
daking replied to Roggesound's topic in MJ Tech: Modification and Repairs
It's not a freeze plug. -
Hole in crankcase above starter?
daking replied to Roggesound's topic in MJ Tech: Modification and Repairs
Round hole about ~1" dia? -
Got the bumper mocked up, everything is just setting there, the LED lights are not bolted in. Note the hitch, is not the one they sent. Its a real trailer hitch. But I've already changed my build plans :) I got a pintle hook style hitch. I'm going to remove the 2" hitch and weld on a 1/4 " plate on the bumper. Then I'm going the re enforce the back side with 3/8 or 1/4" plate. My future off-road trailer will ,mount to this hitch. Image Not Found Note the rear axle breather..
-
finally started the bumper build. cut outs for integrated LED lights, 7pin+4 trailer connector. And I'm using real 2" hitch boxed. Re-enforcing the hitch. And adding a skid to protect the rear battery. Image Not Found Image Not Found I don't think we will grind down the welds, they look great. more later.
-
looking good!
-
Jeep Comanche Build, 2X4 To 4X4, 5Speed To Auto, Stroker
daking replied to daking's topic in Member Projects: Your Comanches
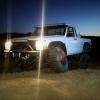
Some updated pictures : Image Not Found Image Not Found Image Not Found Image Not Found Image Not Found -
My Lights 17" bumper LED Bar (for when winching) 40 or 42" LED Bar on the roof, 300watt All marker and turn lights converted to LED 2 flush mount lights (dulles) for the rear bumper. For reverse, and manual enable. 2 LED under hood lights, for working on engine in dark. 4 LED mini lights in the bed, under the bed rail. 8 LED mini lights under the truck, near the tires. for night crawling. Image Not Found