


Gjeep
-
Posts
1221 -
Joined
-
Last visited
-
Days Won
3
Content Type
Profiles
Forums
Gallery
Everything posted by Gjeep
-
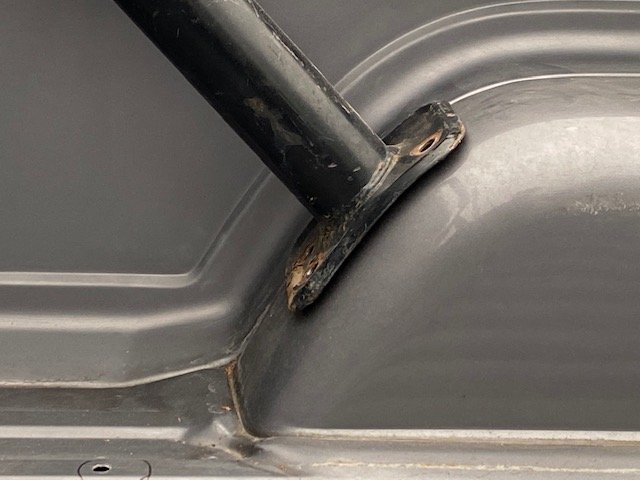
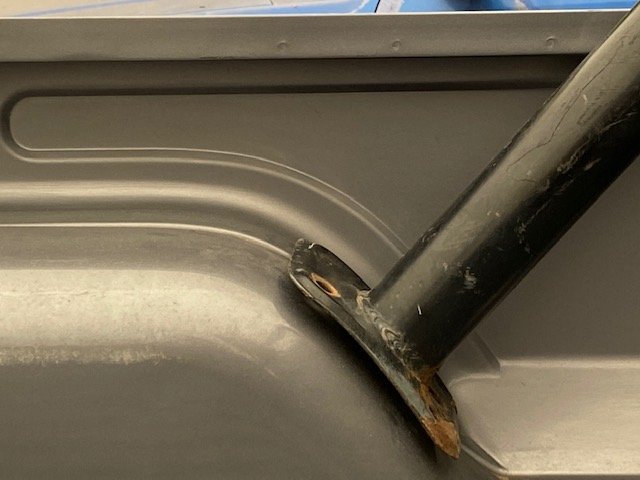
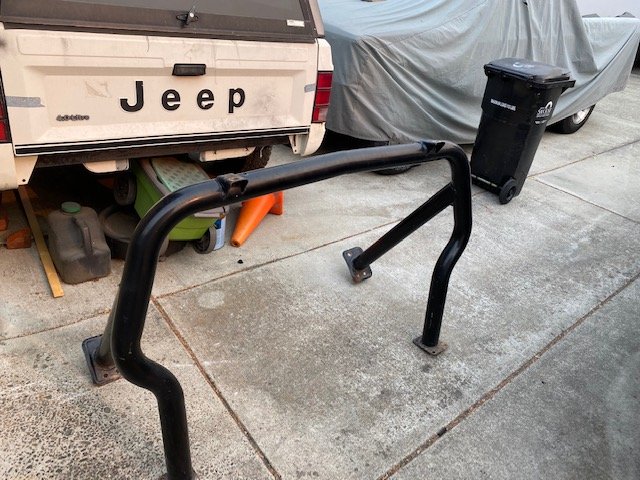
Spent a little over 3 hours re-shaping the kicker 'feet' of my roll bar with a 4 lbs mallet...There was close to 1/4" difference between how the driver's side and passenger's side sat near the fender well at first placement. See photo's below. (Driver's side was further away.) Finally I got them equidistant to the fender well, with front legs of the bar the same distance from the front of the bed. Next step is drilling holes, adding the underside brackets, and then tightening everything up to hopefully have the metal take final shape. I want to get all this buttoned up before paint.
-
Successful trip MI through IN, IL, CO, and back to CA...Met a couple great MJ-er's along the way. Stripped out the little rusted SportTruck which had one of the best black interiors I'll pulled. Took everything except the bench seat...which was near mint (and if you're interested ping me and I can put you in touch with the guy I gave the truck to who can sell you the seat. Auto column truck.) Got a recently relocated CA truck rollbar, complete with brackets. And last but not least a SB Jeep dealer purchased MJ camper shell. Got a bunch of other misc stuff too...but now back to focusing on getting my MJ to paint!

-
It's built on the Ram 1500 Chassis but has IRS.
-
If the old waggy hadn't existed, the new waggy would be a handsome vehicle. Hard not to want to see some homage paid to the old Jeep. Especially since it looks like a combination of every brand large SUV out there...I see Navigator, Explorer, Palisade, Escalade. Would have been nice to depart from the norm.
-
Thanks for the pics, I've seen the Ranger stepside and that doesn't look quite right to me. I do think the gold MJ bed above is from a Chevy Luv...and still different. I agree the squarebox Chevy doesn't look quite right, nor does the early Ford F-series, but it's closer. I'm considering the FSJ box and or MJ correct dually flares that are floating out there. If anyone has these, ping me as I'm looking to buy. Thanks all.
-
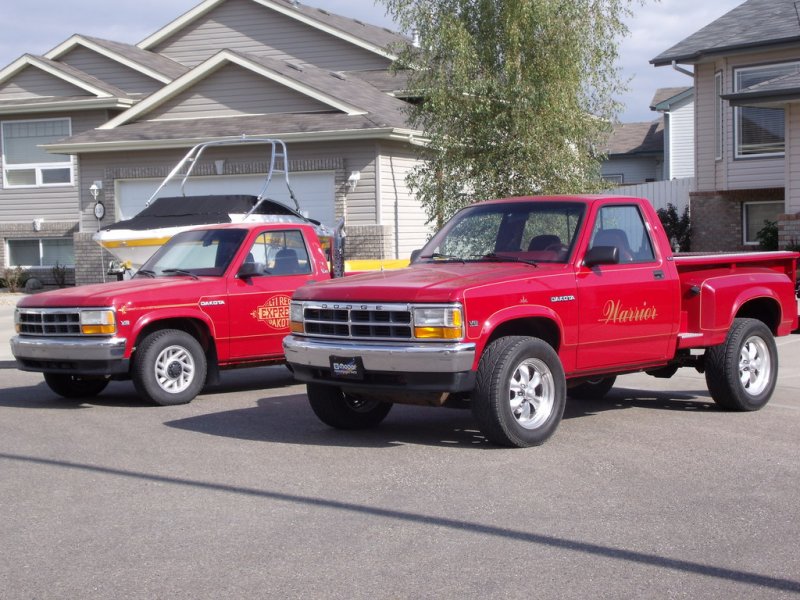
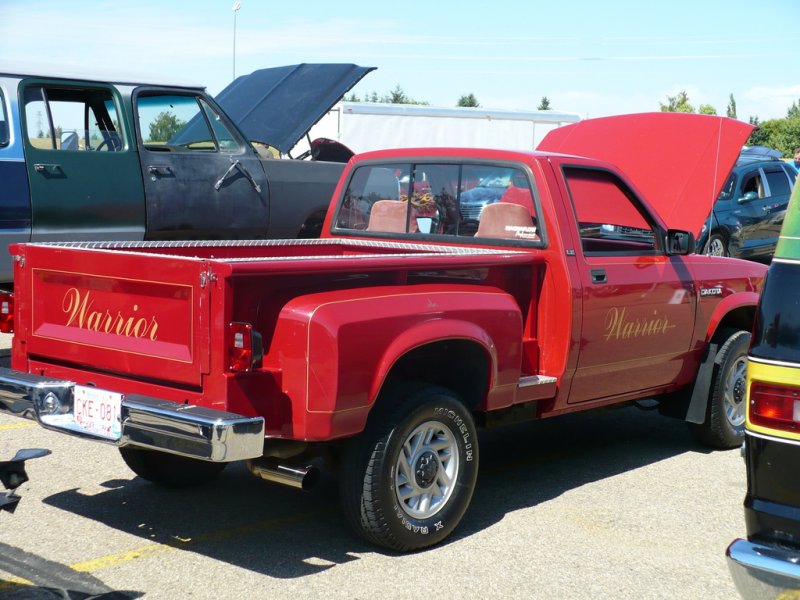
In my search for Comanche parts I somehow stumbled on a Dodge Dakota step side…which got me thinking about building the Comanche Sportside that never existed. Li’l Red Express Dakota trucks (also sold under the “Warrior” and “Warlock” names direct from the bed manufacturer) were produced by LER Industries of Edwardsburg from 1987-1992. They also sold as a dealer option for 1990-1992. The Li’l Red dealership option only seem to have been made available in MI, IN, OH, and PA – and is along the same lines at the Street Comanche, as gold dash plaques were in place numerically labeling them annually. Only the Express trucks had the stacks atop the step bed, not the Warrior or Warlock. It's estimated that there were only a few hundred made. LER Industries apparently started life in 1975 in the conversion van craze of the 70’s then moved onto RVs after that. The company doesn’t seem to be with us any longer... My aim is to buy one of these and make a Comanche Sportside (similar to the J-series truck). The Dakota and MJ share similar dimensions so adapting this bed to a Comanche shouldn’t be too challenging. I can see a CJ adapted tailgate for the Jeep stamping, squared off bedside openings with either an XJ or MJ rear flare, J-series taillights, and a factory MJ step bumper to finish things off. I may go wild and do a Honcho edition, complete with adapted graphics. Now the fun part begins… locating one. I know I’ve never seen one of these. This will be several years before it gets kicked off, so I though it best to post in “MJ Tech”.


-
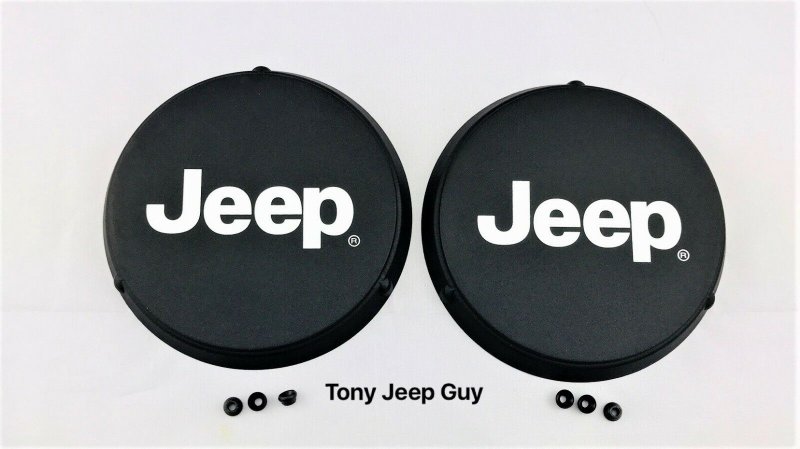
I knew someone would catch that.. Because I'm not running the Marchal driving lights that I am on the '89 MJ. The way things were staggered from the factory early on was Marchal fogs on the bumpers and driving on the bar. They had different lenses. Later sport bars, after the era of Marchal, defaulted to KC always if purchased from the dealer accessory catalog. For this build (my '92 MJ), I'll actually be running TJ 6" identical round fog lights bumper and bar, hence the same symbol. I actually thought about that before selecting the icon I did. I am crazy. ;) Here's a pic of the factory light covers of the lights I'll be using. Image from ebay. The white Jeep lettering with look good with the white letters on the BFG KO's.
-
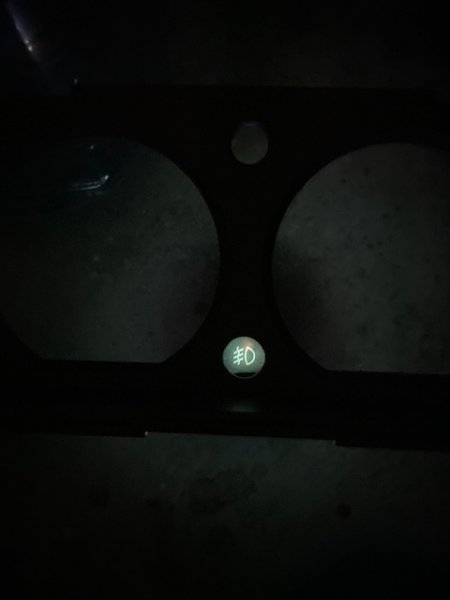
Practice part, cobbling together the idea... This will be the indicator light for my rollbar lighting. I'm going to cut out a single lighting pod that will accept the factory lighting connector (as used for the rocker switch icon lights left and right of steering column). It'll be plastic welding it to the backside of the gauge overlay. The speedometer gauge corner will need to be notched to fit the lighting pod. Did my best to show a day and night vision version of this indicator using a flashlight, t-shirt and blue plastic sheath. The final hole on the instrument cluster overlay will be beveled like the hi-beam indicator insert above it.


-
Visually it makes me want to vomit, so I'm going to see if I can spin one side. Thanks for the info. Glad to know I don't need to unbolt the whole damn thing...just some of it. Kills me when I overlook things first round.
-
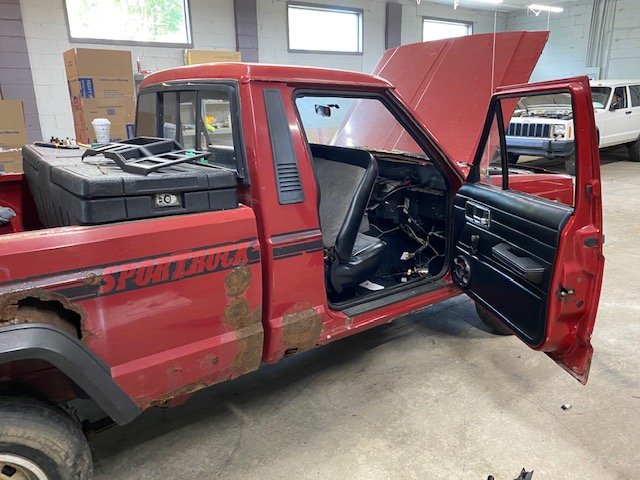
Interior side, I finished the wiring clean up and got the rear tires back on. For the most part the majority of this wiring gets fastened to the back of the dash during installation. Next step is swapping out the steering column for a black tilt unit. I first need to replace the turn signal/ combination switch wiring and ring in that tilt column-- as the hazard light switch portion seems to be damaged (it won't budge from its current position).
-
I thought the bushings were different sizes (big and little) but it's been a while since the install and I've done an XJ leaf swap in between. The springs probably have 50 miles on them if that. I wonder if I can 'spin' the overloads if I loosen things up? IF that would even make a difference.
-
Did a search without luck -- I'm running General Spring Metric Ton leaf springs on my '92 MJ and OEM Mopar Jeep Metric Ton leafs on my '89 MJ. I've been scratching my head and going a bit crazy over the 1/2" difference in ride height at the rear only my '92 MJ sits at. I did yet another look over and noticed the leaf springs are mounted differently. I got the earlier style 3+2 leaf and the overloads don't sit centered between the leaf spring clamps. One end is longer and the other end is shorter...Which is the correct direction? I have my ideas but want to see the forums advice. Longer to to rear or longer to the front. I can tell you, the longer to the rear side is 1/2" higher than the other (10" from top of tire to metal lip of fender). Where as the shorter to the rear overload is 9.5" from the top of the tire to metal lip of the fender. And as a side note, when comparing all this to my '89 MJ factory Jeep springs...those are dead on centered between leaf clamps. There is no one side longer than the other.
-
Hard to see that I put time into neatening up the behind the dash wiring, but I did. About half the way through it taping and looming the various accessories and amenities added in. Getting there...

-
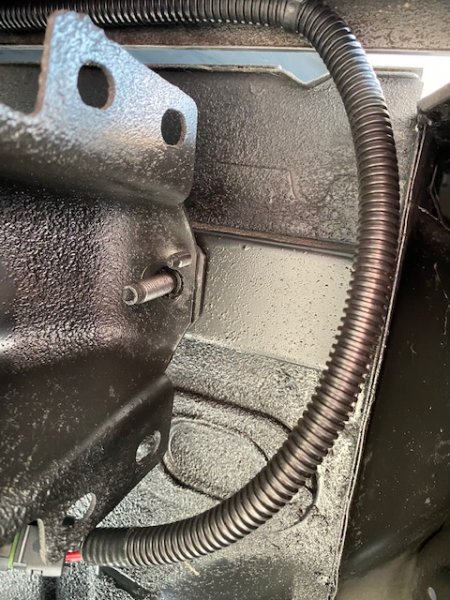
Should be a fun trip, and a journey slightly north of the last. I'm collecting black interiors for both the MJ's -- 'Stinky' and my current project (this build) 'Son of Stink'. For some reason, a lot of black interior parts and vehicles have come up for sale as of late -- so I'm all over it while the gettin's hot. Here's my accomplishments for the brief morning -- got the CJ high beam switch installed (nutserts on the other side of the bolts), a rough cut-out of the firewall mat done (will be squared off and foam neatly trimmed), and the rollbar wiring secured along the underside exterior of the MJ cab with the connector in place. The factory wiring connector for the CJ switch should arrive later this week so I can run the wires into it using OEM terminals. All is tested and works great. I tapped the highbeam switch used into a spare 'ignition' tap of the under dash fuse panel (that way if I forget to turn the rollbar lights off, they'll turn off with the ignition). I've yet to decide if I'm going to place an indicator light on the dash for them -- if I do, it will be subtle and most likely below the high beam indicator on the gauge. Will see...
-
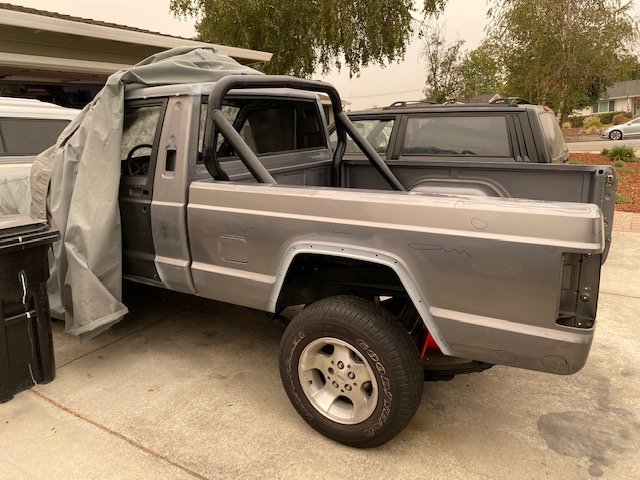
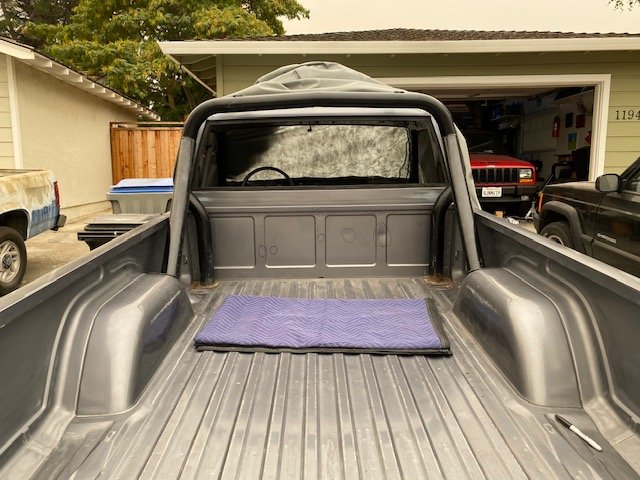
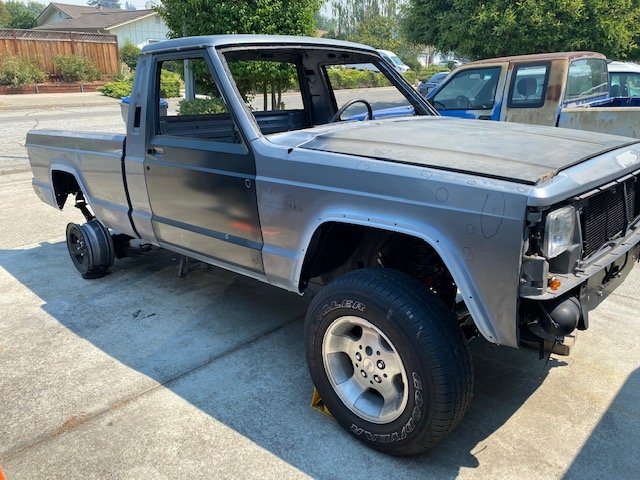
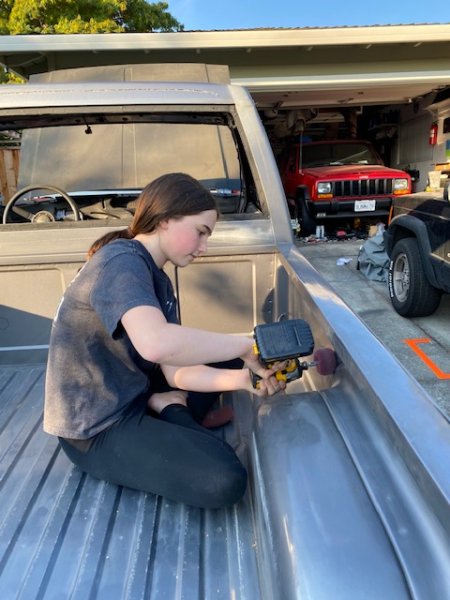
Got the bed back on, windshield cut-out, NOS hood on (though it's dusty as hell), and roll bar light wiring run back to the back of the cab. From there I'll have a weather-pack connector between the underside and coming down through the bed from the roll bar as a quick disconnect should I want to remove for the camper shell. And speaking for a camper shell -- found a fellow MJ-er in IL who's parting with a mint dealership purchased Leer shell. So time to hit the road again where I'll begin the journey in MI where I'm removing the black interior from this surprisingly low mileage, very rusted out MJ, continuing to IN, then on to IL picking up other MJ goodies. Next up rear tires back on and continued body prep work. My daughter came out this morning to help me prep the bed.
-
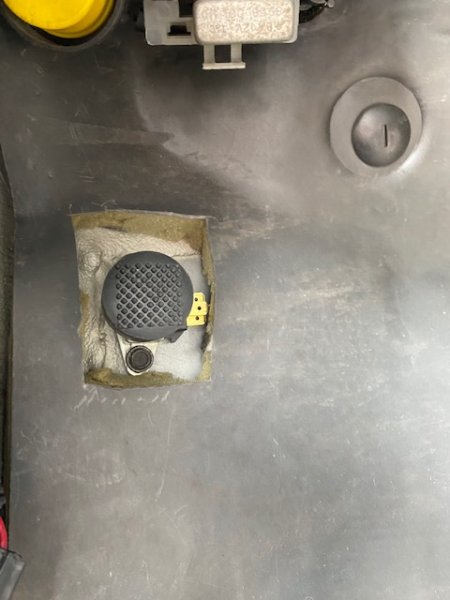
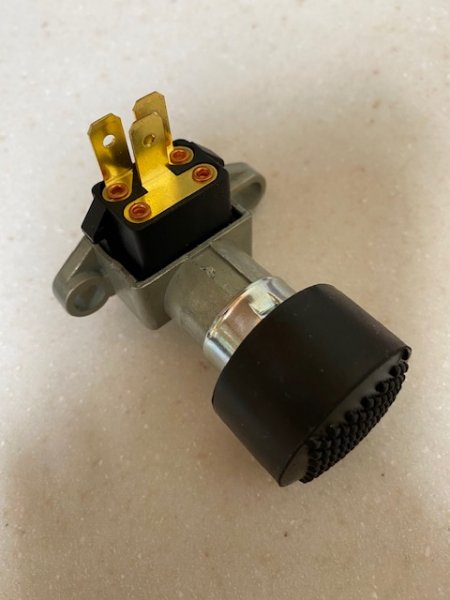
I decided I'm going with a Sport Bar on this MJ also, and was lucky enough to locate one. My challenge is I'm out of factory switch space on the dash thanks to various factory and aftermarket (winch) accessories I'll be running...and I'm not fan of random aftermarket switches that could look out of place. So I'm going to use the on/off for the Sport Bar mounted lights to be the floor mounted hi-beam switch the FSJ/CJ's had (many GM & Ford vehicles also). Found a rubber boot and carpet grommet also for this switch. My ebrake is now XJ-style so this leaves a spot on the floorboard for this switch to be mounted.
-
Source for brake pedal pad (91 Auto)
Gjeep replied to 91Pioneer's topic in MJ Tech: Modification and Repairs
I just ordered NOS on ebay for my 97 XJ, 52078540 -
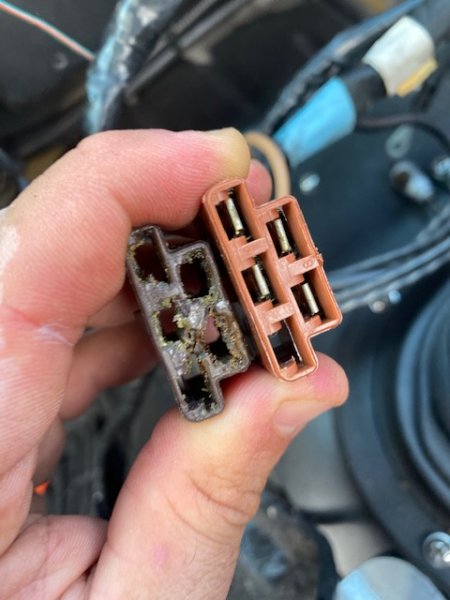
Twas time. I'm familiar with this blower switch connector melt as I'd seen it go about the same time on my old '95 XJ. Three of the four connectors had nearly melted the plastic completely through, and two of those four were no longer clipped securely into the connector. Replaced it thanks to someone here on CC...Can't remember for the life of me who I bought it from, but also available on ebay. I didn't have to replace the electrical terminals. Just cleaned them up and added terminal grease. Going to go through all me behind the dash connectors just to make sure all others are good while I have easy viewing with the dashboard out. https://www.ebay.com/itm/Jeep-Cherokee-XJ-Comanche-blower-motor-fan-switch-Connector-w-terminals-1984-96/333347019982?hash=item4d9d07dcce:g:z1MAAOSwukZcWwun
-
It might be worth a try to see if you can find NOS. I was surprised 5 years ago that there were NOS MJ seat belts (complete available) for bucket and bench. You're situation may be a bit more challenging since you have the first gen AMC belts. I think the male end is shaped slightly different over the later year design (as female buckle is completely different). It' been a while since I had the first gen shoulder belt assembly in my hand, but isn't it a cotter pin/post that attaches the belt to the assembly? I you got a working assembly, you should be able to swap the belt over. At least that's what I seem to remember possible.
-
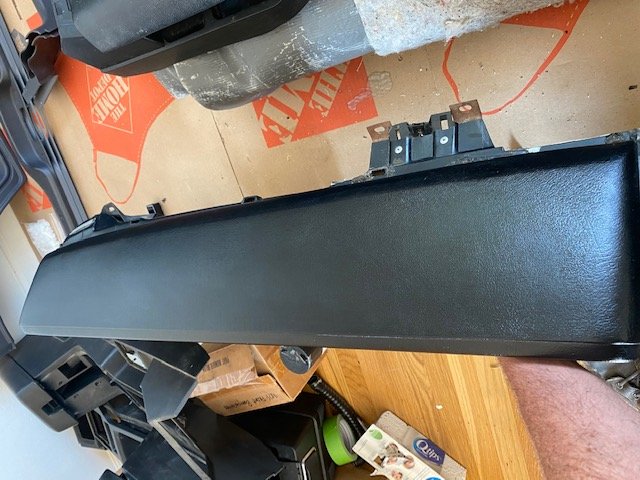
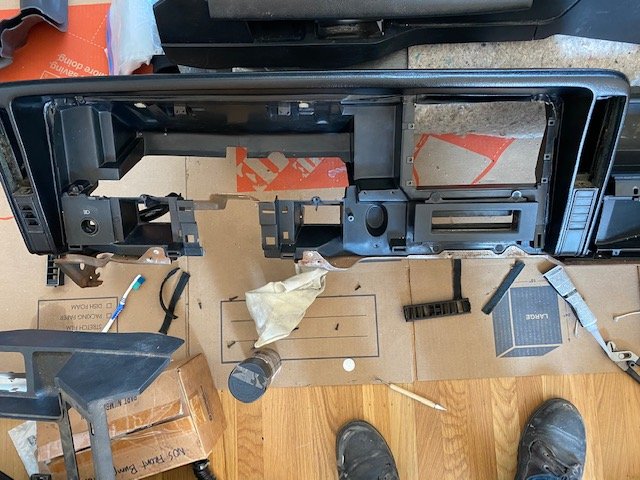
Devil in the detail work with the black dashboard continues...Over the past week I have wiped Zymol Vinyl Conditioner on 10 times (twice a day, morning and evening). The first 5-6 times I wiped it on it soaked completely in and left the dash how it looked soon after I cleaned all the dust/dirt off it -- somewhat dry. The next 4 times I hit the dash with the conditioner, it continued to benefit in look and appearance -- and was not left greasy to the touch. The end result? The dashboard has ply in it again. It isn't often I rave about a product, but Zymol really delivered on its promise and left a 33 year old dashboard looking like new in appearance and condition. I've also removed the original HVAC vents and felt attached to the dash around the HVAC insert. I'll be replacing that old felt with the soft side of black velcro strips. I've done this in the past and it works great. I do however 'buzz' down the velcro a bit before I install it with a clothing 'pill' remover. Reduces the velcro height and allows the HVAC vent to adjust left and right properly. I also pulled my 'old' dashboard out this morning, again in prep for paint. I've gotten good at dash pulls as I've been doing it quite a bit lately -- know where all the wire retainers are back side of dash and snip them off in a flash. Important step here that's easily forgotten...Pull the VIN plate! No crazy cutting needs to happen when doing this. No need to drill-out the rivets of the plate to get it off and onto the next dash. The trick is a heat gun...Run it across the VIN plate and a little at a time using a flat/wide x-acto blade pry it up. the VIN is riveted into plastic, the heat obviously expands the plastic and the plate comes right out. Being gentle when prying is important. Now to put it on the new dash. I put a light dab of JB Weld onto the backside of rivets and it keeps the VIN plate put. The cowl defroster is getting replaced as both mounting tabs are cracked. This unit you are looking at was NOS for a '95/'96 XJ back in 2012. I replaced the dashboard original to the truck back when I bought it (as the original dash was cracked). This newer cowl duct is a single piece/molded plastic, where as the older design was two-piece plastic riveted together...I can tell you as I've toured junkyards over the many years the original duct design is less often cracked at the mounting tabs. It's a less rigid plastic. I'll be going back to the original cowl design and was lucky enough to locate a NOS one back East. Next to go is the windshield...
-
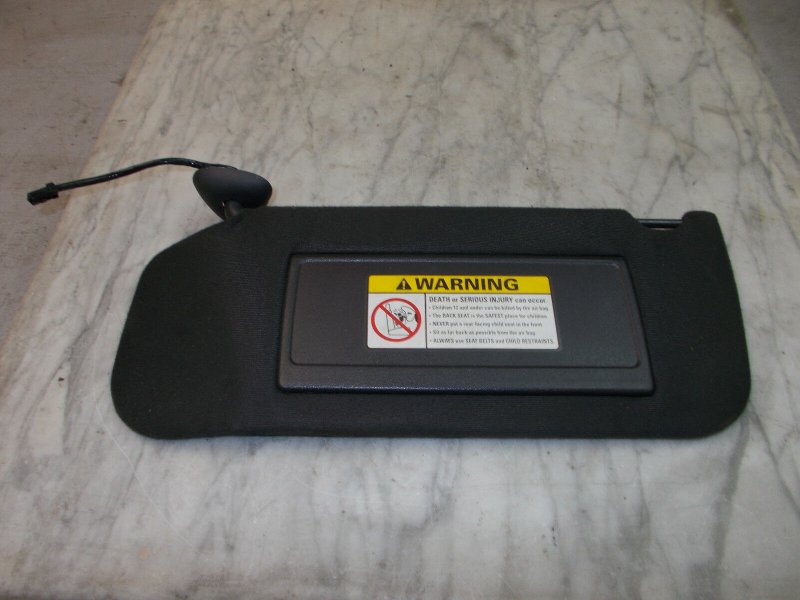
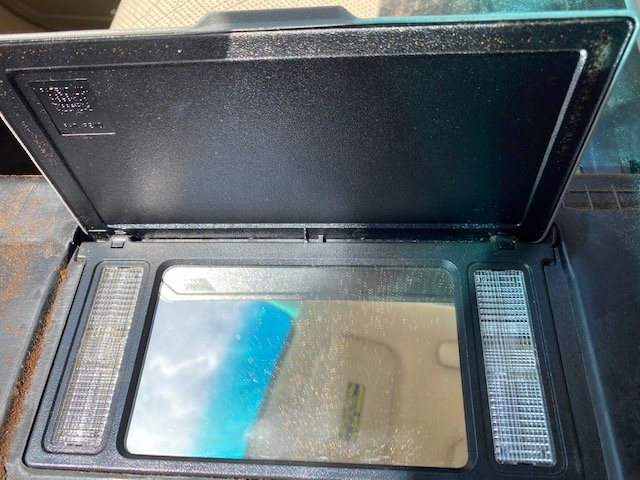
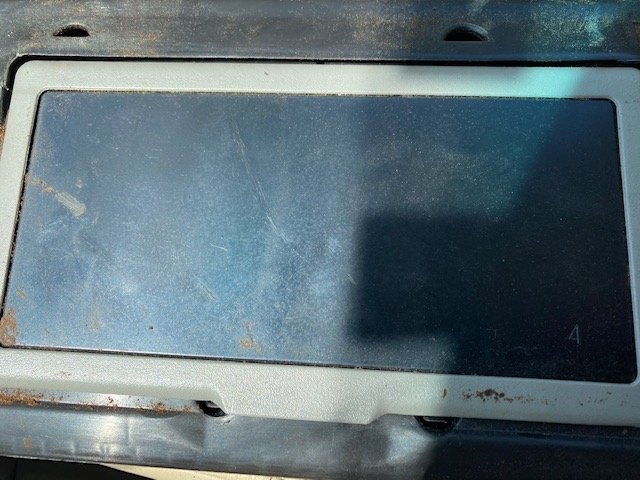
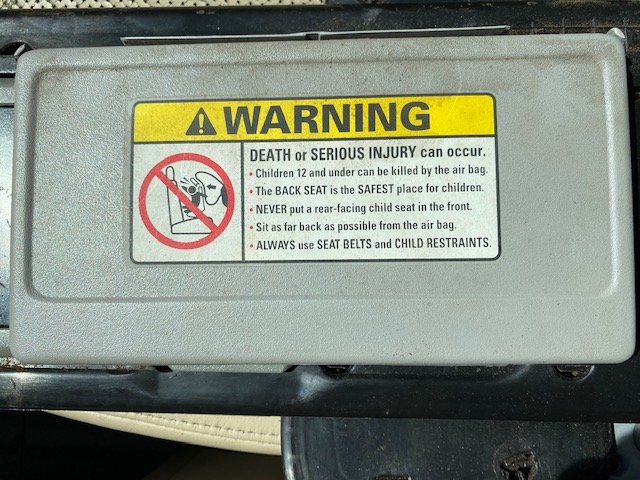
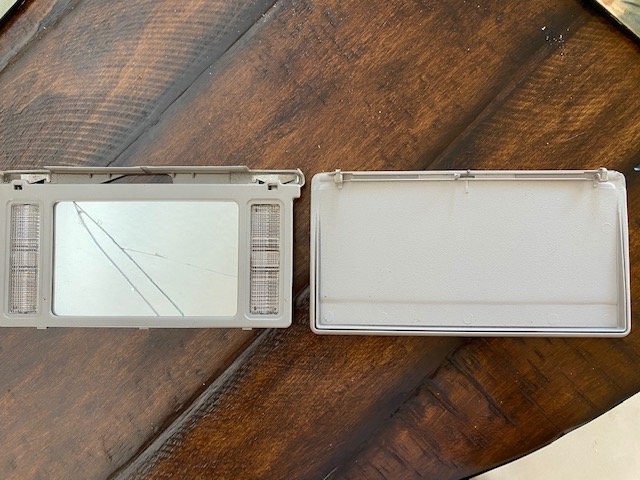
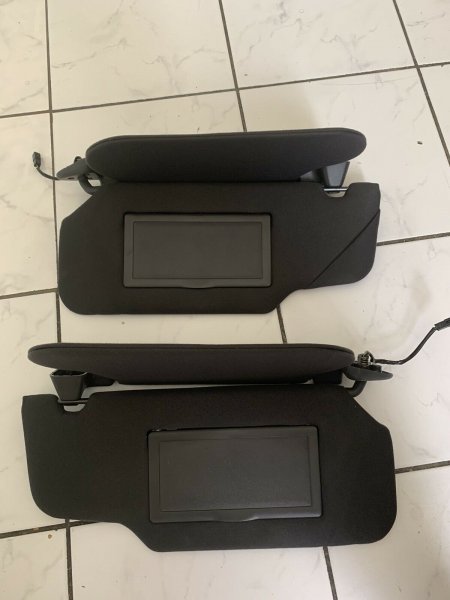
In the crazy pursuit of finding true black plastic molded '91+ lighted sunvisor mirrors for this project — I made a discovery. A laughable break-through. Actually two...There were 2 style sunvisors in 1990 XJ/MJ (this I did know prior) - both short. The ‘first gen’ was a cardboard variant similar to the 1984-1989 XJ/MJ. Then ‘second gen’ sunvisor was the hard plastic design that saw its way through end of XJ production in 2001. The first hard plastic offering has a molded black plastic lighted mirror (never knew this) without the adjustable dimmer later years had. The lid of this unit had a light gray surround and fabric insert (as these visors did through 1996). Now here’s the second thing I learned in the quest to find molded black plastic mirror assemblies... Ford in their Lincoln Town Car only (not Crown Vic) used the same lighted mirror assembly as the 1991-2001 XJ/MJ or an alternative is on the 1998-2002 Mercury Grand Marquis which had the exact same assembly as the 1990 XJ/MJ in black. The difference between the Lincoln and the Mercury vanity assemblies is the lid. In 1990-1992 Lincoln used the same mirror as the XJ/MJ, then went to a slightly narrower, 1” wider mirror until 1998-2002 when they again used that same old mirror assembly design as the XJ/MJ. All molded in black as an interior option choice for the Town Car and Grand Marquis. So…I just need to swap the assembly lid or simply use the entire Lincoln or Mercury black mirror assembly (and scrub off the airbag warning label if using the Lincoln. Mercury put the airbag warning label on the visors cloth.) The reason for all this chaos is the black interior swap I’m doing on the MJ with a modified overhead console install... and I wanted to keep lighted visors driver and passenger side. I’m nuts yes, as I know anything can be painted, but one scratch and back to disassembly/re-paint. I just don’t want to deal with that. Feeling victorious although I don't think I've ever looked at myself in a visor vanity. Typically would be in the rear view mirror...Oh well. Below two pics of the 1990 'second gen' sun visor mirror assembly. 1998-2002 Lincoln Town Car scrap mirror to test for lid disassembly...and further down ebay find in black. 1998-2002 Grand Marquis vanity mirror assembly (difference between this and the Lincoln's is the lid). Lid is easily removed too... Mirror was cracked out of the car I pulled it from.

-
Looking for mint chrome driver and passenger side (top and bottom) chrome trim that surrounds the interior hockey stick door arm rest. Looking for chrome that is chrome, not green chrome as I know that happens to these. PM me pics of what you have. Photo below is of the chrome trim I'm looking for. Thanks. Would like to get 2 sets.

-
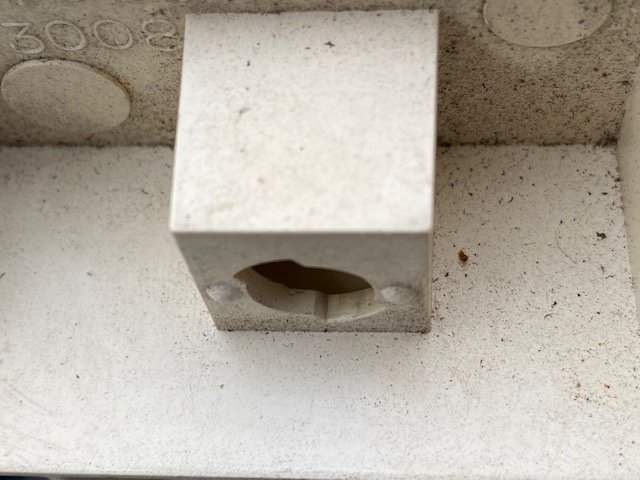
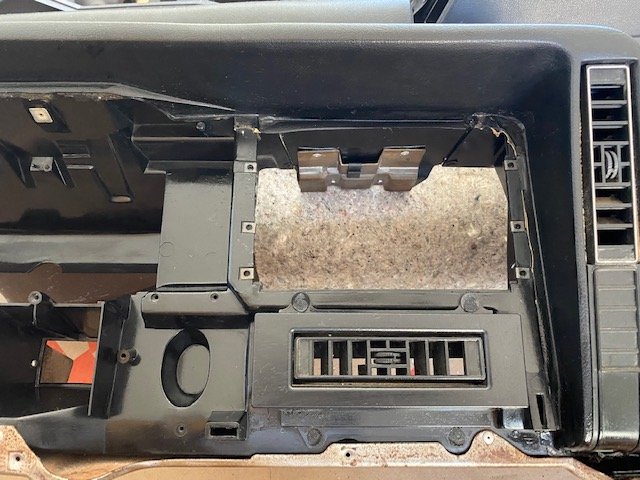
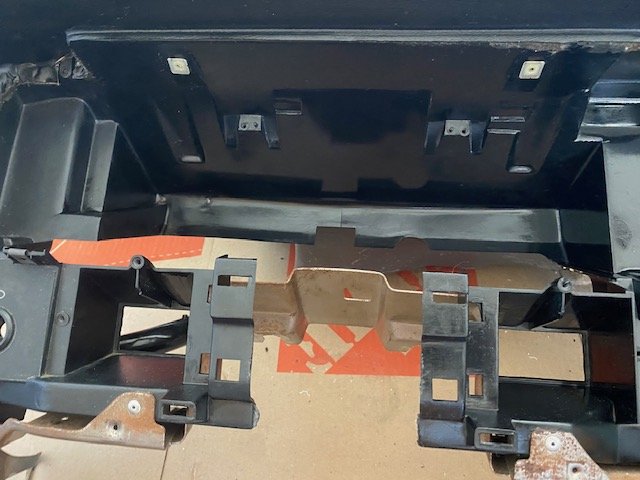
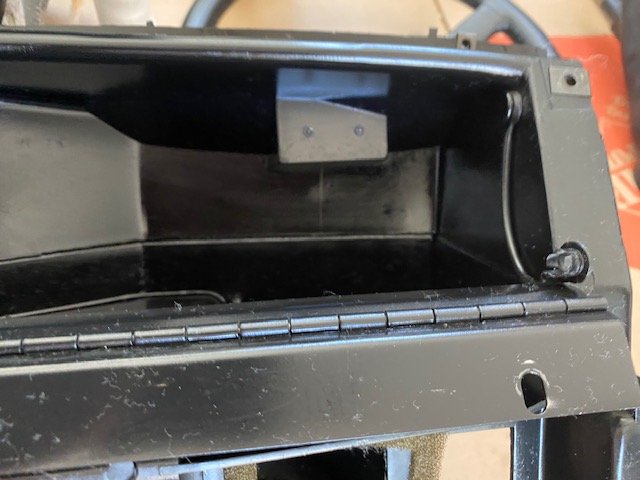
Been a while since an update...Puttying dings has been my main focus, in addition to cleaning interior parts I pulled from the road trip. Spent way too many hours cleaning up one of black dashboard finds -- inside and out, front and back. Very few cracks on any of the plastic, support pieces or otherwise. Even inside the glove box, top right corner...the little square-ish box with rivets, no cracks. Can't say I've owned or seen another XJ/ MJ without a crack in this area (unless new). The heap I pulled this from had a under 70K which I'm sure helped. All vents on this dashboard will be replaced. Couple more dashboards and lots more interior parts to clean, sort and select from. Currently the dash is coated with GooGone to loosen up the dirt stuck in the 'grain' of the material. Works great, I let it soak for an hour and wipe off, then follow-up with a mild dishwash soap/water mix.


-
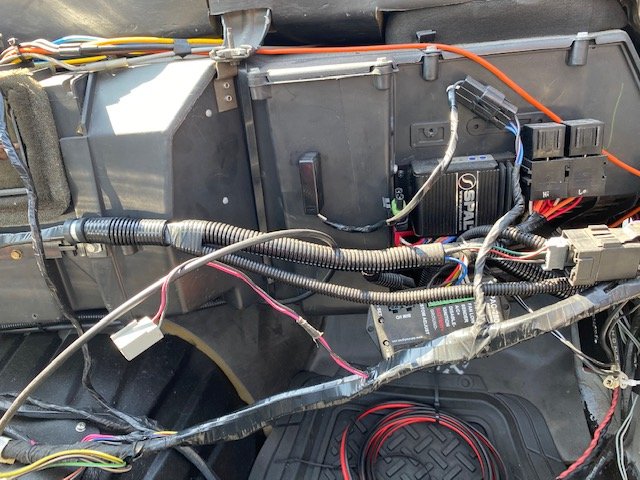
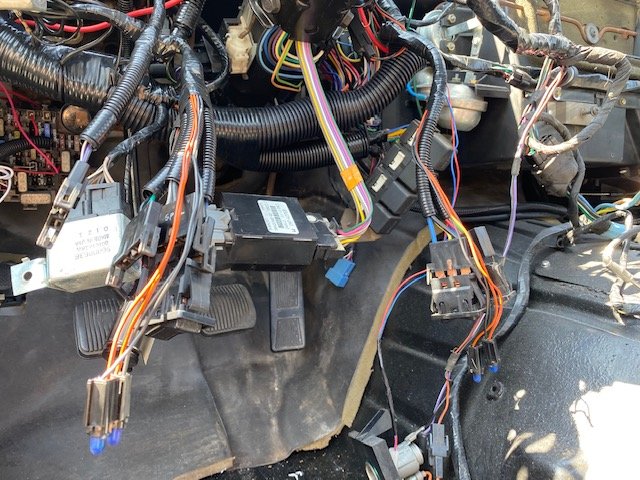
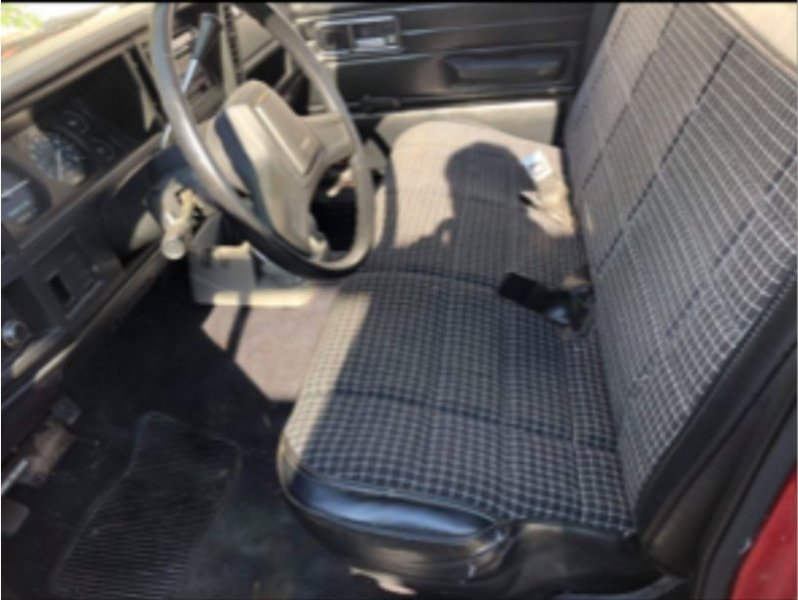
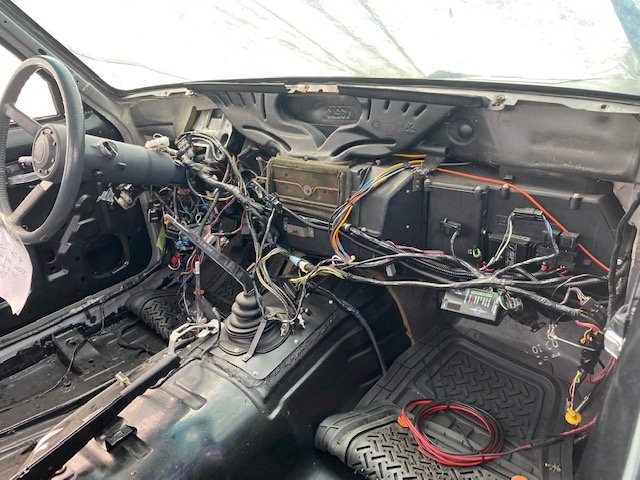
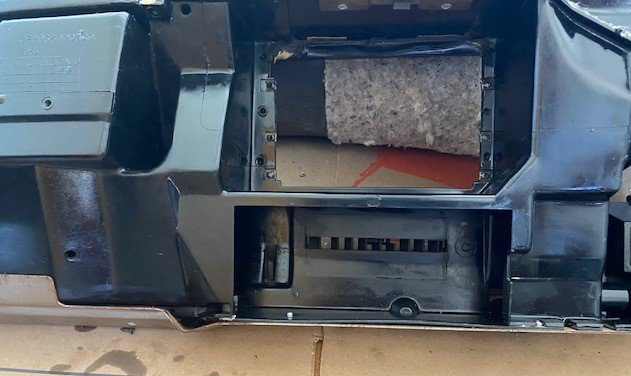
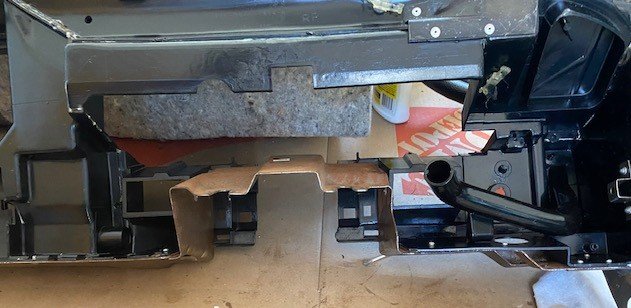
You have a 5-speed truck - if you had an automatic there would be the silver transmission box (TCU) on the lower dash panel you pulled. The only other silver box Renix years which you have would be to the upper right of the steering column. This is the engine controller. The yellow box drivers side on the lower dash panel is the cruise control.
-
Bay Area here
