JimBorecky Posted December 23, 2022 Author Posted December 23, 2022 Productive day today. The Comanche's door was separating from the frame after 30+ years. Had to pull the door and fender to straighten out and weld the hinge with reinforcement of course. It's been 20 years since I picked up a welder and it shows. Plus I never used a flux core before. Not pretty but it should stick.
JimBorecky Posted March 6, 2023 Author Posted March 6, 2023 Not sure how many people are still following this thread, of the slowest build EVER! Got some more work done in the last couple of months. So where the old mirror was got it fixed. Also where I managed to cut the bed with a skill saw twenty years ago, I finally welded up.
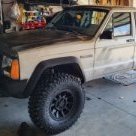
JimBorecky Posted March 6, 2023 Author Posted March 6, 2023 Finally found me the axle I was looking for and gathering parts now. Shameless plug for one of my favorite youtube channels Shave complete Now just waiting on parts. :)
Salvagedcircuit Posted March 7, 2023 Posted March 7, 2023 On 10/17/2022 at 2:48 PM, JimBorecky said: That shift indicator is looking extra spice! Nice job.
JimBorecky Posted April 14, 2023 Author Posted April 14, 2023 On 3/6/2023 at 10:35 PM, Salvagedcircuit said: That shift indicator is looking extra spice! Nice job. Thanks!
JimBorecky Posted May 30, 2023 Author Posted May 30, 2023 So took last week off, had some ministry opportunities and got to do some work on the Gray Ghost. Time to replace the ripped up carpet. UGH!!!! I was afraid of that. Well it could be worse. Guess I have some patching to do. Looks like this is the worst of it. After some cutting and welding, I think I got most of the ugly stuff.
JimBorecky Posted May 30, 2023 Author Posted May 30, 2023 Time to neutralize the remain rust. Has anyone used this? Seemed to do the job. Time to take the clutch pedal out! This isn't identical, but I think we can make it work. A little cutting and a little drilling and presto! No more Clutch!!! Went a little crazy on the Flex seal paint and putty. But I think it'll last me another ten to fifteen years. Got to do the bottom side before I'm done.
JimBorecky Posted May 30, 2023 Author Posted May 30, 2023 So trying to re-enforce the interior tab a little. Not pretty but you'll never see it. So what the heck!!!???? It doesn't matter how many pictures I take pulling the thing apart, I always miss something critical. How the heck do you run the defroster hose through this solid metal? There isn't a hole underneath. OH WELL! I'm sure I'll figure it out when I put the dash back in. But for now, I'm cutting me a hole.
JimBorecky Posted May 30, 2023 Author Posted May 30, 2023 A/C airbox installed! I'm so EXCITED!!! Alright. So it looks like the airbox I have, doesn't quite match the wiring from the original. But we can fix that too. A little sound deadening material, and I'm almost ready to reassemble the interior.
JimBorecky Posted June 6, 2023 Author Posted June 6, 2023 So three steps forward, one step back. Had to pull the air box back out to get the vinyl flooring in. Sigh. Something to note, I had to leave it out in the sun for awhile to make it pliable enough to work with. and you can see the wrinkle in the back above the hump. Haven't tried to straighten it out yet with a heat gun. Not sure if it was from me laying it out in the sun, or it's just malformed? It was purchased from Auto Custom Carpets. Air box back in!
JimBorecky Posted June 6, 2023 Author Posted June 6, 2023 So in another portion of the garage....... A little spray foam to fill in the clapped dash. I might have gotten a little carried away. LOL A little Bondo to fill in the holes left by the foam. Second coat afraid it might need a third. Plan on recovering it in vinyl. We'll see how it turns out. This was the worst of the three dash's I have an happens to be the original in the truck.
JimBorecky Posted June 6, 2023 Author Posted June 6, 2023 The condenser fit well behind that massive radiator! No adjustments really needed to be made. Just gathering up the pieces to make custom hoses. Big THANK YOU for to Mike Rocklin and Don Brown Bus Parts! They had the fittings I needed for the expansion value. A little hick up in shipping, but they made it right. GREAT customer service.
JimBorecky Posted June 8, 2023 Author Posted June 8, 2023 Three steps forward, two steps back. I knew before I put in the air box the vacuum harness did not have the line for the recirculating air vent. I didn't think I'd find one, but low and behold I found one on ebay, so this makes the fourth time I remove this box.
Pete M Posted June 14, 2023 Posted June 14, 2023 On 6/6/2023 at 8:37 AM, JimBorecky said: So three steps forward, one step back. Had to pull the air box back out to get the vinyl flooring in. no!!! I just finally installed the airbox and don't have the flooring yet!
JimBorecky Posted June 15, 2023 Author Posted June 15, 2023 Well the condenser fits well. Can't say the same for the adaptor ports from Amazon. I still have a leak somewhere and I'm guessing that's where. Homemade custom hoses. This A/C better work as I've already poured a ton of money into getting this far. Not sure I'm so thrilled with the service port location for the low side. It's awfully close to the exhaust and I'm afraid I'm going to get burned.
JimBorecky Posted June 23, 2023 Author Posted June 23, 2023 On 6/21/2023 at 12:07 PM, Rowdy89mj said: Are you doing anything for a trans cooler? I plan on reattaching it once I make sure I fix all the leaks. You can see it hanging in the one photo. I plan on attaching it the trans cooler the same way I did before. https://www.amazon.com/JEGS-53500-Universal-Nylon-Mounting/dp/B078WHF9F5/ref=sr_1_7
JimBorecky Posted June 24, 2023 Author Posted June 24, 2023 So here is what I have. I haven't had any issues so far.
JimBorecky Posted June 27, 2023 Author Posted June 27, 2023 Ok so added another service port further up the line. So both are on top of the engine compartment where I can get too them. Looking GOOD! It's holding a vacuum! Now to get the dash back in and wire up the A/C components. So for those following these are the ports that worked for me. https://a.co/d/4y4swQL Also I used this compressor https://a.co/d/eekVzPa This piece fits the evaporator: https://donbrownbusparts.com/products/fitting-str-5-8-mo-x-10-hose-beadlock-313217
JimBorecky Posted July 17, 2023 Author Posted July 17, 2023 So a little UPDATE: Decided to change up the door cards thanks to @Warren99. For those that are frustrated with cold air in the winter cause someone removed the vapor barrier at some point in time. I've done this more than once when I have to get into the door mechanics, an it's much cheaper than getting a new door vapor barrier. Bought thick plastic drop cloth and double sided duct tape from hardware store Put the tape where I want it. place the plastic in place. Take a utility knife and cut along the dotted line. :) FYI I zip tie the rods so they don't fall down into the door. And here we are.
JimBorecky Posted July 17, 2023 Author Posted July 17, 2023 The update on the A/C. Had to go with a different style compressor, since the so called aftermarket LS swap adaptors are crap. I was all excited that I had the A/C wired properly and the compressor was going. It was blowing cold air into the truck. Twenty minutes later the seals around the adaptor gave way. GRRRRRR. Went to this style; Then bought this adaptor. I had to do a little grinding on the adaptor to make room next to the engine mount, it fit, but may rattle a little. The system is recharged and I still haven't taken it out on a test run yet. Seemed to be good in the garage. I was putting the dash back together and managed to pull three wires out of one of the connectors for the cluster. So I gave up for the night after that. How I wired this one. Your mileage may vary. :) FYI I also had to change the PCM settings to Analog here.
JimBorecky Posted July 24, 2023 Author Posted July 24, 2023 They did, I plan on pulling them and painting the arm rests, but the "plastic" paint isn't sticking too well to the other trim pieces so I'm going to try and find something else.
JimBorecky Posted July 28, 2023 Author Posted July 28, 2023 Someone on FB was asking how I plumbed up the radiator. I took a few pictures and thought I'd post them here too. I started with universal hoses and hated them because they seemed always kinked. These are basically cut and splice, looks better anyway, we'll see how reliable they are. I'm also most likely goin to replace the top support and cut less out of it.
JimBorecky Posted December 9, 2023 Author Posted December 9, 2023 Finally got the leather steering wheel installed. This is the products I used to dye it black. Pulled the old wheel and installed the new one. Had issues finding any assembly photos that weren't very vague. So I first placed the thin metal ring on first, concave side down, so it popped up in the middle. Then placed the other assembly with the rubber spacer on. I drilled a small hole in the rubber/metal assembly and changed the spade connector out for a ring connector. then ran the wire through the gap in the hole, and secured it with a screw. Painted the gray horn button with black primer and used silver model paint to make the jeep logo stand out. BEEP BEEP it works!!!! Feel free to comment if I assembled this wrong. :)

Recommended Posts
Create an account or sign in to comment
You need to be a member in order to leave a comment
Create an account
Sign up for a new account in our community. It's easy!
Register a new accountSign in
Already have an account? Sign in here.
Sign In Now