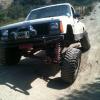
86FUBAR Posted October 28, 2009 Author Posted October 28, 2009 what is that decal on your door of?and is it removable? i noticed you had it on your bed for a bit in one of the pics as well the decal is a big magnet , it says "Monterey Viejo Chapter 1846 . E Clampus vitus " basicly were a historical drinking society or a drinking historical society :cheers: , thats still in debate :???: . Its an orginization that was started during the gold rush era , at the time of conception in the early 1800's its members were comprised of the not so upstanding citizens of the community though not much has changed over the years . nowadays we take great care to preserve some of the lesser recognized history of our great state . Here is an artical and a small news clip of what we did just this last weekend ( i was hanging out at the top of the latter truck taking pics ) http://www.ksbw.com/news/21415107/detail.html And if u want to read more on us here is some more history http://www.irjr.com/postoffice/ecvhistory.htm
86FUBAR Posted November 15, 2009 Author Posted November 15, 2009 Well i finshed hooking up my OBA , also managed to put an air guage on the dash right were the cigarette lighter used to be and it fit like a glove and it even looks like it was suposed to be there! and then i changed the oil + filter in the manche as it had not been done since i put the new to me engine in next is to do the front brakes , i got all the parts now i just need the time .
1990 Pioneer 4x4 Posted November 15, 2009 Posted November 15, 2009 what is that decal on your door of?and is it removable? i noticed you had it on your bed for a bit in one of the pics as well the decal is a big magnet , it says "Monterey Viejo Chapter 1846 . E Clampus vitus " basicly were a historical drinking society or a drinking historical society :cheers: , thats still in debate :???: . Its an orginization that was started during the gold rush era , at the time of conception in the early 1800's its members were comprised of the not so upstanding citizens of the community though not much has changed over the years . nowadays we take great care to preserve some of the lesser recognized history of our great state . Here is an artical and a small news clip of what we did just this last weekend ( i was hanging out at the top of the latter truck taking pics ) http://www.ksbw.com/news/21415107/detail.html And if u want to read more on us here is some more history http://www.irjr.com/postoffice/ecvhistory.htm Cool story about the historical drinking society. :cheers: Northern CA is also very cool. But, I have to take exception to the part about “our great state”. Your elected governor can’t pronounce his own state and has bankrupted CA beyond belief. At least his acting career helps when begging for federal monies. Sorry, just get tired of watching that BS on the news...
86FUBAR Posted November 16, 2009 Author Posted November 16, 2009 Cool story about the historical drinking society. :cheers: Northern CA is also very cool. But, I have to take exception to the part about “our great state”. Your elected governor can’t pronounce his own state and has bankrupted CA beyond belief. At least his acting career helps when begging for federal monies. Sorry, just get tired of watching that BS on the news... Ya we have alot of fun drinkin and such :cheers: :clapping: and as for the govenator ............ i didnt vote for him , besides i don't even think hes legal (which is probably how he got the job :fs1: ) :wall:
CRF136N Posted November 16, 2009 Posted November 16, 2009 I used to know a clamper, heard some crazy stories
86FUBAR Posted March 21, 2010 Author Posted March 21, 2010 finaly drug the manch out of my parents back yard and dusted it off as i got some work to do on her . not much done yet but i did manage to strech the front axle out the 3/4" that it needed to help accomidate its newish shoes, next i got to fab a new track bar bracket and then work on some rear d/shaft mods and skid plates .
86FUBAR Posted May 15, 2010 Author Posted May 15, 2010 well i got my new trackbar bracket fabed up , still need to make the brace for it that ties it into the other side of the frame but its better than what i had before , i also got my spare front axle shafts , they are superior cromo's , a spare mile marker stub shaft and some spare u-joints so the front axle is prity much covered i think. Here i got to try out the break that i made , it worked flawlessly and made nice clean bends every time then i torched out the lower piece out of some scrap (the lower piece was already bent) ground it flat and drilled out the 5/8 hole and the frame bolt holes , mocked it up and tacked in place. then i cut and bent the other side of it then i drilled , cut tacked and burned some more i don't have a good finshed pic so ill try to get one later
86FUBAR Posted May 31, 2010 Author Posted May 31, 2010 Well i did a little horse trading the other day with a fellow jeeper at work and scorred some 20 mill amo cans for the back of the manch to help free up some space in the big box , i figure ill put the recovery gear etc........ in the amo cans and the tools and spare parts in the big box here is the 1/4" mounting plates from the inside , with 3/8's hardware. the inside bolts are above the frame so i used some HD nut serts next i gota weld some lock tabs on to be able to secure them and then get some matching locks , man these boxes are nice i have been looking for them for months but know one had any
86FUBAR Posted May 31, 2010 Author Posted May 31, 2010 Well now that i have all this new space in the box i just couldnt wait to fill it up again and since i needed a second battery i figured in the big box was the best place . so after a half dozen trips around town and a bunch of money spent i gathered up all the necessary pieces to do the install . here is the battery box i picked up at VatoZone , its big enuf to fit a group 31. i ran the cables under the lift strut and out the bottom edge of the box there was just enuf room behind the box to get there drill in there and punch the holes and run the cable the cable was run through the back of the cab towards the passenger kick pannel where I'm mounting the switch, figuring out where to mount the switch was the hardest part of the whole build. next i drilled a 3/4 hole next to a hole that was already in the fire wall to run the common wire and battery cable in to the cab to the switch here's the switch , now i can run on the main battery , the second battery , both batterys or kill all power to the truck i usualy just throw away the interior pieces as i take them off but this was gona look to good to do that so i punched a 4" hole in the kick panel and mounted it over the switch I'm probably gona have to make some kinda cover to go over it to keep people from accidently hiting it wile I'm driving but its ok for now i think
86FUBAR Posted June 2, 2010 Author Posted June 2, 2010 Thanks guys . Today i welded some lock tabs on the amo box and moved my recovery gear from the big box into the little one and I'm impressed at how much room i still have in the big box and i still got to mount the other one on the passenger side though I'm gona try and not over fill the truck with stuff but its nice to have all this extra room :yes: . I'm still looking for a full size spare but other than that things are looking good but i still need to get my buddys trailer fixed up for the trip (some tires etc..) and then hook up the electric brakes on the PW . Ahh nothing like waiting till the last moment! :cheers:
86FUBAR Posted June 15, 2010 Author Posted June 15, 2010 well i managed to mount the other amo box in the bed and i also scored a new 35 12.50 15 BFG AT for 35 bucks at the local swap meet so now i got a full size spare I also mounted my spare front axle shafts to the lid of my tool box using some 1 1/4" tube clamps that i got from the local hydraulic shop and pop rivited them inplace , the shafts fit perfict and are protected and out of the way I also got the electric brake controler hooked up and my locker bypass hooked up in the PW so now i can use the lockers in 2hi or 4hi if i want which might help since i hear there is still alot of snow on the ground , but i still havent done anything with trailer yet
reson46 Posted June 15, 2010 Posted June 15, 2010 Those tube clamps are a great idea! Mind if I ask how much they were? Thanks, Willy
DJM/78 Posted June 15, 2010 Posted June 15, 2010 That track bar mount is beefy , looks like the Curry mount .... Good job , as if you need to hear that from me . :dunce:
86FUBAR Posted June 16, 2010 Author Posted June 16, 2010 Thanks guys , those tube clamps cost about $5.25 each which isnt all that bad when compared to the cost of the spare shafts them selfs and it keeps them from clinking around in the box geting all dinged up. Today i managed to trim the back fenders for tire clearence, i kinda wanted to keep the flare but after poping it off i started liking the look more and more and i figured that by keeping the small lip of metal i could pop rivet the inner fenderwell to the outer fender and still keep it nice and ridged and i liked the look of the lip on there. after removing the flare i wiped the dirt off and taped a line for me to try and follow , and u can see the previous triming that i did . i was realy suprised that there was no rust anywhere even around the old trim lines . next i drilled some 3/16 holes above the origional mounting holes , this is verry important as once cut its gona be extreamly flimsy then i cut and debured the edges , poprivited the 2 together and moved on to the passenger side and a crappy side shot
86FUBAR Posted December 9, 2010 Author Posted December 9, 2010 Well not much new on the truck, I did do some track bar bracket mods as I missed a measurement some where and it was a a little longer than needed and even though it wasn't noticeable it bugged me so I shortened it and added some gussets . I still need to make the brace from the other side of the frame to the bracket but it works for now . Next is to try the air soft beads in the tires as they need it but realy only when there is mud in the rim.
cocy Posted December 11, 2010 Posted December 11, 2010 thats one sweet comanche you have going, i was woundering about how u have the rear shocks, does the angle of them make a difference or what are the pros or cons of haveing like that?
86FUBAR Posted December 16, 2010 Author Posted December 16, 2010 thats one sweet comanche you have going, i was wondering about how u have the rear shocks, does the angle of them make a difference or what are the pros or cons of haveing like that? Thanks ! As for the shocks they are inboarded like that for better performance , when the shocks are in the stock location they work well for normal driving but when you start to flex the shocks will bind at the mounting points as they wernt exactly designed to travel at such angles. by inboarding the shocks they won't bind during articulation as the shock is traveling in the same uppward arch as the axle making for more un restricted flex . the cons of this is the shock travel is efectivly shortened the further you lay the shock at an angle , the most common problem with this setup is people some times put the shocks to close together at the top which realy makes the shocks useless . My shocks are 11" stroke and I utilize 10 inches of that wile wheeling , some poeple don't agree with this style but it works well I think however it isn't for all trucks like say a prerunner or other go fast trucks
cocy Posted December 16, 2010 Posted December 16, 2010 thanks 86fubar, that all makes sense, i just started to get into wheeling and everything and I like to see what people are doing to there rigs but like to know why they did this or that. won't learn anything if u don't ask questions!
86FUBAR Posted July 3, 2011 Author Posted July 3, 2011 Well it seams i havent updated this in a wile , mostly caus i havent done anything to it but i decided to drag out from the back yard a couple weeks ago and have been useing it as my dd for fun . I did manage to get to work on it yesterday and finaly build my track bar brace and since i finaly made me a photobucket account as i maxed out picture trail i can post some pics. Well once i got it on the lift and got a plan i got started , now from what iv found from other people is that they just utilize the lower track bar holes that already exist on the passengers side of the frame but when i grabed them with my fingers and wiggled a bit you could see movement and that just aint gona cut it for me . So i decided to drill out the upper holes for the track bar mount on the passenger side (as the blankes are there and visable from the inside of the frame) so i could plate it and make it nice and strong. it helped having the stock mount laying around , i eyeball measured the hole location , clamped the mount and drilled a 1/8" locator hole , i hit center on the second try and then opened it up to a 1/2" using a unabit . next i torched out a piece of 1/4" plate , cleaned it up , bent it to the desired size , marked and drilled the holes and test fit it. once that was done i cut a piece of 2" .250 dom , chucked it in the lath and faced and chamfered both sides . then i used a 1 1/2" hole saw and cut a piece of 1/4"plate to fillin the bottom and welded it in place , then i chucked it back in the lath and re faced it just enuf to make it flat again. once i did all that i drilled a 5/8" hole and welded a 5/8" nut on the inside and bolted it together next i drilled a 1 1/2" hole in the frame to accomadate the welded nut with everything in place i mocked up the piece of 1" 3/16" square tubing i was using for the bar , i bent it for max clearance using a special bending die i made to fit my hobo freight bender once i had it where i wanted it i burned it in It came out better than i planned , and as for the track bar side itself i had already made a 1" steel slug to weld to . I may add another attaching point at the track bar side later but for now it works.
86FUBAR Posted July 16, 2011 Author Posted July 16, 2011 Drove the manch to work today and removed the T.B. Brace for primer and paint and reassembled . I also found out the other day that it's due for smog this month so I need to probably replace the cat at the least but I I don't know , I might just take it down and hope it passes but it didn't want to pass last time but fortunately my budy owns the shop :brows: so that helps :yes: .
shelbyluvv Posted July 16, 2011 Posted July 16, 2011 I am still working on getting up there to get that shell. I was the victim of identity theft last night so my funds are in limbo right now. Let's try to work out a solid date here soon. I could possibly take a couple days off during the week and grab it on evening when you are home.

Recommended Posts
Create an account or sign in to comment
You need to be a member in order to leave a comment
Create an account
Sign up for a new account in our community. It's easy!
Register a new accountSign in
Already have an account? Sign in here.
Sign In Now