DirtyComanche Posted June 8, 2016 Author Posted June 8, 2016 Another boring picture... Parts have started to arrive. Image Not Found
DirtyComanche Posted June 28, 2016 Author Posted June 28, 2016 Ordered some u-bolt eliminators from TMR: http://www.tmrcustoms.com/store/index.php?main_page=product_info&cPath=139&products_id=1979 And I ordered a single tie rod taper insert. I'm going to flip the tie rod, otherwise I think I plan to leave the steering alone for now. Still just amassing parts. I'm just throwing things for this in with other orders. Still hunting for traction devices too.
DirtyComanche Posted November 1, 2016 Author Posted November 1, 2016 So I figured I better work on this since I don't have a truck to drive. Well, I bought a J-10 hoping it would be roadworthy with a week of evenings on it, and that turned out to not be the case... :rotf: So back to this. Anyways, I had to steal the A/C delete idler off this thing for my XJ because the A/C clutch seized up. It's getting hard to find Renix brackets at this point, and I couldn't find a HO with the A/C delete either. Also, the little idler had a bad bearing, and was not very trustworthy. So, gotta make something instead, which meant moving the alternator made more sense. Started by cutting out the one notched mount so bolts could be put in it from both sides: Image Not Found Then I made some brackets out of steel and slapped some paint on them: Image Not Found The smaller one is 1/8", and has a 1" standoff (1-1/8" total thickness). The larger is 3/16". That was more convenience in regards to material on hand than necessity. Rear bracket: Image Not Found The front 'ear' on the alternator takes a different sized bolt (I believe it is a M8, slightly smaller than the 3/8" hardware that normally bolts the A/C compressor on), so the existing hole had to be bushed. To do it over again I wouldn't cut out the bracket or bush the hole, I'd just drill the hole in the alternator out to 3/8" and use a single long bolt like the A/C compressor did. There needed to be a 3/8" spacer also, so that nut was used, which is kinda hack but this is revision 1. Front bracket: Image Not Found The stock A/C compressor bolt was used on the A/C mount. The bolt through the alternator is the stock attachment bolt for it, I just had to dig through my stuff to find a nut as it goes into a threaded bracket in the stock configuration. Blurry picture of belt routing: Image Not Found Sorry the picture sucks, my fone does that... Downside to this belt routing is there isn't a lot of contact on the fan pulley, I'm not worried about it right now but will keep an eye on it. I may go to electric fans down the road so it really won't matter if that is the case. Another slight issue is one of the bolt heads in the P/S pump bracket needed to be filed a little bit to ensure it didn't rub on the belt. Belt: Image Not Found 71" 6 rib. Truck in my shop, if you don't believe me: Image Not Found Of course the battery was completely dead from sitting. Actually, it was leaking too. So I baking soda'd everything and cleaned it up. The only other good batteries I had were larger, so I threw a group 34 in it. I didn't try to close the hood. Will it fit without shorting out or rubbing on stuff? It's too tall for the hold-down, but that's easy to fix...
DirtyComanche Posted November 5, 2016 Author Posted November 5, 2016 I made an AX-15 mount out of an AW4 mount, because I didn't have an AX-15 mount here. Not super pretty... Probably should have just gone to the junkyard.Image Not FoundBut now at least I can get the trans and tcase positioned correctly so I can measure for rear pinion angle, well, assumed rear pinion angle, but less of a guess than before.Also found that my tcase shifter linkage is binding on everything and totally wrong. I will have to dig through the stuff removed from The Blue Pill and see if I saved that crap and if it can be used on a AX-15. And I've decided I will be lazy and split the tcase under the truck to do the SYE. Or at least that's my plan right now.
DirtyComanche Posted November 6, 2016 Author Posted November 6, 2016 Tcase linkage is a total WTF. Which lead to more WTFs about how this truck has been put together... So I'm going to have to build one from scratch. Yay! But that's a project for another day.Anyways, onwards. Out with the blow'd up D35!Image Not FoundAnd the crusty turd of an XJ D44 getting prepped to go in:Image Not FoundHonestly, I didn't get much done today. Lots more swearing than usual. Oh well. Anyone know how thick the wall of the XJ D44 tubes are? 1/4"?
DirtyComanche Posted November 8, 2016 Author Posted November 8, 2016 Got the new rear in to set the pinion angle, tack the spring perches and shock mounts, etc.Image Not FoundI was going to use u-bolt eliminators originally, but I decided I'm going to hang onto them for something else, plus I manged to get the factory perches off in one piece.My shocks are kinda short, but they were really cheap... I might order some Bilsteins at some point, but I think these will be fine for now.Anyways, now to pull the rear back out and weld everything up, then try to figure out the brakes....
DirtyComanche Posted November 8, 2016 Author Posted November 8, 2016 Brackets are welded onto the axle... Now for the part that's going to consume a bunch of time, and hopefully works out... Ford Explorer 8.8 rotor, Isuzu Trooper II caliper and pads: Image Not Found Just gotta make a bracket to hold it correctly. My backing plates had rust holes in them, the brake hardware was all in a pile in a box, and I hate drum brakes... So this is how it's going to go down. The Isuzu caliper is nice in that it uses a lever parking brake rather than some terrible drum in hat garbage. Anyways, all I really got done was cutting the backing plate down and opening up the center of the rotor a bit so it would fit, then eyeballing things a bit and looking at my steel pile.
HOrnbrod Posted November 8, 2016 Posted November 8, 2016 Just to give everyone an idea how terrible the body/bodywork actually is... Holes, bondo, bondo over holes, rusting from the backside: More holes: Image Not Found Holes, bondo, ah, you know what I'm talking about: Damn, even the rubber molding is rusting. :yes:
DirtyComanche Posted November 10, 2016 Author Posted November 10, 2016 So I've been messing around with random little things, and still pondering the rear brakes... It was too late for making massive amounts of noise tonight, so I figured I'd pull the tcase to do the SYE. Good thing I decided to pull it, there was only 5 nuts holding it on, and of that two were loose... This also made it so I could get access to the shift linkage to tear it off and throw it in the garbage. I'm not sure what the parts were from, but I'm guessing it's a Peugeot setup that was installed on an AX-15, so it wasn't even close. Tcase: Image Not Found I don't know why everything is so oily and dirty... The truck was basically not driven since this stuff was installed. Does nobody clean things before bolting them on?
DirtyComanche Posted November 11, 2016 Author Posted November 11, 2016 Nana nana nana nana nana nana Batbracket!Image Not FoundCut out:Image Not FoundWelded on:Image Not FoundAnd I did a spray n' pray paintjob on the axle tubes.I'll get a picture of the calipers actually mounted at some point, maybe... But either way, it looks like it works.
Wiggilez Posted November 12, 2016 Posted November 12, 2016 Nana nana nana nana nana nana Batbracket! Image Not Found Cut out: Image Not Found Welded on: Image Not Found And I did a spray n' pray paintjob on the axle tubes. I'll get a picture of the calipers actually mounted at some point, maybe... But either way, it looks like it works. Bat brakets, i love it haha.
DirtyComanche Posted November 12, 2016 Author Posted November 12, 2016 Got the tcase split open and the SYE installed: Image Not Found I really need to straighten out that rear bumper... Rear axle back in: Image Not Found Gotta do brake lines, vent line, probably a few other small things... And figure out what ebrake cables I'm going to order and hope will work. Unfortunately I got all rammy when I removed the D35 and made only a small effort to save the stock ebrake cables before I resorted to cutting them. They might have been workable... Not really any way to know now. Another shot of the installed caliper/brackets/spacer if anyone else is silly enough to duplicate this swap: Image Not Found
DirtyComanche Posted November 12, 2016 Author Posted November 12, 2016 And I'm going to look for this, but maybe somebody will answer... There was no vent hose on the tcase, so I figured there probably wasn't one on the tranny either. I looked around on it and nope, can't see one, but I don't see a nipple for one either. So, where is the vent hose supposed to be attached on an AX-15?
HOrnbrod Posted November 12, 2016 Posted November 12, 2016 I had this bookmarked: http://www.jeepforum.com/forum/f9/ax15-breather-writeup-972897/
DirtyComanche Posted November 12, 2016 Author Posted November 12, 2016 I had this bookmarked: http://www.jeepforum.com/forum/f9/ax15-breather-writeup-972897/ Figured as much. I'll see if I've got the space to pull the little poppet out and put a barb in, otherwise I'll just leave it for now. I mostly wanted to make sure there wasn't a nipple somewhere on it and no hose connected...
DirtyComanche Posted November 13, 2016 Author Posted November 13, 2016 I put the tcase back in, which meant I had to fix the shifter. I went through my pile of tcases to see if I had a style of arm that bolts to the tcase that would work better, and I didn't really, so I decided to make one. Image Not Found I put two holes in it for no reason. If it didn't work on the top hole then it wasn't going to work. The throw ratio is 1:1 using the stock gated shifter, which is what the upper hole is. Installed: Image Not Found The rod ends are actually from some tailrotor pitch links, they aren't worn out so I'm guessing I got them from something that crashed. The threaded rod is stainless, left over from one of the JB twinstick kits I bought. Anyways, seems to work good. It might disengage under torque, if so it's because the motor mounts are a little soft and will go on my next order. Also, the random driveshaft I had hanging up on the wall fits perfectly in the rear. Which is what I was really hoping. Front and rear driveshafts are bolted back in so this thing is officially 4wd for the first time in, umm, ever?
DirtyComanche Posted November 14, 2016 Author Posted November 14, 2016 One of the rear brake hoses I bought was bunk, stripped out the threads before I could get it to seal. I highly doubt there will be on in stock anywhere near here. Pretty much screwed all chances of having this thing driving for the next couple weeks.
DirtyComanche Posted November 14, 2016 Author Posted November 14, 2016 Turns out the hoses are metric, which I suspected, but I couldn't get a metric line to thread into them in the parts store. Damnit, my fault it stripped. Will reevaluate tomorrow.
DirtyComanche Posted November 16, 2016 Author Posted November 16, 2016 Turns out I didn't need to leave town, work cancelled on me, so I got a little more done on this and managed to get the rear brakes hooked up. Mockup of how it's hopefully going to look: Image Not Found Gotta swap some parts in the front suspension (coils, track bar, might try to get some caster shims in for now), bleed the rear brakes again (dunno what went wrong, the calipers being upside down doesn't make it easy though), fix a few other little things, maybe put the rear flares on and try to straighten the terrible rear bumper out a bit, then get some insurance.
DirtyComanche Posted November 17, 2016 Author Posted November 17, 2016 I swapped the front coils out for the RE ones. One of the coils that was in there was broken. Swapped the Bilstein shocks into the front too. Then went for a little drive. Brakes really need to be bled again. I'm thinking the front brakes too, as in doing it properly this time, I just bled the back because I did not touch the front and kept a pair of vicegrips on the rear hose while it was disconnected. Thinking about it the brakes didn't really work at all when I drove it into the shop, so chances are the fronts are screwed too. I should just do the front hoses while I'm at it. Might have to bleed the clutch too, or I'm just not used to it and this tranny. I won't be jumping all over that in a hurry. The headlight switch is also on its way out. I should pull it out and clean/lube it before I write it off, otherwise I will need to see if I still have a spare. Otherwise everything seems okay so far... Still gotta do a bunch of stuff.
DirtyComanche Posted November 21, 2016 Author Posted November 21, 2016 I've been busy at work and beat/sick (it's that time of year) so I didn't work on this as much as I wanted to. But I did bleed the brakes out no less than 3 times. Maybe 4 or 5 times. Tonight I finally got it to be reasonable, well, probably as good as it gets, mounting the rear calipers upside down definitely didn't help me. On the test drive braking wasn't spectacular, but I'm comparing it to a very modern vehicle (2011 JK) and a vehicle with a hopped up hydroboost setup (plow truck). I could mash it and get the brakes locked up, or slowly apply more pedal until they locked up, so I really think it is working properly... Only thing is the brake fail light will NOT go off. I've smacked the distribution block to try to get it to reset, pumped the brakes a ton of times, etc. Still on. Mind you, it didn't come on until after I had done 6 or 7 bleeding runs on the rear brakes... I'm sorta thinking it's just stuck. I haven't decided how to proceed. Drive it a bit and see if it goes off? It does stop...
DirtyComanche Posted November 23, 2016 Author Posted November 23, 2016 Had no instrument lights... Changed the headlight switch because it seemed suspect anyways (the headlights went out on me while checking the brakes). One thing led to another and I wound up pulling a few fuses out of the fuse panel. Bad news. Everything is corroded badly from the clutch/brake master leaking and water running in from the hood scoops. Now I can't get much of anything to work, and I don't want to pull the bulkhead connector to get at the back of the fuse panel, I'm guessing it will only make things worse. :fs1:
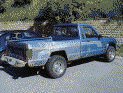
DirtyComanche Posted November 23, 2016 Author Posted November 23, 2016 I finally got it to the point that I threw some plates on it and made the entire 25km round trip to the gas station and back. Proof that it went outside. 8) It has a critical speed of 86km/h and then the deathwobble sets in hard. :grrrr: Lack of caster isn't helping. So I ordered some RE LCAs and I will throw the crappy RC adjustable trackbar on it, and I have some steering parts around that should help too. RE coils I put in compared with the ones that were in there:

Recommended Posts
Create an account or sign in to comment
You need to be a member in order to leave a comment
Create an account
Sign up for a new account in our community. It's easy!
Register a new accountSign in
Already have an account? Sign in here.
Sign In Now