DirtyComanche Posted November 23, 2016 Author Posted November 23, 2016 Also the oil pressure gauge doesn't zero, and when I filled the tank it took more fuel than it *should* have and wrapped the gauge well beyond the full line. Yup, more awesome electrical. Until I get a speedometer cable I can't even go by the tripometer for approximate fuel remaining, which I religiously do in anything I drive.
DirtyComanche Posted November 24, 2016 Author Posted November 24, 2016 Was pretty sidetracked today but did change out the track bar for the RC one. Honestly, I wish I had just sold the RC track bar and bought a better one that actually included a new bracket and didn't use a heim in single sheer (which they didn't even bother to safety washer, huh? I made a safety washer). They also used a fancy smancy F911 bolt at the axle end, rather than having you oversize the hole or something like that, which wasn't a bad idea other than I was left scratching my head at why they would use a course thread in the application, it rather defeats the gains from going to the F911 over a Gr8. Anyways, long story short, the track bar I took out was probably perfectly fine and I highly doubt it was in any way a contribution to the death wobble. There is one TRE (right at the pitman arm) that is a little suspect, otherwise all of the steering was tight enough. Looking at the tires the driver's side is noticeably cambered in at the top. Ruh-roh. The balljoints aren't completely falling out of that side at least, in that there was no play in the tire when I had it on jackstand, but that doesn't mean a lot and I didn't put a prybar in it. My guess is I need to do the balljoints, but I will do more investigating tomorrow. Failing that the housing or C is bent and it should be discarded. Looks like I'm in for yet again more work.
DirtyComanche Posted November 26, 2016 Author Posted November 26, 2016 Since I filled the gas tank it decided to pull the ol' Exxon Valdez trick. Guess I'll start researching my options. Otherwise I got nothing done, ball joints weren't in stock so I only got them today.
DirtyComanche Posted November 27, 2016 Author Posted November 27, 2016 It looked like the tank was only leaking around the seam (half way point) so I pumped it down below there. Nope, it's now leaking from everywhere else too, although not anywhere near as bad. So it the Spectra Premium one off Rockauto okay? I can get it out of one of their Canadian warehouses, so it's not actually that bad for price ($200~). Also, I somehow missed it but the ujoints in the front axle are destroyed on this thing. I'm planning to pull the front diff cover later tonight, there's a chance that there is no point doing anything with this axle beyond swapping it for another one.
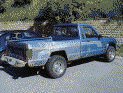
DirtyComanche Posted November 30, 2016 Author Posted November 30, 2016 Waiting on some parts. But I put the front axle back together and drove it to work. Terrible picture of the front end back together with all new BJs, wheel bearings, ZJ CV shafts, V8 ZJ tie rod and later XJ drag link: Shaft comparison: I'd been told that the ZJ CV shafts were a bolt in swap. I'm guessing they might be for a later XJ, or an ABS equipped XJ. Using my early non-ABS unit bearings they are not. The tone ring, far left, had to be removed for the shaft to actually fit with the unit bearing. However, this left an issues, as there is a seal on the inner side of the unit bearing, which normally rides on the runner, far right, pictured as removed from the OEM 260x shaft. However, the machined surface that the tone ring is pressed onto on the ZJ shaft is a smaller diameter than the surface for the seal runner on the OEM shaft, so you can not just install the seal runner on the ZJ shaft. As it was I felt I needed to just get it put back together and installed it with the seal not running on anything, I packed the bearing face with grease to protect it for now. The debate is if the seal is actually needed, as IMHO it is a holdover from the original hub design which did not use sealed bearings. However, needed or not, it would help to protect the bearing from water/dirt. I will have to do more research into this. If I absolutely had to I think I could have used the XJ seal runner, I would just have to centerpunch the ZJ shaft to produce a raised area and RTV or otherwise bond the seal runner on. I only was able to pull one seal runner at the time, and it was not in great shape, if I had two news ones I would have probably tried that to assemble them. Knuckle: In order to get the ZJ CV shafts into the knuckles I had to replace the zerk fitting in the lower BJ with a flush one. A non-greasable BJ would allso solve this. Either way, it worked in the end. Note these are some of the weakest knuckles with the windowed steering arm and seperate caliper mount. Anyways, all of this fixed my death wobble, camber issues, and allowed me to do a more proper alignment. I also installed a Lokka locker in the front axle, however I failed to take a picture, because nothing says reliable DD like buying the cheapest autolocker available.
DirtyComanche Posted December 3, 2016 Author Posted December 3, 2016 I also bought some RE LCAs to fix the caster a bit. Plus the current LCA bushings were pounded. I think I should buy a set of uppers too, and the bushings for the axle side mounts. They're also pounded. Somewhere in my pile of scrap beside the shop is a JK steering stabilizer, or so I think it is, I'm hoping I can use it. All in all the thing is driving WAY better than it ever was before. Still waiting for a gas tank and some other small parts though.
DirtyComanche Posted December 11, 2016 Author Posted December 11, 2016 I have been tidying up a few things. I got the ebrake cables installed and working. No pictures, but I had to mod the brackets on the calipers a bit to hold the Comanche cables correctly. Also, my 'splitter' bracket on the chassis was all screwed up and I had to weld part of it back together. Anyways, the ebrake is now working. I fixed the backup lights so they now come on when in reverse, and shut off when not in reverse. I found my JK? steering stabilizer. Just need to swap it on. I also ordered a Zip locker for the rear... Yeah, me stupid. And a little Viair compressor. My gas tank showed up. I was just going to slam it in, but it was unpainted (but coated in a preservative grease type goo), and I decided I couldn't just do it... It's very thin, already had a dent from shipping, so I figured I'd better give it a chance against rusting. Tank: Koropon primer and lacquer topcoat: I cleaned up the fuel level sender while I had it out, and I can now trust the fuel gauge. It's been quite cold but I've been driving it around and the truck seems to be doing okay. I'm not sure if the block heater actually works, and it has the wrong tstat in it so the heater isn't a good as it could be. Also the poorly welded door hinge/door trying to fall off is getting a little annoying, so put that on the list.
HOrnbrod Posted December 11, 2016 Posted December 11, 2016 Had to look up Koropon - sounds like good stuff. Looks expensive unless you got some surplus leftover from your work.
DirtyComanche Posted December 11, 2016 Author Posted December 11, 2016 We have a shelf life on it, so normally there's a little left over that is best to be used up elsewhere rather than pay disposal. It's extremely forgiving to shoot and will stick to anything.
HOrnbrod Posted December 11, 2016 Posted December 11, 2016 Ah, okay. Used to get my fiberglass resin like that.
DirtyComanche Posted December 11, 2016 Author Posted December 11, 2016 It's pretty much how I get all my oddball adhesives/sealers/assembly lubricants/etc as liability has lead to almost everything having a shelf life. It works for me!
HOrnbrod Posted December 11, 2016 Posted December 11, 2016 Me too when I was working for the Navy. Now I'm retired so unfortunately I have to buy stuff if I don't have it in my stash.
DirtyComanche Posted January 8, 2017 Author Posted January 8, 2017 I have sorta been working on this. But not much is 'done' so nothing to really show yet. But as a sneak peak here is what I am doing for my air pressure gauge and the switch to turn the compressor on: I wanted to do this to an actual clock housing, but the circuit board takes up the entire thing! So that wouldn't be possible. Gotta love 80's tech. Luckily the boneyard had an XJ that somebody was cheap enough to not order a clock when they bought it...
wheelsaz08 Posted January 9, 2017 Posted January 9, 2017 nice. i too have a clockless piece and mounted my fan switches there
DirtyComanche Posted January 13, 2017 Author Posted January 13, 2017 I got the Viair mounted and plumbed, I could not fit the tank and will deal with that later (put it under the bed maybe, I haven't decided). Plus I did the Putco relay harness for the headlights, which for the record I would not recommend purchasing although it does do the job (the quality of it is a little suspect, very cheap components). I added fuses to the Putco harness because it doesn't actually come with them, which is insane. I used one of these shop air distribution blocks from Princess Auto to build a manifold for the air junk. I use them a lot it seems. I have one end port left to plumb the tank in later, if I so choose. As to the Viair itself, I'm not too impressed with it as a kit. The kit I bought is the 1/4 duty kit, so no it wasn't a lot of money, I will give it that. The compressor itself seems pretty decent, I am impressed with it. But the wiring and accessories they give you is a little bit meh. They don't give you a relay socket, rather they just want you to put individual push on spade connectors on each of the pins, umm, no thanks, so I bought a relay holder and pins to do it properly. Same with the air pressure switch, they do not provide a plug for it, although it isn't as critical in that it's just a switch so you can't really mix the connectors up. For the pressure switch I used a GM push on A/C pressure switch plug (3 pin, it only uses two though, like many of the A/C systems), which I happened to have leftover from when I cut down the wiring harness on my XJ. Again, I felt they should have provided that rather than the stupid push on spades. The other thing that I felt was quite terrible was the actual nylon air line they provided. It is probably just truck airbrake line, but it is not like any airbrake line I have dealt with in that it is terribly inflexible, I put it in front of the furnace to warm it up before routing it, and I needed to gently warm it with the heatgun in order to get the ends onto the fittings. That said, it's in there, it's working, routing the line behind the dash to the gauge was terrible and I hope I never have to take it apart.
DirtyComanche Posted January 13, 2017 Author Posted January 13, 2017 Dash back together, for anyone that cares. I think the Viair gauge matches the instrument cluster I have nicely. The bulb in it is a little brighter than the rest of the dash though, but I think it will be okay... And no, the gauge isn't off center, it's just the effect from the flash.
HOrnbrod Posted January 13, 2017 Posted January 13, 2017 Looks good Dirty, and fits in well. Looks like you have one of the 86 and below silver dash bezels. The silver color on them looks much more realistic to me than the newer "spray paint look" of the newer ones.
DirtyComanche Posted January 13, 2017 Author Posted January 13, 2017 Looks good Dirty, and fits in well. Looks like you have one of the 86 and below silver dash bezels. The silver color on them looks much more realistic to me than the newer "spray paint look" of the newer ones. That whole bezel blew apart when I took it off this time and I glued it back together with ABS pipe cement. I'm not sure if that will hold up but I'm probably going to look for a replacement. I like the bezel but it's been abused and I scraped off 3 layers of different glue/silicone (none of which worked) before putting the ABS glue on it. Typical though, can't do one thing without opening a can of worms. :doh:
DirtyComanche Posted January 24, 2017 Author Posted January 24, 2017 I didn't do much. I did swap the dead steering stabilized for what I think is actually a TJ one, which at least isn't completely shot (actually looks to be low miles). Then I took the rear end apart to install the Zip locker (P/N YZLD44-3-30)... And surprise surprise, Yukon did what they're known for, and they drilled it for 7/16" ring gear bolts. 95% of 'normal' D44 applications use 3/8". Viper, Corvette, TJ Rubicon (which comes with a locker) and Rocky Mountain D44s, some aftermarket thick gearsets and gearsets packaged with "Super 44" kits also use 7/16" bolts, and I do believe this would be 5% of applications or less given the D44 has been in production since the late 60s. JKs also use 1/2" bolts, but the gears are different too so it's not really relevant. What's annoying about this is that originally they did not drill them to 7/16", and at some point in time (probably recently) changed to doing so. Thus their instructions clearly state that IF you have a ring gear that takes 7/16" bolts, you must drill the carrier to 7/16". I read the instructions prior to purchasing, and thus was very much lead to believe it would be drilled for the normal 3/8" ring gear bolts. Also, the vendor who I ordered from didn't mention it, as I don't think he knew, nor did he have the note on his site (because again, I don't think he knew)... Now if I had bought it from Randy's there was a note that you would need sleeves for the bolts that I may or may not have seen. 10 sleeves at $9.something list price each. So, $90 in sleeves that almost everybody is actually going to need to install this locker, which certainly cuts into the economics of purchasing it VS an ARB/OX/Elocker. IMHO they should have included the sleeves standard, or dual drilled it (the Elocker is), or left it the way it was before (drilled to 3/8", if you're in the minority that needs 7/16" you have to drill it yourself). Anyways, price notwithstanding (I think I wound up paying $4~ each for the sleeves through my dealer, he may or may not have felt bad for me) the whole thing is a typical Yukon PITA. It's also 2 weeks to get parts to me assuming they are actually shipped same day. The only good thing was since I had the axle apart and had time, I pulled the pinion out and found the inboard bearing was pretty much thrashed, so I replaced the bearings and the seal. And I bought new wheel bearings/seals. So the axle is going to have mostly new stuff in it at this point. Hotdog in a hallway:
DirtyComanche Posted February 11, 2017 Author Posted February 11, 2017 So, I'm back. Got the sleeves for the ring gear bolts, and I figured I'd get right pie-arr-squared and order new bolts too. P/Ns below if anyone cares: The sleeves are pretty stupid. They aren't actually long enough to take up the entire thickness of the flange on the carrier, so they kinda just hang out in there rather than definitely being on the shoulder of the bolt... I could have got fancy and put them on the bolt with retaining compound first, but I was more or less done with the whole thing. If the ring gear comes flying off the carrier I will buy an ARB, as Yukon has IMHO more or less dropped the ball with this product. Stupid trick to torque the ring gear bolts, squish the whole thing in the press so it does the holding for you: I also went all out and changed all the bearings in the axle. The wheel bearing retainer plates were completely thrashed, so instead of just putting it back together I figured I'd chance ordering some different ones. These retainers are for a 1966-77 small bearing Ford 9", which is nice because they are much thicker than the Dana ones, and have the cutout to allow you to put them on later; however while the bolt pattern is the same the center diameter was not, but a little work with the die grinder to chamfer the edge was all that was needed. Stock (bent and rusted) retainer, modded aftermarket 9", unmodded 9": Zip locker in and function testing: I still need to clean up the hose routing a bit, put the cover back on, add oil, put the brakes back on the axle, hook the driveshaft up, etc, but it's close. Another thing is that the instructions with the Zip locker leave a lot to be desired in many ways. There is no information about how the switch is to be wired, or anything like that. So here's a crap diagram of the pins on it: Also, Yukon prides themselves in giving you 'plenty of air line, even for a full size long box truck.' I used all but about 26" of it, and that's on a short box minitruck... So while it worked out for me, I could see it being less than ideal for somebody else. I need to pick up some extra hose and fittings anyways, as the push connect airbrake fittings and nylon hose aren't exactly the most robust stuff in the world.
DirtyComanche Posted February 12, 2017 Author Posted February 12, 2017 It's alive again, as of this morning. Unfortunately it has warmed up a ton, so the snow is rotting badly, I'm hesitant to really go anywhere 'off road' with it in these conditions. Super easy to bury yourself completely. I'll put some miles on it and maybe there will be guys going for a run next weekend, if I'm still around.
DirtyComanche Posted February 13, 2017 Author Posted February 13, 2017 The stereo sucks. I'm not picky, but it's like listening to one of those tin can and string dealios back when I was a kid and Al Gore was still inventing the internet. So I'm ordering these: https://www.amazon.ca/Polk-Audio-DB651-6-5-Inch-Speakers/dp/B000P0PF9G/ref=sr_1_1?ie=UTF8&qid=1486969317&sr=8-1&keywords=db651
Minuit Posted February 13, 2017 Posted February 13, 2017 You'll be happy with the Polks. I run them in all of my junk and the people I install them for always have good things to say. Sent from my LG-D850 using Tapatalk
DirtyComanche Posted February 13, 2017 Author Posted February 13, 2017 You'll be happy with the Polks. I run them in all of my junk and the people I install them for always have good things to say. Sent from my LG-D850 using Tapatalk Yeah, I saw they had good reviews and figured Polk generally makes good stuff. I think they should pretty much just drop into the hole in the door anyways, so it should be easy.
DirtyComanche Posted February 15, 2017 Author Posted February 15, 2017 Got the speakers today and threw them in. Turns out there was already some 6.5" Alpines in the door, but they're cheap junk. Night and day difference between them and the Polks. I then realized there is actually rear speakers installed. Hmm. Might have to look into what else can fit in there. Also I should probably change the door pins in the driver's side, and the striker has busted a bunch of the spot welds, and I definitely need a new door seal... That might cut down on noise a bit which would be nice.

Recommended Posts
Create an account or sign in to comment
You need to be a member in order to leave a comment
Create an account
Sign up for a new account in our community. It's easy!
Register a new accountSign in
Already have an account? Sign in here.
Sign In Now