neohic Posted March 21, 2012 Posted March 21, 2012 Kinda cool watching something that looks so familiar on the surface and then appear so alien under the hood. This is cool! Glad it's working out. :popcorn:
Automan2164 Posted March 21, 2012 Author Posted March 21, 2012 Thanks Ben! I am used to it by now... Every time I pop the hood, it's just "there". I used to get the shakes, they've went away... Now if I could only it it's shakes to go away. Today was another good day. It's super motivating to have 80 degree days in March this far North. Makes for excellent wrenching. Started out by taking out some stuff I wanted to change. Out with the dual battery system, it's cables, and the two batteries. Removed all that, hooked back up the factory hot lead to the starter, and tossed in the new battery. Luckily, I found the factory battery hold down still on the passenger floor, and got real lucky when I was pulling out the stuff from the toolbox when I found the nut for the hold down. Score. I don't have a use for all the wiring I took out, but I'll find one. Pretty heavy gauge cable, some ends, and the multi-battery switch... Might be cool to use on some dual deep cycles on a Camper trailer... Hmm... 8) I took out the speaker box / amp while I was at it, might find a home in the Farmer when I get it done. Fits behind the passenger seat nicely. Passenger seat came out today too. I picked up a length of hose to hook up to the booster from the pump, got that all in place. They were out of vacuum line, so I just had to use 3/8" fuel line for the time being. It was cheap enough, and I just wanted to see what would shake out anyway. I didn't drive it around, but so far, the brakes now feel like they are getting the help they need. Also, I was hoping to see some changes in anything else vacuum controlled, but none yet. Did fire it up today! It seems to run better and better with every change. I was on the hunt for leaks, and wanted to see if anything I was doing is helping at all. I found a few leaks, looks like my big, big dripper seems to be the dipstick tube: Was channeled by the ribs on the block, down onto the motor mount, and down the bottom: After about 20 minutes: Probably end up pulling the tube out, cleaning the surfaces, and reinstalling it with some RTV around the base. No biggie (I hope). Also noticed a little fresh oil around the vacuum pump: I had kind of expected this, but the remote oil filter / cooler might be doing a little something too, down the inner fender, onto the engine mount, and down the frame: I am still a little weirded out by my rear main, and will be keeping an eye on it. I noticed some dark drips collecting on the bolt heads, but I wiped them off to see if they come back. I did let it get hot enough that the hoses were hot to the touch, and checked the temperature sensor to see if it's working properly or not. I didn't get a reading out of the gauge. I ohmed out the sensor, and the numbers don't jive with the book. Figure I might as well replace it anyway... $15 part. The system was able to build a little pressure, and everything seemed good. I can't wait to get that alternator though and hopefully have the tach act normal again. It's leveled out from spinning circles after taking out the dual battery setup, but it's still off. I did check the voltage of the running article today, turns out it is putting out a bit of power, but just over 13... Needs to be a bit more than that. Knowing the RPM would open a ton of doors for me, because it would tell me if they shaking is because it's idling low. I am only assuming so for now. The only thing I haven't been able to find is the "Cold Start Capsule" replacement, as the current one doesn't move at all. It's supposed to bump the cold idle/timing, but it never moves. It's wide open to the normal hot range... More checking to do there. And for you faithful followers, I took a video of how quick/good it starts up today, and some of me playing with the throttle. Dce6maYuIfs Rob
kawaboy13 Posted March 21, 2012 Posted March 21, 2012 Keep up the good work :thumbsup: great to see one getting back on the roads.
Automan2164 Posted March 21, 2012 Author Posted March 21, 2012 Big thanks to Hornbrod today, with his help I tracked down a "Cold Start Capsule" sitting on a shelf at a dealer in New England. Ordered it up, should be here later this week, or early next. Rob :cheers:
Abyx Posted March 22, 2012 Posted March 22, 2012 Just wanted to say that I really enjoy reading this build thread! Not sure why, but I'm digging the wagon wheels/whitepaint/chrome toolbox combo. The TDI helps a lot too. :D Keep it up!
Automan2164 Posted March 22, 2012 Author Posted March 22, 2012 Thanks! I think this is as deep as I have gone step by step on the site. Usually I just tear through on my own, but this is a little more special. I enjoy sharing it with you guys. Also, I want to have a lot of the key points of these things on a searchable basis on the net. Try to help out the next poor sucker who picks one up... Haha. Today I got some more done, starting with gutting the rest of the non-essential to running interior... Seats, center console, back trim, back carpet, and kick plates out. Don't even ask how this seat base bolt came undone without lots and lots of swearing... Call it luck. Ready to pull the carpet out... Drum roll please. Wah-wah-wah. Water city... I had an idea of where it might be coming from, to be discussed in a bit. Rust-rust-rust. :ack: What did I think might be a big water intrusion problem? Now that I have the headliner out, you can really see the issues... Didn't notice this before. Like the light was in the wrong place, then got moved. Sun beaten and plain old beat headliner: Soaked, soaked, soaked carpet... Still in good shape, but needs a power washing and some cleaner. Plastics: I also wanted to get a better look at the timing belt situation, and see what I am in for. Decided to take off the cover. I really just wanted to see what it looked like under the cover, once I saw the accessory belts were going to be a problem, I broke out the Gerber tool: Enter the bane of my existence: Timing mark, took me forever to find the stinking things. According to the FSM, the cam and the injection pump should have 19 teeth on the belt between marks, which this one still does. I was hoping to see if I could get away without pulling the crank pulley when I do the belt, but the block has a casting that guards the belt, and it's in the way. The belt definitely feels/looks old and tired... Video: 74wYZPx7odo lI20OtGUc5E While I was in the engine, and knew it wasn't going to be running for a bit, I addressed the leaky dipstick tube the only way I could think of... RTV baby. Out. Dirty hole: Clean hole!: Little RTV. Got it in, and smeared it around the best I could with my fingertip... Pretty tough spot to reach. 'Tis all for today. Rob :cheers:
terrawombat Posted March 22, 2012 Posted March 22, 2012 Although the play/slack on the timing belt looks and seems excessive, it can sometimes be deceiving. I've owned and worked on many overhead cam engines (namely, 3000GT's), where the same kind of slack could be seen when the engine was off. Never skipped a tooth or bent a valve. However, there is never any harm in replacing the thing. Or replacing it twice since you seem to have an abundance of those parts...
JeepcoMJ Posted March 22, 2012 Posted March 22, 2012 Renaults have a VERY specific timing service requirement. Being that the service history is an unknown, and the amount of play in the video....replace it. Only thing worse than an interference motor with a blown timing belt is one you can't get parts for
Automan2164 Posted March 22, 2012 Author Posted March 22, 2012 Only thing worse than an interference motor with a blown timing belt is one you can't get parts for Couldn't have said it better myself, but I did emphasize where necessary. Rob
knever3 Posted March 22, 2012 Posted March 22, 2012 Is that motor building boost? It seems when you rev it up I can't hear the turbo? It looks like you have your work cut out for you, my suggestion is to remove the engine and go through it on an engine stand. Far easier to clean it and replace all the wear parts. I like the diesel noises it makes, cue Tim Taylor!!!!
Automan2164 Posted March 22, 2012 Author Posted March 22, 2012 Is that motor building boost? It seems when you rev it up I can't hear the turbo? It looks like you have your work cut out for you, my suggestion is to remove the engine and go through it on an engine stand. Far easier to clean it and replace all the wear parts. I like the diesel noises it makes, cue Tim Taylor!!!! It's not building boost when I just rev the throttle, it's not quick enough/under load. It does build boost under load going down the road though, and you actually can hear it spool. It will build about 8 PSI. The only reason I don't want to pull the engine now is I want to drive it this summer. If I pull the engine, I am going to want to paint the engine bay/frame, and I don't need another Farmer on my hands at the moment. Rob
knever3 Posted March 22, 2012 Posted March 22, 2012 Is that motor building boost? It seems when you rev it up I can't hear the turbo? It looks like you have your work cut out for you, my suggestion is to remove the engine and go through it on an engine stand. Far easier to clean it and replace all the wear parts. I like the diesel noises it makes, cue Tim Taylor!!!! It's not building boost when I just rev the throttle, it's not quick enough/under load. It does build boost under load going down the road though, and you actually can hear it spool. It will build about 8 PSI. The only reason I don't want to pull the engine now is I want to drive it this summer. If I pull the engine, I am going to want to paint the engine bay/frame, and I don't need another Farmer on my hands at the moment. Rob I completely understand that!! I would like to build my motor but it's hard when you want to drive it too! I enjoy reading and seeing pics thanks.
camjeep3 Posted March 23, 2012 Posted March 23, 2012 I agree with everyone else. It is cool to see u pic through and find out all of the trucks little quirks and interesting things. Keep up the good work! :wrench:
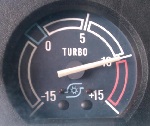
Automan2164 Posted March 26, 2012 Author Posted March 26, 2012 More progress this weekend. Not as much as I would have liked, but progress none the less. Started by addressing the floor. Once I got the carpet out I found out it was a little rustier than I had hoped. The drivers side floor also needed some steel and TLC. I started by hitting all the rust with a flap disc and a grinder. Then I decided I should probably go ahead and pull the dash... Found some stuff along the way. Someone had obviously been in there before. The steering column had a support that wasn't bolted on, and the main loom coming up the drivers side had been sliced open... Some pics of the back of the cluster... The turbo boost gauge is actually a live gauge... Happy to see that the radio wiring wasn't all hacked up... Someone used the adapters. Be nice when I get around to tracking down a factory Jeep/AMC tape deck. Rolled forward. Out. Once everything was out, I wiped down the floor, hit it with some brake clean, and applied a generous coat of rust converter / primer on the entire floor. Then I let it sit overnight with the windows open, and let it get a good cure. Looking at it in the daylight, you could see the drivers floor was showing it's true colors. After some picking and prodding... Then I introduced it to the grinder... Made some cardboard templates. Welding in the steel. Once everything was down and in, I hit it with some nasty two part epoxy sealer I borrowed from work... Nasty nasty stuff. No more rusting here. Figured while I am waiting on the DOHC holding tool for the belt, and some other engine parts, might as well address the torn hinges. Don't all you guys have the rare 90 degree opening door? I tossed a little weld at the hinges. Unfortunately, the hinges were also pretty bent. To my dismay, I couldn't get enough muscle on the hinge to bend it without pushing it into the sheet metal. I went to pull out my oxy/act set, but I was out of gas. The bent hinges will have to wait until another time. I just don't want to crank on them that hard. I just put the door on for now. Still pops open, and will fly all the way to 90 degrees, but at least it's not tearing itself away from the truck anymore. The carpet got some attention too. Loaded it on the trailer, scrubbed it down with carpet cleaner, and took it to the car wash. Once it was all washed up, the only thing I could think of to dry it off was to hang it from the deck... Really classing up the neighborhood. I did order up the sprocket holding tool for the cam/injection pump, that should be in tomorrow afternoon. I just checked the UPS tracking number, and my cold start capsule should also be in tomorrow. I'm also going to put a call into the glass guy, as I can't think of a better time to get the windshield replaced than when I have the dash out. Hopefully it will save be a bit of coin if they save a bit of time. Rob
MancheKid86 Posted March 26, 2012 Posted March 26, 2012 fender doesnt even bend with your 90 degree door? I'm impressed :yes: keep up the good work! :thumbsup:
neohic Posted March 26, 2012 Posted March 26, 2012 Don't all you guys have the rare 90 degree opening door? That's a comfort feature. Another one of AMC's great idea like how the passenger door on a Pacer is a few inches longer than the driver's making it easier for rear passengers to get in.
Automan2164 Posted March 26, 2012 Author Posted March 26, 2012 Just ordered the windshield. Guy is coming out tomorrow afternoon. Once that is in, the interior is ready to go back in. Rob
terrawombat Posted March 26, 2012 Posted March 26, 2012 I'm assuming you're going to keep the amber lights on the roof to act as a "seal?"
JeepcoMJ Posted March 26, 2012 Posted March 26, 2012 pull all the chrome around the windshield, and remove/save as many of the trim clips off that aren't stuck in glue as you can...they don't supply new ones usually. the new windshield will be a rubber gasket style. it will pop right in, but to keep original you'll need to have him do the install and have the chrome clean and ready before he gets there because they have to reinstall it after the job is done in order to make sure of fitment. If you do that, save the rubber gasket for me. I always like having spares.
Automan2164 Posted March 27, 2012 Author Posted March 27, 2012 I'm assuming you're going to keep the amber lights on the roof to act as a "seal?" Yeah... Plugs for the holes that they created... I honestly wouldn't mind them on something else, but knowing they are on this, and that it's 16 more holes to address... It irks me. Something I also forgot to add to the last post, is that while I had the door/interior ripped apart, a key fell out of something and I found it in the grass. It's a completely unused door cylinder key, punch out still in it. It feels so solid and crisp in the cylinder compared to the well worn key I have... The copies will definitely get made from this one. Windshield appointment has been confirmed for tomorrow, going to be $180 installed. I had to take a half day, so weather permitting, I hope to make some more progress. I did get some parts today though. DOHC gear holder came in, I hope it works for the cam/injection pump. I also got my thermostatic capsule in the mail from New Hampshire. Once the glass goes in tomorrow... Time for the interior. Rob :cheers:
Automan2164 Posted March 28, 2012 Author Posted March 28, 2012 Windshield is in, as well as most of the interior. All that's left to put in is the seats and the center console. Everything is looking good... Dash went back in great, looks better. Dash lights are not coming on, could be as simple as the headlight switch. Pics tomorrow, time for bed. Rob
terrawombat Posted March 30, 2012 Posted March 30, 2012 Pics tomorrow, time for bed. C'mon man, I've been glued to the computer since Wednesday morning waiting for the pics.
Automan2164 Posted March 31, 2012 Author Posted March 31, 2012 Pics tomorrow, time for bed. C'mon man, I've been glued to the computer since Wednesday morning waiting for the pics. Yeah, yeah... Been a little... Err... Upset with things lately. On top of that, my phone has been throwing a fit with my "Diesel Comanche 2" folder on FB, so now they will only upload to a different album. Where did I leave off? Oh yeah, the window. It was already not in all that well, made for short work getting it out... He made mention of the different kinds of window sealant used, and that whomever installed it last did it incorrectly, putting the new sealant on top of the old. Makes for a poor bond. Minimal rust in the frame, but he still hit it with the rust converter and a sealer they use on all the surfaces. It all went pretty good, except for the part where he didn't bring enough of those little black plastic clips for the window trim. He had a handful of them, and most on the diesel were dry and cracked. I offered to go to NAPA, no luck, and Advance Auto, no luck. One of those times when having MJ's laying around is nice. I ended up cannibalizing the Farmer. Luckily, the clips weren't too buried in the old glue, and I could slide a good amount of them out for the diesel. Wasn't too happy about that, but whatever. It's in, and it looks good. Once he was done with that, I worked like a mad man putting in the interior, and did it in record speed. I started by re-wrapping the cut wire loom over on the drivers side, and replacing all the little zip ties that hold the wiring into the dash. The old ones are always super brittle, so I cut off all the old ties, and put new ones in place. I also cleaned out the cluster while it was out, and found one of my factory AMC Jeep AM/FM radios hanging around to put in. Before you knew it, the interior was in. It's a great feeling getting this out of the way, save a few details. Also had a chance to put on a decal I had laying around... I have had some troubles with the alternator too... I called O'Reilly's on the 10th day, the day it should have been in at the latest. Turns out, it's back ordered... Yep, you bet I asked why they told me they had one waiting on the shelf at the manufacturers, and then I had to wait 10 days for them to tell me it was back ordered. Especially after I had paid for it to be ordered. He told me he had searched all around, NAPA, Carquest, AutoZone... And no one else had one for them to buy and sell to me at the agreed price. I could have told them that. They did however, tell me they had found a used one on the LKQ parts supply chain, used, $65 with a year unlimited miles warranty. Told them I would be in to check it out and work out the cash. Got there, and looked at the specs... Listed on the LKQ website as a 1986-91, fishy, and that it was a 78 amp... Super fishy. Instant pass for me. They came in 60/70 amps, but not 78... More time down the drain. I took the refund, and headed to Carquest with my tail between my legs. They actually found one with me standing at the counter, so I dropped payment and have it on the way. Should have just trusted my gut and went with them to begin with. After all, I owe all my business to them really, for tracking down the timing belts, and comping them on top of that. Speaking of stuff from them, I did have a chance to try out the DOHC cam lock tool. It works, but the teeth in the cogs aren't spaced the same as the tool is laid out, so it doesn't sit right in the teeth like I would want it too. With a bit of playing around, I can get it to lock in one tooth per side, and it will hold them tight though... better than nothing I guess. And that's where I am going to leave off for now. I had really been cranking away at it to try to drive it to the LKQ trip for us IL/WI guys, but the alternator, along with the sheer amount of ends to tie up slapped me with a dose of reality. I took yesterday off, as well as tonight because of the weather. Still to do: Timing belt Pull Radiator, crank pulley, to get better access. Pull alternator while everything is out, Replace. Pull vacuum pump while alternator is out, reseal mating surface to the block and stop oil leak there. Pull remote filter assembly, disassemble and replace o-rings to stop leak there. Drain/Fill Trans. Drain/Fill Transfer Case. Drain/Fill axles. Cut off huge exhaust tip in favor of simple turn down, or stock tailpipe. Replace Door/window seals/trim. Recover headliner. And I think that's about all I can think of at the moment... Rob :roll:
opsled Posted March 31, 2012 Posted March 31, 2012 Lookin good Rob. A couple of things. That timing belt is way loose. Check out your tensioner. It's right below the camshaft pulley. The tensioner has a pivot bolt, lock bolt and is spring loaded to provide proper tention. The bolt are supposed to be loosened on occasion so the spring can retention the belt. It doesn't look like that was ever done or that belt would be tight even if worn. The tensiner can get corroded up too so make sure it's moving freely. Rad out and crank pulley off is a must to do a good job on changing the belt. I did mine without the tool for holding the pump/cam pulleys but that tool will make things easier. The key to getting it right is to pin the crank at TDC #1 (#1 is the rear cylinder) before the old belt comes off. If you keep the cam/pump timing marks at the pointers in the windows on the cover with the 19 belt teeth between the marks it will be good. Make sure any slack in the belt is between the cam and crank pulleys when the new one goes on. Let the tensioner set the tension and lock it. Pull the pin on the crank and rotate the engine two complete turns and repin the crank. Loosen the tensioner again so it can readjust if needed. You might want to do this a couple of times to make sure all the slack is out of the belt. and I would check it again after the engine has been run. You don't have to pin it all the time but the new belt may need to be retensioned a bit as it wears in. The tensioner can be gotten to without taking anything else apart so it's not a big deal. Be prepared for trouble on the remote filter lines. They will not come off easily if at all. They are bastards and also special. Good Luck, Phil
Automan2164 Posted April 4, 2012 Author Posted April 4, 2012 Thanks for the input Phil. I hope everything goes smoothly for it, going to be a pain if something messes up. Gates did change the way they do the tensioner though, so I'll follow what they say. They actually have a whole different tensioner/pulley bracket, and it doesn't have an ear for the tensioner spring to push on. Here is the updated info from Gates: http://www.gates.com/europe/file_displa ... 045040.pdf As for the remote filter lines, I don't want to jinx myself here, but I was looking at them today while I had the radiator out, and they don't look that bad at all. I also have to keep in mind that I won't have a lot of the corrosion issues you might have had with a truck that lived in the rust belt for 25 years. This one hasn't even seen a winter on the road. See what happens when I take mine apart, I am sure I'll have lots of pictures. Anyway, today I finally got my alternator in, and visually at least, it looks all sorts of right. I'll toss it in once I get the timing belt back on, and all the other stuff wrapped up in that area. Speaking of the bane of my existence, I took a few steps closer to getting the thing taken care of today. I had to do some other stuff first, but with the time I had left, I decided to pull the radiator, fan, and make the condenser movable so I could get at the belt. Start with draining all the old coolant. Grille came off to get to the condenser/radiator attachment bolts. Reference shot. Business end of the intercooler, little easier to see without the grille on. So much hate in this picture... So much hate. Luckily the flex lines of the condenser are long enough for me to do this. I really don't want to take the fittings loose to find out there is still some charge in it, or introduce air/moisture into it. It will stay as so for now. Motor shock. Tensioner, applying almost no tension... So much room for it to take up slack. If I knew how old the belt was, I might be inclined to just make the tensioner take up the extra and put it back on the road... Already this far though. Fan and shroud for $#!&s and giggles. And that's where it ends for today. Looked a bit like rain coming in, so I called it a night. I got the issues with my phone uploading pics to Facebook fixed, so now I can be back to uploading gobs at a time. There are just so many interesting things to look at. Couldn't imagine how weird it is for you guys who don't see this everyday... It's just "There" for me. Rob

Recommended Posts
Create an account or sign in to comment
You need to be a member in order to leave a comment
Create an account
Sign up for a new account in our community. It's easy!
Register a new accountSign in
Already have an account? Sign in here.
Sign In Now