

Salvagedcircuit
-
Posts
1381 -
Joined
-
Last visited
Content Type
Profiles
Forums
Gallery
Everything posted by Salvagedcircuit
-

1988 Golden Brick
Salvagedcircuit replied to Salvagedcircuit's topic in Member Projects: Your Comanches
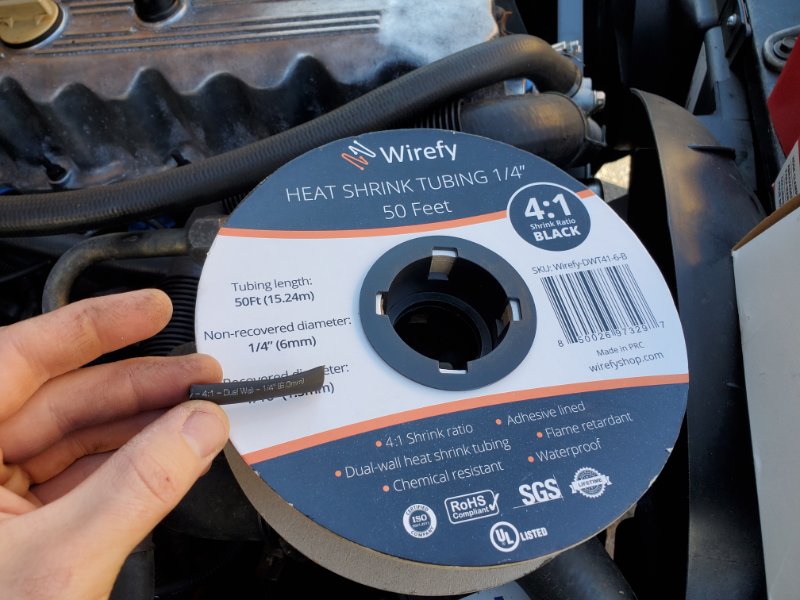
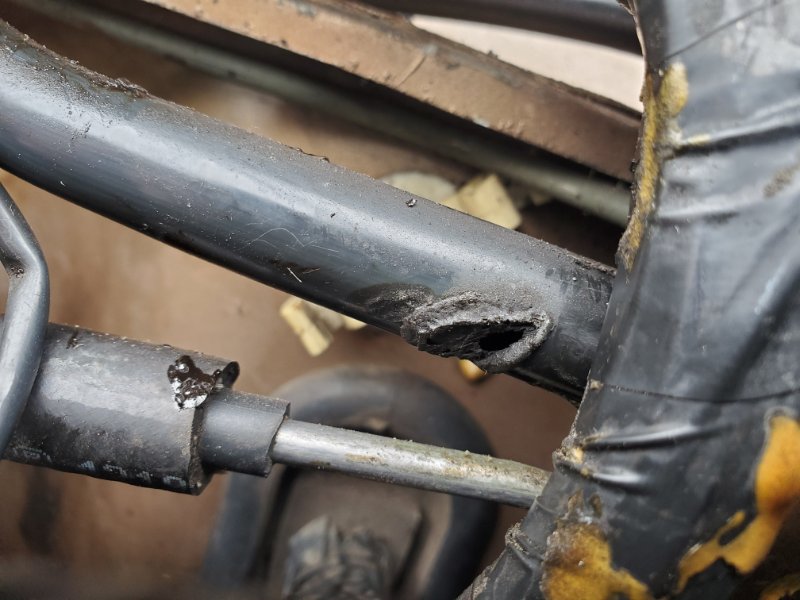
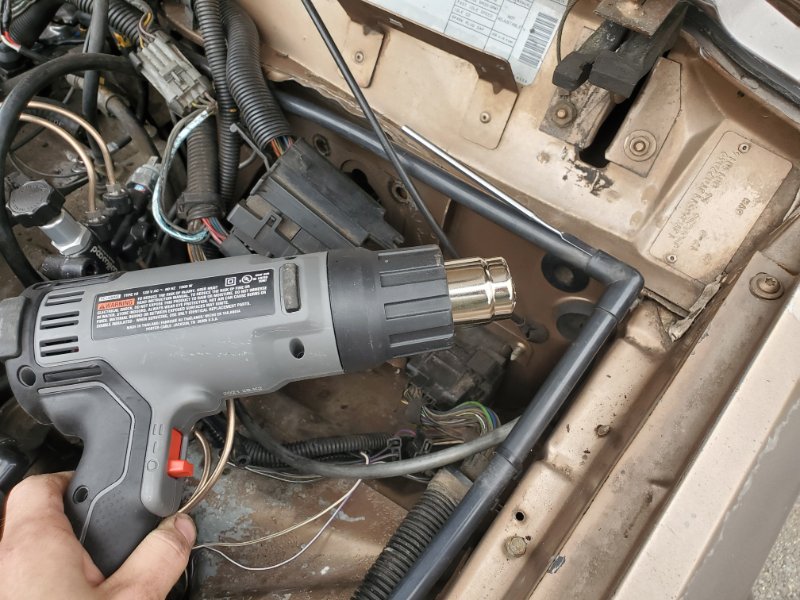
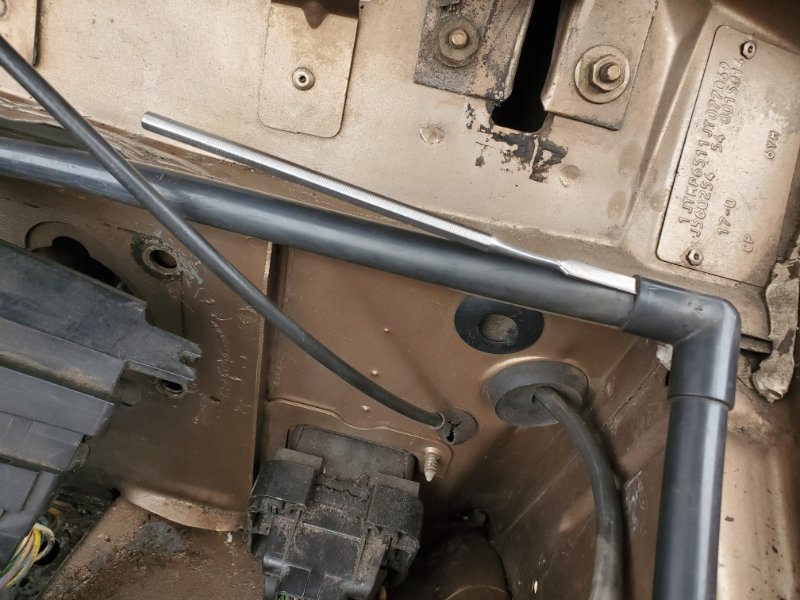
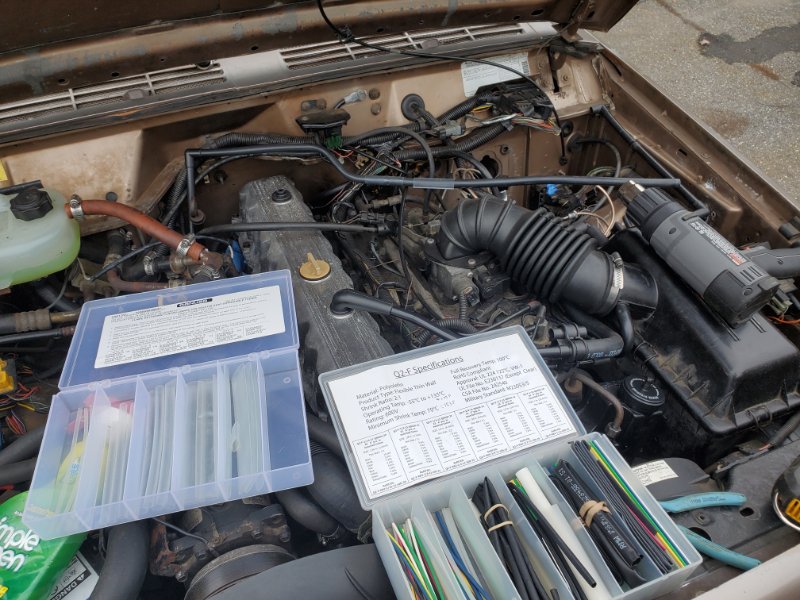
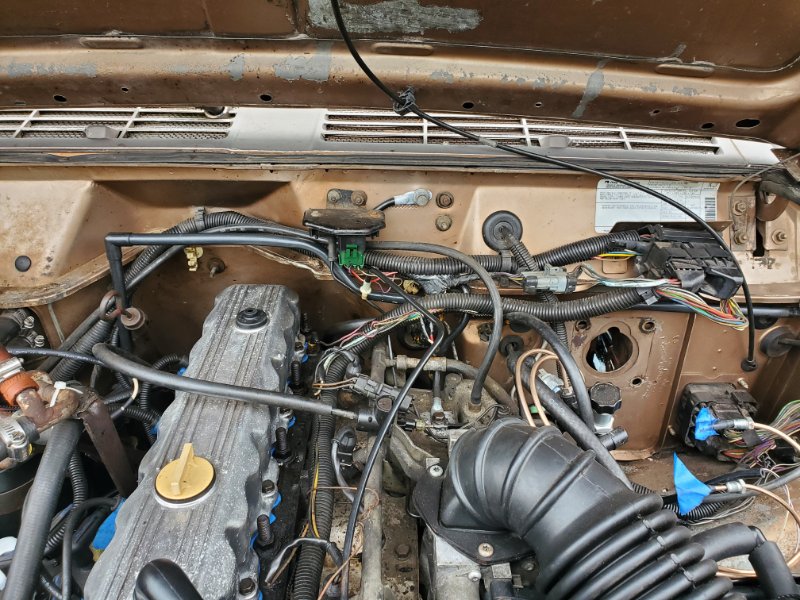
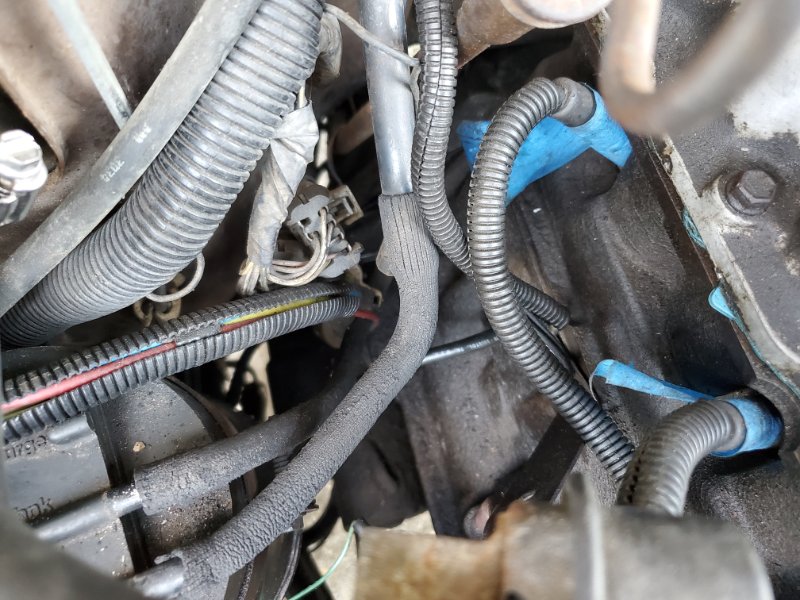
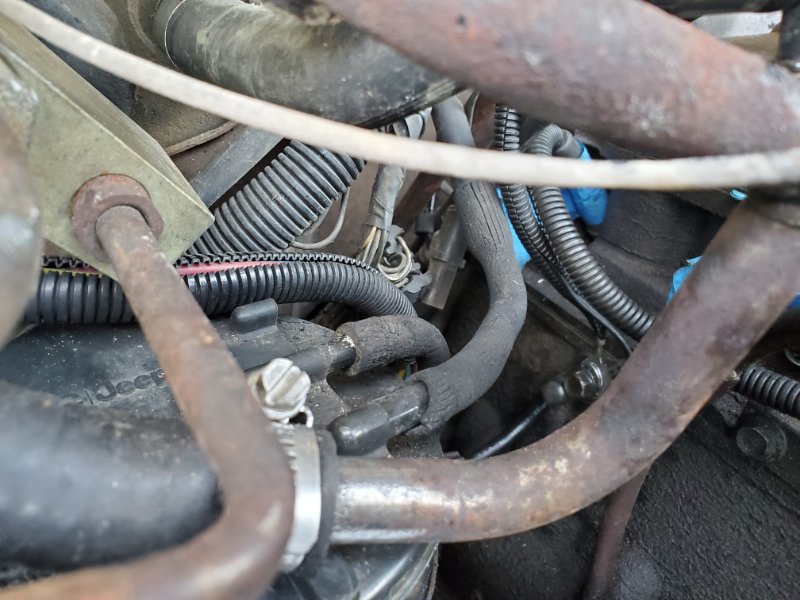
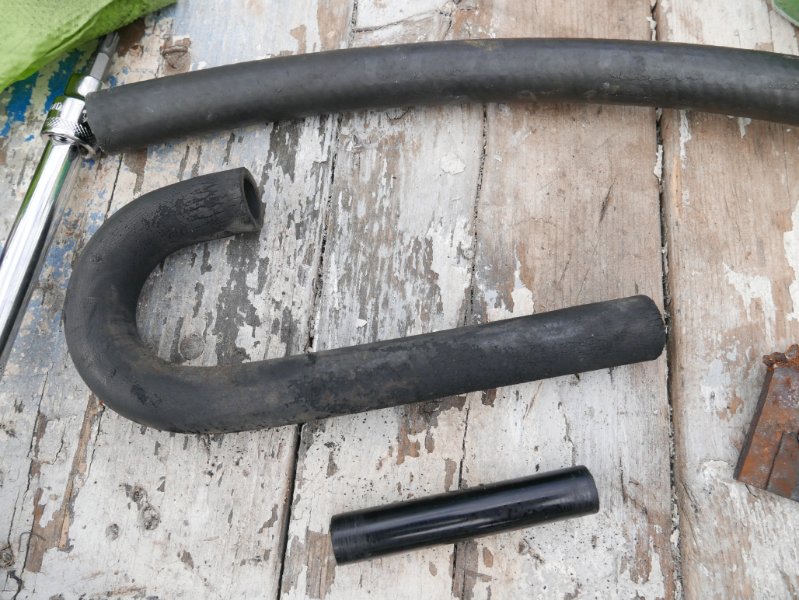
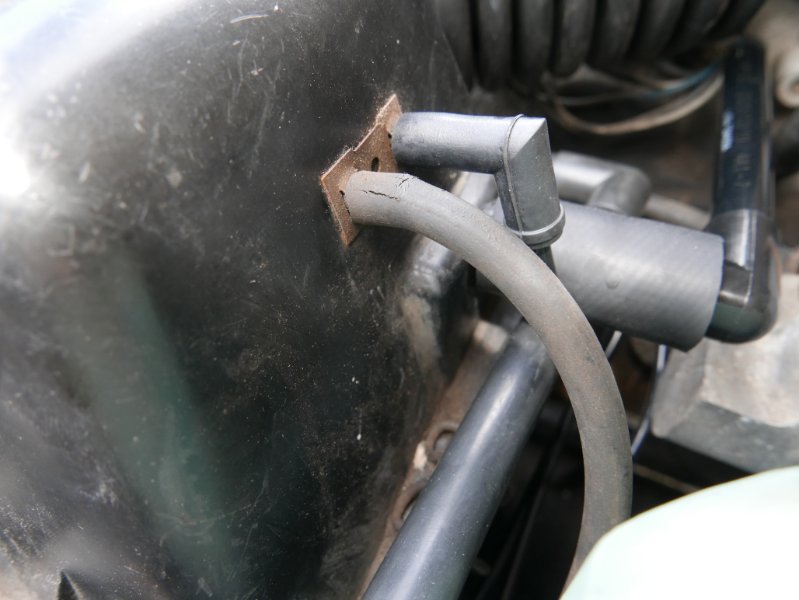
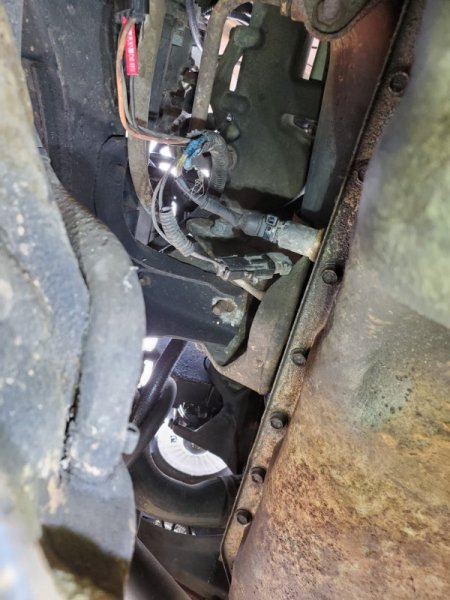
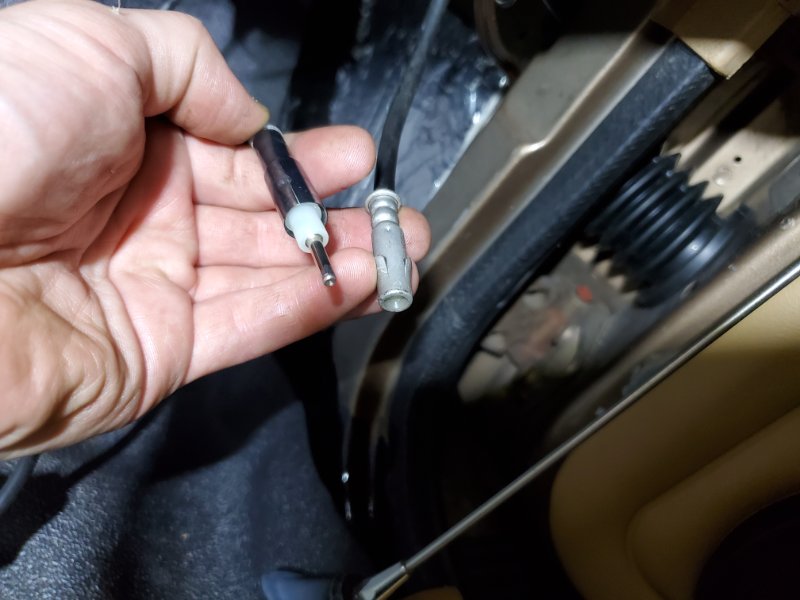
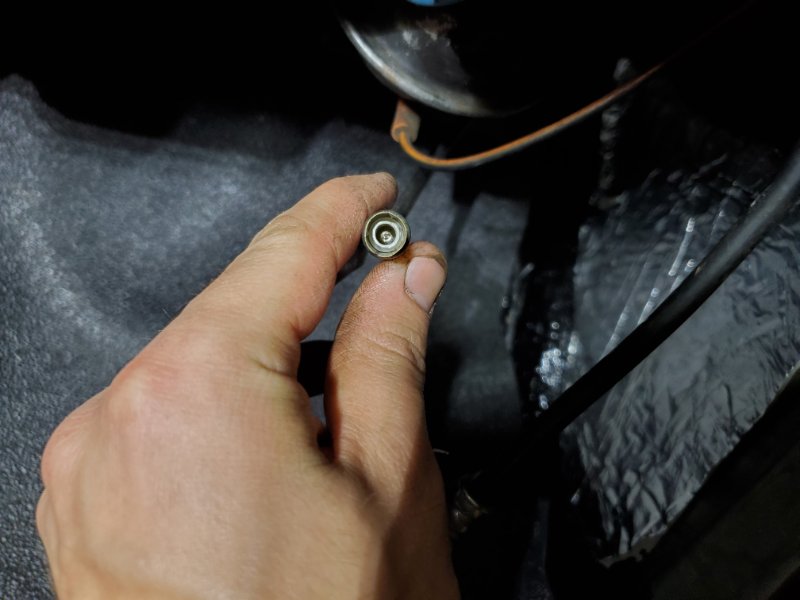
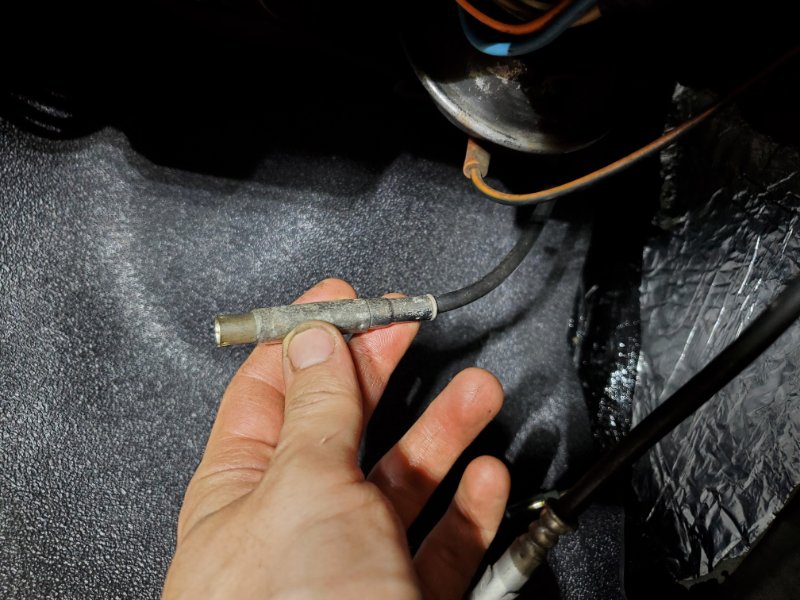
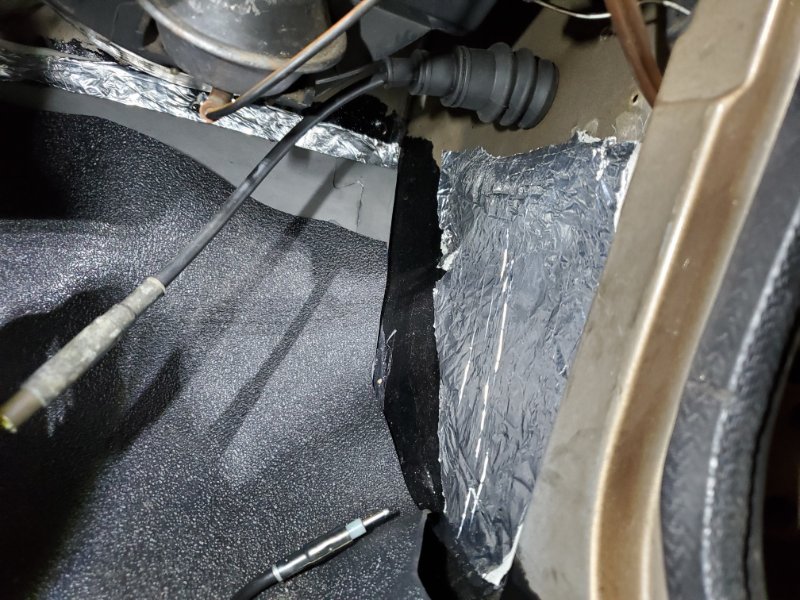
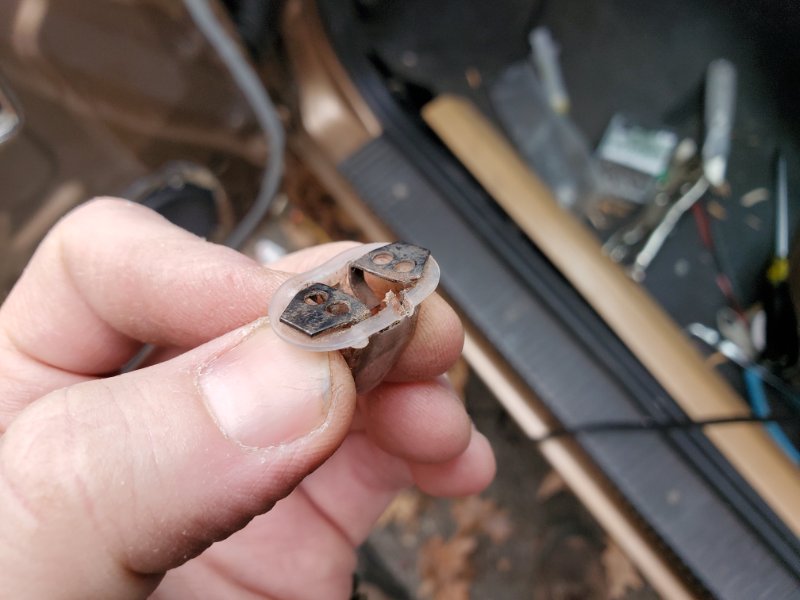
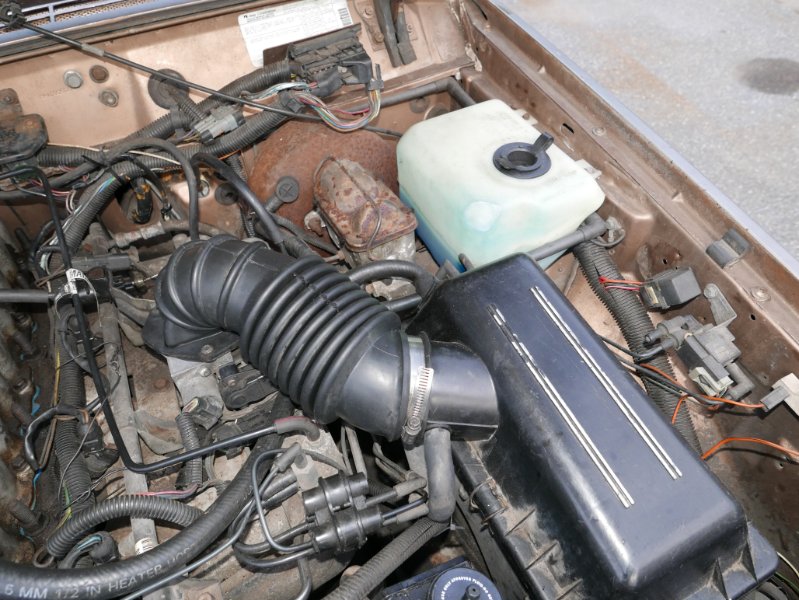
Vacuum Line Repair Digging a little deeper into idle conditions, I noticed my heater core vacuum lines were crumbling and I found a sizeable hole in the rear vacuum line that runs along the bottom of the firewall seam. Ouch indeed. Since It's my first time experiencing vacuum lines I did not know what to expect in terms of a replacement. The heater valve vacuum lines ran right into a firewall grommet and I was in no rush to remove the dash to find out where they terminate. With a lot of experience in repairing electronics, I was hoping that heatshrink would come to the rescue. In this case I opted for adhesive lined heatshrink, but unfortunately my heatshrink kit did not include any adhesive lined strips. I usually grab genuine heatshrink from Digikey or Mouser, but I needed the heatshrink in a rush, so I took a risk and grabbed some from amazon. Amazon and ebay are the clonezone marketplaces of the western world, so I did not have high hopes that I would receive a useful product. The wirefy brand 4:1 shrink ratio adhesive lined heatshrink seemed to work pretty decently well at repairing the very fragile 1/8in vacuum lines. It leaves a nice bead of adhesive on the ends of the cut strip, indicating that the glue has properly flowed. So far I have used it throughout the engine bay on the small vacuum lines and for the very necessary wiring harness soldering repairs. It's been working decently well and reinforced the vacuum lines nicely. A low setting was used on the heatgun to prevent any unwanted vacuum line damage. Most heatshrink melts well around 200f, so keeping it below that is a good benchmark. I job I was dreading the most was repairing the larger rear vacuum line. I tried finding a replacement source of ~1/2in rigid black vacuum line but I could not find any line anywhere locally. It didn't seem like a consumable part and no 3rd party lines were available for the comanche online either. I used the heatgun on a low setting and worked my thin metal spudger into the 90 degree vacuum joint. Keeping heat on the joint, I wiggled the spudger around the diameter of the tube inside the right angle joint and with a bit of tugging, the tube came right out of the elbow. Success. I was concerned that I would overheat the tube and it would stretch and tear. That was not the case. With the tube removed, I was able to slide on the heatshrink tubing needed to properly repair the hole in the vacuum line. I used two stacked heatshrink segments for extra rigidity. So far the fix has worked well. I would highly suggest this method of vacuum line repair. It became evident that whatever rubber hoses attached to the rigid plastic vacuum lines in the engine bay were completely toast. One major example are the lines coming off of the emissions vapor tank. Hey Aveeno, I've got a great model for a skin care commercial Other rubber vacuum lines did not appear bad at first glance, but an easy way to tell is if you touch them and change skin pigment. The "J-shaped" rubber tube to the air box ended up just like this. The smaller rubber vacuum lines that connect to the air box were clearly cracked but luckily you can easily source those. 5/32 windshield washer tubling is a direct replacement for the tiny rubber vacuum line that allows for the hot air port to function on the renix air boxes. I purchased prestone brand 5/32 tubing from my local autozone. The tubing fits nice and snug into the side air box clips.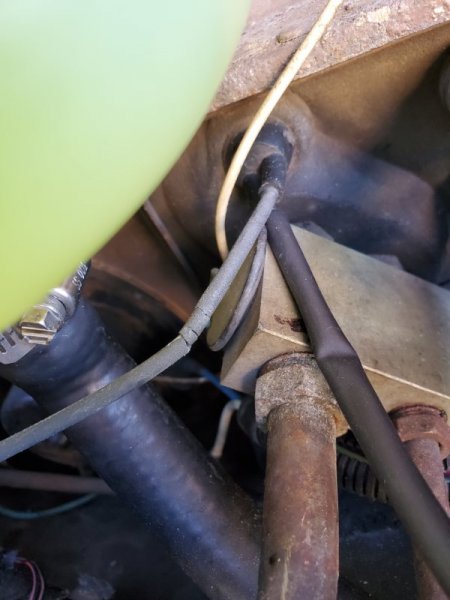

-
1988 Golden Brick
Salvagedcircuit replied to Salvagedcircuit's topic in Member Projects: Your Comanches
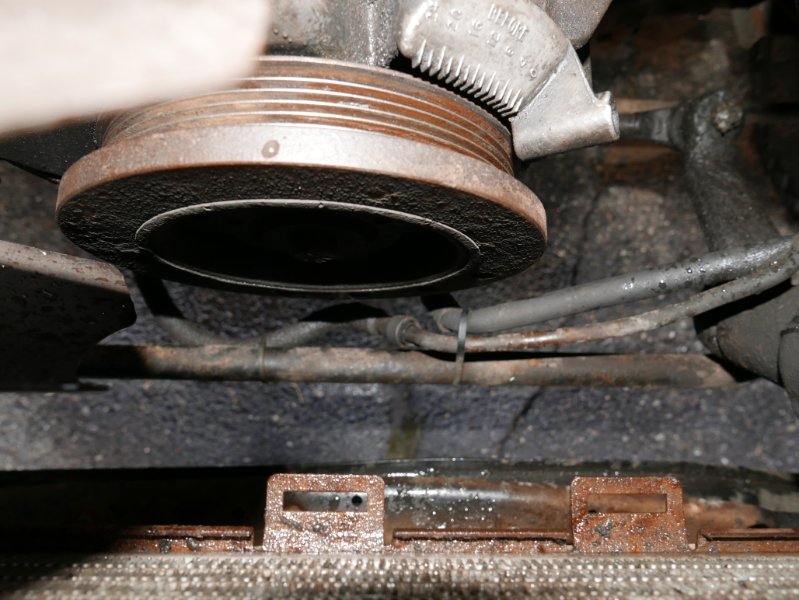
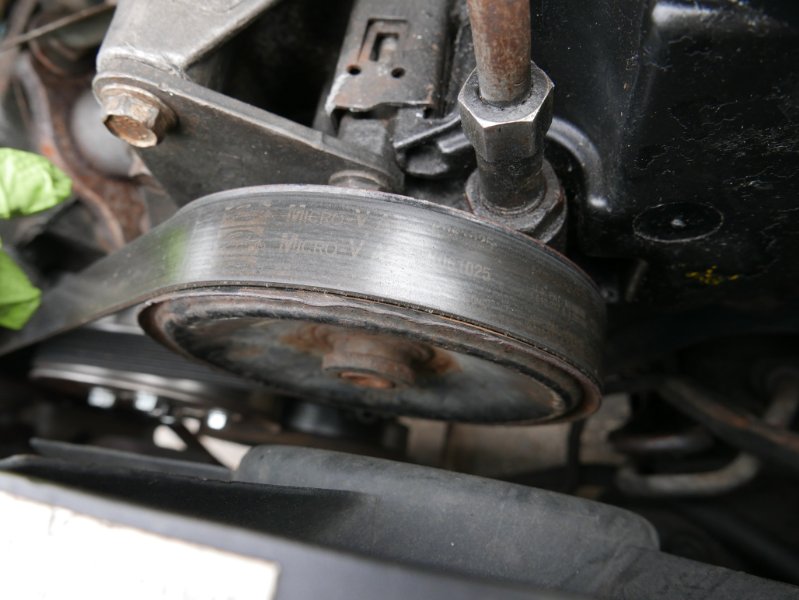
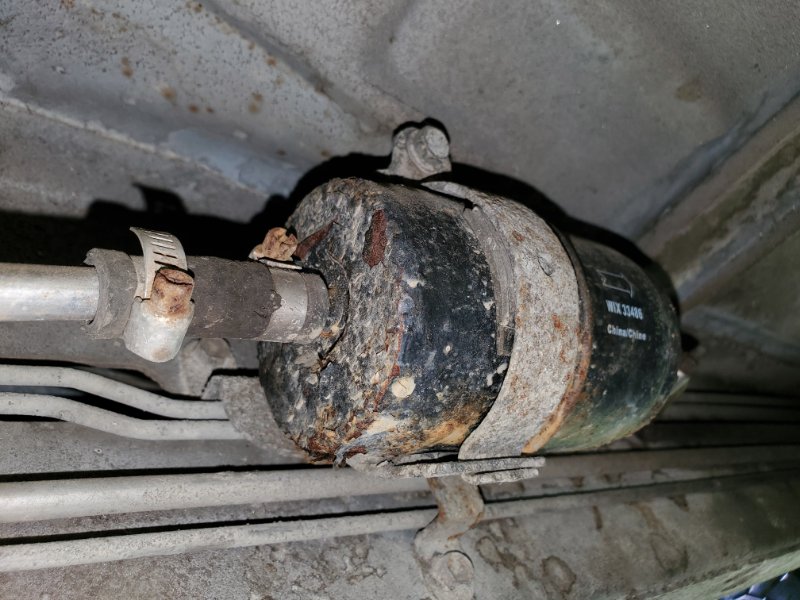
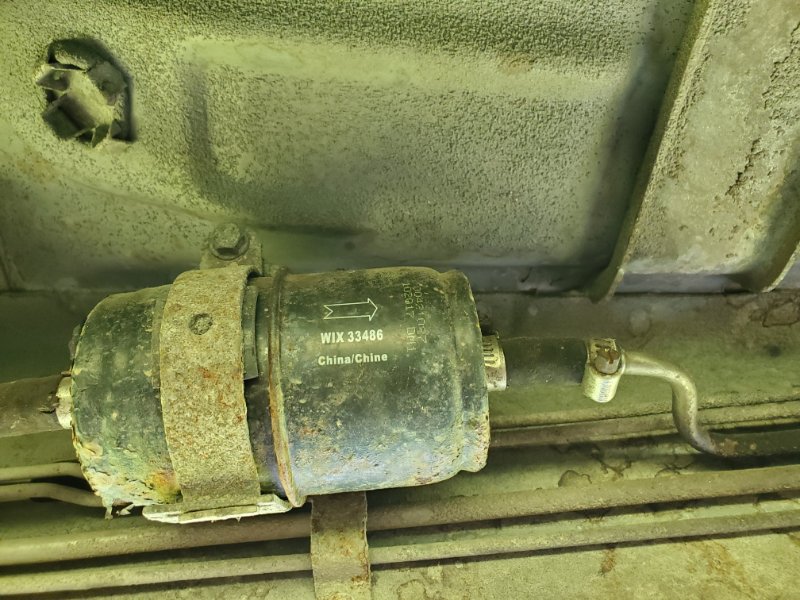
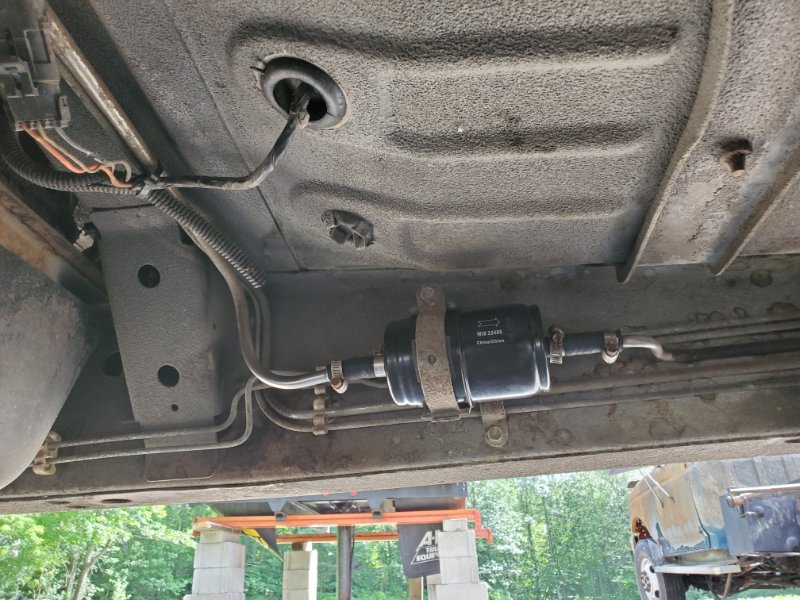
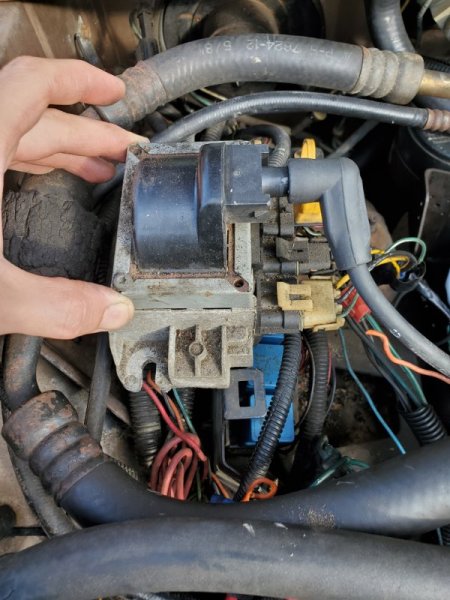
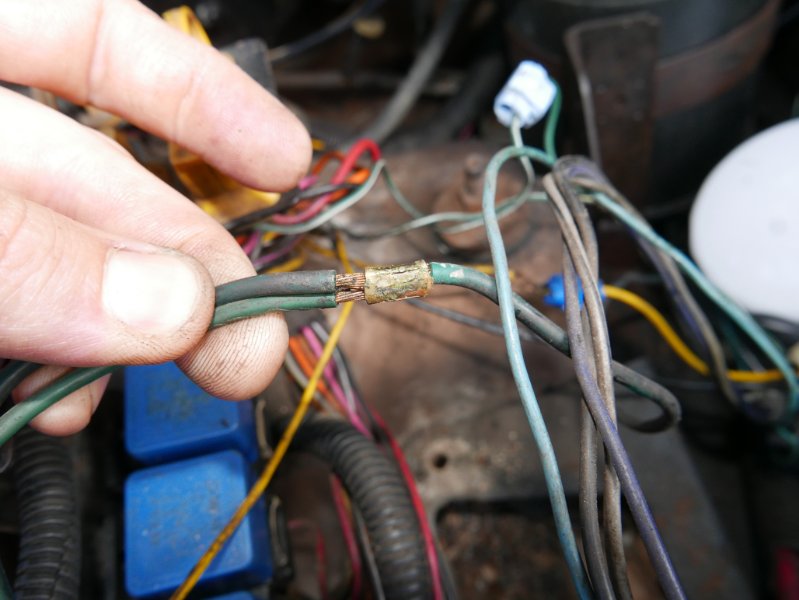
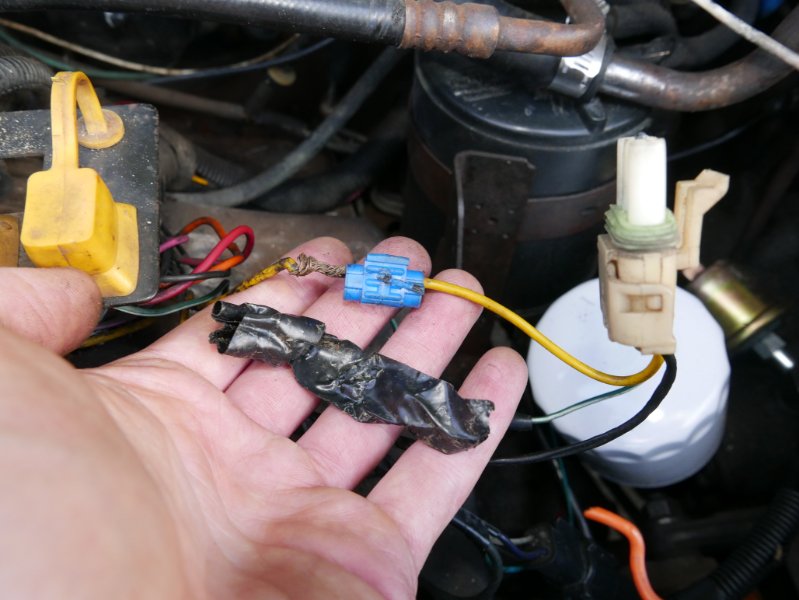
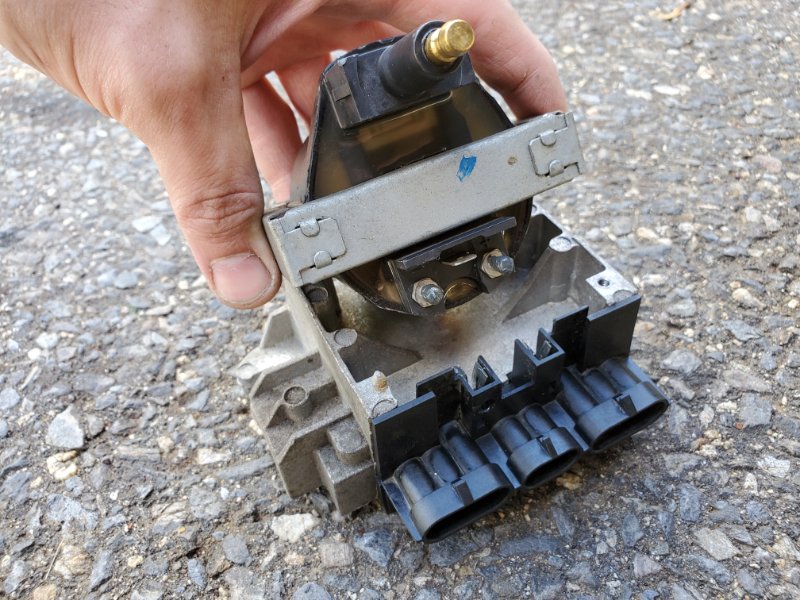
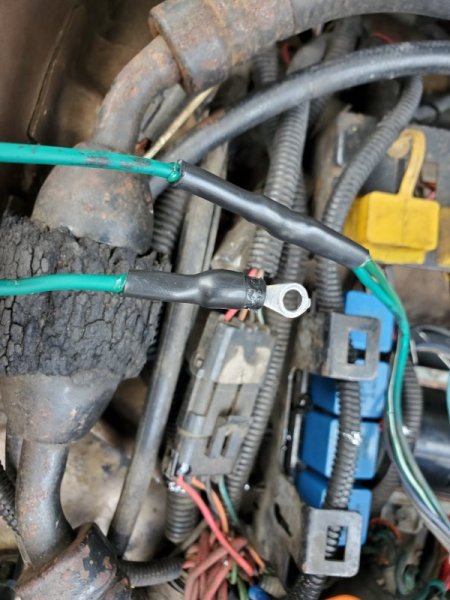
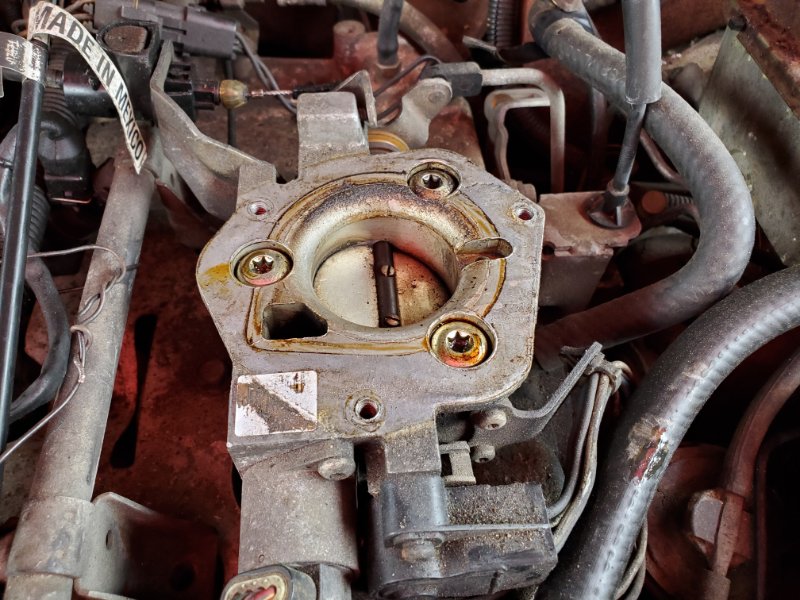
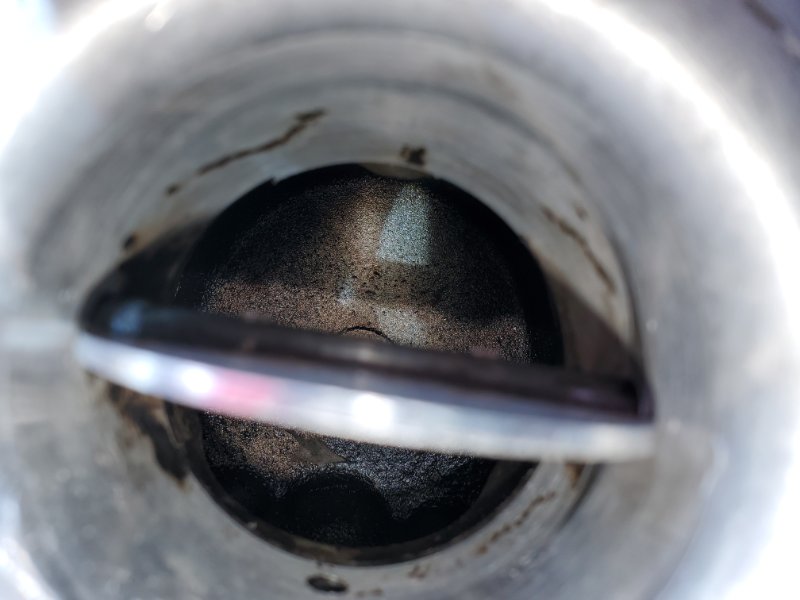
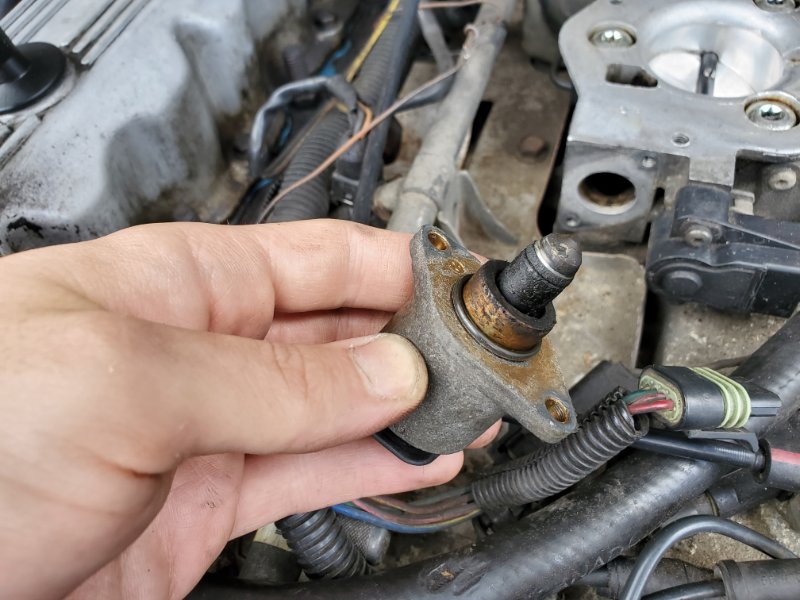
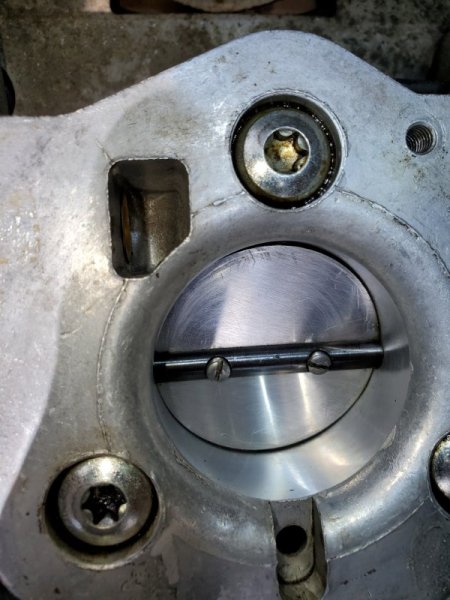
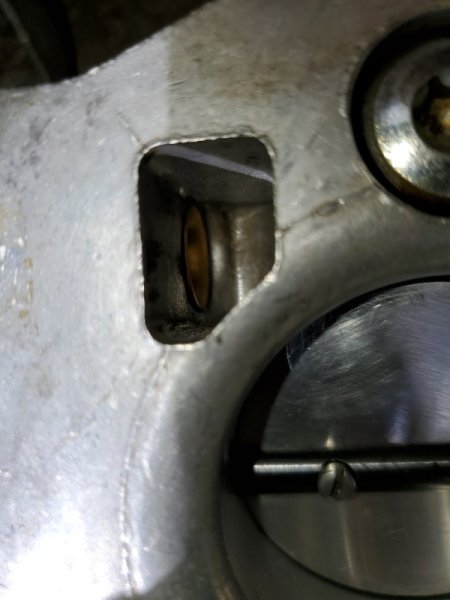
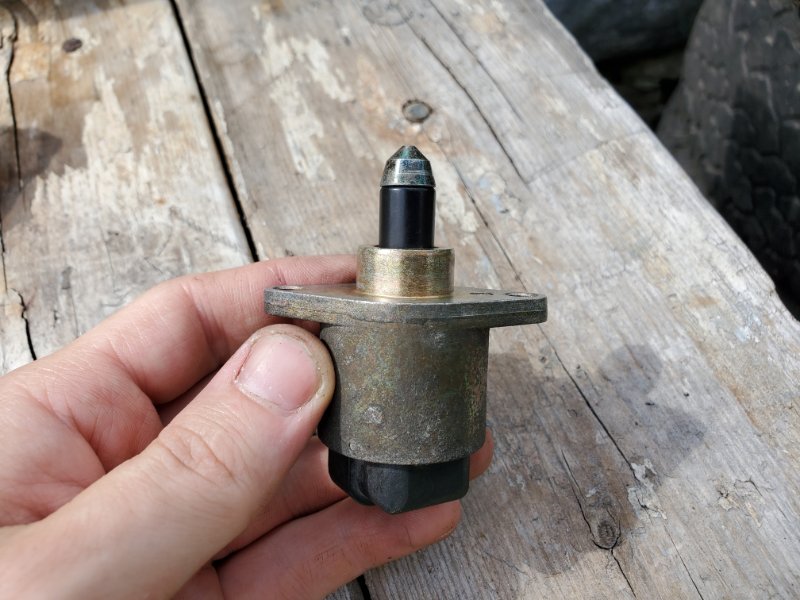
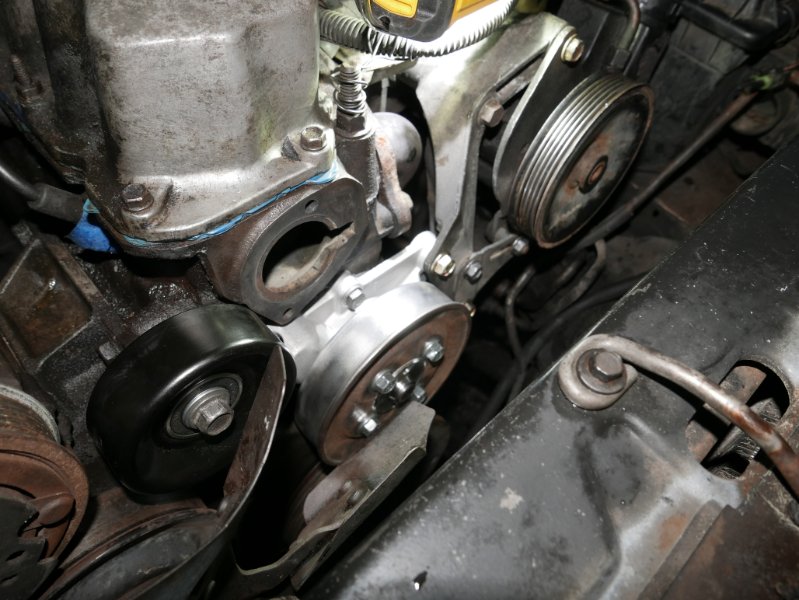
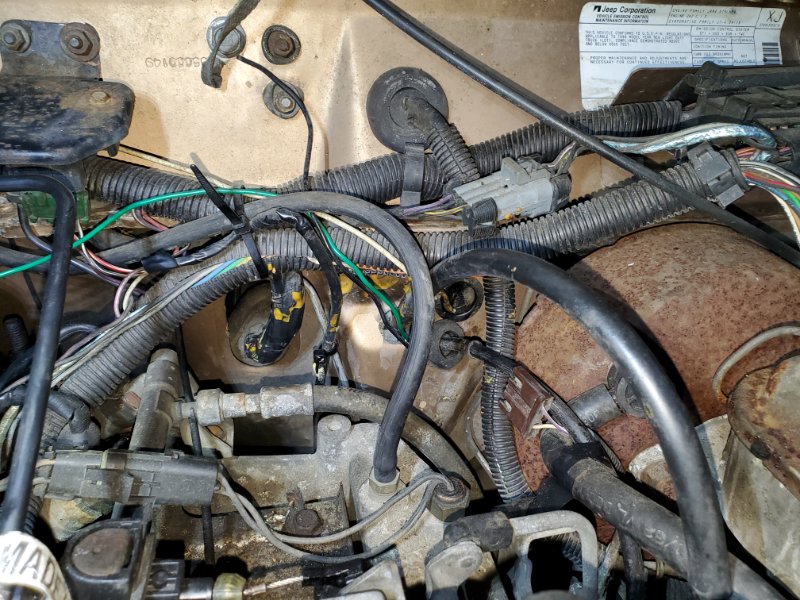
Harmonic Balancer, Fuel Filter, O2 sensor, Ignition Coil, IAC, Throttle Body While we were working on the front end of the engine, I inspected the harmonic balancer. It did not look like it was recently replaced, but it showed no signs of failing. There was slight evidence of a rubber shoulder on the front face, but it was consistent and very marginal. If the rubber stuck out significantly I would have replaced it. I also inspected the drive belt. Usually I'd replace the drive belt but there was no signs of significant wear or cracking, so I kept using it. Rounding out the easier repairs, the fuel filter was replaced because it looked like it was returning to the elements and the O2 sensor was replaced. The engine was running well under load, but at idle, nos so much. My older brother came by with his renix REM monitor and my O2 sensor was reading all over the place so we decided that it was time to replace it. I grabbed a locally sourced bosch O2 sensor and the engine seemed to run a lot smoother. I also re-crimped the O2 sensor cable as the previous one was cut in 4 places. The O2 sensor is indeed smaller than the old one and it made me a bit uneasy, but frankly, the more troubling part is how poorly welded the stock renix exhaust header was. It's just pure laziness to leave pipes of various lengths protruding into an exhaust cavity and welded hap-hazardously. I went ahead and refreshed the grounds in the engine compartment, added a battery ground to the frame, a new ground to the intake and started investigating the ignition coil. Boy did it need some attention! The wiring to the ignition coil was completely toast. Two of the wires were melted badly and several other wires were crimped in multiple spots along the same cable! I found the holy trinity of bad wiring jobs: ghost crimps, loose crimps and hand twists all in one cable! One of the connector pins were melted beyond recovery, so I went to the local advanced auto parts and grabbed a BYD weather pack connector so I could use the new terminal from the connector and replace it into the old harness. Worked a treat. While I was there I cleaned the contacts with CRC contact cleaner and applied OX-guard to the two terminals on the ignition coil and where it sits in the ignition coil base. Some dielectric grease was used on the repaired connectors of the ignition coil base. Further down the rabbit hole of cruiser54 tips, I went ahead and cleaned the IAC and throttle body. Both parts needed a cleaning desperately. Luckily, both parts cleaned up well. Don't forget to reinstall the IAC O-ring!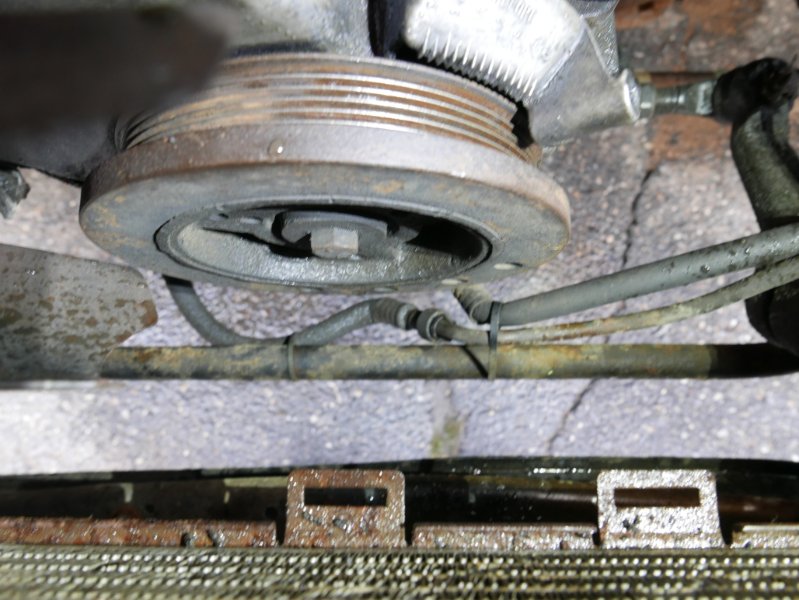


-
Just to confirm, the stock comanche never had any tint on the windows right? Thanks
-
Innovative Performance Chips
Salvagedcircuit replied to JimiGibbs's topic in MJ Tech: Modification and Repairs
This is a complete scam. Above are quotes directly from the GainMPG / Innovate Performance Chips website. There is no factory data sensor on the comanche. There is a diagnostics port for reading values. That's it. If the performance chip does not directly interface with the factory computer, how can it possibly work? The photo also shows a random black anodized box, the same ones sold for $4 on aliexpress, with no photos of how it installs in the vehicle and no photos of what connector each module uses. This is one of those plug into a cigarette outlet and gain HP scams. It's a capacitor in a box. Complete scam. The entire website is a boilerplate design and was made in just a few minutes on shopify. Every page is identical for every vehicle with no differences between make or model. It is all too convenient that every make and model vehicle is supported by their tool, which would be nearly impossible. Don't give these clowns a penny. It's too bad we don't have an agency that actually responds to fraud, something like the FTC that actually does something -
1988 Golden Brick
Salvagedcircuit replied to Salvagedcircuit's topic in Member Projects: Your Comanches
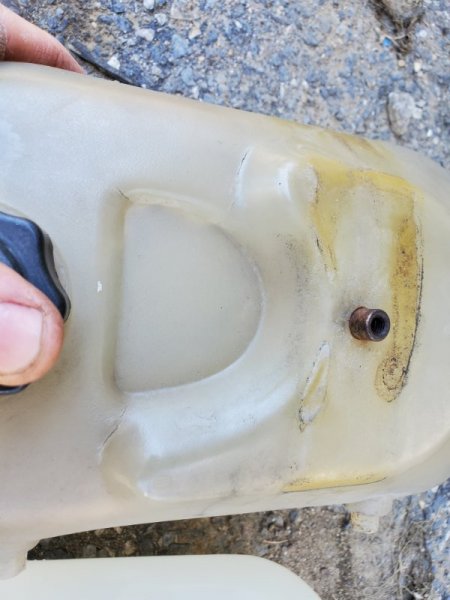
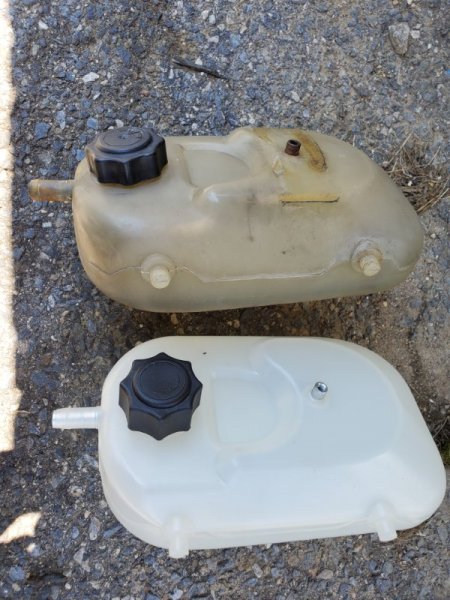
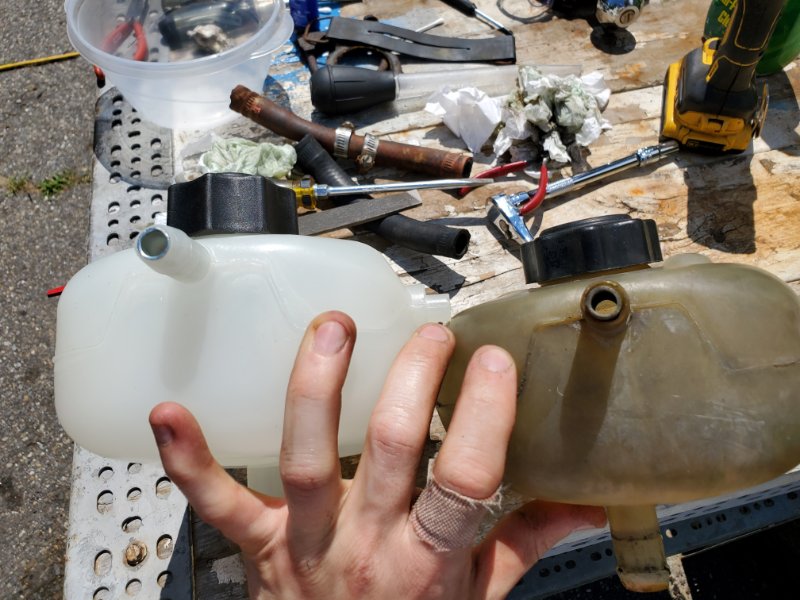
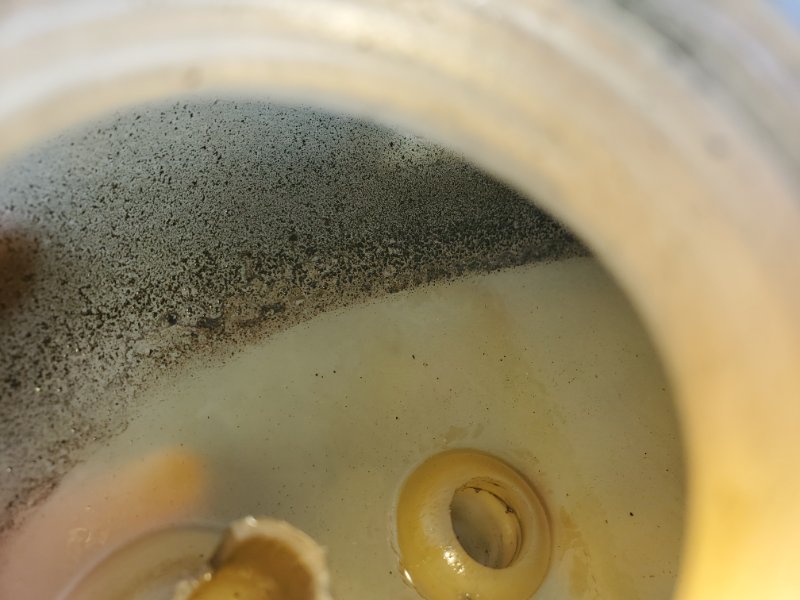
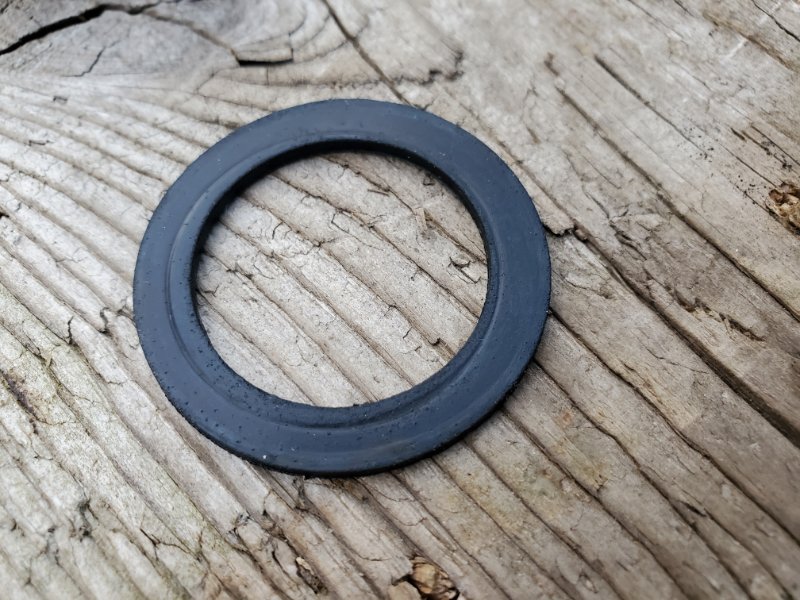
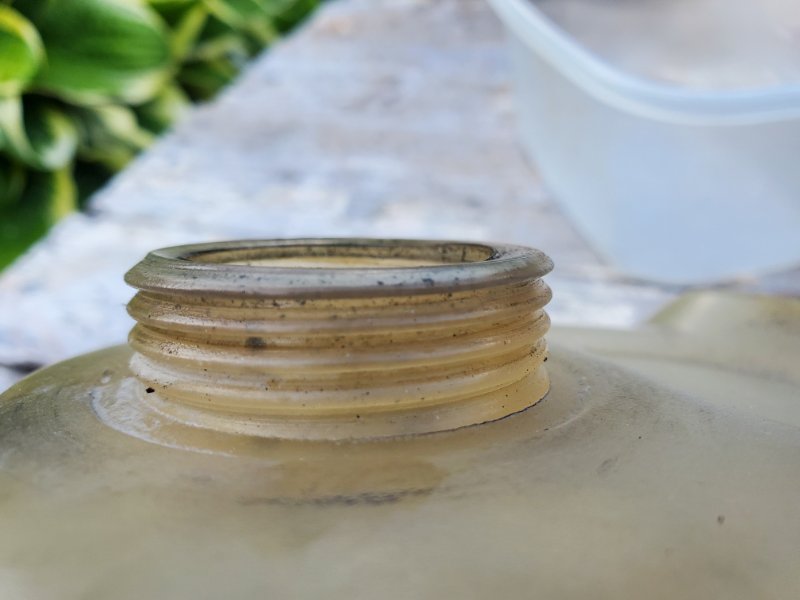
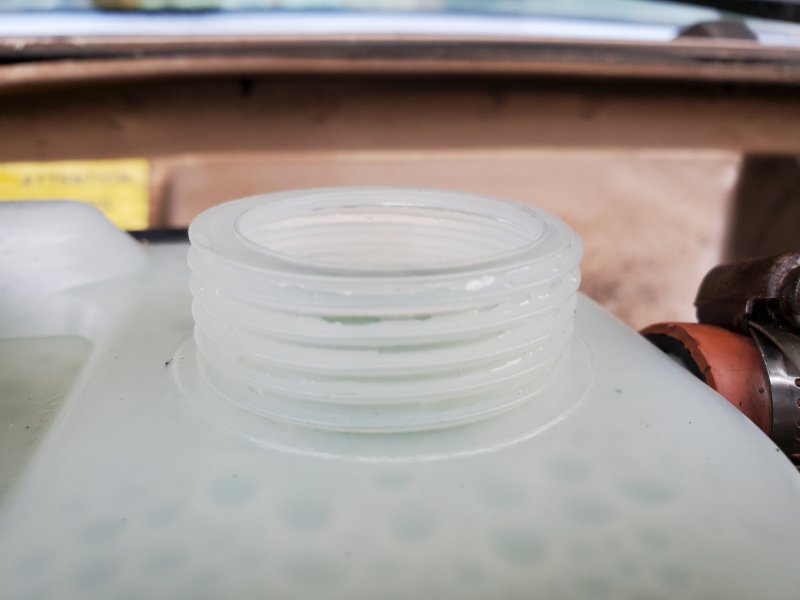
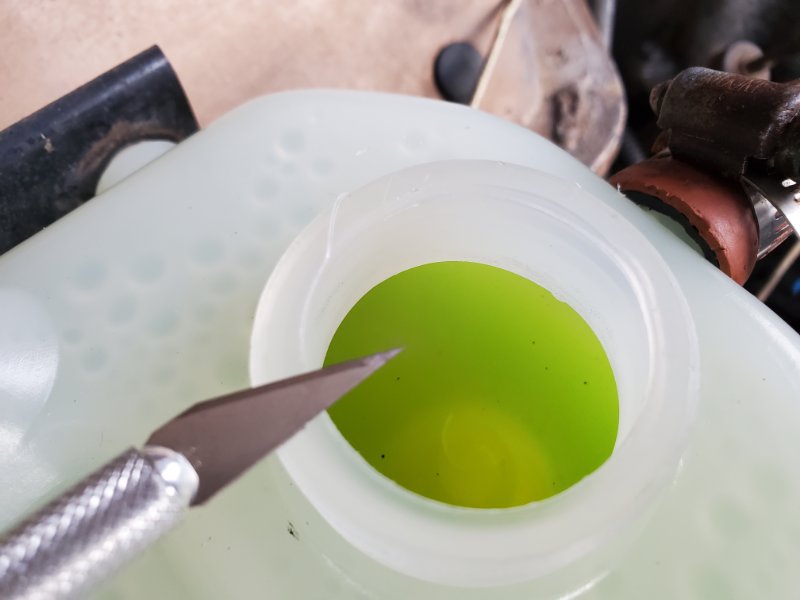
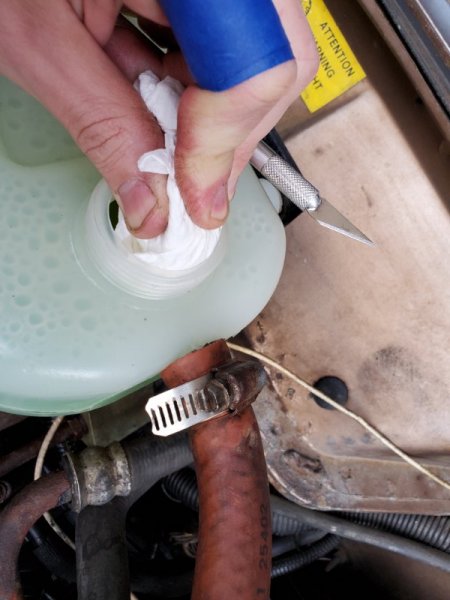
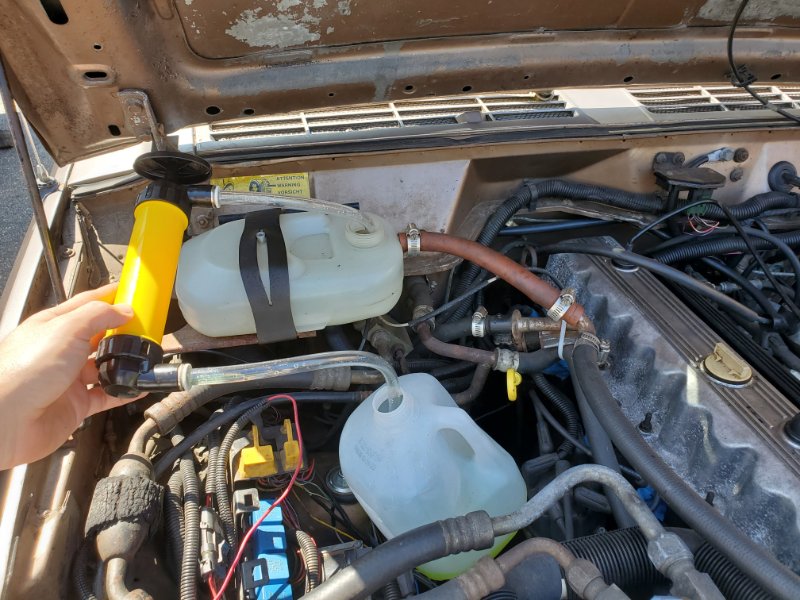
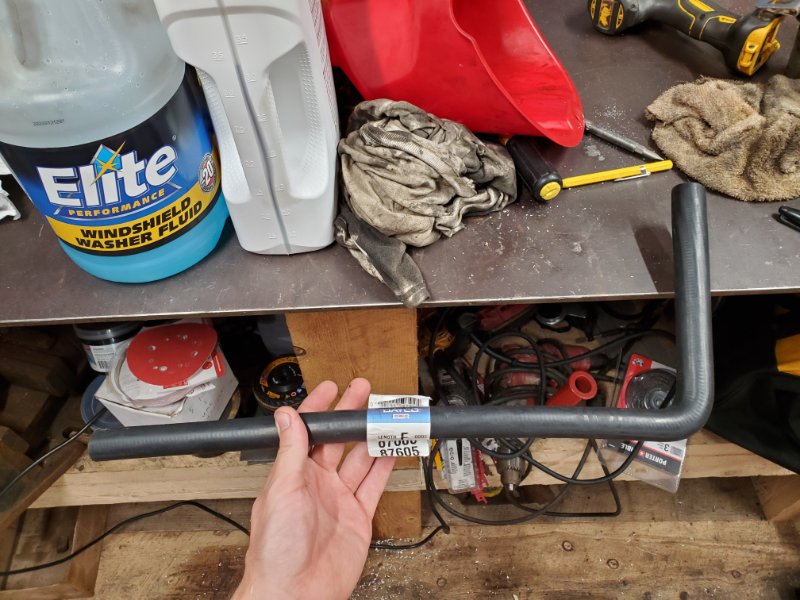
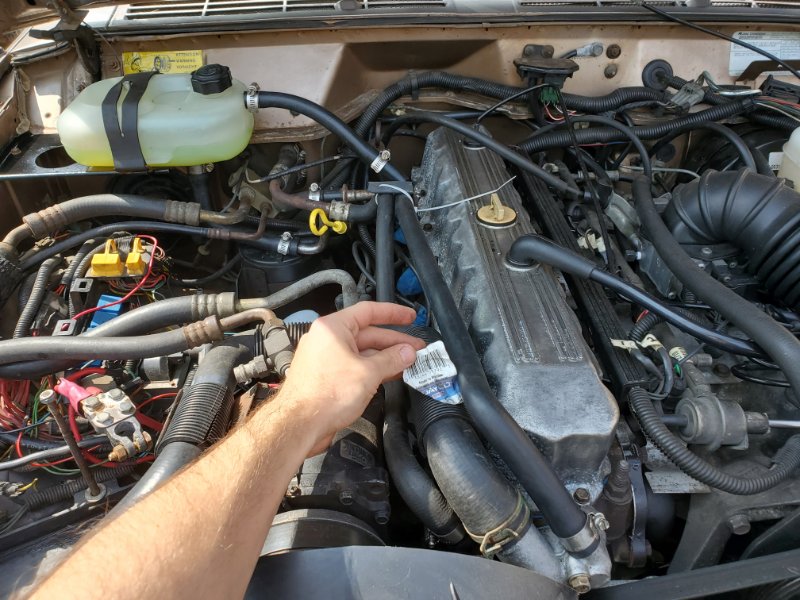
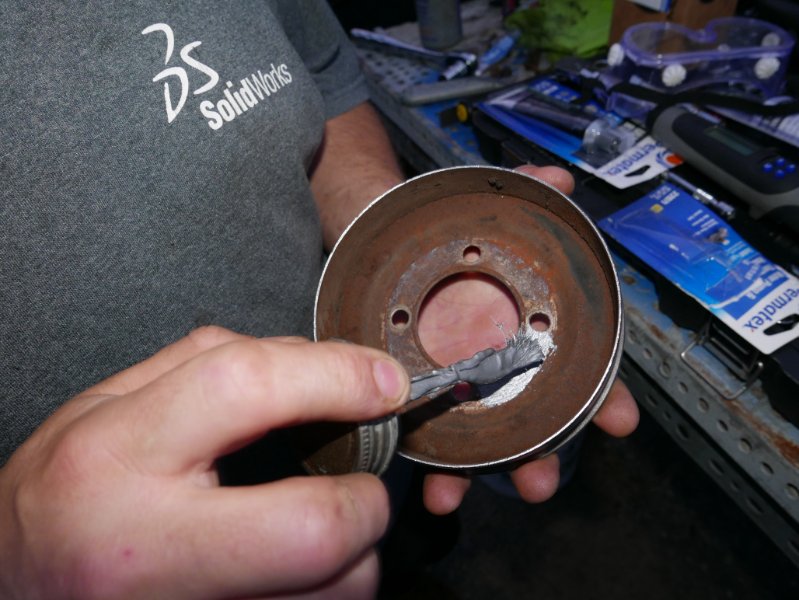
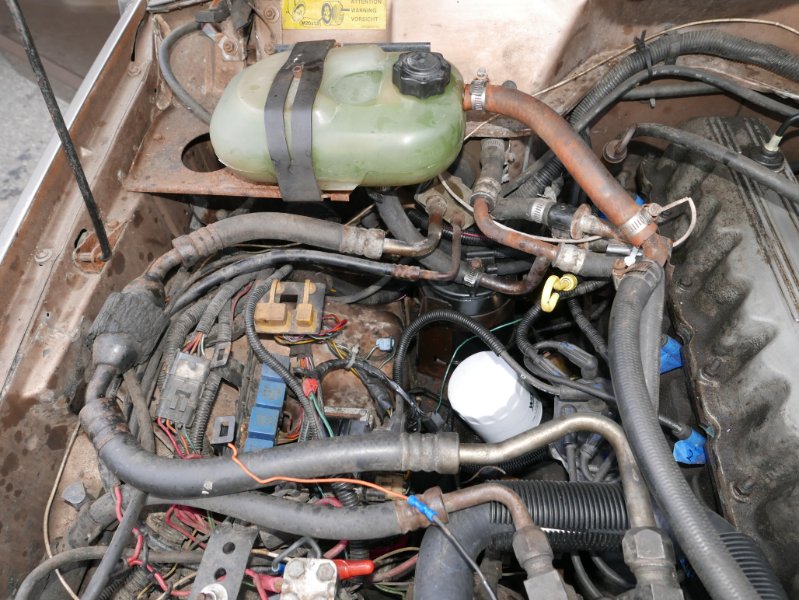
Dorman 603-300 Coolant Tank Analysis My comanche came with a cracked expansion tank and I did not feel safe keeping it in operation, so I replaced it. I read around on comancheclub and naxja that all new plastic tanks were garbage, but I decided to take the plunge anyway. I later found out about the excellent mac's aluminum expansion tank, but I was able to get the newly manufactured plastic expansion tank to work. I purchased a Dorman 603-300 from amazon. Side by side, the expansion tanks are near identical in construction and overall build. You could not tell if my old one was OEM or a clone it's that good. My original tank was clearly in worse shape, and had black deposits all over the inside. I originally could not explain the deposits, but I later determined the deposits to be deteriorating original rubber coolant hoses. Yummy. Filtering the coolant with a paper towel further confirmed this. I installed the dorman tank normally and tightened up all the hose clamps on the hoses the vehicle came with. I wanted to replace these hoses at the time, but I had no idea what the part numbers were and I was not able to find them locally. As you could have guessed, the dorman tank leaked like a sieve from every opening. Most notably, it leaked right from the top. What pathetic excuse of a part leaks right from the cap, even with the cap torqued down by my brother's super human strength baseball-pitcher's glove of a hand? Here's why: The quality control engineer is on vacation! The new rubber o-ring blew the whistle. The top threaded stem on the new dorman tank has a burr that has been pronounced by years of overusing the same injection mold, leading to a seam line that cuts into the rubber seal instead or providing an even flat surface to seal against. Analyzing the old expansion tank, there was no burr on the threaded port. You can see this in the photos I attached. To use the new Dorman 603-300 in an operating vehicle you simply need to shave off the top burr with an x-acto knife and use the new rubber seal included in the Dorman 603-300 on your old expansion cap. For some reason, the new dorman cap did not seal as well as the old cap even though they looked nearly identical. When the jeep got up to temperature, even with the stem shaved, the new cap simply would not seal. I tried flipping the new seal over too. No dice. Coolant seemed to leak out of the cap. It's possible I just did not torque that one down enough, (my hand strength is far outshined by my brother's) but I don't think that was the case here. I think the new dorman cap has a relief valve that opens too soon. For now, I highly suggest using the new dorman tank, shaving down the threaded opening and using the new cap seal in your old cap. This combo holds and doesn't complain. I discovered this glaring issue after I filled the tank, and I did not want to empty it again, so I shoved a paper towel in the opening and used the x-acto on the threaded port. Nothing got into the tank this way. For those interested in replacing their expansion tank, here are the related coolant hoses. I highly suggest replacing them, as they are all molded hoses and none have the same inner diameter. The previous owner of my comanche decided to use a straight 3/4 hose from the bottom of my expansion tank and that caused me a huge headache. Expansion tank rubber hose replacement GATES 18072 / Dayco 87605: Water pump top to metal heater valve Tee. "L-shaped hose" GATES 18051 / Dayco 87301: Top right expansion tank hose, molded. Fits "mu" shaped metal tee GATES 28466: Bottom expansion tank L-shaped hose. Very snug fit on bottom, but it fits with some wd-40. It's also used for the heater core line to the dash. GATES 18413 / Dayco 87305: Hose that was previously crimped to "mu" shaped tee, bent on each end.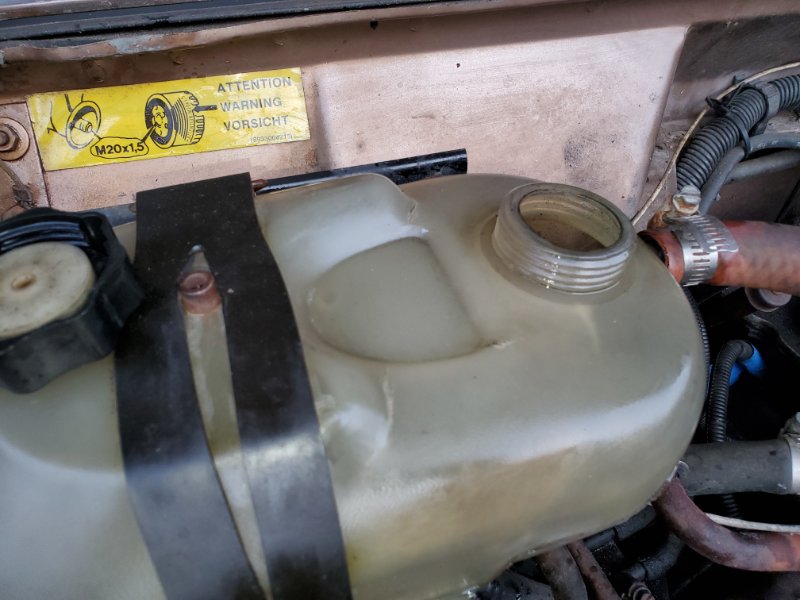

-
1988 Golden Brick
Salvagedcircuit replied to Salvagedcircuit's topic in Member Projects: Your Comanches
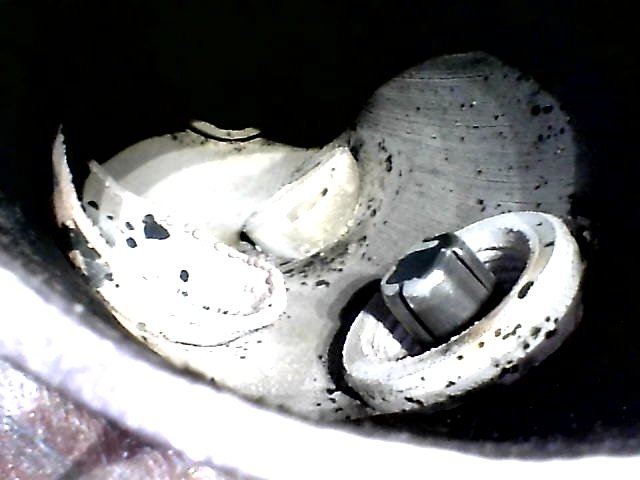
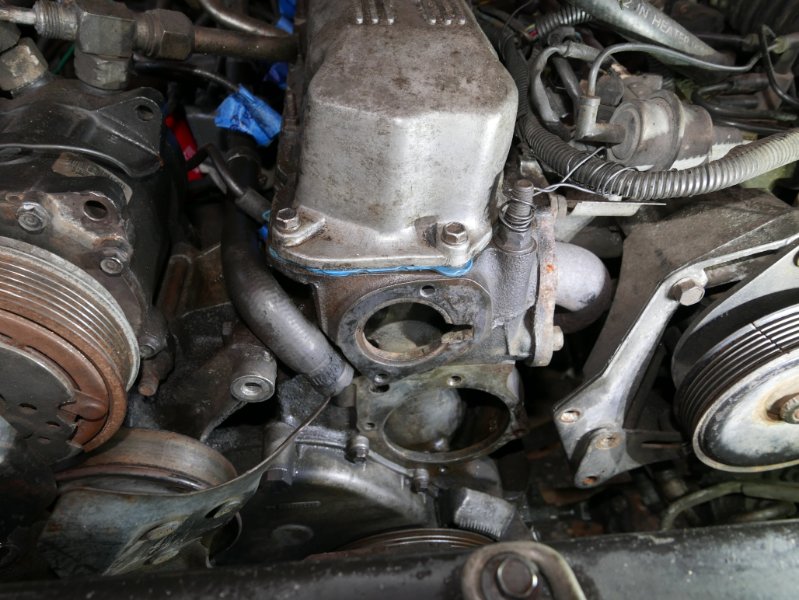
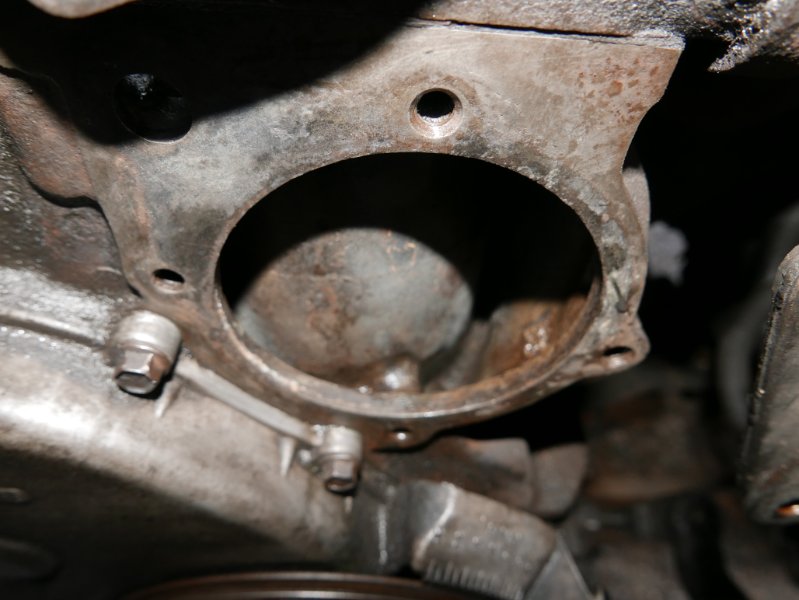
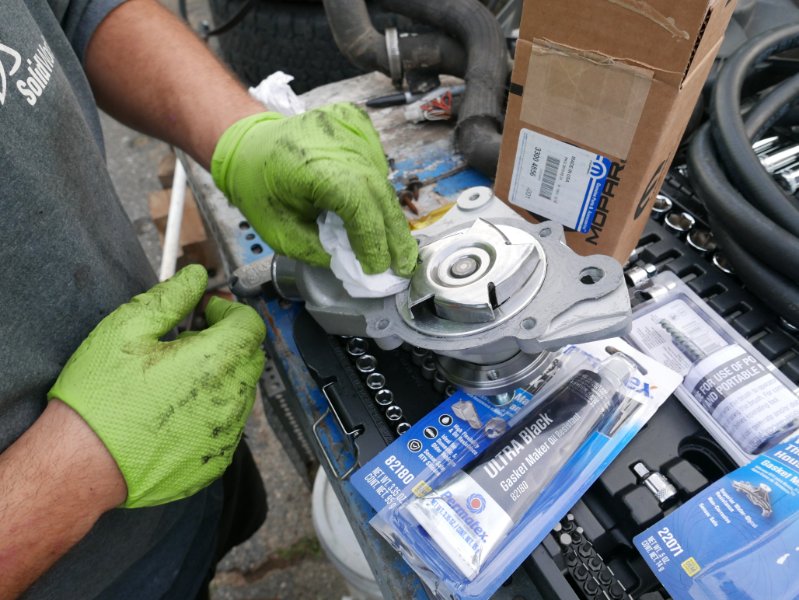
Coolant System Overhaul: Hoses, Water Pump, Inspection Disregarding the sludge, we pushed on and focused our attention on the cooling system. With no maintenance records offered by the previous owner, we went ahead and replaced the water pump, the radiator hoses, flushed the coolant, and replaced the cracked expansion tank. We used the largest shallow plastic tote we could find locally and flushed out the engine. We took our time and thoroughly flushed out the system to remove as much as possible from the engine. Luckily, the coolant that was collected was not that rusty and was a consistent color. The lower radiator hose spring was harvested and installed into the new lower rad hose using a bunch of wd-40 and elbow grease. The lower hose was likely the original 34 year old hose. Definitely a good run. While we were at it, we took a peek inside the cooling jacket of the engine block. The engine was definitely a bit dirty. After inspection, we analyzed the water pump and prepared the new pump and gasket. The old pump did not seem to have any signs of propeller wobble, bearing failure or grinding sounds, but it just made sense to start from a clean slate, so the new pump was used. We used gasket making compound and a fiber gasket as this seems to be the most reliable way to get a good seal. All the parts were torqued down to spec.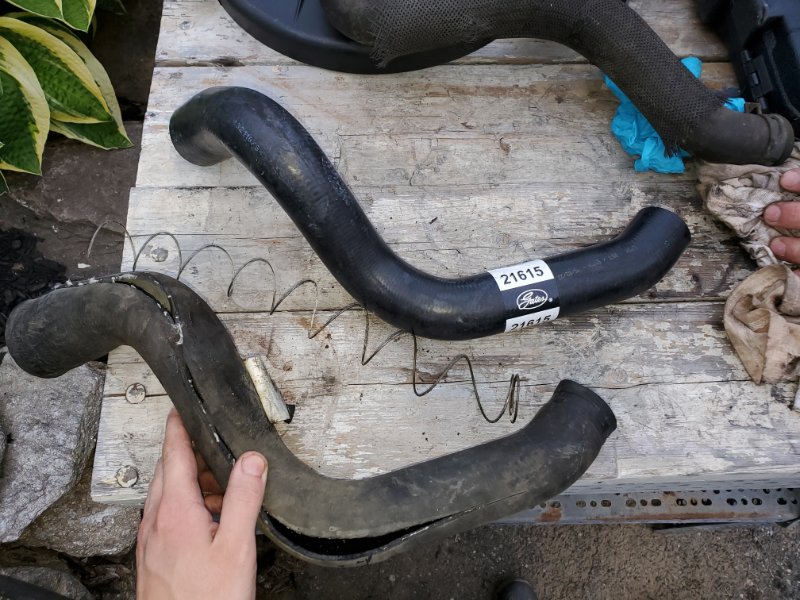
-
1988 Golden Brick
Salvagedcircuit replied to Salvagedcircuit's topic in Member Projects: Your Comanches
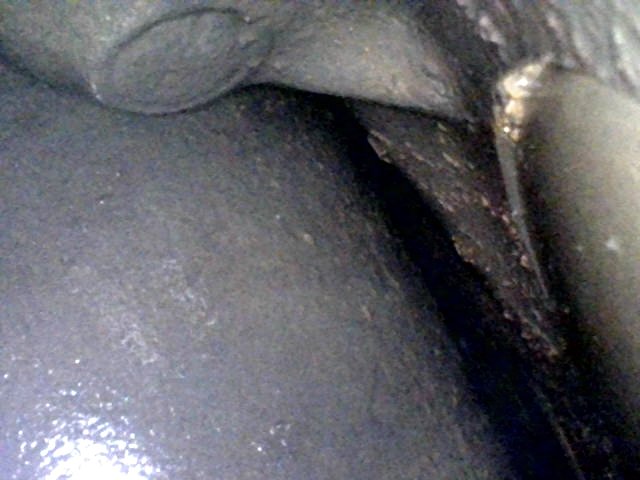
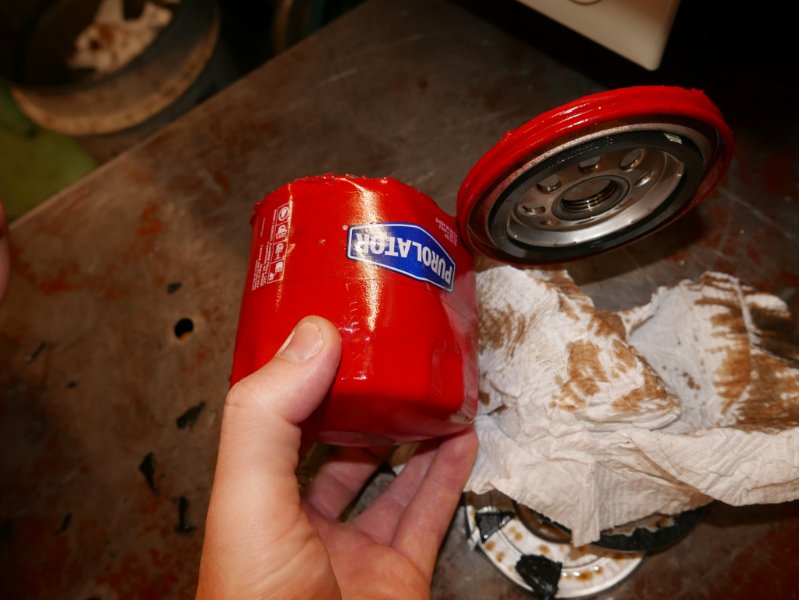
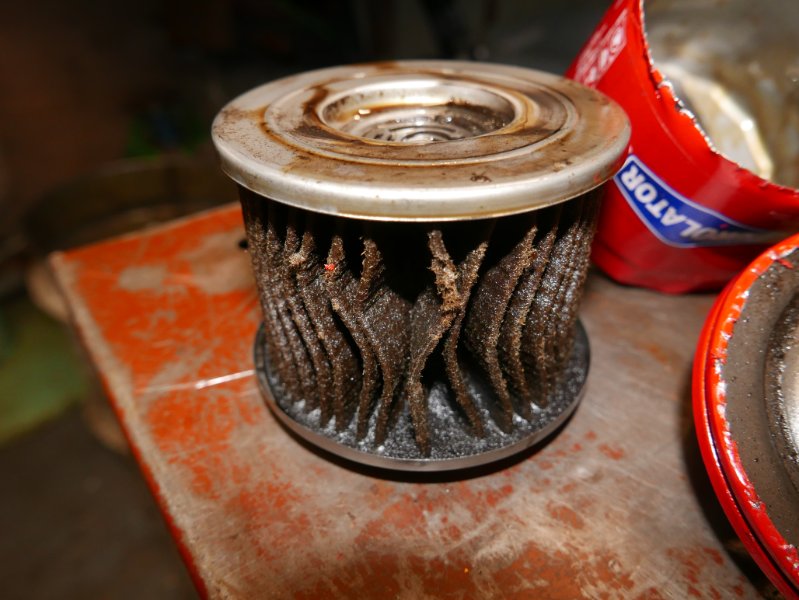
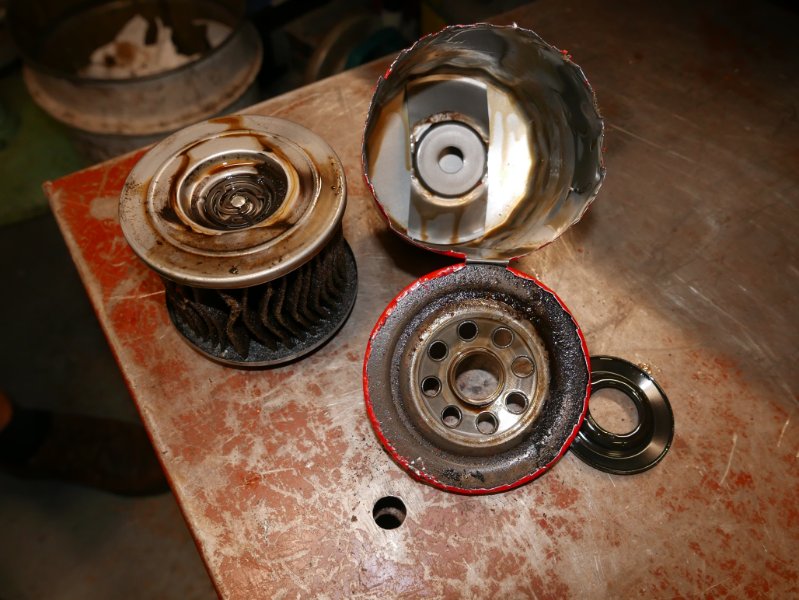
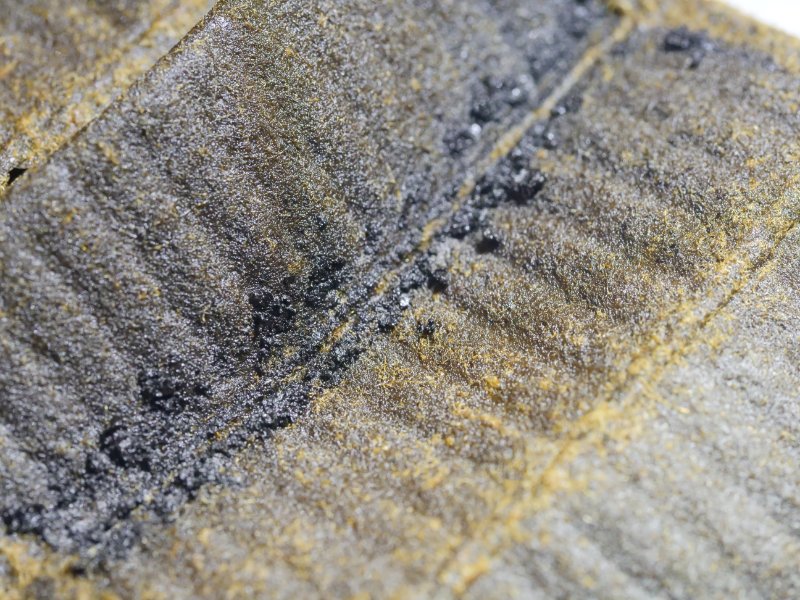
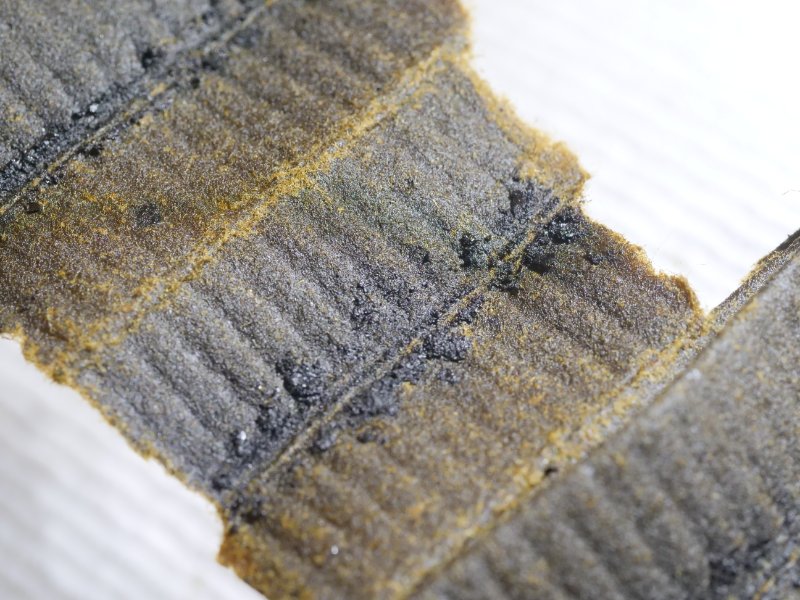
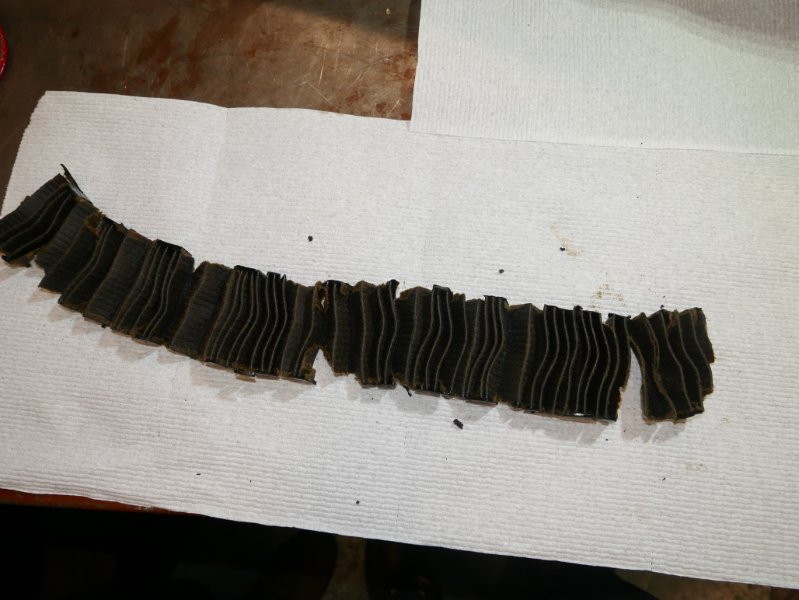
Thanks for the kind words! @Drahcir495 First Oil Change, Oil Filter Analysis After confirming that the engine was in decent running condition, I went ahead and performed the first order of jeep maintenance: change the oil and analyze the filter. The oil pan was undamaged with no dings or dents to be found, but the drain plug had a very sorry looking crush washer installed. I replaced the drain plug with a magnetic plug and a copper + rubber seal from mcmaster. The oil came out clean and there were no obvious problems in the catch pan. I let the filter dry out for most of the day and cut it open. The filter used was a red Purolator brand, but more importantly, there were no metal deposits on the pleats! There were definitely signs of sludge, but again, it's got 264,000 miles on it. My folks' 3.6L WK2 grand cherokee with 98k miles has more debris in the oil filter than mine and it's been regularly serviced! Crazy. Curious about the extent of sludge in the engine, my brother and I took a peak inside the valve cover for further inspection. We used a ~$20 USB-C endoscope camera and it worked a real treat. It looked like the Pennsylvania Hershey factory erupted inside the valve cover! Boy was she dirty.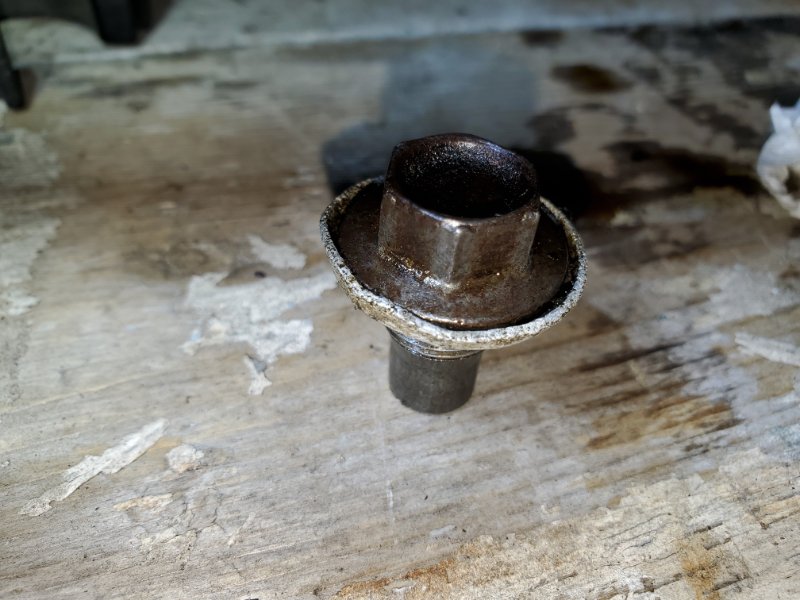


-
Radio Antenna Connectors
Salvagedcircuit replied to Salvagedcircuit's topic in MJ Tech: Modification and Repairs
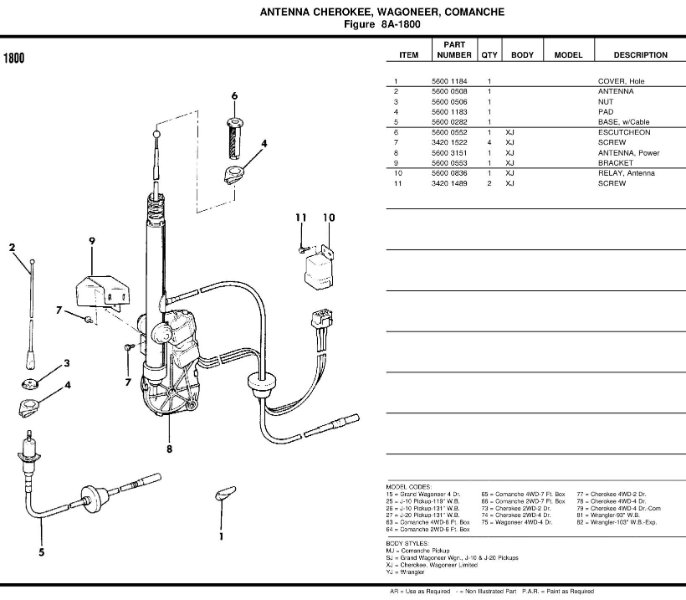
If anyone has photos of their radio antenna connectors, that would also be super helpful So far, these are the only references to different radio connectors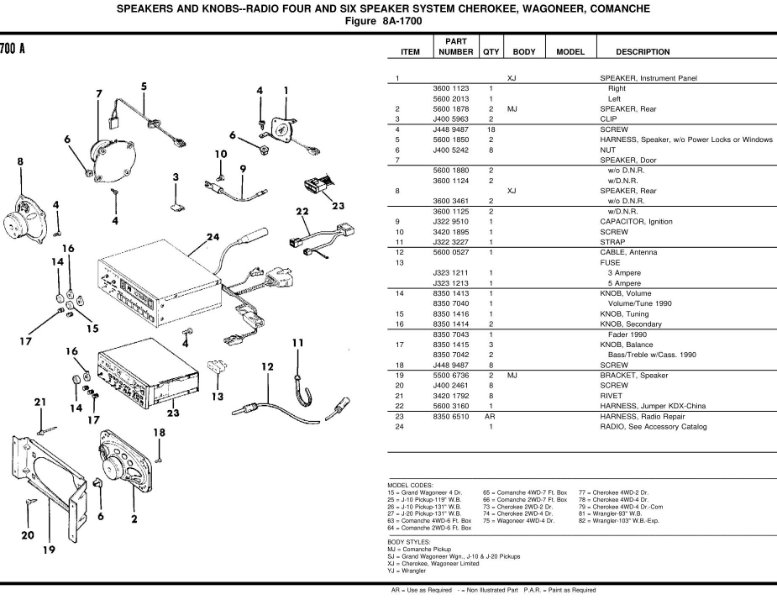
-
Georgia: '92 4.0 Ho, Ax-15, 2Wd
Salvagedcircuit replied to 1987Comanche's topic in Member Projects: Your Comanches
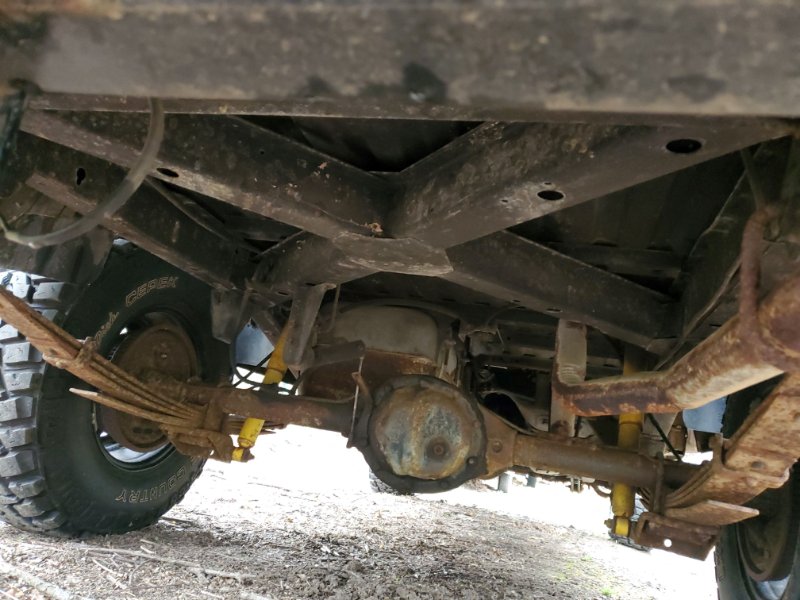
Wow, that jeep needs a tetanus shot -
Reach out to PCBway and get a quote for metal deposition. It is often called "vapor deposition" in industry. It is a process commonly used for metalizing plastic for conductive and reflective properties. Modern automotive headlight reflectors are plastic with aluminum deposition on the convex side. Fancy 5g radio equipment and high dollar RF equipment use metal deposition for shielding specific sections of high frequency PCBs. Traditionally, a machined chunk of aluminum was used to provide isolation between regions of a high speed PCB along with metal fingers and ESD padding. The hollowed out custom aluminum block would sit on top of the circuit board and be screwed to a ground rail. By creating metal cavities to contain the noisy regions of a PCB, you can effectively create a compartmentalized Faraday cage and keep other regions of convolution free from contamination. However, machining aluminum is a time consuming and costly process, especially in volume. It makes sense for dozens of items, but not 10s of thousands. Depositing metal onto a plastic injection molded part makes a lot more sense in those applications. It's become a lot more common in RF equipment in the past 5-10 years. I've used PCBway and JLCpcb for PCB making and they are incredibly cheap. Many folks that use their service believe they are subsidized by china itself as they often produce goods cheaper than the cost of the material in developed countries. I have not used their metal deposition service, but finding out a quote can't hurt. Edit: spray paint will likely be cheaper, but I know some folks go full-on and send parts to Mexico to be chrome plated, since the very hazardous plating process is basically banned in the USA. Good luck!
-
Wanted: Many XJ and MJ parts (Updated 11/16)
Salvagedcircuit replied to Salvagedcircuit's topic in Wanted
Whoops, I updated the post. I'm looking for the interior passenger side handle with the chrome plating on the bezel for manual windows -
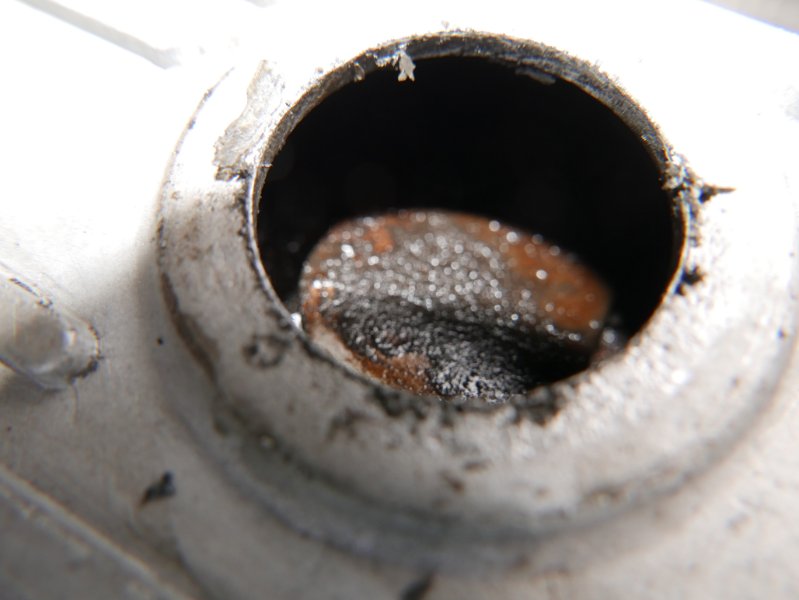
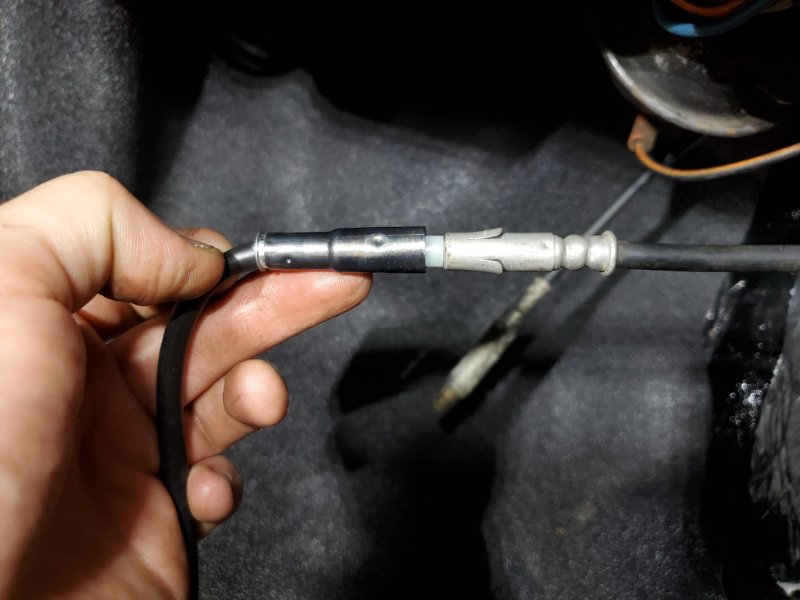
I have a base model comanche that did not feature a radio or speakers. The antenna cable was still included inside the dash with the cable ending near the passenger foot well. The previous owner used a 3rd party antenna instead that had one continuous cable from the outside antenna to a standard motorola antenna radio plug. The external antenna was sheared off at the base when I purchased the truck. I was able to source an original jeep antenna and install it, but it uses a very strange plug that does not come close to mating with the factory jeep radio antenna cable. I would not mind removing this cable, but it seems to be screwed into the back of the dash and I have no intention of pulling the dash to get to the screw. I found another period correct antenna and it does mate, but the outer shielding does not mate at all, just the center pin. Does anyone know anything about these mating plugs? Alternative solutions: -Cut off both connectors and use an RG-58 / RG-59 crimping tool with a coax coupler. -Replace the entire antenna cable assembly with a better coaxial wire of the same characteristic impedance, possibly RG-6. Anyone want to help me play the game of name that connector AMC got cheap at a warehouse firesale? Thanks a ton!
-
Wanted: Many XJ and MJ parts (Updated 11/16)
Salvagedcircuit replied to Salvagedcircuit's topic in Wanted
Hi. I'm looking for these parts! I'm the 6th owner of my comanche and it's seen a lot of hands... A lot of hands that forgot to reinstall bits and bobs over 34 years. Just trying to get it back to stock. Thanks -
Wanted Thread: -Door insert for hockey stick handle (attached photo) -Renix ceramic body o2 sensors -Tan middle bench seat belt -Tan seat belt bottom sleeves -Tan seat belt plastic clip for B-pillar -Transfer case skid plate -Mudflaps front and back -Tail lights in ok condition (no cracks) -Alternator bracket
-
Drahcir495's Build-up
Salvagedcircuit replied to Drahcir495's topic in Member Projects: Your Comanches
Love the sprayfoam idea for the headliner. Now I can finally fix up my old beaten-up headliner and make that center console I've wanted to do -
Interior reassembly question
Salvagedcircuit replied to gogmorgo's topic in MJ Tech: Modification and Repairs
I'm glad I read this because the rear cab interior is coming up next. Thanks! -
1988 Golden Brick
Salvagedcircuit replied to Salvagedcircuit's topic in Member Projects: Your Comanches
I did not realize this. Thanks a bunch! -
1988 Golden Brick
Salvagedcircuit replied to Salvagedcircuit's topic in Member Projects: Your Comanches
Thanks a ton! Editing and updating my records now. -
1988 Golden Brick
Salvagedcircuit replied to Salvagedcircuit's topic in Member Projects: Your Comanches
CP indeed. What does this mean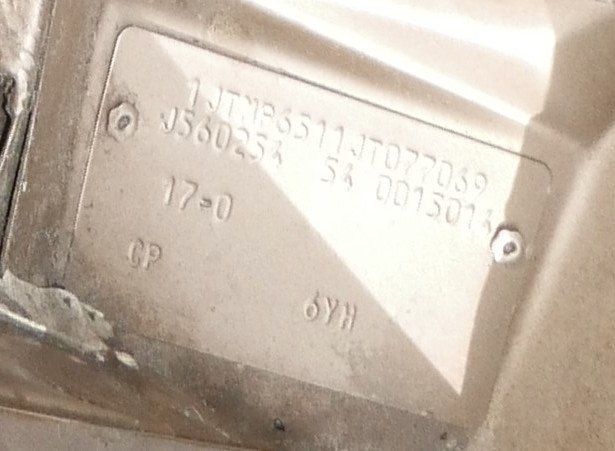
-
1988 Golden Brick
Salvagedcircuit replied to Salvagedcircuit's topic in Member Projects: Your Comanches
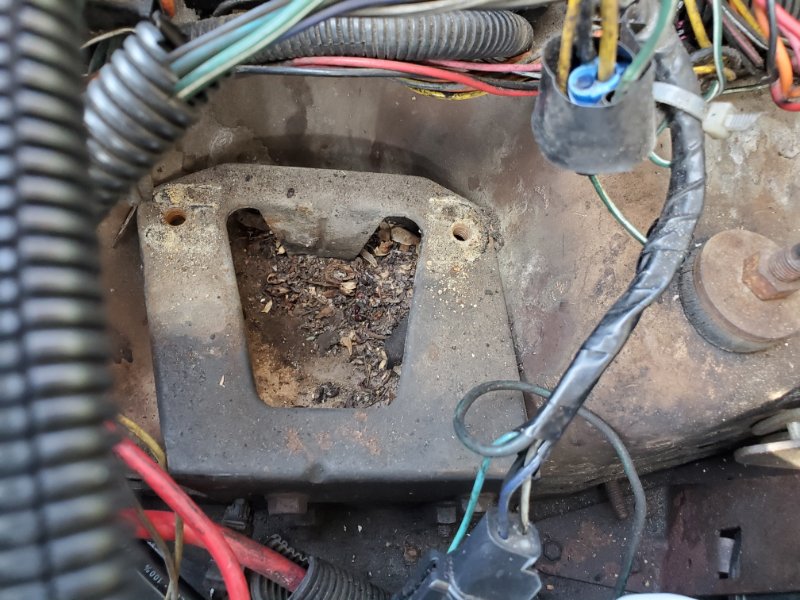
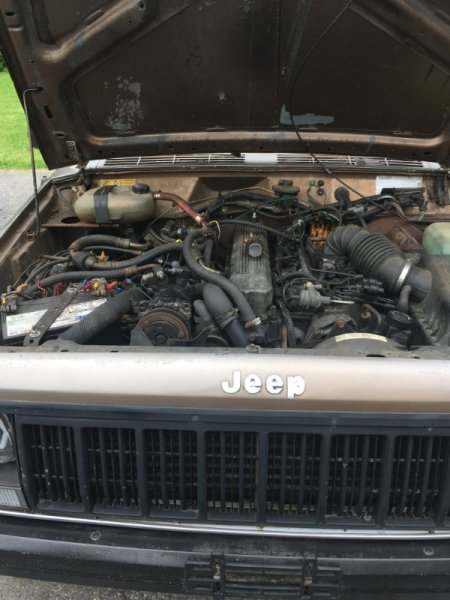
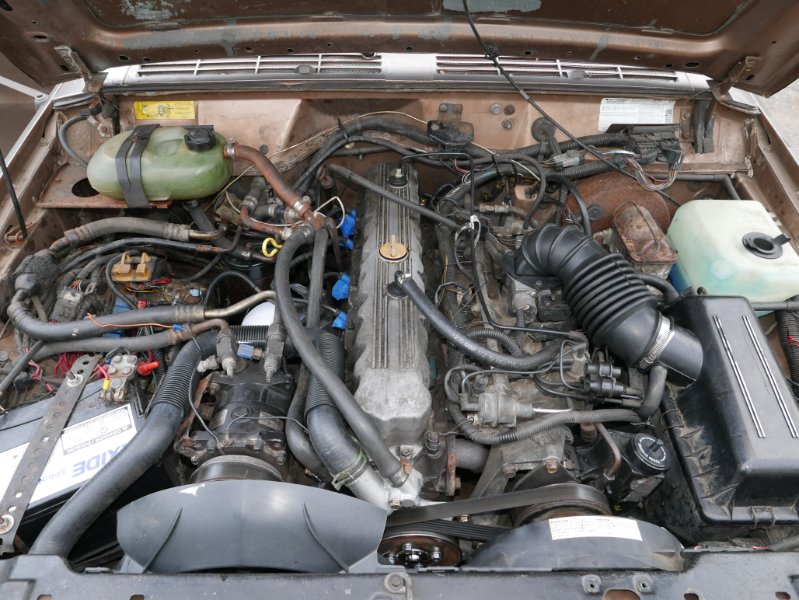
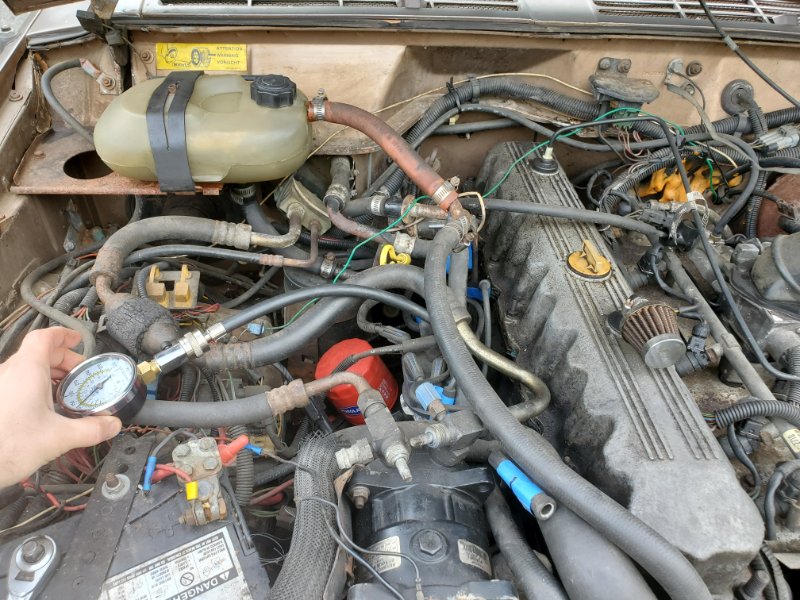
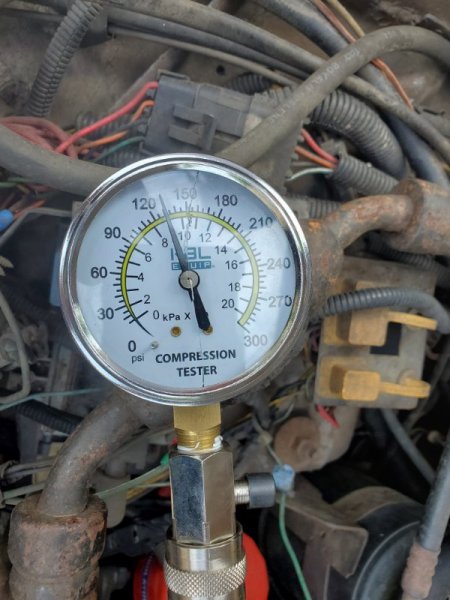
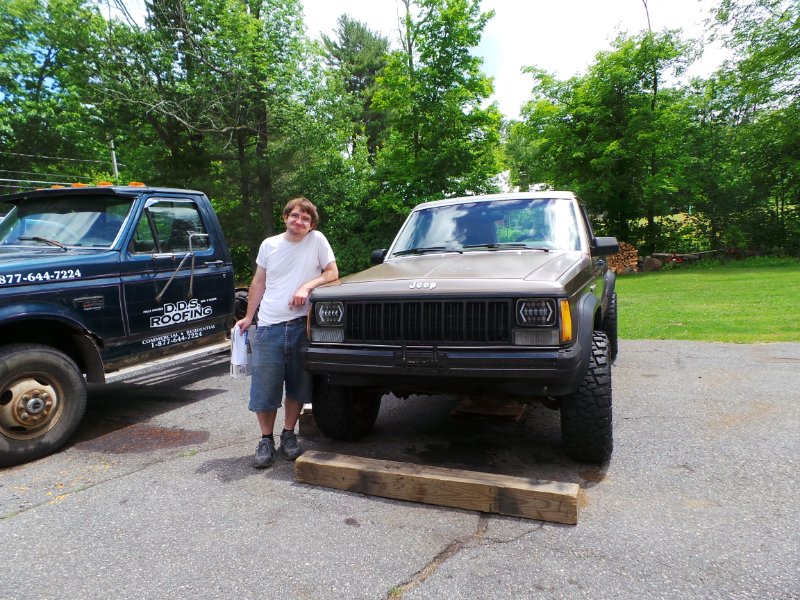
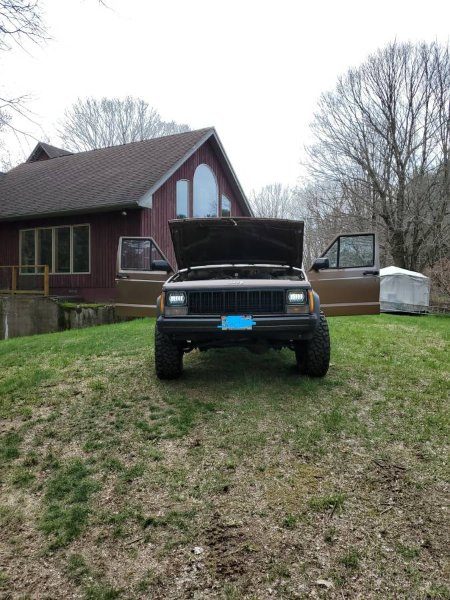
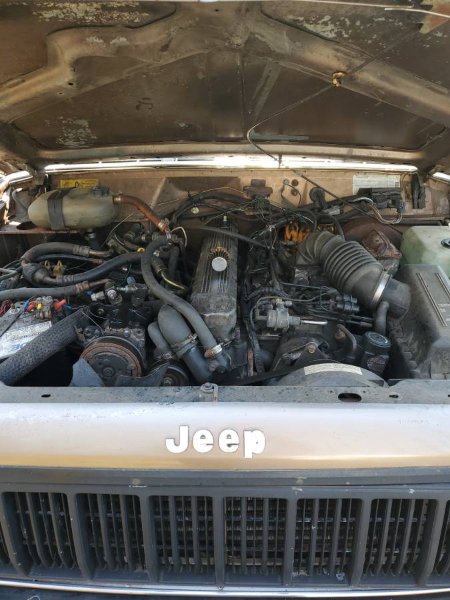
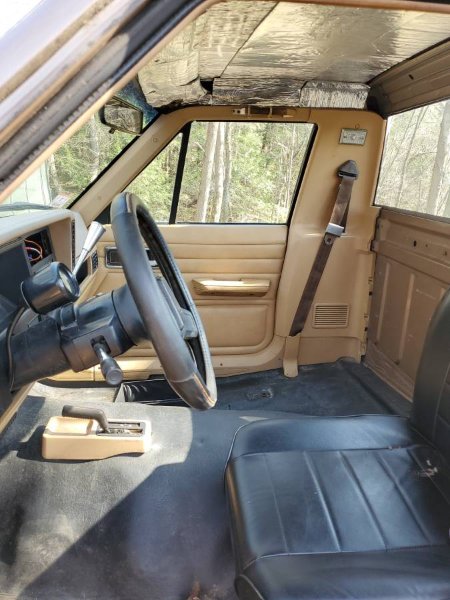
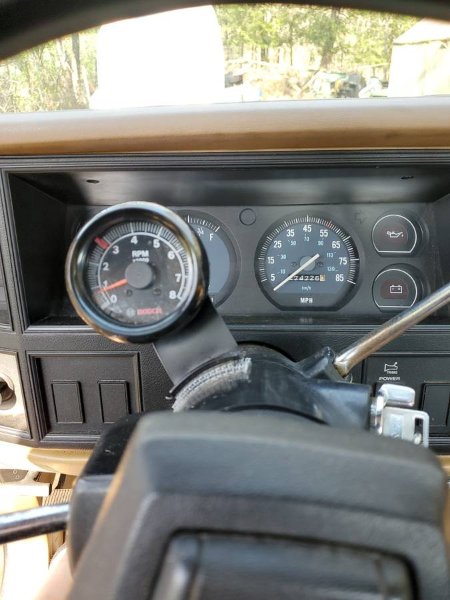
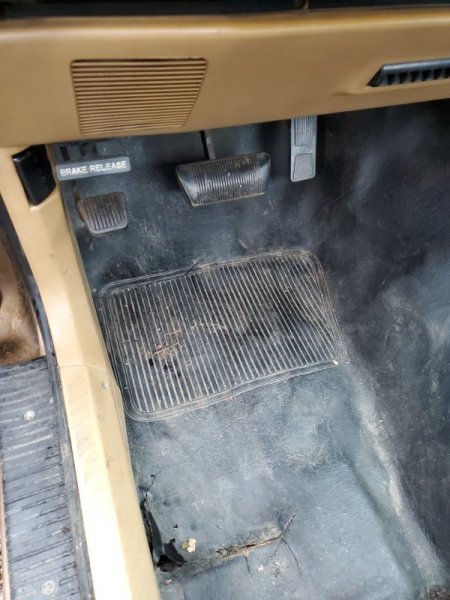
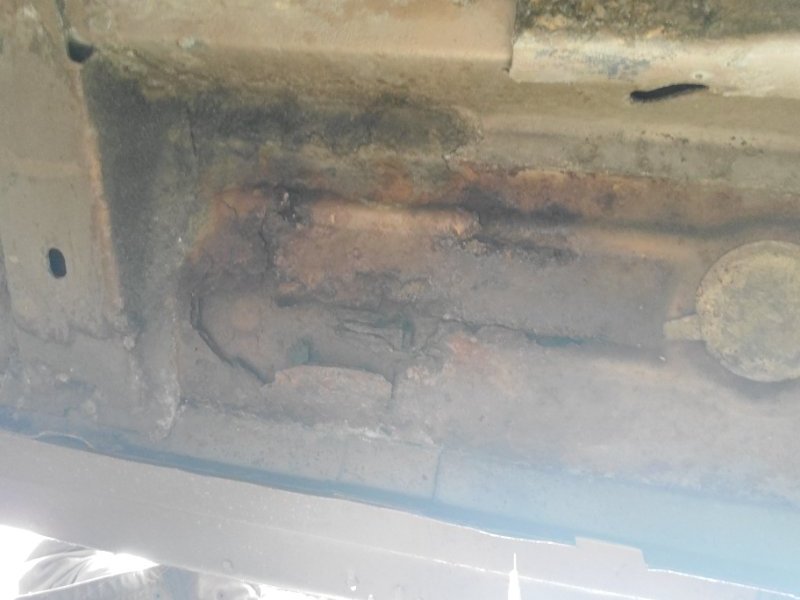
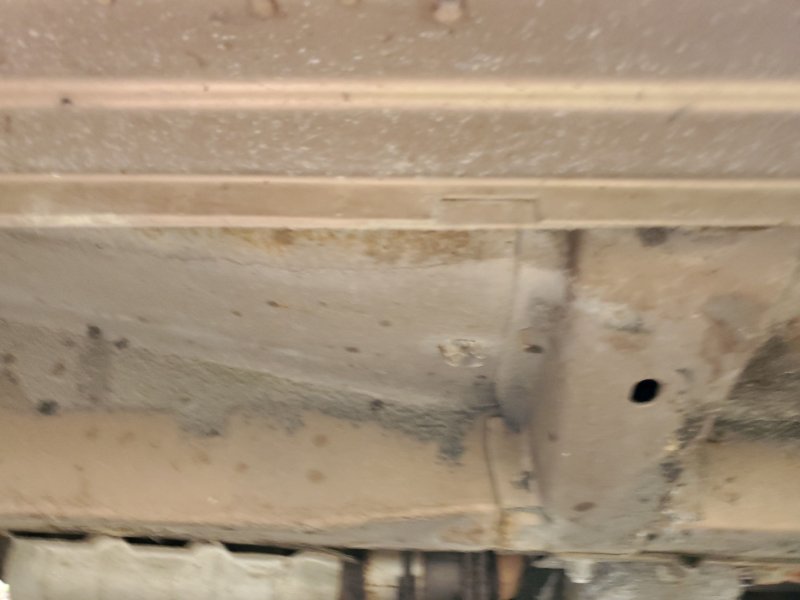
My Inspection: Externally, the body was in great shape. No rust on the driver or passenger door, no rust on the door sills, the rocker panels, the cab corners, the bed or any quarter panel. Incredible for the east coast, just incredible. This alone pushed me over to purchase it even though there were such glaring red flags. The only significant location that had rust was the driver side floor board, but that should be a straight forward fix, we already repaired my brother's cherokee XJ driver side floor, how bad could it be? Boy, was I in for a surprise later on. I had some vague familiarity with the comanche engine bay, since my brother's cherokee was an '89, but I was still every much wet behind the ears and did not understand anything about renix at this point in time. The engine bay was very much a mess. There was a random right angle filter on the valve cover that clearly looked 3rd party. There was a distinct orange blob on the firewall that looked like spray foam to plug the holes in the firewall along with missing and cut firewall plugs. From every corner of the engine bay came random wires with the worst quality butt splices I've ever seen, and multiple corroded crimps in series with another just mere inches apart! Luckily, the main wiring loom that was sprayfoamed was just pushed out of the oval hole in the firewall, it was undamaged otherwise. Of course, there was rubber rot as far as the eye can see. If I looked too hard at a vacuum line or nudged it slightly, it turned to dust. Fasteners were missing everywhere, even from the intake manifold, fuel rail and electric fan. The brake booster and master cylinder were so rusted that they looked older than the vehicle. The AC lines had many cuts in them and the wires coming from the compressor pump seemingly went nowhere. One of the first items on the docket was obvious: service the engine! All 6 spark plugs were removed, inspected, cleaned and the spacing checked. The distributor cap was replaced and the index location was checked. With everything back together, the engine compression was tested. The end result was not incredible but not terrible. 130, 130, 130, 121, 130, 125. A variance of 7% per cylinder is not bad on an speedometer that read 274,000 miles.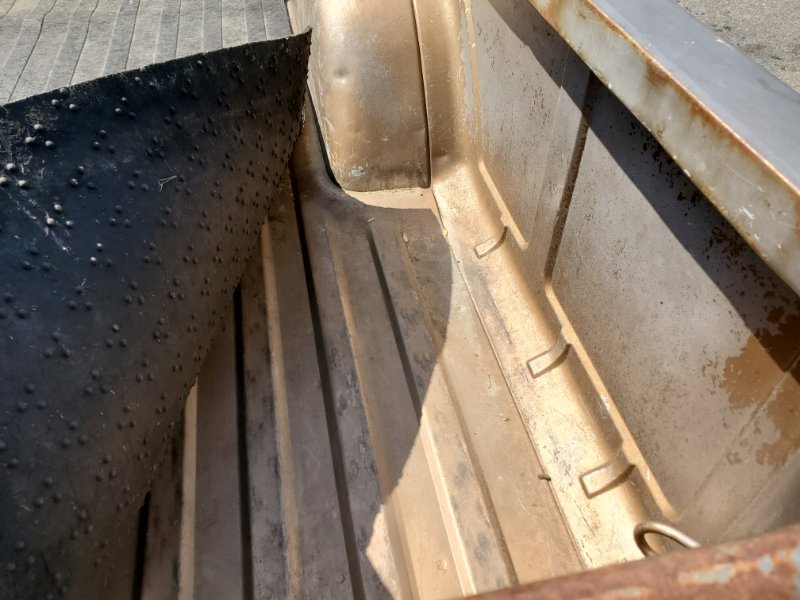

-
1988 Golden Brick
Salvagedcircuit replied to Salvagedcircuit's topic in Member Projects: Your Comanches
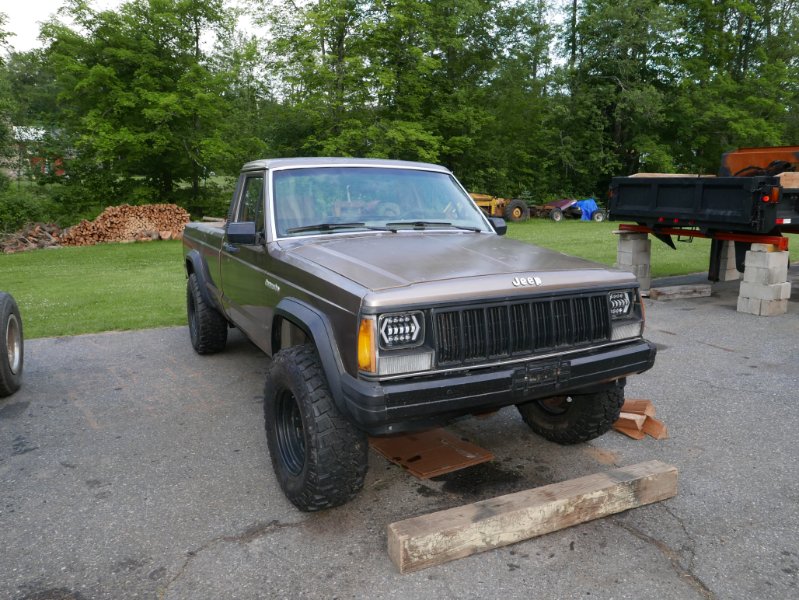
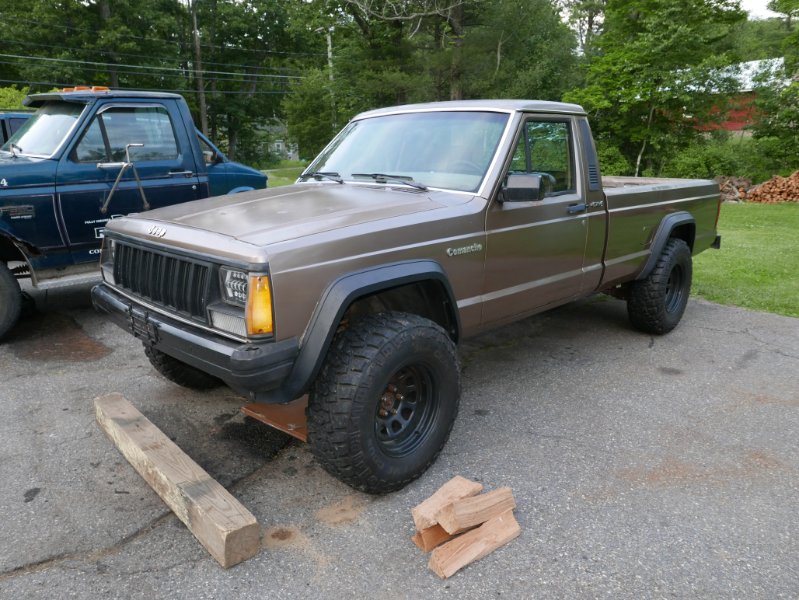
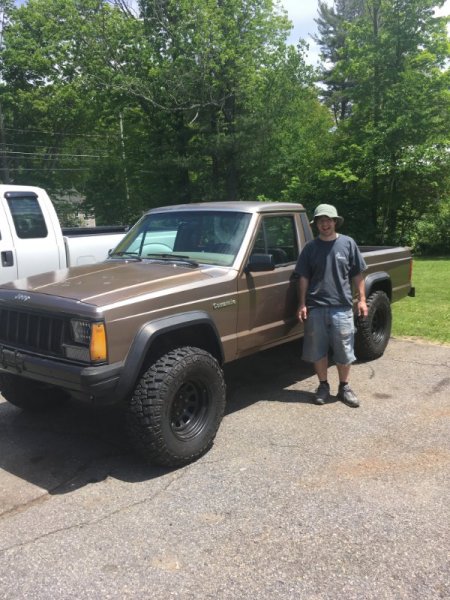
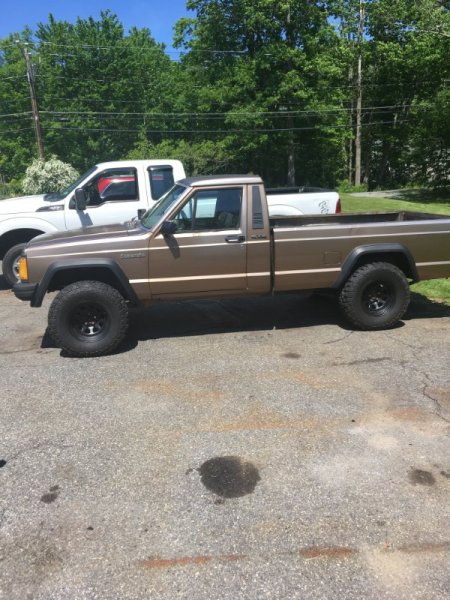
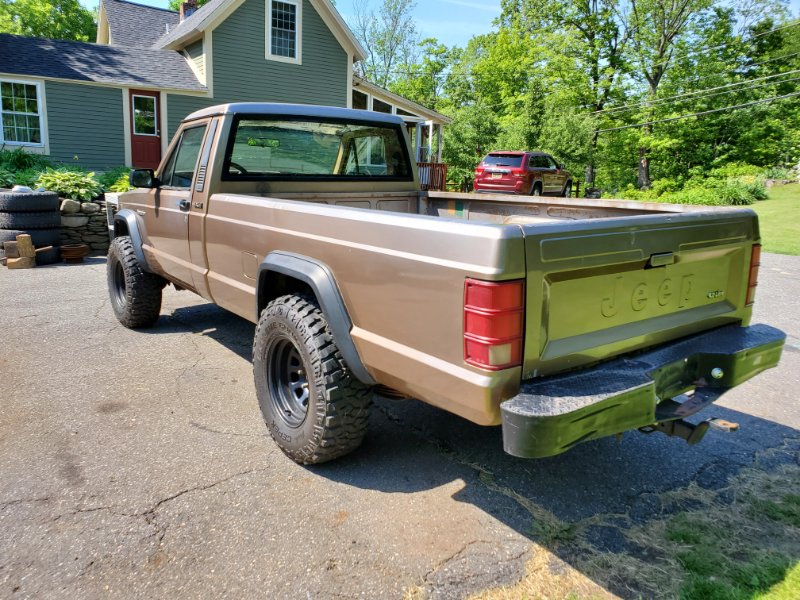
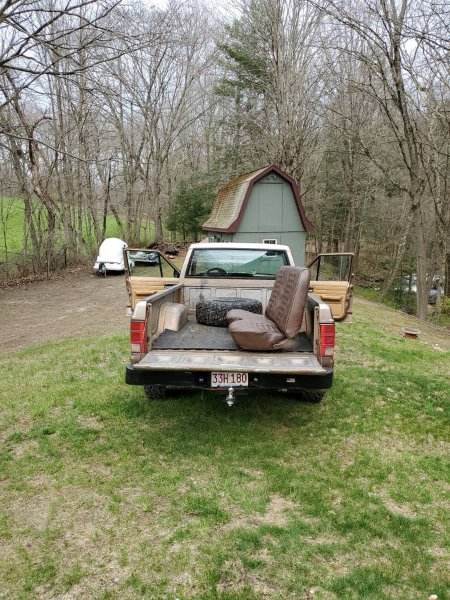
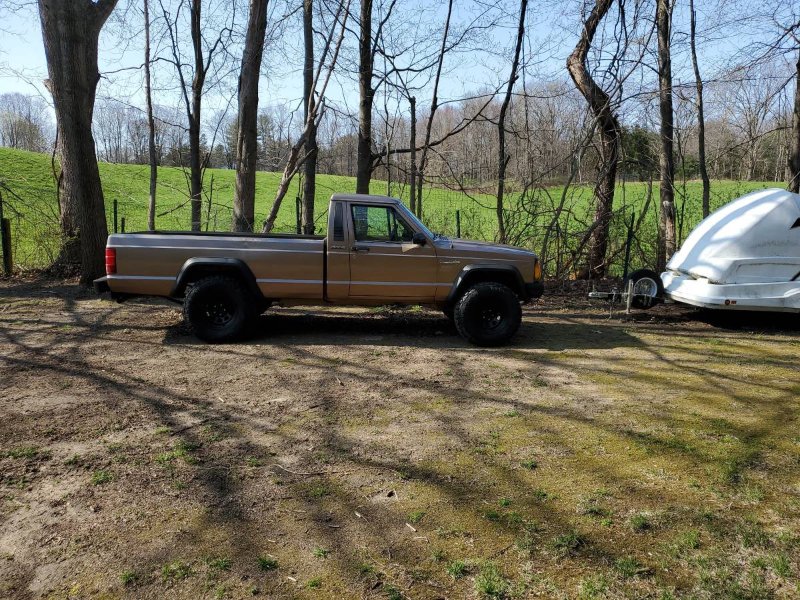
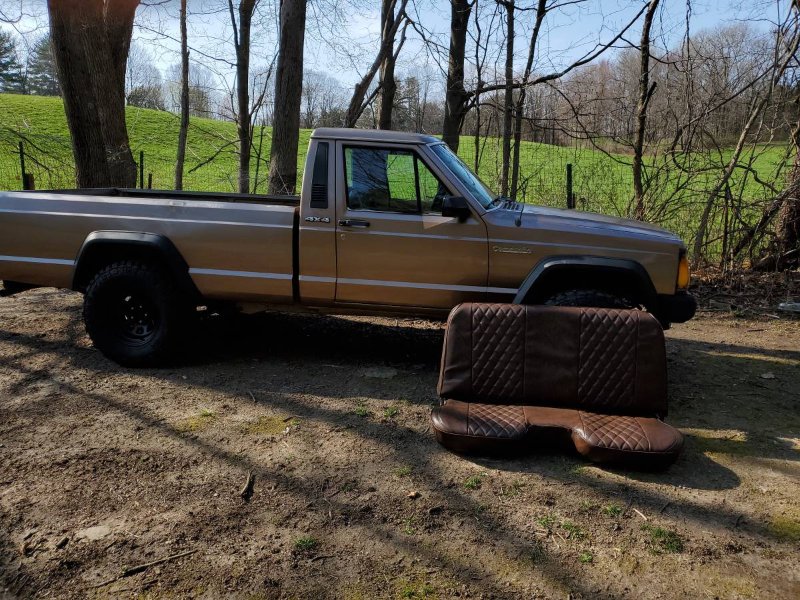
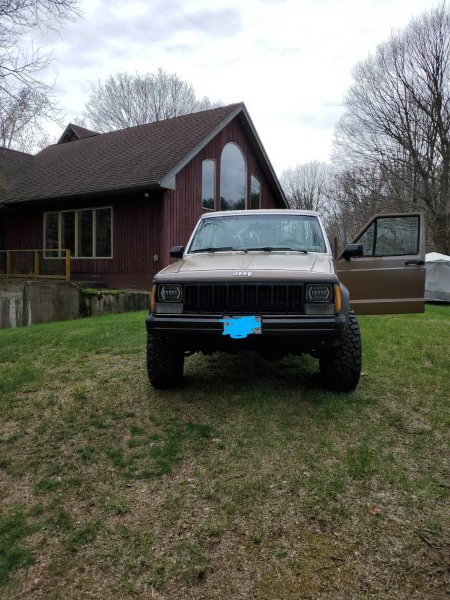
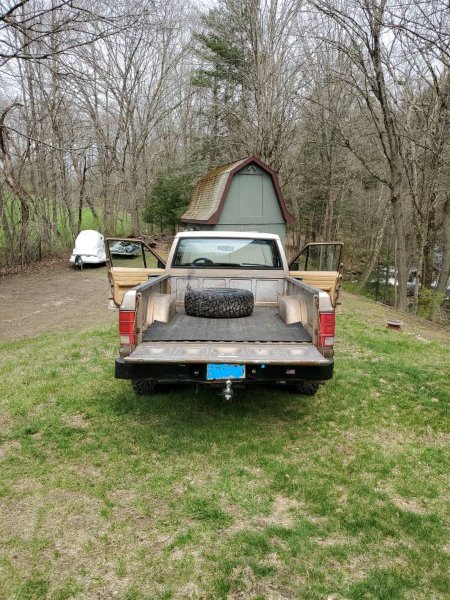
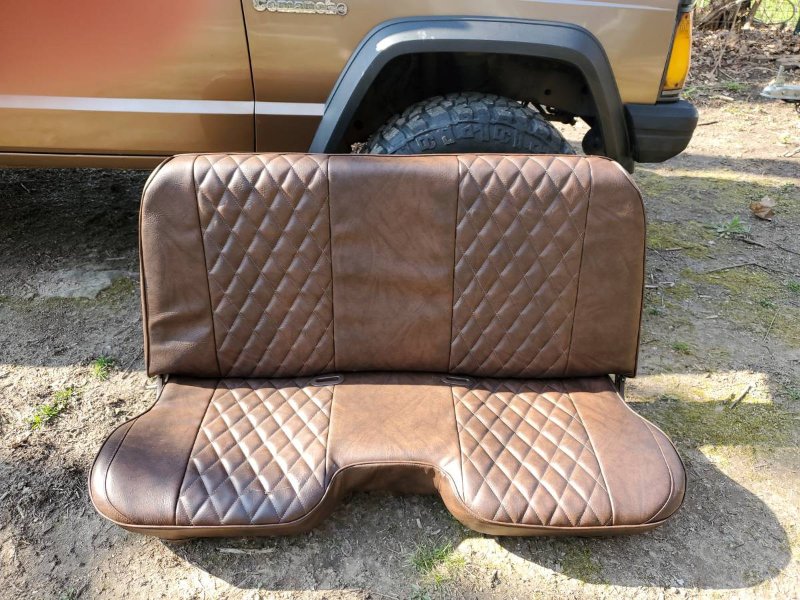
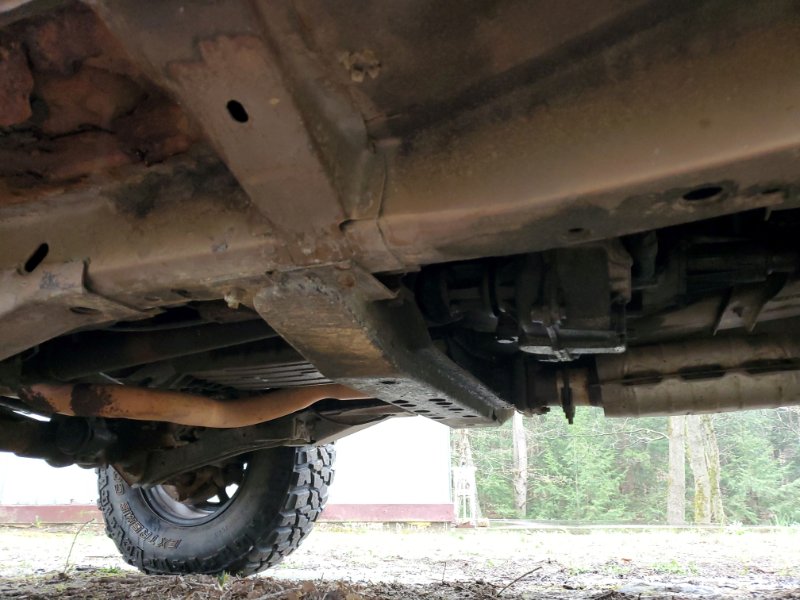
Initial Inspection Initial inspection is what you would expect for a jeep that's 34 years old: it needs attention. My brother did the inspection as I was a distance away from Massachusetts and he was closer by 5 hours. The jeep drove under it's own power, the brakes worked, but were soft and overall the truck was very loud. There was some rust under the driver floorboard, but no where near as bad as nearly every other comanche I found on the east coast. The oversized 31in tires looked brand new and the jeep seemed to have a 2in lift all around. Rear suspension was supremely soft, if you sat on the bumper it would hit the bump stops. The seller's story: He purchased it a few years ago from a guy in West Virginia with the intention of using it around his property / farm. The jeep spent most of it's life in Virginia. The West Virginia seller put an HO engine in it and it ran well. The jeep recently developed an exhaust leak and that was the source of the noise. You could not have a conversation near the engine bay it was that loud. He said a new exhaust pipe would fix it. He installed the tires and did the lift because he wanted to drive it in the mud around his property. He also had the bench seat professionally reupholstered. Unfortunately, the seller recently damaged his hip so he could not get into or out of the jeep easily, so it sat for a few years under a tree on his property and he finally decided to sell it. My brother negotiated a bit under asking price and he took it home the next day. This is it's first day under my ownership. I didn't realize just how much smaller it was than the F250's and F350's my brother enjoys. Quite the difference.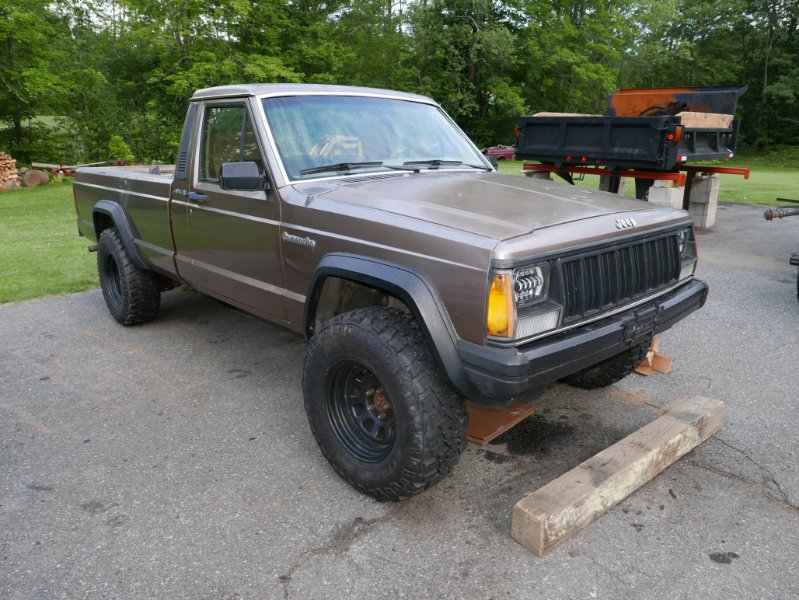
-
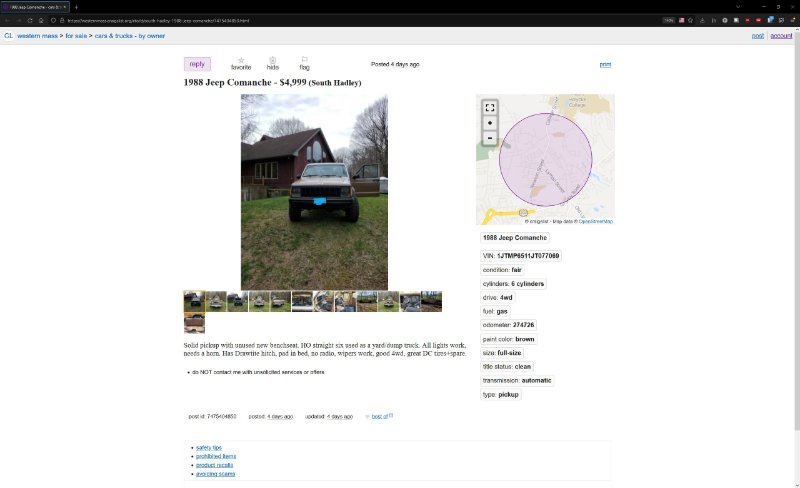
My long overdue build post. It's finally here! What's gold in color, shaped like a truck and has the aerodynamics of a brick? The official paint name is "Medium Bronze Metallic" from the 1988 Jeep book, but gold is close enough. With the amount of time and money I already put into this, I think it's a fitting tongue and cheek name for it. I have been documenting the entire repair and restoration process from initial purchase on my own machine and it's time to write it up. I will make some side guides along the way because certain parts have become unobtanium and solutions had to be made. Without further ado, here's the initial craigslist listing:


-
Tips for a cool running comanche?
Salvagedcircuit replied to Discoman9001's topic in MJ Tech: Modification and Repairs
That is some excellent reasoning. I should have thought of that. I've never seen my electric fan kick on and was going to take some elaborate drive to test the fan temp sensor. Good noggin right there! Thanks -
Door Window Seals
Salvagedcircuit replied to 88 Pioneer 4.0's topic in MJ Tech: Modification and Repairs
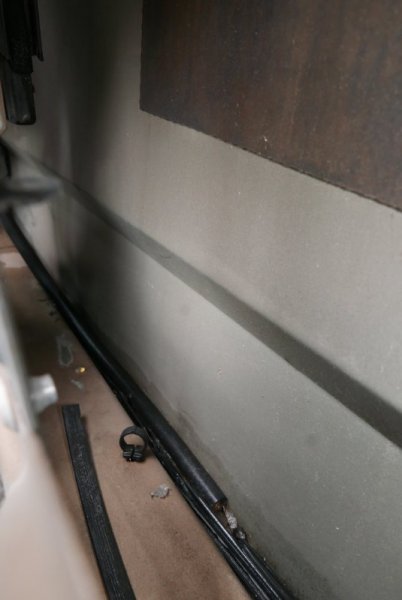
Absolutely! This was my passenger door during the clean up process. I didn't even know there were holes there!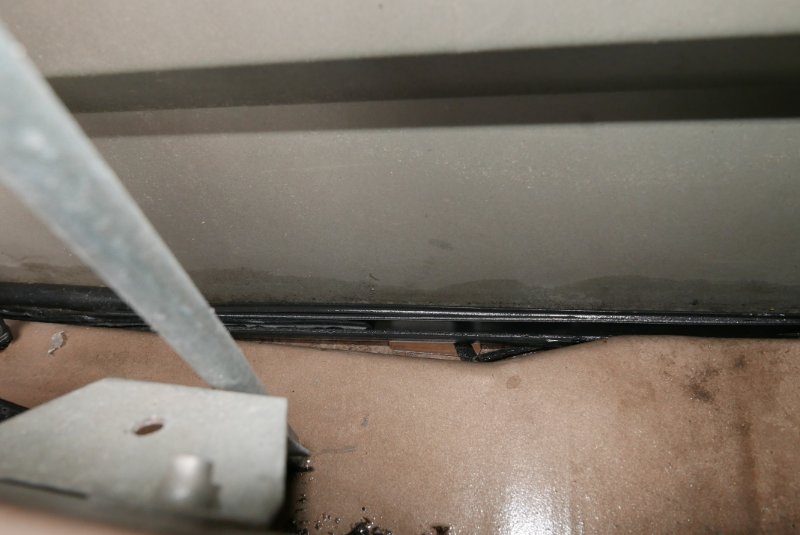
-
Door Window Seals
Salvagedcircuit replied to 88 Pioneer 4.0's topic in MJ Tech: Modification and Repairs
I know there was discussion on what year window / door seals are better for our comanche's. Does anyone know what the breakdown is? I know the 97+ window seals have double pleats and seal better against the inner glass. I purchased the precision products 97+ window seals and I could only get them to work on the inside of the window, the outside one left a huge gap between the trim and the window. What are the best solutions for the glass, the window track, the door gasket etc... Thanks!