

AZJeff
-
Posts
1295 -
Joined
-
Last visited
-
Days Won
1
Content Type
Profiles
Forums
Gallery
Everything posted by AZJeff
-
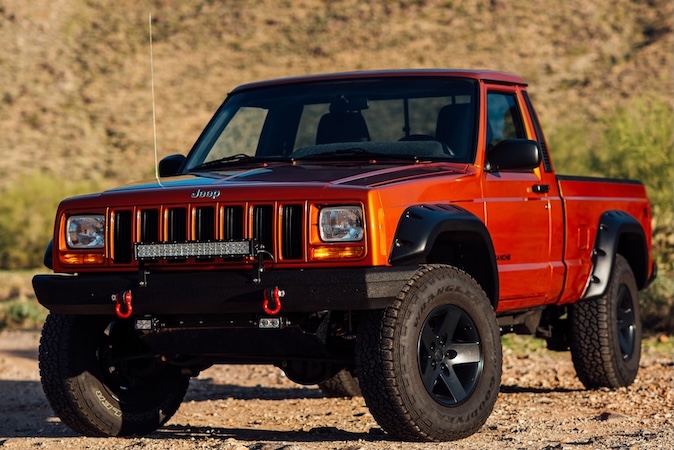
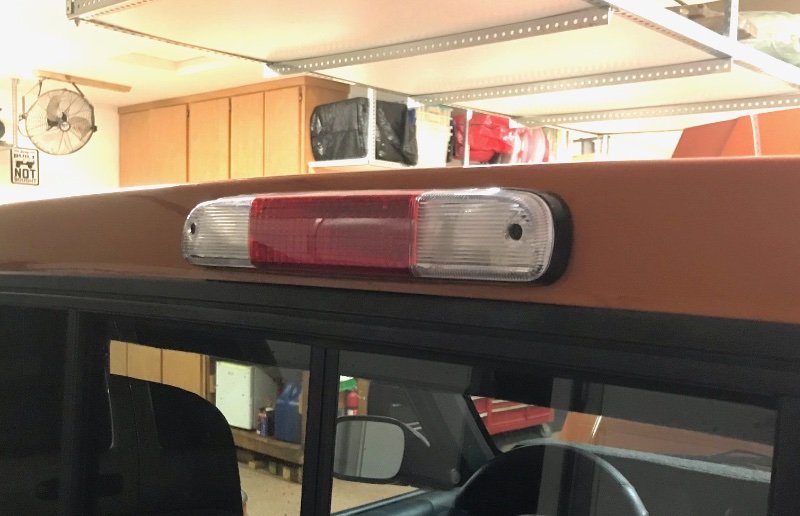
Are you talking about the one I posted the photo of on my MJ? That's the high mounted stop lamp/bed light for a 1998 Ford Ranger. You should be able to find those on Ebay or some other auto parts retailers on line.
-
Here is what it looks like, installed.
-
My MJ uses a high mounted stop light/cargo light assembly from a late model (1999 or thereabouts) Ford Ranger. You can buy Taiwanese copies that are decent from Amazon, and they include a closed-cell foam gasket. you will need to open up the hole in the cab to install these. I used a Dremel tool with a cut-off wheel. I then used Tinnerman-type “J-nuts” on the edge of the opening to allow the mounting screws to have a solid engagement, rather than just screwing into the cab sheet metal directly. The
-
The ball joint removal/installation tool you can borrow at AutoZone and it's competitors usually does not have the proper adapters for the XJ/MJ yoke and knuckle. HOWEVER...if you ask the store for what is loosely called the "4 wheel drive adapter kit", it will allow the "regular" ball joint tool to work on the XJ/MJ. In essence, you need the basic tool, PLUS this adapter kit to do the job correctly. I found this out when I borrowed the tool from my local O'reilly's.
-
Can I use a later XJ Heater Core
AZJeff replied to howeitsdone's topic in MJ Tech: Modification and Repairs
The heater core input/output pipes extend through the firewall just far enough so that heater hose can be slipped over them and clamped on. The foam rubber seal you see in the diagram is intended to keep water and air from the engine compartment from getting into the cab of the vehicle. It plays no part in the actual sealing of the coolant lines to the heater core. Since you are planning on replacing your core, there is a good chance that foam seal will be trashed with dry rot when you try to remove the core from the seal. If that happens, just get some other foam at a hardware store or fabric/sewing shop, and cut something to fit the space. Use contact cement to hold it to the heater box. -
Bueller?? (BUMP)
-
I don't have a stock MJ or XJ to measure, but I know plenty of the members here do. I need a measurement with someone with an MJ or XJ at factory STOCK ride height. What is the dimension between the centerline of bolt that hold the link to the axle bracket, and the flat surface on the sway bar where the link bushing are sandwiched?
-
Steering Box Wizards Come In Here--UPDATE IN NEW POST
AZJeff replied to AZJeff's topic in MJ Tech: Modification and Repairs
Thanks, I will investigate them. -
Steering Box Wizards Come In Here--UPDATE IN NEW POST
AZJeff replied to AZJeff's topic in MJ Tech: Modification and Repairs
Hmm....that is sort of what I would expect. But the input shaft will turn further than the stop on left turns, but not on right turns. Yet, from what I can determine, the stop screws on the knuckles are both even. So I wonder if the box is misassembled? (It is a reman, as I noted earlier.) The one thing I am still pondering is why the box has started leaking. Initial in-car inspection seemed to suggest a leak at the high pressure hose into the box. I removed the box, and hosed it down with brake-cleaner. (Purging the oil on the bench is one VERY messy task, as you can imagine.) I inspected everything, and saw nothing obvious. Even after I installed new hoses and o-rings, the box is leaking around the high pressure port. No leaks on the pitman shaft, nor on the input shaft. I am thinking the box has something wonky inside it causing the leak. -
Steering Box Wizards Come In Here--UPDATE IN NEW POST
AZJeff replied to AZJeff's topic in MJ Tech: Modification and Repairs
I don't think it's a track bar issue. I have an aftermarket bracket from Rubicon Express, and I used a long 1/2" drive breaker bar with a "torque multiplier" tube slipped over the handle to tighten the mounting bolts. They are WELL over 100 ft-lbs now. -
THIS IS A LONG POST, BUT I HAVE TO GIVE YOU GUYS ALL THE DETAILS SO I CAN GET GOOD INPUT FROM THE TEAM. FIRST, SOME BACKGROUND: About 2 years ago, I installed a remanufactured steering box from Rock Auto (AC-Delco branded), to replace the OE box that the PO had trashed by gross misadjustments. All was well with the replacement for about a year, until I noticed a crack in the frame radiating out from the front/upper mounting bolt for the box on the outside of the frame. To address this, I did the following: 1. I removed the box, welded in a doubler plate on the top of the frame rail above the box. (There was a small older crack that had been previously repaired poorly). 2. I welded in custom made 1 inch diameter steel tubular spacer that goes across the inside of the frame where the upper front bolt was located. This replaced the failed sheet metal spacer the Jeep spot welded in from the factory. 3. I welded in a 2 inch wide doubler plate on the outside of the frame where the upper front bolt goes that extends 5 inches forward and back of that hole. This was to reinforce the area where the bolt hole was cracked. 4. I added a reinforcement bracket from 1.5 inch angle that attaches to the front crossmember from side to side to further stiffen the crossment and tie the two frame rails better at the front end. 5. I added in a pair of the OEM "tow hook reinforcement" angle brackets that tie the front side of the front crossmember to the "horns" of the frame rails where the bumper mounts. 6. I replaced the die cast aluminum steering box spacer with a welded steel type. I then added in a RockHard bumper, and modified the driver's side mounting arm so that it extends past the lower two steering gear mounting bolts. (This required longer bolts for the steering gear box, so I got some grade 8 bolts and hardened washers to attach the box back to the frame.) So when my steering box is bolted up, it has an added layer of steel on the outside of the frame, as well as the benefit of the steel spacer between the box and the frame, and all of the holes have proper reinforcement inside the frame "box" to keep it from collapsing now. In addition, the bumper makes the front two 'horns' of the frame rails very rigidly connected. THE PROBLEM: All was good with my repairs and improvements until about 2 months ago. At that time, I started noticing that there was a "creaking" noise in the front end, but only when I turned slowly LEFT from center, and only when the vehicle was warmed up. From cold, there was no noise. The sound was not heard at anything except parking lot speeds, and the vehicle steers and tracks very normally. MY EXAMINATION I did a bunch of visual examination with everything still installed, and the creaking seemed to be coming from the steering box proper. (Track bar and it's mount are both good JKS parts.) The drag link end at the steering box is new, and without play. I then removed the steering box, and cleaned the frame thoroughly, and inspected with a bright flashlight all four sides of the frame for cracks, and found nothing. I checked the steering box proper for smooth operation on the bench, and found nothing. WHERE IT STANDS NOW. I reinstalled everything, and replaced both power steering hoses, since they were both leaking. (I used Edelmann brand hoses.) Now the creak is more noticeable than ever, and the brand new high pressure hose is leaking where it enters the steering box. (And I did use a new o-ring when I installed it!) The creak is DEFINITELY right around the steering box, and I can feel a slight vibration when the creak occurs if I place my hand on the box or the frame adjacent to the box. ONE LAST THING: When I have my wife turn the steering wheel from lock to lock with the engine on (and axle on jack stands), the steering box attempts to twist the frame when the drag link reaches the end of it's travel when turning left. The knuckle hits the stop bolt, but the steering gear still can move a bit further, and the power assist tries to pull the drag link further, and in doing so, is twisting the entire frame slightly. I am at my wits end. So I need some input from experts here. 1. Why would a new hose leak on the fitting at the box? (Crack in steering box through threaded hole for fitting?) 2. Why is the steering box still trying to move when the knuckle hits the stop bolt? I cannot imagine the box twisting the frame was part of the design intent of the XJ/MJ platform. 3. And what is making the creaking sound?
-
Bump so that someone with ECU/PCM knowledge at a deeper level can comment here. I know this is not very MJ specific, so if someone can point me to another forum that deals more with OBD-2 PCM’s on XJ’s, that would be appreciated.
-
NICE LINK!!!! 👍👍👍👍
-
About the hoses and the R134a versus R12: I wrote about this topic recently here, but the R134a molecules are SMALLER than those of R12. When R134a was introduced, they introduced a new type of hose with a “barrier” in the various layers that prevents the smaller molecules from migrating through the rubber. older hoses used with R12 lack this barrier, but there is a good side: old R12 hoses tend to be soaked in the R12 refrigerant oil. That makes them have an unintentional barrier to R134a molecules my accident. in other words, old used oil-soaked R12 hoses do fine with R134a in most cases. Most companies making new auto refrigerant hoses include the barrier regardless of the intended refrigerant, so replacement of old hoses is not an issue.
-
I think we are headed down a rabbit hole about the newest type of refrigerant. If the OP wants his AC to work, the smart (least costly/best results) would be to charge the system with R134a, and use the appropriate oil to accompany that charge. He can either do that himself (or with his buddies), assuming he can secure a charging manifold and a vacuum pump. Otherwise, the safe bet is to pay a pro to fill it with the correct type/amount of oil, and charge it with the appropriate amount of R134a.
-
Yeah, I forgot about that stuff. SInce I am a DIY guy, I have not encountered that refrigerant in the wild, thus far. My newest vehicle, a 2014 Wrangler, still uses R134a as it's OEM refrigerant.
-
Back to resurrecting this thread. So I put in a new NGK cam position sensor, and confirmed it's "timing" with the toothpick method per the FSM. No change. In fact, over the past month or so, it's actually gotten slightly worse. Now, if I leave the vehicle for more than 10-15 minutes, I have to crank the engine twice before it's starts. Once to get the control system to get a sync, and then the second time, it starts. It sure is acting like a loss of volatile memory is taking place. So, I am just spitballing ideas here: ---I checked the 12v "keep alive" power feed to the ECU, and it's working normally (at least up through the connector). However, I don't know if there might not be an internal issue with the ECU. Perhaps the feed is not getting into the actual circuit board inside the ECU. ---Or, maybe the capacitors in the ECU are getting old and bleeding down rather quickly with old age, and thus the ECU looses some memory settings due to capacitor drain. I seem to remember reading about someone who went in and replaced the caps in an ECU on some MJ or XJ, but I cannot remember which forum I was on where he reported doing this. I need some suggestions from our electronics wizards on this.
-
I have been following this conversation since it started, and I feel that I might be able to offer some suggestions, since I have done many AC repairs over the years to various vehicles, both older R12 ones and newer R134a types. 1. If you have an MJ that still is filled with R12, but needs AC work, that is the PERFECT time to do the conversion from R12 to R134a as a refrigerant. Some "purists" insist that, since R134a is not as efficient as R12 is as a refrigerant, any conversion will result in a less cooling system function. While that is technically true, the AC system in an MJ was designed for use in an XJ, which has more cabin volume and windows than the little cab the pickup has. This means the AC system in an MJ is already oversized for the job, so the slight loss in system cooling capacity won't be noticed. 2 Using substitute refrigerants like the OP's R12a is certainly viable, but, as others have noted, that stuff is flammable, which regular R12 and R134a are not. There is a reason that auto manufacturers don't use flammable refrigerants in passenger vehicles, and I think the reasons are obvious. I would stay away from them for the same reasons. 3. To do proper AC recharging, one needs a proper charging manifold/guages, and a vacuum pump. WIthout both of those, you CANNOT recharge the system properly or safely. If you don't have access to those tools, or have a friend who does, then your best bet is to do all the mechanical portions of the work replacing parts and adding refrigerant oil, and then take it to a professional, and ask them to evacuate the system and charge it appropriately.
-
I have used the setup that "knever3" suggested on my previous XJ's, and it's quite good. On my MJ, though, I went a different route for the actual headlight proper. I have some relatively no-name LED lamps I got off of Amazon. No Name LED Headlights They are not the longest-projecting lamps I have used, but they are a bright white, and the beam does not cause oncoming drivers to complain once aimed correctly. For REAL long range driving, I use an LED light bar I got from Quadratec that I mounted on the front bumper. Here in AZ, if you drive out in the boonies, you need all the light you can get, and that provides it. Also, the law enforcement community out here isn't terribly aggressive about vehicles having extra lighting as long as you use it sensibly (read that "not in traffic"), so adding more lighting is pretty common for rural applications.
-
I am overheating and I need it fixed yesterday
AZJeff replied to Jesse J's topic in MJ Tech: Modification and Repairs
The fact that the upper rad hose isn't getting hot is a sure sign that there is no water circulation. That COULD be the water pump, but more likely, it's a partially plugged radiator. The cooling system on the MJ/XJ is just barely adequate when all the parts are in as-new condition. Once any of them deteriorate, you can expect overheating pretty soon thereafter. One other tip: although you do not have a temperature guage, you can buy a laser infrared thermometer like this one on Amazon: Laser Thermometer It's pretty cheap, and can be very useful. Just point it at the thermostat elbow, and you will get a good reading on coolant temperature. -
Yes, it’s the standard switch Assembly used in all older GM steering columns.
-
One other suggestion: Loctite makes a special kind of compound to retain sleeves on shafts. I would apply a layer of this to the area where you are going to have the sleeve positioned before you actually press the sleeve onto the shaft. Here is what you need: Loctite 640
-
You put the sleeve on the area where the seal will ride. The slip yoke normally only moves axially about 1/2 inch under normal conditions. (Rock crawling or other extreme axle flex would be greater motion of the yoke, but in normal road use, 1/2 inch is typical.) With your driveshaft installed and the vehicle at normal ride height, you should be able to find the spot where the seal rides. Center the sleeve over that spot.
-
97+ XJ Style Custom Rear Flares
AZJeff replied to boxyjeep's topic in MJ Tech: Modification and Repairs
The factory flares for the XJ are made from urethane, IIRC. Do some searching on how to bond urethane pieces together. There is probably a professional body shop product made for that task. -
Brake work . . . a nightmare of biblical proportions!
AZJeff replied to NC Tom's topic in MJ Tech: Modification and Repairs
Since you are replumbing the system, I have found a butane torch with a pencil tip to be really helpful in loosening rusty connections. —Use a wire brush to remove loose corrosion —Apply hear to the flare nut with the torch —While good and hot, turn the flare nut with a flare nut wrench. Try to avoid using an open-end wrench, as they tend to round off the nuts. Only use Vise-Grips if the nut is too rounded off to get a wrench to engage the flats.