


ghetdjc320
-
Posts
5079 -
Joined
-
Last visited
-
Days Won
1
Content Type
Profiles
Forums
Gallery
Everything posted by ghetdjc320
-

Project “Tomahawk”
ghetdjc320 replied to ghetdjc320's topic in MJ Hardcore Tech: Epic Journeys to Greatness
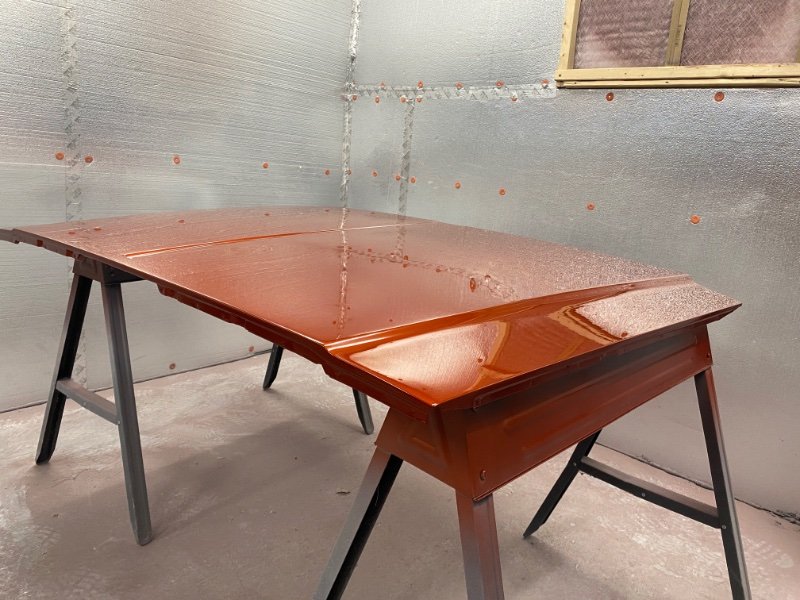
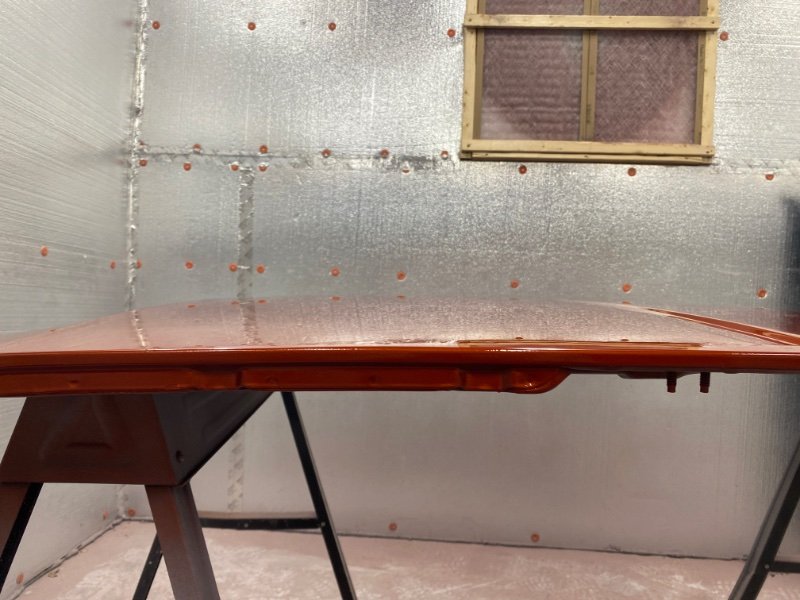
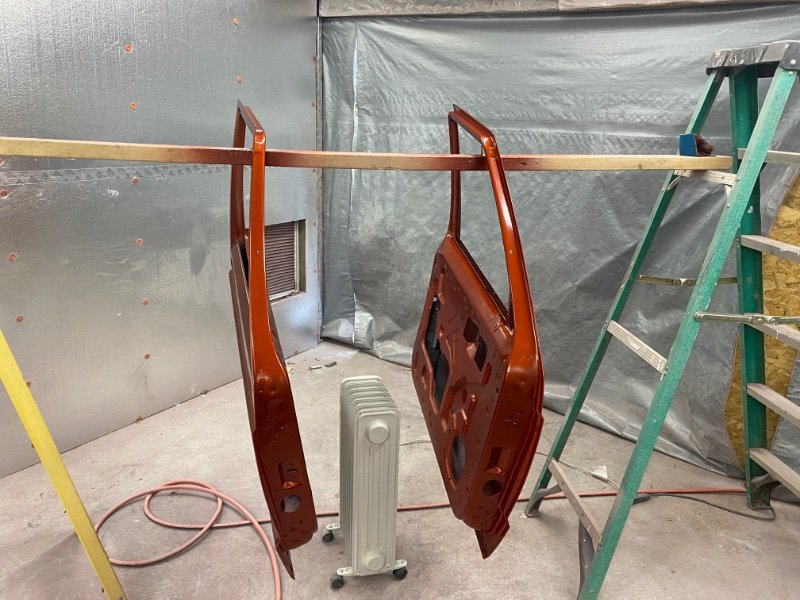
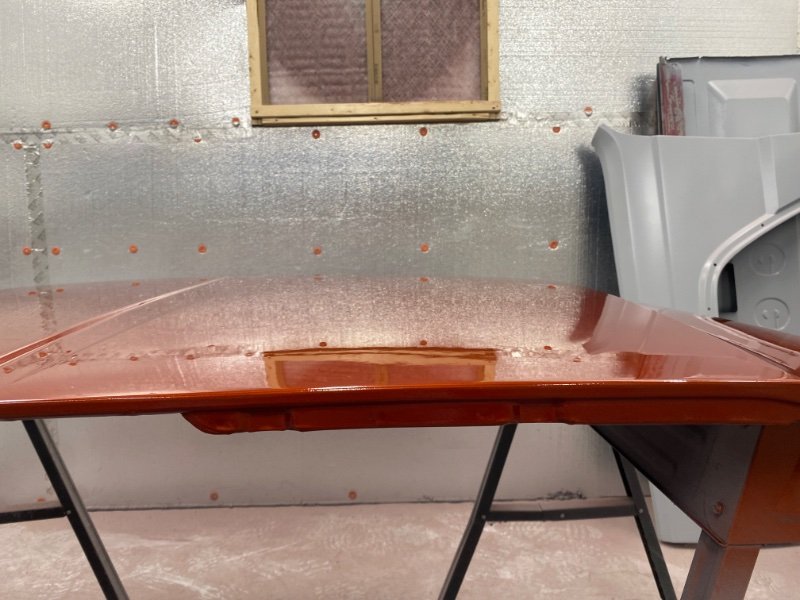
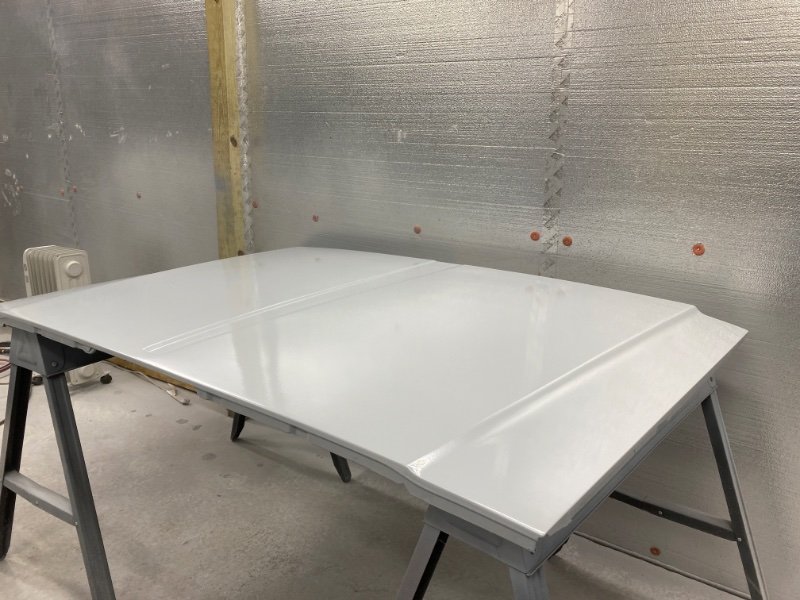
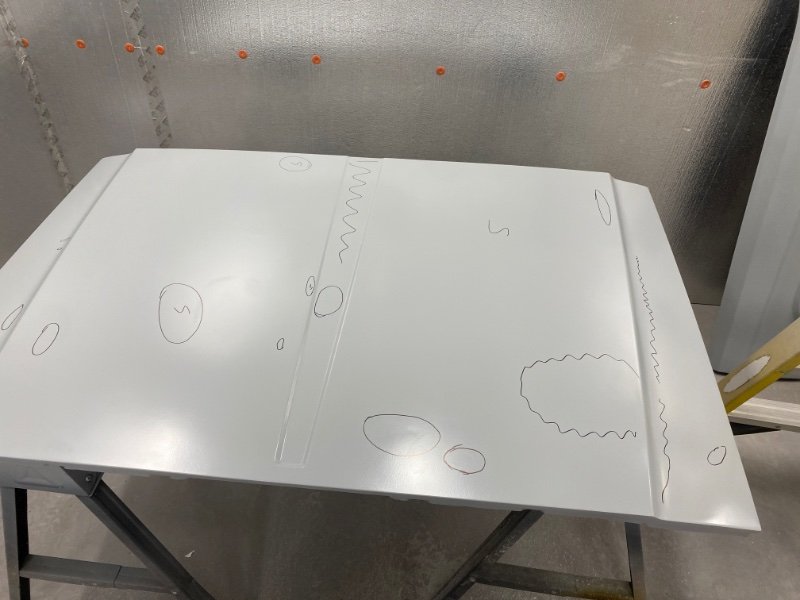
Indeed! Did 4 coats of base (3 plus a guide coat) and 6 coats of clear (tinted the first 3 with base for depth) And here are the result: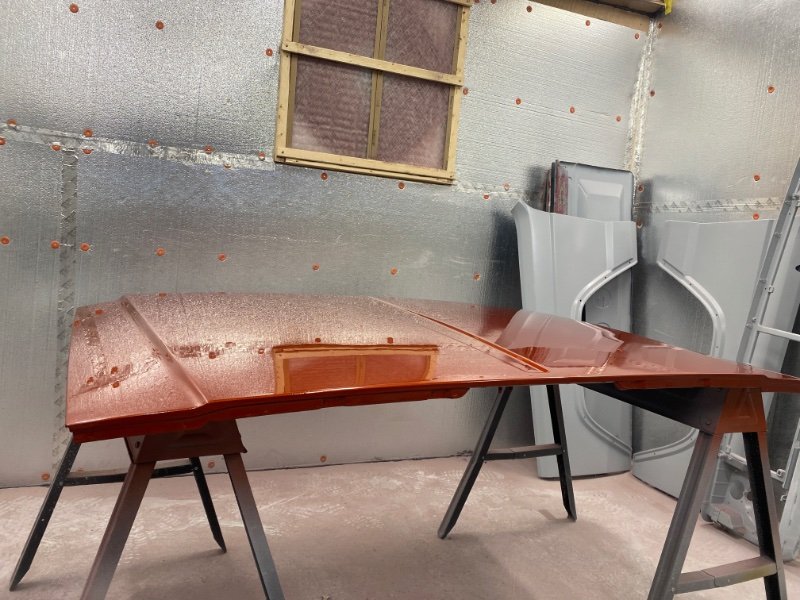
-
Are you going to regear the front to 3.73 or the rear to 4.10?
-
Not sure what gear ratio you’re running but you may be money ahead getting a junkyard KJ 8.25 which will have larger 29 spline axle shafts and disk brakes in most years. Just a thought since an axle swap from an XJ isn’t bolt in anyways.
-
Project “Tomahawk”
ghetdjc320 replied to ghetdjc320's topic in MJ Hardcore Tech: Epic Journeys to Greatness


-
Project “Tomahawk”
ghetdjc320 replied to ghetdjc320's topic in MJ Hardcore Tech: Epic Journeys to Greatness
-
The aw4, ax15 or ax5?
-
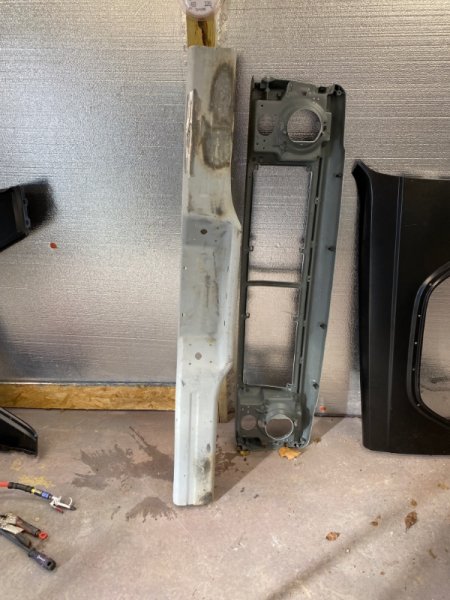
The amount of work needed will only be apparent once you have it stripped down. As far as alignment is concerned, it’s not hard to get things back into spec. Key parts makes bedside panels, rocker panels, bed sections, floor pans and a few other small parts. Cab corners can be found on Facebook occasionally. As long as you don’t cut the actual “frame” you shouldn’t have any alignment trouble. As a precaution though, get some simple square metal tubing and tack weld it to different areas of the truck as a temporary reinforcement.
-
Project “Tomahawk”
ghetdjc320 replied to ghetdjc320's topic in MJ Hardcore Tech: Epic Journeys to Greatness
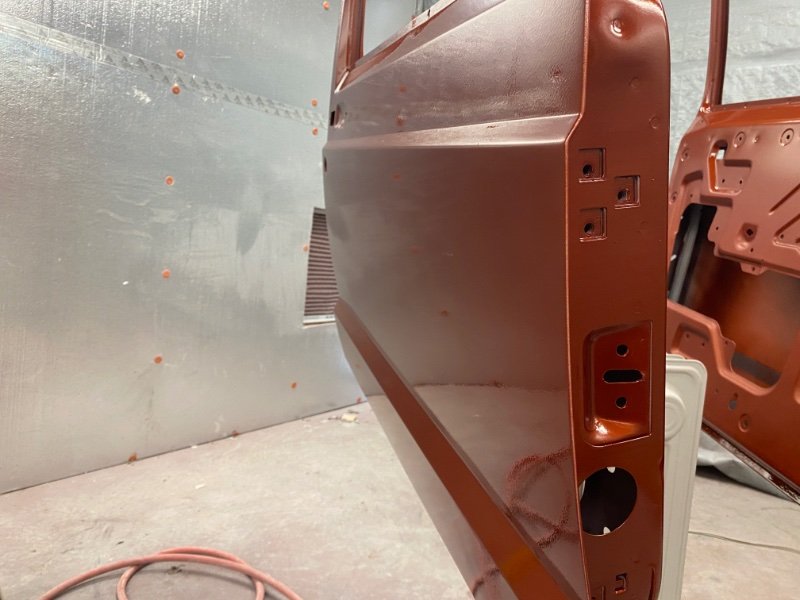
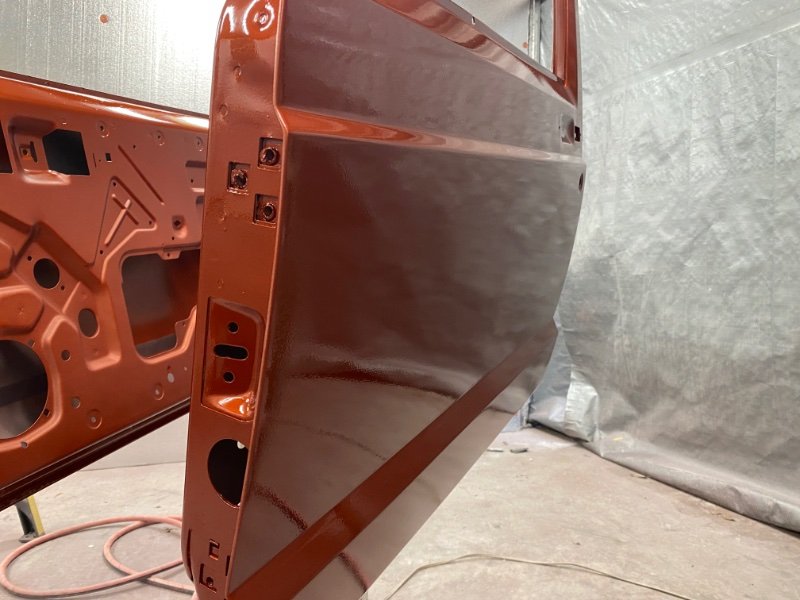
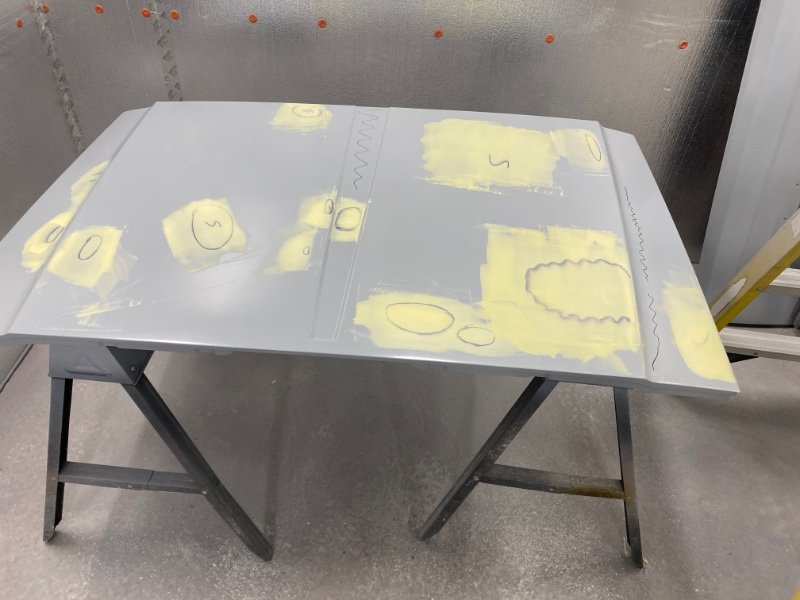
Body panels all prepped and ready for primer/sealer
-
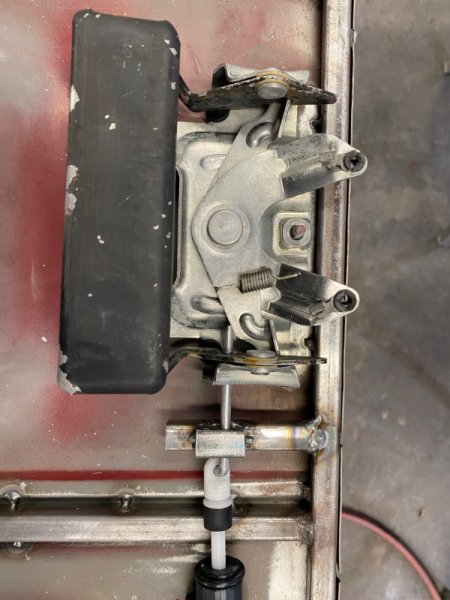
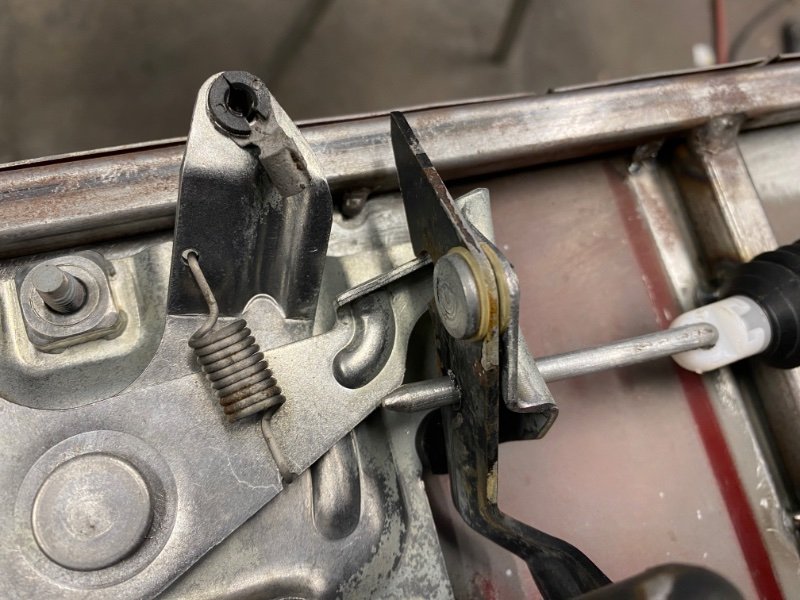
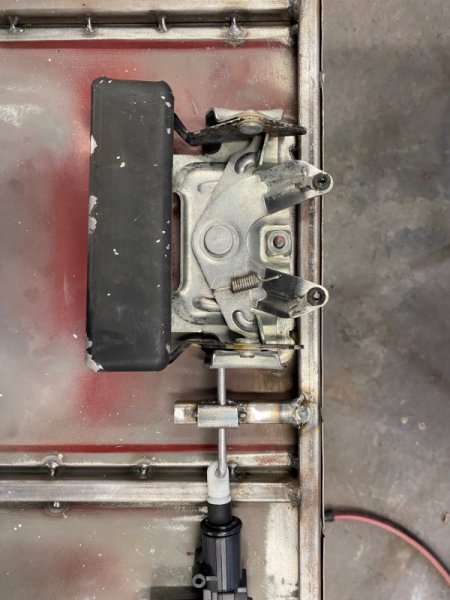
Power actuated tailgate lock
ghetdjc320 replied to Gjeep's topic in MJ Tech: DIY Projects and Write-Ups
Here are some pics of my install. I also went with a very similar design but since I had my tailgate split and had built some internal square tube frame for reinforcement I decided to add an additional pin guide to relieve the strain on the actuator. I used 3/16 galvanized steel rod along with 1/2x1/2” square tubing. The guide holes for the locking pin are 7/32”. The guide itself I welded onto the inner “frame” that I had built for the gate. I didn’t built a bracket for the unit but the actuator can still be removed through the opening for the handle once the gate has been reassembled. Once I had everything fabbed up and welded, it was sanded, cleaned and sealed with epoxy.


-
Project “Tomahawk”
ghetdjc320 replied to ghetdjc320's topic in MJ Hardcore Tech: Epic Journeys to Greatness
Will do -
Project “Tomahawk”
ghetdjc320 replied to ghetdjc320's topic in MJ Hardcore Tech: Epic Journeys to Greatness
I can add the info the the tailgate separation write up I did last year. I think it’s buried somewhere in the mods and repair section. If you want to move it to the diy area, I can add the info there -
Project “Tomahawk”
ghetdjc320 replied to ghetdjc320's topic in MJ Hardcore Tech: Epic Journeys to Greatness
It’s pretty straight forward. 3/16 rod, 7/32 holes carefully lined up. But unless someone tears apart their tailgate and adds support structure, there is no good way to add the locking pin guides which are crucial to not putting the strain on the actuator. I tried using the 1/8 rod that comes with the actuator but I could have easily opened the gate by force. The 3/16 rod just doesn’t allow for any play in the handle and it’s the biggest rod the actuator would accept. You’d probably end up bending the handle before shearing the lock pin. Going to tie it in with the door locks. It will be a nice addition to the locking hard retractable bed cover. There should now be a fully locked secure cargo area! -
Project “Tomahawk”
ghetdjc320 replied to ghetdjc320's topic in MJ Hardcore Tech: Epic Journeys to Greatness
Electric tailgate lock. High powered actuator, 3/16 locking pin with beveled guide. The pin is guided by 3 pints of contact before going through the actual handle. The handle has almost no play when locked and the actuator arm doesn’t have to bare any of the pressure from the locking pin due to the guides. And yes, you can replace the actuator through the tailgate handle hole. Though there is no way to build the additional pin guide without tailgate disassembly.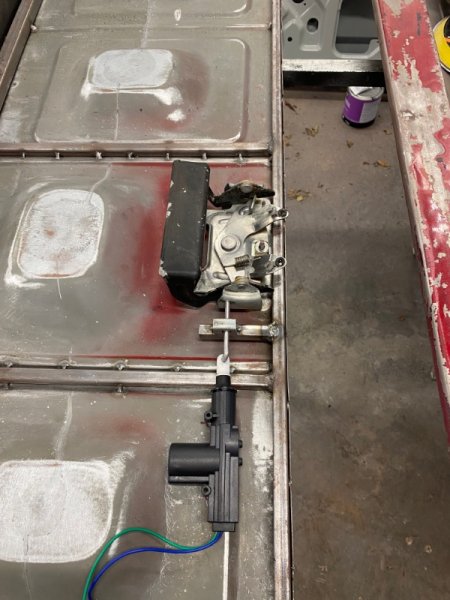

-
Project “Tomahawk”
ghetdjc320 replied to ghetdjc320's topic in MJ Hardcore Tech: Epic Journeys to Greatness
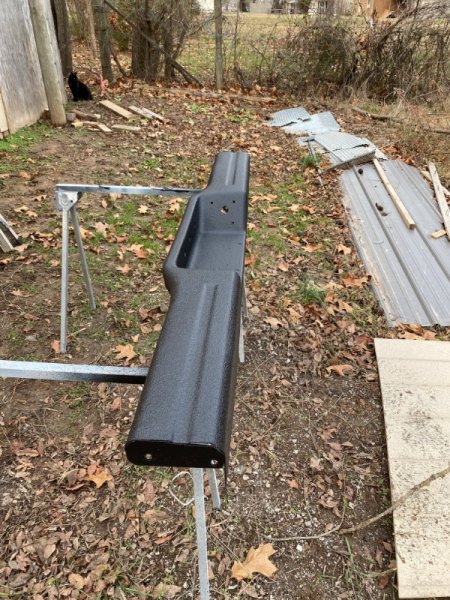
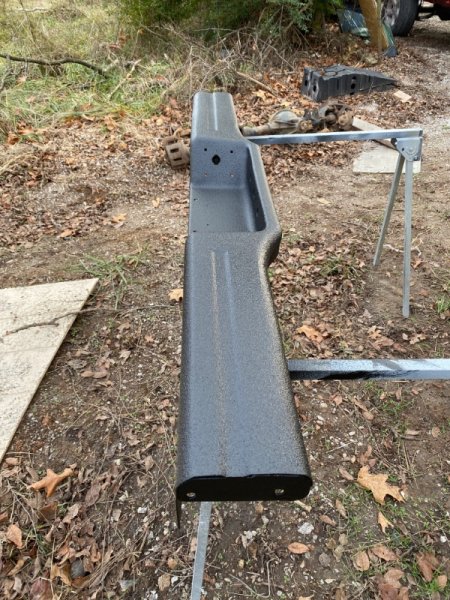
Oem bumper straightened and trued. Took lots of heat and an air hammer for a few spots.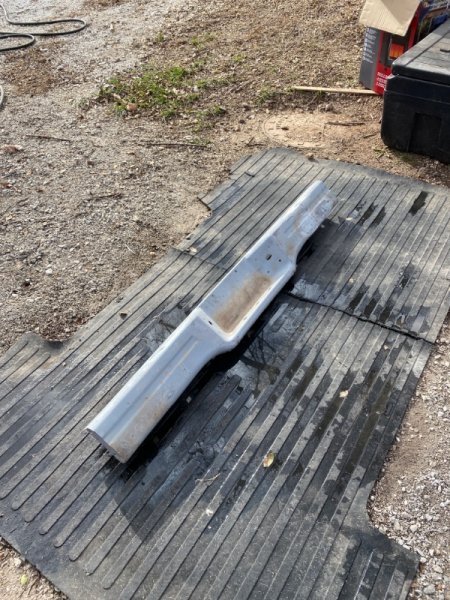
-
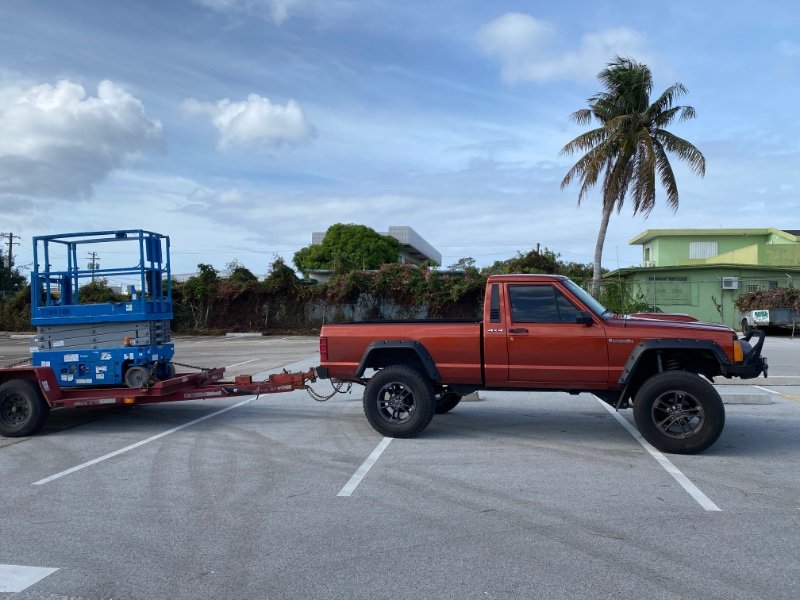
Had to really dig for this picture but the MJ handled this no problem. That was at least 3k. No trailer brakes either and plenty of hills and curves in traffic. On a side note, that’s the kind of tongue weight it took to finally level those general spring 4 leaf packs setup soa against the rubicon express 5.5” coils
-
X2 on the CO2. You can just use air in it but you will need much more than 150psi to be useful. CO2 is a much better way to go though
-
I have an original oem receiver hitch I might be letting go. Not positive though yet. The most solidly built setup though imo is to have the receiver directly in the aftermarket bumper. Dirt bound does not do that, theirs in an add on that hangs onto the bumper mounts. JCR used to make them but have since stopped. Hansens will make them but you have to call them to request it. Every once in a while krusty makes a batch. You may find one on Facebook also.
-
JK NSG370 bellhousing pattern
ghetdjc320 replied to DirtyComanche's topic in MJ Tech: Modification and Repairs
The NSG370 has an integral bellhousing. The actual location of the cps has been a non issue for conversions with the HO flywheel since it uses 3 sets of equally spaced reference points and the CPS was just at the next set of marks. I know Renix also uses 3 marks equally spaced but I’m not sure if their position is the same as the HO. -
3.5" Lift with 31" Tires?
ghetdjc320 replied to DesertComanche86's topic in MJ Tech: Modification and Repairs
31’s on a 3.5” lift always seemed like the ideal setup on an MJ to me. You can still run stock flares, have a pretty stock ride experience but gain some good ground clearance overall. My last MJ was about 6” lift with 33’s but the new one I’m building is 3” on 31’s -
Project “Tomahawk”
ghetdjc320 replied to ghetdjc320's topic in MJ Hardcore Tech: Epic Journeys to Greatness
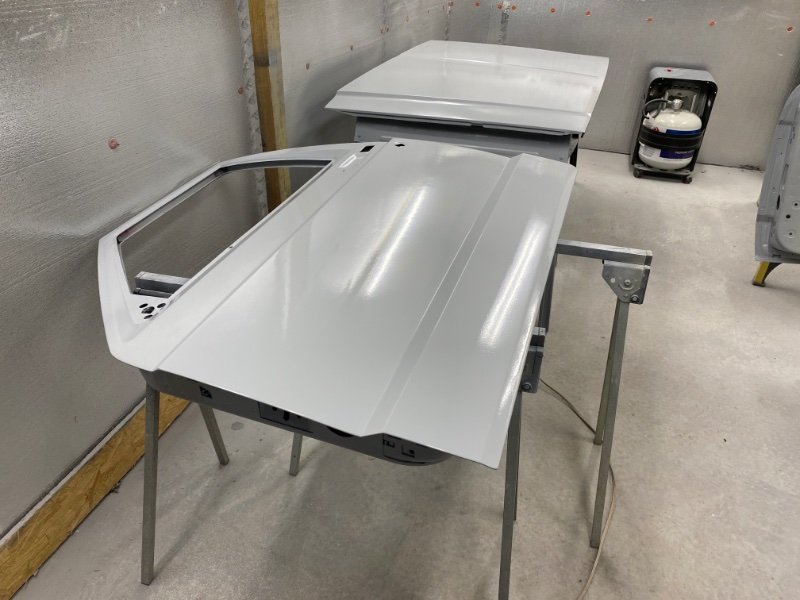
Started into the cut and polish.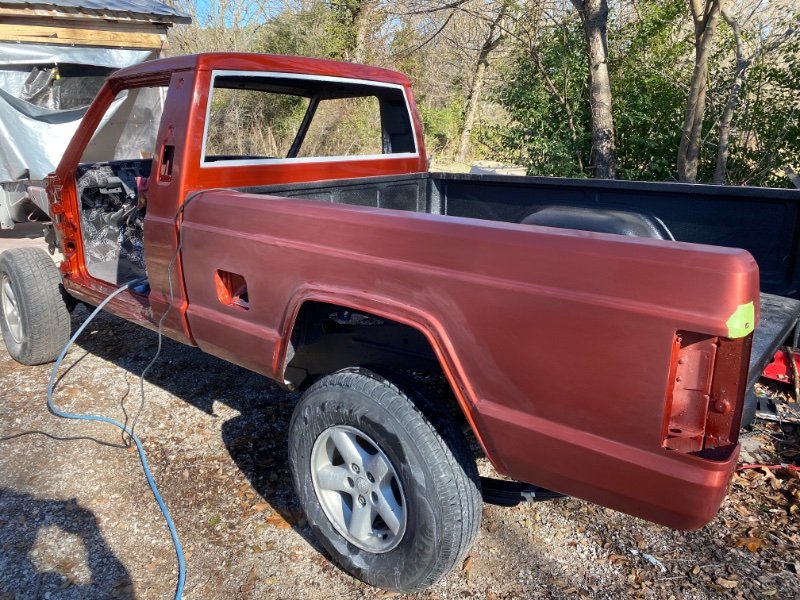
-
Project “Tomahawk”
ghetdjc320 replied to ghetdjc320's topic in MJ Hardcore Tech: Epic Journeys to Greatness
No not professionally. Restoration has just been a family hobby. -
Project “Tomahawk”
ghetdjc320 replied to ghetdjc320's topic in MJ Hardcore Tech: Epic Journeys to Greatness
This paint has a ton of pearl and metallic so shooting it all at once is preferable to have uniformity across the panels and gaps. Since I’m doing mine in sections, I’m shooting a final “guide” coat where I drop the gun pressure and increase the distance to essentially shoot a fine mist of texture that will settle into the partially flashed base coat. That helps keep things nice and uniform when shooting individual panels with these types of paints. Imo, the number one benefit of tearing these apart to this level is to repair all of those horrible factory seams -
Adding low washer fluid warning to an MJ
ghetdjc320 replied to Anthi4078's topic in MJ Tech: Modification and Repairs
X2, it was there on my 91 just kind of tucked away in the harness. -
And to think I had two in good shape no one seemed to want. Chucked them to clear space maybe 2 months ago
-
Full suspension bushing kit available?
ghetdjc320 replied to Jlindsey86's topic in MJ Tech: Modification and Repairs
All the ones I’ve had I drilled several large holes on the rubber then hit the shell with an air hammer to collapse it inward. There is a bit of access to the shell where the spring eye wrap comes together. The bolts also tend to completely seize within the inner sleeve and offer require cutting.