


ghetdjc320
-
Posts
5212 -
Joined
-
Last visited
-
Days Won
1
Content Type
Profiles
Forums
Gallery
Everything posted by ghetdjc320
-

Project “Tomahawk”
ghetdjc320 replied to ghetdjc320's topic in MJ Hardcore Tech: Epic Journeys to Greatness
Thank you very much! -
Project “Tomahawk”
ghetdjc320 replied to ghetdjc320's topic in MJ Hardcore Tech: Epic Journeys to Greatness
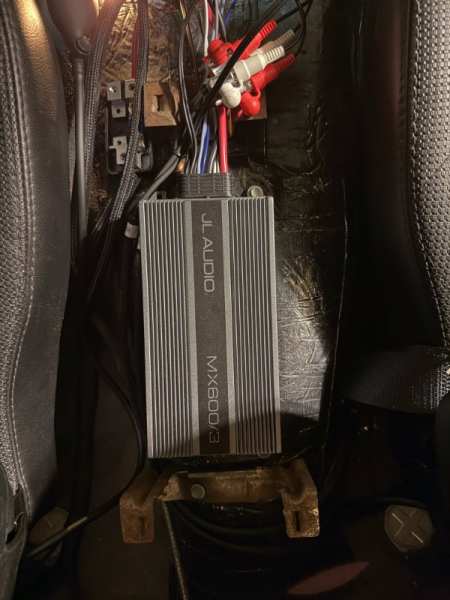
Yep the amp fits perfectly under the center console with about a 1/2” of airspace above it and plenty of venting out the back and sides. Our center consoles lend themselves very well to concealing an amp since they had the provision for the XJ rear air ductwork to pass through them. As for the radio, it now has a full programable internal DSP which makes all the difference. I am still using the powered speaker level outputs but that does help retain a good signal to noise ratio. Down the road, I’ll build another radio that deletes the internal preamp entirely and provides pre-outs. You can pull the line level signal from the RX radio before it goes to the amp stage but, the level is very low. If I was going that route, I’d probably use a good quality line level converter like an audio control unit. The built in amp for the rx series in only a 2channel but the preamp fader control splits the signals to power rear speakers. So, the advantage to keeping the the speaker level outs is that you can retain fader control which I’m using as a sub feed so I can adjust the sub level using the fader control. -
What CC knows about stock Jeep radios
ghetdjc320 replied to NickyV's topic in MJ Tech: DIY Projects and Write-Ups
Awesome, glad that helped! It can take a bit to reset the chip when Its not seeing the triggers from the tape mech. But it should stay that way now. BTW, that’s a pretty good looking radio there. Good candidate for a restoration -
What CC knows about stock Jeep radios
ghetdjc320 replied to NickyV's topic in MJ Tech: DIY Projects and Write-Ups
There is a radio mute function that is part of the tape mechanism logic that’s got you stuck. Are you ok with just deleting the tape player all together? If so, just remove the two main connectors from it along with the 3 wire signal out. Remove the four screws that retain the casette player chasis and you’re done. -
Project “Tomahawk”
ghetdjc320 replied to ghetdjc320's topic in MJ Hardcore Tech: Epic Journeys to Greatness
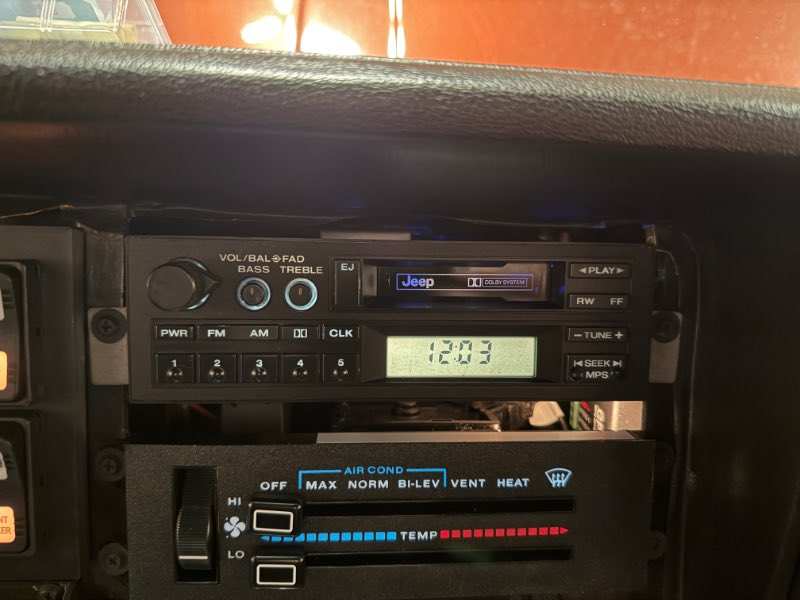
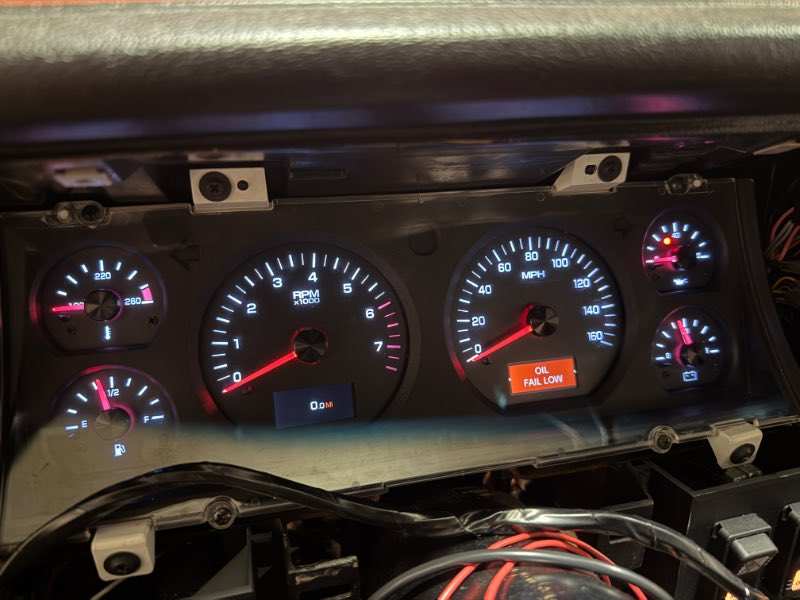
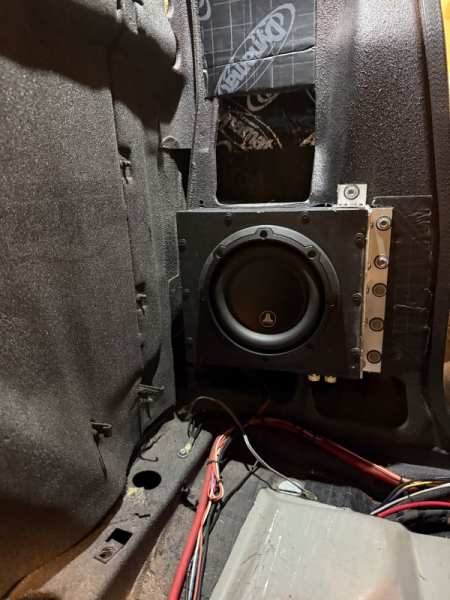
Wow, sound is phenomenal. The bass is super clear and deep. Still have some tuning to do. Also dropped the rear of each corbeau seat bracket 1.25” and welded them back up with proper alignment. Truly amazing how much more comfortable that small adjustment made it. I left the carpet out at the moment just to be sure I have zero further cab leaks and to do some further cable management. Finished my personal RX173 with the internals significantly modded. Now I have custom automatic signal routing, full programable DSP and multiple inputs. Restored the lighting, button backing and faceplate. every audio component is now hidden with zero space taken up on the cab. The custom Dakota digital dash is also an extremely good piece of tech. I’m running the canbus signals from the original vette ecu for gauge signals.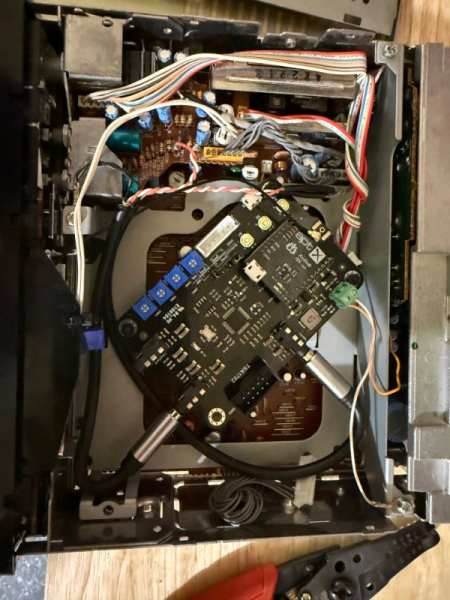
-
Project “Tomahawk”
ghetdjc320 replied to ghetdjc320's topic in MJ Hardcore Tech: Epic Journeys to Greatness
Will found out in the next few days. I’m finishing up with some dash wiring work I needed to get done to accommodate the Dakota digital dash swap. Going to put back in the seats without the carpet to ensure I have zero water leaks and to make any other fine adjustments with cab wiring layout before laying down fresh carpet. Will report back soon though: -
Project “Tomahawk”
ghetdjc320 replied to ghetdjc320's topic in MJ Hardcore Tech: Epic Journeys to Greatness
Thanks! Now just need to reinstall the interior and make some bezels/grills for the b pillar trim. -
Project “Tomahawk”
ghetdjc320 replied to ghetdjc320's topic in MJ Hardcore Tech: Epic Journeys to Greatness
Well, that was a ton of work to design build and install, but well worth it.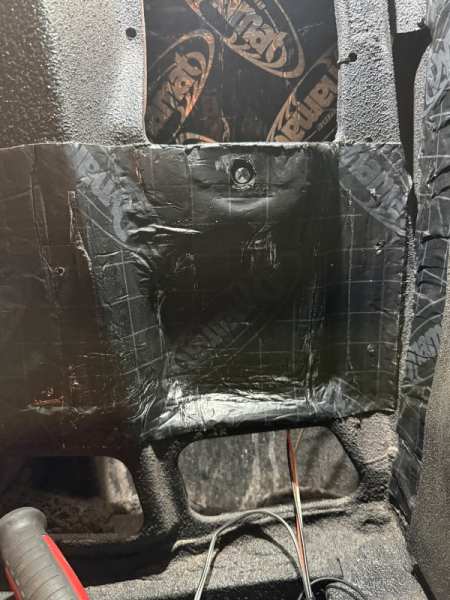
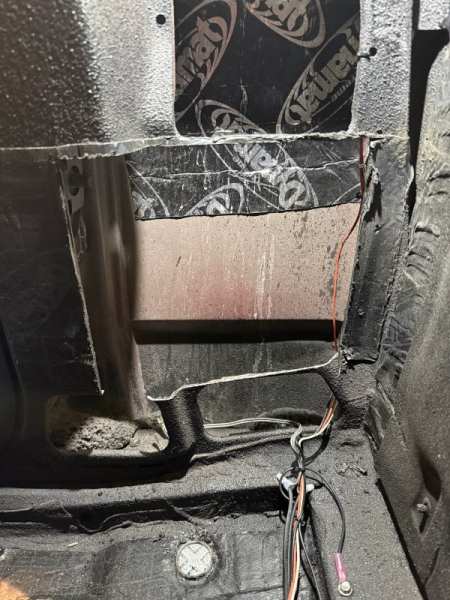
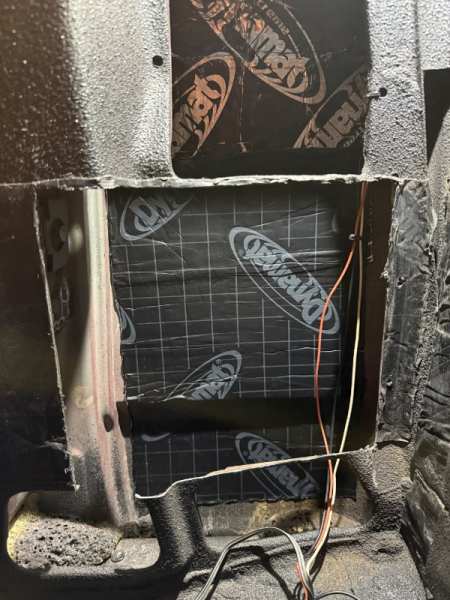
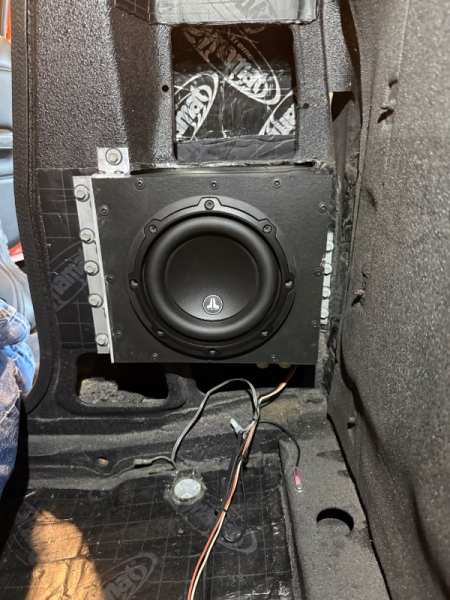
-
Modified OEM Radios “Feeler”
ghetdjc320 replied to ghetdjc320's topic in MJ Tech: Modification and Repairs
I think most of the info I posted on these is pretty obscure in the diy section. I’ll see if I can throw together a thread here in the mods section about what can be done with these units. Specifically the RX-171, 172 and 173 as these radios can still be found in plenty of 96- XJs in the yards. I like the look of some of the AMC radios but imo, the later RX-171+ units look more period correct in the dash. -
Modified OEM Radios “Feeler”
ghetdjc320 replied to ghetdjc320's topic in MJ Tech: Modification and Repairs
The best audio quality you could get would be a usb DAC with an analog output to an internal DSP which can then switch between tuner/aux and Bluetooth. Ideally you’d use the DSP preamp output to provide line level output. That would be the purest signal without running an optical or coax digital output from your DSP to amp. If you read through the DIY thread on these (“what cc knows about stock jeep radios”), that is a definite possibility Edit: Here where some of the mod/tech info on these units begins -
Modified OEM Radios “Feeler”
ghetdjc320 replied to ghetdjc320's topic in MJ Tech: Modification and Repairs
If your going to use Bluetooth or otherwise provide some type of external signal input, that is within the scope of the mods. Checkout the mods done thus far in the DIY section “What CC knows about stock jeep radios”. You might find what you need there to fit your needs. I’ve kept all the data there open source, and provided the signal flow pathways to modding the daylights out of these radios. Adding an FM modulator is a nice setup actually that can give the same audio quality you’d get from a clean FM station. But it does require adding in some sort of switch somewhere to turn it on as it will shunt the vehicle antenna signal to about zero when it’s on. -
Project “Tomahawk”
ghetdjc320 replied to ghetdjc320's topic in MJ Hardcore Tech: Epic Journeys to Greatness
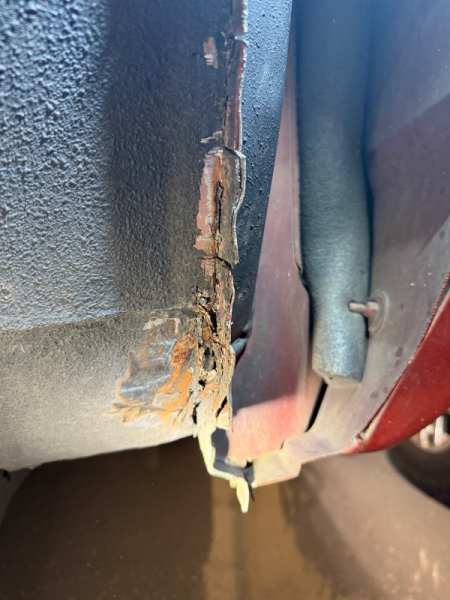
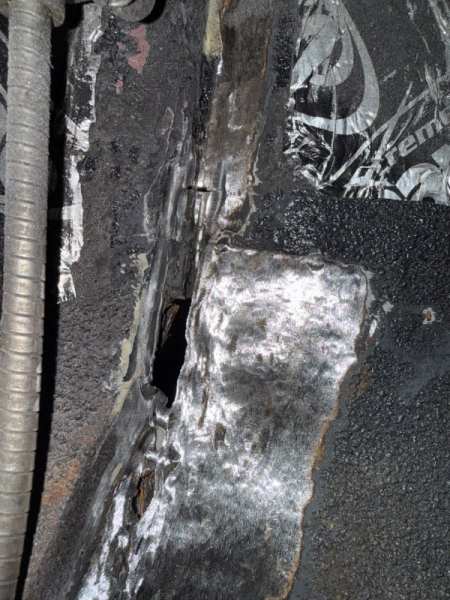
Had to make a small detour to patch a nasty water leak. Cutting out the old metal seam and getting some solid clean metal to work with. Then will weld it all up solid.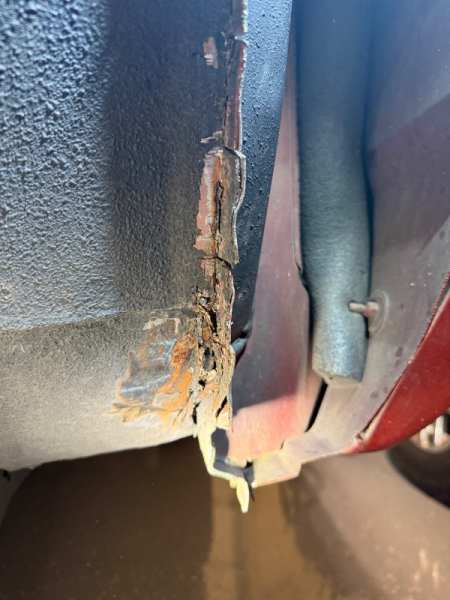
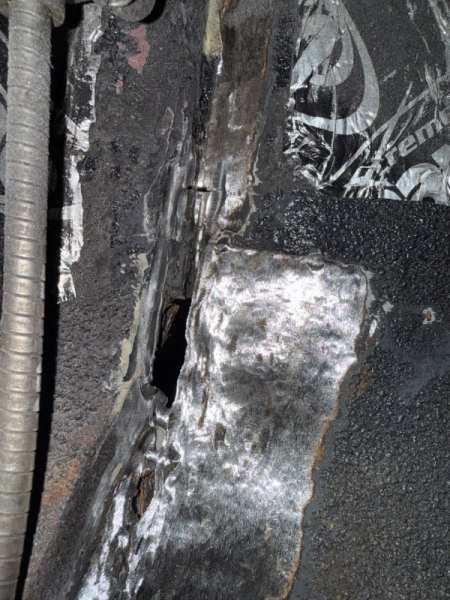
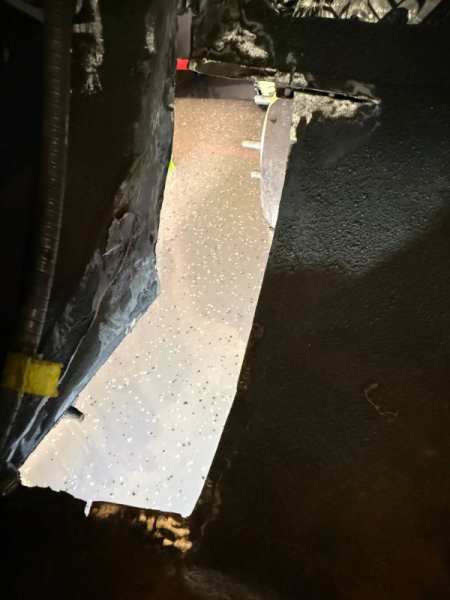
-
I should have seen this coming. Been chasing down a water leak in the drivers side floorboard for some time now. I had patched in some new metal back when the build was first underway. Near the end of the build, I installed Notch flares which, aside from looking great as an end product, are utter junk for fitment. Part of the install process involves the typical cut and fold of the pinch seam in the wheel wells. Well, as you fold that seem over, you start to slightly open up the two pieces of metal which are spot welded. As I lived in a monsoon climate, water of course worked its way down into those seems that opened up in the fold. This is the result:
-
Novak AX-15 short throw shifter
ghetdjc320 replied to Eagle_SX4's topic in MJ Tech: Modification and Repairs
Thats not a bad price for a short throw. However, Id be inclined to make one myself. We have a how to somewhere in the DIY section. -
What CC knows about stock Jeep radios
ghetdjc320 replied to NickyV's topic in MJ Tech: DIY Projects and Write-Ups
Pleased to report that this system is working great now. Just need to source a switched power supply on the board and finish refurbing the radio. The sound quality is superb in both the tuner and Bluetooth sources and there is now zero tuner bleedthrough as I created a digital audio relay system with Bluetooth priority. And the DSP is a tuning dream with endless routing configurations and functionality. I’ll use right angle 3.5mm trs plugs going forward for better clearance. Will also play around with installing a nice amp board at some point. Here is how it laid it out for this demo radio: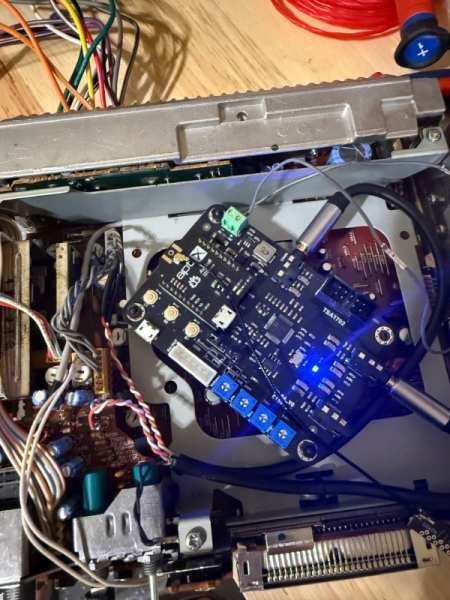
-
120mph full custom OE gauge cluster - $350 NW Arkansas
ghetdjc320 replied to ghetdjc320's topic in For Sale
Same here. Took me forever to source one as they are scarce now. Then was a giant pains to get it here. But it’s one nice unit to have when it’s all said and done. Plus 88k original miles is nice -
120mph full custom OE gauge cluster - $350 NW Arkansas
ghetdjc320 replied to ghetdjc320's topic in For Sale
There was For the XJ, but this isn’t the police package. This is a somewhat rare UK spec version. The XJ police package speedo was blue/white and looked like the gauge font from the renix era to a degree. -
I’m building a very custom setup. Look at my build thread “Project Tomahawk” in epic tech and my post in the diy section “what CC knows about stock Jeep radios” for full details
-
What CC knows about stock Jeep radios
ghetdjc320 replied to NickyV's topic in MJ Tech: DIY Projects and Write-Ups
The new DSP and bluetooth module has been programmed. These things are too cool in what they can do. With the Analog Devices DSP chip, you can create endless automatic signal routing pathways, EQs, ducking settings and so much more. So I wrote the program to do the following: Receive the analog stereo AM/FM signal and pass it through unless there is bluetooth signal present. If bluetooth signal is present (which is an I2S signal for a clean digital pathway and astounding audio quality) the am/fm is digitally muted from the system. The sensitivity for the ducker. is -80db (line level signal) and the dwell time is 5 seconds. I will adjust further if needed. Now we have a digital "relay" that wholly eliminates any tuner bleed-through without disabling anything on the original radio. Then I added a multi band eq system in the mix and will use it to tune the Comanche cab to perfection with my new audio setup. Really neat to inject this modern tech into these old radios and provide so much functionality along with sound quality that would rival most all aftermarket units. And just for kicks, I renamed the Bluetooth friendly name to "Tomahawk" At some point I may also install a nice mosfet amp board in one of these. That would eliminate the need for a separate amp in many installations. I can fit about 400w of class D amp into these units with the tape mechanism removed. With the right combo, I think I could setup a radio that would handle a perfect Comanche 2.1 audio system with the two main door speakers and a sub, all powered through what looks like a factory radio. It would likely have a little cooling fan on it and would have a connector for an 8awg power wire. Fun stuff -
These are all over on eBay. You just send them the info and they make you new labels.
-
120mph full custom OE gauge cluster - $350 NW Arkansas
ghetdjc320 replied to ghetdjc320's topic in For Sale
Price drop to $350 shipped. -
Original b pillar speaker brackets with kicker KS 4x6 speakers installed. $80-shipped
-
Is it closed all the way?
-
Engine Cooling - Master Thread
ghetdjc320 replied to ghetdjc320's topic in MJ Tech: Modification and Repairs
I often see the grand Cherokee fan clutch swap using a Hayden unit from Napa. I ran that and a 7 blade oe fan and shroud. Very good airflow with that combo. If you have a thicker radiator core though, there can be clearance issues. -
Modified OEM Radios “Feeler”
ghetdjc320 replied to ghetdjc320's topic in MJ Tech: Modification and Repairs
I’m assuming you’re using a usb thumb drive? You would need some way to control your media. Typically that’s a smartphone or iPod style device with either a Bluetooth or headphone output. If your music is stored on a drive, you’ll need a way to access the file index and control playback. Although not impossible, it would take a substantial amount of work to build one that does that.