RAH66
-
Posts
43 -
Joined
-
Last visited
Recent Profile Visitors
1319 profile views


RAH66's Achievements
Can Spell Comanche (2/11)
-
I'm talking with the buyer on Facebook right now, I'm seriously interested in this.
-
1992 Comanche - North Charleston SC
RAH66 replied to scguy's topic in Craigslist/eBay... i.e. Not Your Stuff
Man I wish I was closer... could be a fun project to replace my stolen '92. -
Thank you for the suggestions, I've been trying to get some eyes on it in facebook groups. Good idea about the Mexico MJ group, Pete. My wife speaks spanish so I can have her help me write a post.
-
Thanks for the sentiment and keeping an eye out, everyone. Theft has never been a huge concern since I don't drive it a ton and it lives in my garage 99% of the time, I just had it out for a few days because I needed some garage space. Ugh. If by some miracle I do get it back I will absolutely add a killswitch and look into tags.
-
Hey all, unfortunately my Comanche was stolen at 5:30 AM this morning in San Diego. I have security cam footage of them pulling up and driving away a couple minutes later right from in front of my condo. I've already filed the stolen vehicle report, but if anyone happens to see it, please send me a message ASAP. I am heartbroken right now. I put so much time into this thing with my dad and it was such a special project for us.
-
Speedometer VSS hook up after SYE install
RAH66 replied to RAH66's topic in MJ Tech: Modification and Repairs
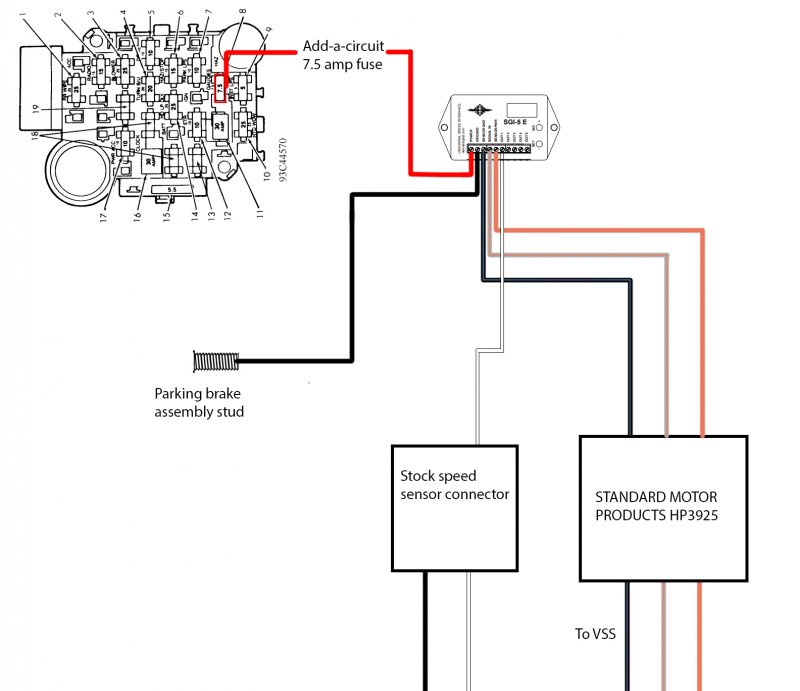
Alright, got it working! Here's what I ended up doing, for anyone else curious. Anyone else with more electrical experience than I see any red flags with this setup?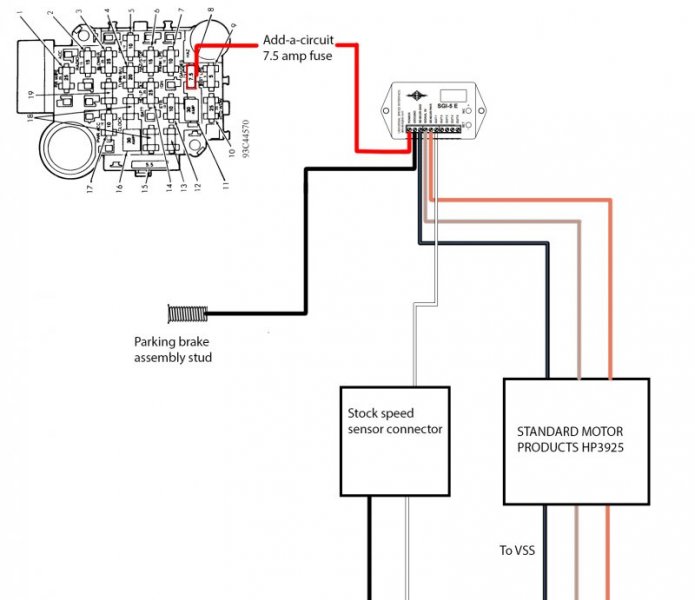
-
Speedometer VSS hook up after SYE install
RAH66 replied to RAH66's topic in MJ Tech: Modification and Repairs
Honestly just a misunderstanding on my part of the SYEs and Speed Sensors. At the time I ordered it I still wasn't sure what size gear and tires I was gonna go with, so I got the one with the electronic speed sensor thinking that was the only one I'd be able to easily reprogram after the fact. I realize now that I didn't need it, but oh well. -
Speedometer VSS hook up after SYE install
RAH66 replied to RAH66's topic in MJ Tech: Modification and Repairs
Well... that's unfortunate. Theoretically, according to this post, I don't need the signal converter, as long as I supply 5v to the new VSS. I can try that if this thing doesn't work out. -
Speedometer VSS hook up after SYE install
RAH66 replied to RAH66's topic in MJ Tech: Modification and Repairs
I installed a Slip Yoke Eliminator which uses a hall effect speed sensor instead of the gear driven speed sensor that came stock. -
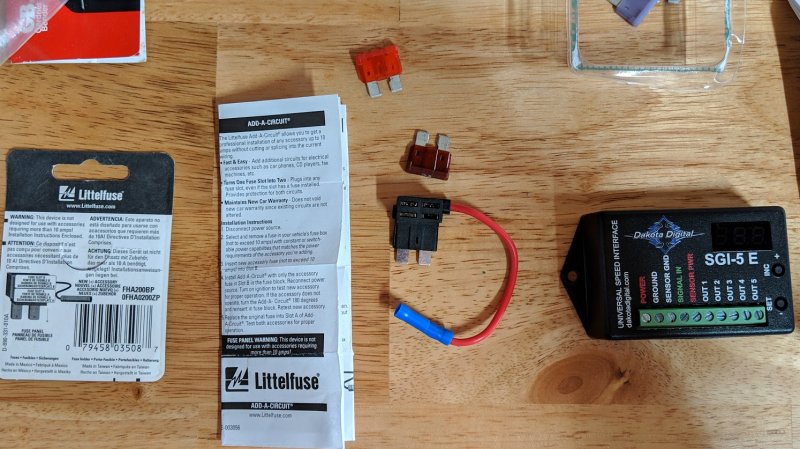
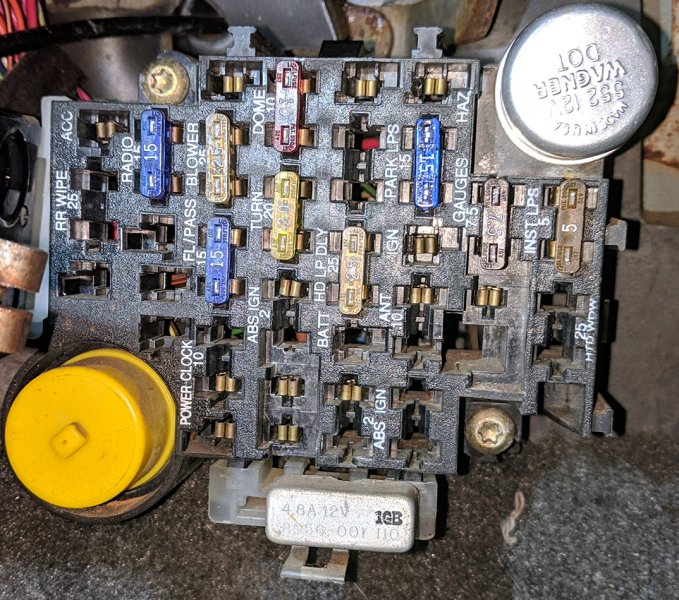
Here's where I'm at: Transfer case has a 3 wire speed sensor (VSS), and my Jeep is a 2 wire VSS stock. The parts I have: Dakota Digital Universal Speedometer Signal Interface SGI-5E (USSI) Add-a-circuit 3 wire pigtail connector plenty of wire I think with my tire and gearing combo I'm about as close to stock ratio as I could be, but I figured I'd get the signal converter to have complete control make my life easier if anything ever changes in the future. I have 2 questions: Question 1 To power the USSI, I got an add-a-circtuit to get 12v from the footwell fusebox. What would be the best socket to draw power from? I'm thinking I'll use the unused POWER CLOCK 10 amp socket for power. However, since the GAUGES are 7.5 amp, should I stick with 7.5 amps and stick my add-a-circuit in there? Or just use a 7.5 amp fuse in the 10 amp POWER CLOCK socket? Or some other fuse / socket entirely? I can't seem to find any info on how many amps the USSI needs. Question 2 I tried tracing the stock speedometer wires to the gauge cluster, but once it meets up in the harness in the engine bay I have no idea where it goes. Does anyone know where the two stock speedometer wires are that I can send the modified USSI signal to? If that's unfeasible, I suppose I could just send the modified signal wires back to where the stock wires used to connect to the VSS. Seems a little messy, but if the alternative is risking damage to my gauge cluster or something else in the cramped area under the dash, I can live with it. I appreciate any guidance!
-
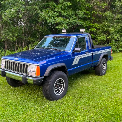
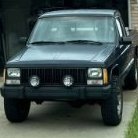
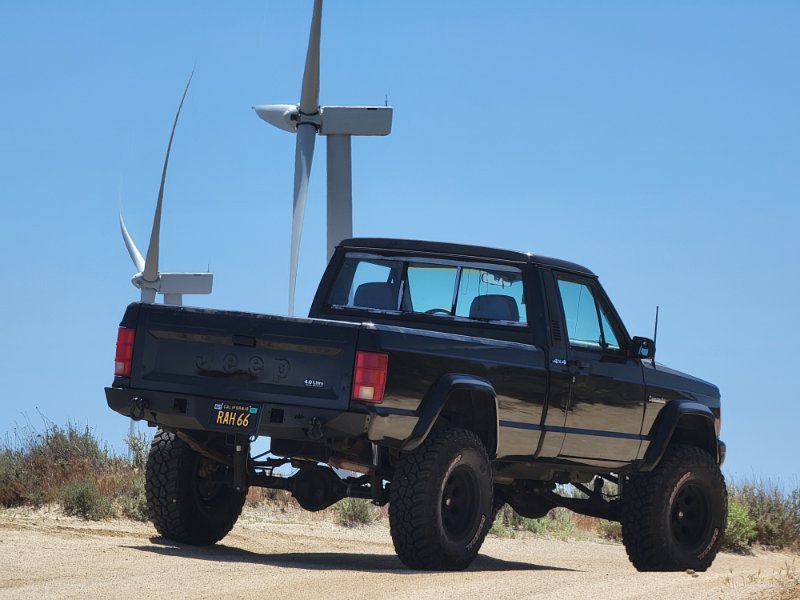
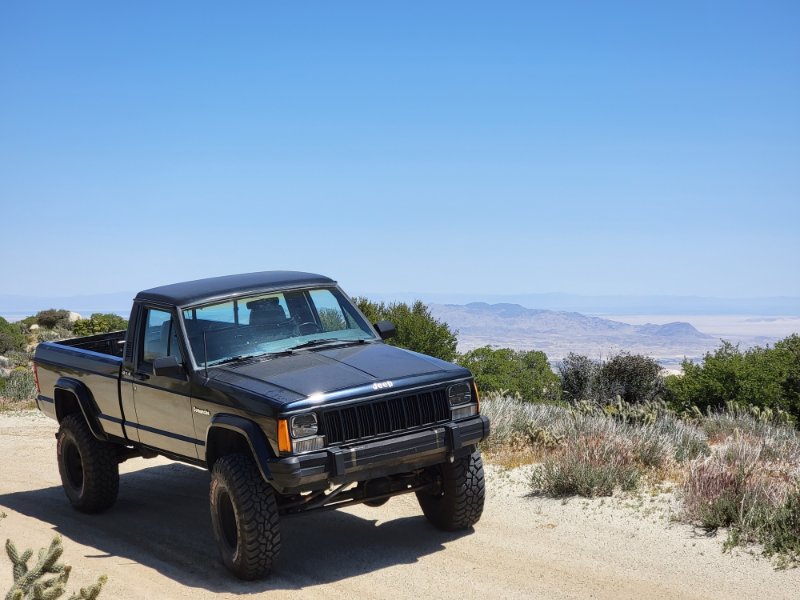
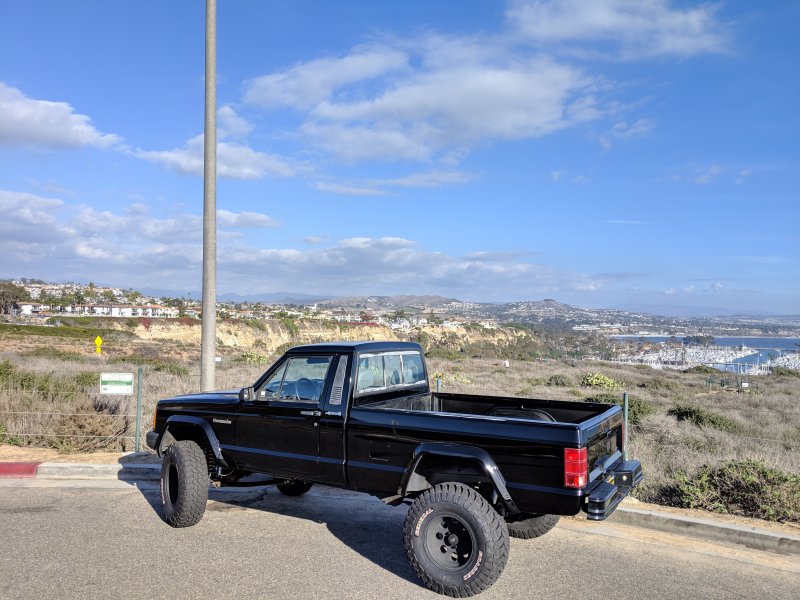
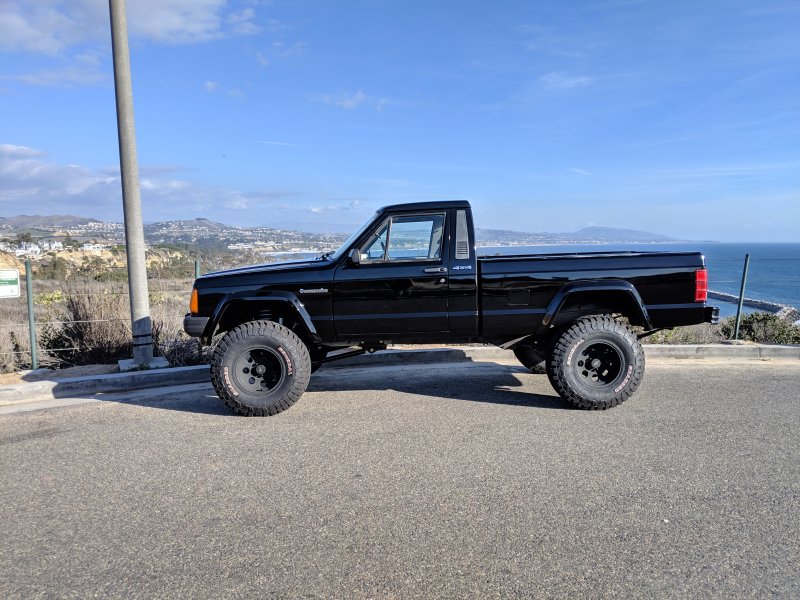
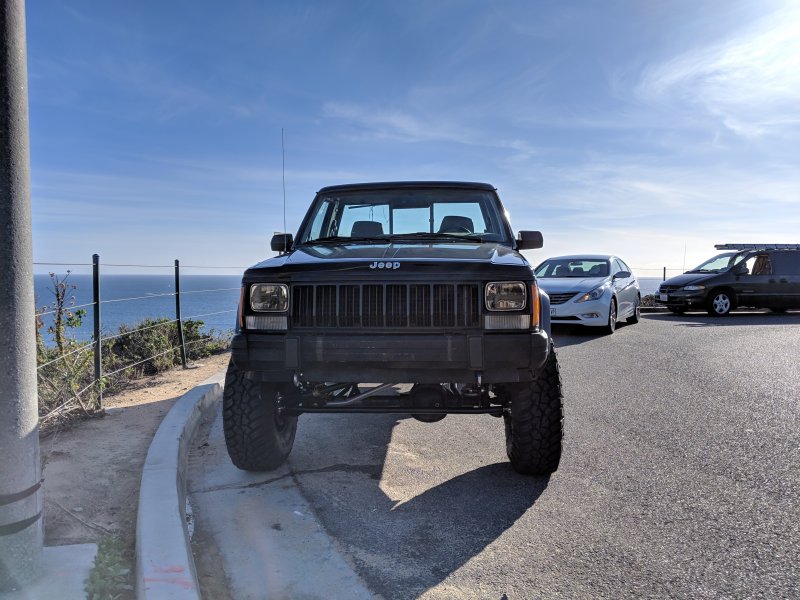
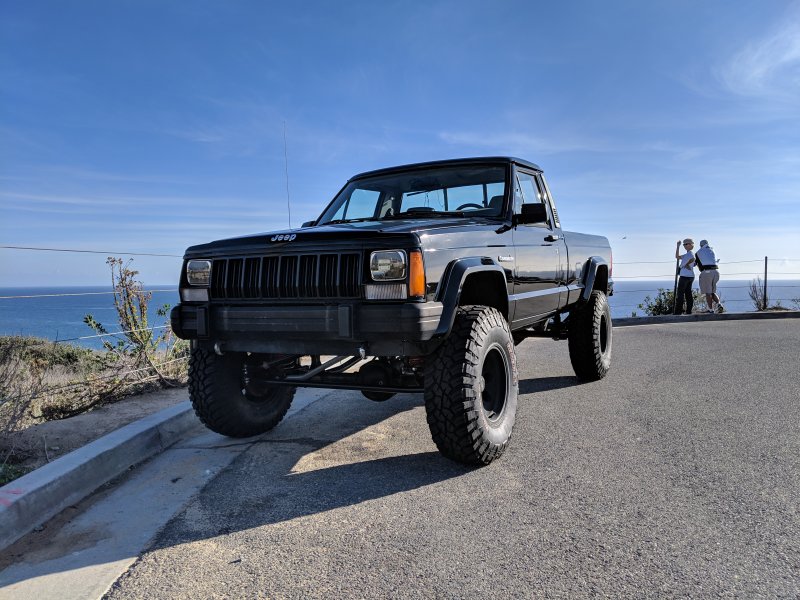
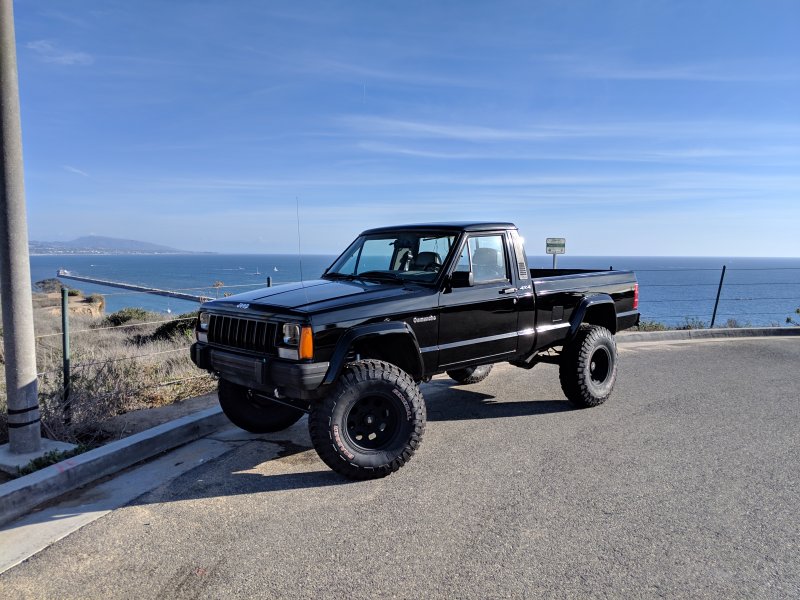
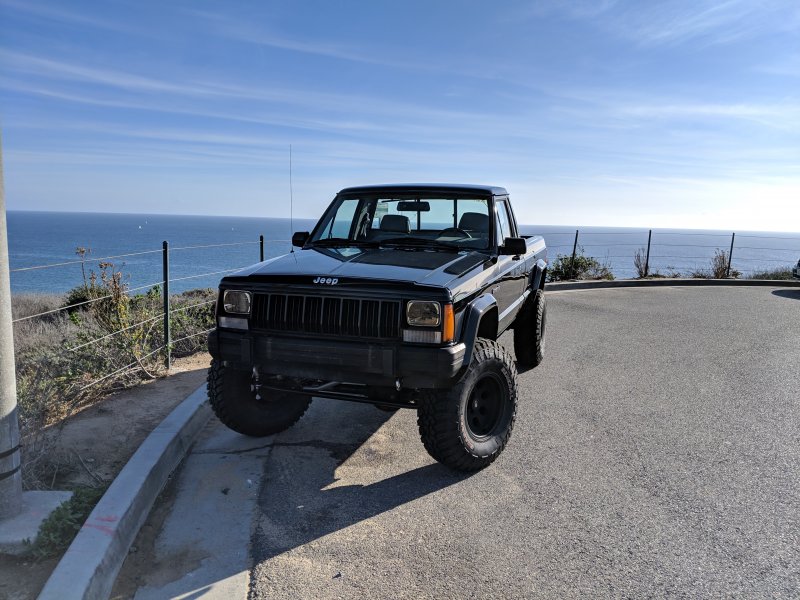
Hey all... figured it's finally time to start a build thread. When we got the truck, my wife lovingly named it after one of her favorite animals, the Pangolin. Over time we've tended to just call the truck "Pango", hence the title. First of all, I want to talk about my mentality and philosophy going into this build. With a combination of a lot of patience and even more luck, I managed to grab this 1992 Comanche Eliminator a couple years ago. I got it bone stock from the original owner. It's 4.0, 5 speed 4x4 with a D44 axle. I pretty much found a unicorn and am beyond grateful and don't take it for granted. I wrestled for a long time with what to do with it. I got it because I wanted a project vehicle to work on, but after I got it and its rarity sunk in, I started wondering if I should even do any work on it. The truck, while in nice shape, is definitely not in pristine, just rolled of the showroom floor condition. The owner used it for years as his farm truck, so, the body has its fair share of dings, dents and scrapes (and has been repainted at some point). So even though I can show off the best angles in photos, it's still a 25 year old, well used truck under the hood. I had a vision in my head of my perfect Comanche, and after driving it stock for over a year, I decided to just go for it, because I'd never be truly happy with it without doing what I got it for in the first place. With that being said, I still wanted to respect the truck and not turn a beautiful, rare machine into a hacked up shell of its former self. So, with one exception (which I'll explain later), everything I've done to the truck is either a better-than-stock replacement, or could be brought back to stock if I ever wanted to for any reason. The axles aren't a defining characteristic of the truck so I modified those more freely. I planned the build for months, and wanted a "no regrets" type build, where I did exactly what I wanted the first time so I didn't end up buying a different part later on. With all that said, on to the mod list: LIFT CavFab Alpha 3 link long arms CavFab heim steering Rubicon Express springs Rubicon Express track bar, bracket, and brace Spring Over Axle in the back with TNT U-Bolt Eliminators Bilstein 5100 series shocks all around JKS quick disconnects Prothane progressive bumpstops Prothane bushings for sway bar and rear leaf springs WHEELS & TIRES 33x10.5 General Grabber X3s Pro Comp 69 wheels BRAKES Dual Diaphragm Brake Booster + master cylinder Teraflex rear disc brake conversion Iron Rock Offroad extended stainless steel brake lines for front and rear Load Sensing Valve Delete AXLES 4.10 gears Eaton E-lockers front and rear DRIVETRAIN JB Conversions Super Short SYE Tom Woods rear driveshaft That's most of it, probably a few other smaller things here and there that I forgot. I have a garage here at my home in Los Angeles where I can park it, but it's a small 1 car garage with no power. So I did all the work at my parents' garage down in San Diego. I started this build June 15th, and just finished last weekend. The build was a lot of fun and I learned a ton. Of course there were bad day bad days and good days, but we got through it all. Of course it's not "done" (it never will be), but at least it's drivable! So, now that it's all said and done... here are my final thoughts, and, with the incredible power of hindsight, things I wish I would've have done differently. Right now, the thing I most wish I had done differently was not done a long arm kit. First of all, the install was a huge PITA for a first time lift kit installer. I learned during install that Comanches are only mostly the same as Cherokees in the front... and I think I found all the differences. The brake and fuel lines route differently than Cherokees... RIGHT where the upper control arm mount goes. There are also some braces between the frame and the body that got in the way. Short arms would've been waaaaay easier than I realized going in. Secondly, the only body modification I did was to make room for these long arms. I cut off the lower portion of the original control arm mounts, and cut away one of those frame-to-body braces. These body mods, even though they're pretty minor, do still bug me more than I thought they would. It's the only part of the body that I modified. If I had to do it all over again, I think I would've just done adjustable short arms with Rocky Road's Control Arm Drop brackets, so I could've kept the body 100% stock. Still gives me a little knot in my stomach, but what's done is done, so I'm trying to just enjoy the truck now. I guess one minor little solace is that I managed to remove the lower control arm bracket's Comanche specific braces in one piece I do, however, tend to suffer from "the grass is greener" a lot, so had I gone short arms I probably would've wondered if I had gone with long arms. So it is what it is. That little guilty bit aside... I'm so happy with how it turned out! Like I said in the beginning, I had a vision in my head of the "perfect Comanche", and this is it exactly. I couldn't imagine a more perfect looking truck for me. Every day that I walk out from work and see it sitting there it gives me butterflies in my stomach So what's next? First thing up is getting the speedo to work. I didn't realize that the JB Conversions SYE had a different style VSS, so I'm hopefully going to get that working this weekend. Follow up info and some questions I have about that to follow a little bit later. After that, I want to build some rock sliders for protection. (bolt-on, no more body mods besides drilling some mounting holes). So, on to the pictures!
-
Thanks, Pete! I know I don't post much, but you and this forum have been a HUGE help on my Comanche build, and many, many questions of mine have been answered by searching through this forum.
-
I was working on my Comanche at my dad's house in Escondido all weekend. It was brutal.
-
Upgraded Battery Cables!
RAH66 replied to MeanLemons's topic in Vendors- members making products for MJs
Got my cables installed. Would anyone mind double checking my work before I fire it up? Just to make sure I didn't miss anything and catch my truck on fire haha. Imgur album with high res images Overview with labels: Another overview: Connection to starter (can also see the cable going from the bat- to engine block): Connection to engine block: Another view of connection to engine block: Connection to alternator (I had to take a dremel to that plastic protector thingy): The cable going from the engine block to the cab: How I set up the fuse box: -
Rusty's metal taillight housing
RAH66 replied to riverrat92's topic in MJ Tech: Modification and Repairs
The guys at Dirtbound Offroad hinted that they may be developing something soon: https://www.instagram.com/p/Bf4J0bhlgCc/ If you can be patient it may be worth waiting to see what (if anything) they come up with.