

MancheKid86
-
Posts
1590 -
Joined
-
Last visited
Content Type
Profiles
Forums
Gallery
Everything posted by MancheKid86
-
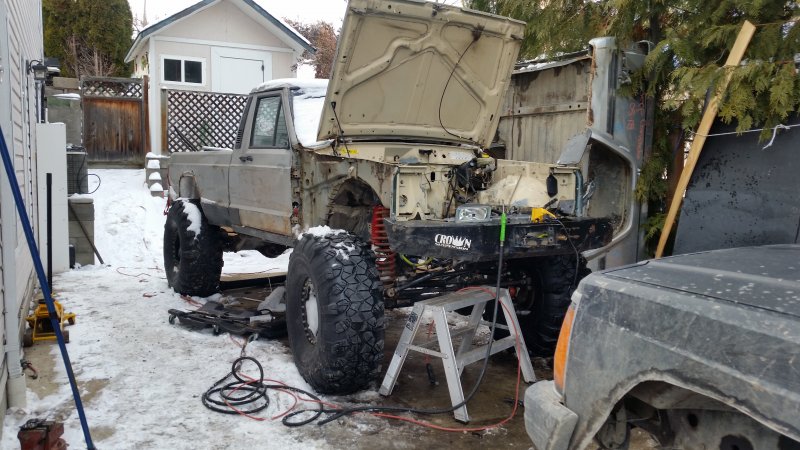
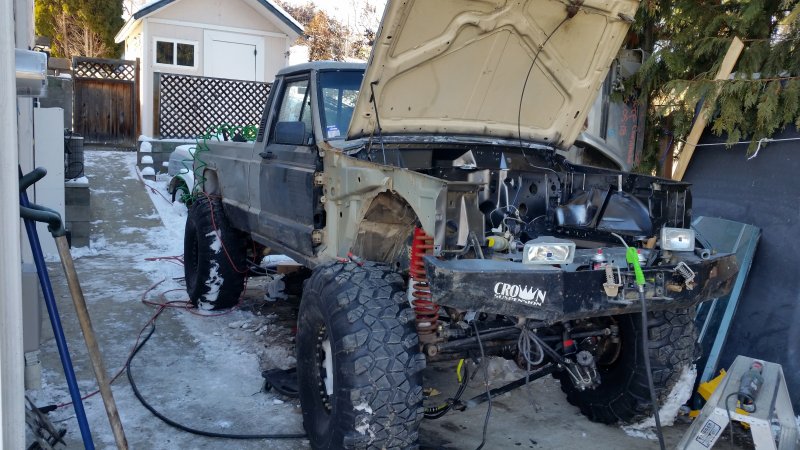
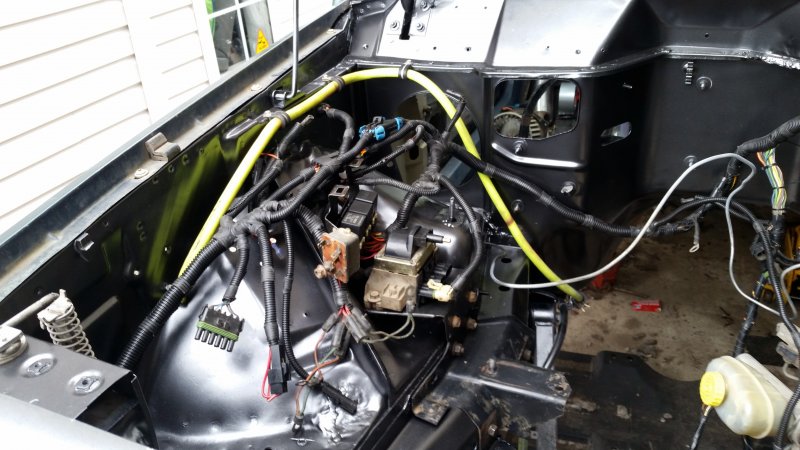
ill eventually go through my pictures and back log them onto here but here is some for now! just need to get the new box bobbed and two dents pulled on the cab and i can start prepping for paint (doing doors fenders grill ect off of the truck bed and cab separate) i spent a day sanding the engine bay with 180 and primed it, and then some spray bomb of magnetic metallic gray my wiring harness was wrapped on the bench so once everything is installed ill re wrap them for better suited orientation. fit the power doors, working on making a harness for those currently things are coming along nicely, have not heard back about my crank and camshaft yet (fingers crossed they can be saved)


-
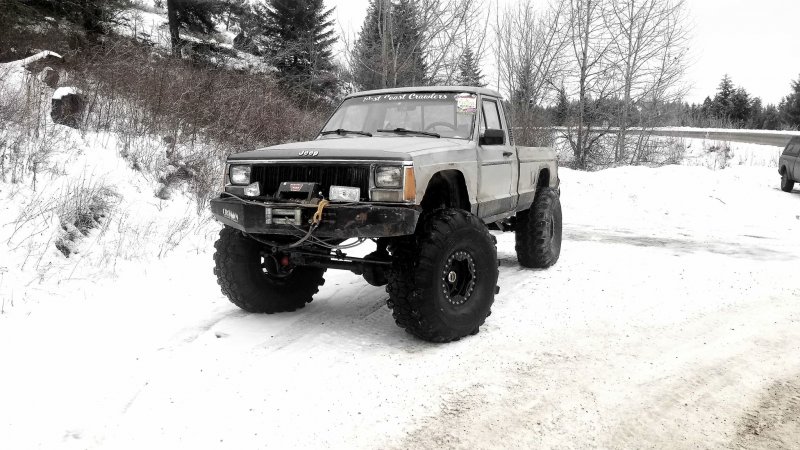
trucks still kicking. i had a great season snow wheeling that came to an end some what short half way through i rebuilt the entire front end and tossed some mevotech TTX balljoints, (worth the money, still intact unlike a moog or a spicer) I blew the motor, currently i have it out and waiting the machine shop to tell me what i need to order for parts. spun the #6 connecting rod bearing and have a dished lifter (seeing if the cam and crank are even salvagable) over the last week i have removed the engine, stripped it down and sent it out to the machine shop have trans and tcases out to be torn down and bearings replaced have the engine bay stripped and almost ready for paint, removed dash stripped the ecu and main body harness down of all the unnecessary extra wires and untangled the rats nest of the stock harness. the whole thing fits in 5/8 loom now removed the ecu daignostics ports, which ironically never worked from factory. as per the wiring diagram it was miss pinned to C12 instead of the appropriate D12. it never worked from factory (i could have just swapped the pin and made it functional but i had previously decided that it was being removed altogether) waiting for it to stop snowing and then ill start fitting the power doors i guess I'm doing a complete tear down and re wire, i have my dash on the bench and currently thinning out the wiring harness on that also. plan is to have it painted and running for may long wheelin will post some pics someday, theres just so many to go through and sort chronologically that I tend to put it off tell it gets to overwhelming lol my other comanche is still alive! just rolled 80K Miles on her too (~129Kish km)
-
Two PCV valve kits - hose to air filter box
MancheKid86 replied to Cali Cruse's topic in MJ Tech: Modification and Repairs
follow cruiser54's valve cover mod. http://cruiser54.com/?p=131 -
i ended up finding play in my upper ball joint bore of the knuckle (the ball joint did not have play) so i sourced out a new scout II knuckle for $20, tossed some new ball joints in it and reamed it for a over knuckle 1 ton TRE i had to cut off the old knuckle, since it was no good, i had zero issue chopping it up. otherwise i would have taken a sawzall and cut the upper and lower balljoints out with the RCV's in a Scout II spicer 44 (dana 44) they have to be installed assembled at the same time as the knuckle is being installed ( it is a bit of a royal pain) in order to disassemble the axle, you literally have to cut the knuckles off. it is a one way installation. once they are installed. there is no nice way of removal at this time, i refreshed 1 ton over knuckle steering with all new TRE's and put it all back together also just some randoms. i refreshed my comanche badges, cleaned, polished, repainted the black and a generous amount of clear coat and side by side my buddy's 2" lowered cherokee, that walks most of the imports in town and me testing out the new parts
-
i then painted the axle, once it was stitched together. everything else had a thorough final clean, then mostly every part got a fresh coat of paint. tossed the axle back under the truck and back out into the bush there is a few reasons why i stayed with the dana 44 under the truck instead of going to a 1 ton axle unsprung weight, would to too great and i would have to stiffen the truck (i will down the road but not now) before i could even think about driving it again new rims and tires all new gears locker upgraded shafts ect... for me currently that financially isnt an option the biggest one though is diff clearance. the way the truck is set up is to achieve maximum diff clearance ,the axles are strong enough built up to withstand the 39.5 tires snow wheeling is HUGE here, and it is my favorite season. diff clearance is critical. if i went to a 14 bolt and shaved the lower portion of the housing i still would loose clearance and that is not an option. that being said, i also maintain a large sidewall keeping the 15" rims
-
I then cut the retainers off my axle shafts, since my disc brake conversion brackets become the new retainers and with the help of my friend designed and made a truss for the new axle
-
longview, you must be forgetting the 94-95 yj's that came factory with external ax15's buuuuuut since my last update a few things have happened. the last trip to apex, we stopped in the nearest town to get some food. while hanging out in the parking lot i noticed my rear diff housing had failed. (the right tube has always been bent since i owned the truck, i guess i gave it the final nudge haha) so called the tow truck and get er hauled back home. i ended up picking up another scout II d44 housing for $40, it needed alot of cleaning before i even was able to put the gearset in. but i shimmed it all into place. and meticulously cleaned the entire housing
-
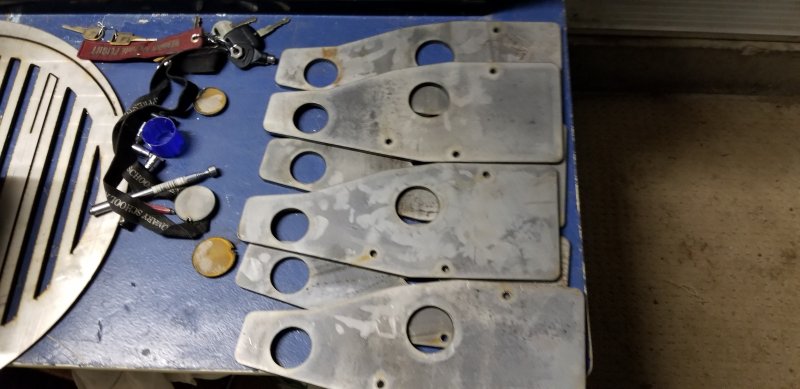
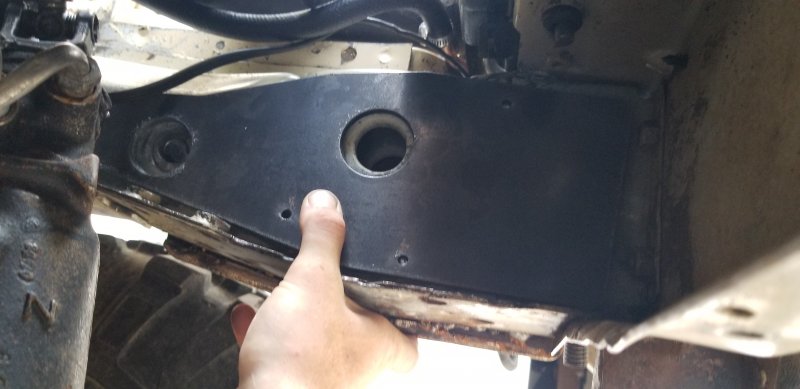
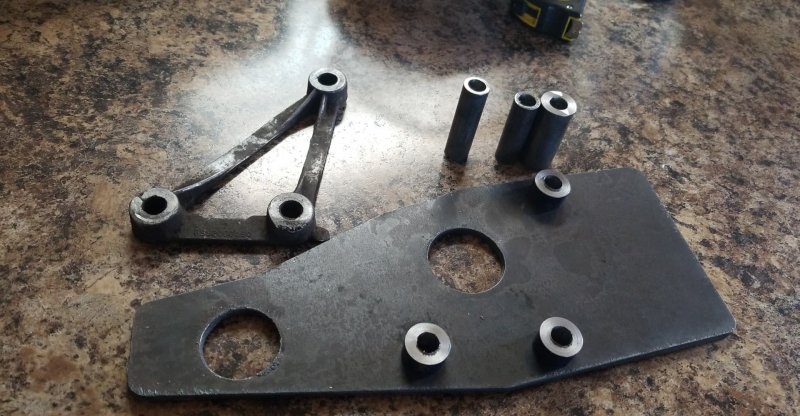
Seeing if theres any interest out there, I have made a stiffener/repair brace for the MJ/XJ that I feel would be a good upgrade for any one who needs one. Cut from 3/16 plate steel, it has three steering box mounting holes drilled. And the two OEM factory flanged holes have been exposed for another surface to be welded to, and to still be able to utilized for extra areas to mount hardware for your offroad bumper brackets As for the spacers I have used dom tubing reamed to a .625 ID to ensure zero play of the hardware. I still need to have the spacers welded on. I figured $80 CAD + shipping (which is currently $62 USD +shippingwith the exchange rate)
-
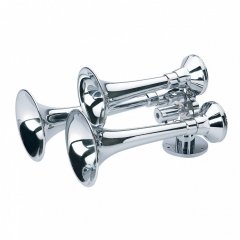 ditch the electric soleniod. it freezes open and keeps air going through, can't shut it off XD ask me how i know. just use a manual ball valve. more air. louder. and shuts off.
 -
lol i gotta read past page one before i post XD
-
you made me check, even did a search query all could find was so i am confused on what your talking about, i think that explains itself? thanks for reading my build thread though! i guess i should of put a comma after external slave to make it easier to understand
-
I think you mean YJ transmission with an external slave bell housing? Otherwise it sticks out under the truck like a soar thumb under the frame to all the rocks
-
here's some of the pictures from this trip, with all the fires going on right now it was very smokey
-
I ended up replacing the track bar bushing at the same time as all the control arm bushings. at this point i "should" have been death wobble free. so i go for a rip down the road and one bump, death wobble, baaaaaaaaad finally fed up with it occurring even thought i replaced everything in the front end within 1500 km of each other found the culprit i tore the front apart and starteda repair, i took some DOM and used a reamer to obtain a true .625 ID for the new hardware. i then used a unibit and opened the inside of the frame up just enough to install the sleeves.welded it all together and i was able to drive 90 mph on 40's without a steering stabilizer (could have gone faster but didnt want an impound or roll the damn thing) this is my repair in final before it was welded onto the frame. like i said i don't have final pictures ever on the road we are!
-
onto the engine bay i went, gave it a good clean, and re routed/relocated some things (at this point the stock airbox still remains, i want to relocate it into the wiper cowl) i ended up routing the front airline and winch power side by side on the passenger frame in the end. for some reason i only take mid way pics and no finals haha every bare wire was loomed i relocated my washer fluid reservoir to my truck box and my and over flow reservoir behind my bumper also at this time i added more stickers to my window, as a bandaid and replaced my lower control arm bushings they are from a dodge ram 3500
-
afterwards, i tore the interior apart, acquired the remaining trim pieces needed from a donor Comanche to finish the interior. i striped every panel out, replaced every insert and fastener for the trim pieces. (no pics of them but i swear they are installed) gave the cab a good wash. and proceeded to chase my interior wiring gremlins. i was able to gain full function of my interior lights after soldering in some new wire. i may have even steam cleaned the seats, you should have seen the amount of dirt that came out of them
-
the drive back from apex was pretty rough, so i decided to look into what was the culprit. first thing i found was my upper control arm mount! at this point, i replaced all upper control arm bushings, repaired the control arm mount and effected area on the frame i also picked up some TJ bushwackers, the netted more coverage then the XJ ones. i now have to take them off when i go down trails
-
it definitely was a scenic trip! i had such a good time i made it back again in august to do some more exploration and run some of the trails
-
after getting everything packed i made it out to apex at 3:30 am spent the day there, checked out some gold mines and drove home
-
back in june i lost my rear passenger bushwhacker down some 100+ KM of FSR still havent found it (maybe if i go back that way i will, LOL) i ended up getting a message from one of the local clubs telling me to get my junk together and get wheeling so i tossed a set of shocks in the front and put some garden trim on to keep me from getting pulled over
-
thanks! here's some pics from yesterday.
-
not much new, truck went out a few times and i had to reseal the rear outer axle flanges after the disc install, it was apparent that they were leaking onto the new rotors. have a new set of bilstiens for the front, i have to relocate the lower mounting flanges just trying to get the suspension to cycle correctly with them with their larger body length. i may return them though for a stiffer valved shock. possibly in a newer " short body " took my mom out 4x4ing for her first time ever. she LOVED it! had to take a 2 step for her lol have been spending too much time on my buddys 4 runner. full re wire and i have been meticulously polishing and cleaning/parts fab
-
my brakes came in last week! the reasons why i went to this style of disc conversion: one bracket broken on old setup. only one caliper in the rear e brake levers to stay legal were non existant serviceability wasnt the greatest. they were just plain tired new style disc allows rotors go go over studs and seat on external axle flange. gives me another 3/8 of an inch width to the rear on each side! brackets actually are the new axle bearing and seal retainer. i left my custom cut ones on for extra measure (had the thickness doubled of oem) but the old retainers are no longer needed. the T bolts given in the kit for the axle flange lack in quality. they stretch easily so i replaced them with grade 8 hardware instead. look not bad either i ended up getting extended wheel studs than what was suggested. i ran into the issue where my wheel spacers were not in safety. somewhat unnerving to see not even a single thread of wheel stud coming out of the nut so longer studs it was. infact... they were so long i had to lob a good 3/8th off each one so i could bolt the tires back on! (totally okay with this, atleast my wheel studs are in proper safety) will get some more pictures rolling soon!
-
The Golden Eagle MJ
MancheKid86 replied to jbain's topic in MJ Hardcore Tech: Epic Journeys to Greatness
love the build! and your selection of tires! you'll enjoy the sector shaft support and rcvs. with the 40's i definitely notice a difference with the steering brace with sector shaft support installed. the rcv's claim to be quiet but they do make noise just so your aware! keep it up -
cut it up and put it on my truck. turns out since ive been gone my good friend now has a tube bender and plasma cnc. going to build some armor for it after the bed bob is complete. (if i don't go up north for school first)