

88mancheman
-
Posts
143 -
Joined
-
Last visited
88mancheman's Achievements
")
Comanche Fan (3/11)
-
Looks to be the wires for the 4WD indicator switch, the switch itself is usually on the driver side of the tcase on the top of the unit on the planetary section of the case (kind of above the front driveshaft on the part that attaches to the transmission if that makes sense)
-
[mention]eaglescout526 [/mention] may have hit the nail right on the head since OP said it would cool off when he was moving again
-
I have to agree with@WahooSteeler if your running stock control arms it’s cheaper & less of a headache to just replace the whole control arms as those bushings can be a pain to press out without ruining the stamped steel control arms, for about $120-150 you can get all 4 control arms & new axle side bushings with them, it’s something you could easily do with a good rental balljoint press.....(or a large hammer)....and a free afternoon :)
-
First thing that comes to mind would be a coolant flush, it sounds like there might be some junk in the cooling system not allowing it to work correctly, my other thought is on the later model XJ & I believe MJ’s had a smaller aux fan for the ac condenser that is suppose to kick on around 220 or so if that is not kicking on there could be some other underlying issues, also if you don’t have an aux electric fan it’s never a bad time to add one for peace of mind! :)
-
Someone else may chime in but if the little lock tab is broke or missing the only way I’ve found to grab that nut is to use an offset wrench like this Unofortunaly the last 2 or so trac bars I’ve remove seemed to have the nut frozen or welded to the bolt or something to the point where the nut would not spin so I just took a sawzall and cut the bolt between the mount & the trac bar towards the nut side of the bolt and slid the bolt out
-
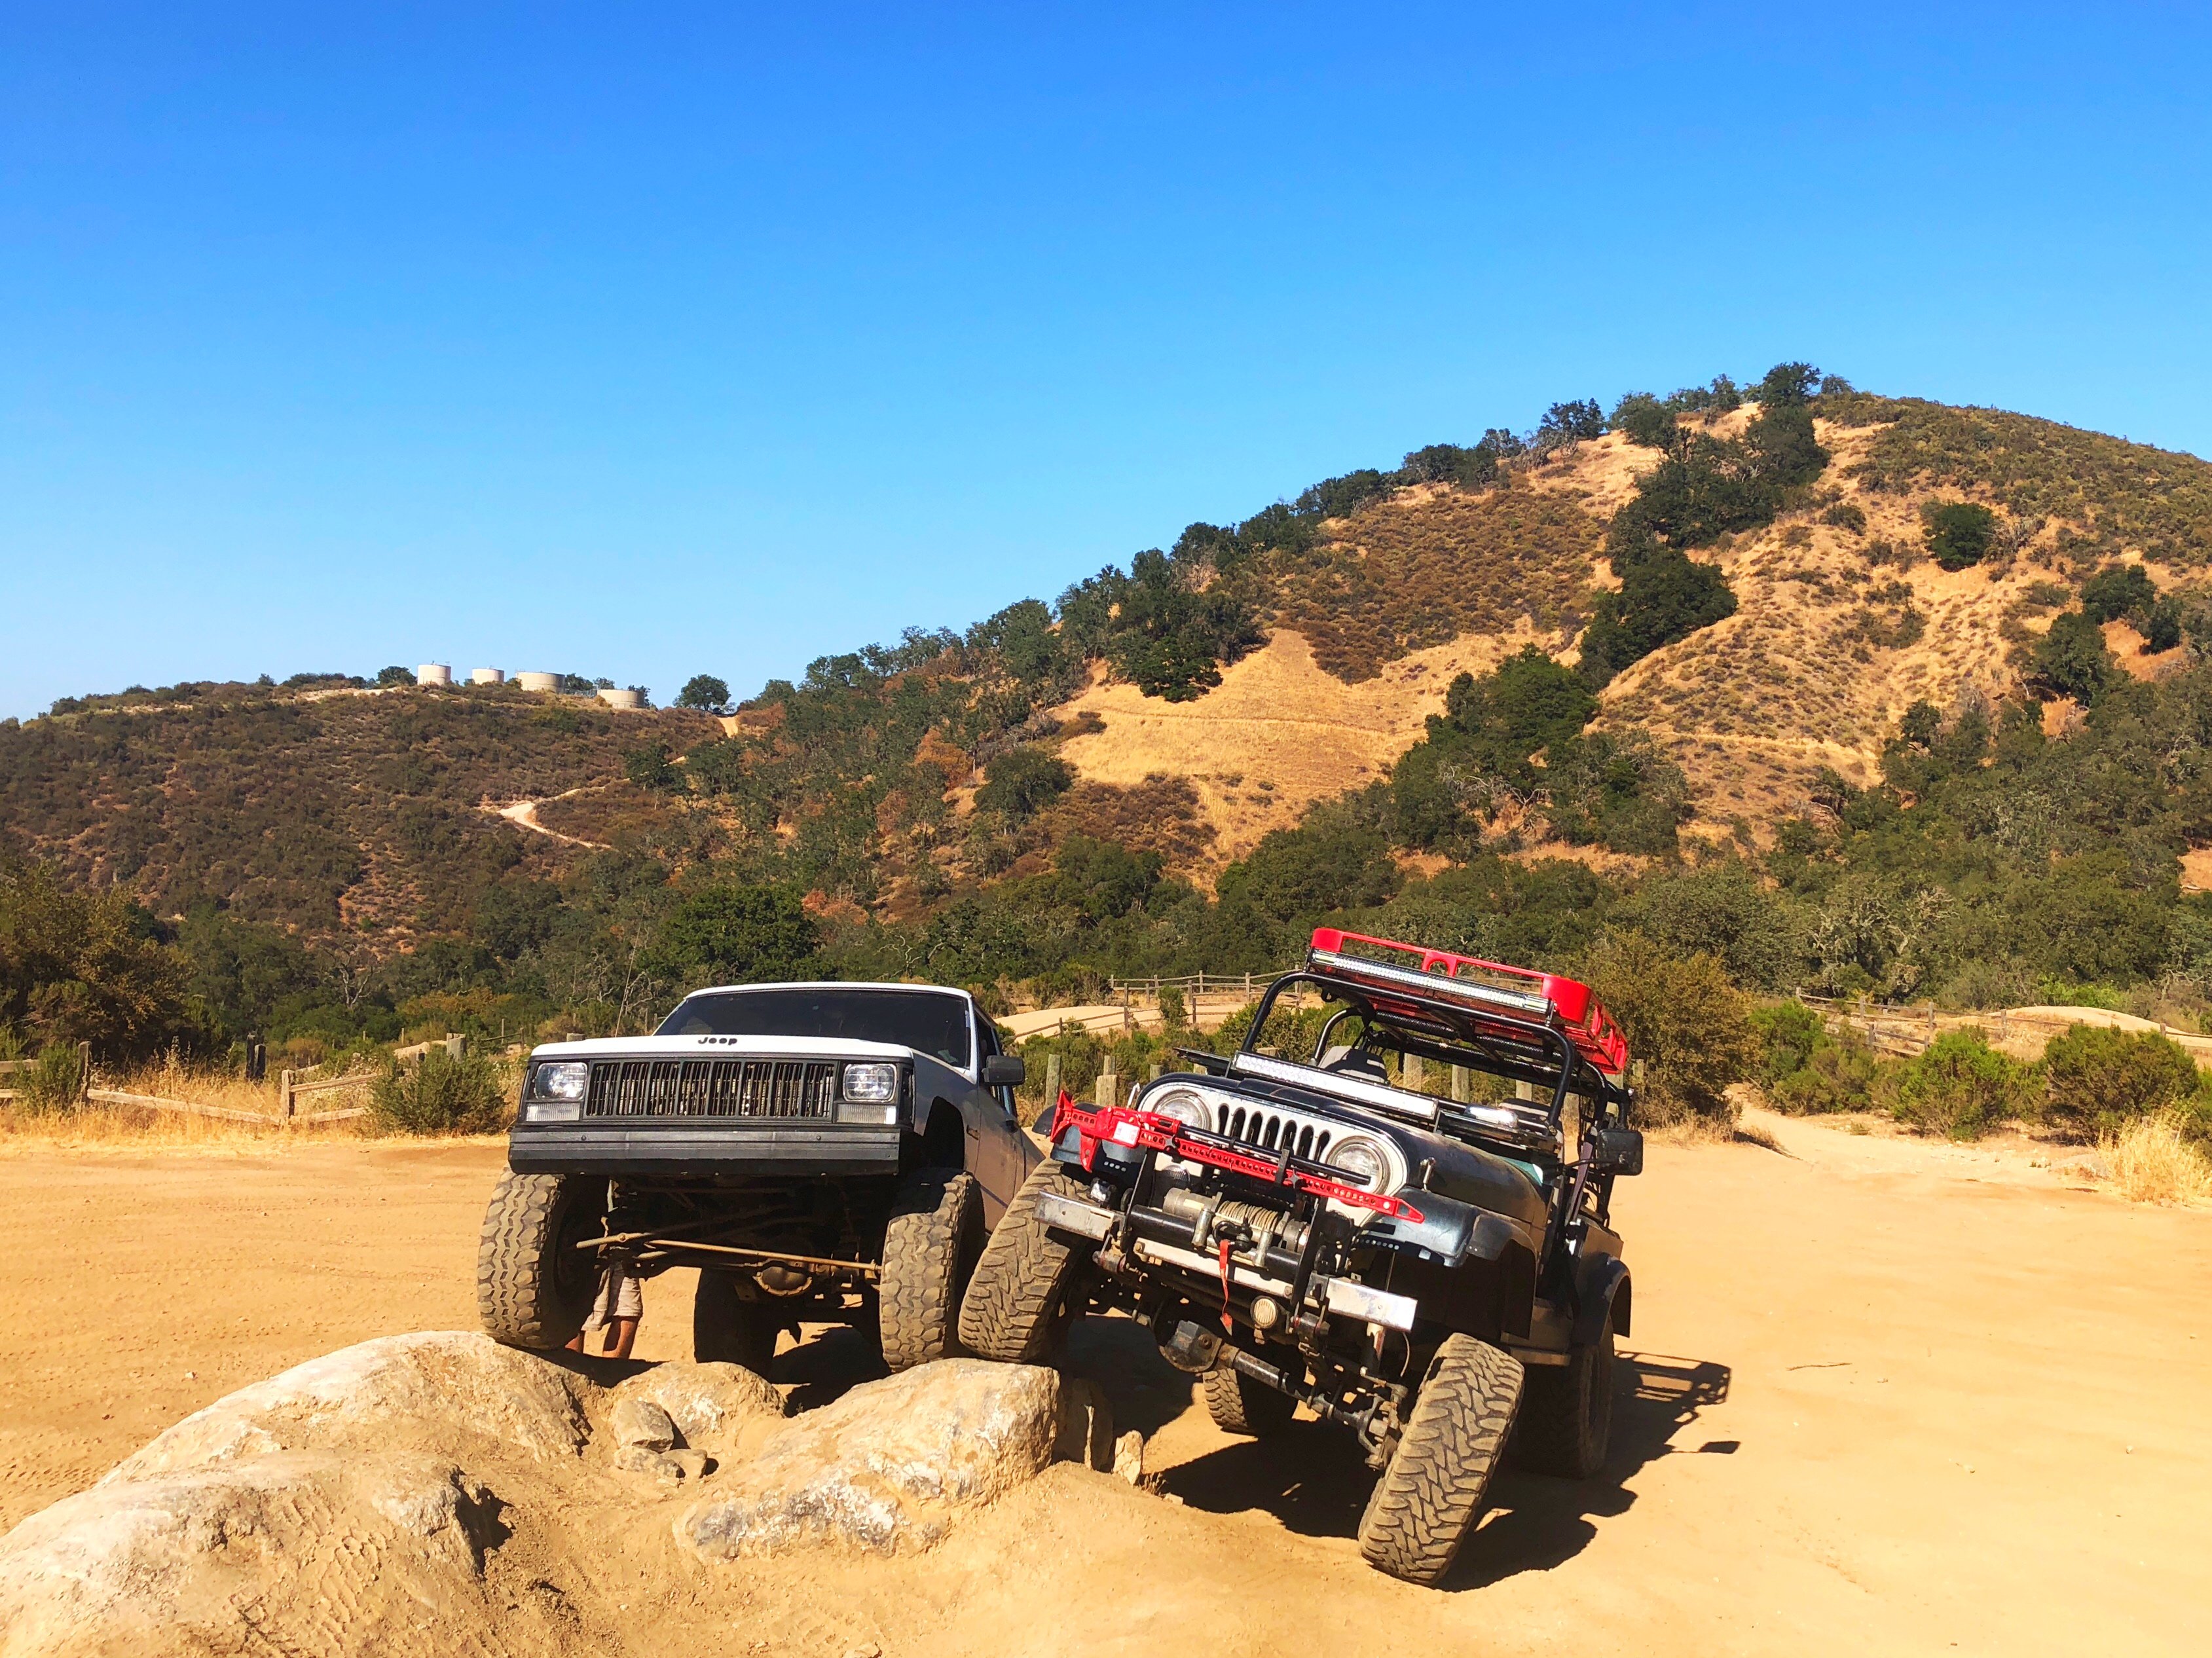
1988 Comanche Pioneer Project
88mancheman replied to 88mancheman's topic in Member Projects: Your Comanches
Got around to installing my new crossover steering from cav-fab last weekend too, I must say for about $250 shipped it was hard to beat the quality of this steering setup, everything was a breeze to setup only thing I really “modified” was the 5/8 bolts that held the steering together, just relying on lock tight & hopes and dreams didn’t sit too well with me so I took a 5/16 colbalt drill bit to them and made a hole for a cotter pin to make me feel better lol Before: After: My steering was pretty whacked out before I swapped over this crossover steering now with the crossover the steering is nice and tight no more play or bump steer I couldn’t be happier I’d recommend this setup to anyone who wheels there MJ decently hard I’ve managed to mangle the ZJ drag links many time but I don’t think I’ll be mangling this one anytime soon -
1988 Comanche Pioneer Project
88mancheman replied to 88mancheman's topic in Member Projects: Your Comanches
Been getting a little more work done to the MJ in my spare time, fabbed up a new shorter exhaust for her to let her breath some more & allow a little more up travel in the rear end, I must say I was expecting it to be obnoxiously loud when I was welding it all up but it actually is not much louder than a full exhaust & gives the 4.0 a little deeper exhaust note so I’m pretty happy with it! I wish I could post a video on here for y’all it actually sounds really good! -
I think I might end up going with a new Mellings pump just for piece of mind, but I’ve heard a few horror story’s on the forums of the pickups not sealing 100% on the new pumps is there some trick to getting them to seal? Some sort of anaerobic sealer & a good tac weld I’m guessing?
-
I had completely spaced the fact that a new one would need a pickup tube aswell that is an extra $20 lol
-
I’m alittle late to this but sometimes our alignment machine at work won’t dial in camber 100% on larger trucks due to the lasers needing adjustment or calibration (whatever we pay hunter inc hundreds of dollars todo lol), instead I just slap the magnet gauge on the end of the axle/bearing nut and it gives me good enough measurements to make the computer happy, I do agree with others though there is not much camber adjustment on our solid axle trucks....if it truly is far out of wack on camber (as in more than 2-3 degrees) it’s most likely a bent axle from my experience
-
Is there any advantage to rebuilding the pump VS replacing it? Seems like the new Melling’s ones are only $12 more
-
Hey all I’ve been pondering this question for a while now, Ive been in need of an oil pan gasket replacement for some time now but it hasn’t been till recently that the leak has gotten bad enough to warrant being fixed, now here is the kicker, I’m at about 220k possibly more lol (odo stopped long time ago) she runs good has great oil pressure 35-55psi all the time, solid 14-16 vac at idle and sounds healthy.... but along with the RMS that isn’t leaking yet inner me feels like I should replace the oil pump while I’m down there... what are your opinions on replacing it?
-
IMO the universal fit cats are the best bang for the buck, I’ve borrowed my neighbors flow master high flow setup for smog once & I didn’t notice any major seat of the pants improvement over the OEM setup and for the 400+ I just can’t see a reason todo so, I’m sure I’ll get some grief regardless but if your not in a smog county unbolt the cat from the headerpipe & drive around a bit, if you notice an improvement in performance your cat is prolly plugged up good, cats can also be gutted ;) you didn’t hear that from me though
-
1988 Comanche Pioneer Project
88mancheman replied to 88mancheman's topic in Member Projects: Your Comanches
The new front axle was pretty much ready to be bolted in, but before I tackled that one I had a kinda serious leak from the trimming cover/harmonic balancer area that was going to piss oil onto my new front axle so I decided to handle that while it was all apart and easy todo, tore it all down to find the PO had tried to solve this issues before but did not buy a sleeve & seal kit for the harmonic balancer so there was 2 large groves worn into the harmonic balancer where oil was just snaking around it under pressure, it was obvious they tried to slap some rtv to seal it up but it didn’t last long... I was prepared for this with a brand new harmonic balancer, timing cover gasket & a new timing chain set from cloyes so I went to town: Old timing chain Nasty nasty dirty Side by side of new and old ( old one had much more than a 1/2 of deflection it was close to a whole inch!!) New one fit tighter than you know what....lol, even took some wrestling to get it in place the chain was soooo tight which was a good sign! Everything went together like a dream, painted the timing cover while I was there because why not, and gave it a pressure wash after it was all together to get rid of some of the mud & oil that has gone everywhere to make sure there was no fresh leaks and it everything it sealed and good to go then it was time to get the Jeep out of hover mode and get the new front axle under her -
1988 Comanche Pioneer Project
88mancheman replied to 88mancheman's topic in Member Projects: Your Comanches
Once the truss was done I had a little bit of fun trying to swap my locker from my old Dana 30 to my new to me one, I’ve done plenty of lunchboxes before (must have all been under 4.10 carrier break because.....) when I went to pull the locker out of my old 3.07 carrier everything came out like butter but then when I went to tear down the new to me 30 with the truss I ran into issues after issue, first I don’t have a case spreader so it took me a total of an hour just to pry / hammer it in and out of the pumpkin, then I had always been told that 4.10 and higher gears that the cross pin won’t come out without the ring gear being removed... I always chalked that up to be an ole wives tale or something but I learned my lesson as soon as I went to remove the cross pin on the 4.10 gears..... the ring gear had to come off.. no biggie but it was 1130pm at that point to I persisted through, got it all back together at about 1 am but then I hit another brick wall.... I had no way to torque the ring gear bolts after a cold brew I figured I’d bolt the old stubby axle shaft to a wheel and use that... WALAH! It worked and everything was hammered and bolted back together at about 230 am when I started falling asleep lol I didn’t get any pictures of the cross pin or my awesome torquing procedure but let me tell you... they where quite the sights to see lol Added some timken seals when reinstalling aswell, these seems to be a newer version of the Dana 30 seals as they have the little curled lip that goes towards the outside if the axle shaft to stop dirt I’m assuming, the last 2 sets I used from Dana/spicer did not have these little curled lips and where merlerly just straight seals(similar to the black picture on the timken box), needless to say I was very happy with these seals