MancheKid86
-
Posts
1586 -
Joined
-
Last visited
Content Type
Profiles
Forums
Gallery
Everything posted by MancheKid86
-
as the title says wondering about non gas charged hydraulic shocks in the front, going away from stud top mount shocks because I can't find any with 15"-16" of travel. found a set that are long enough without going to coil overs, but they are non gas charged hydraulic shocks. anyone with with experience running non gas charged hydraulic shocks in the front? unsure if stock shocks come with a charge in the front or not. I have had the current set for so long and they have a charge in them. am I over thinking things, and they will be fine. Or should there be a gas charge. if so, how come?
-
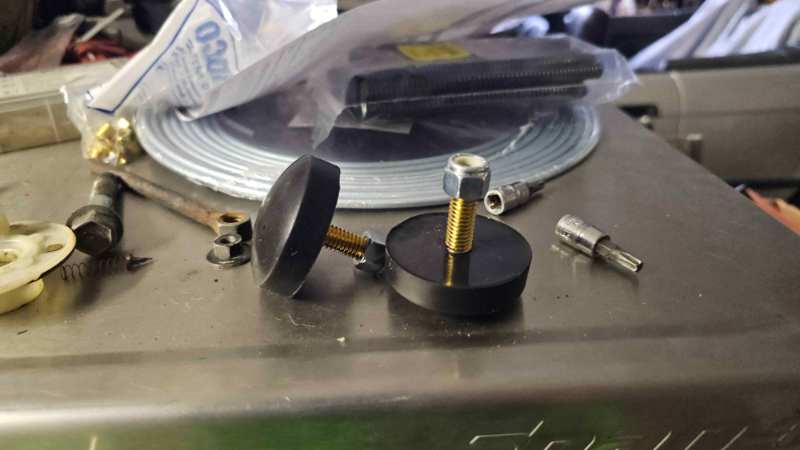
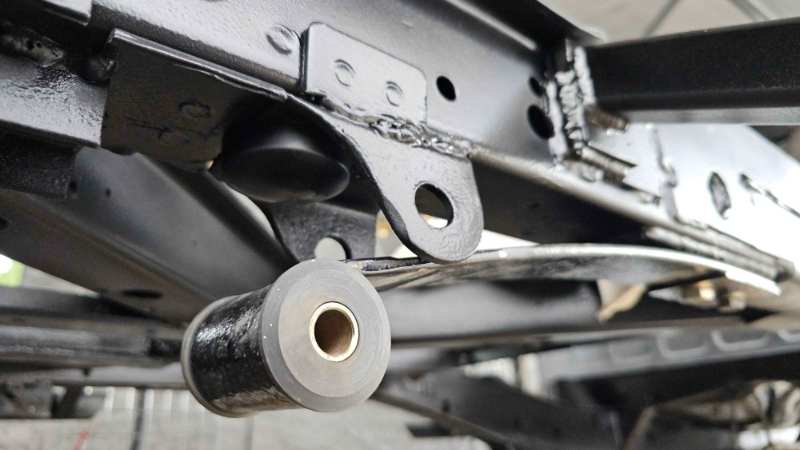
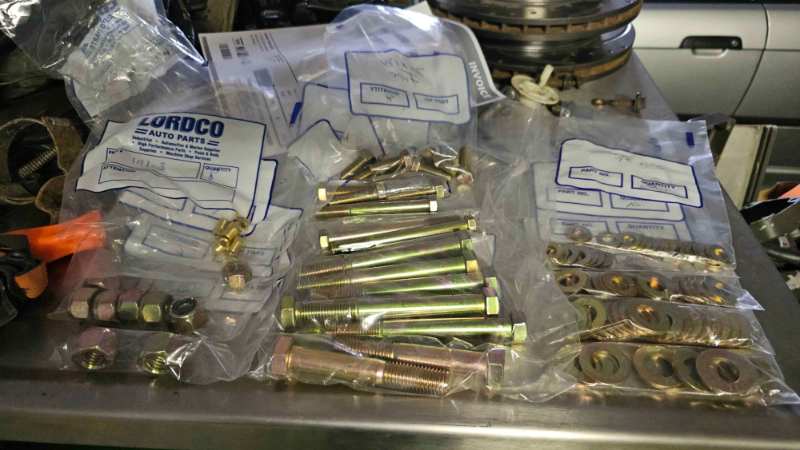
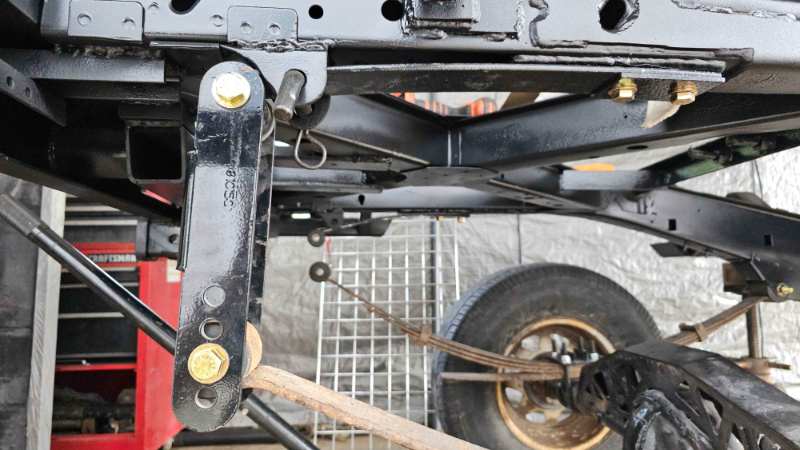
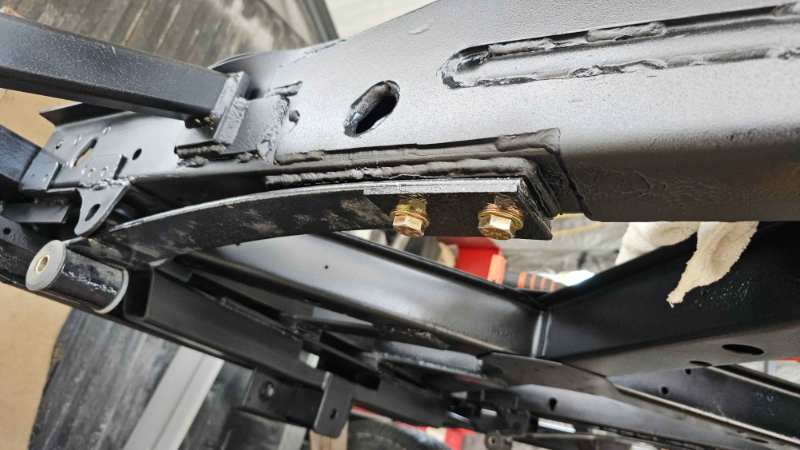
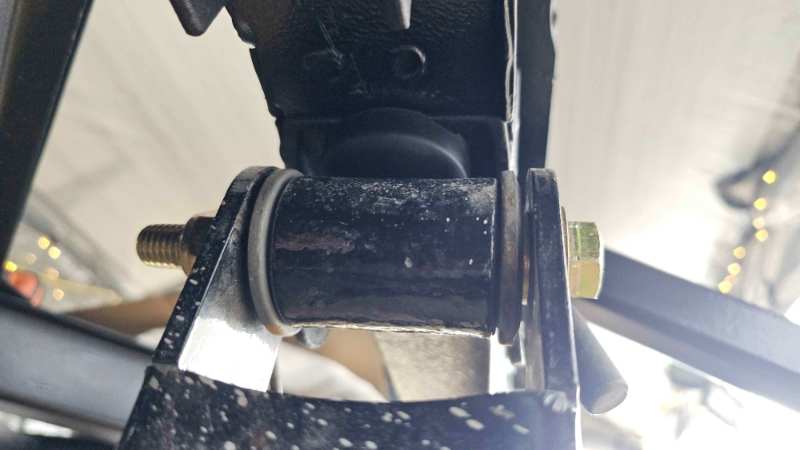
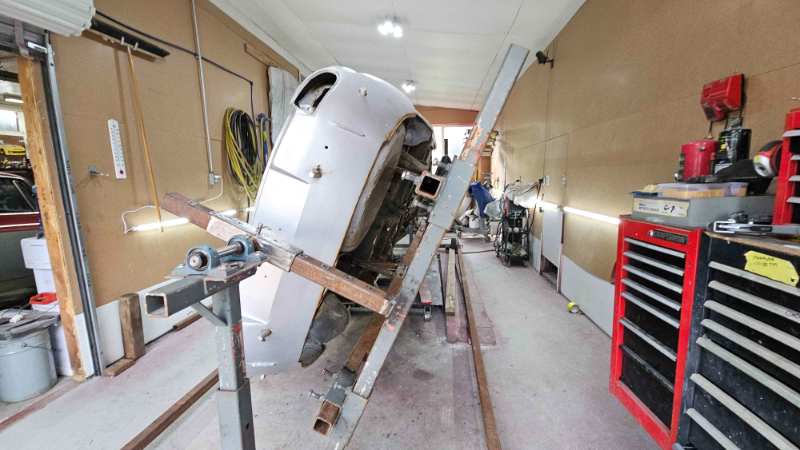
ordered some new bumpstops for the ol' elliptical setup went down to the local fastener store and picked up majority of the hardware I need to start the reassembly alot of the mods in the rear are almost as old as I am, including the elliptical suspension. looking at the quality of welds and that they have lasted for 30 years makes me think they can't be that bad lmao so with that being said, I started adding the new hardware. I even spaced out either side of the rear shackles with washers this go around instead of just giving them the ugga duggas until they conformed. speaking of rubberized undercoat, I ended up going over to help my neighbor switch his rotisserie around on the new car they have in the shop to restore. @watchamakalit this is exactly why the internet says not to use rubberized. especially if its sprayed overtop of rust. pictures don't do it justice, the thing is rotten and plagued with halfassed repairs. who ever "restored" it previously scabbed some patch panels on and just put lipstick on the pig. they are bringing it down to the local sandblasting outfit, I think there will just be the outer skins remaining afterwards

-
man this thing is sick! great work!
-
after drilling a 1.5" hole for the fuel sender wiring in the drivers floorpan I masked it all off, and went to town. it went on like paint. after reading the spreadsheet it called 500 microns/0.5mm. so that's what it ended up getting. some ripples from being too close or not properly fanning the spray but overall pleased with the results. did not do the top of the rear "frame". still contemplating it. but I don't see the need as the box covers it and there shouldn't be any high velocity stones making contact with its surface. did the sliders and rear bumper as well because why not, it is non-paintable so I can always hit it with some gun wash and it will come right off if I ever want to touch up the sliders/bumper with some rattle can after rubbing on rocks and trees. and all unmasked, did the inside of the fenders as well since I am not running any inner wheel well liners. (they tend to just get torn off when a big stick/log works its way though the wheel well anyways) wish I could figure out how to get the site to not resize the pictures to the size of a large tumbnail since I'm no where near the max upload limit per post
-
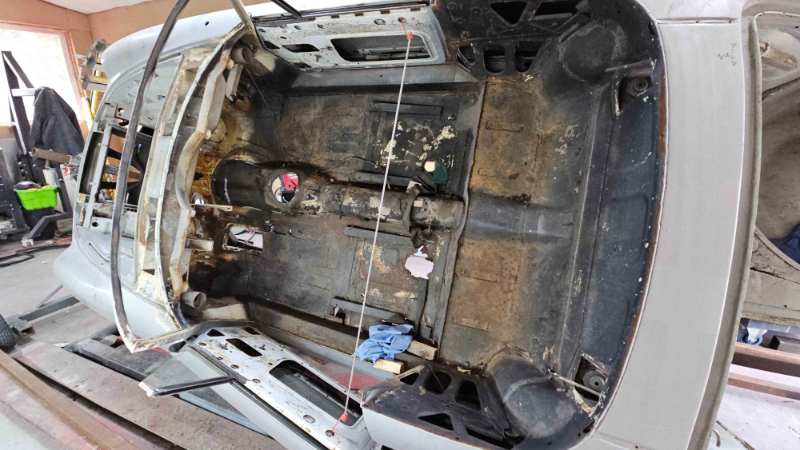
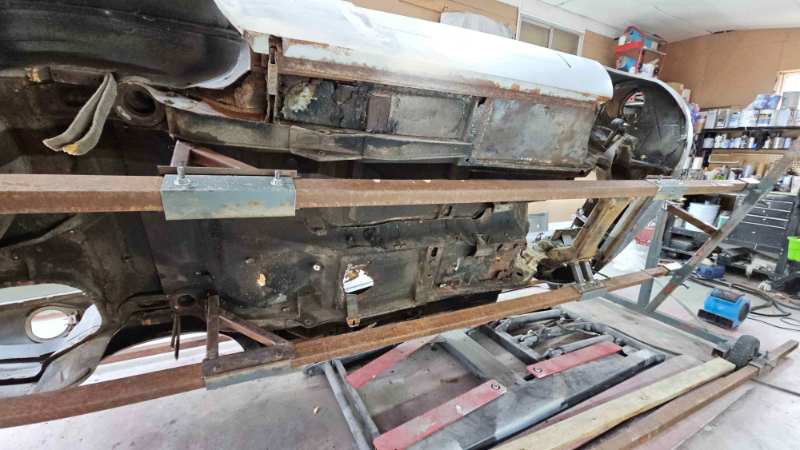
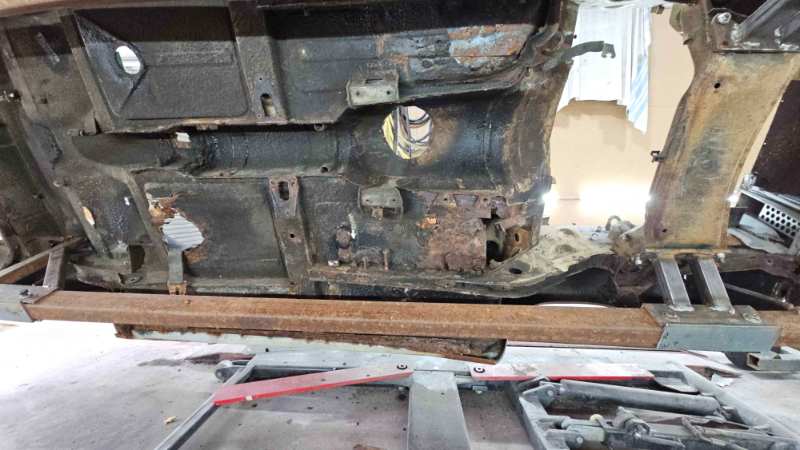
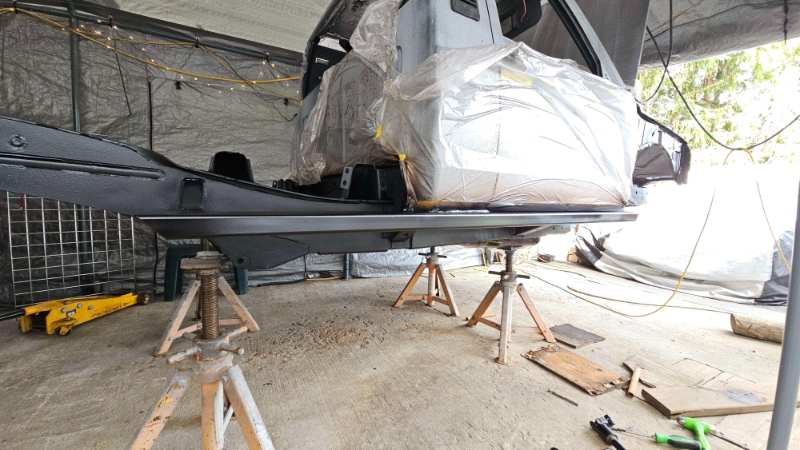
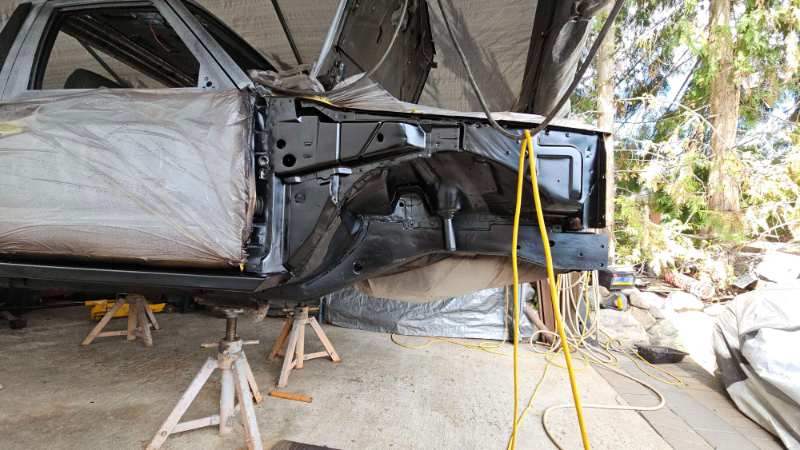
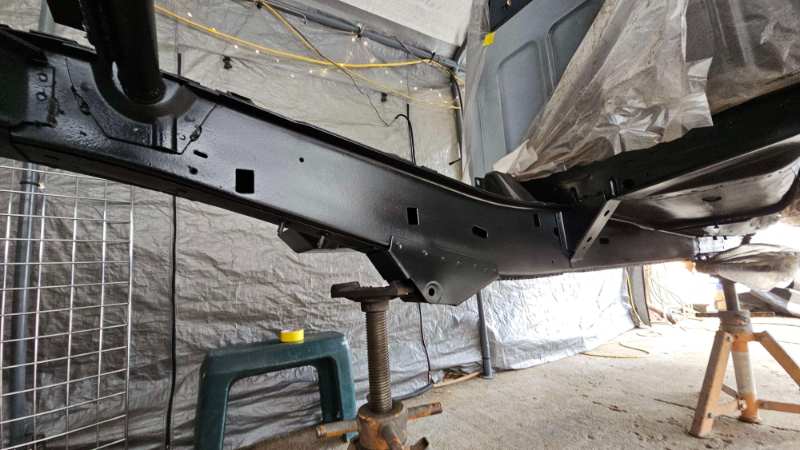
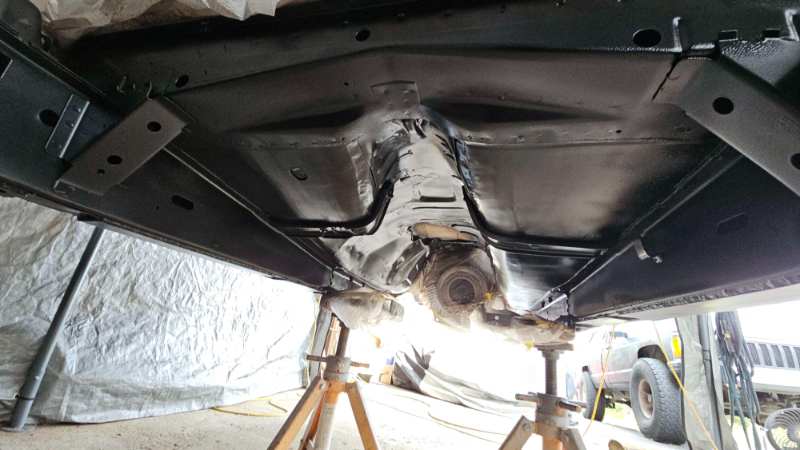
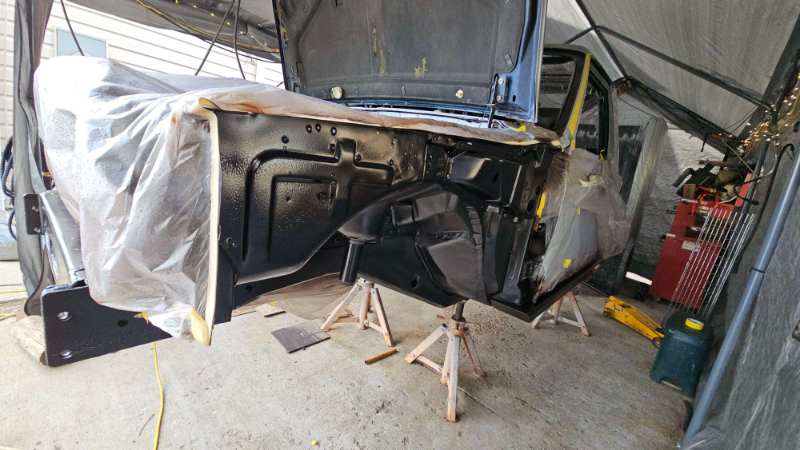
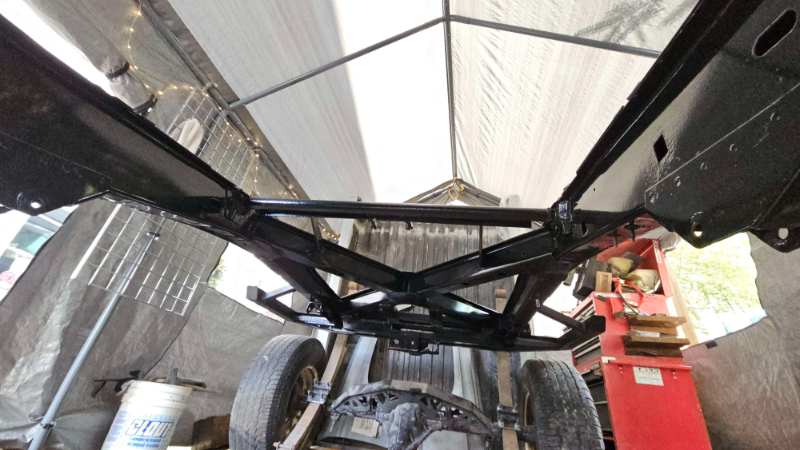
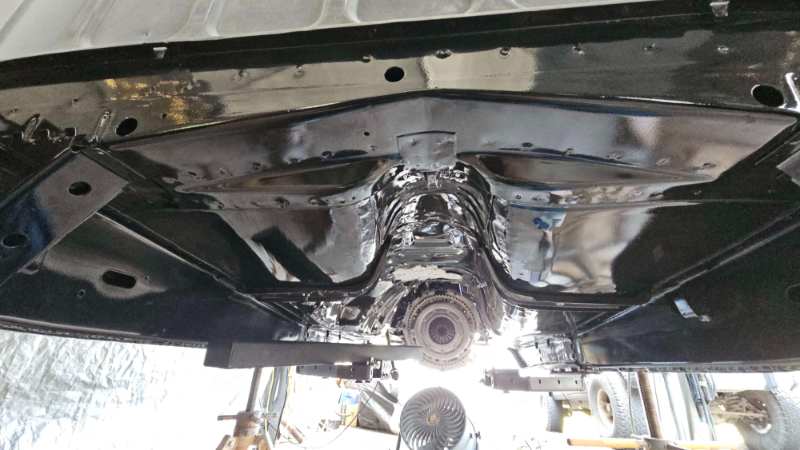
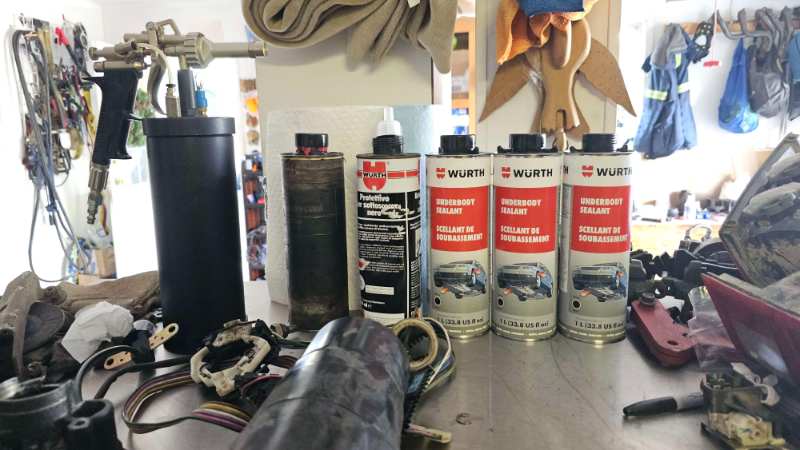
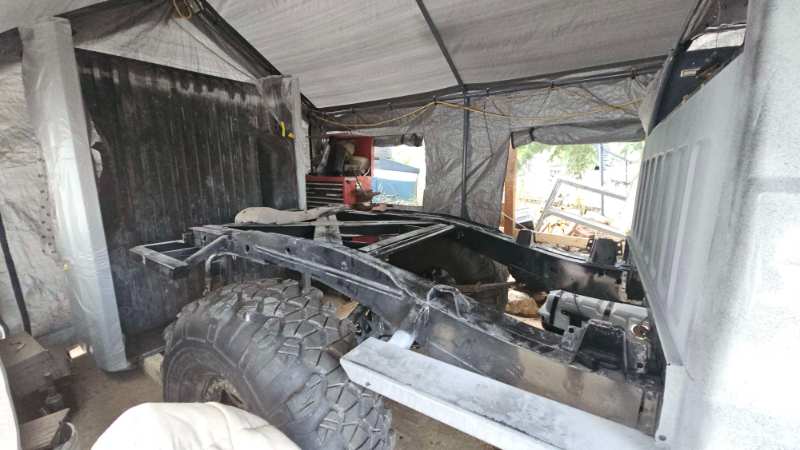
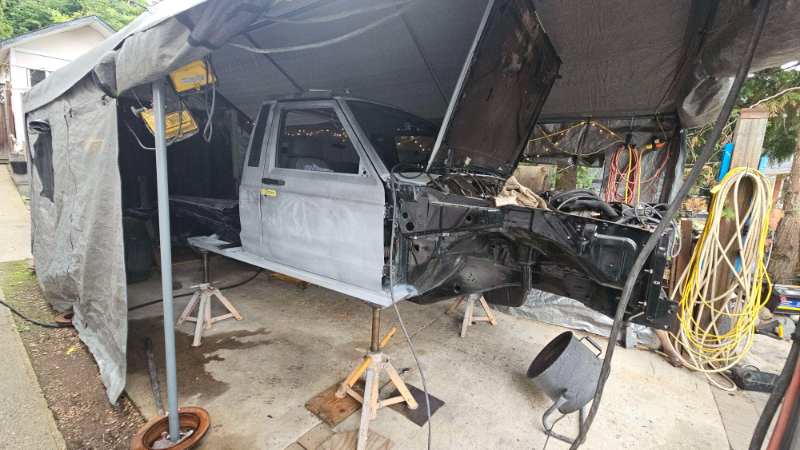
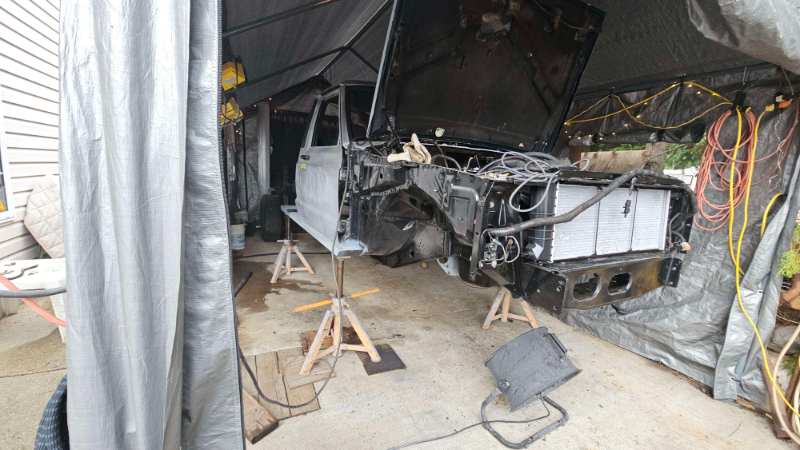
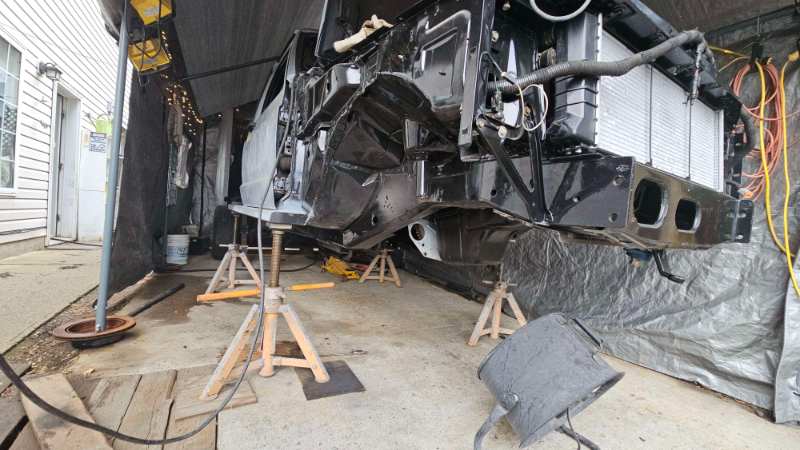
now some people may not agree with what I am about to say. every ones experience is different. it depends on your location (rust belt, living next to bodies of salt water like oceans) road conditions (if they are heavily salted) undercoat is a very controversial topic. depending on where you read online its either a yay or nay. I believe there are a few factors that ultimately dictate the overall outcome. condition of the vehicle, if its brand new. Or if it is already seen road use/rusted/dirt salt trapped in it. the composition of the undercoat itself ie. oil based, bitumen (asphalt) or rubberized the prep work (removing all grease, salts, debris ect) or lack of prep oil seems to be the go to nowadays because it extremely easy to apply with very little to zero prep and as you know oil repels water and blocks out any oxygen (aka oxidation) but it too has its drawbacks. if not properly maintained ie. washing your vehicle regularly, and not just the exterior paint, underneath as well. it can build up dust and salt just as easily since it creates a sticky surface. when the dust builds up that in turn wicks in moisture. as long as you are diligent and do thorough job of cleaning it there shouldn't be an issue. granted you need to annually re apply the oil. if you use detergents while washing it will overtime wash away the coating rubberized is 100% a no go, as it generally bubbles and creates air pockets during the application, and overtime it shrinks and cracks causes it to debond from the surface. Allowing moisture, salts, dirt ect in causing this state of rapid decay seen on the internet. Bitumen depending on the manufacturer and additives that compose it (the type I went with) isn't perfect either but doesn't shrink/crack and if applied in the correct thickness does a great job. every comanche I have owned/parted out (10 of them) has had the bitumen underseal from factory. now I am not saying that It cannot cause rot but if applied correctly then it does its intended job. granted if I lived in an area that uses salt has high humidity and bodies of salt water. it probably would be a completely different scenario Wurth underbody sealant (german made product) AFAIK is used on all the Porsches on the road #1 issue I see causing adverse affects is application thickness. A coating of ~1-2 mm MAX is adequate and does its intended purpose. any more than that and it is too thick. the misconception is thinking you want to drown the metal in it, in this circumstance less is more protection and more is less protection another misconception is that you can annually add another layer of bitumen underseal, this is a big no. you are effectively sealing in a years worth of road grime, dirt and hidden moisture. if there is any debonding chips ect it will be sealed in. causing the rot to start. the proper way which you will not find suggested online is to remove ALL old underseal, address any areas with the converter of your choice. and start fresh with that 1-2 mm coating. adding layer after layer is just negligent and promotes instead of inhibits. shops don't care and will gladly do it because they are getting paid and its not their vehicle. most important thing you can do is clean your vehicle regularly especially in the rustbelt/high salt areas. as stated earlier not just the visible body panels but ensure you wash underneath in all the nooks and crannies that can house dirt and salt. if you are diligent and take the time to clean your vehicle, it will last a very long time. its just like someone who brushes and flosses daily versus someone with poor oral hygiene who doesn't take the time to brush and floss. ones going to have cavities/missing teeth and the other one generally won't unless they have some underlying health/genetic issues. or another good example if your a hunter/marksman and shoot corrosive ammo you best bet you are meticulously cleaning everything after an outing/day at the range otherwise your barrel ect is going to start to rot going out to my base model 2wd comanche (which I 4wd ax-15 swapped) that still has its factory undercoat. it is mint underneath. as stated previously its undercoat thickness is 1-2 mm at most. the only rust on it is from moisture trapped in the factory carpets padding in the drivers footwell from leaking window seals/lack of floor mats allowing snowy muddy boots to drain directly into the floor. also stone chips on the exterior paint that I never dealt with and allowed dirt and salt to fester without washing/reapplying paint to the bare steel for extended periods of time. sorry for the long winded explanation. but that is my take on the matter. here are some pictures of my unibody after thoroughly cleaning it with Por-15 degrease in prep of applying a 1-2 mm coating of underbody sealant. it has been professionally media blasted twice, etched and coated with Endura industrial grade epoxy
-
been looking for a deal on coil overs myself! haven't been able to decide between 14/16, doing lots of reading it online says 14 is more than enough, but in my town everyone has 46"+ tires so only 16's are on the marketplace until then I will be running my old coil springs with a sticker in the wheel well saying " I identify as a coil over"
-
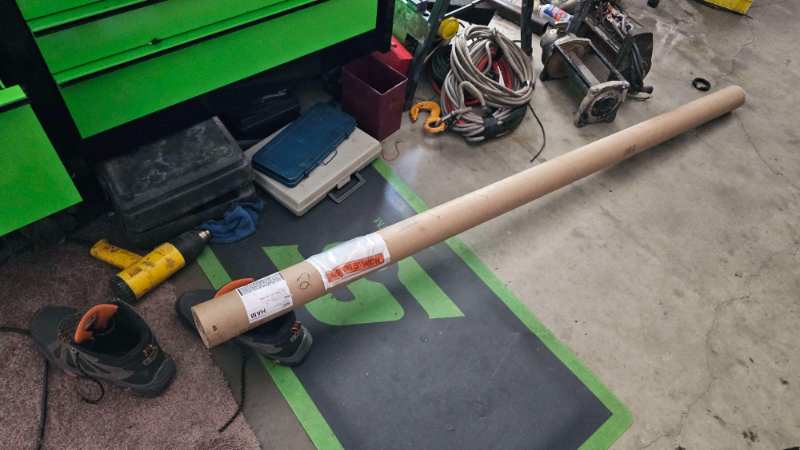
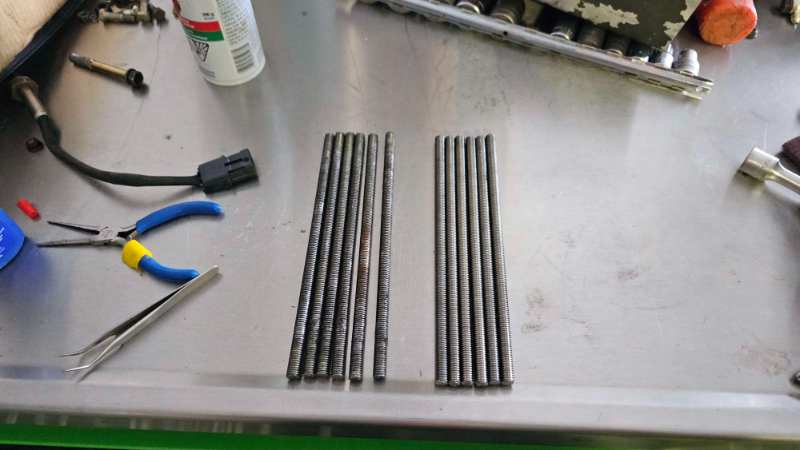
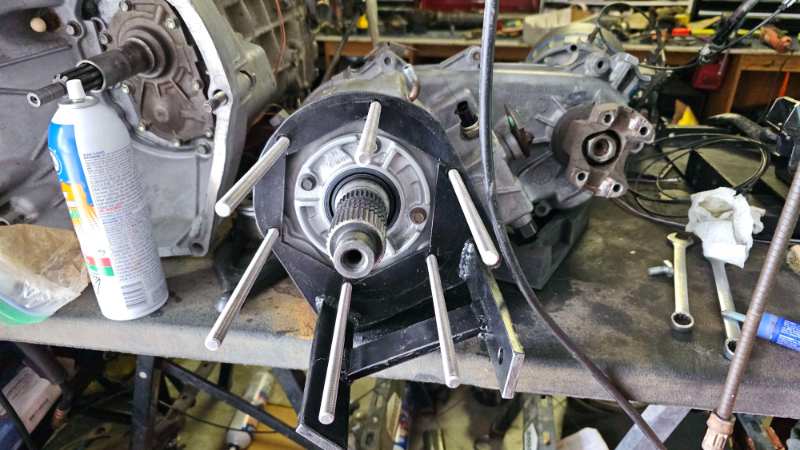
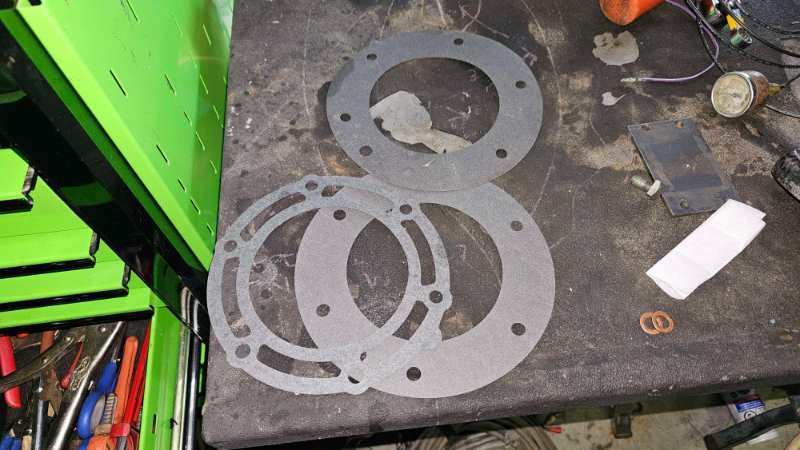
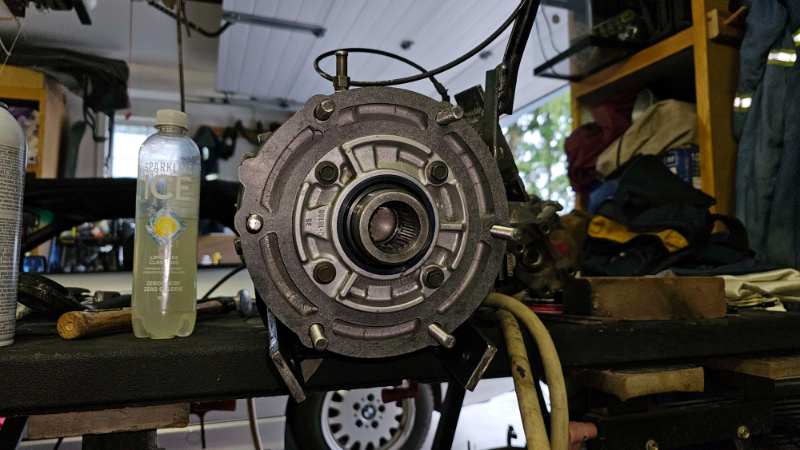
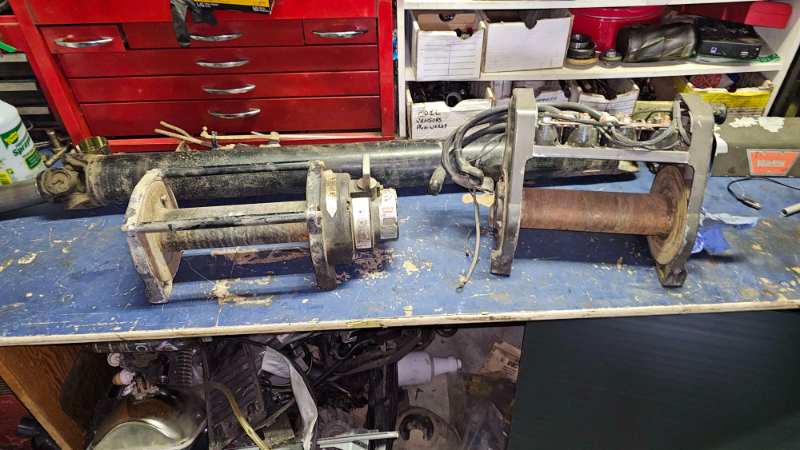
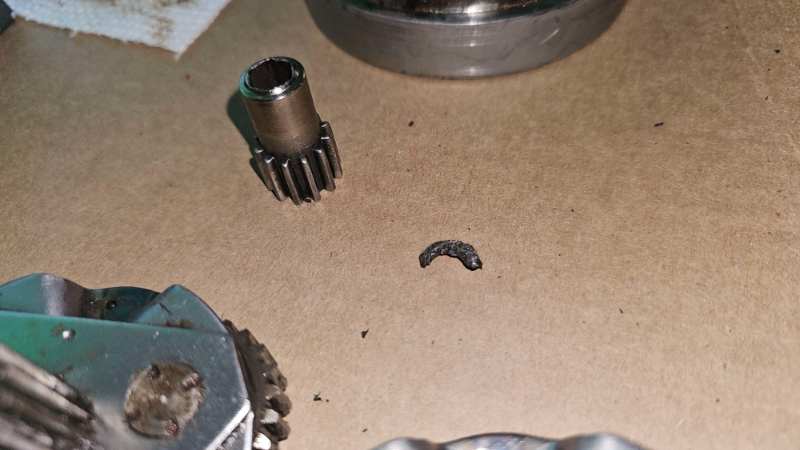
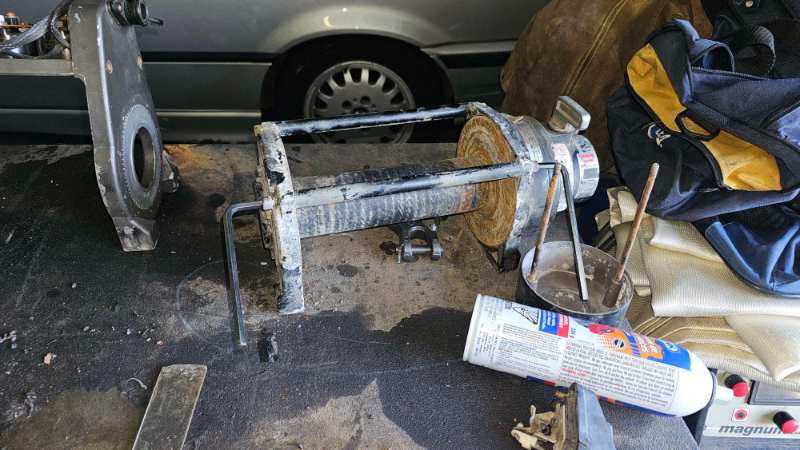
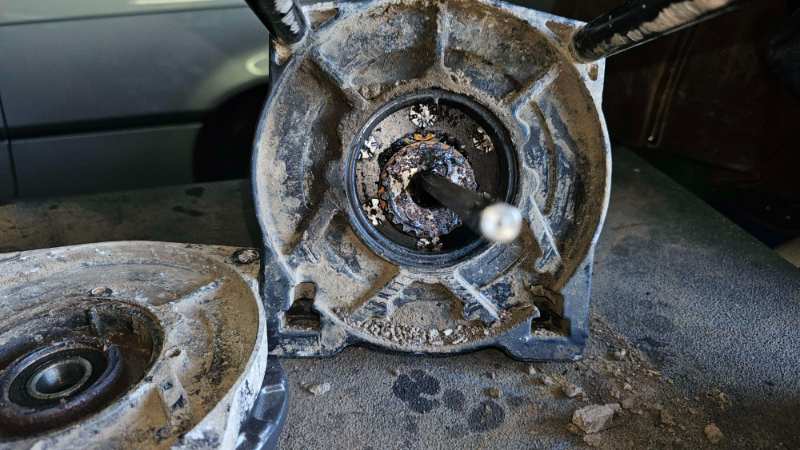
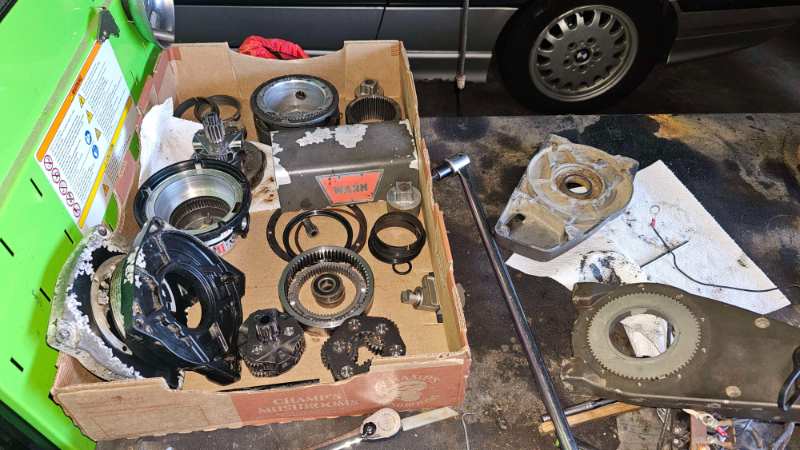
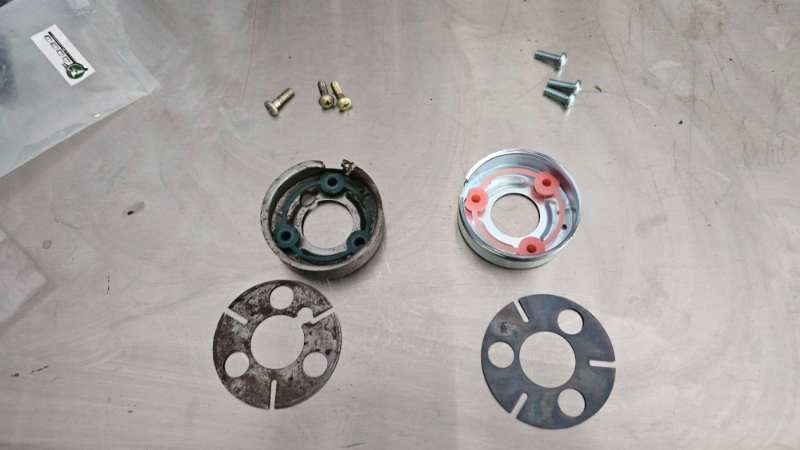
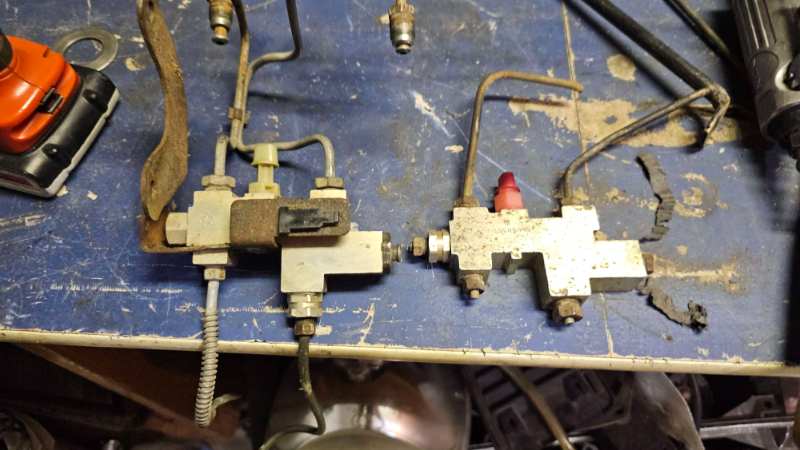
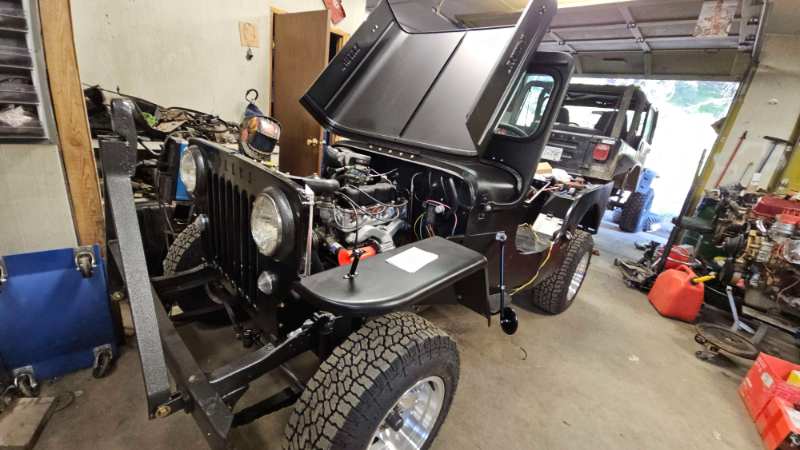
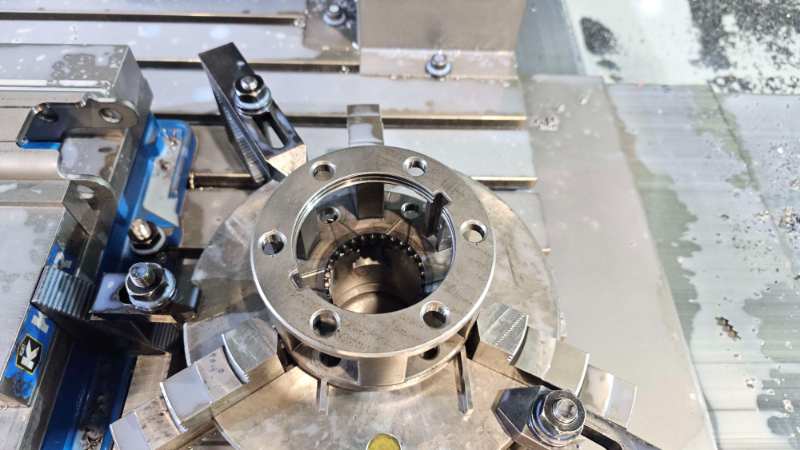
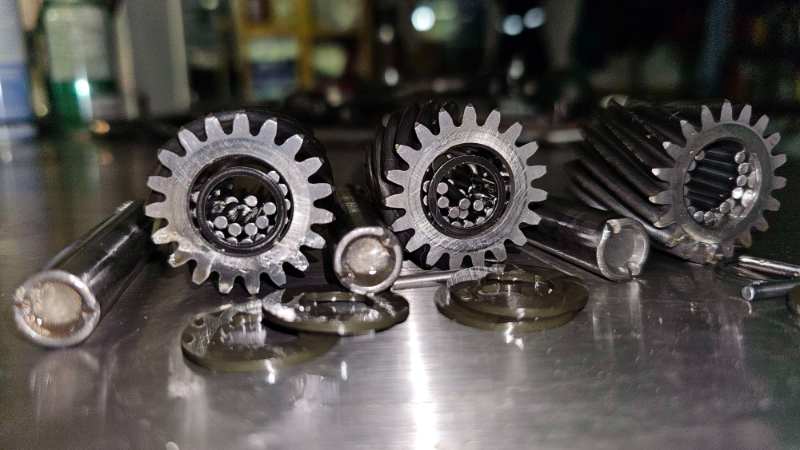
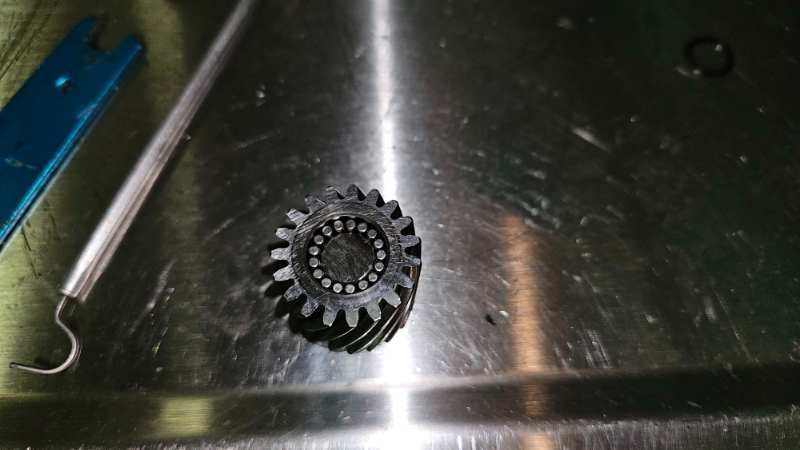
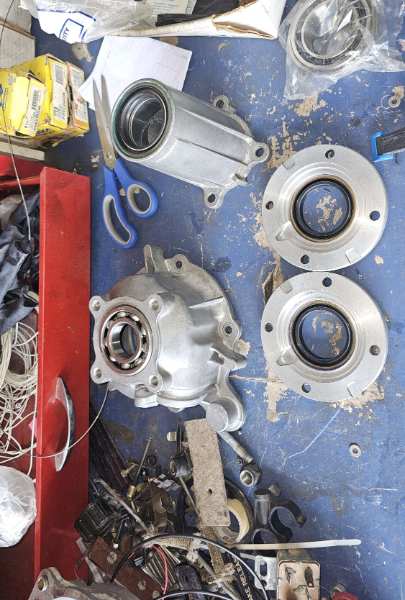
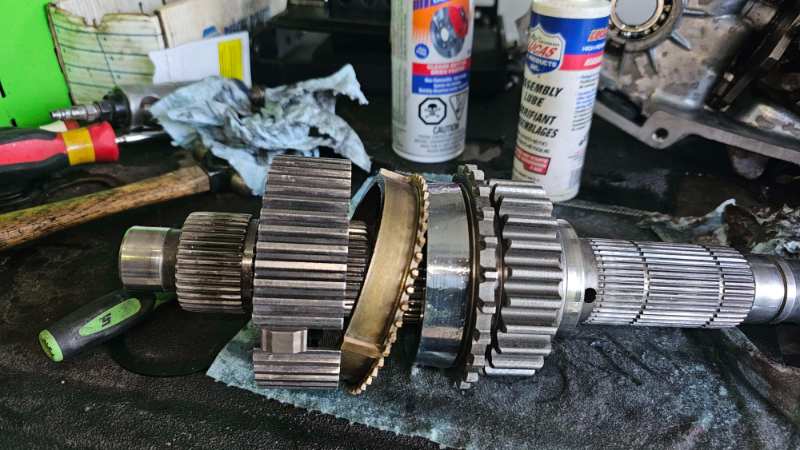
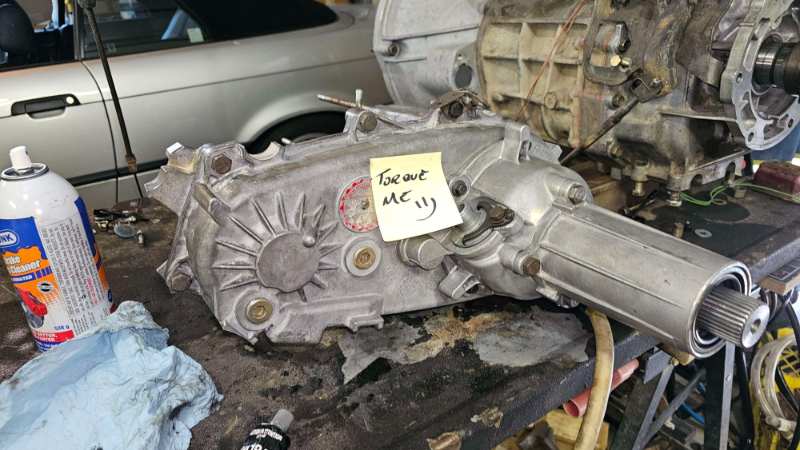
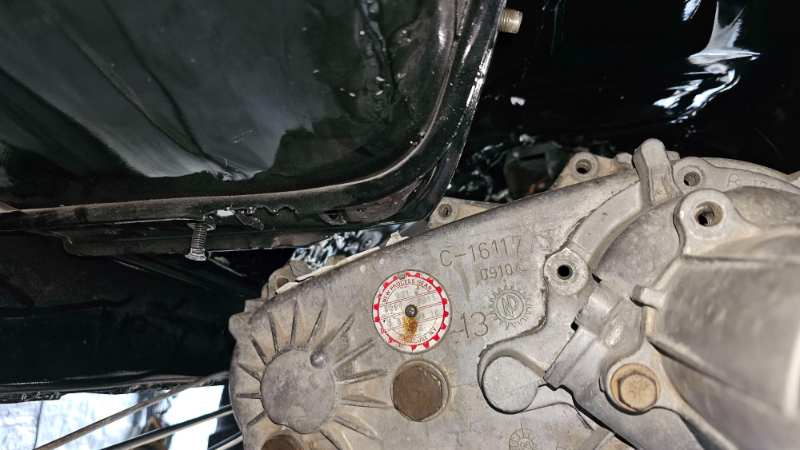
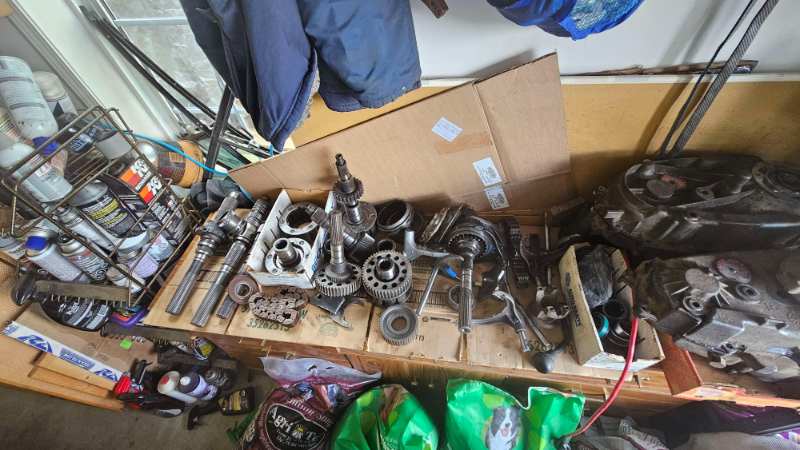
for the cost of a new 6 pinion carrier it would have been just as easy to buy one, but I have alot of free time and it was a fun challenge. most tedious part was putting all the needle bearings in, which after the first two I had a pretty good rhythm. the easiest way would have been to keep the slug in the entire time and not let them fall out in the first place. took about three weeks for the grade BD threaded rod to show up, thanks to my homie who machined the carrier. his work had an account with mc master carr which actually had stock of this. no where in canada that I called had it or even knew it existed. Such a big tube for a single threaded rod! all trimmed down and installed I have a collection of gaskets from various rebuild kits so I decided to use them since the mating surface on the doubler have seen some abuse ( it may have been dropped once or twice over the years) since the studs go straight through the doubler it tends to seep fluid through them so my fix involves using copper crush washers under the nuts finally it is all together, yes it gets messy in my garage very fast lmao waiting on the undercoat my neighbor promised he was ordering (which was over a month by the way, and I ended up finding someone else in the end who was actually had a wurth account to order it, which took another two weeks) I decided to tear the into the winches. one I 100% over greased, and used an aviation grease which didn't last long, it dried right up and caused alot of drag during free spool the Warn 9000XDI it took a long time to scoop all of the dry grease out, before using solvents to clean the rest found this piled behind the pinion gear which was pushing the planets up breaking open the warn vr 8000, which has lived its entire life upside down under the box of the truck. you can tell it has been underwater once or twice it did clean up though! wire wheel and solvents and it turn out decent, not new but still useable, looks night and day better than when i cracked it open. will be getting the casings media blasted and powder coated to deal with the aluminum corrosion prior to reassembly ordered a new horn button/cap retainer assembly. the spring loaded pin did not fit so I am wondering if I put the non tilt turn signal cam in. so I will have to dig a little deeper into that or figure out something else to get it to work the previous one had a wire soldered onto the cap itself and for the life of me I can't find any of the spring loaded bits from the three steering columns I took apart my brake proportioning valve (left) vs stock (right) no load sensing valve required in the rear and finally! the day has come, the undercoat arrived so time to strip the truck down and rip the axles out to start prepping the paint for undercoat more to come, will scrub everything down, undercoat and then work on brake/fuel lines. also, A-Man thank you for taking interest in my build. there's only one other person out the twelve years of having this thread who has beat you in posts and that is Pete himself. You Pete and and Neohic have proven that there is actual interest in the stuff i post. so thank you again! here is a pic of a cj-3a my friend is finishing for a customer, which i had the pleasure of seeing while gearing some axles for his own rig


-
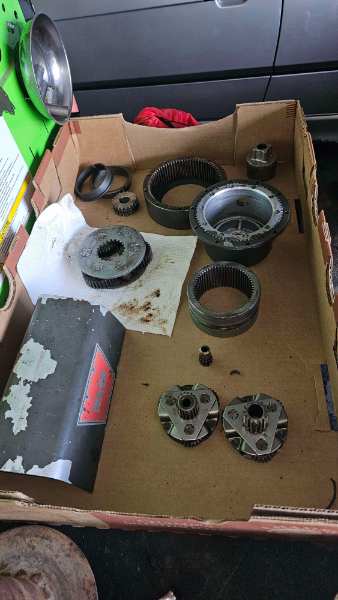
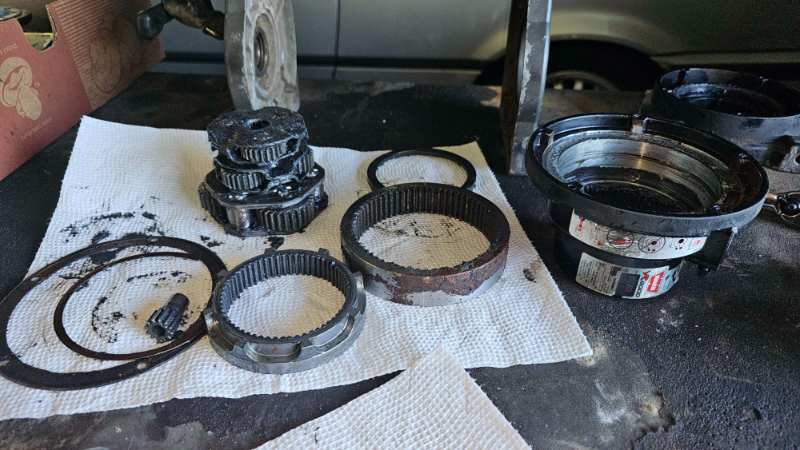
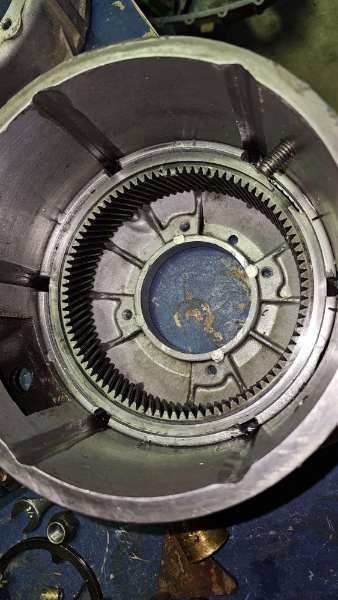
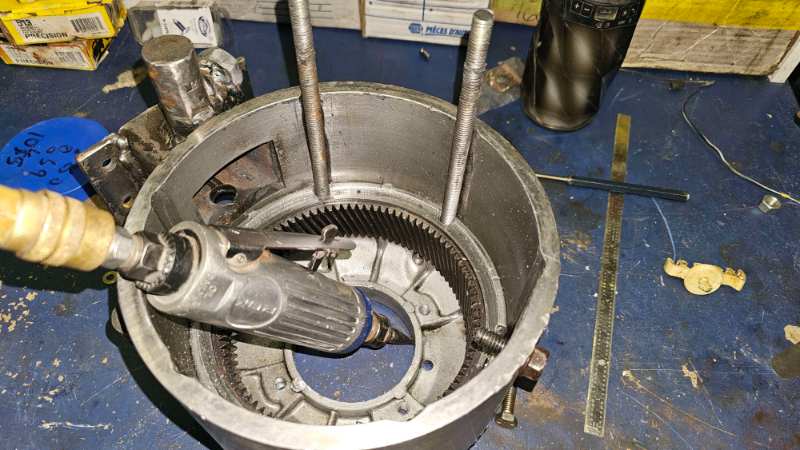
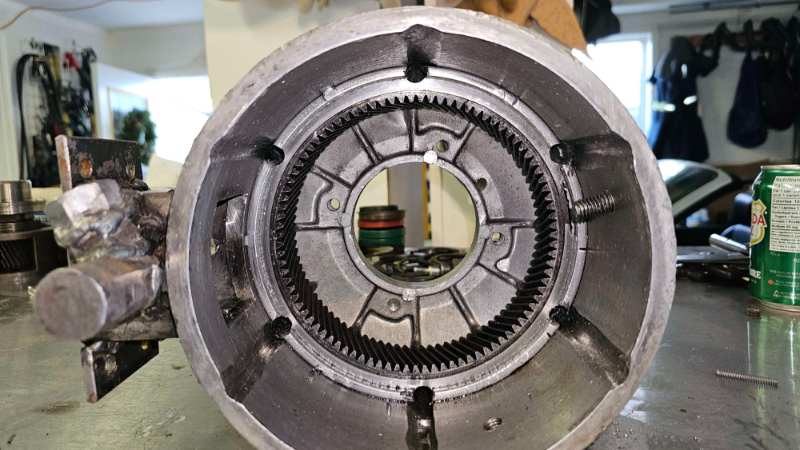
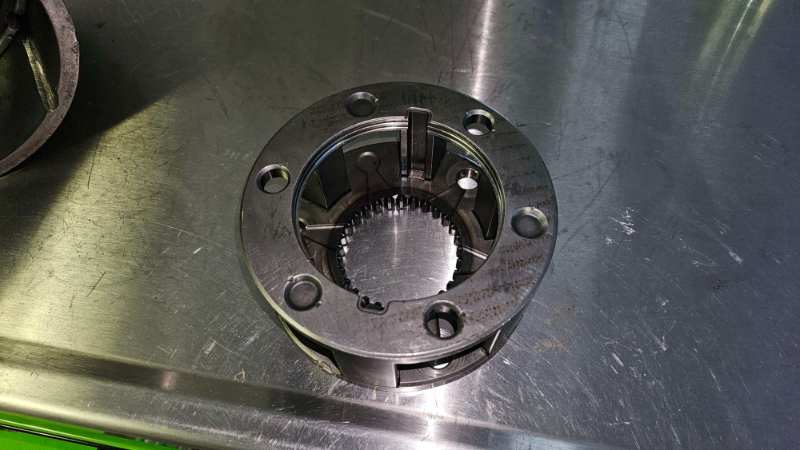
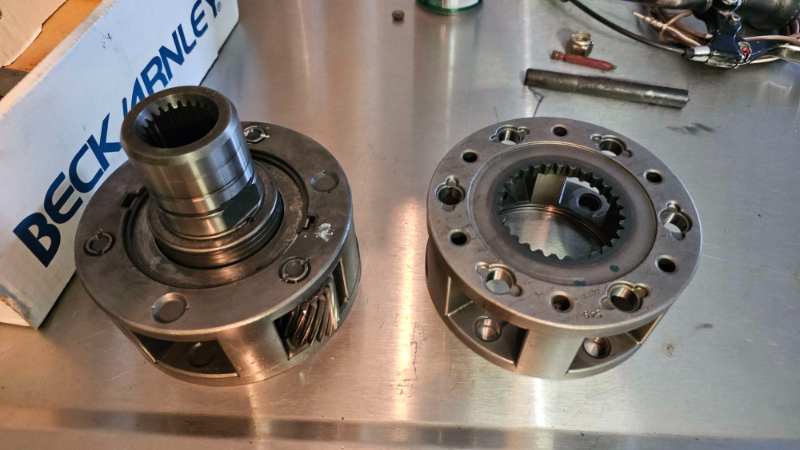
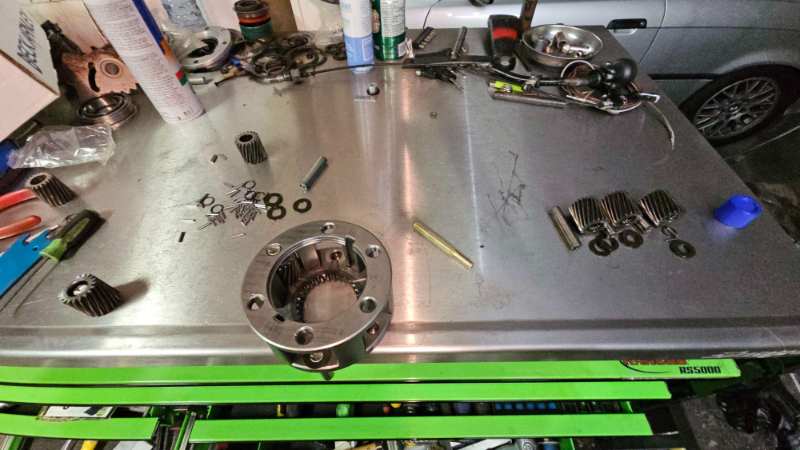
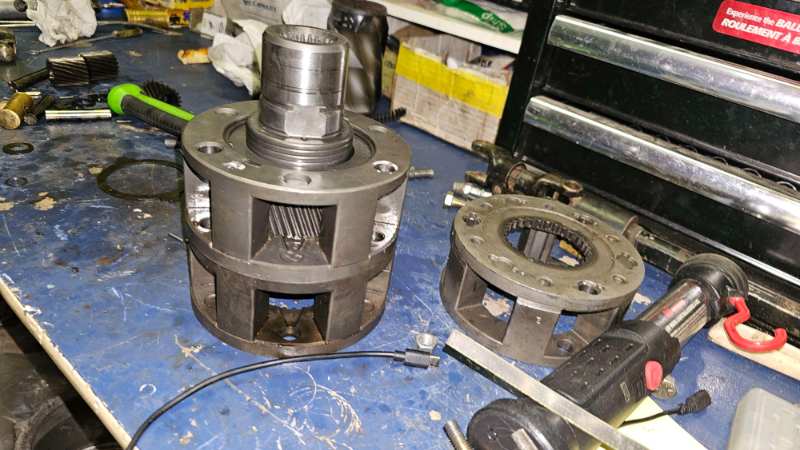
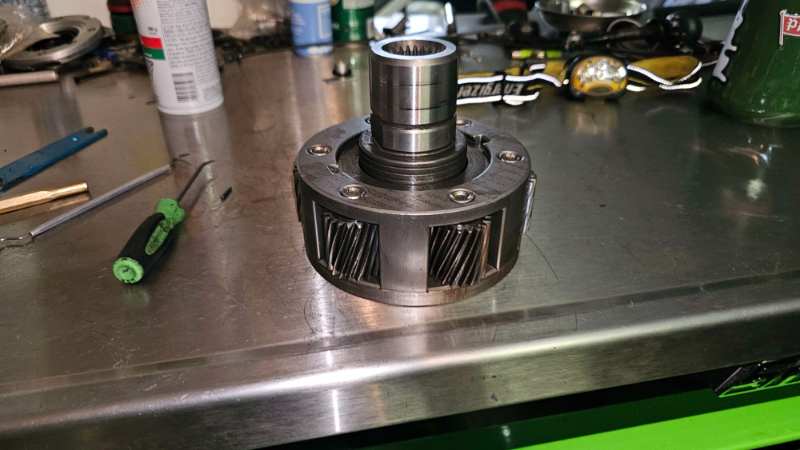
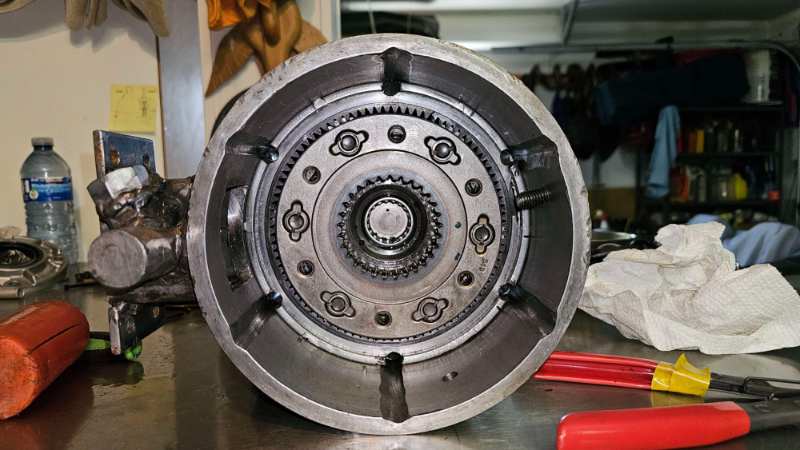
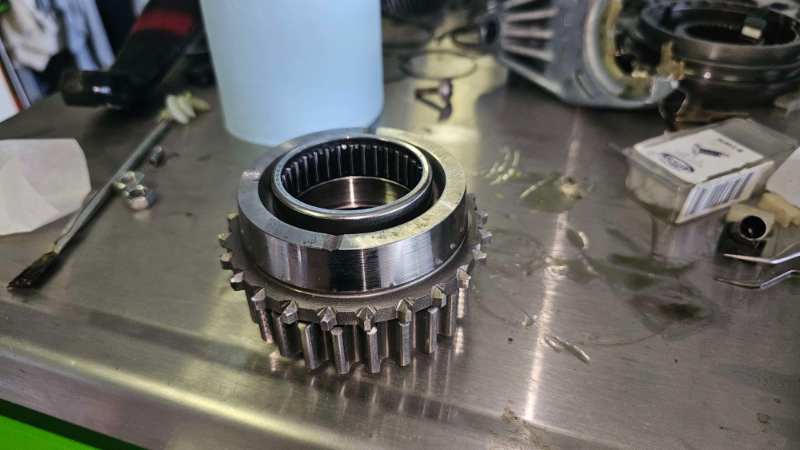
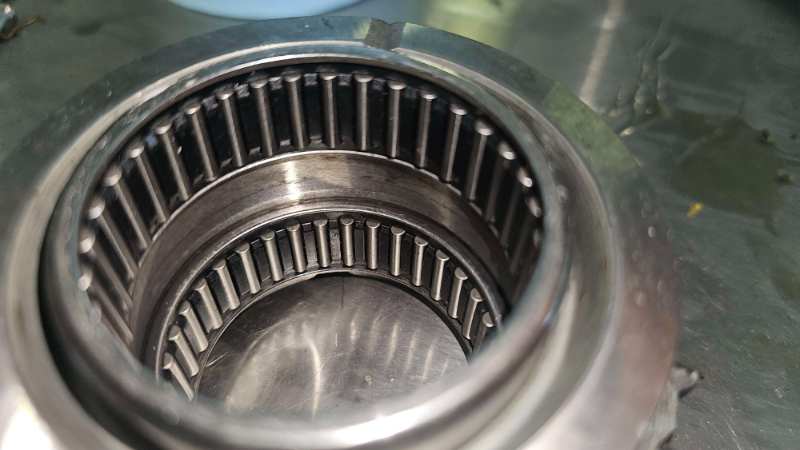
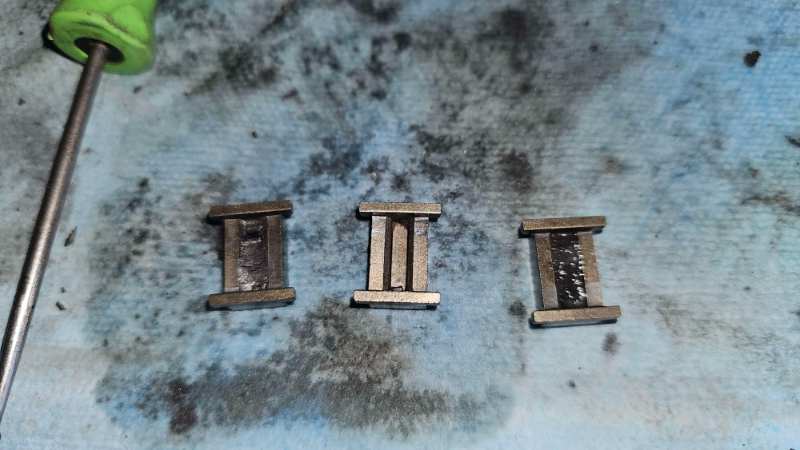
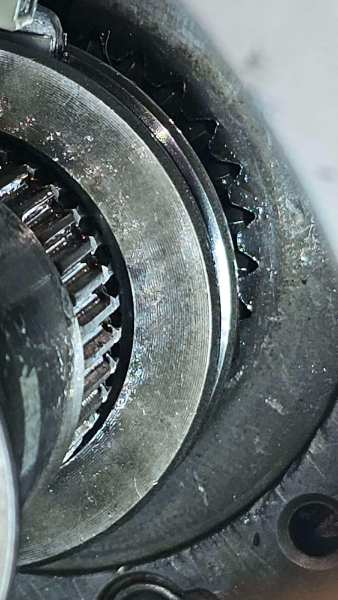
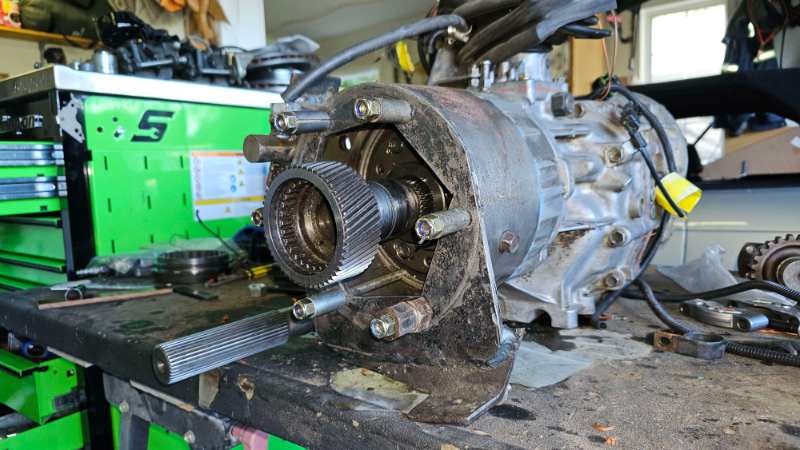
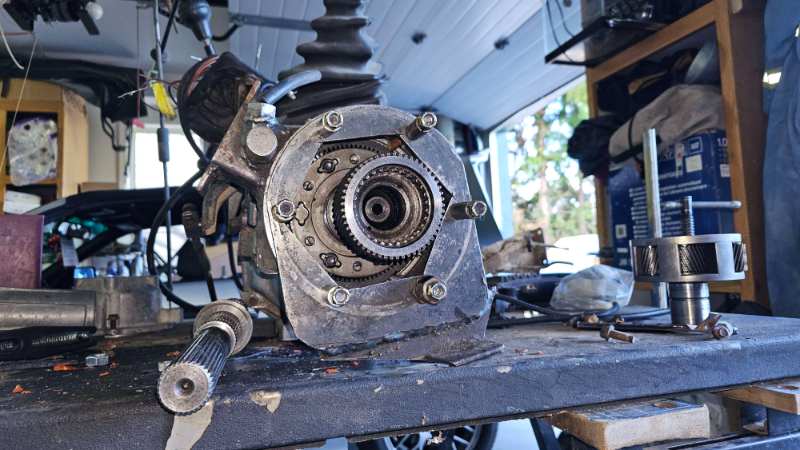
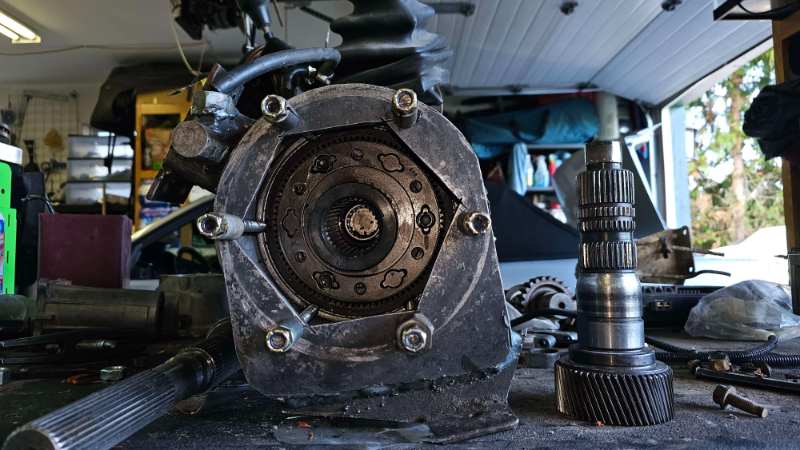
more into the tcase way back in 2014, the ring gear in the doubler spit out in a very sketchy spot both of my winches, plus two more and 8 people helped spin the truck around and safely down to a flat where I was able to swap tcases the next day ended up having to split a case in half to get a new ring gear donor. the way the doubler is built didnt allow for a retainer, or so it was lead to believe. put the new ring in, stake in in place good to go. fast forward to now. the ring started walking again! so in went the proper retainer and I started grinding hear me out, before anyone says it. Literally no idea why i didnt line the tangs up to one of the studs, thought about it the entire process... especially on the last hole lmao but here it is, it even retained its springtivity was cleaned afterwards to install the new bearing ran an idea past a buddy and he said come on down. 3 planet carriers are out of style but 6 planets on the other hand.... thats more like it! 3 vs 6 starting to assemble lets stand all of those bearing back up the graveyard, 3 carriers due to one being roasted, the other was already parts from when the ring gear ejected in '14 but made for good bearing slugs. and the third had good junk final planet and all together again


-
added a few more holes to this guy
-
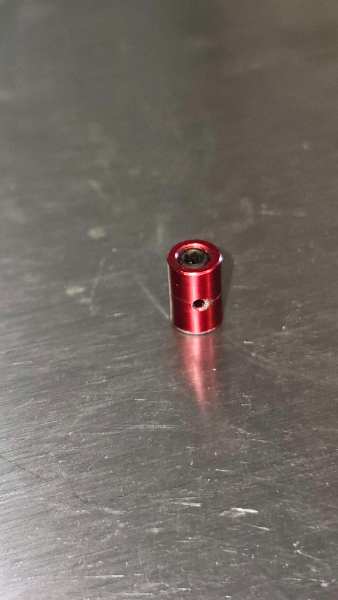
went down to the local bike shop with my shifter in hand lookin for some sort of cable crimp. this is what they gave me, it ended up fitting the lever and wire perfect. it was off of a dropper post, which is actually where my cable came from. and now its fully functional. 20250608_144311.mp4
-
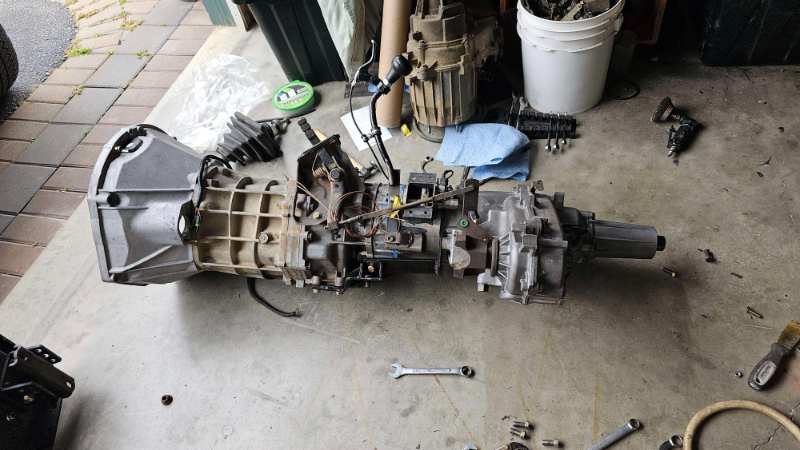
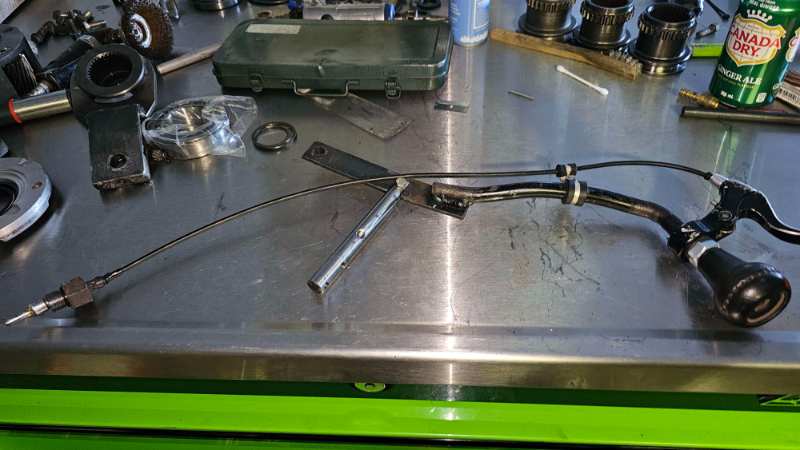
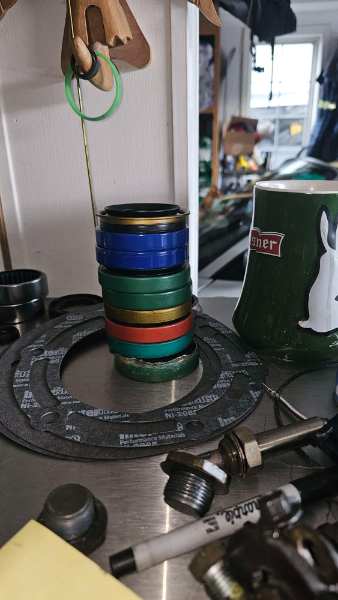
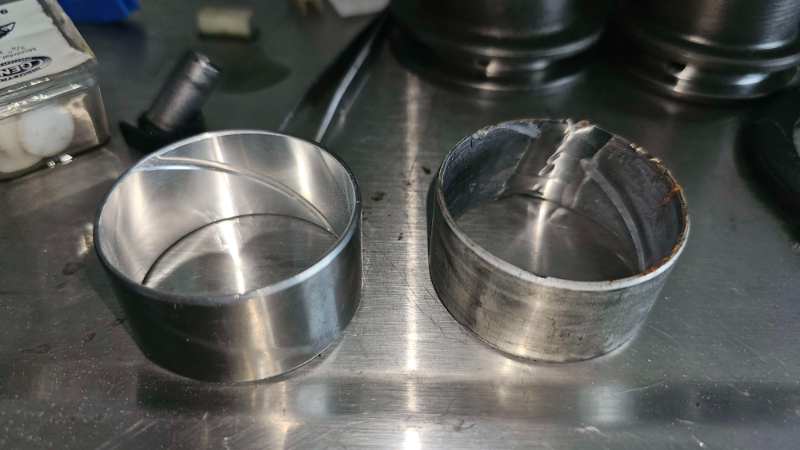
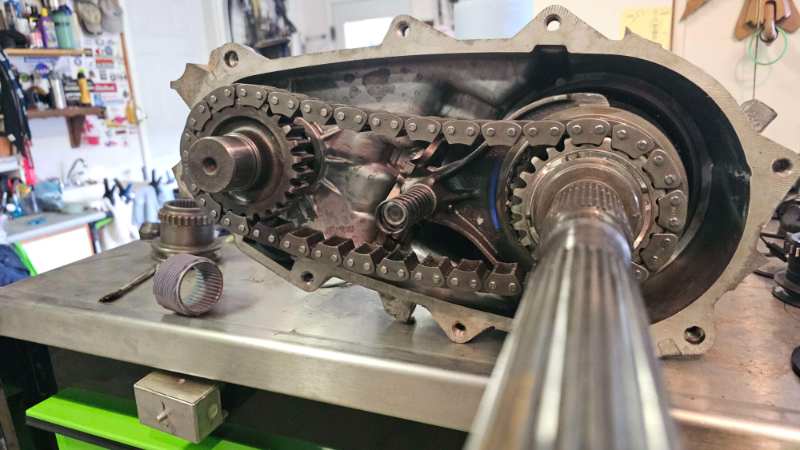
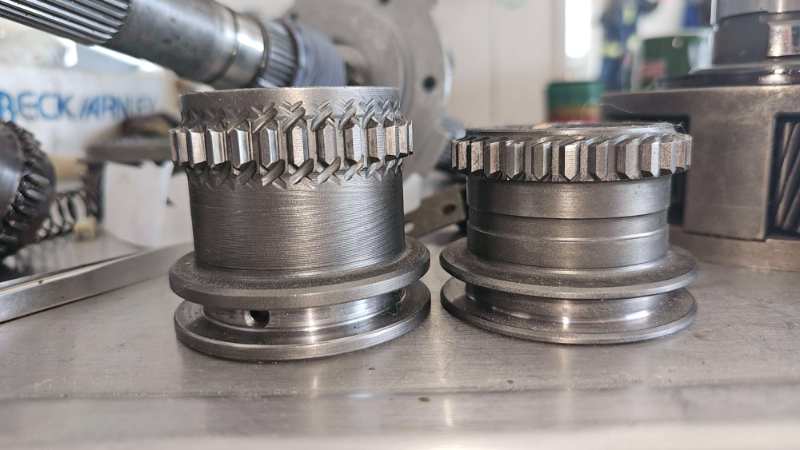
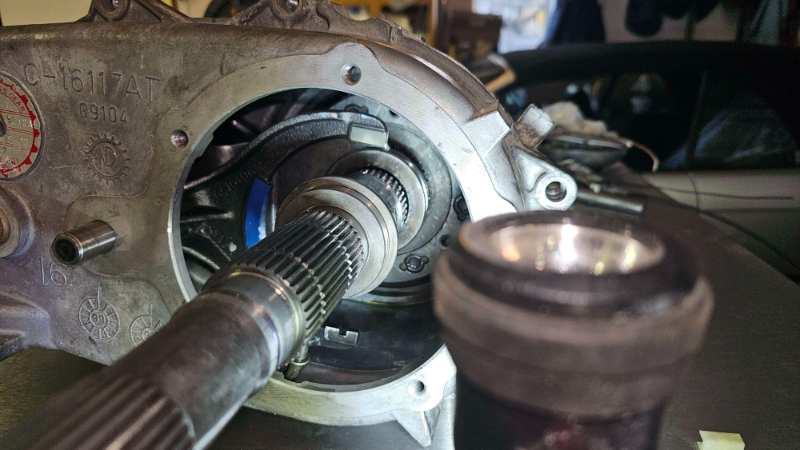
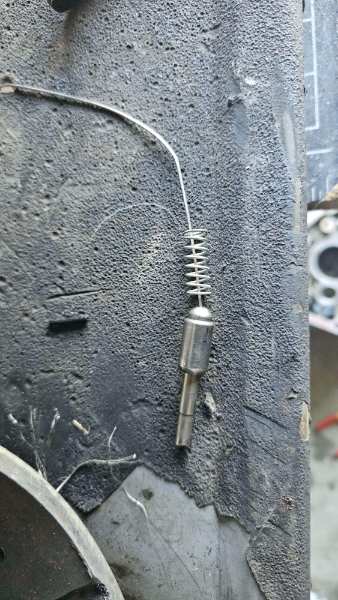
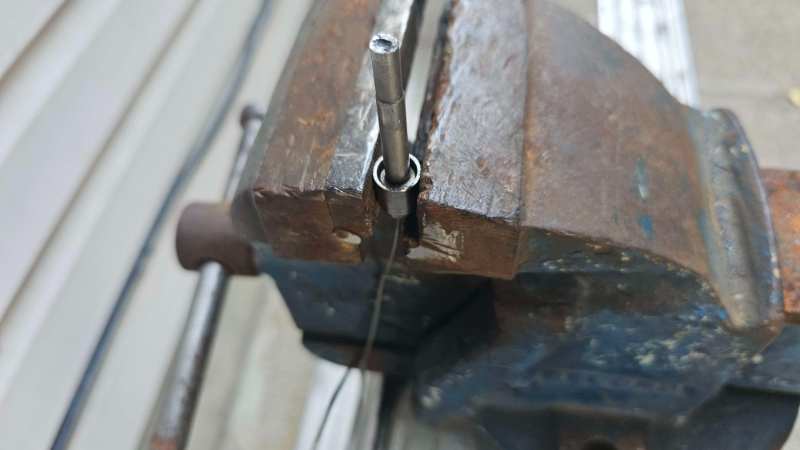
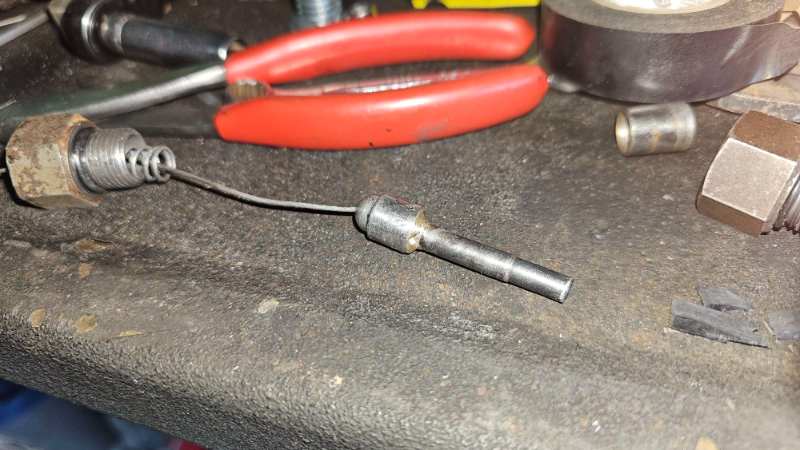
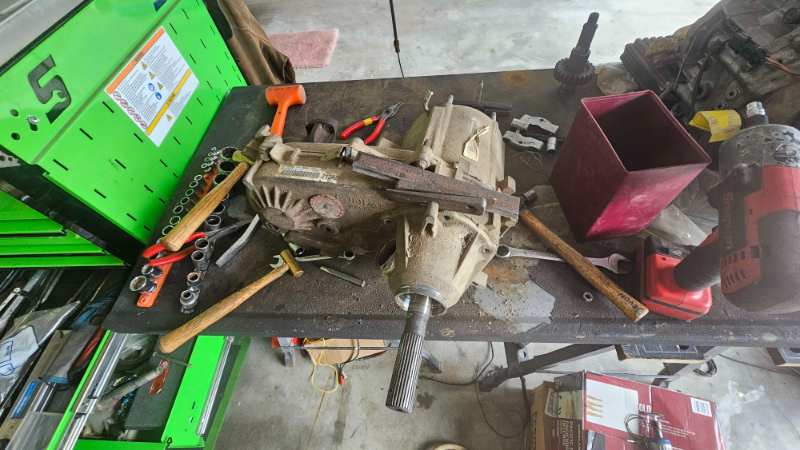
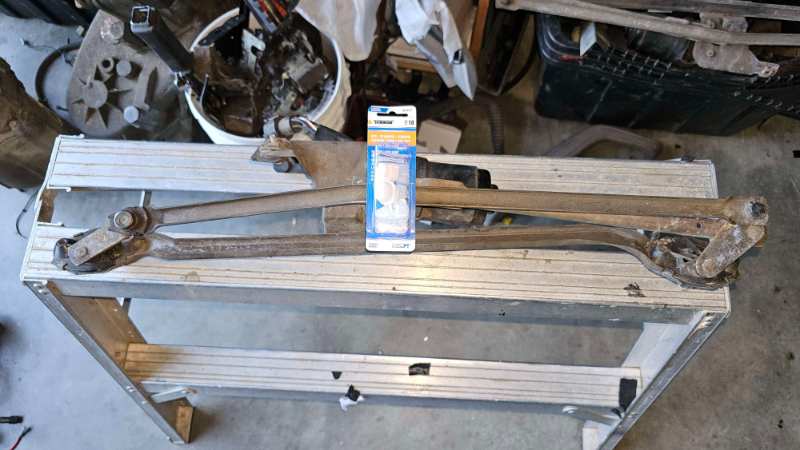
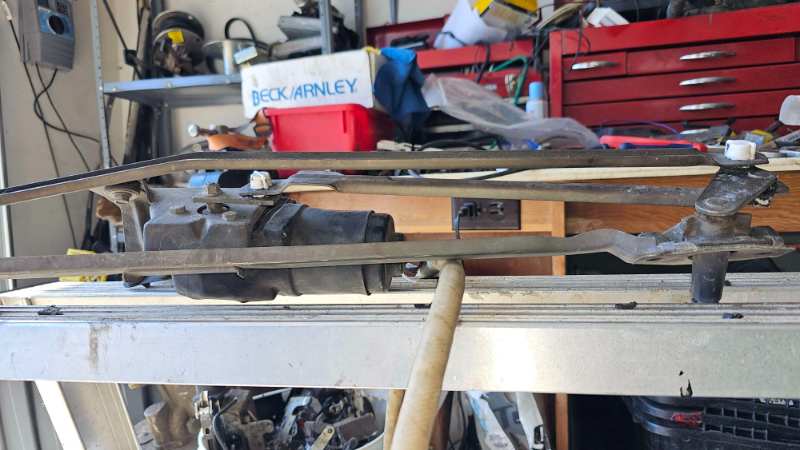
bearings and seals arrived! messed up and ordered two fat input bearings instead of a fat and skinny I think I have too many rear output seals also, they just appearing replacing the rear output bushing output flanges resealed this hands down was the most stressfull bearing to remove. ended up just tossing a washer in the bottom and went to town with a 1" rotary file. once the wall of the bearing was thin enough it just imploded and I pulled it out. replacing all the needlebearings felt like a downgrade honnestly, the new ones have half the needle count and plastic cages to take up the space. we shall see how long the last the 241's syncro dogs had a bit of crud in them outputshaft/syncro assembly after all the oil galleys got a good douching starting to put things back together was having some issues with the tcase shifting between ranges ended up tossing in the shift fork from the 80's gm 241 and the shift collar from the 2004 241 which for some reason is shorter than all of the others. I have 5 other shift collars and they are all the height on the left. thing worked flawlessly, HI 4HI N LO. full engangement of splines in HI and LO installed the spedometer gear and oil pump and closed er up left myself a friendly reminder figured out the doublers shifter, just need to add a cable guide through the top of the sping detent cap. the pin from the shift rail shift lock ball spring from fm radio antenna coupler crimped cable oxy fuel brazing I ended up shortening the pin, and using that 231 casing dowel on the right (below the electrical tape) as a bushing for inside the bore ID and OD worked out perfect another air fitting drill guide here you can see the rest of my frankenstien shifter. bike lever and mill spec wdg clamps lmao and it in action! like i said before I ended up using that dowel as a bushing for when the pin is locked in which I made after this, it straight up worked perfect and took away all the slop from the fork. that lever on the otherhand, it has character 20250607_184116_1.mp4

-
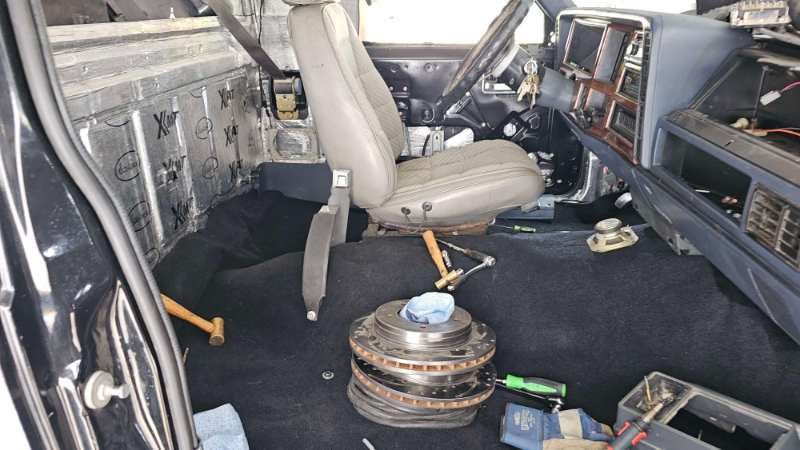
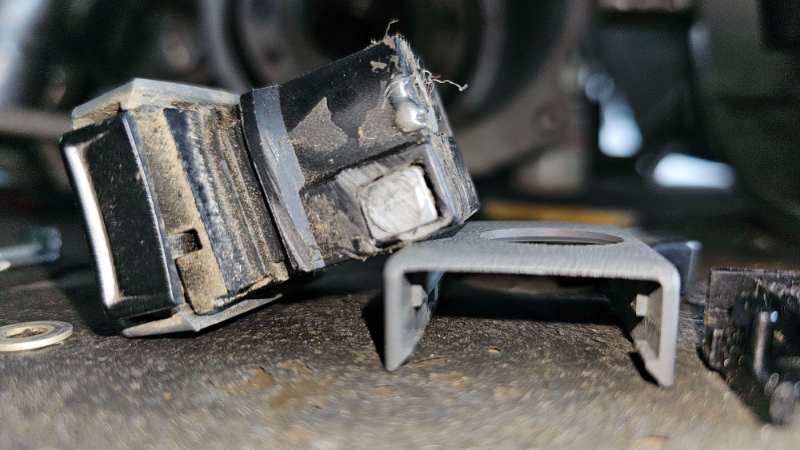
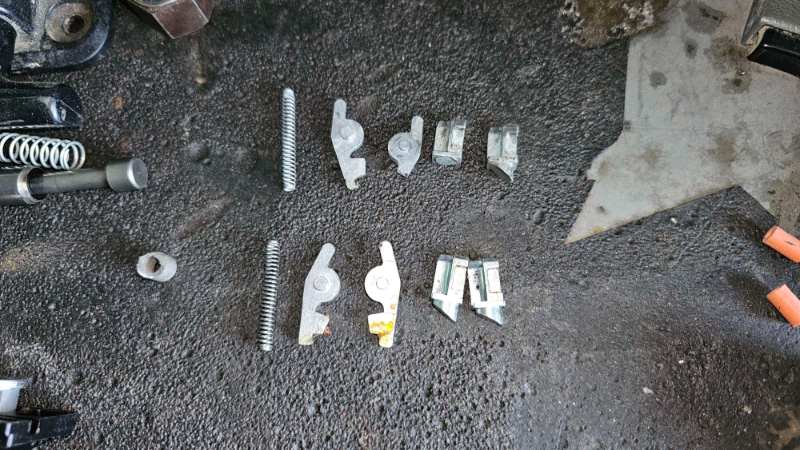
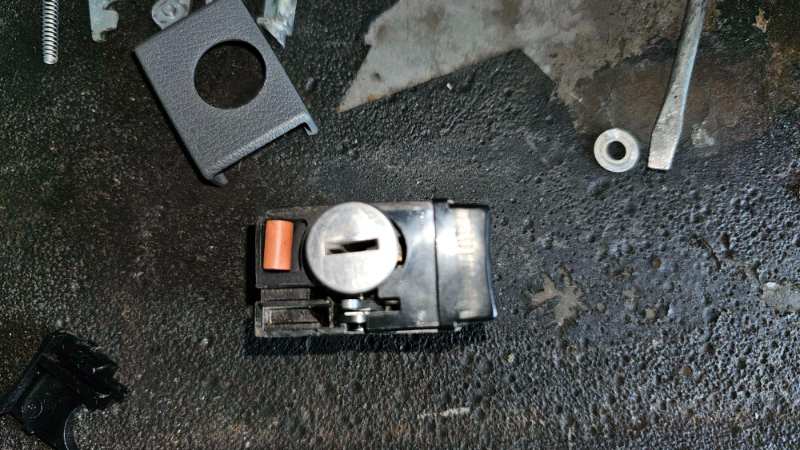
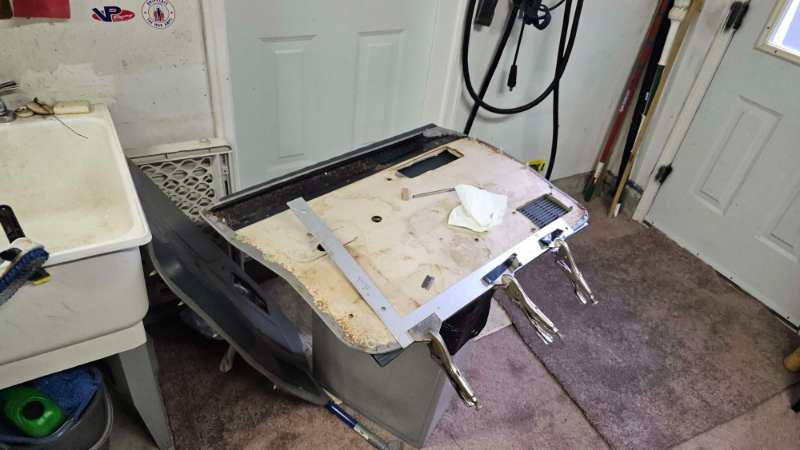
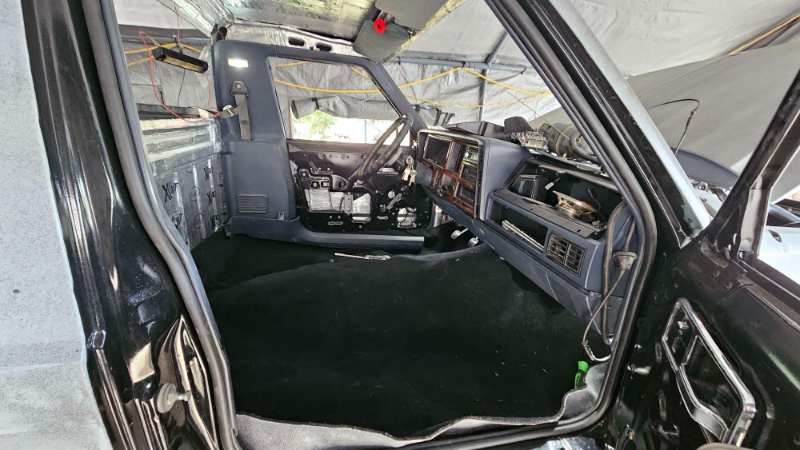
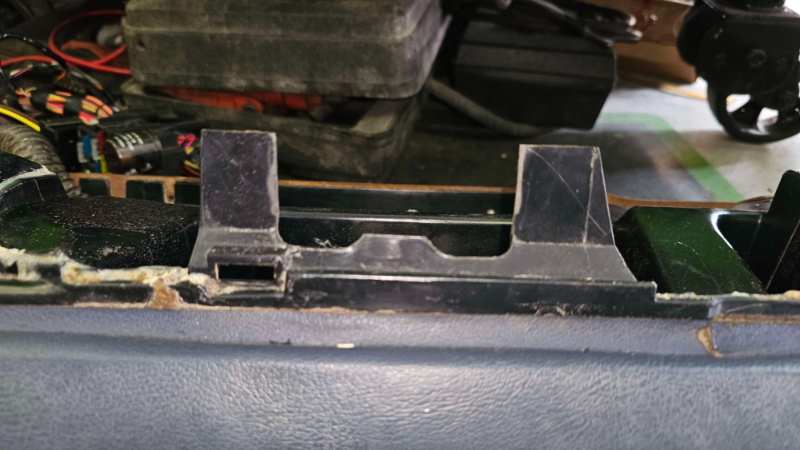
I'm realising (not quickly, because its been 6 years) that no one is going to finish this truck for me day after day of waking up and seeing no progress magically happen made me think the night shift has been slackin.. finsihed up the carpet. like I said its not perfect. my floor pans in the rear have no dip like oem, I went straight flat pan so theres a bit extra carpet behind the drivers seat. I swear I had a navy blue glovebox cover, maybe its sitting beside the 4 relay cover fasteners for both my trucks couldnt find it for now the OG is back on at somepoint the lock broke, and I am uncertain if i cut the one latch off but it sure was zipped off at some point It looks like it was taped and epoxied to make it work again, neither did anything. good vs bad latch assembly, to remove you just remove the plastic bezzle and then pull up on the scissorlink, the latches will just pop out from spring pressure. then assemble the way you took it apart. don't forget the little bushin's underneath the latch release and now onto doorcard repairs, blue very rare, once uppon a time I had a set, and that is where the map book holder came from, wish I knew that I would rebuild the truck and need them now for the present day. but my god are these things expensive (not really, but per card $100-200+ canadian + shipping + taxes + import +duty adds up) so guess they are getting repaied

-
Man A-Man!!! you do amazing work. what I could only dream of doing if i had access to those tools (id probably break and end mill first off) here I am with a zip disc and grinding wheel started fitting the carpet. had it where I thought was good, and guess what it was off. pulled it over to the drivers side and its a biiiit short on the passenger (my own fault) its like a 1/4" away from being picked up by the screws that hold the rocker sill plastics man I need new seats
-
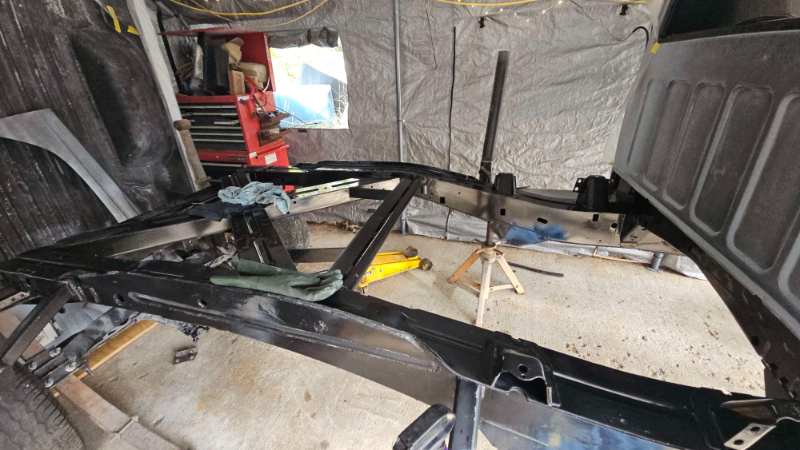
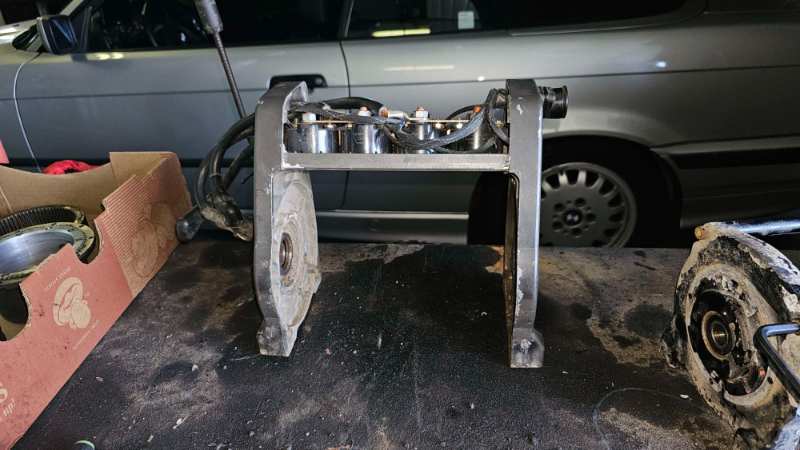
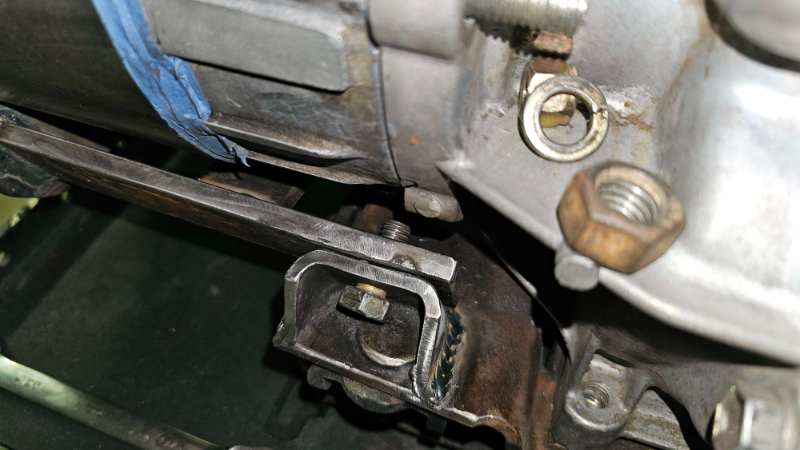
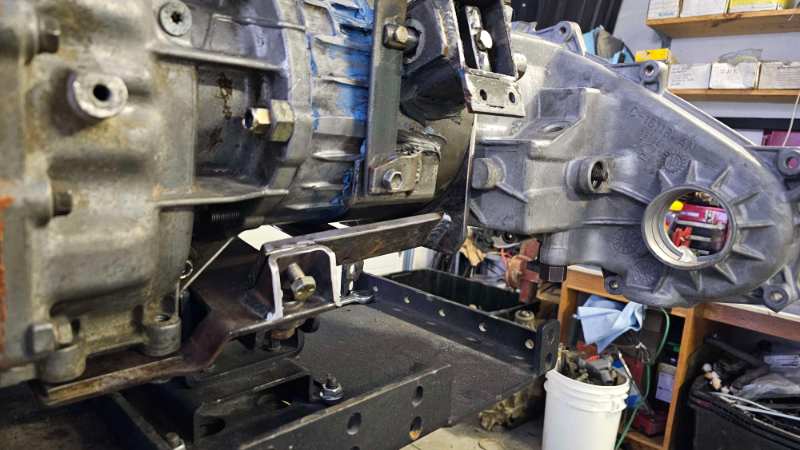
I dug around in my chucks of metal and came up with this. tied the doubler brace into the transmission mount so now the basket it complete its tight but it fits!
-
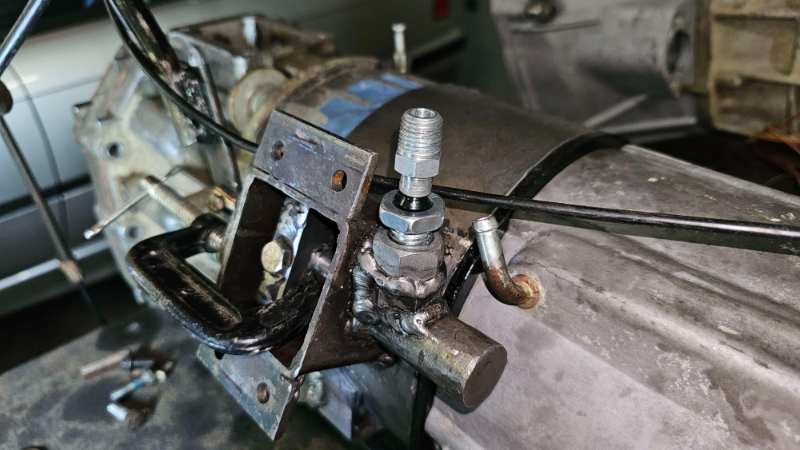
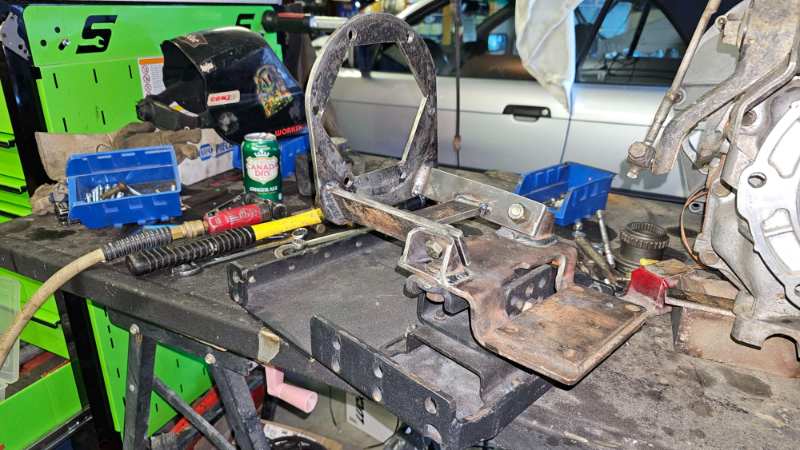
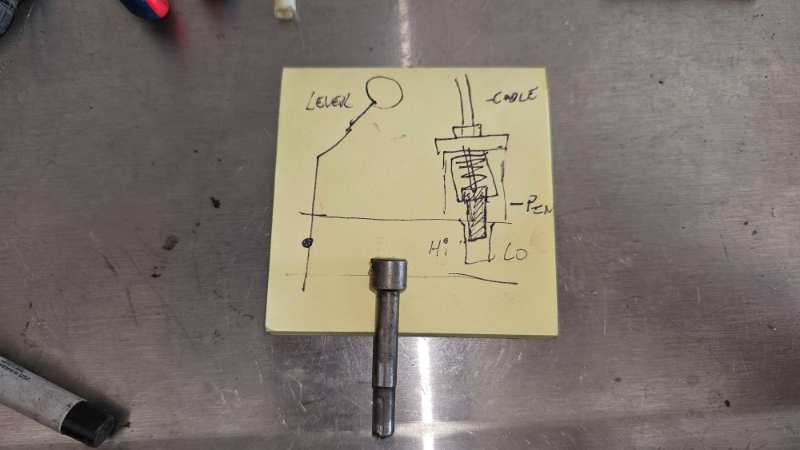
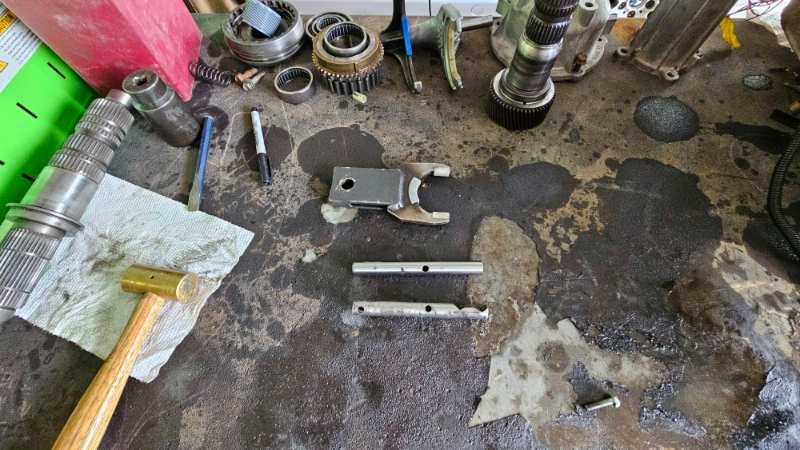
here is a crude drawing on the shift lock I want to make. after looking aound the garage I have found enough junk to start building it I want to use this hardened pin that actually came out of the shift rail, two posts up you can see one of them still sitting on the front output selector rail or what ever its called and for those who are wondering.... no I am not a complete savage. I do have a nice work surface for doing important stuff like final assembly with bearings. that other one is nice because I don't have to care about mucking it up working on the shift rail some more needed to drill a hole for the shift lever and I wanted it to be as straight and centered as possible best choice would of been to walk down to the other end of mydriveway to my neighbours ( we share land entrances, and honnestly its been great, he has every tool I don't and vice versa, I don't charge him for work so I have free rein over there) but I was feeling lazy and I had an old air fitting lying around that i ground the bottom of until it matched the profile of the rail. afterwards I put like half a stick of hot glue on the fitting it actually worked! next step was to tap the bore where the hardened pin came out of, to accept the new bolt for the fork. which was conviently sized for a 5/16 tap about 10 mins of slow going and it made it through, I could have gone quicker but it was fighting so much I had to break out the large tap handle and I didnt want to break. something about the metal being hardened still bla bla bla I ended up drilling the fork out to accept the new 5/16 bolt, which was double the size of the old one. just like that all the slop is gone, and it shifts nicer than I have ever felt it shift since I have owned this truck I havent brought it to the machinist. after assembling it I am scared too. I feel that it could cause me more greif having just one part machined perfect, if in the future it comes back to haunt me I'll eat my words and let yall know. and testing the ranges with both reductions installed left over junk equals great work stands and training aids.
-
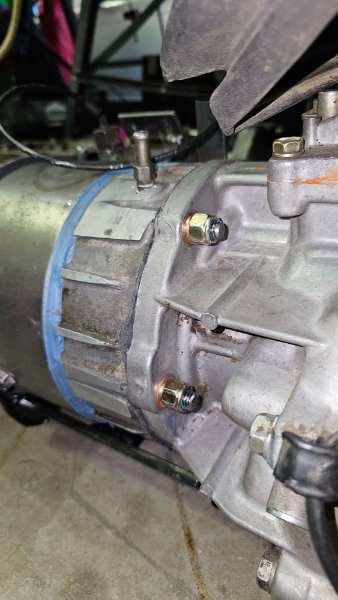
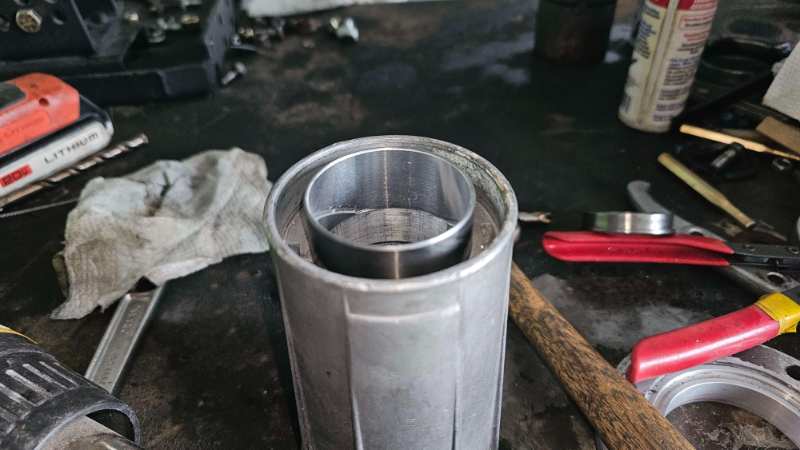
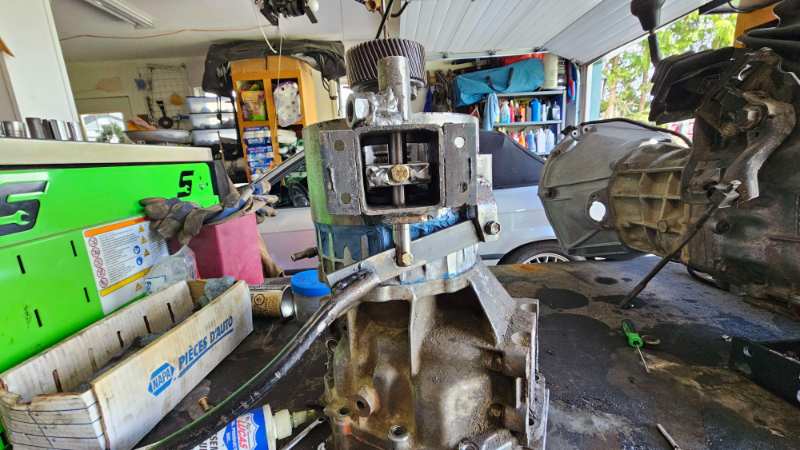
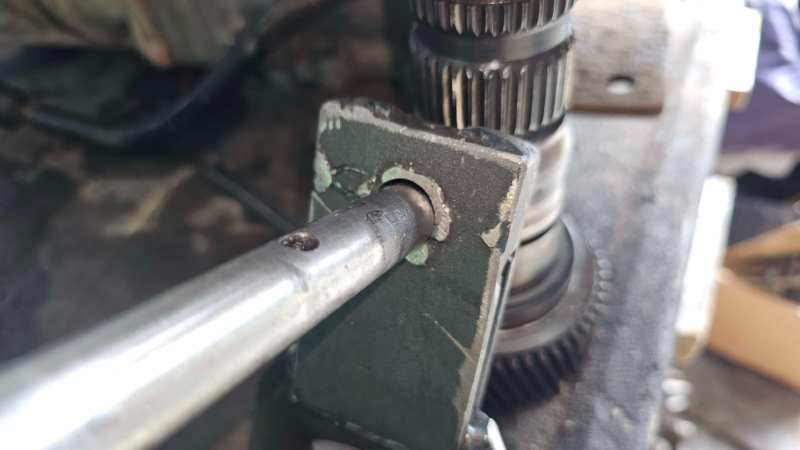
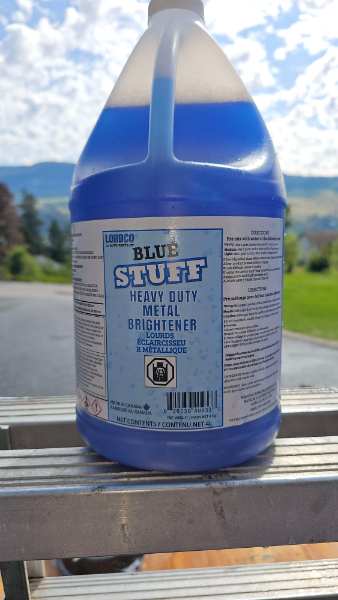
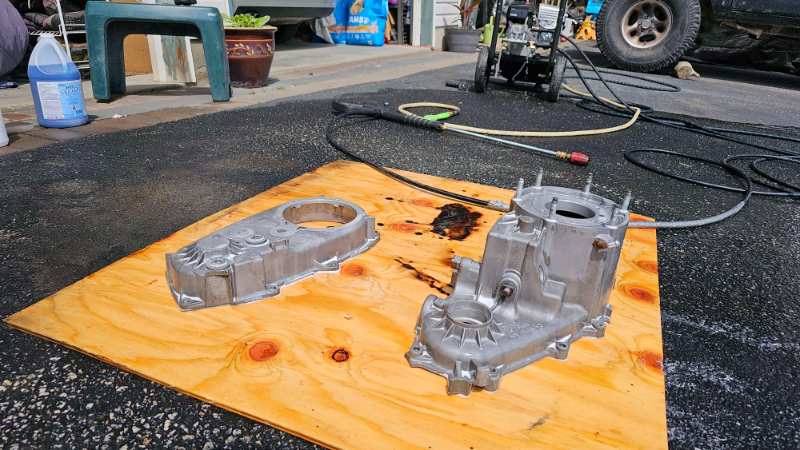
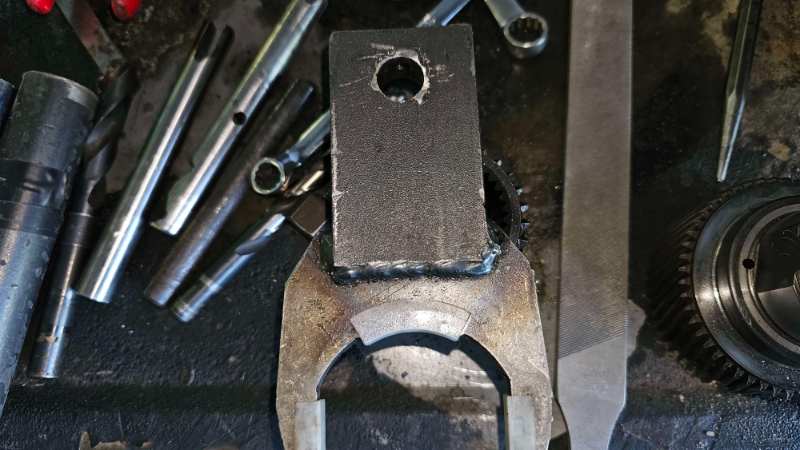
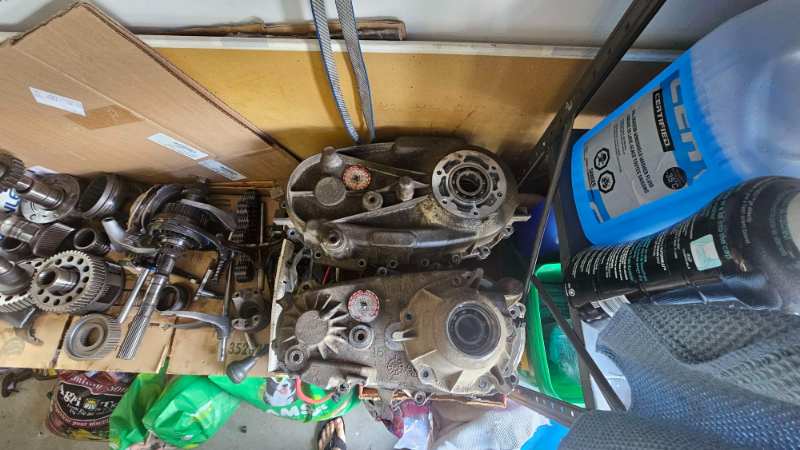
better shot of how the bore is oversized picked up some blue stuff to clean the casings since they were oxidized and I wanted to see if it there was any hair line cracks (yes i could have when it was oxidized, but it looks better lmao) went from this to this and here it sits, waiting for new bearings and seals + the shift fork to be machined. getting closer to being able to connect a driveshaft! I need to tie in the transmission mount into the doubler bracket still I want to make a spring loaded drilled/pinned shift rail instead of ball detent. any suggestions? I have a hardened pin that held the original fork to the shift rail I am using that would work perfect, just need to design the rest. PS if you buy a snapon box, don't get the rock gaurd top its horrible. it will peel on second thought DO buy your box with a rockgaurd top, and then warranty to a stainless for free like i did!
-
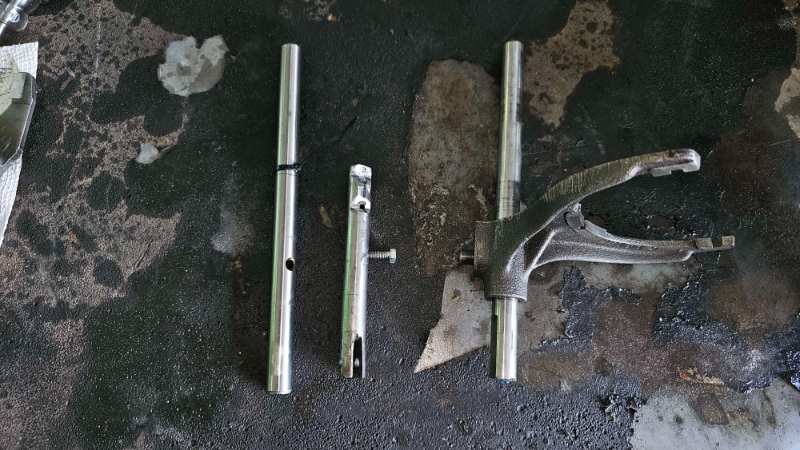
made the new shift rail for the doubler you can see i straight up butchered the old one years ago while getting ready to drill the hi low detents I noticed some inconsistency in how it was engaging between ranges it ended up being the shift forks bore is forked, allowing it to shift side to side on its own I will have to get it filled and rebored and add about 1/4" of shoulder on either side to prevent it from happening again remember this fork was made about 30 years ago. its proven itself. it works...

-
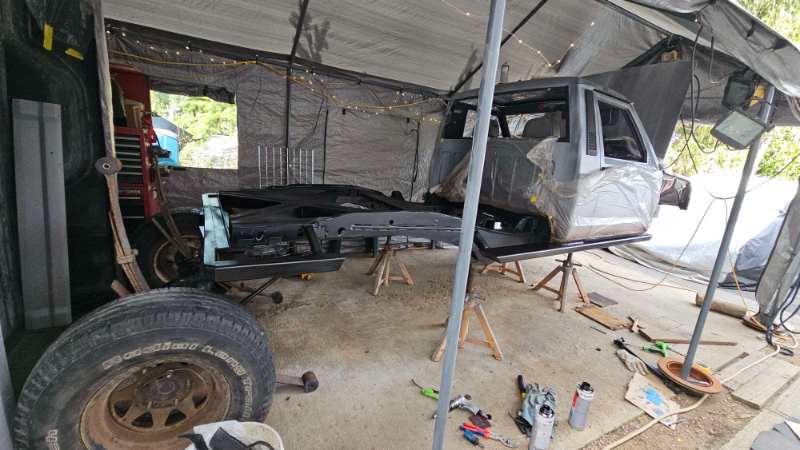
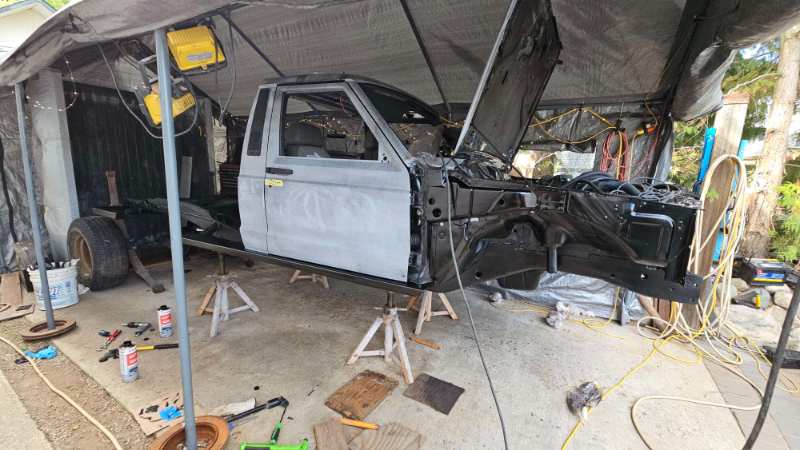
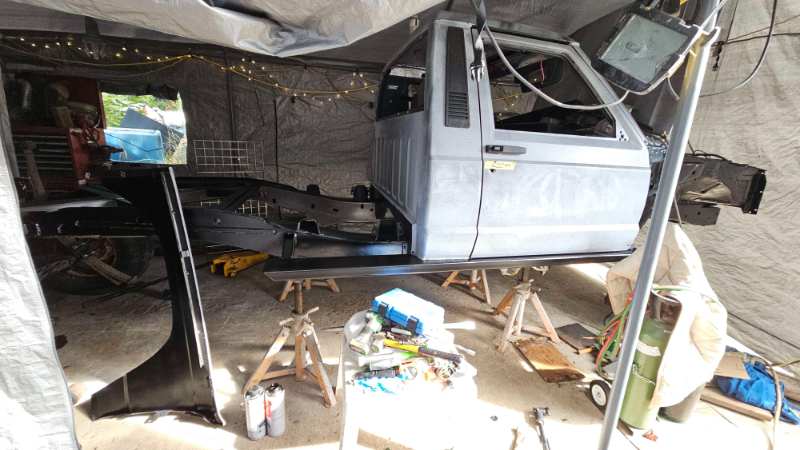
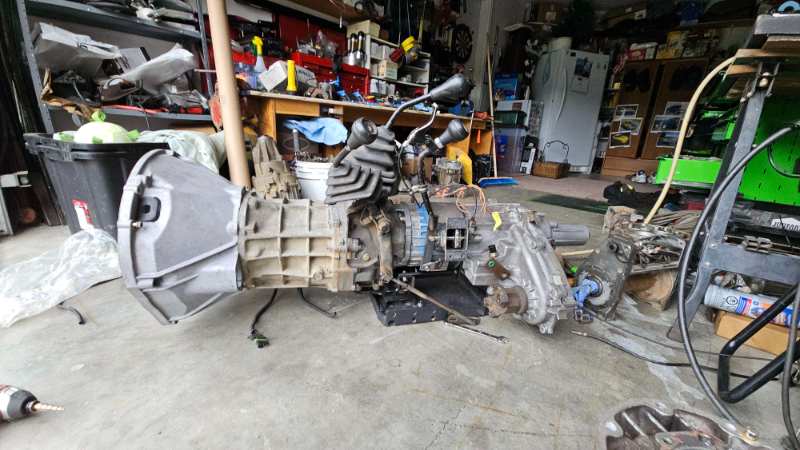
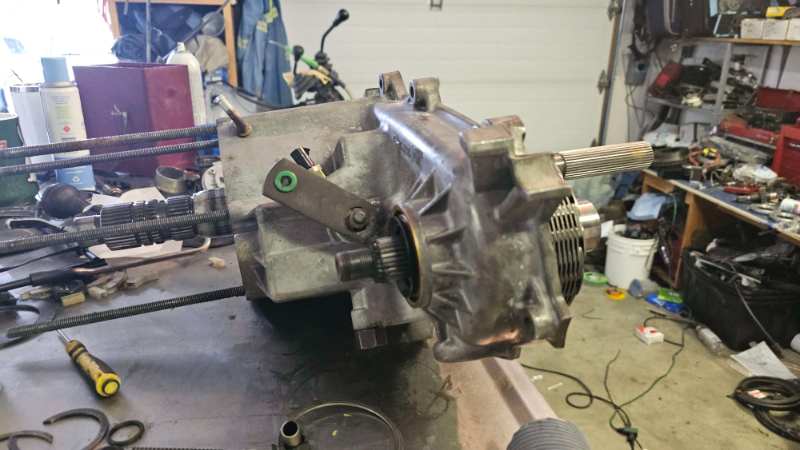
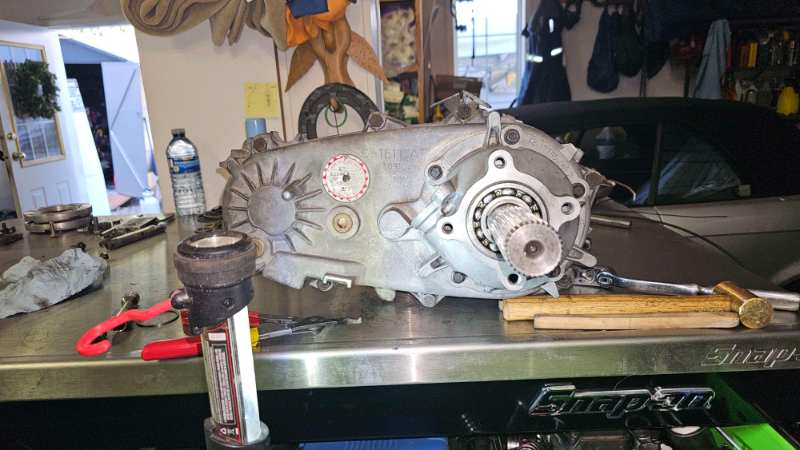
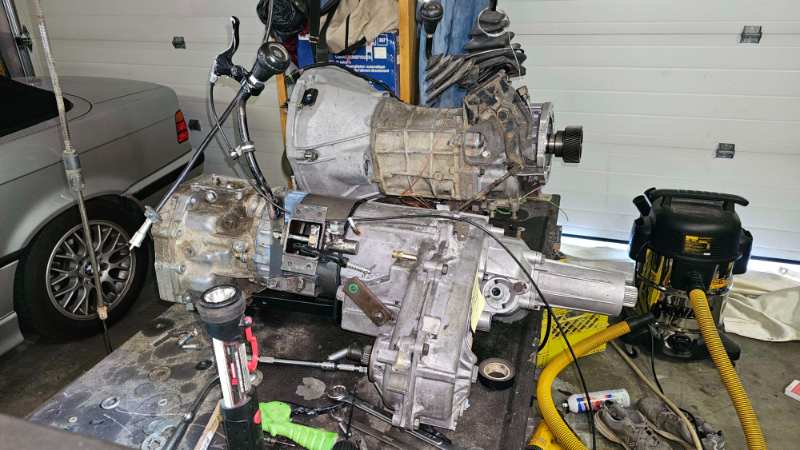
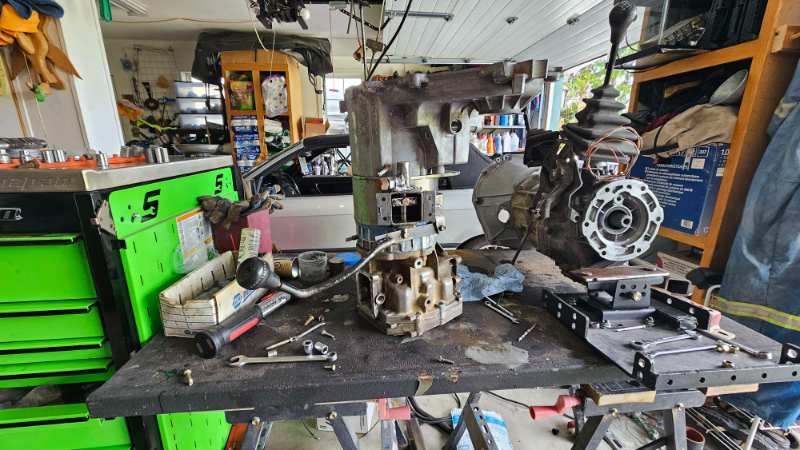
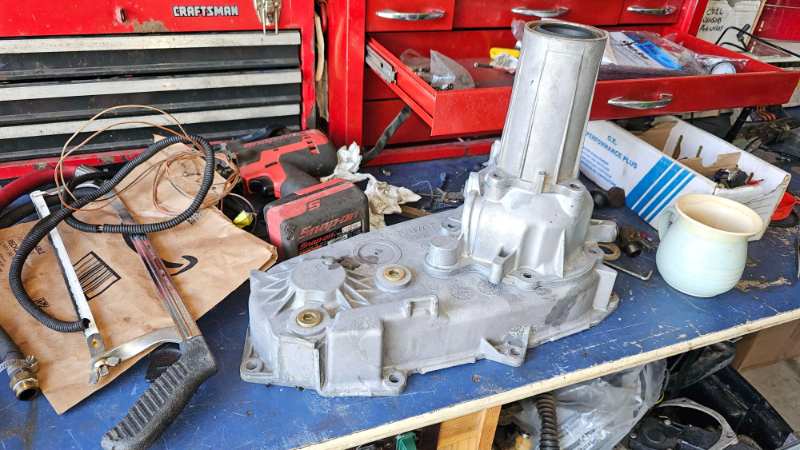
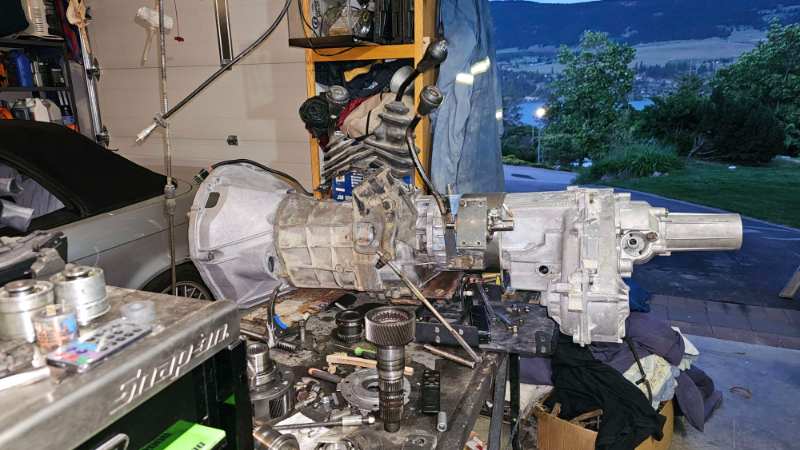
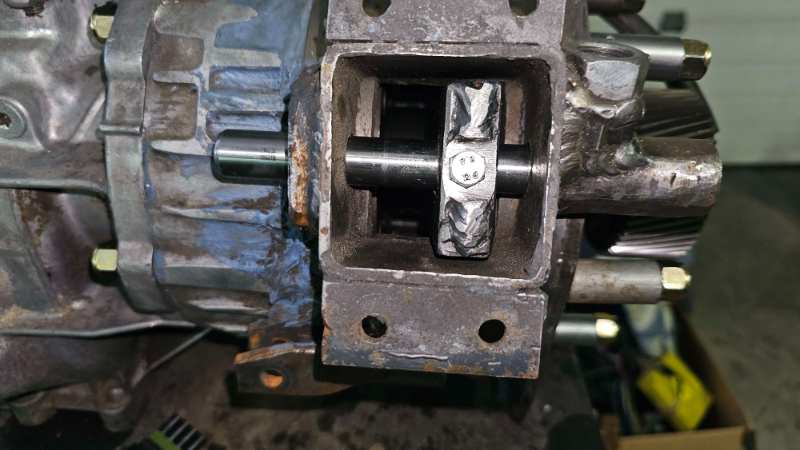
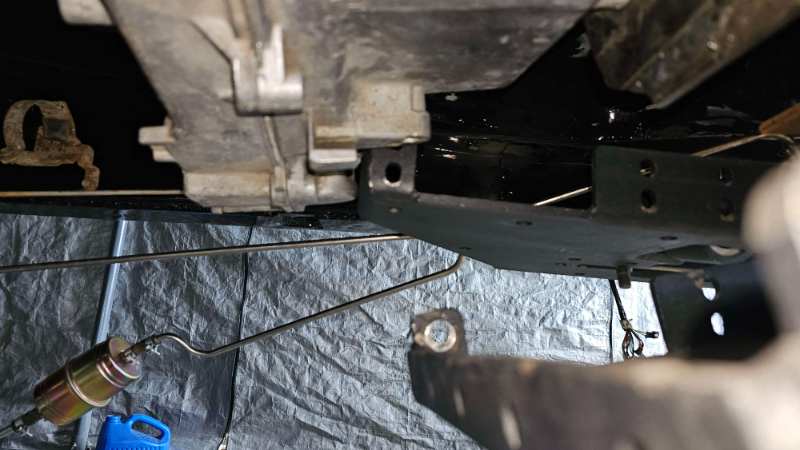
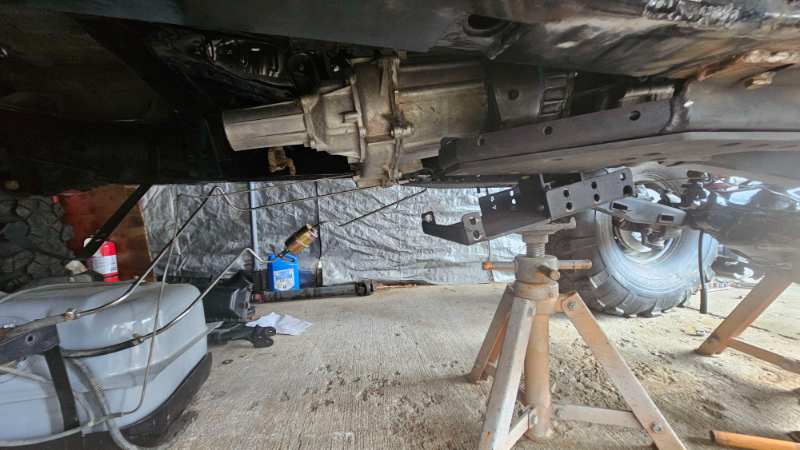
well the clearance washers worked boys! our clearance is clearancing!!!! no cuttin for this guy!!!!!!!! clearance washers in action 20250524_170031 (1).mp4 and removed after adequate clearance achieved all jokes aside, IT CLEARS! I can't believe it. it is extremely tight but its doable I would also like to redact statement two on page 5 "2. the ironman 4x4fab xmember is so wide regardless of the doubler it makes it extremely difficult to install tcase/trans at the same time. to the point I am cutting the floor out I have made and turning it to an access panel" it actually clears perfect with the doubler. granted I still need to make a custom driveshaft for the front thinking if all goes well, I can maybe take it up and down the street in a week or two. brakes have to be done first. not much flat land in these parts. now with all the empty casings out. time to work on the transfer cases. I have acquired an np 2005 241 D I was planning on using because it has bigger internals than my current np241 AND supposed to have a 6 planetary gear setup. after taking it apart and examining carriers its only a 3 planet. what a shame.... I tried to put my 6 planet in, and it didnt fit so I tore open the 99 np231 J i had lying around to use the casings and stuff my orginal np241 internals into it. that also means, no machining on the legendary homemade sector shaft required! there were few that believed it would hold up. but 30+ years, i'd say it has done well starting to mock up the doubler and set up hi/lo shift rail (i destroyed the otherone being dumb years ago)

-
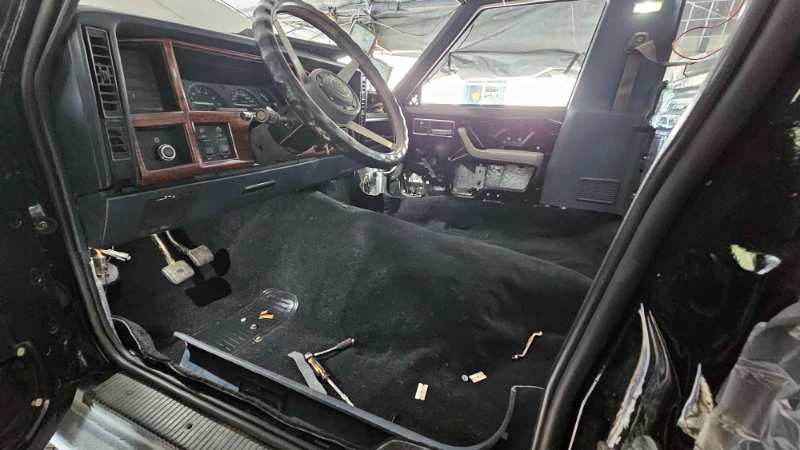
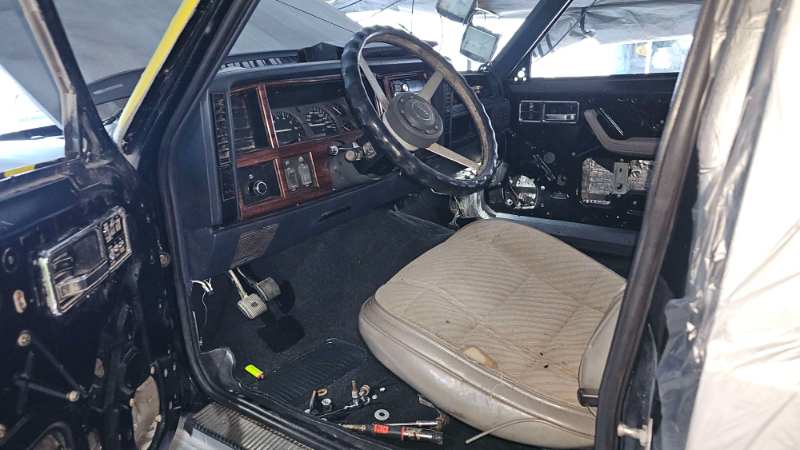
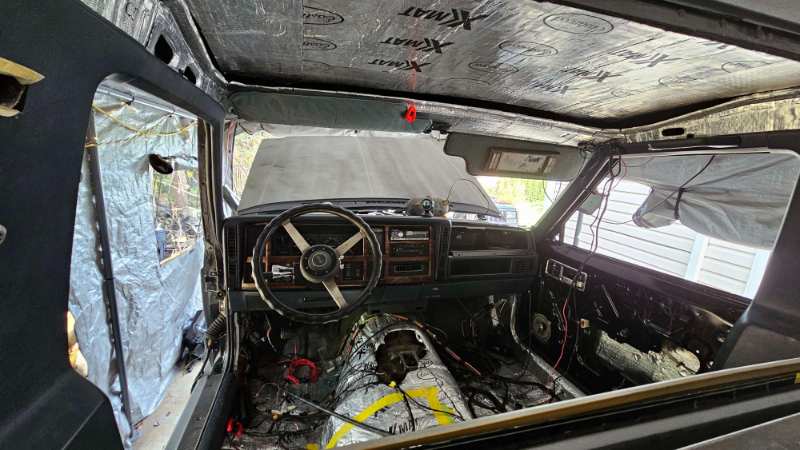
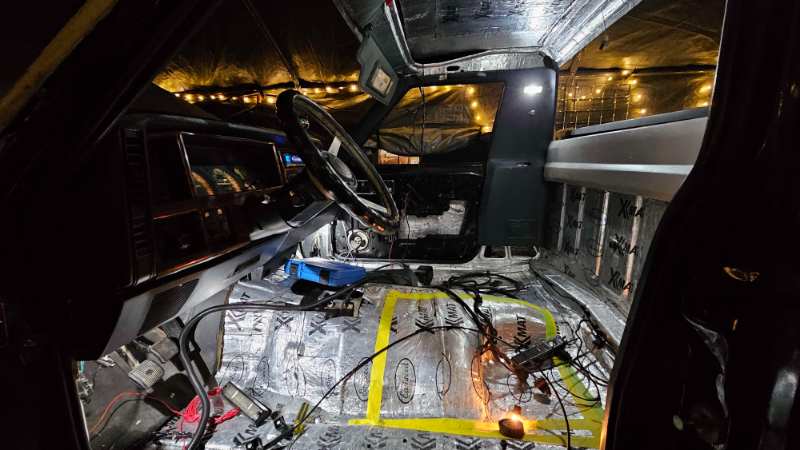
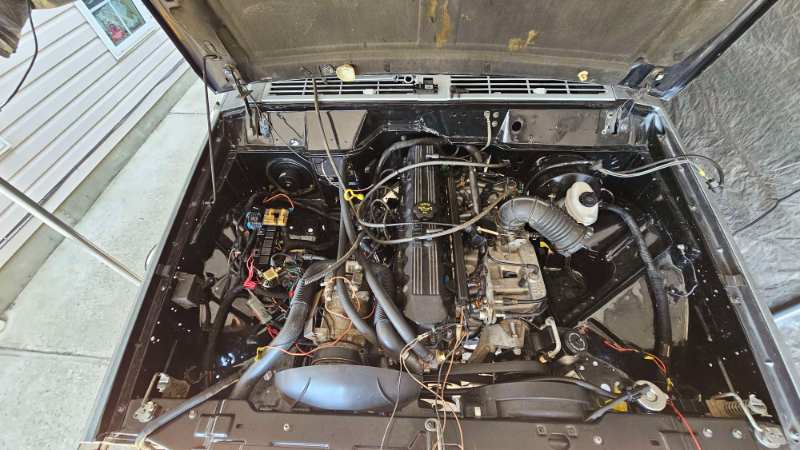
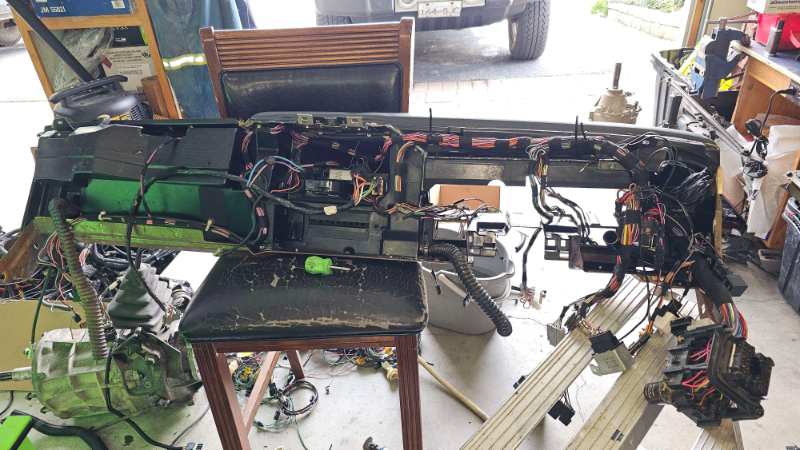
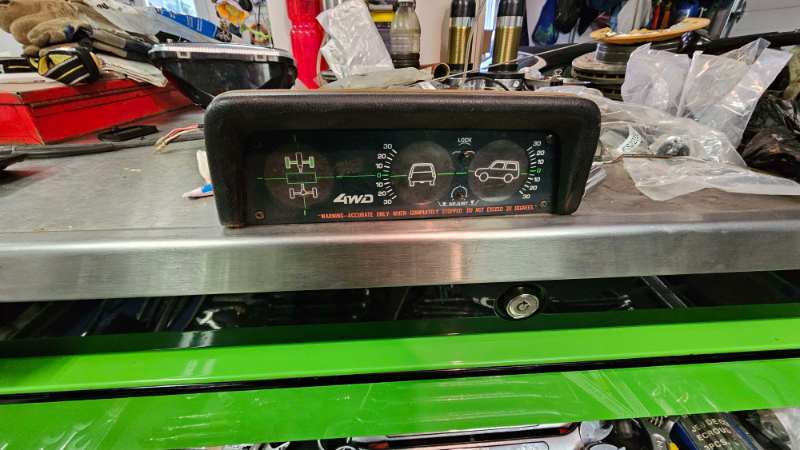
the battle of the motors has begun.... and finished. in rapid succession. the winner recieved new bushings. dash all buttoned up. all switches functional. need some custom switch placards. cab fully wired. time to cut my floor and turn it into an access pannel

-
gave it some washers 20250524_170031.mp4
-
clock works!

-
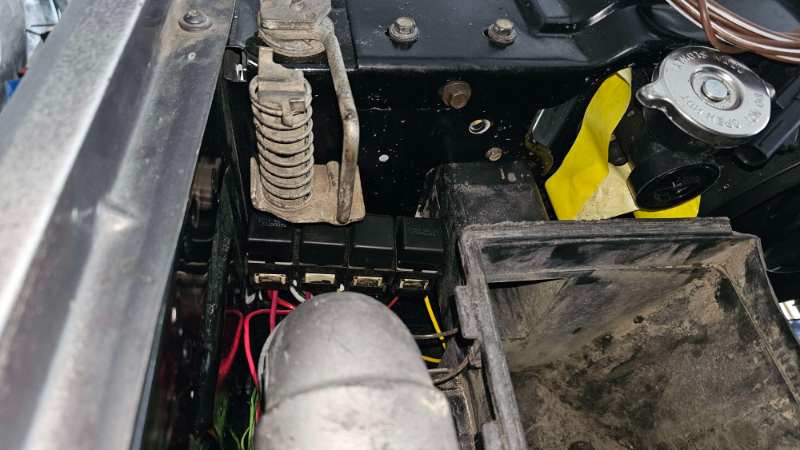
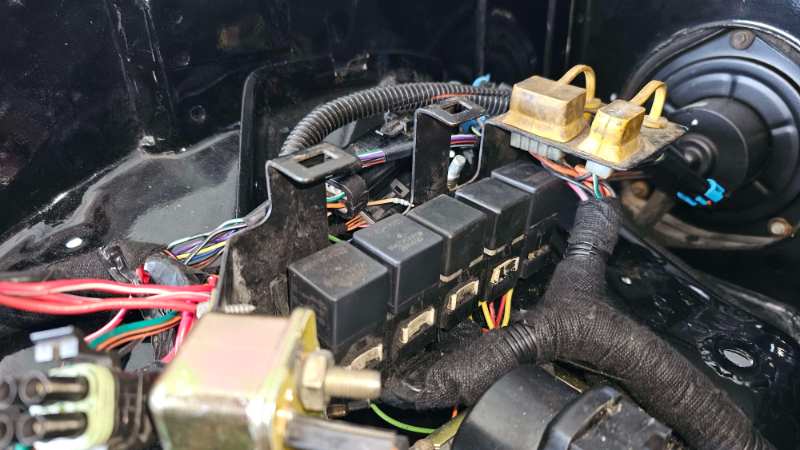
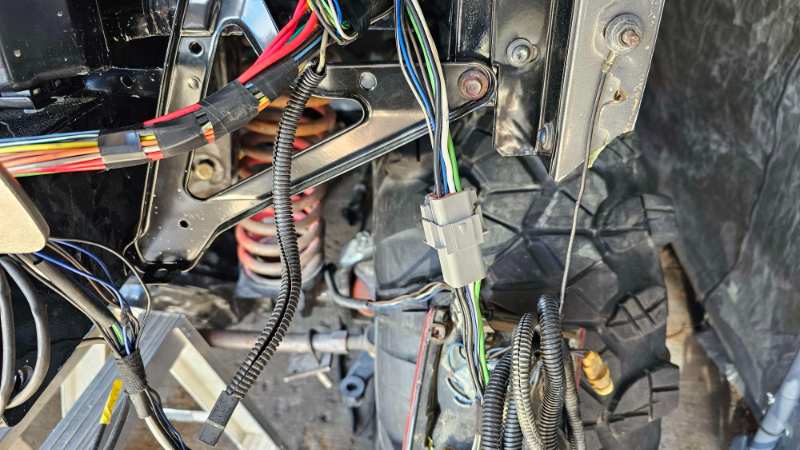
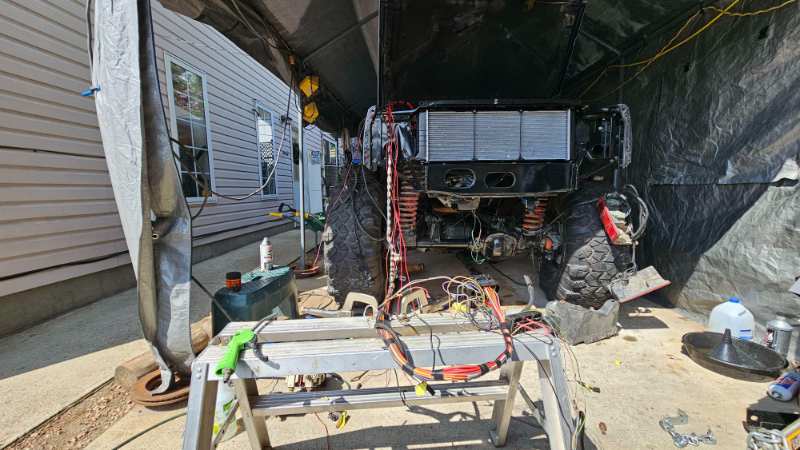
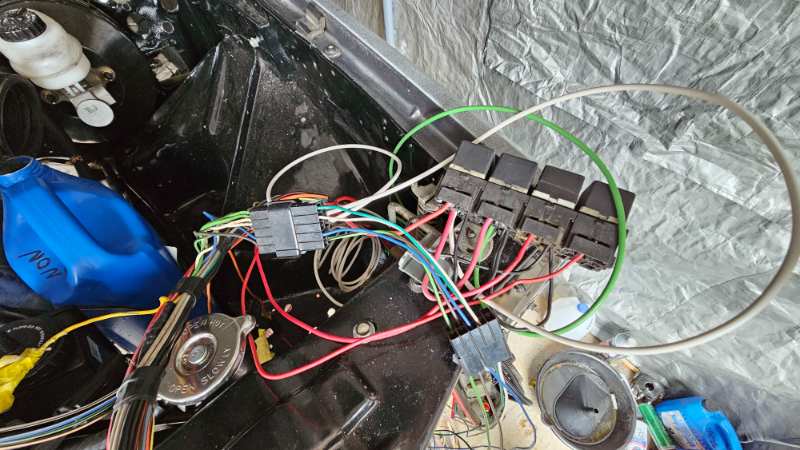
been a few days! headlight relays fit perfect beside the airbox! (need to add the little grey clips that hold the back of them tight) you can even sneak an extra one under the renix diag ports headlight harness is done you can see the wire beef connectors showed up engine bay is looking better, no more jungle of wires. need to shorten the temp sensor wires, add the onboard air stuff. delete the balast resistor (it is removed. just have it jumpered. but will solder the wires together. doesnt do anything anyways) putting the harness in the dash. had it in and all wrapped up before I realised the clock I want to use (the quartz one) was lacking the wires to function. pulled another harness out and robbed the wires.

-
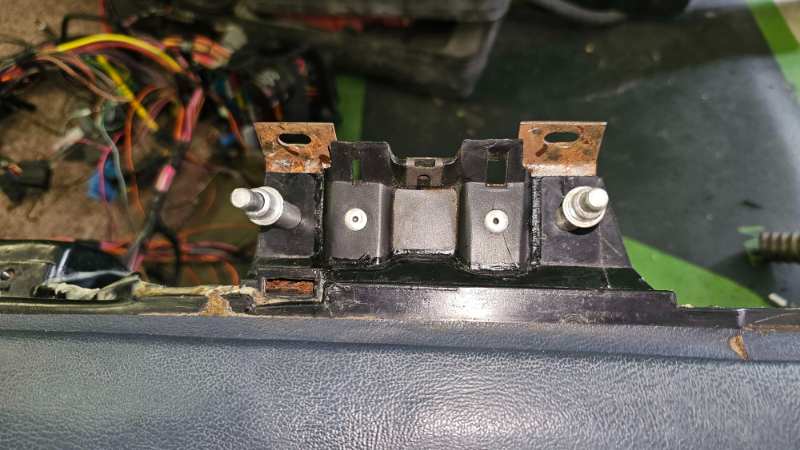
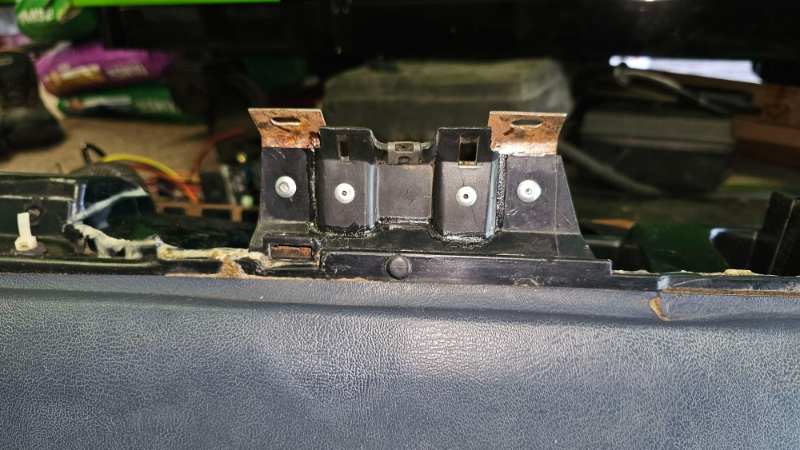
plastic repairs are all done, dash is now somewhat useable atleast it wasnt as tedious as doing textron ducting repairs back to cutting parts out of the donor dash took me a bit to decide how I was going to blend the new peice with the old and this is what I have came up with after drilling some new holes and celco'ing in place I bonded the two together and then added some rivets. disregard the plug in that appeared in the middle, my original plan was to add a rivet there. so i used a spotweld cutter and removed the top layer. after I drilled the center for the rivet I realized there was a big void between the brace and where I wanted to fasten. hence the plug I do have another Idea for that hole, I have this old landcruiser inclinomoter, yes sadly not the one with the altimiter. but the wires need to go somewhere. and that is right behind the area I am going to place it. maybe oneday I'll get to drive this again.... but for now I will keep posting pictures


-
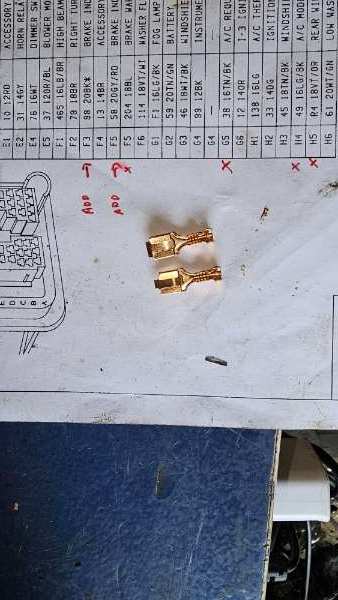
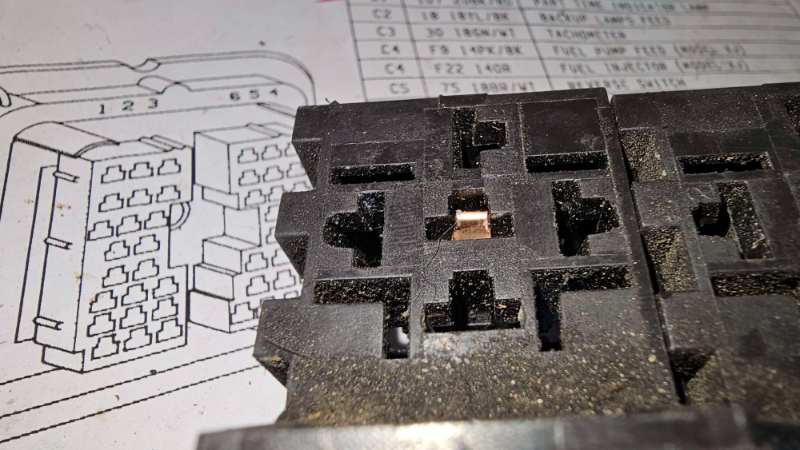
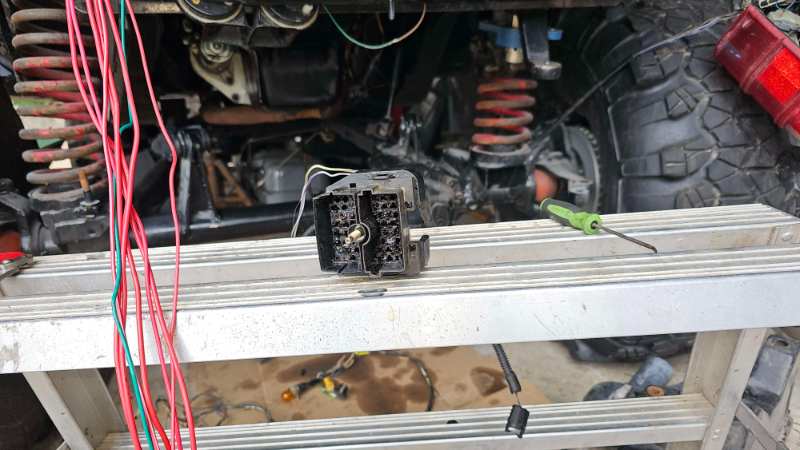
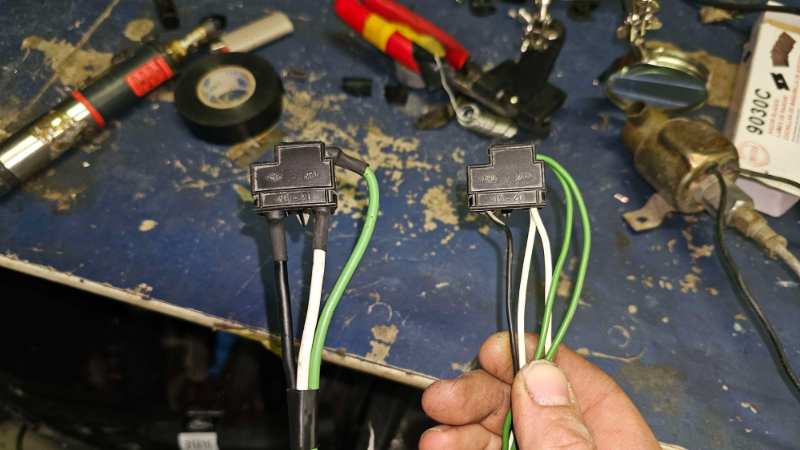
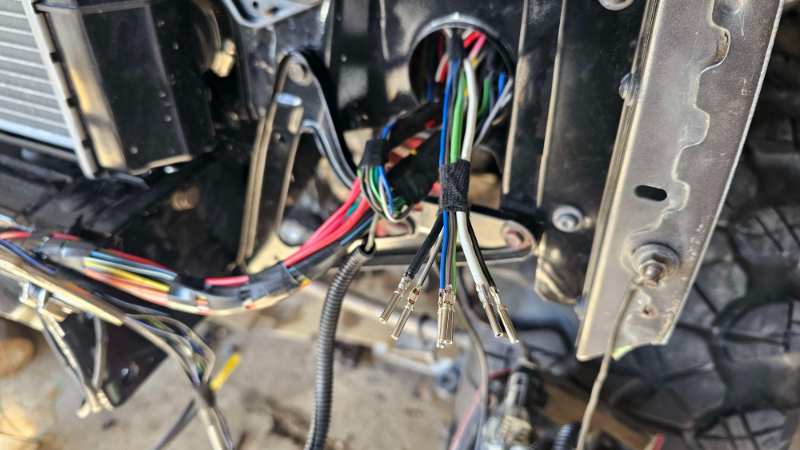
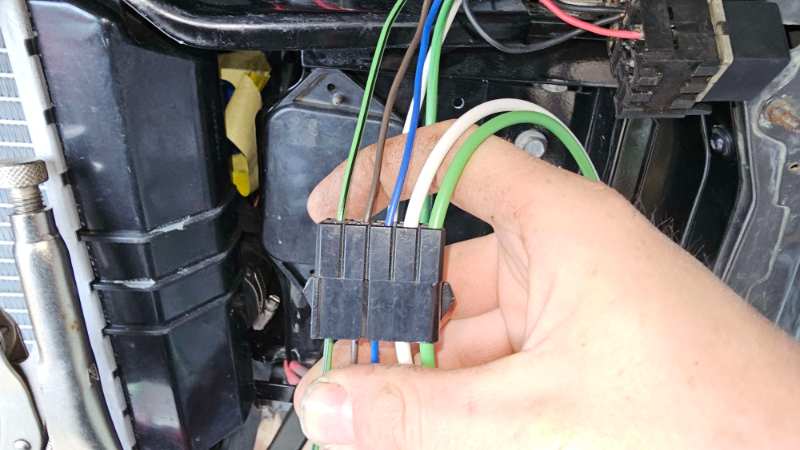
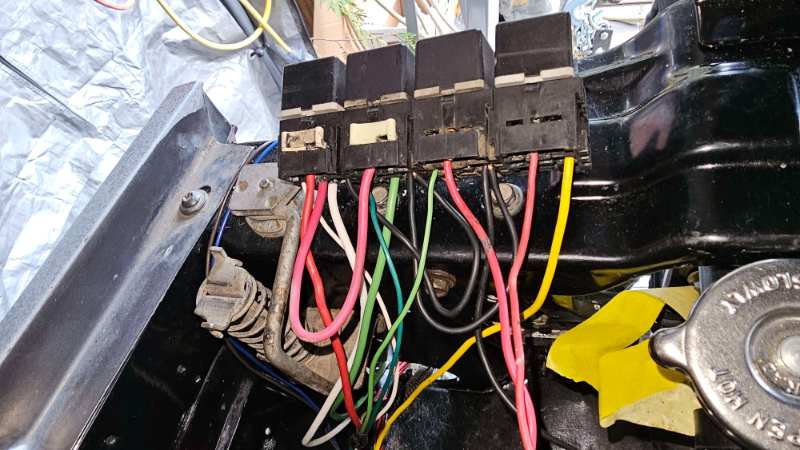
harness now bundled i'm not actually usuing electrical tape, I will be cutting it all off and replacing it with some harness wrap. back to wiring in the relay bank before I went and straightened out the harness. I had a few male/female connectors lying around that matched the front clip, so I started making an adapter for it to be plug and play, sadly I can't use the female end to the front clip since I just cannot find the terminals if anyone has p/n for 12 awg wire terminals for the connectors pictured please comment them here you can see the difference in the wire gauge. I will be running the same gauge in the front clip harness as well. most of the relay bank assembled. once the new connector for the front clip shows up i will shorten the two fusible links to match the rest. here is where they will live. the stock grounds for the relays was like a gaint spider nest. I will be adding a few common ground studs throughout the engine bay and grounding everything to those. essentially those relays control HI/LO beam, foglamps and the aux radiator fan just need to wire in the compressor and linelok but those will go on the passenger side of the jeep

-
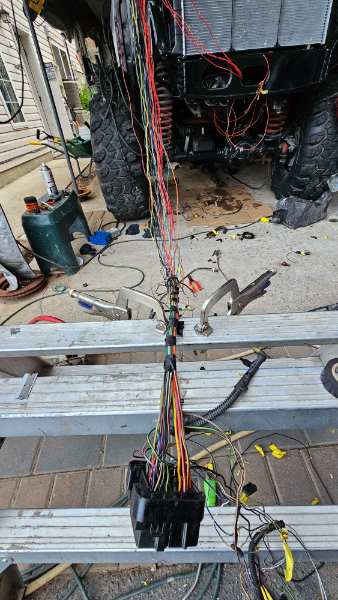
Thanks A-man, it really is. honnestly, if nostalgia wasnt such a thing I probably would have never gone this indepth. I know I have said it time and time again. but Robert Bryce built the original poor mans stroker in the early 90's, thats where the term came from for the 4.0L this is infact THE truck and motor from way back. the early days of the web forums, back when people wrote pages of trip reports and had web spaces dedicated to their craft. there was no aftermarket support like there is now, back then you just had to make it youself. there was alot of firsts Robert "Rye Guy" had done. to building custom suspension making home made tcase doubler/sectorshaft that has still held up to this day and making the famous "jeep poor mans stroker" I am sure there is more all of which I speak of has now dissapeared from the internet as a new wave of fresh content and architecture flushes out the old. the only place besides CC to even mention is jeep40performance I am sure Pete M could agree, reading those trip reports and seeing all the pictures really got me into comanches! then one day I get a message saying "hey I know where the truck is, he will sell it" now this is no exuse why its taken me so long to finish. the older I have gotten the lazier it is to be. but hearing that motor fire up for the first time in over half a decade has gotten me locked in. I modified the terminals I picked up to work with the relay blocks, they ended up working so i buzzed about 30 of them down mocking dash harness into its new home at this point I was wiring in the relays for my aux systems and the main harness was bugging me so I got to de pinning the entire harness out of the builkhead connetor after a while of detangling I just started pinning everything back intoplace making sure not to cross wires and here is what I am left with. much nicer.