


agamble
-
Posts
214 -
Joined
-
Last visited
Content Type
Profiles
Forums
Gallery
Everything posted by agamble
-

Dana 44 Disc Brake Conversion
agamble replied to agamble's topic in MJ Tech: DIY Projects and Write-Ups
The rims I’m running are the OW9029 which are 15” x 7”. The 10 spoke (OW1402) should not have issues with fitment as they are the same size. -
D44 disc conversion
agamble replied to ftpiercecracker1's topic in MJ Tech: Modification and Repairs
Haha, the copy paste you’re referring to in my response is indeed copied from my thread(s). I have it on my build thread and I put it in the DIY section of this forum here as well. So, indirectly this was me saying I’ve personally done the conversion and currently run the setup on my Comanche. Why reinvent the wheel so to speak. I’ve already provided my first hand insight. If you elongate only one side, yes it leaves very little material. But if you take material from both sides when you open the holes there still is substantial material. -
D44 disc conversion
agamble replied to ftpiercecracker1's topic in MJ Tech: Modification and Repairs
I went with the Ford 8.8 backing plates and calipers paired with ZJ rear disc rotors when I did this conversion. Have not had any issues. I went with the setup I mentioned as all I could read up on the conversion showed Ford explorer rear discs read to be the best for this conversion as the spacing on the backing plates is closest to the D44. - 95 - 01' Ford 8.8 rear discs backing plate has a 2" x 3 9/16" bolt pattern - 86 - 90 MJ/XJ D44 has a 2" x 3 11/32" bolt pattern This gives a horizontal difference of 7/32" between the two backing plates. The explorer backing plate need the holes to be inwardly elongated 7/32" for them to bolt onto the D44 housing. A dremel with a carbide bit made quick work on elongating the Ford 8.8 backing plates. Remove about 1/8" inward side of each hole. I used the retaining plate to measure when I had removed enough material. When selecting rotors I had read of some using explorer rotors and others going with ZJ rotors. The difference between the two is practially negligible. I read of some people getting some brake pad drag when using the Ford 8.8 rotor. But the main issue with using Ford 8.8 rotors is the center hole. The D44 axle shaft will not fit through the center hole without widening it. About .015" needs to be removed from the inner surface, a flapper wheel could probably take care of this. I went with the ZJ rear rotors due to the two issues that I read about the Ford 8.8 rotors I went with the ZJ rotors. -
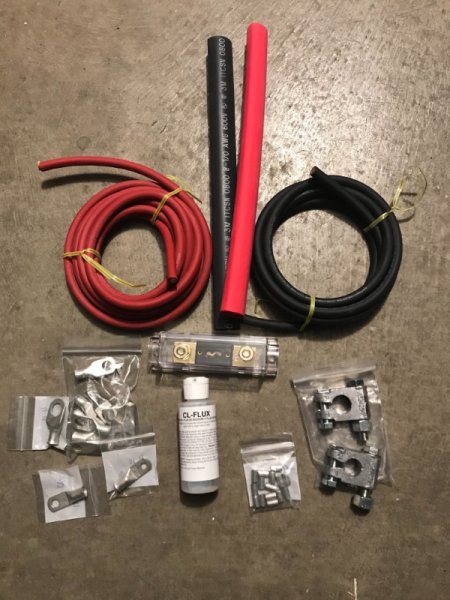
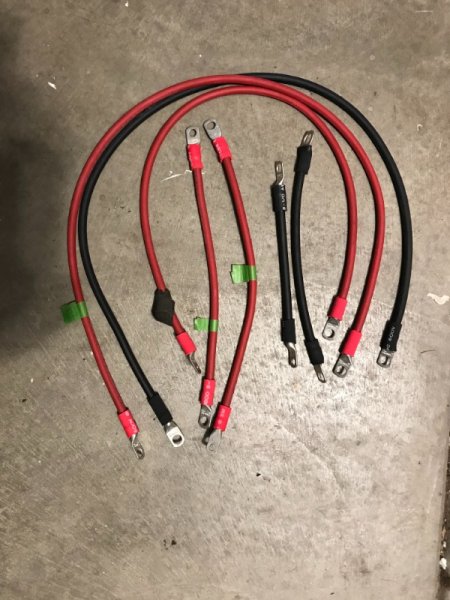
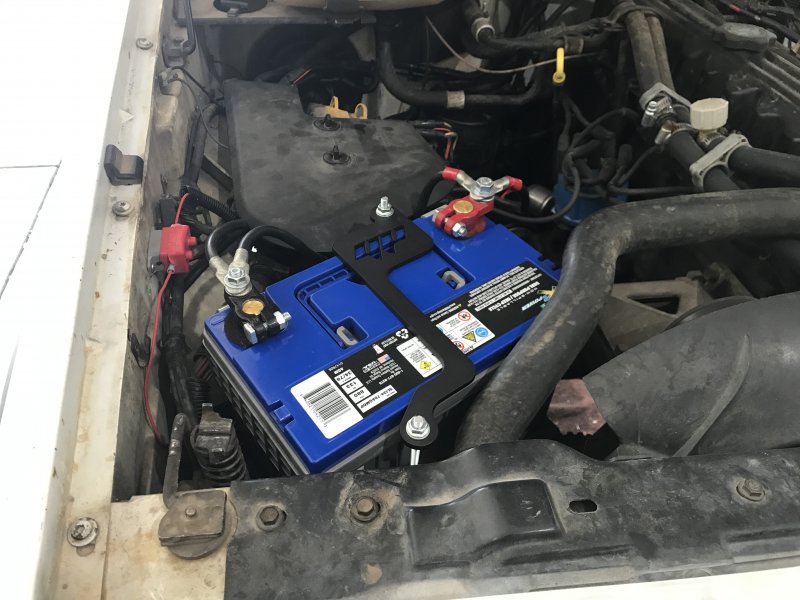
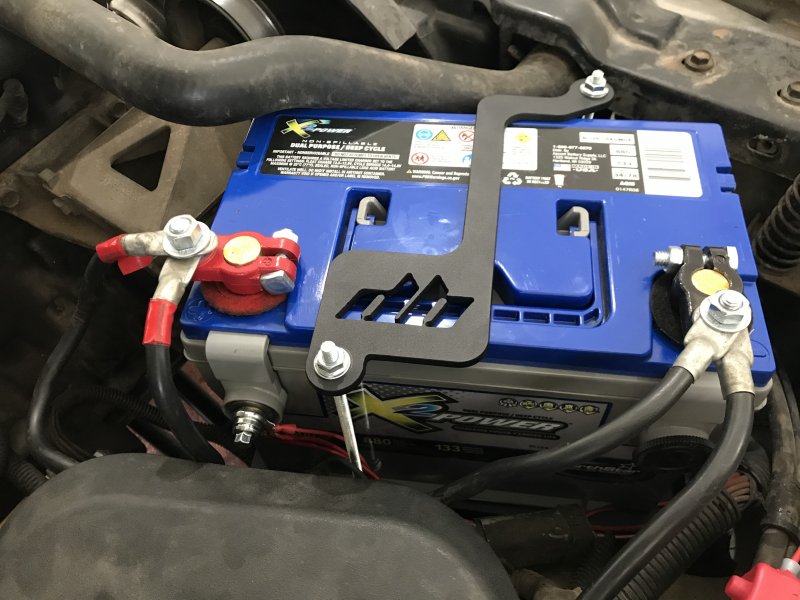
Recently upgraded the battery cables in the Comanche. The goal was to upgrade the current battery cables with finer strand cables and replace the inline fuse to the alternator. When searching the internet for Big 3 battery cables most kits averaged >$110 and used 2AWG cable. 2AWG is overkill as it’s rated to carry 190-250 amps offer a distance <5ft. The limiting factor in most Renix systems is going to be the alternator. As 4AWG cable can easily handle up 190 amps it’s plenty big enough. Especially since at this point the Comanche still has the stock with the stock alternator at this point in time. In the end I decided to make my own cables using information found on other jeep forums. Here is a list of the specific parts I used to complete the project (totaling ~$75) - Copper welding Cable Flxible Rubber SGR Battery Cable (4 Gauge, Color Black) 8ft batterycableusa.com - Copper welding Cable Flxible Rubber SGR Battery Cable (4 Gauge, Color Red) 9ft batterycableusa.com - Battery Cable Ends, Lugs, Ring Terminal Connectors, Tin Plated Pure Copper, (Wire AWG Gauge size 4) Hole size 3/8" x 10 batterycableusa.com - Battery Cable Ends, Lugs, Ring Terminal Connectors, Tin Plated Pure Copper, (Wire AWG Gauge size 4) Hole size 1/4" x 3 batterycableusa.com - Battery Cable Ends, Lugs, Ring Terminal Connectors, Tin Plated Pure Copper, (Wire AWG Gauge size 4) Hole size 3/16" x 1 batterycableusa.com - Battery Cable Ends, Lugs, Ring Terminal Connectors, Tin Plated Pure Copper, (Wire AWG Gauge size 4) Hole size 1/2" 1 batterycableusa.com - Solder Slug Pellets - Flux Core to fit 4AWG Lugs/Top Post Terminals x 14 batterycableusa.com - CL-Flux x 1 batterycableusa.com - 1ft section Heavy Wall 3M ITCSN Heat Shrink Tubing Adhesive Glue Lined (0.80 in diam., Color Black) batterycableusa.com - 1ft section Heavy Wall 3M ITCSN Heat Shrink Tubing Adhesive Glue Lined (0.80 in diam., Color Red) batterycableusa.com - KOLACEN ANL Gold Plated Fuse 150 Amp + ANL fuse holder Amazon.com - Ampler Military Spec Battery Terminal End Amazon.com To make installing the cables easier, I used military spec battery terminals. These are nice in that they allow for ease when bolting on additional accessories. Making of the cables was straight forward. Remove existing cable, cut new one to similar length (for non existent cables I ran length of string to size them), solder on lug terminals, cover with heat shrink tubing. Here is the final specs of each cable: Battery Cable Cable Length Cable Termination B(+) to starter motor 40" 3/8" hole lug both ends B(+) to starter motor relay/distribution 16" 3/8" hole lug, 1/4" hole lug Starter motor relay to ANL fuse 14" 3/16" hole lug, 3/8" hole lug ANL fuse to alternator 30" 3/8" hole lug, 1/4" hole lug B(-) to engine block 40" 3/8" hole lug both ends B(-) to inner fender 8" 3/8" hole lug, 1/4" hole lug Engine block to firewall 12" 3/8 hole lug, 1/2" hole lug
-
(Manual) Pedal Assembly Question - Broken Weld
agamble replied to 86Redline's topic in MJ Tech: Modification and Repairs
I haven’t come across any new ones available for purchase. Could always check junkyards to have a few spares. -
(Manual) Pedal Assembly Question - Broken Weld
agamble replied to 86Redline's topic in MJ Tech: Modification and Repairs
You’ll have to remove both the brake pedal and the clutch pedal while leaving the bracket in place. There is enough room to slide the bolt out. There are a couple plastic bushing on each pedal you’ll need to reuse. I had the same issue occur on a previous Jeep. -
Any chance while at work you were working with or handling industrial chemicals like a degreaser or something similar? You had what’s sounded like “degreasers flush syndrome”. It’s been documented to occur when a worker is exposed to an industrial chemical while at work then goes home and consumes alcoholic beverages. Often occurs after working with or being around methanol, isopropanol, glycol ether, methylene ethyl ketone, or toluene. The metabolism of ethanol can be affected by exposure to toxic industrial chemicals, creating symptoms of alcohol intolerance like “Antabuse syndrome”. A worker exposed to carbon sulfide, dimethylformamides, trichlorethylene, or nitroglycerin could also bring out the symptoms you showed on those days. Not saying this is what you had or that it can’t be something else. I think you should still see a doctor, but you could put this info in your back pocket and bring it up when talking with them and it might give them something else to look into along with allergies.
-
It is really luck of the draw on who the technician is. The technician I had had no issues, and in fact preferred using the newer gasket. I've heard of people battling with them about installing the newer style gasket, which I've experienced in the past.
-
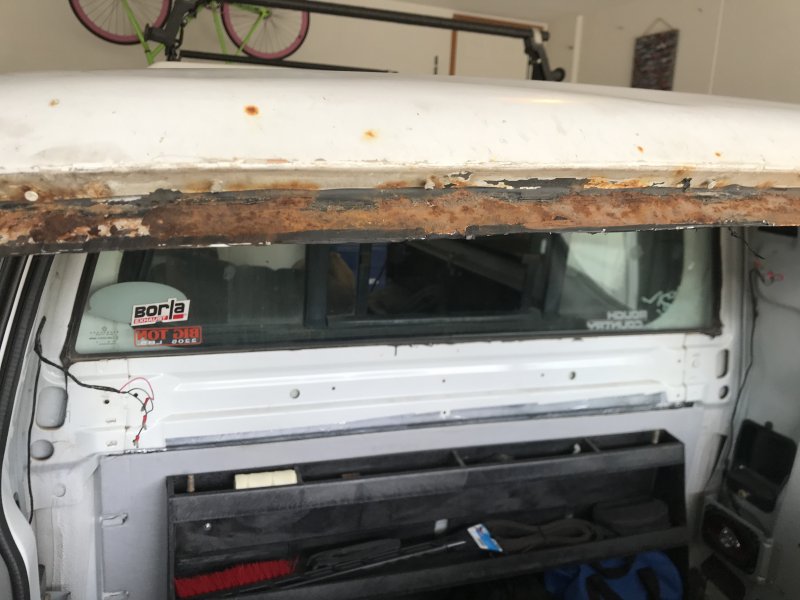
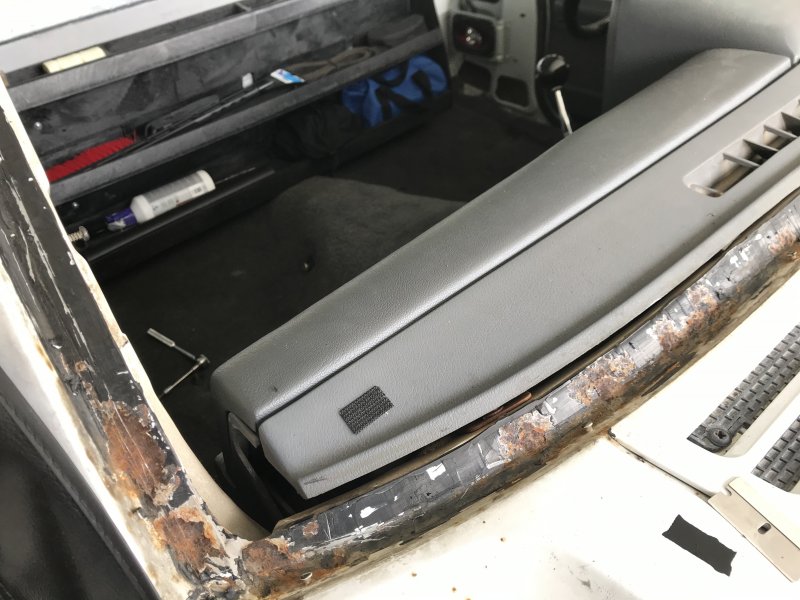
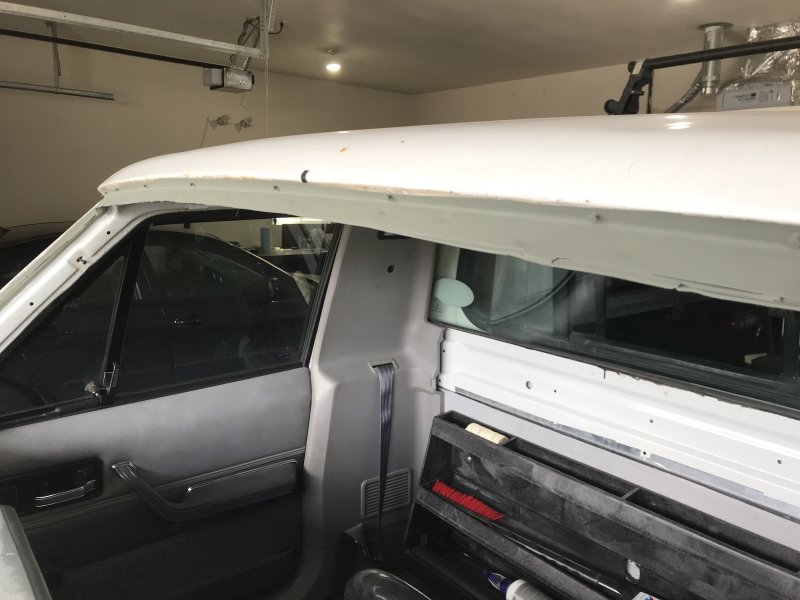
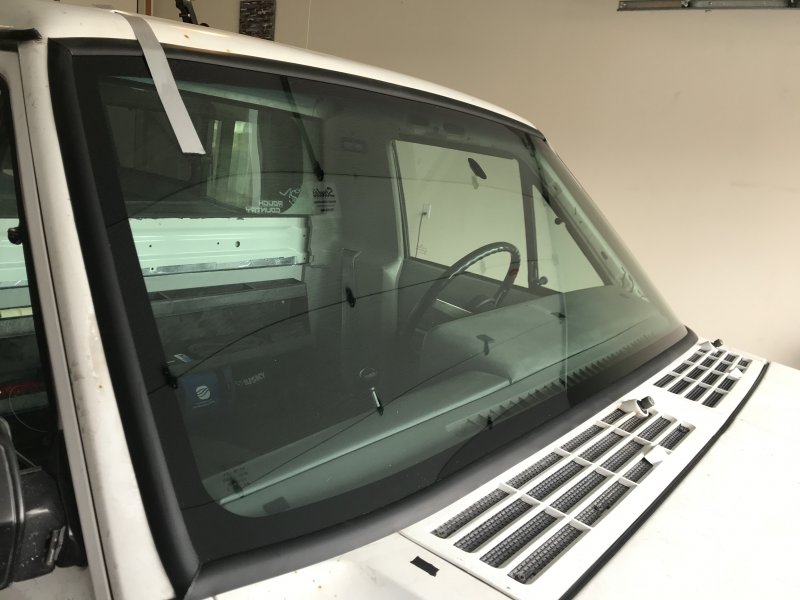
The windshield has leaked on the passenger side for quite some time. Anytime that it rained or snowed, regardless of the amount, I was guaranteed a puddle on the passenger floor board if the Jeep was left outside. The easy solution that I had been doing was parking it in the garage and not driving it when there was precipitation in the forecast. I finally got a crack in the windshield from a stray rock the other day so it was time for a new windshield. I set up an appointment with Safelite, and when to the shop to have the windshield replaced. Figured I'd be in and out in the 2-hour window that they gave. 30 minutes into the appointment the technician asks me to follow him out in the bay, where it begins to show the rust running around the outside edge of the windshield. He lets me know that there is too much rust to put in the new windshield and I need to take it to a body shop or clean it up myself before they can install the new windshield. So I schedule an appointment for later that day for a mobile technician to come out and remove the windshield. Once it was removed I began the tedious task of removing all the previous eurathane and rust accumulated from over the years. I think it was a little rusty. Unsurprisingly most of the rust was on the passenger side of the cab. The silver lining in this is the rust was superficial. A days' worth of work with a wire wheel, wire brush, and 60 grit sand paper had all the rust removed. When only shiny metal was showing a wipe down with xylene and denatured alcohol removed any remaining grease, oil, or what have you. Then a nice healthy coat of auto primer was laid down to protect the exposed metal. With all the rust removed the mobile tech returned and installed the new windshield with the newer style molding.
-
Thanks! I probably never would have attempted the repair if I hadn't seen it done before. I should be thanking you.
-
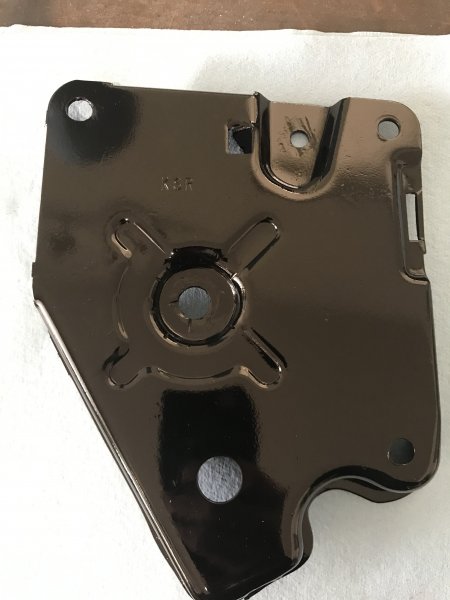
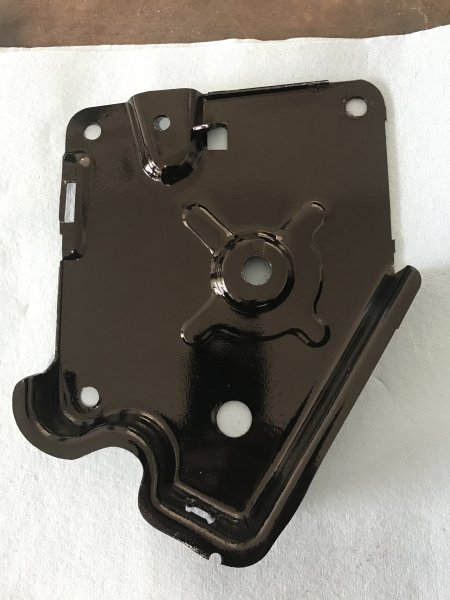
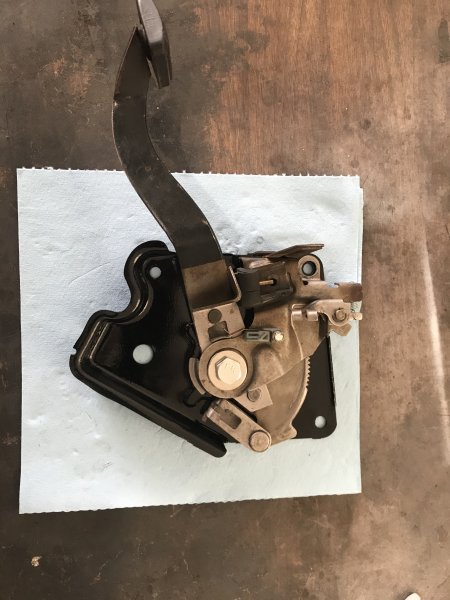
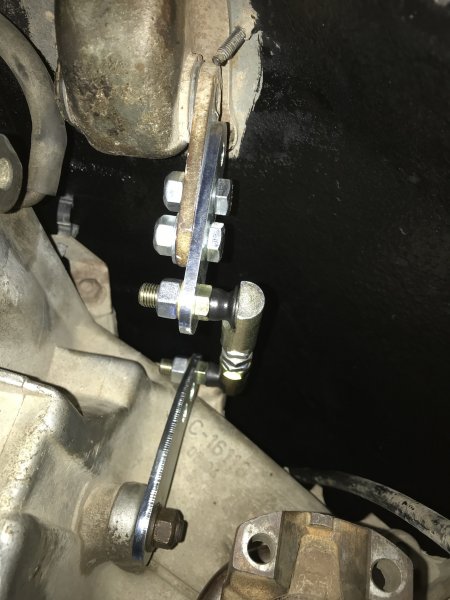
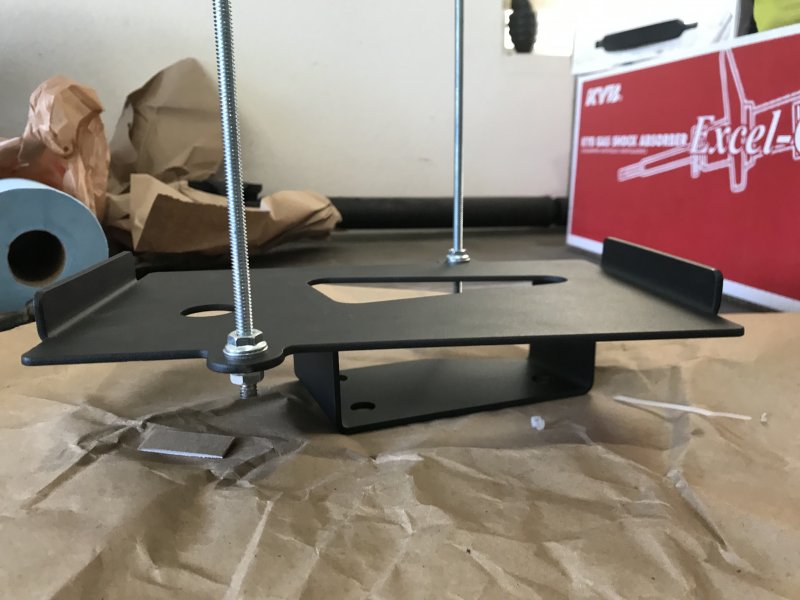
The second item that I tackled was the parking brake assembly. The lever had too much play in the left/right direction preventing the parking brake from remaining engaged. This subject has been covered various times and I won't go into much detail as I followed two excellent write-ups: I started out by following the write-up done by A-man930. The only change was instead of a 3/8" stud, I was going to use a 1/4" stud. The stud would only need to compress the parts of the assembly together, as the arm would still rotate on the rivet. However, after drilling out the rivet, the 1/4" tap that I was using broke off. After a few hours of unsuccessfully attempting to get the broken tap out I gave up and started following the write-up done by ftpierceracker1. Here I was able to learn from his experience and instead of removing the rivet and hump on the mounting plate I cut the rivet flush on the front side (side that faces into the cab). Then I drilled out the rivet with a 1/2" drill bit. This still left the the back side (side that faces wall of the cab) of the rivet tac welded to the assembly. With the 1/2" hole I was able to see were the rivet met up with the mounting plate, this allowed me to use a 3/4" drill bit to drill out the backside face of the rivet until I was almost to the mounting plate. Then using a cut off wheel on a Dremel I made relief cuts in the remaining outer portion of the rivet. The areas not tac welded to the mounting plate fell right off. I then used a grinding bit on the Dremel to remove the remaining portions of the rivet. It was a bit more tedious but I did not have to repair the mounting plate. With the rivets removed the mounting plate was given a refresh. To reassemble the assembly I used a 1/2" x 2-1/4" Bolt cut down to about 1-1/8". This length was chosen as it allowed for the pedal arm to rotate on the smooth portion of the bold, while providing enough threads to thread on the lock nut. I bought low profile lock nuts for the 1/2" and 5/16" button screw that were used to reassemble the parking brake assembly. The low profile locking nut it about the same depth as the original rivet back was, so it won't affect the assembly when you install it back into the truck. Final product:


-
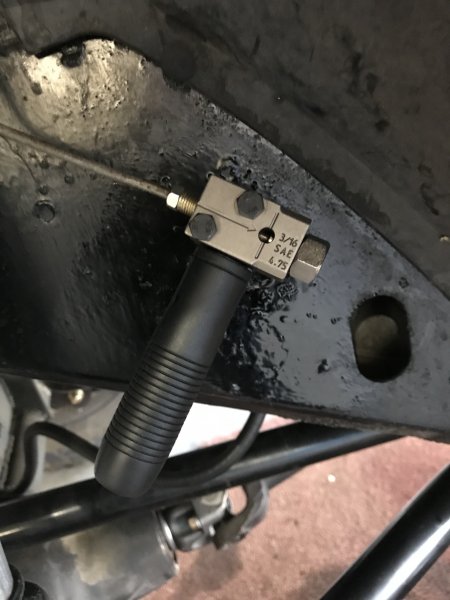
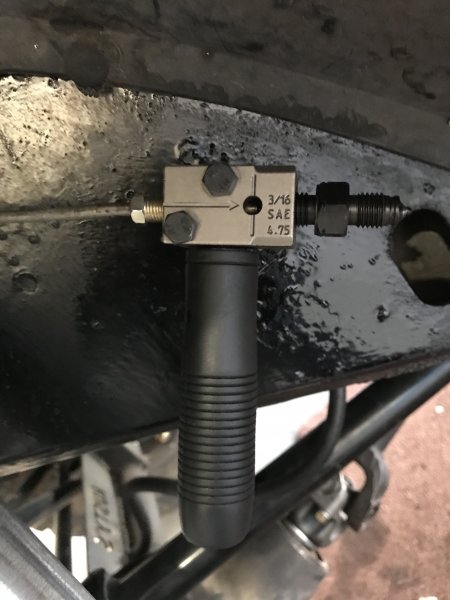
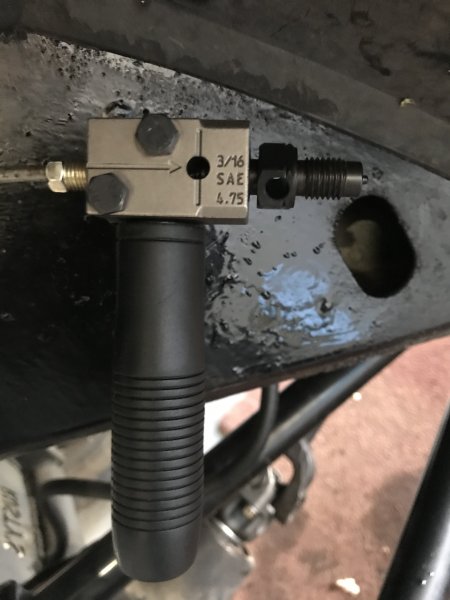
With all the down time from COVID-19 I've been taking care of my lunch list of items on the Comanche. First item that I tackled was the leaking brake line connections. The drivers side front and the passenger side rear brake lines were leaking at the connection point of the hard and soft lines. On top of the leak the flare nut on the drivers side front had been stripped at some point in its life, which required the use of some vice grips to tighten and loosen the nut. I've avoided reflagging the line as I did not want to remove the lines from the Comanche and didn't want to wrestle with the flaring tool in cramped quarters. While surfing the internet I came across an inline flaring tool by Titan Tools. I found one at the local O'Reilly's autoparts for about $40. The tool makes double flares on 3/16" or 4.75 mm steel, copper, or nickel brake line. Step 1: With the positioning bolt in the flaring tool, insert the brake line until it is stopped by the positioning bolt. Then tighten the two locking screws to secure the line in place. Step 2: Remove Positioning Bolt and insert the OP1 end of the punch. Tighten until the hexagon on the punch sits flush on the tool. Step 3: Remove the OP1 punch, reverse and insert and tighten OP2 end of the punch until the hexagon of the punch is flush with the tool. Loosen lock screws and remove the flaring tool, and viola; perfect double flares. I was able to replace the nuts and relate both lines in 30 minutes.

-
Being under the Jeep I addressed another issue I was having. The Boostwerks Engineering 231HD Linkage was giving me fits. You would think with such a simple design (two FK rod ends, two jam nuts, and random nuts) to connect everything it would be simple to operate. No matter how much I adjusted and fine tuned the linkage I could not get the transfer case to stay in 4Lo while driving. It should shift into 4Lo, but as soon as I went to crawl forward it would pop out of gear. I've adjusted and played with the linkage length while under the Jeep, and it would go into 4Lo. But as soon I went to drive it would pop out of gear. It appeared that the transfer case lever would contact the center console before it could lock fully into gear so as soon as torque was applied it would pop out of gear. I was getting to my wits end when I stumbled on a simple solution. Who would think something as simple as swapping which side the linkage attaches to the shift lever and transfer case actuator would fix the issue. I did not change the linkage length. Ever since I swapped the sides the shift lever engages 4Lo and staysin gear while driving.Before After

-
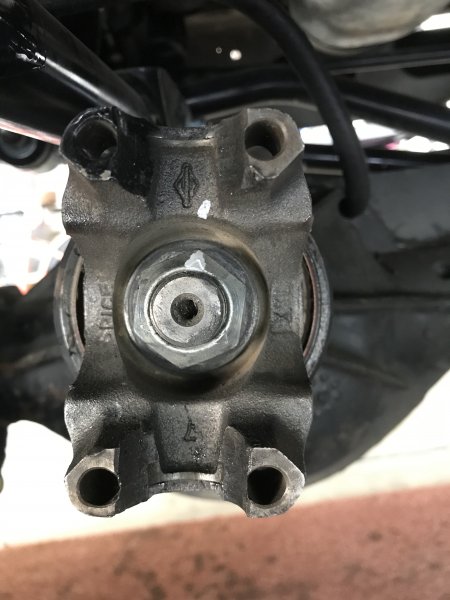
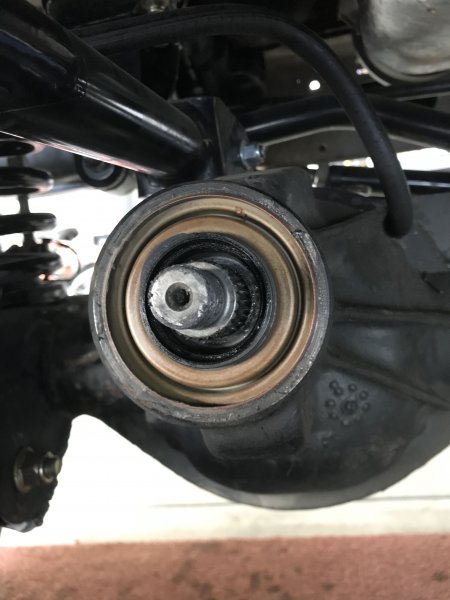
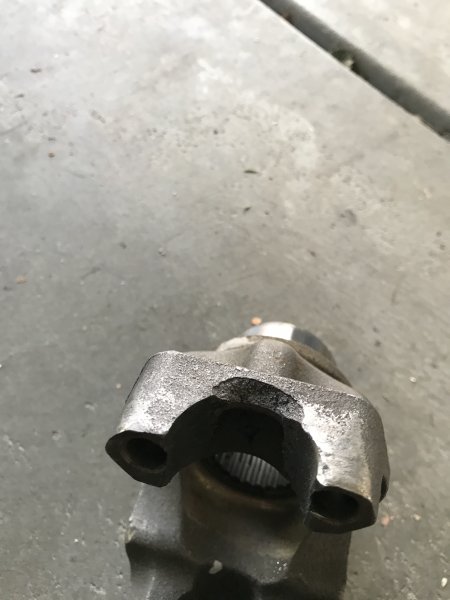
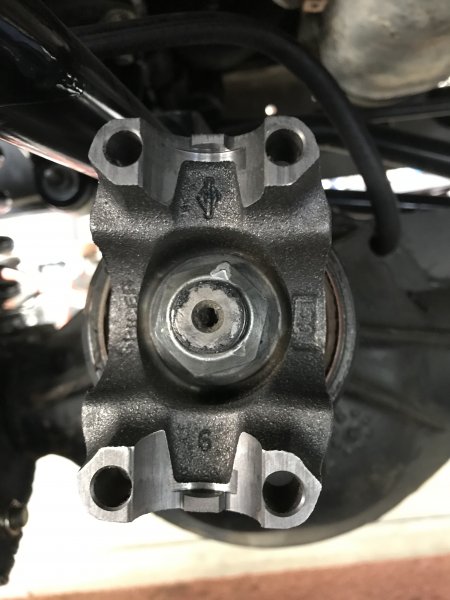
When the transmission cross member bolts tore from the frame it caused the drive train to shift to the drivers side. As the yoke ground against the upper control arm both of the "centering tabs" (not sure what the technical names of these are) broke off. As I see these as more of a centering device I have always been unsure of how vital these "tabs" are, especially as I prefer to use the u-bolt straps. My thoughts are the u-bolts are really what apply the pressure and prevent the end caps from flying off during rotation, but I don't really feel like testing this theory out. So in place of unnecessarily testing out my theory the yoke needed to be replaced. Earlier in the build I swapped out the original disconnect HP Dana 30 for a non-disconnect HP Dana 30 from a 98' XJ. This eliminated the weaker axle tube and the two piece axle for the single more "stout" axle shaft. The 98' HP Dana 30 uses a shim pack for pinion bearing pre-load adjustment, meaning the yoke torque is independent, as the bearing pre-load is set by the shims. So I didn't have to worry about a collapsible crush-sleeve that is tightened until the correct pinion pre-load is obtained. Regardless of how the pinion pre-load is achieved I've read multiple threads that recommend recording rotational drag of the pinion, however as I could not find a definitive answer to this I am thinking it is not necessary.To swap the yoke I went about it in a more crude manner as my torque wrench is broken and the slow turning with a breaker bar kept causing the Jeep to creep forward instead of breaking the nut loose. To keep the torque in the ball park I marked where the nut aligned on the yoke with a paint pen then removed the lock nut with an impact wrench. To a whole 5 seconds. With the nut off yoke slid right off with little effort. The new yoke was aligned in the same orientation, slid into place and I use the impact wrench to tighten the lock nut back down. While tightening I went at a "controlled" pace and torqued until the paint mark on the lock nut was in the "same" general alignment that it was previously.
-
With the Chassis Saver Cured, a new battery tray from Dirtbound Offroad was installed. New battery in its place.
-
I was of the same train of thought. The bolts only need to keep the cover in place.
-
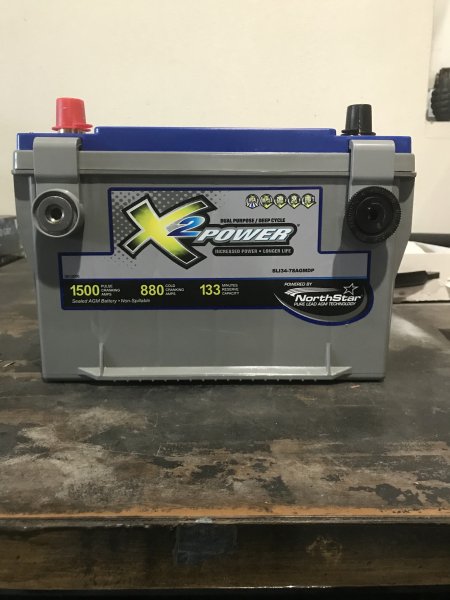
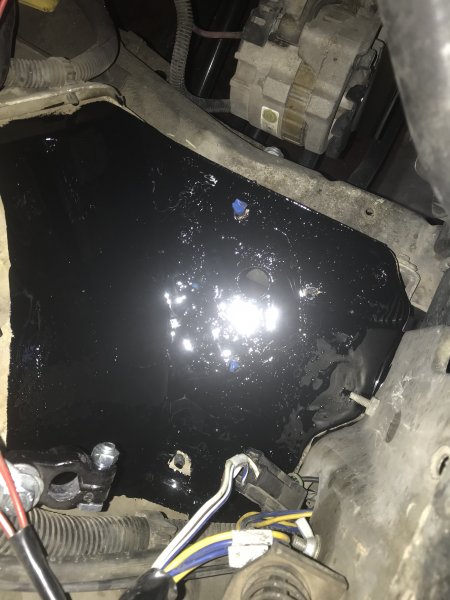
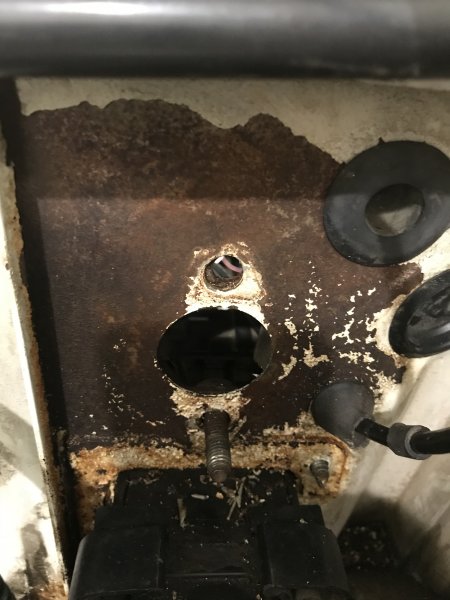
There’s nothing worse than starting your Jeep only to have the battery fail you. Having now experienced this several times in the last few months, I finally came to my senses and decided it was time to really address the issue. It's been said, a Jeep with a performance battery will never fail to start, whether you’re in the blistering cold of Montana or in the dry heat of the Arizona plains. Whether you choose a performance battery from any of the top brands, you’re guaranteed to get a battery that will get you to where you need to go. A performance battery with advanced AGM technology and up to 1500 pulse amps is guaranteed to outlast conventional starter batteries. After reading through specs and reviews on several different kinds of batteries I finally settled on the dual purpose (deep cycle/starting) X2 manufactured by NorthStar. I opted for dual post to connect the auxiliary power supplies for various low draw accessories to the front post. I spent more than I really should have on a battery, but my hope is that it will last several years before I need a replacement. To go along with the new battery I got a new battery tray from Dirtbound Offroad to replace the stock cracked and deformed battery tray . When I pulled the old battery tray out I found rusting had occurred on the nuts holding the tray in place, as well as beneath the battery tray. Even though I had soaked the bolts in PB Blaster a couple of days prior I snapped off the stud on the first bolt on tried to remove. A lot of heat from a butane torch and the remaining two bolts came out with a bit of groaning. I still had a bit of Chassis Saver on hand and put a couple coats down to stop further rusting. I let the Chassis Saver to cure for 48 hrs. before installing the battery tray and new battery. The front post provides 12V power to the head light harness and the Eaton E-locker. New battery in place.
-
89 Comanche external slave swap
agamble replied to Killernoise's topic in MJ Tech: Modification and Repairs
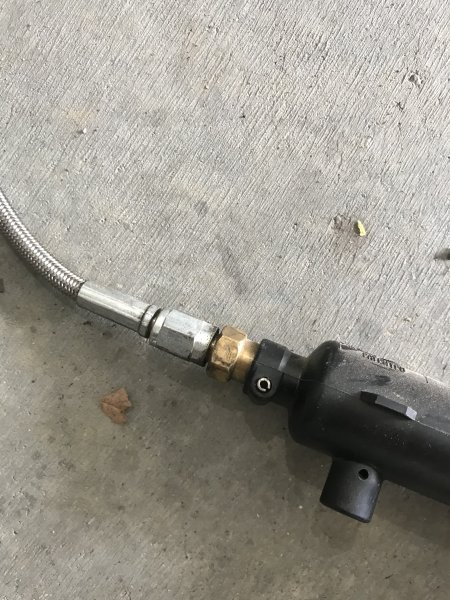
I hope that the TJ fitting solves the issue with the fluid leaking out. Which end of the braided hose do/did you have connected to the master cylinder? The end with the 90 degree bend should be connected to the master cylinder. -
89 Comanche external slave swap
agamble replied to Killernoise's topic in MJ Tech: Modification and Repairs
I know you said you used a lot from advanced adapters. When I did my swap I used individual parts. When going from an internal slave to an external slave, there are various ways to go about getting the clutch master cylinder and external slave connected. One method is to buy the complete kit. The issue that I have heard with this is that it requires the drilling of a new upper mounting hole in order for the later clutch master cylinder. I have no personal experience with this so I cannot confirm this. To avoid headache and making unnecessary holes I went the second option. AdvancedAdapters sells hydraulic fittings that allows youth retain the year specific clutch master cylinder while mating it up to the slave cylinder at the bell housing. You can order the complete setup (Jeep Slave Cylinder Assembly For NV3550/AX15 Bellhousing, P/N 716340) or you can purchase the parts individually. Why I don't know but, I had a brand new slave cylinder laying around so I purchased the individual parts. To connect the stainless steel hose (716130-60, 60" length or 716130H, 42" length) you will need the early master cylinder fitting that is a 7/16 inverted flare style (P/N 716130F). This fitting will thread right into the clutch master cylinder. Then to connect the stainless steel hose to the slave cylinder you will need the TJ Master Cylinder Fitting and Slave Cylinder Fitting (P/N 716130 TJ) and O-ring (P/N 716130OR). Once its all connected you will need to prime the hydraulic system. The slave cylinder does not have a bleeder valve. In order to prime the hydraulic system you'll need to let the push fully extend (don't cut or break the retaining straps that come with the slave cylinder). While holding the slave cylinder at a 45 degree angle, pour the fluid into the slave until its full. At this point insert the fitting, o-ring, and hose. And place in the retaining pin. Once secured with the retaining pin hold the slave in a vertical position with the rod pointing down to the floor and slowly push the rod inward about 1". After about 10-15 strokes there should not be any air bubbles in the master cylinder reservoir.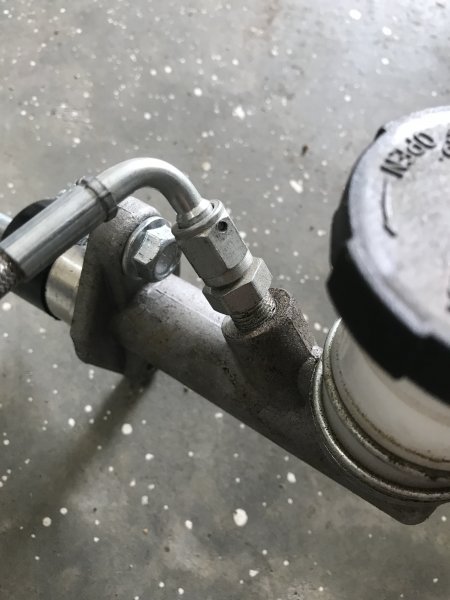
-
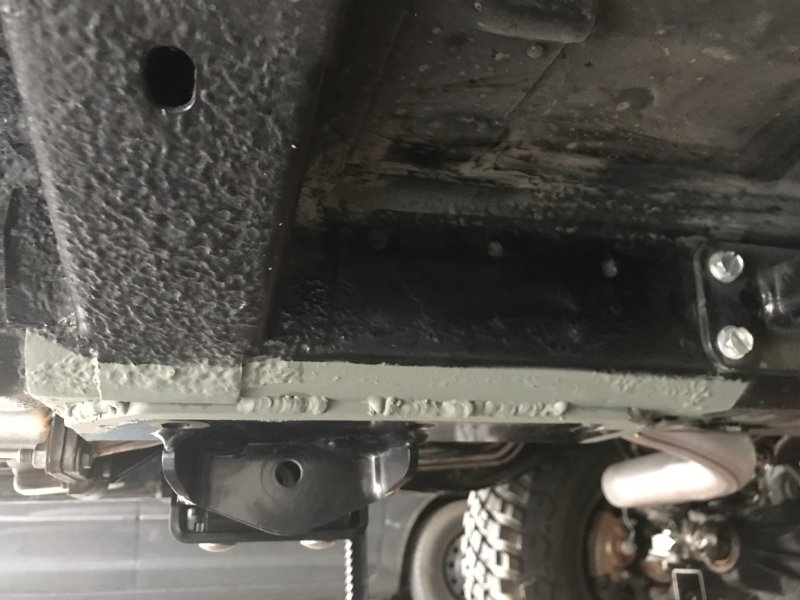
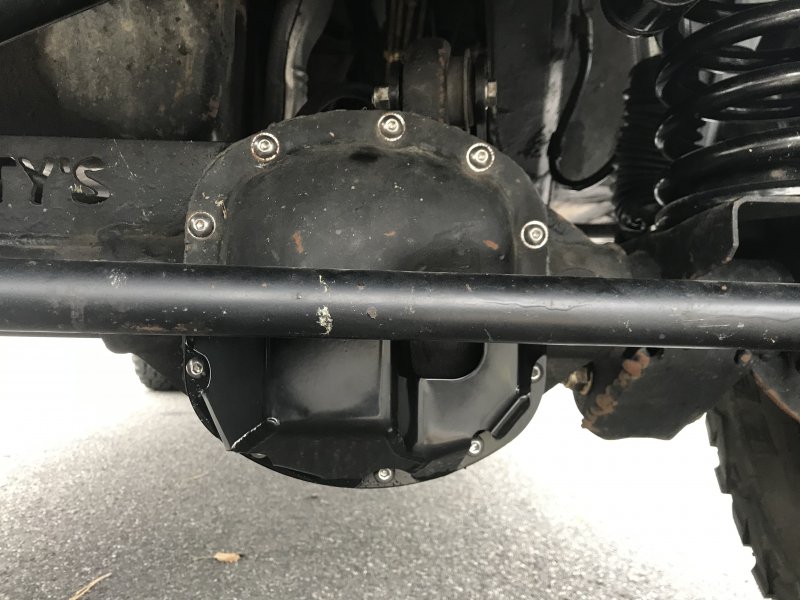
Pulling up to the 4-way stop there was a loud pop, followed by a loud grinding sound that quickly went away. I quickly turned around and headed home. Once I got the Jeep into the garage, I was in a rush and already running late, I made a quick glance and noted that the front driveshaft was hanging down and left it at that. At the time I thought it was odd that the front u-joint on the driveshaft would randomly blow up like while driving. Later on, with more time to inspect I noted that the centering tabs on the front yoke had been broken and the free swinging driveshaft had marred up the upper control arm. Still thinking it was odd that the front u-joint would blow up and cause the centering tabs to break off was odd, I did more searching and that when I found the issue. All three cross member bolts on the passenger side had broken off (I neglected to get before pictures). It then became clear that when the bolt and/or bolts broke, the drivetrain was pushed to the driver side where the driveshaft then contacted the upper control arm, breaking the yoke and front u-joint. The nuts welded into the frame for the cross member had broken free, so using new bolts was not in the cards. I ended up welding the outer long arm brackets in place. Welding the outer brackets in place required removing the undercoating. Which will be replaced as soon as the temps get back above 60's. While I was under the Jeep, I took the opportunity to install the new diff guard that I'd had laying around. The diff guard came with new mounting hardware for the guard. Not wanting to have half the bolts be 1/2' bolt and the other half 3/16 allen head, a run to the hardware store was made to get 5 more. While getting additional hardware I noticed that there was no price difference between the stainless steel bolts and regular steel. I ended up getting 10 stainless steel bolts so they all matched.

-
Best place to tap into dash lights
agamble replied to 1989commanche's topic in MJ Tech: Modification and Repairs
Prime4x4 sells a panel that replaces the clock panel. -
Power Window & Door Lock Switches
agamble replied to WahooSteeler's topic in MJ Tech: Modification and Repairs
A good How-to video on cleaning and repairs power window switches. -
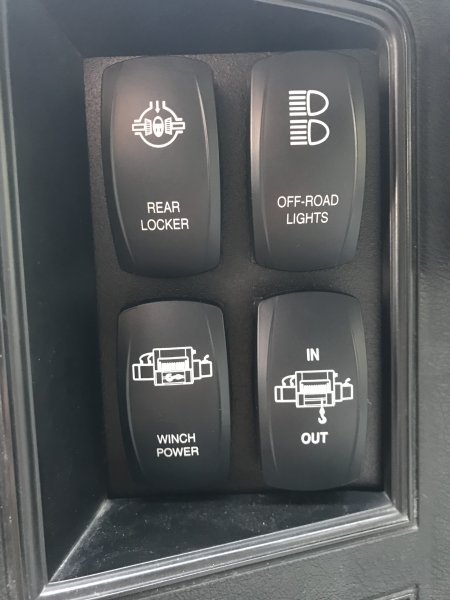
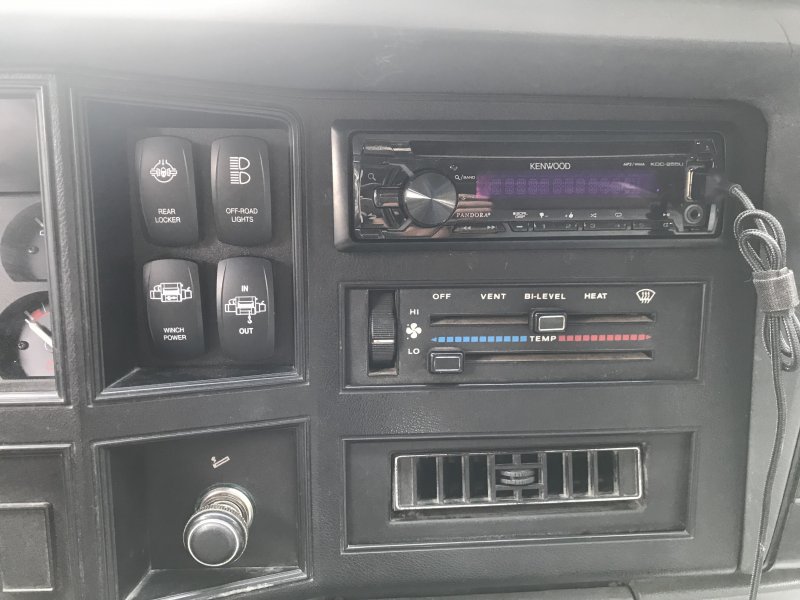
Wanting to keep the cab looking as stock as possible I bought the '84 - '96 Jeep Cherokee and Comanche In-Dash DIY Carling Style 4 Switch Panel from Prime4x4 that replaces the factory clock. I went with the Prime4x4 switch panel as it is a steel construction vs being plastic that other manufacturers offer. After installing the Eaton E-locker wiring harness, the supplied rocker switch was too large to mount into the Prime4x4 switch panel. Rather than enlarging the opening of the panel I purchased a Contura V rocker switch at otrattw.net (wanting to have all the switches match I bought additional switches for accessories to be added at a future date) for the locker.
-
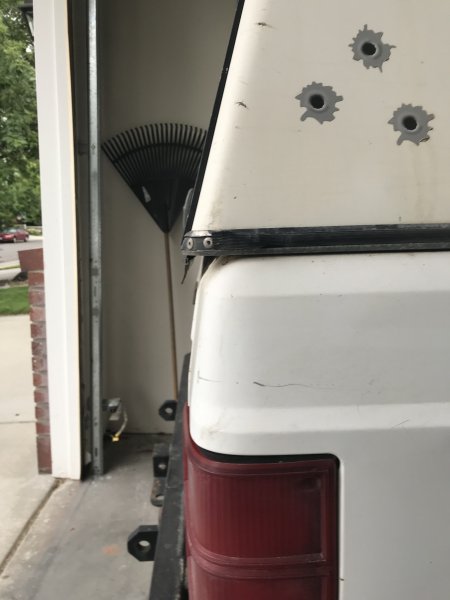
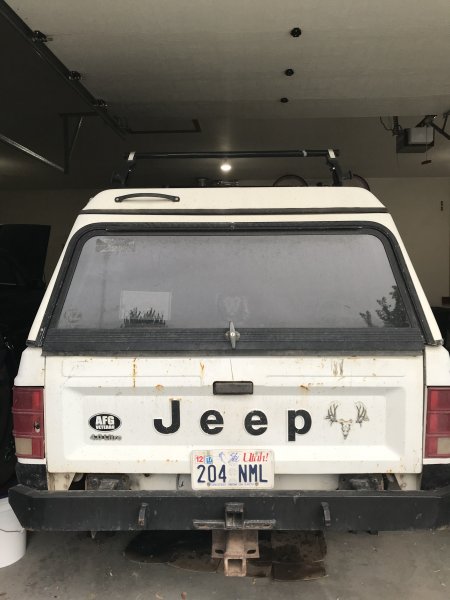
Thanks! It’s almost complete.....or so I keep telling myself. But as anyone here can attest to, I am only deceiving myself. There’s always something that will need to be done or changed. No. The Wildernest is not Comanche specific. The canopy a Tent Top Model Number 91/ Tip Top Model Number T91 and is designed to go with a number of light weight long bed pick-up trucks, essentially a one size fits all approach. While the fit isn’t perfect, it’s a close fit not to be aesthetically unpleasant. Height is ~1.5" below the roof line. Width wise is almost a perfect fit. Length is ~1” too long leaving a small gap between hatch and tail gate. For a complete setup on the long-bed Comancheit requires a rear door wedge, which I don't have, nor ever seen. Here is a link to a brochure listing model numbers: http://www.therangerstation.com/resources/pdf_documents/Wildernest_OEM.pdf.

-
Appreciate it. The one minor issue is the window crank barely scraps the speaker cover when rolling the windows up and down.