agamble
-
Posts
214 -
Joined
-
Last visited
Content Type
Profiles
Forums
Gallery
Everything posted by agamble
-
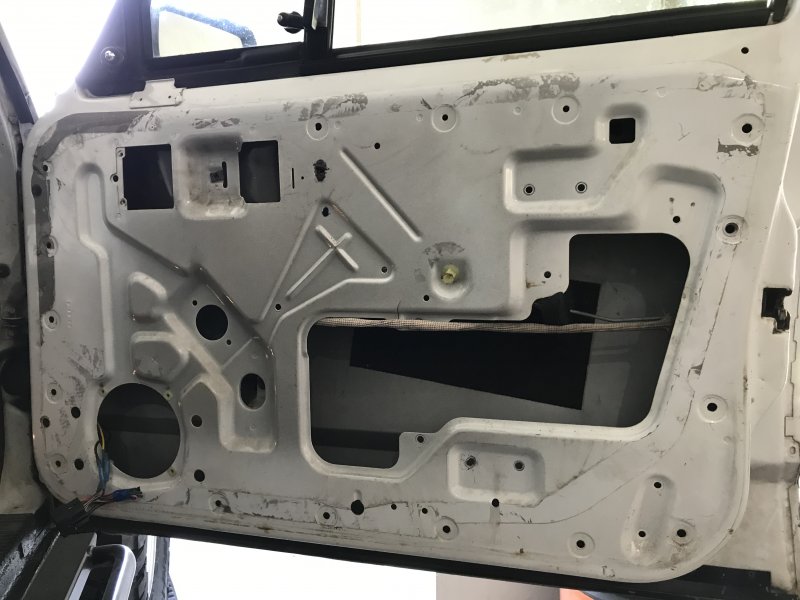
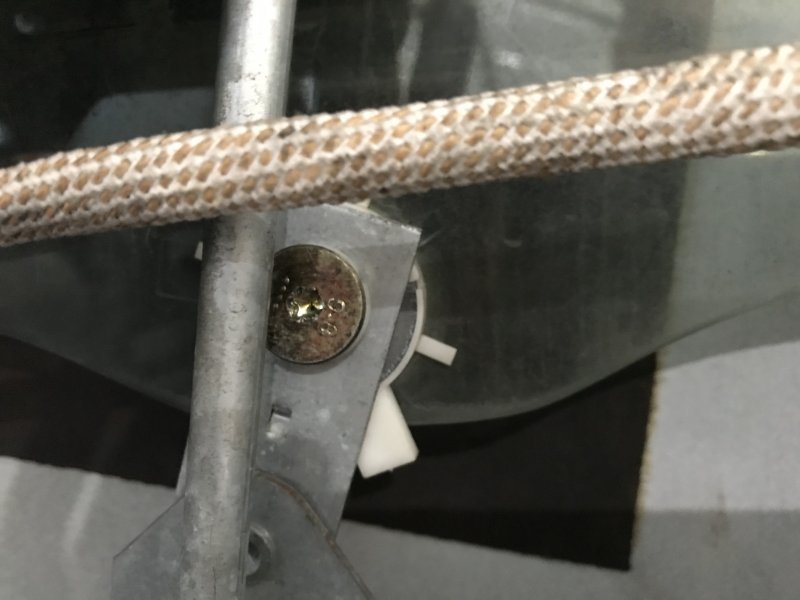
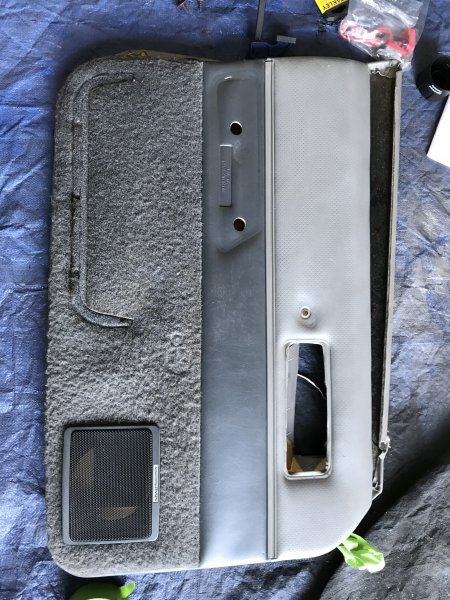
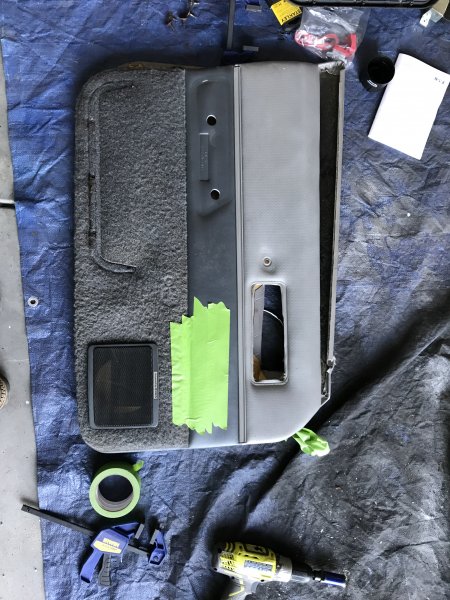
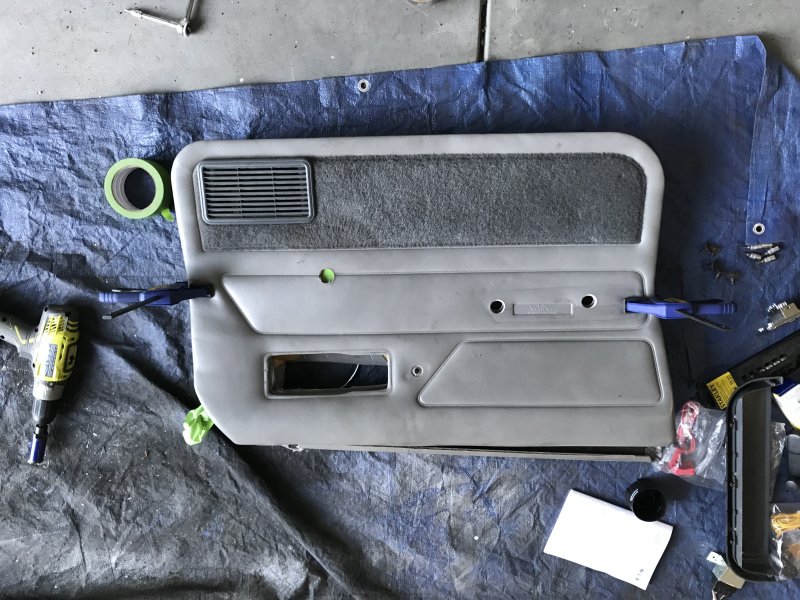
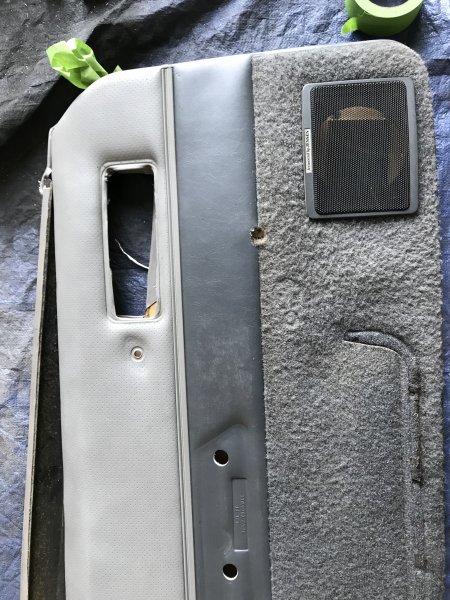
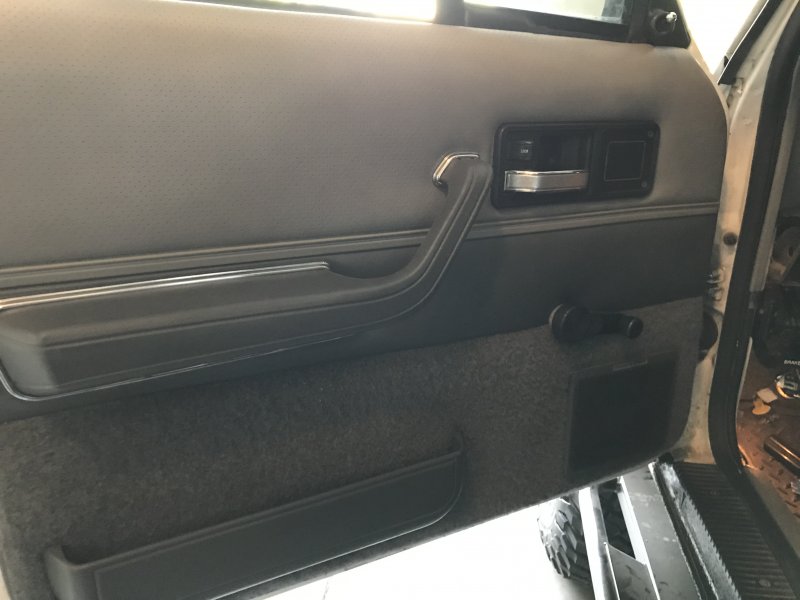
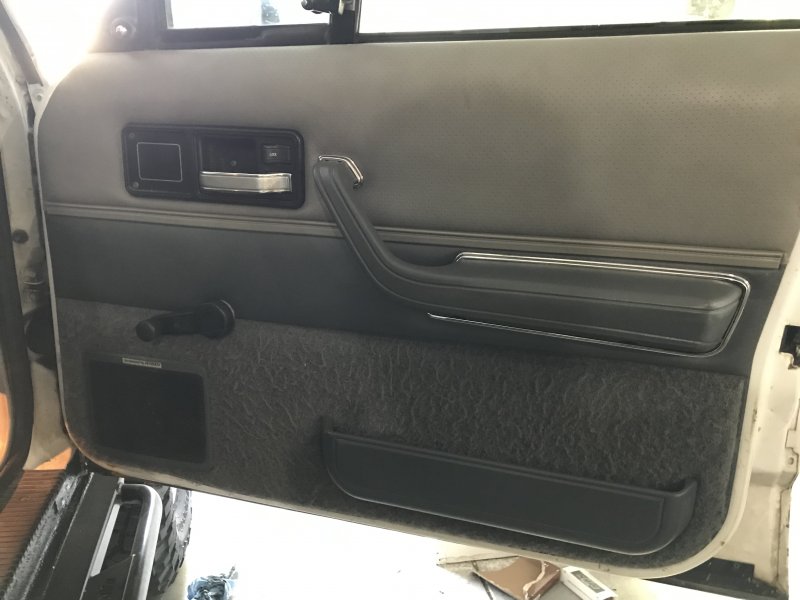
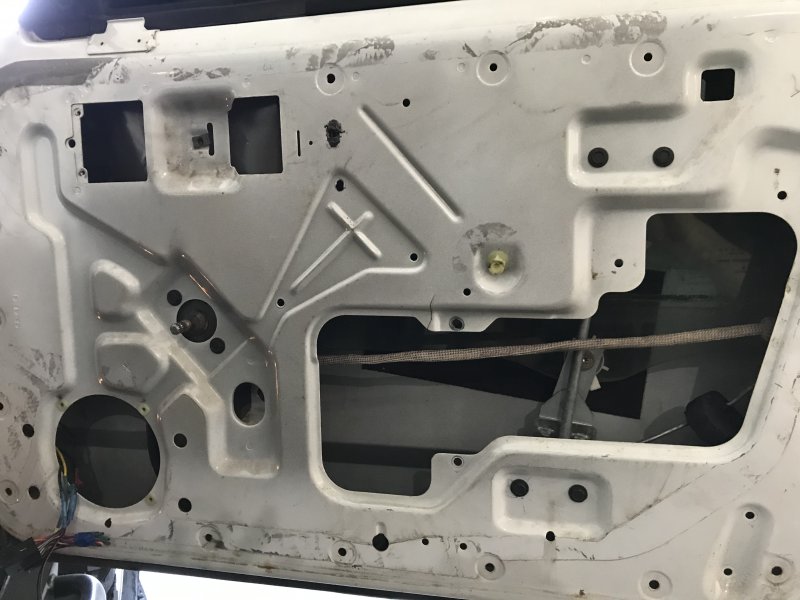
While it's been more of an inconvenience than a problem, I became tired of not having operating windows over the summer. Both windows would roll down but I was unable to get them back up without applying power directly to the motors. So for the summer months I drove around with the vent windows as the only way to get air moving through the cab. The replacement doors that came from an XJ came equipped with power windows and locks. When the windows were first wired the the drivers side control panel only operated the drivers door window and lock. A wiring harness from 4-door Cherokee with power windows and locks was later installed to connect and operate both doors. After the install the locks and windows worked.......for about a day. At first I thought the passenger window regulator died on me while I was testing it out. It would go down with no problems. Going back up I would have to flick the switch on both the master control switch and passenger switch multiple times to get it to go back up. However, I couldn't hear the motor running. I traced the the issue to the wiring harness connection in the master control switch. The wire pins (located inside the resin) were not making good contact with the window switches. I couldn't address the problem without destroying the wiring harnesses. Several runs to different junkyards provided plenty of donors for a replacement wiring harness, none gave confidence of lasting long term. There was one 86' - 96' XJ that had manual window regulators. After giving it some thought, the manual windows would better meet my needs and eliminate unneeded electrical issues. Swapping the regulators is straight forward, with the window rolled down, with a T-40 star bit remove the bolt holding the window glass to the regulator, once removed tape the window up and out of the way. Remove the rivets holding the window regulator and door braces in place. With them removed the regulator can be removed with some finagling. The manual window regulator was them put in its place. The indoor panels currently in the Jeep didn't have the hole necessary for the regulator cranks. I grabbed the panels from window donor, but they were not in as good of condition. I modified the nicer ones to allow for the window cranks. Using the second panel as a template a 1" hole saw was used to make the window crank opening. With the window regulators swapped and the window crank hole made the door panels were reinstalled on the doors.
-
Thanks for the reminder.
-
Thanks.
-
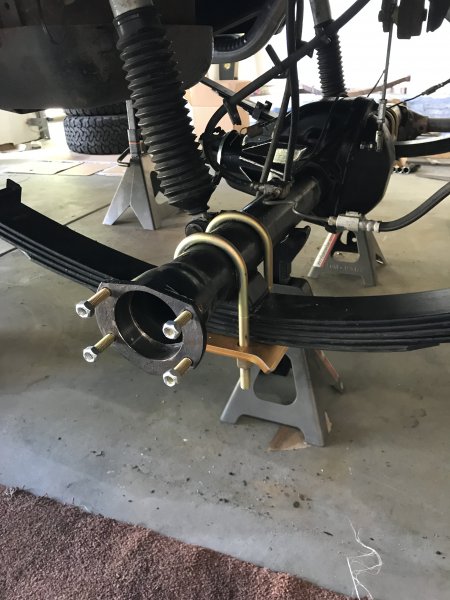
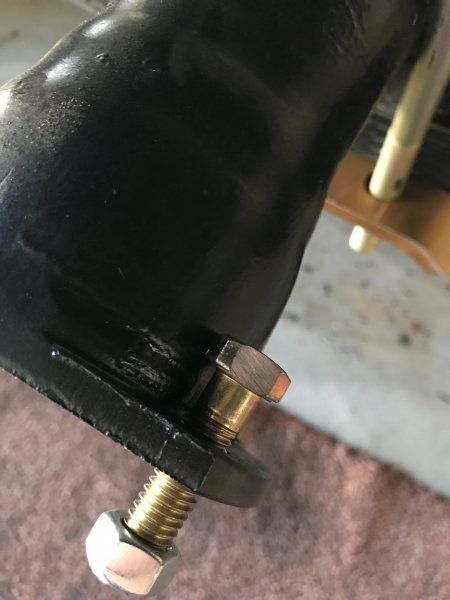
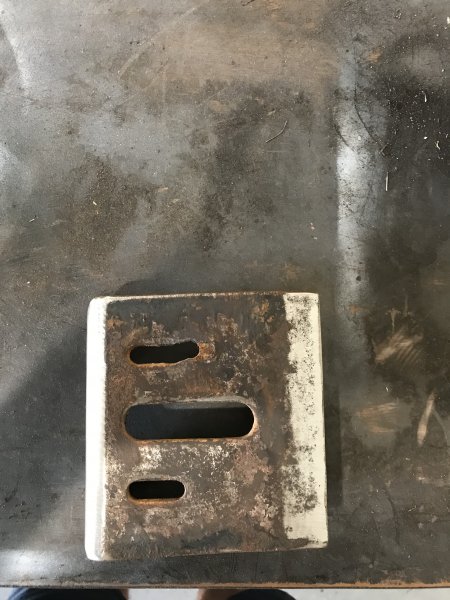
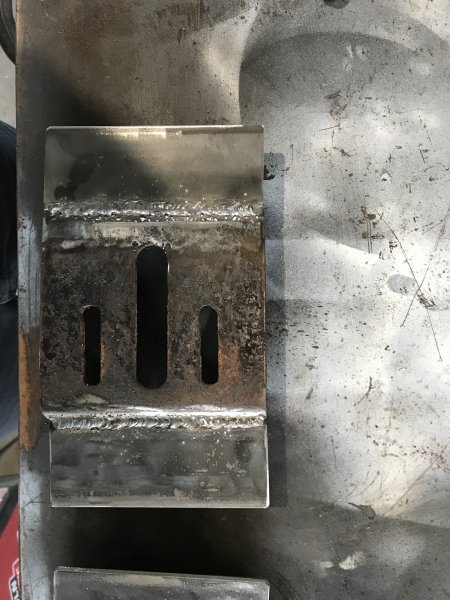
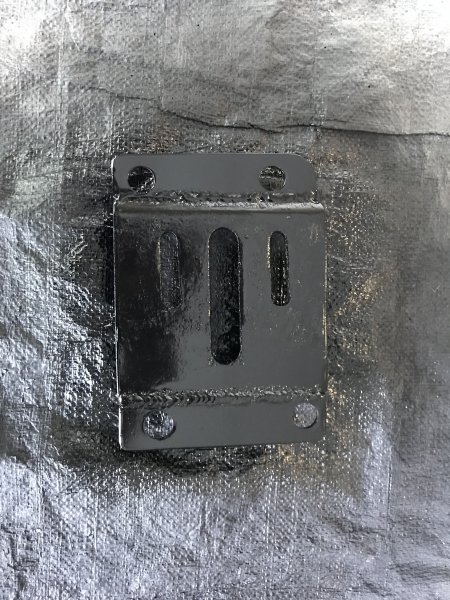
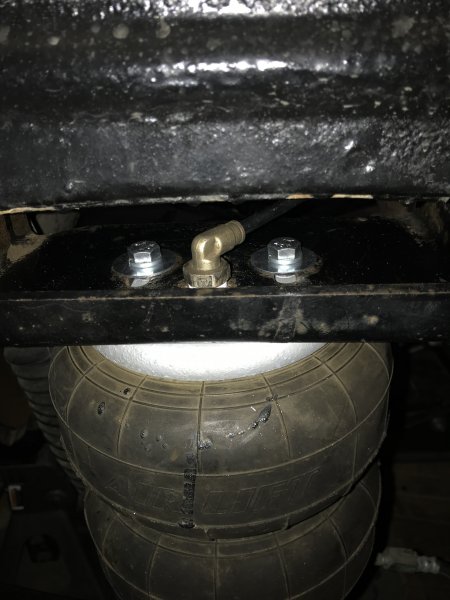
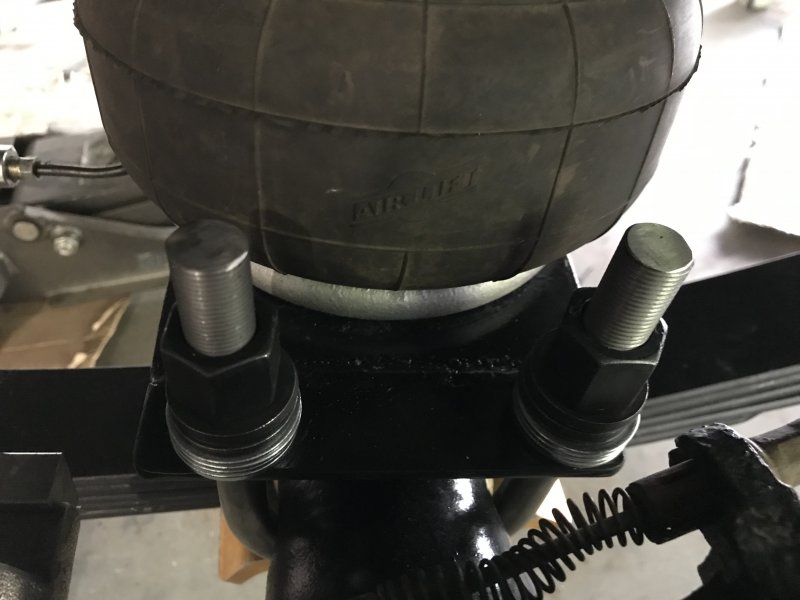
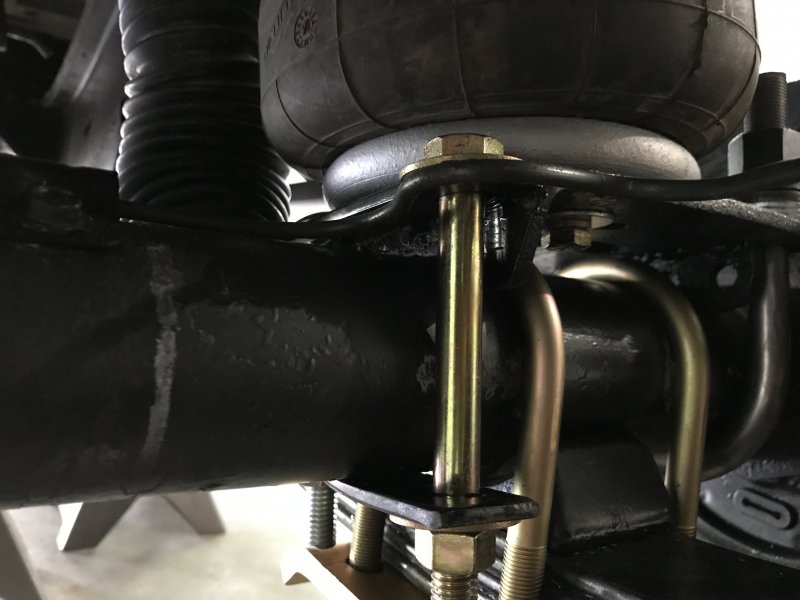
Awhile back the axle was given a refresh before taking it to the guys at Just Differentials to it regard and a locker installed. The big questions were which gears and which locker? The Comanche started with 30" tires and the typical stock gearing of 3.07 gears. The 30" tires were robbing the power from the Comanche, and with the recent jump to 33" tires without a reduction in gears robbed even more power. Earlier in the build process I found a HP Dana 30 with 4.10 gears on Craigslist for a good price. The popular 4.10 ratio is a great ratio that will bring the ratio and tire size to almost stock. The debate on which kind of locker is as hot as the debate of automatic vs manual transmissions. Everybody has an opinion. Some say the lunchbox style locker have the edge. Lunchbox lockers are locked when you need it to be locked, but can't be unlocked. While others swear by the selectable variety, with its open daily streetablilty being a strong lure. There truly is no right answer, it really boils down to what you need/want out of your vehicle. For my application I chose to go with a Eaton E-locker. I chose the E-locker for its simplicity and less components. While failure in the air system does not occur frequently, it will render the ARB useless. With more components there are more areas for failure. My thoughts are as long as there is power and the wiring is connected there should be a locker. As my build is for overloading I don't want to be in a scenario where I am in a remote location and I have a failure in the air system, particularly in the differential housing. Before scheduling the appointment I already knew which direction I was going but their customer service rep, Scott, was double checking my selections and why and talked me through all the available options. With everything scheduled the axle was dropped of for the install and back in my possession within the week. With the axle ready to go in the rear suspension was installed to match the front. For rear leaves I purchased Rusty's 4" leaves. I've never had issues with Rusty's products and the height matched the 4" coils from Ironrock offroad.The disc brake conversion that was put on the previous axle was swapped over to this axle. The last iteration the stock bolts that hold the retaining plate to the housing were used. The only drawback was that they were almost too short. This time around longer bolts were used. The only needed modification is to grind down one side of the bolt so it can sit again the axle tube. The weight of the Wildernest was causing the previous leaves to sag prematurely. Airlift airbags were put on to help carry the weight of the Wildernest (~300 lbs). When it was first installed the lower mounting brackets were not compatible with the Comanche's suspension. To make it work at the time the lower mounting brackets were welded directly to the axle tube. This made it so lower airbag bolts were inaccessible and the u-bolts virtually unremovable. Not good on either account. This time around some modifications were made to make airbag lower mounting bracket removable, allowing for access to the lower airbag bolts and removal of the u-bolts. 3/8" plate was welding to the sides of lower mounting brackets. With a few test fits the plate was trimmed down to allow for clearance of the shocks/shock mounting tabs and the backing plates. Then holes for u-bolts were measured and drilled into the 3/8' plate. With the airbags removed for the first time in years the fittings, hoses and hardware were replaced. For the outer axle tube 3" u-bolts were used for diameter increase as you go towards the outer axle tube. U-bolts were used for the outer mounts on both sides. The u-bolts didn't have enough thread engagement without the leaf pack, so a large stack of washers was used as a spacer to compensate. The original plan was to use u-bolts for the inner mounts as well. However, the airbag sat to far inboard to allow the u-bolts to be used. An alternative plan was devise using bolts to hold the inner bracket to the axle tube.
-
I just bought 4 new bolts for my front drive shaft. If memory serves I bought 5/16-24 (fine thread) with 1-1/2 length enough length to use a lock washer and flat washer.
-
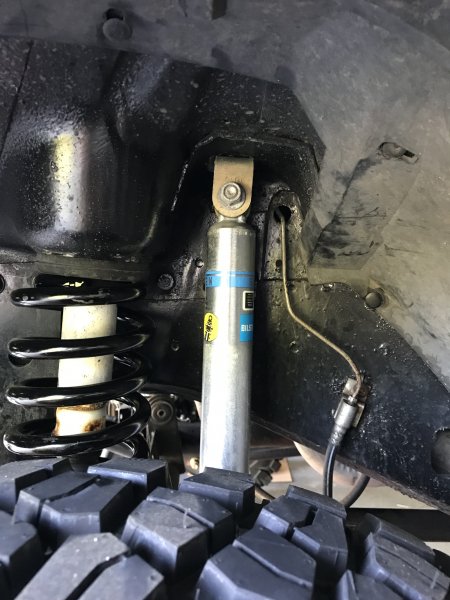
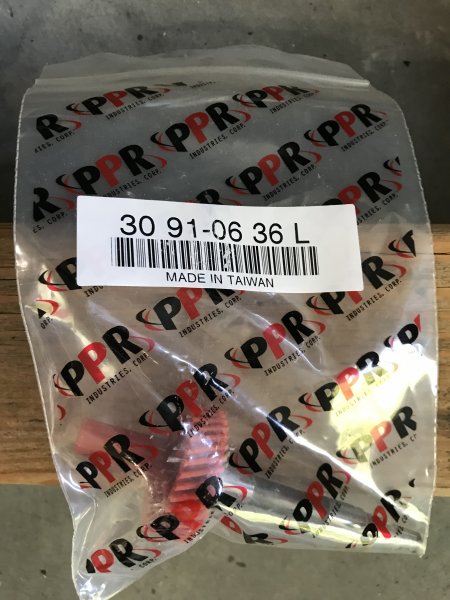
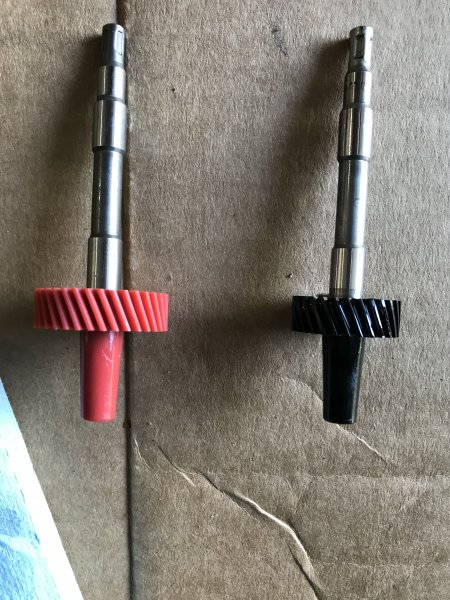
At the suggestion of DesertRat1991 I rotated the upper shock mount adapters 90 degrees to be perpendicular to the lower shock mount. Having changed the gearing to 4.10s and the tire size to 33s on the Jeep, using the gear chart below I replaced the factory speedometer gear with the most correct tooth gear. 55-93 Long Shaft Cable Driven Speedometer Gear Chart Tire Size 44" 42" 40" 38" 36" 35" 34" 33" 32" 31" 30" 29" 28" 27" 5.38 Ratio 34 36 - - 42 43 - - - - - - - - 5.13 Ratio 32 34 36 - - 41 42 43 - - - - - - 4.88 Ratio - 32 34 36 - - - 41 43 - - - - - 4.56 Ratio 28 - 32 34 36 37 - - - 42 43 - - - 4.10 Ratio - 26 28 - - 33 34 - 36 37 - - - 41 3.73 Ratio - - - - 26 28 - - 32 33 34 - 36 37 3.55 Ratio - - - - 27 28 - - - 32 33 34 - 36 3.07 Ratio - - - - - - - - 26 27 28 - - - The gear and tire combination that I am now running fell between a 34 and 36 toothed speedo gear. I went with the larger of the two. Remove the bracket holding the assembly in place and pull it out of the transfer case. Swap the speedo gear and put it back in place. Make sure to "clock" the new gear to match the number range on the housing. You want the bottom bracket peg to line up with the range notch you need. Tighten it down and you should be good to go. If you don't get a reading, make sure the housing is turned correctly and the speedo cable or sensor peg is fully meshed with the speedometer cable gear shaft.
-
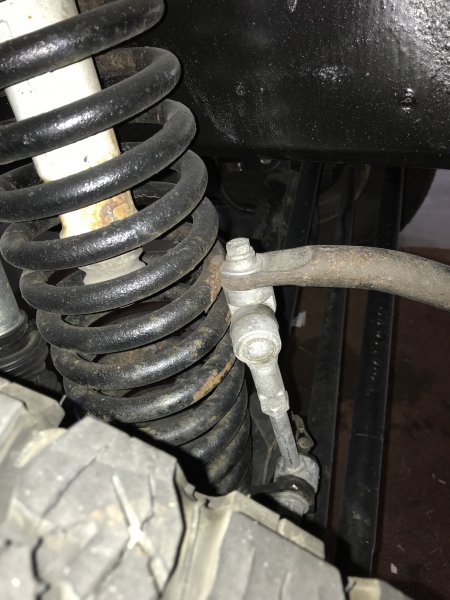
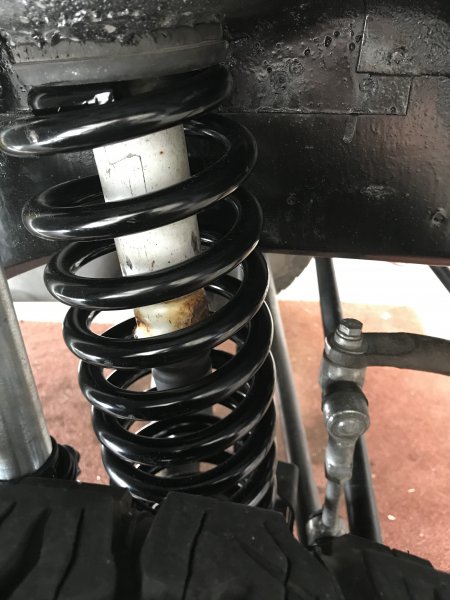
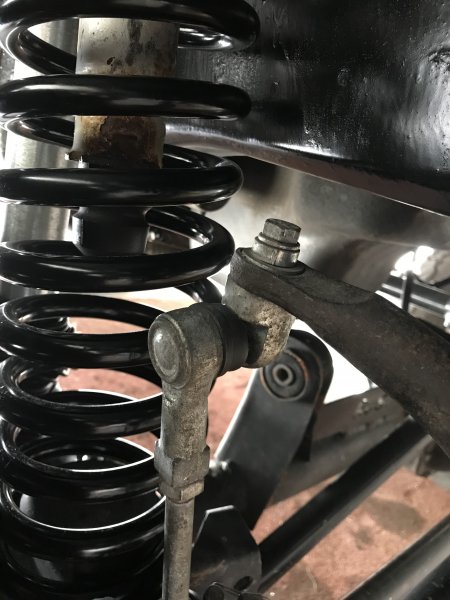
The sway bar links are indeed too short and make the sway bar arms parallel with ground. They were salvaged from a lower lifted Jeep as I wanted the quick disconnects and I have not purchased longer ones. Currently I am making do with what I had available. When I had the stock sway bar there was ample space between the coil spring and the sway bar, however when I upgraded to a thicker V8 grand Cherokee sway bar the sway bar started contacting the coil spring. Please don't think I am picking fights as I post here to gain others insight and appreciate the feeback; the manner/punctuation in which you wrote the last sentence comes across as rather condescending and other may take offense.
-
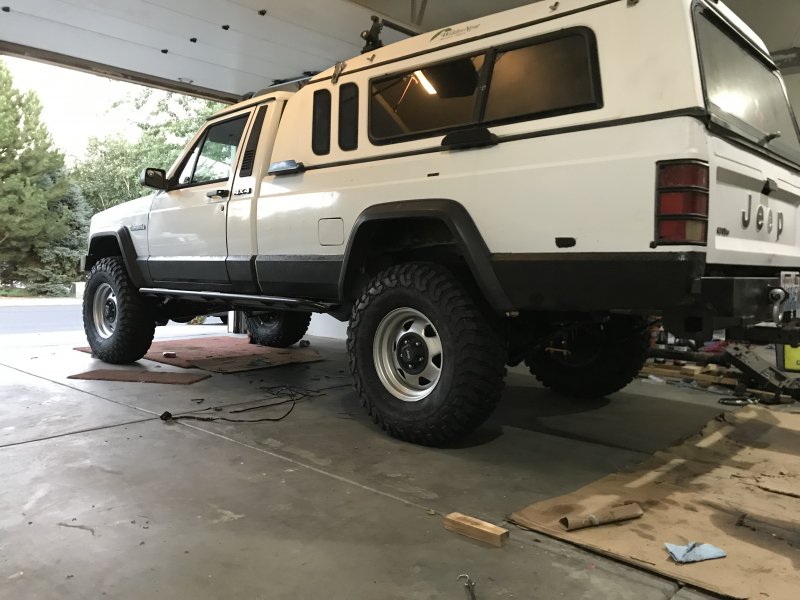
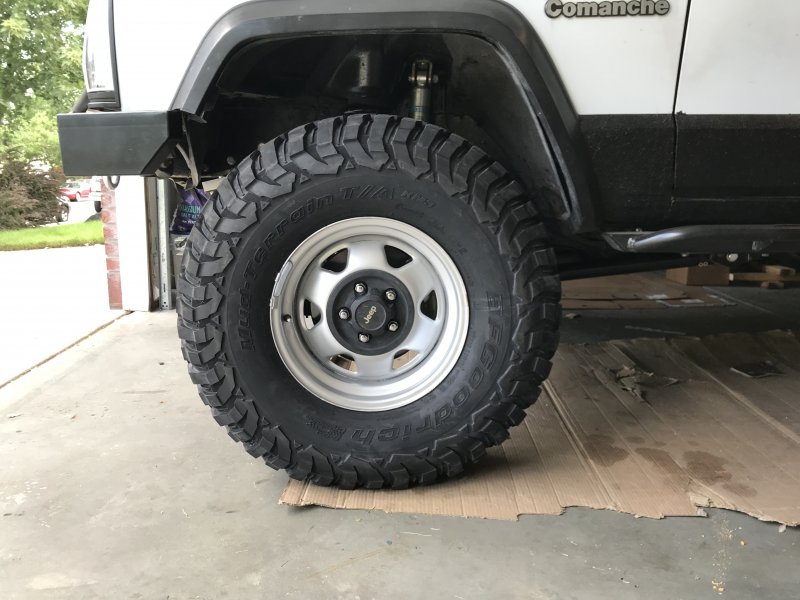
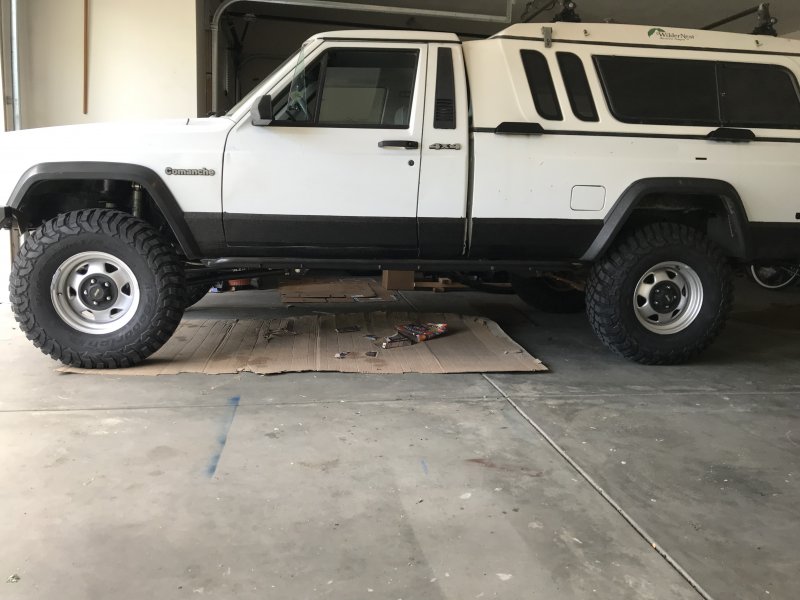
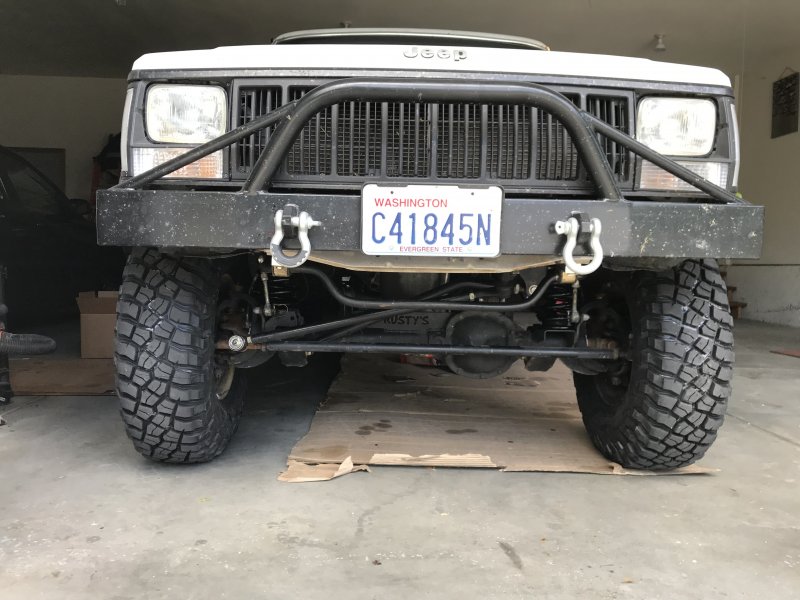
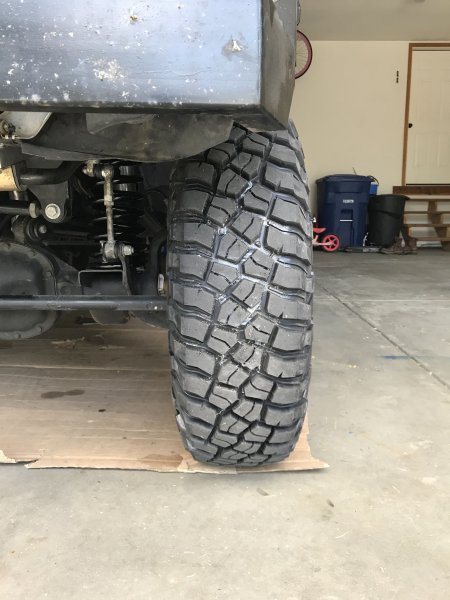
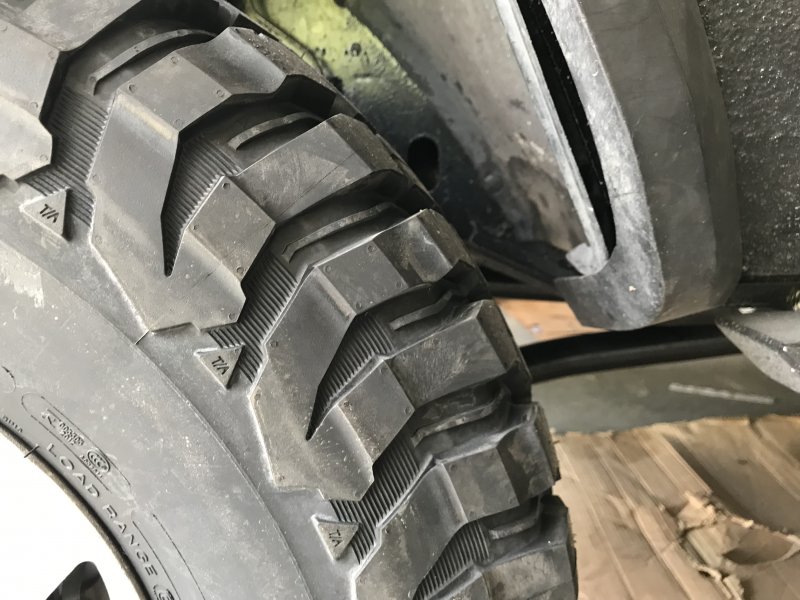
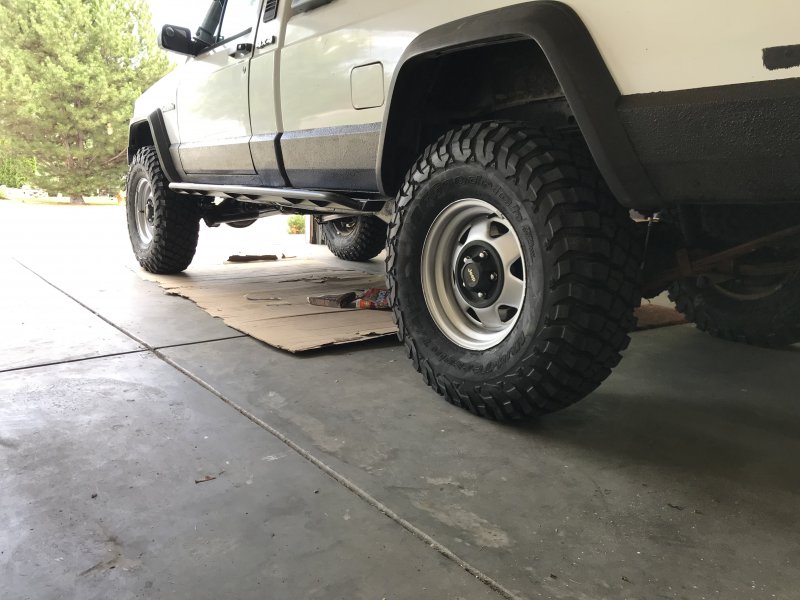
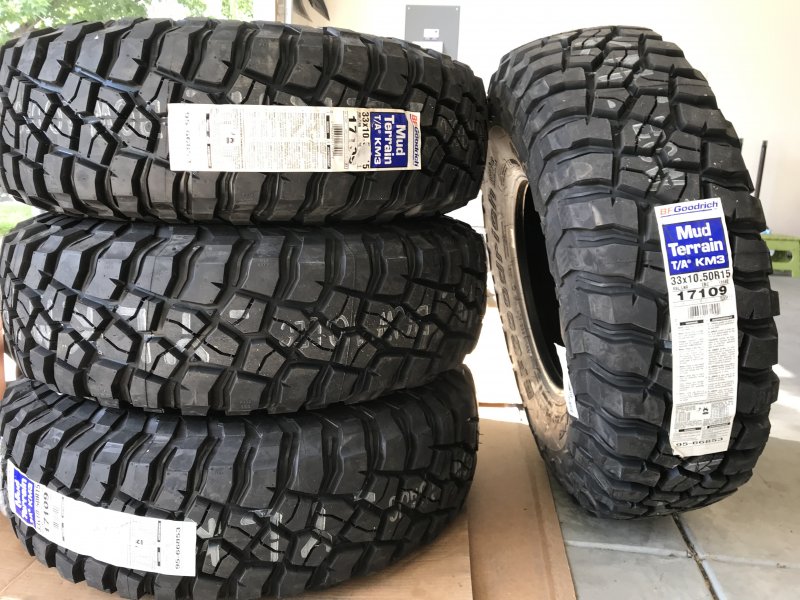
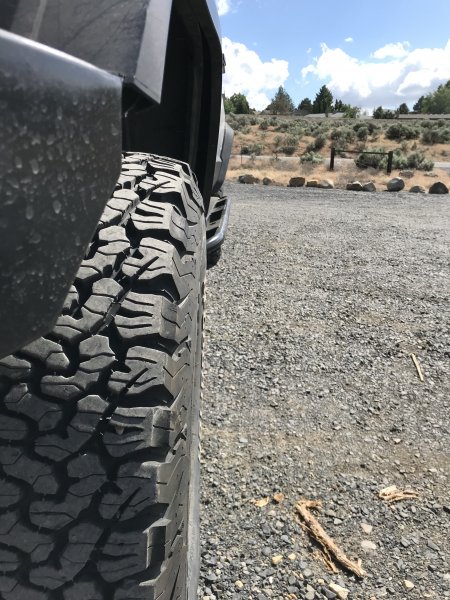
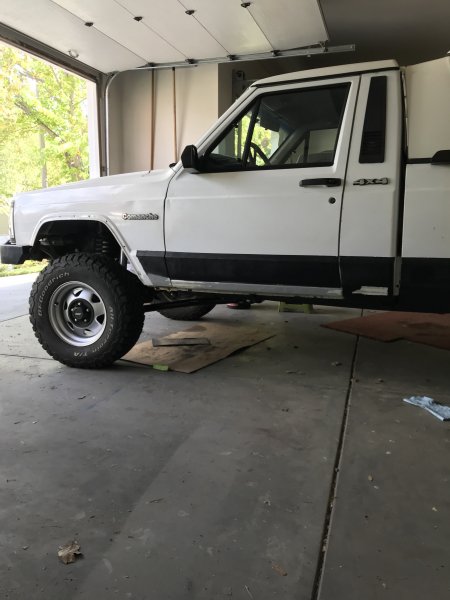
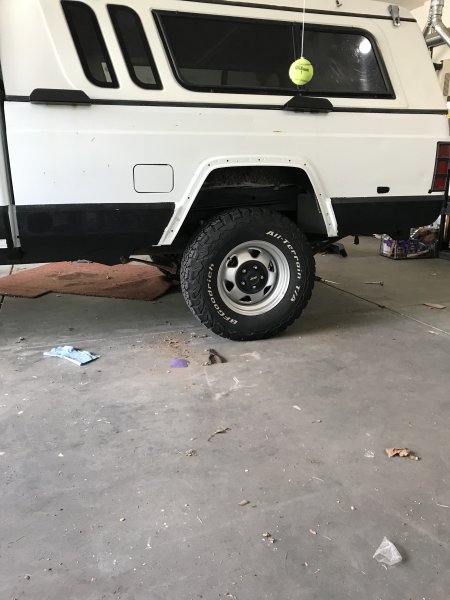
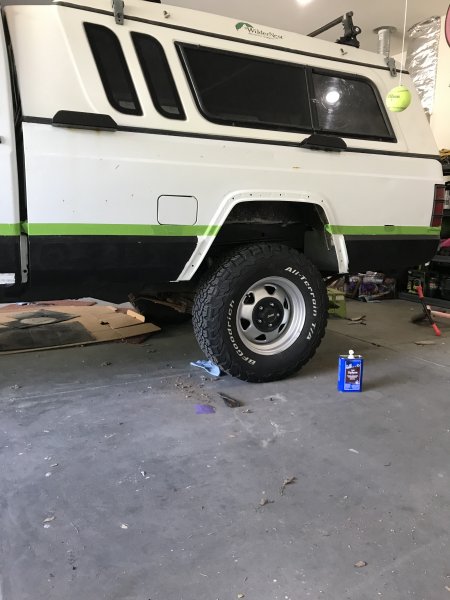
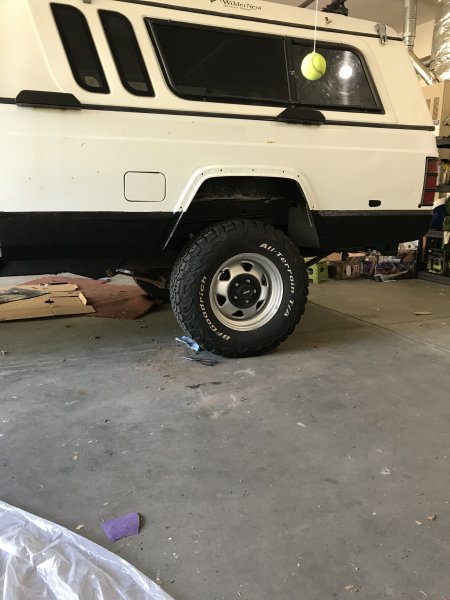
The other item of note is I got the new 33x10.5 BFG KM3s installed on the Jeep. I really went back and forth on which size (31" vs 33") to buy. I have always thought the LWB Comanches look better with a bit bigger tire. And I am not regretting the decision. The front is sitting higher as I've swapped new coil springs. The 4" lift gives plenty of clearance. The only rubbing that I have encountered is just on the passenger side. The tire rubs on the sway bar when backing up and the tires are turned left at full lock.
-
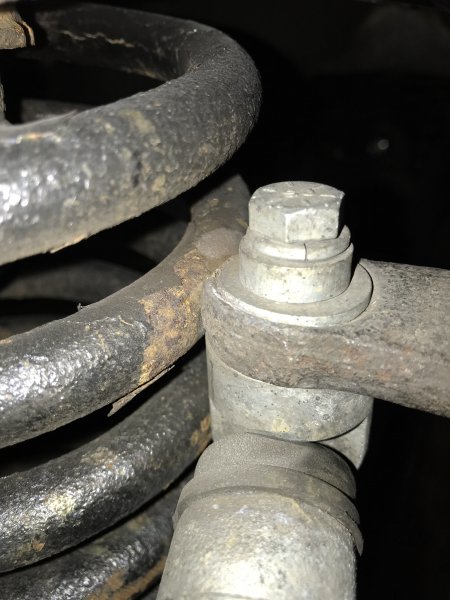
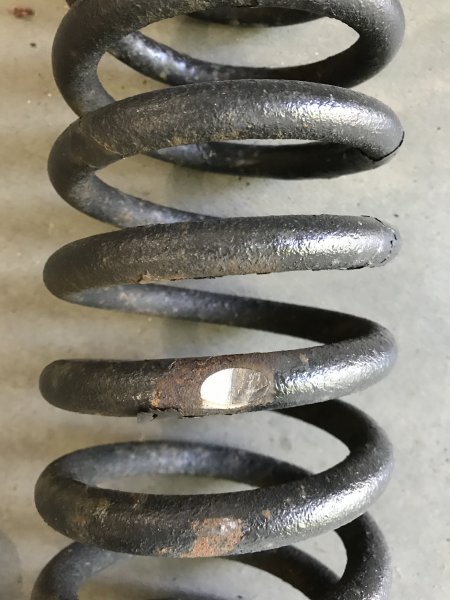
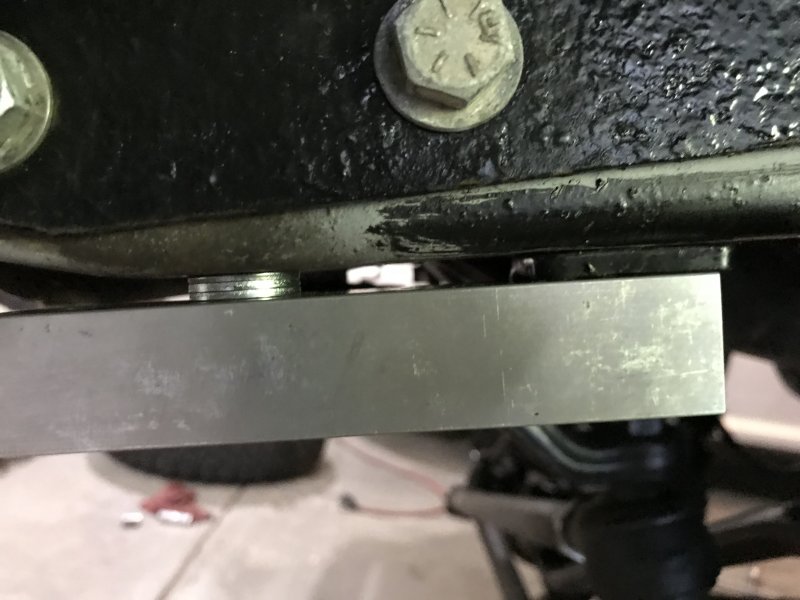
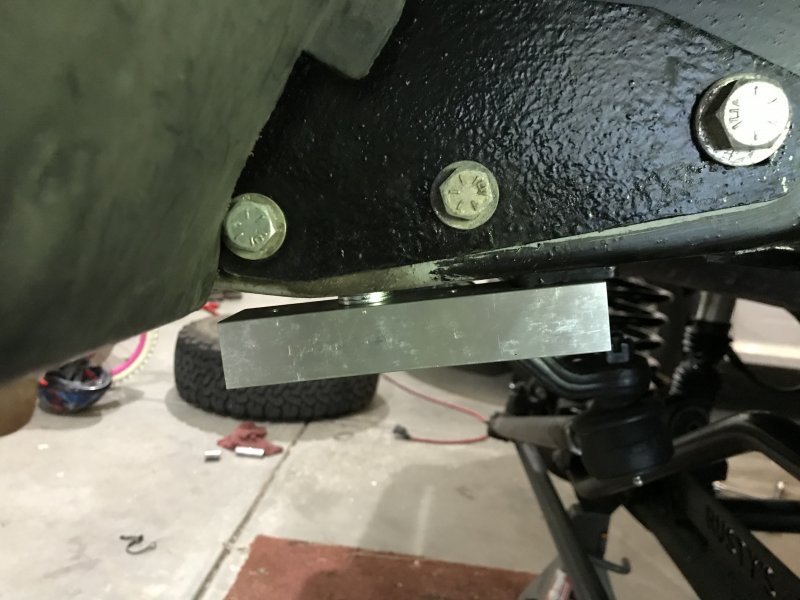
When driving around I had metallic hollow clunk from the sway bar end link contacting the passenger coil when ever the suspension would cycle up and down. The result of the sway bar end link rubbing on the coil. I didn't want this to happen to the new coils going on the Jeep. As I was replacing the worn old coils with some new ones, I took the opportunity to add a set of Synergy rear sway bar relocation brackets. They brackets move the sway bar down 1" and forward 1-7/16" for added clearance. The hole spacing for the brackets line up perfectly with the MJ frame and and sway bar bushing brackets. The two main issuesI had/have with the brackets is the steering box brace from KevinsOffroad I have on the Jeep wouldn't allow the brackets to sit level. The simple solution was to use a few washers as a spacer front to level the brackets out. The second issue is the brackets overhang the front of the frame. However, the results speak for themselves. The benefits definitely outweigh the two cons that I found regarding the brackets. Plenty of clearance between the sway bar end links and the new IronRockOffroad 4" coils.

-

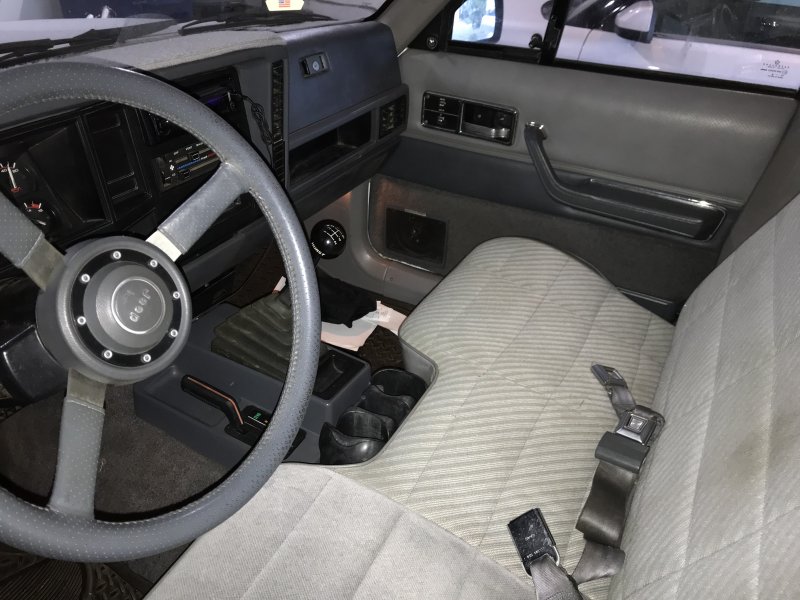
Lets see some pictures of your stick shift interiors
agamble replied to Deleted's topic in MJ Tech: Modification and Repairs
A Walmart special if memory serves right. -
Lets see some pictures of your stick shift interiors
agamble replied to Deleted's topic in MJ Tech: Modification and Repairs

-
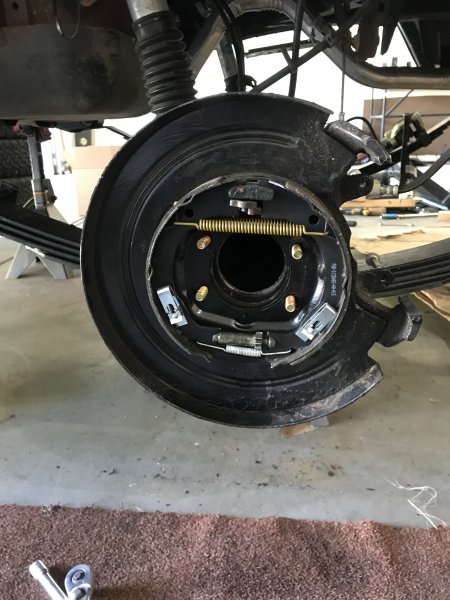
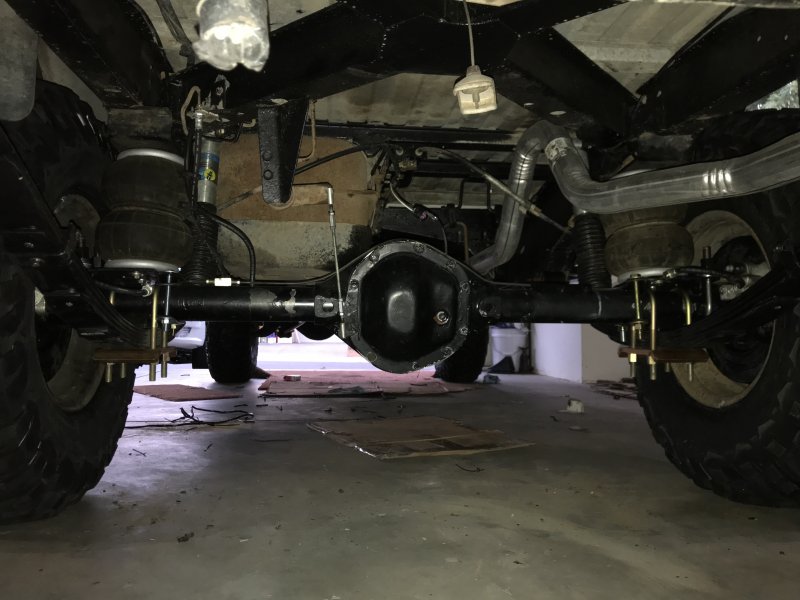
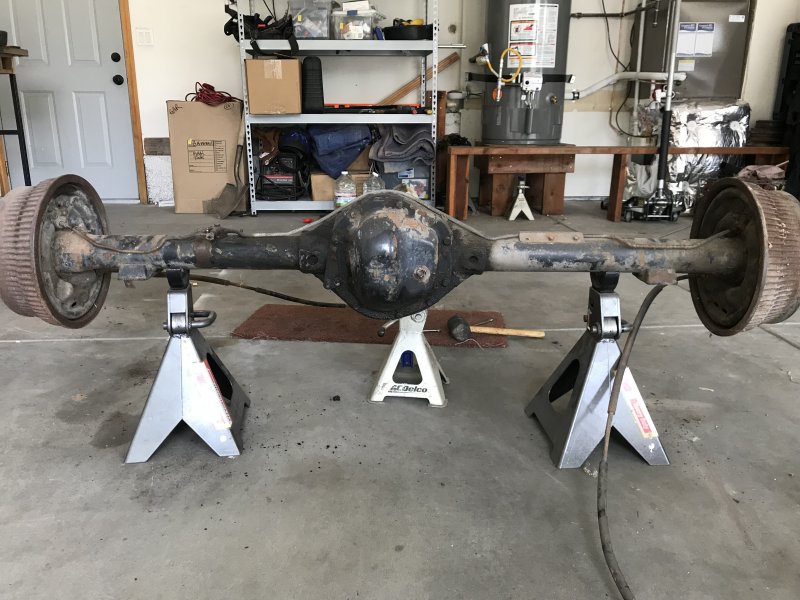
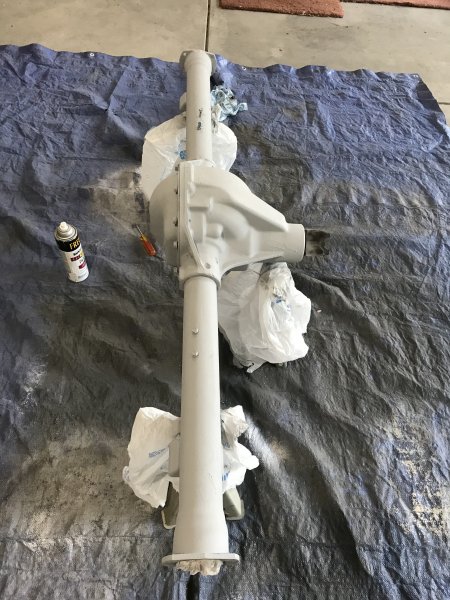
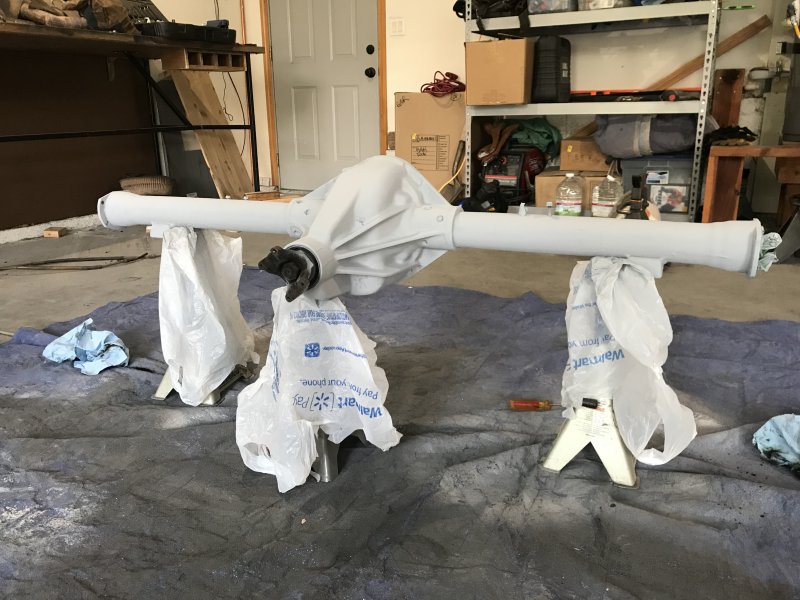
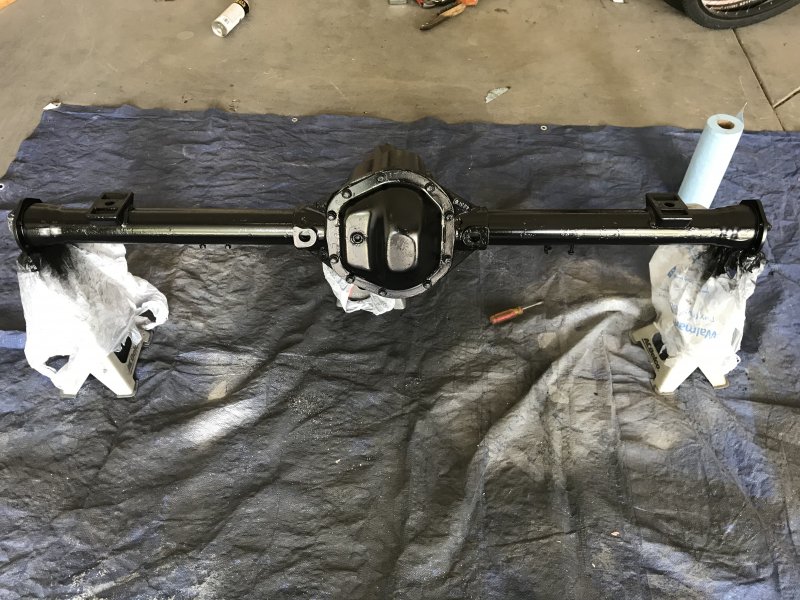
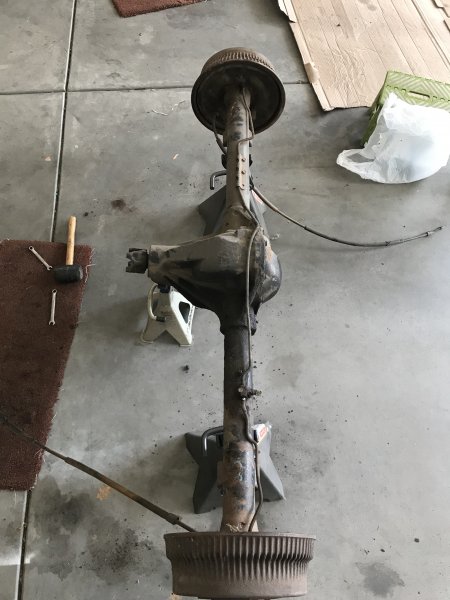
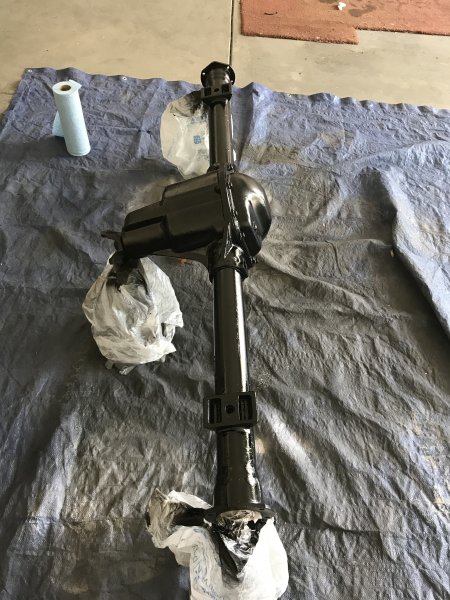
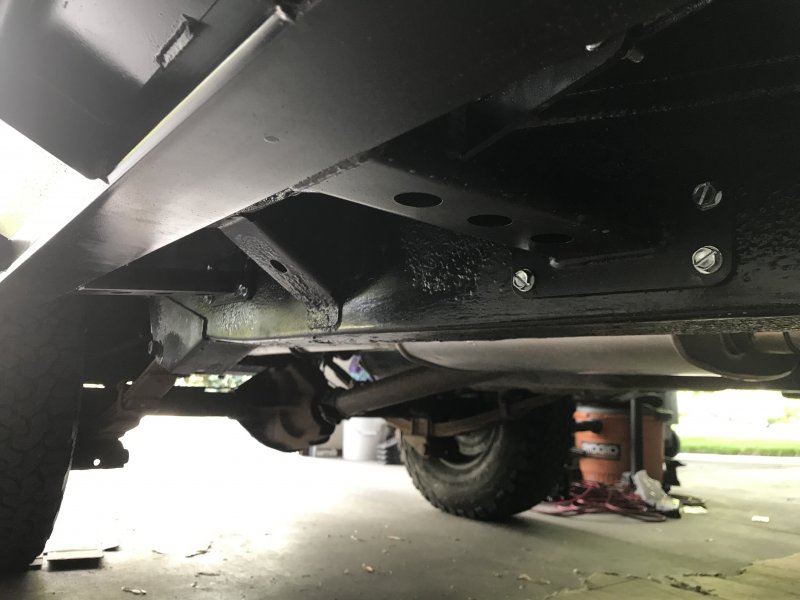
In the next month I’m having 4.11s and an E-locker installed in the rear Dana 44 to match the front Dana 30 currently under the Jeep. With a bit of research I decided on a method for painting the Dana 44 that I’d sourced a year or so back. I ultimately went with paint verses powder coating for the simple reason of as the paint gets messed up all I need to do is run to Home Depot or Ace and pick a couple cans of paint and recast the axle where the paint is damaged. Previous experience with powder coating has shown that as it becomes damaged you can’t repair it. As it starts to peel/strip you need to remove the entire coat and start over. Now while the paint won’t last as long it can be easily fixed, therefore I’m theory it should last longer and prevent rust with routine upkeep. Here’s what I did to paint the axle over 3 days. Day 1: After removing the drum brakes and backing plates and axle shafts all the built up grease, dirt, flaking coating and rust with a wire cup brush. (This step took longer than anticipated as the there was much more grease than I originally thought.) Then I washed the axle housing to remove residual grease and dirt with Dawn dawn dish soap a scrub brush. Day 2: Sprayed on 3 coats of Rust-O-leum automotive primer and allowed it to cure for 24 hours. Day 3: Applied 3 coats of Rust-O-leum appliance epoxy. With a 30-minute dry time between each coat. Where it now sits for the next week to allow the paint to fully cure. The appliance epoxy has become my go to for rattle can paints as I've found it to be more durable than the regular Rust-O-leum. It’s took awhile but it works well and is not costly. All told I’m $20 in to it. I’m hoping the that it will hold up well with the knowledge that it it’s going to scuff on the first impact and/or wear off with enough time. Lastly, currently the Jeep has 30” BFGoodrich All Terrains. To bring the RPMs back down after the 4.11s are installed some new kicks in the flavor of 33x10.5x15 BFG KM3 were purchased during the 4WD holiday day. I’ve heard really good things regarding the KM3. I knew new I didn’t want to go any wider than 10.5. I really went back and forth between 31s and 33s. Both were practical and eventually the aesthetics won out. I’ve always thought the LWB looked better with a little bigger tire size.
-
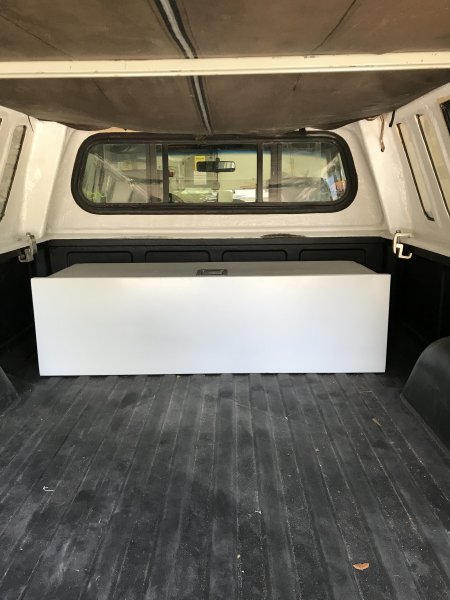
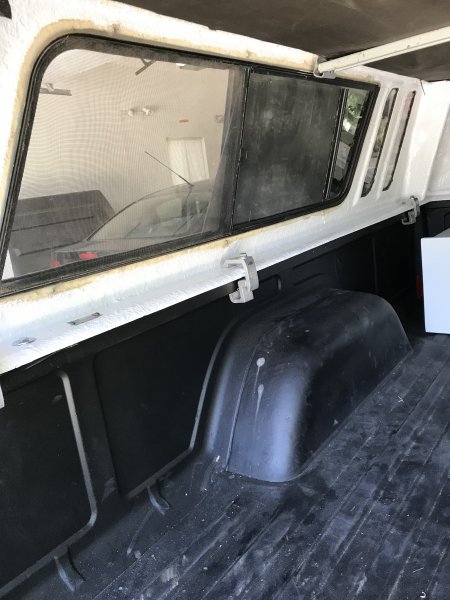
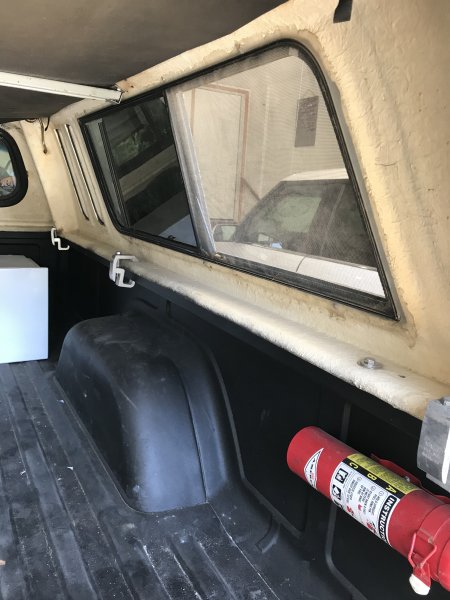
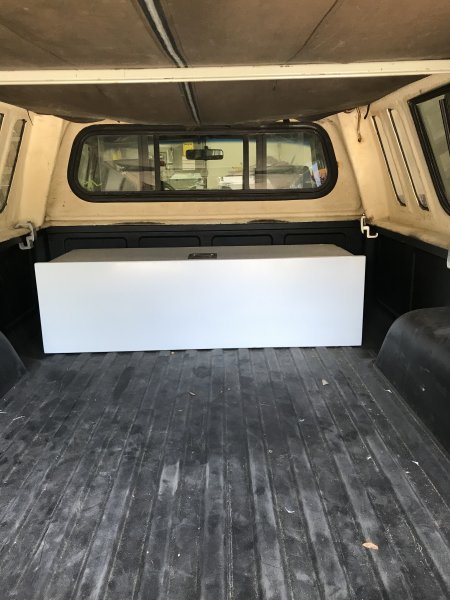
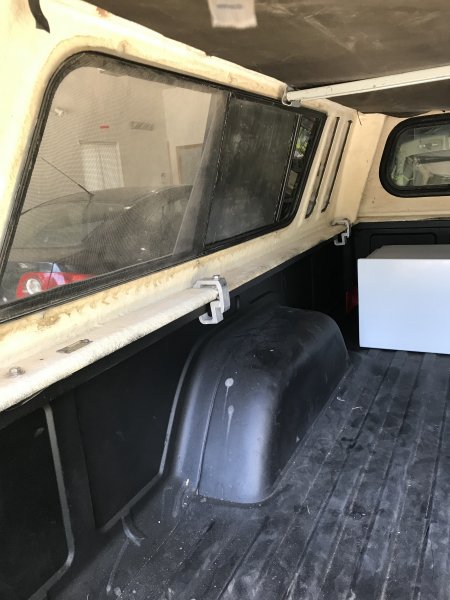
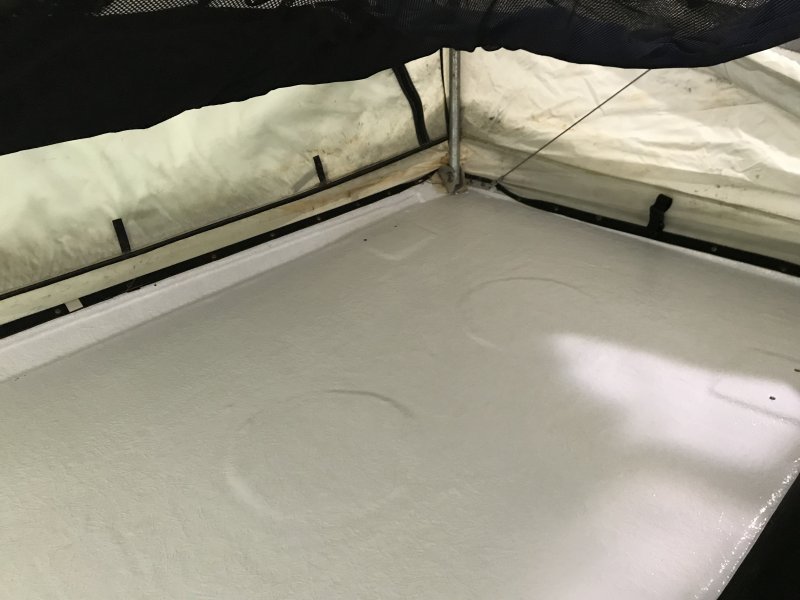
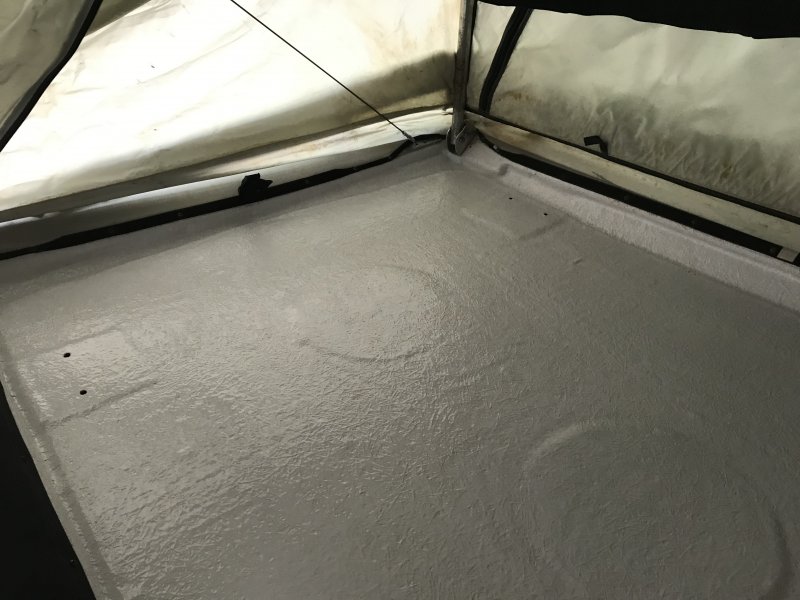
After freshening up the sleeping platform of the Wildernest with enamel paint; 1: it looked much better than before (i.e., cleaner/newer) 2: the dirt didn't stick to it as readily 3: it had a smoother feel to the touch than the raw resin 4: it encapsulated the fiberglass fibers that were breaking free. Seeing as I only used about an 1/8 of the quart to cover the sleeping platform the remainder of the quart was used to freshen up the rest of the cap. Before: After: (Note the silicone sealant used around the edge of the windows didn't allow the paint to stick or cure very well, it was left unpainted.)
-
Thanks! The air bags are nice and they don't affect the quality of the ride. They were added as the leaves started sagging fast from the weight of the Wildernest, about 300 lbs. and every bump would cause the rear of the truck to bottom out. The air bags help take the weight off the leaves and dampen the bumps.
-
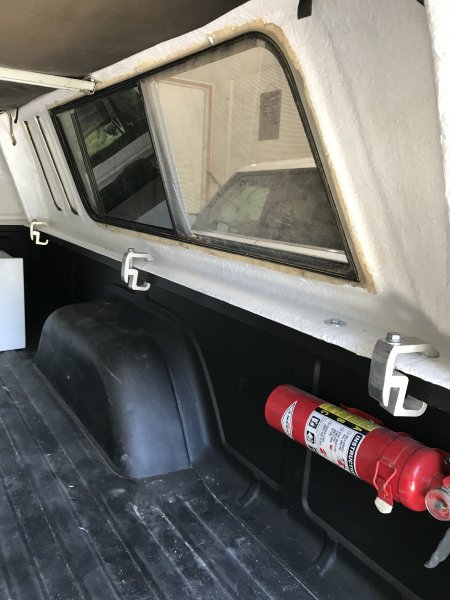
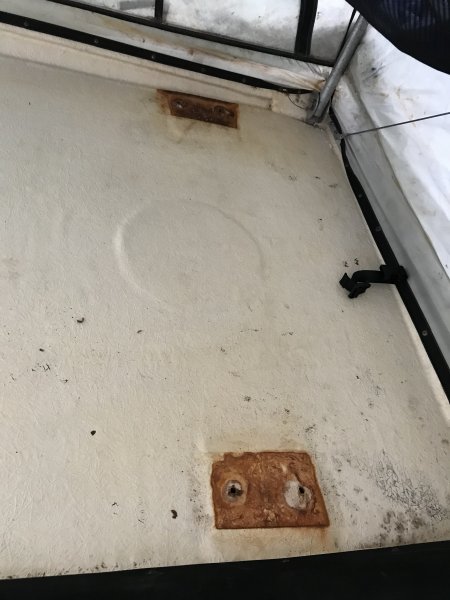
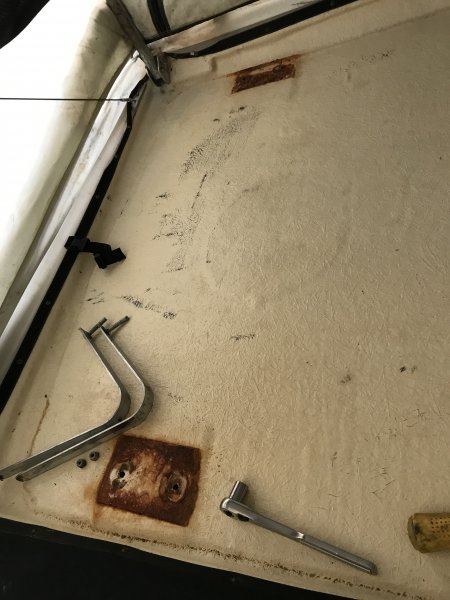
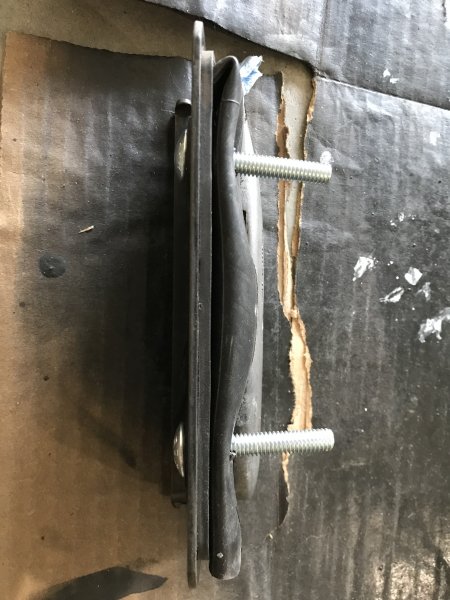
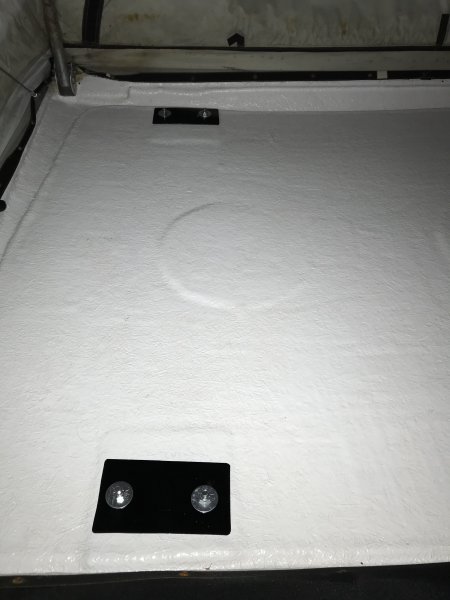
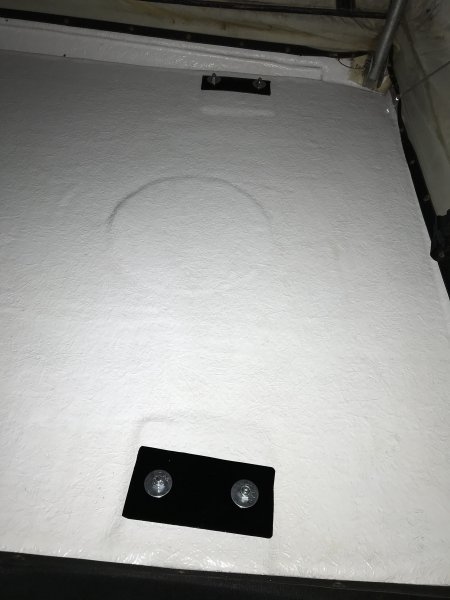
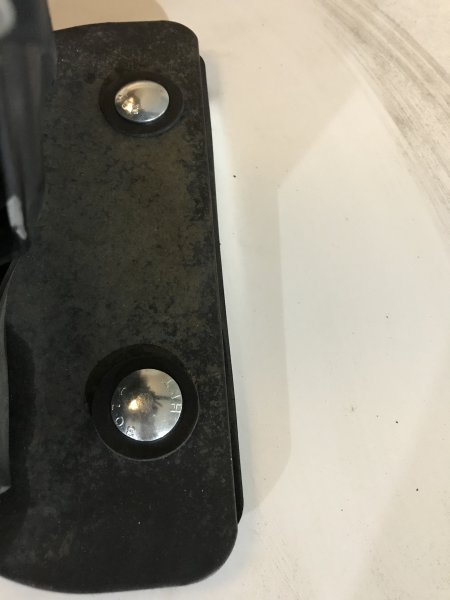
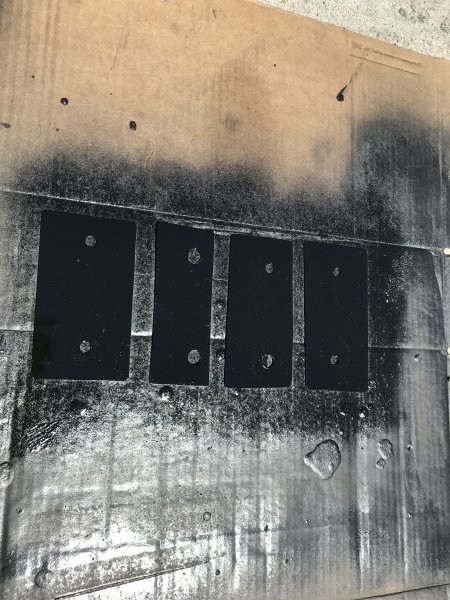
No Jeep specific, but 100% Jeep related in my case as its attached to the Jeep. I started on some of the repairs to the Wildernest. The first thing to address is leaking. At some point a previous owner installed a roof rack onto the top of the shell. In the X amount of unknown time since its installation water has been seeping in the mounting bolts. Underneath the mattress the mounting plates and bolts had rusted. Once the brackets were removed the excess rust was removed from the fiber glass with soap, water and a scrub brush. After a good cleaning I applied a coat of enamel paint, to cover the rust stains and add another layer of protection to the fiberglass resin. The mounting plates had the rust removed and were painted in some enamel paint to prevent future rusting from occurring. The water started leaking in as the old neoprene gaskets that came with the roof rack were dried and cracked. I was unsuccessful in sourcing new gaskets. I had some old bike tubes that I repurposed to make new gaskets. The tube was cut into section of the same length as the old gasket and put into place. The old hardware was too rusty to reuse, so i bought new nuts and bolts. I used rubber washer on the outer bolt to seal the hole and reinstalled the roof rack. Final product
-
Thanks! I'm glad to hear others are enjoying the detail. I do most of it for myself as a way to keep track of what modifications/upgrades I've done and what parts to make it easier on myself if I need to repair, replace, or replicate in the future.
-
The easiest route is to use Ford 8.8 parts, for cables I found that grand cherokee ebrake cables are long enough to use. I did a write up not to long ago; there's a link in the thread to a naxja thread that goes over everything in great detail.
-
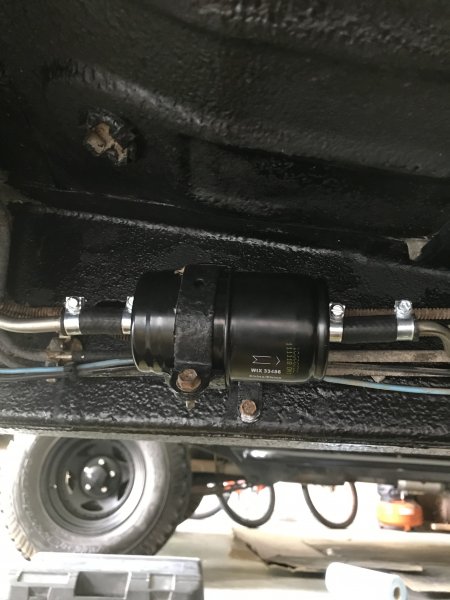
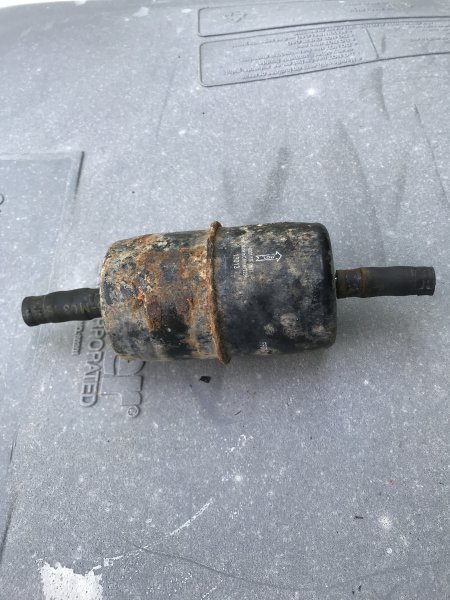
I was crawling around under the Jeep and took note of how rusted the fuel filter was. This got me to thinking how old could the filter be for it to have rusted as such. A $10 investment for piece of mind goes along way. I replaced the fuel line and the fuel injection clamps for a fresh new start.
-
Thanks! Its always good to get compliments regarding ones work.
-
Thanks! Comments/feed back is always appreciated.
-
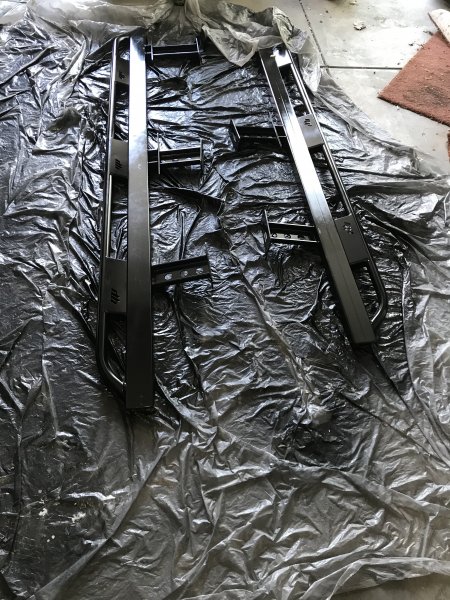
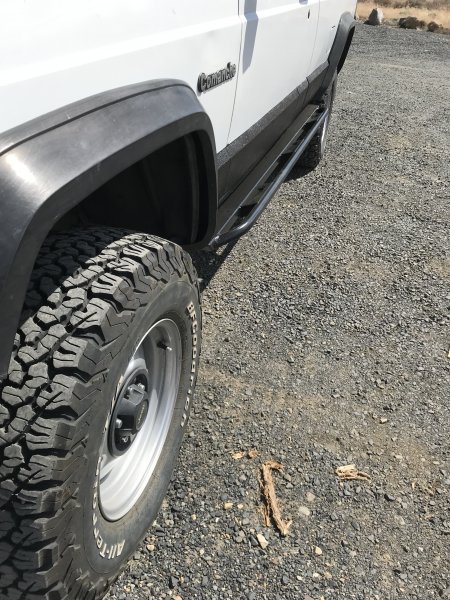
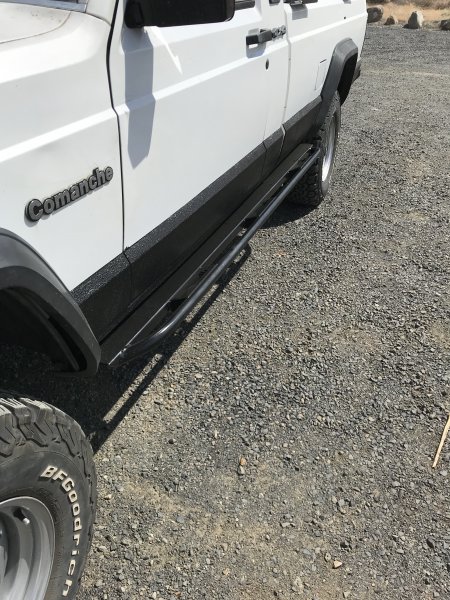
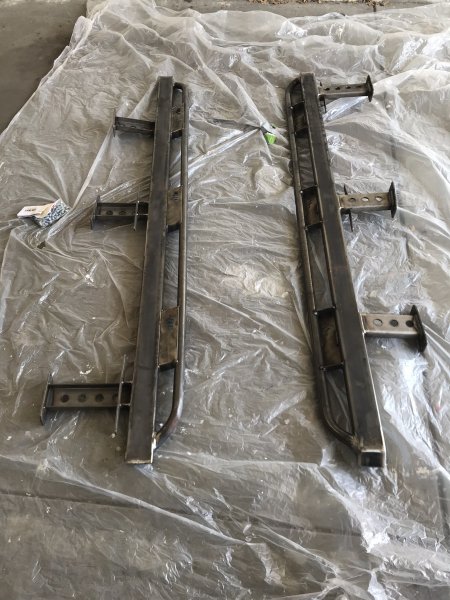
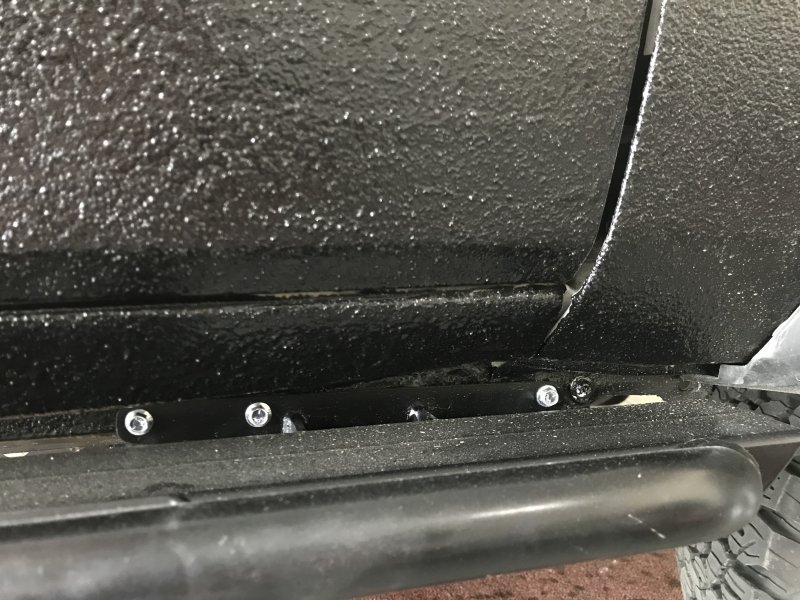
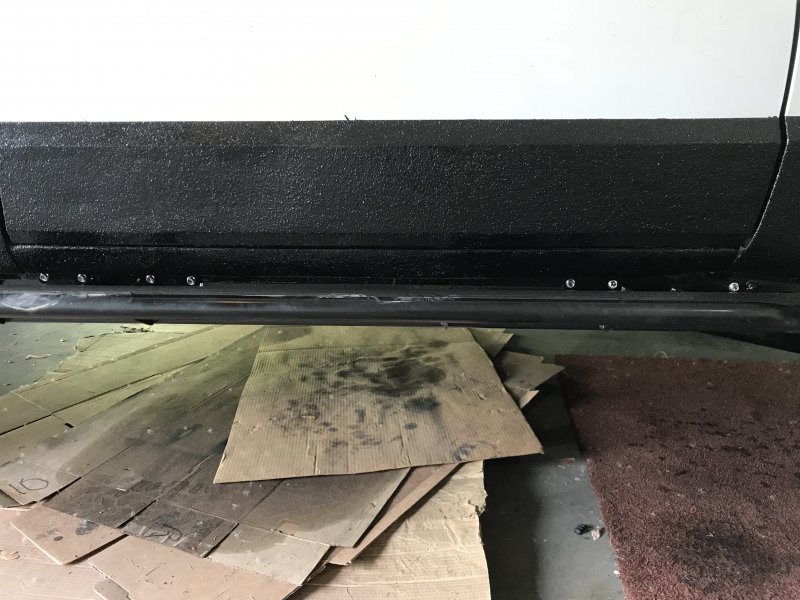
Having completed the lower body panel work, I installed what is my opinion the second most important modification you can do to any offload vehicle (the first of course being quality tires), a good set of rock sliders. Past experience has shown all it takes is one easy trail run gone bad and you've wiped out the side of your truck. I ordered the deluxe rock sliders for the long bed from Dirtbound Offroad. The sliders are built using a 1.5 x 3 x .188" main tube, 1.25 x .120 side tube, bolt to the unibody in 12 places and the pinch seam on 8 plates per side, and come shipped in bare steel.. The added bonus of having the tube step is getting to park in the good parking spaces without getting door dings. It's funny seeing the new half moon marks on the sliders from people inconsiderately swinging their doors open. First I applied two coats of a rust inhibitor to the bare metal, followed by two coats of Rust-O-leum paint and primer in one, then as a finish I applied two coats of Rust-O-leum Appliance Epoxy. To mount the rocker guards, I debated on using nutserts, as I had seen others use and recommend, or use self tappers. After much reading on the web of the pros and cons between the two and internal debate, I went with the provided self tappers. With my mounting hardware selected, I followed/repeated the mounting procedure found on the JCR Offroad website (Dirtbound Offroad did not supply any instructions, nor do they have any on their website), http://www.jcroffroad.com/install_guides/SL_CL_XJ_ZJ_WJ_KK_KJ%20REV%202016.04.15.pdf. Mounting took me about 40 minutes per side, that was with me taking my time, marking and drilling the pilot holes and working up inside to the final 1/4" hole for the self tappers. The outcome of a an easy trail run gone wrong. I was only able to get 3 out of the 4 bolts because of it. When you get the sliders up into place, the unibody mounts will be sitting any where from flush to an 1/8" gap. As you tighten the self tappers, take your time tightening each screw evenly and the gap will close and the mounts will end up being flush.

-
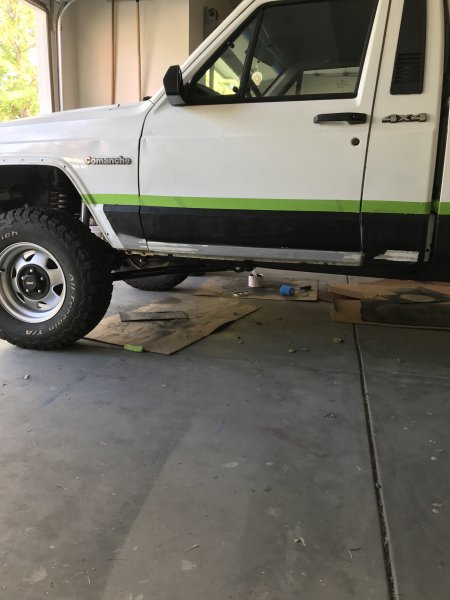
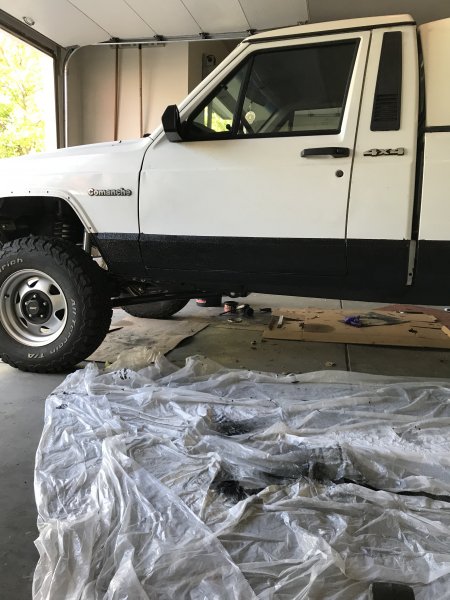
Before fall set in I completed body work on the quarter panels, complete with a primer coating. I was hoping to reapply the bedliner on the lower quarter panels to have it done and out of the way, but time was not on my side. With the colder temperatures the plan was put on pause. Now that spring has sprung, a brought with it warmer temperatures it is time to finish the lower quarter panels. A some point a coat of Durabak (a DIY bedliner) was applied to prevent rock chips. When it was originally done the Durabak was applied with the fender flares on, resulting in peeling near the flares and a feeling of being incomplete. This time around the flares were removed to have a complete running front to back. The garage wall prevented me from having enough space to get a single shot. The entire lower half of the truck was washed cleaned to remove dirt, oil, grease, and grime. I masked off a line where I didn't want Durabak to be. I moved the tape line up ever so slightly to clean up the rough edge from the previous application. Durabak can be sprayed or rolled on, I went with roll. You can buy special rollers from the manufacturer that helps the rubber granuals spread more evenly. The manufacturer’s directions for application of the Durabak bedliner state that a primer coat is not necessary, but I found that the bedliner adhered much better to the primed areas than the places where I had just roughed up the factory paint with a light sanding, as recommended. Application was pretty straightforward. I used the manufacturer supplied foam brush to paint along panel, nooks and crannies I used a paint brush. I started by woking on the factory exposed paint. The first coat went on smoothly, though it did take a minute or two to really get the hang of how to apply the bedliner evenly. Since the air here is so dry, the first coat took ~25 minutes to become tacky to the touch. Once the second was applied, a third and final coat was applied along the entire lower panel to give an even, more consistent look all around. As soon as the final coat was on I we all of the painters tape and am letting the Jeep to dry overnight. I've been out twice to touch up any necessary areas. Since Durabak bonds to itself, this has not been a problem.
-
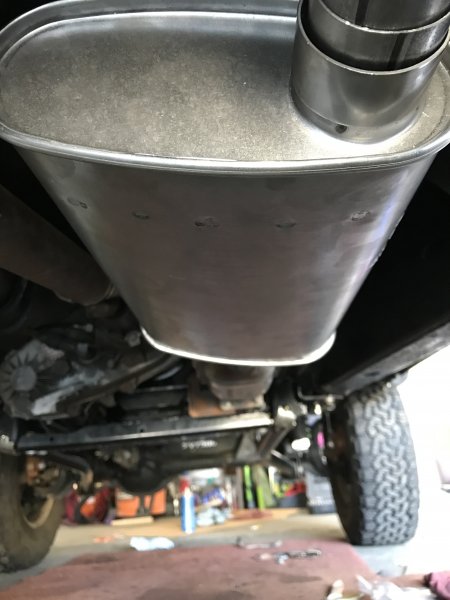
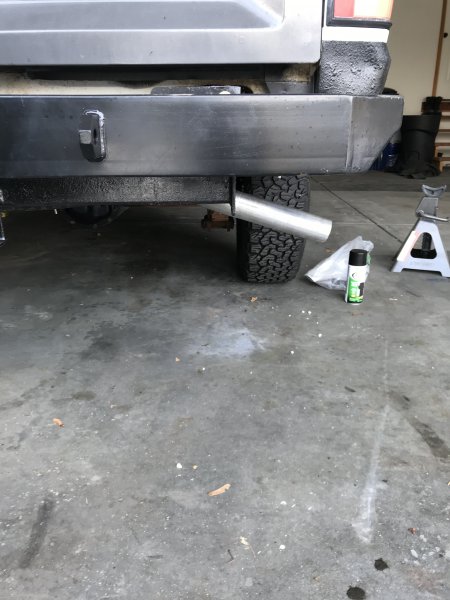
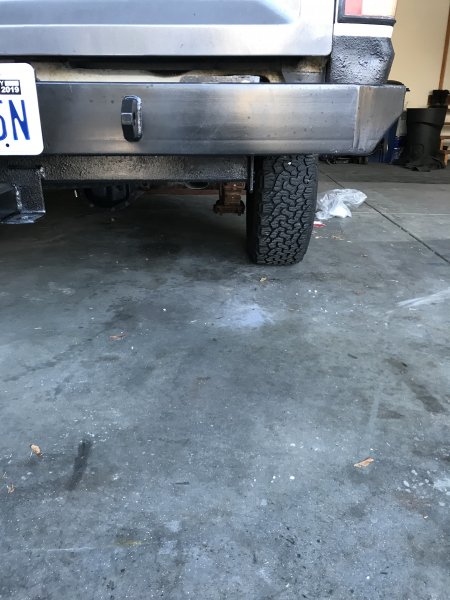
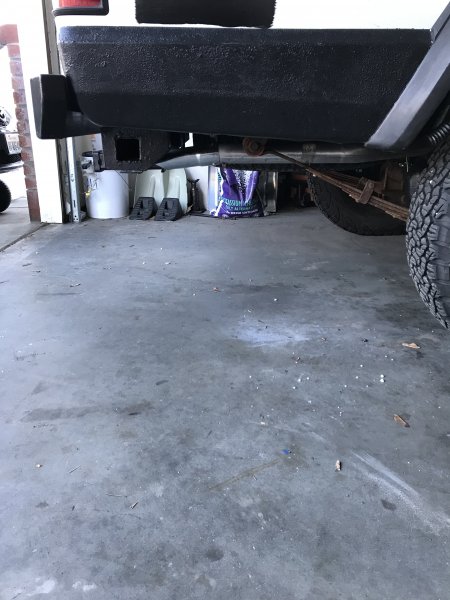
The tailpipe extended about 1/16" too far back and was contacting the hitch. I also did not like how low it was hanging. To tuck it up I removed tailpipe to just in front of where the crimps leading into the bend begin. With the section that was hanging low removed I installed a chrome tip. The tip didn't sit flush on the tailpipe, leaving an 1/8" gap. The two supplied screws used to pinch it into place would cause the tip to angle down and slide/fall out of place. To better secure it into place I drilled out two 3/16" holes allowing the screws to thread into the tail pipe itself. There was also a 3/16" hole drilled through the top of the tip and tailpipe to give an additional screw.

-
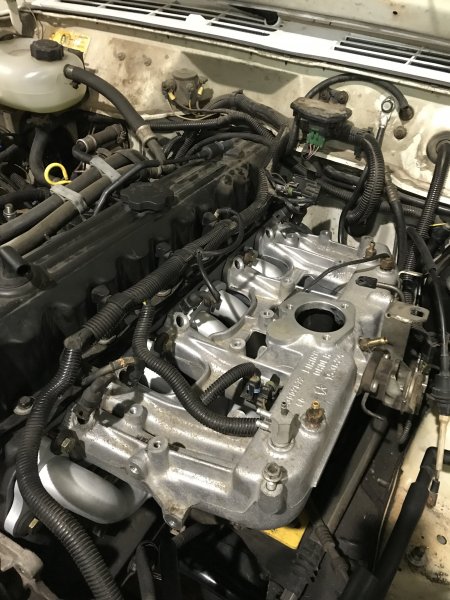
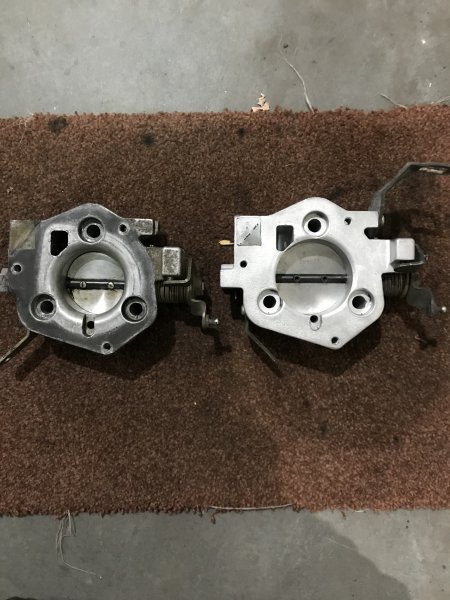
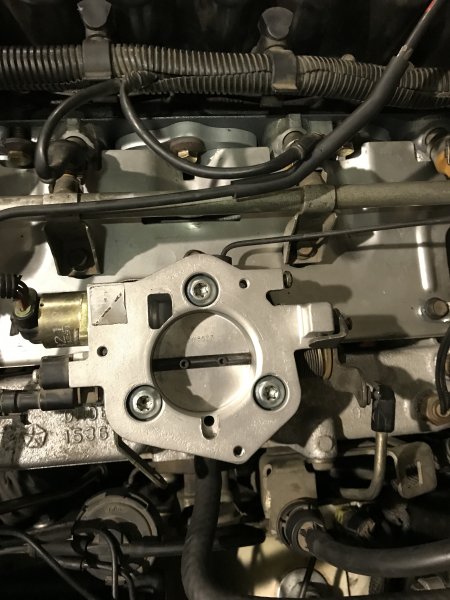
The last thing I did with the exhaust system is I thought I could help the whole system breath better. To accomplish this a MeanLemons 60mm throttle body replaced the stock one. MeanLemons was great to work with. Prompt responses, prompt service.
-
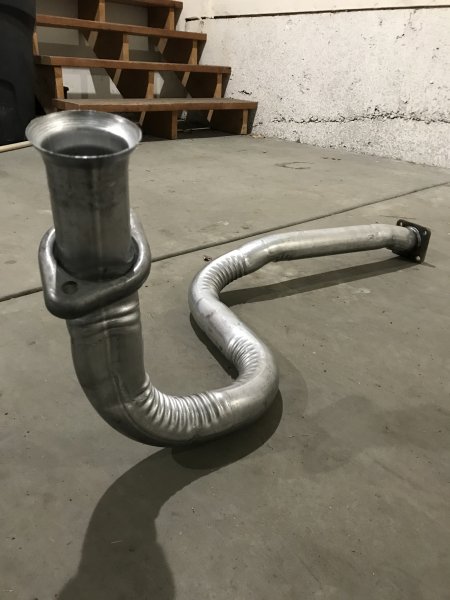
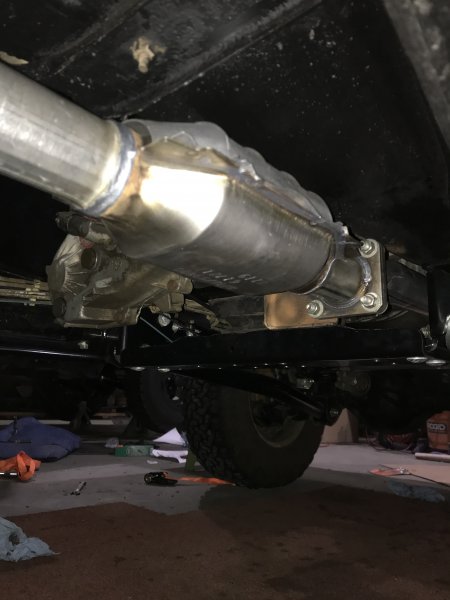
When the manifolds were removed, the bolts were a mixture of OEM and random bolts. All of the random bolts were too long and had random amounts of washers and/or additional nuts on the threads to take up the extra length. A jaunt to the hardware store had 11 new 3/8-16 1 1/4" bolts to replace all of them. out of there habit and without giving it much thought until I was bolting the manifolds on, I grabbed Grade 8 hardware. If I had been paying more attention I probably could have saved a few bucks, ah well. Degreaser made the manifold look almost new. Rockauto has replacements for the entire exhaust, all manufactured by Walker. I bought , the down pipe, a new cat, the SoundFX muffler, and the tail pipe. The only fitment issue is the tail pipe extends out a little far and contacts the hitch. Instead of using the u-bolt style exhaust clamps, I went with band clamps. The u-bolts tend to cause crimps that make it more difficult to disassemble down the road. I personally like to make future disassembly as easy as possible for myself.