Gjeep
-
Posts
1221 -
Joined
-
Last visited
-
Days Won
3
Content Type
Profiles
Forums
Gallery
Everything posted by Gjeep
-
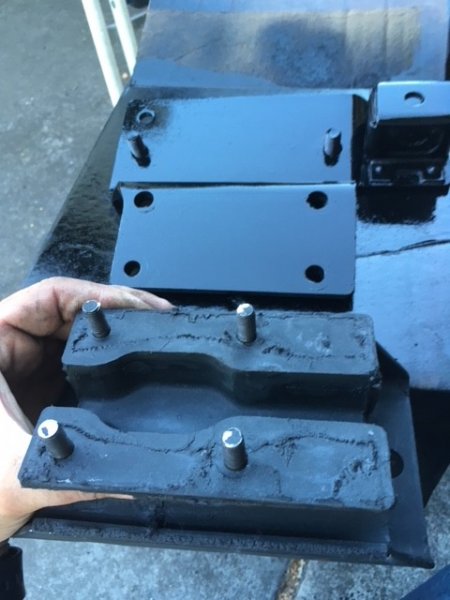
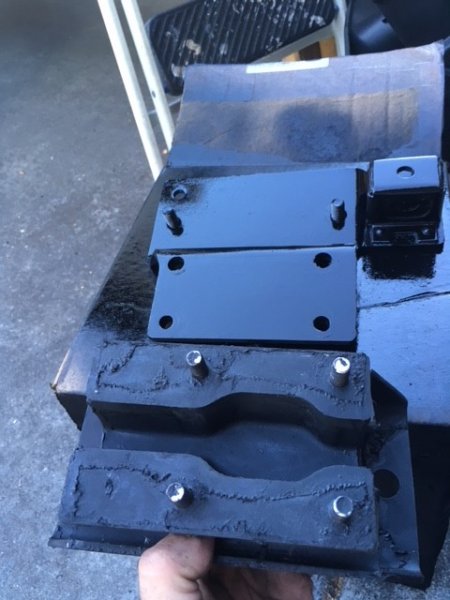
I took apart my AX-15 bracket and rubber trans mount before snapping a pic. I'm sure I can figure it out once I piece it together, etc, but would be easier to just assemble. Can't find any pics online. Anyone know which way it goes for sure? I have an idea, but want to confirm. Thanks.
-
You should be able to drop the RHD right where you have your LHD primary now. I chose to drill a hole and mount my primary fan (RHD) closer to the auxiliary fan. I felt it was more centered to the engine. As far as that vacuum hose, it's something I cobbled together from some new Renix harnesses. There's quite a few vacuum hoses I cobbled from a Renix harness so the lines flowed neatly. And yes, that's A Hesco adjustable fuel pressure regulator.
-
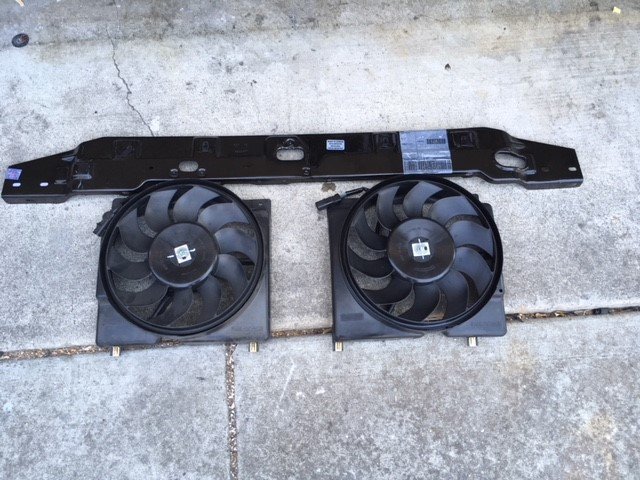
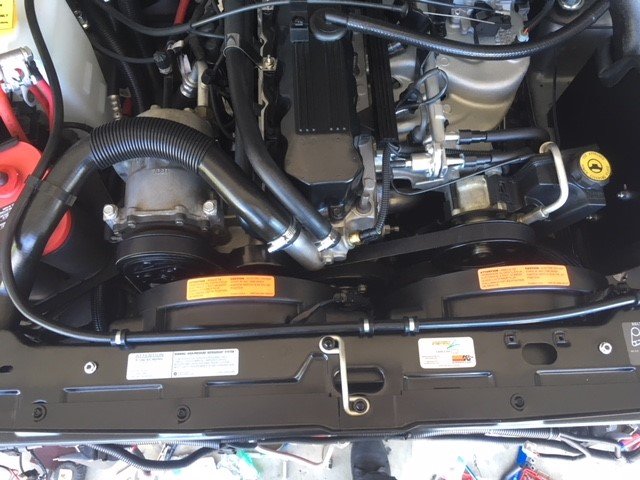
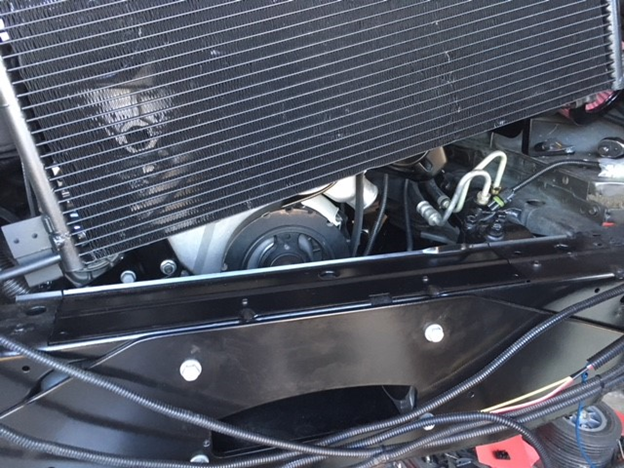
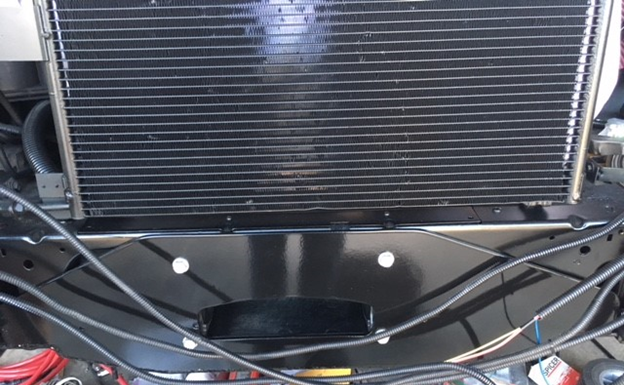
Dual OEM (LHD/ RHD) XJ fans installed. They sit nice and tight against the radiator. Power to the primary fan comes via a temperature switch Renix style in the radiator through a relay. I've yet to fire it up and test things, but keeping my fingers crossed. Still have a transfer case to install and lots of suspension work to do.
-
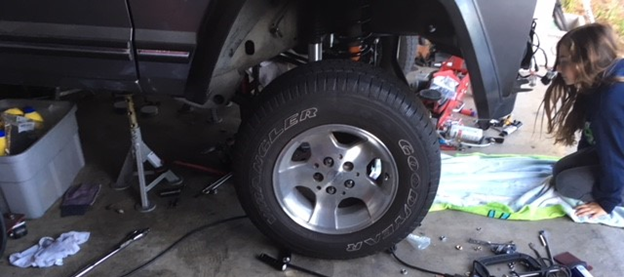
Yep, she wakes up bright and early ready to work...Was helping me install and adjust the control arms, and LCA skids.
-
Replacement Bushings - Rubber or Polyurethane
Gjeep replied to WahooSteeler's topic in MJ Tech: Modification and Repairs
I like polygraphite as it doesn't squeak and you can opt to buy greasable. Any Energy bushings that are black are polygraphite. I've been running them on my '01 XJ since new front and rear sway bars and not a squeak. -
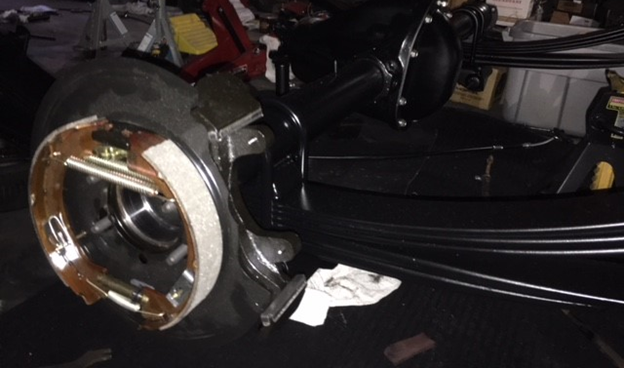
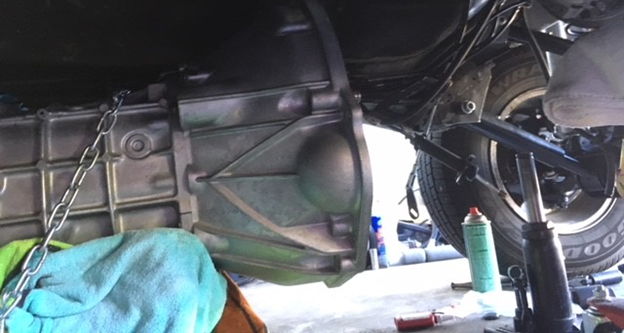
Got the JKS control arms installed, as well as the track bar. Had a fun time centering the tire in the fender. Seems the numbers I found others have dialed adjustable control arms out to didn’t do the job of getting the tire centered for me, but I got things dialed. Also started putting the D44 back together with the Teraflex disk kit and MetricTon leafs. The big accomplishment was getting the clutch installed and bolting up the new AX-15. Assembly went smooth.
-
Nope. Different spline count trans and transfer case. Went to 23 spline in 89.
-
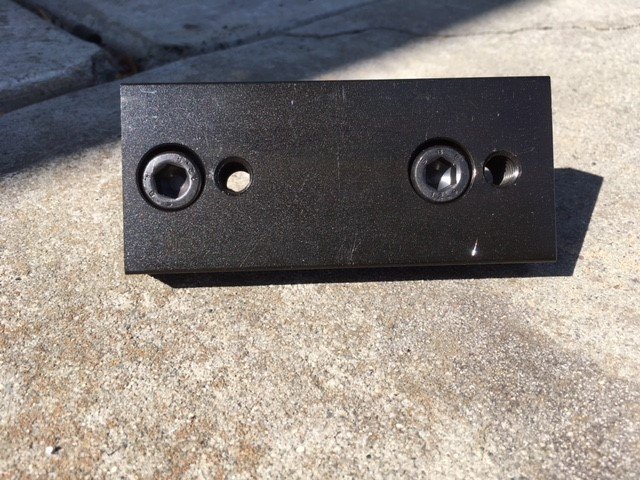
These appear to be for a 2 door Cherokee. They’re a Mopar accessory from 1989/ 1990.
-
True. I should have mentioned I'm running extended endlinks.
-
Pic
-
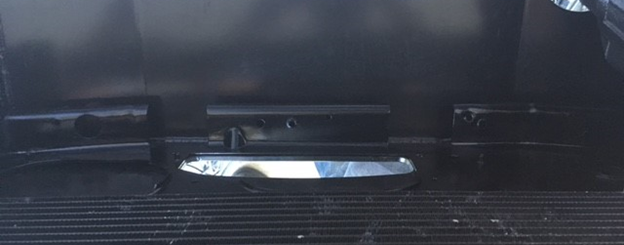
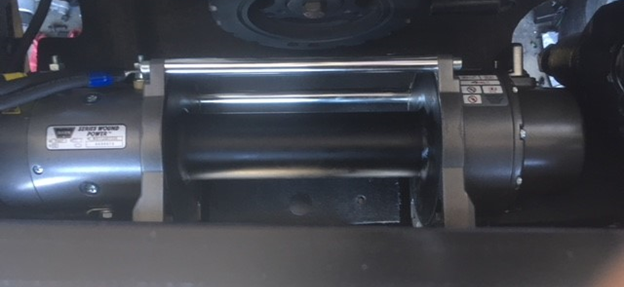
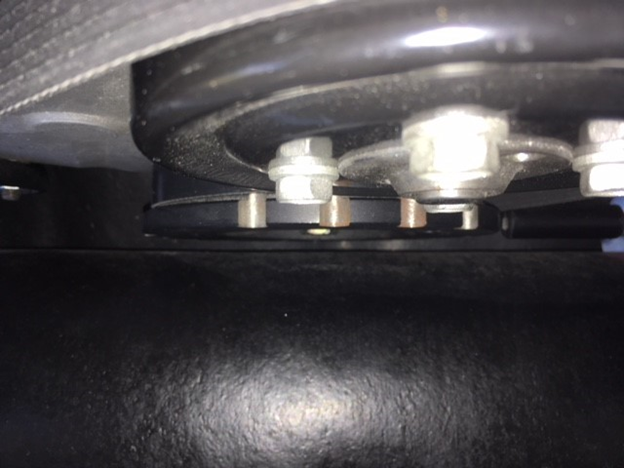
Winch in place…Took a couple test fits, notches, and cuts to the OEM front crossmember and engine splash-shield, but I like how it turned out. I wrapped the winch engine side with masticated rubber (same as OEM splash-shield material) to keep any oil and/ or coolant that make leak off the synthetic rope. The cut-out (top side of the crossmember) serves as a cover plate to access the winch. Also purchased Metalcloak JK sway bar drop spacer kit for hidden winch plate clearance and correct endlink geometry of the ZJ installed sway bar. These spacers were both local to me and the nicest spacers I found online as they come anodized black.
-
88-92 XJ’s Laredo and Limited trim should have the liner. Know that the thermistor you will need to use is renix era only. 87-90. The deletion of the liner I’m guessing was due to cost saving/ profit.
-
The boxes with liners that I have found have held up well over the years. I live In California though and temperatures throughout the year isn’t that drastic. I’m sure extreme temperatures take its toll on the foam. I’m going to run the box with the liner. As for the controls, the high/ low fan switch is electric while the HVAC controls are vacuum. The vacuum harnesses I’ve seen in the yards have always been good. It’s a soft, not brittle colored vacuum hose assembly.
-
Yes, it’s 2 parts that bolt together. Some have a foam insulation inside. Kind of a liner/ filter to catch dust I believe and others are just raw plastic. The older era XJ’s seemed to more consistently have the liner. The newer ones don’t. As for the wiring, it depends on your year. It would be easiest to just grab the entire harness assembly as your MJ may not have the provisions both under the hood and under the dash. Dash additional wiring is minimal...just for the evaporator thermister. Under the hood there will be relays and wiring to the cut-off switch, etc. I’ve always done it the hard way, if my wiring is good, I don’t risk getting a complete underhood harness for example that might have issues. I’ll take the time to just remove the wiring I need and add it into my harness both interior and underhood side.
-
I’ve pulled apart and pieced together a MJ / XJ HVAC box. Went over the parts in detail. They are interchangeable. You can either get a complete XJ ac HVAC box and put it in the MJ. Or get the evaporator side of the XJ box only and attach to the MJ heater core side.
-
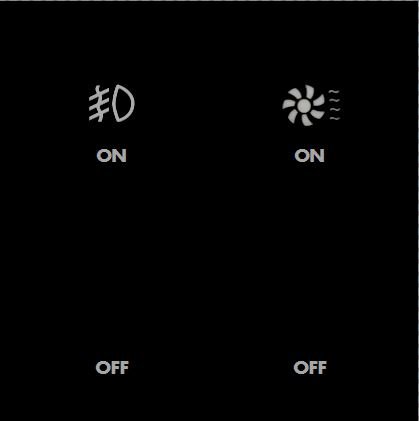
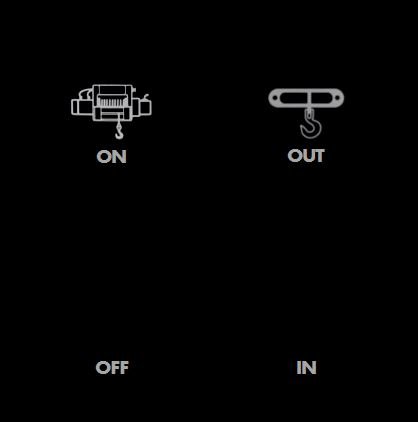
“Rough” print outs of switch pod overlays I’m making. I did the design/ layout and will get these produced as a sticker then cover them with a thin clear textured laminate similar to the finish of the OEM pods. Work in progress… Should have something to show late next week.
-
Yep, much nicer than the plastic...both in looks and quality. It's polished stainless steel. https://www.carid.com/morris-classic-concepts/top-alternator-angled-heater-hose-bracket-mpn-mchb-1b.html
-
Yes, connector is the only difference. Hesco sell a Mopar terminal kit with connector to modify your 91/92 to fit the newer CPS plug. As a side note, Hesco runs a ZJ 4.0L in their CPS/ harmonic balancer kit Same as the 93+ XJ connector, but CPS mounting is different.
-
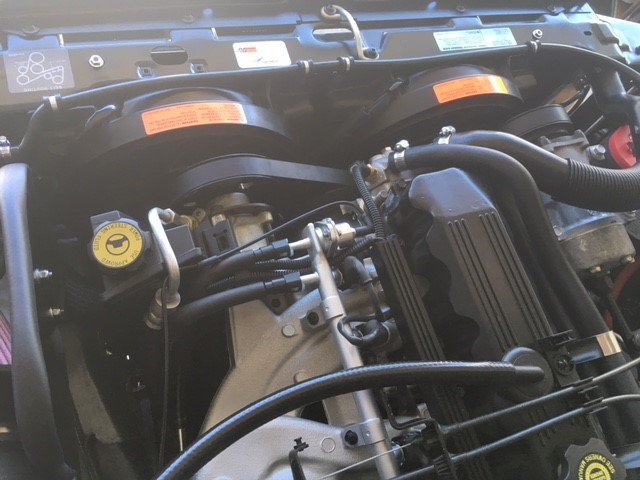
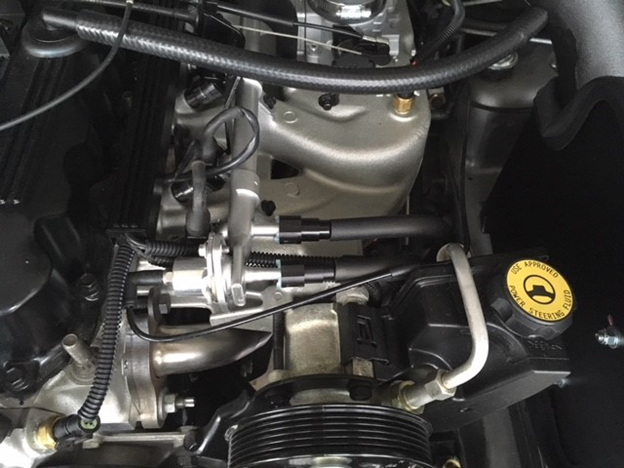
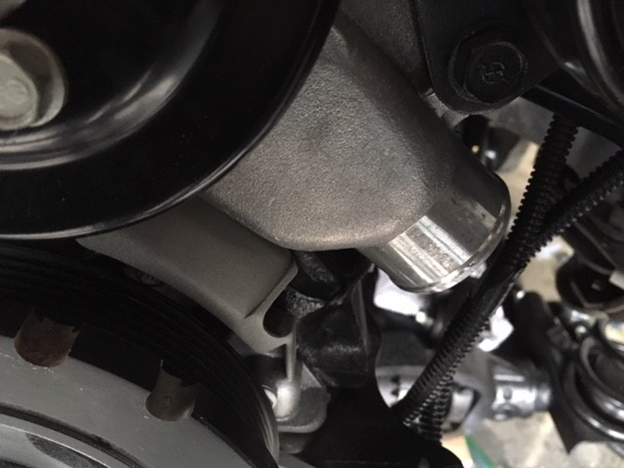
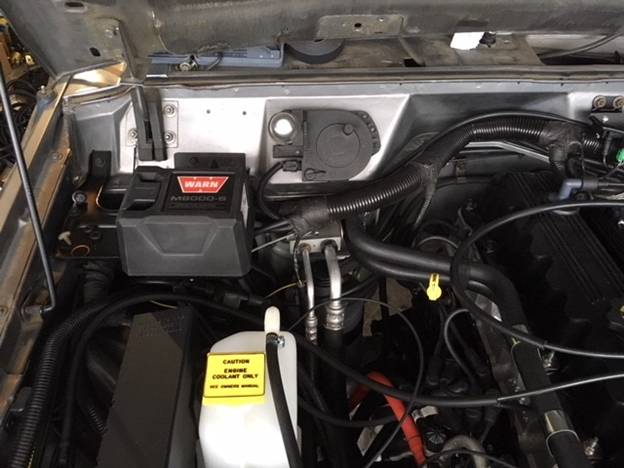
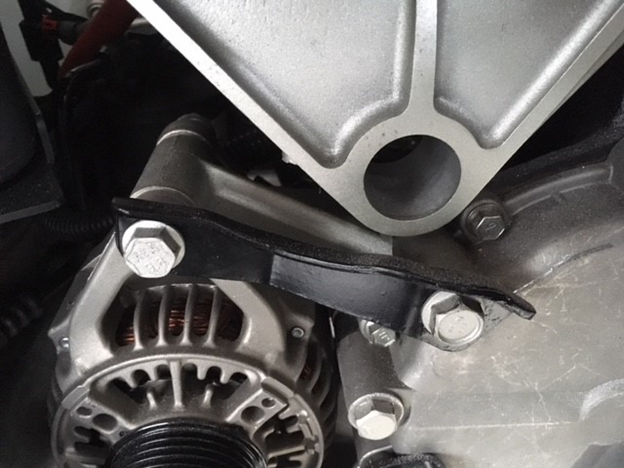
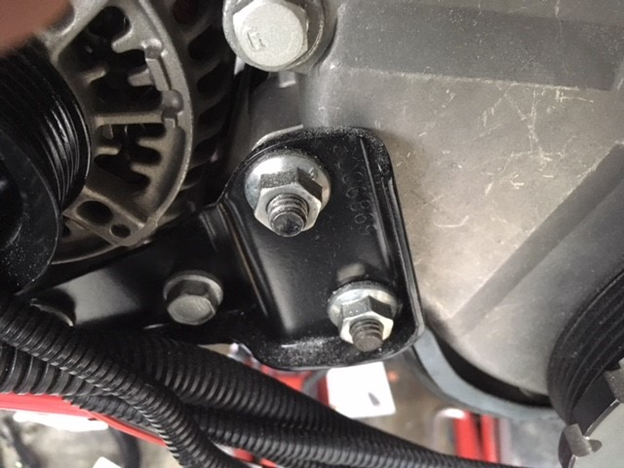
The engine set up is 95% there… All HW tightened and wiring connected. Only thing left under the hood is putting the hidden winch in place then installing the dual efan radiator set up. It has taken some time running extension electrical and new vacuum lines created from Renix-era vacuum assemblies. I like how it has turned out. Looks like a factory set up. I also installed new fuel lines at the engine – was surprised they still make these. They are actually not bent identical to the 91/ 92-era fuel lines but are bent in a way that makes mounting them to the 97+ XJ intake manifold cleaner. I used a slightly modified ’65 Mustang fuel line bracket off the intake manifold. Recently installed highlights include Hesco harmonic balancer/ CPS kit. I have HESCO’s CPS set up running as the primary and a fail-over/ backup CPS in the original location (not connected) should I have issues with the primary. Also, thanks to Mean Lemons for providing me with longer 2-gauge winch copper lines…I was able to mount the solenoid under the hood on a ’91 XJ Limited ABS pump bracket. I ran/ wired in-cab winch controls using Jeep rocker switches – factory fog light switch for the winch on/ off and a ’89 FSJ SJ rear power tailgate up/ down rocker switch for the winch in/ out. I had to modify the earlier 4.0L timing chain cover similar to the later model 4.0L timing chain cover in appearance. The original cover had a tab that prevented me from running the serpentine belt the way I needed to when using the 96+ XJ power steering set up...This took a lot of patience Dremel cutting, then sanding the timing chain cover. It turned out well and I'll be able to run the belt as I need to. Also, the alternator support bracket was modified (essentially cut in half), so I could run the belt up to the waterpump. (You’ll notice I cut off the clutch fan ‘nose’ in one of the photo’s below). Relay wiring is set up for the RHD XJ efan…a write up using both RHD and LHD efans can be found here: After I install the hidden winch, I’m moving on to installing the clutch, trans and transfer case.
-
Truck is over priced, but it has the rare factory option hidden winch and AMC style brush guard. https://sfbay.craigslist.org/scz/cto/d/1987-jeep-comanche-sport-4x4/6670422293.html
-
I've got a spare SWB skid I can ship if you want. Take your time. No rush to get it back. Let me know.
-
Dual OEM Aux Fan Installation, Part 2...An alternative.
Gjeep replied to Gjeep's topic in MJ Tech: DIY Projects and Write-Ups
Relays and wiring in place. On the left side is the factory fog light relay. I re-wired it into a new relay box, so I could mount/ attach the same style relay for the full-time efan complete with 25 amp fuse.
-
Dual OEM Aux Fan Installation, Part 2...An alternative.
Gjeep replied to Gjeep's topic in MJ Tech: DIY Projects and Write-Ups
52028339AB RockAuto has them for $340. Ebay has them as well. Plenty available new. Last week there was a RHD used fan on ebay UK. Unfortunately it's no longer available/ sold. -
Dual OEM Aux Fan Installation, Part 2...An alternative.
Gjeep replied to Gjeep's topic in MJ Tech: DIY Projects and Write-Ups
Yep, basically simplicity. I do like what the spal can do, but I wanted to both keep it simple and have it look/ be more OEM-ish. And I think this set up is along the lines of what Jeep would have done with the dual efan set up back in ‘92. -
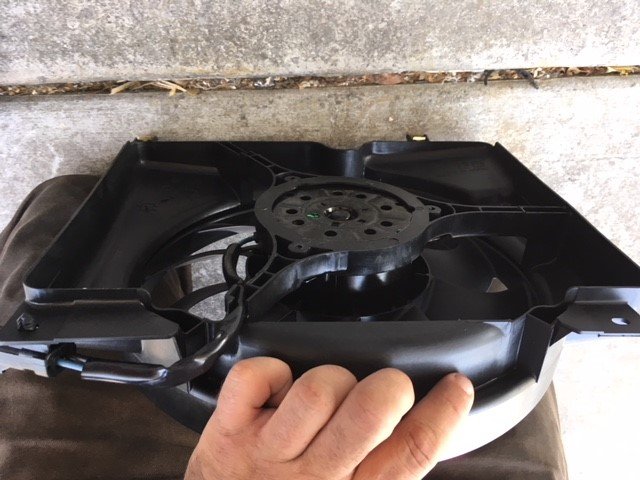
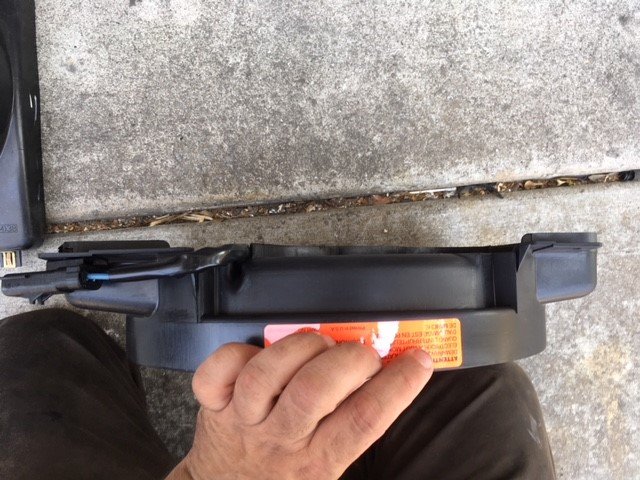
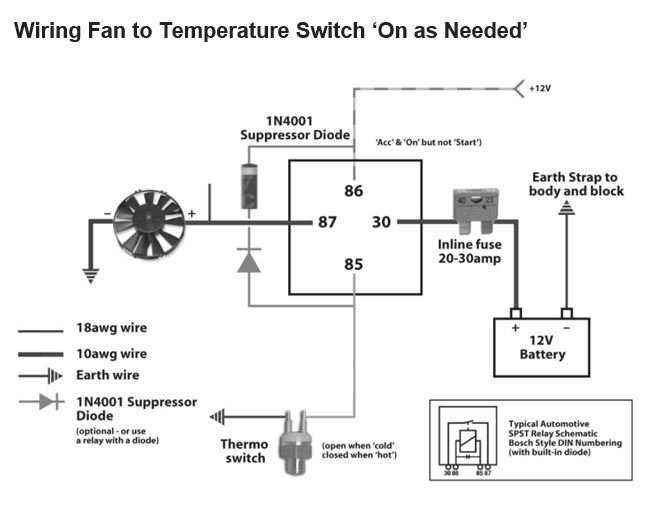
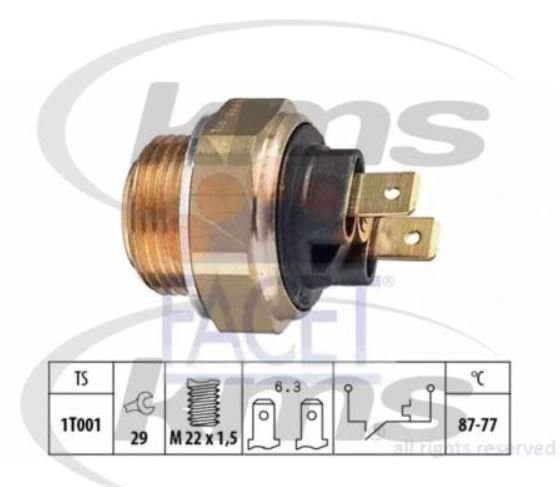
I decided when rebuilding my ’92 MJ I wanted to have a similar set up to Hornbrod using OEM parts. I got to thinking…and remembered the RHD XJ model fan set up in opposite the LHD, meaning the efan is on the passenger side and the clutch fan on the driver side. I took a chance and ordered a Mopar RHD efan. Sure enough the fan/ motor assembly is the identical part number as the LHD model, only the shroud is different. The RHD variant allowed me to mount the efan with only one modification to the upper radiator support -- drilling a mounting hole. Below are photos of the RHD Mopar efan: And as it would be installed. On the bottom side of the radiator I carved out a simple plate that mounts to the original efan/ fan shroud radiator tabs that the 2 fans can drop into. Instead of using a SPAL controller, I went with a hard-wired switch to the Renix temperature switch opening in the radiator. HO radiators already have the Renix provision in place, it’s just a matter of removing the plug. After much internet research, I went with a Facet temperature switch# 7.5007. This is from a Peugeot 205 1.9L Cooling Fan Switch (on @ 189*/off @ 170*). This was a direct fit for the Renix radiator switch hole. I used Bosch relay# 12631710726 which is a 5-pin relay with diode (for primary efan to temp switch wiring). This relay has a diode within. The diode absorbs the high voltage spike created by the collapsed magnetic field on de-energization of the coil.