Salvagedcircuit Posted August 30, 2023 Posted August 30, 2023 My long overdue build post. It's finally here! What's gold in color, shaped like a truck and has the aerodynamics of a brick? The official paint name is "Medium Bronze Metallic" from the 1988 Jeep book, but gold is close enough. With the amount of time and money I already put into this, I think it's a fitting tongue and cheek name for it. I have been documenting the entire repair and restoration process from initial purchase on my own machine and it's time to write it up. I will make some side guides along the way because certain parts have become unobtanium and solutions had to be made. Without further ado, here's the initial craigslist listing:
Salvagedcircuit Posted August 30, 2023 Author Posted August 30, 2023 Initial Inspection Initial inspection is what you would expect for a jeep that's 34 years old: it needs attention. My brother did the inspection as I was a distance away from Massachusetts and he was closer by 5 hours. The jeep drove under it's own power, the brakes worked, but were soft and overall the truck was very loud. There was some rust under the driver floorboard, but no where near as bad as nearly every other comanche I found on the east coast. The oversized 31in tires looked brand new and the jeep seemed to have a 2in lift all around. Rear suspension was supremely soft, if you sat on the bumper it would hit the bump stops. The seller's story: He purchased it a few years ago from a guy in West Virginia with the intention of using it around his property / farm. The jeep spent most of it's life in Virginia. The West Virginia seller put an HO engine in it and it ran well. The jeep recently developed an exhaust leak and that was the source of the noise. You could not have a conversation near the engine bay it was that loud. He said a new exhaust pipe would fix it. He installed the tires and did the lift because he wanted to drive it in the mud around his property. He also had the bench seat professionally reupholstered. Unfortunately, the seller recently damaged his hip so he could not get into or out of the jeep easily, so it sat for a few years under a tree on his property and he finally decided to sell it. My brother negotiated a bit under asking price and he took it home the next day. This is it's first day under my ownership. I didn't realize just how much smaller it was than the F250's and F350's my brother enjoys. Quite the difference.
fiatslug87 Posted August 30, 2023 Posted August 30, 2023 Does the firewall tag have CW or CP as the paint code? Your build sheet from the registry has PYB/QYB as the paint code which should be Medium Bronze Metallic which is CP.
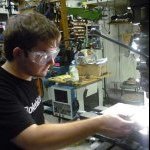
Salvagedcircuit Posted August 30, 2023 Author Posted August 30, 2023 My Inspection: Externally, the body was in great shape. No rust on the driver or passenger door, no rust on the door sills, the rocker panels, the cab corners, the bed or any quarter panel. Incredible for the east coast, just incredible. This alone pushed me over to purchase it even though there were such glaring red flags. The only significant location that had rust was the driver side floor board, but that should be a straight forward fix, we already repaired my brother's cherokee XJ driver side floor, how bad could it be? Boy, was I in for a surprise later on. I had some vague familiarity with the comanche engine bay, since my brother's cherokee was an '89, but I was still every much wet behind the ears and did not understand anything about renix at this point in time. The engine bay was very much a mess. There was a random right angle filter on the valve cover that clearly looked 3rd party. There was a distinct orange blob on the firewall that looked like spray foam to plug the holes in the firewall along with missing and cut firewall plugs. From every corner of the engine bay came random wires with the worst quality butt splices I've ever seen, and multiple corroded crimps in series with another just mere inches apart! Luckily, the main wiring loom that was sprayfoamed was just pushed out of the oval hole in the firewall, it was undamaged otherwise. Of course, there was rubber rot as far as the eye can see. If I looked too hard at a vacuum line or nudged it slightly, it turned to dust. Fasteners were missing everywhere, even from the intake manifold, fuel rail and electric fan. The brake booster and master cylinder were so rusted that they looked older than the vehicle. The AC lines had many cuts in them and the wires coming from the compressor pump seemingly went nowhere. One of the first items on the docket was obvious: service the engine! All 6 spark plugs were removed, inspected, cleaned and the spacing checked. The distributor cap was replaced and the index location was checked. With everything back together, the engine compression was tested. The end result was not incredible but not terrible. 130, 130, 130, 121, 130, 125. A variance of 7% per cylinder is not bad on an speedometer that read 274,000 miles.
Salvagedcircuit Posted August 30, 2023 Author Posted August 30, 2023 12 minutes ago, fiatslug87 said: Does the firewall tag have CW or CP as the paint code? Your build sheet from the registry has PYB/QYB as the paint code which should be Medium Bronze Metallic which is CP. CP indeed. What does this mean
fiatslug87 Posted August 30, 2023 Posted August 30, 2023 The color is Medium Bronze Metallic since CP is on the tag.
Salvagedcircuit Posted August 30, 2023 Author Posted August 30, 2023 2 minutes ago, fiatslug87 said: The color is Medium Bronze Metallic since CP is on the tag. Thanks a ton! Editing and updating my records now.
fiatslug87 Posted August 30, 2023 Posted August 30, 2023 If you don’t know there’s a spreadsheet summarizing all the registry entries, yours is in there.
Salvagedcircuit Posted August 30, 2023 Author Posted August 30, 2023 6 minutes ago, fiatslug87 said: If you don’t know there’s a spreadsheet summarizing all the registry entries, yours is in there. I did not realize this. Thanks a bunch!
Drahcir495 Posted September 1, 2023 Posted September 1, 2023 Very clean looking truck. Love the look of those tire sizes on that lift.
Salvagedcircuit Posted September 11, 2023 Author Posted September 11, 2023 Thanks for the kind words! @Drahcir495 First Oil Change, Oil Filter Analysis After confirming that the engine was in decent running condition, I went ahead and performed the first order of jeep maintenance: change the oil and analyze the filter. The oil pan was undamaged with no dings or dents to be found, but the drain plug had a very sorry looking crush washer installed. I replaced the drain plug with a magnetic plug and a copper + rubber seal from mcmaster. The oil came out clean and there were no obvious problems in the catch pan. I let the filter dry out for most of the day and cut it open. The filter used was a red Purolator brand, but more importantly, there were no metal deposits on the pleats! There were definitely signs of sludge, but again, it's got 264,000 miles on it. My folks' 3.6L WK2 grand cherokee with 98k miles has more debris in the oil filter than mine and it's been regularly serviced! Crazy. Curious about the extent of sludge in the engine, my brother and I took a peak inside the valve cover for further inspection. We used a ~$20 USB-C endoscope camera and it worked a real treat. It looked like the Pennsylvania Hershey factory erupted inside the valve cover! Boy was she dirty.
Salvagedcircuit Posted September 11, 2023 Author Posted September 11, 2023 Coolant System Overhaul: Hoses, Water Pump, Inspection Disregarding the sludge, we pushed on and focused our attention on the cooling system. With no maintenance records offered by the previous owner, we went ahead and replaced the water pump, the radiator hoses, flushed the coolant, and replaced the cracked expansion tank. We used the largest shallow plastic tote we could find locally and flushed out the engine. We took our time and thoroughly flushed out the system to remove as much as possible from the engine. Luckily, the coolant that was collected was not that rusty and was a consistent color. The lower radiator hose spring was harvested and installed into the new lower rad hose using a bunch of wd-40 and elbow grease. The lower hose was likely the original 34 year old hose. Definitely a good run. While we were at it, we took a peek inside the cooling jacket of the engine block. The engine was definitely a bit dirty. After inspection, we analyzed the water pump and prepared the new pump and gasket. The old pump did not seem to have any signs of propeller wobble, bearing failure or grinding sounds, but it just made sense to start from a clean slate, so the new pump was used. We used gasket making compound and a fiber gasket as this seems to be the most reliable way to get a good seal. All the parts were torqued down to spec.
Salvagedcircuit Posted September 11, 2023 Author Posted September 11, 2023 Dorman 603-300 Coolant Tank Analysis My comanche came with a cracked expansion tank and I did not feel safe keeping it in operation, so I replaced it. I read around on comancheclub and naxja that all new plastic tanks were garbage, but I decided to take the plunge anyway. I later found out about the excellent mac's aluminum expansion tank, but I was able to get the newly manufactured plastic expansion tank to work. I purchased a Dorman 603-300 from amazon. Side by side, the expansion tanks are near identical in construction and overall build. You could not tell if my old one was OEM or a clone it's that good. My original tank was clearly in worse shape, and had black deposits all over the inside. I originally could not explain the deposits, but I later determined the deposits to be deteriorating original rubber coolant hoses. Yummy. Filtering the coolant with a paper towel further confirmed this. I installed the dorman tank normally and tightened up all the hose clamps on the hoses the vehicle came with. I wanted to replace these hoses at the time, but I had no idea what the part numbers were and I was not able to find them locally. As you could have guessed, the dorman tank leaked like a sieve from every opening. Most notably, it leaked right from the top. What pathetic excuse of a part leaks right from the cap, even with the cap torqued down by my brother's super human strength baseball-pitcher's glove of a hand? Here's why: The quality control engineer is on vacation! The new rubber o-ring blew the whistle. The top threaded stem on the new dorman tank has a burr that has been pronounced by years of overusing the same injection mold, leading to a seam line that cuts into the rubber seal instead or providing an even flat surface to seal against. Analyzing the old expansion tank, there was no burr on the threaded port. You can see this in the photos I attached. To use the new Dorman 603-300 in an operating vehicle you simply need to shave off the top burr with an x-acto knife and use the new rubber seal included in the Dorman 603-300 on your old expansion cap. For some reason, the new dorman cap did not seal as well as the old cap even though they looked nearly identical. When the jeep got up to temperature, even with the stem shaved, the new cap simply would not seal. I tried flipping the new seal over too. No dice. Coolant seemed to leak out of the cap. It's possible I just did not torque that one down enough, (my hand strength is far outshined by my brother's) but I don't think that was the case here. I think the new dorman cap has a relief valve that opens too soon. For now, I highly suggest using the new dorman tank, shaving down the threaded opening and using the new cap seal in your old cap. This combo holds and doesn't complain. I discovered this glaring issue after I filled the tank, and I did not want to empty it again, so I shoved a paper towel in the opening and used the x-acto on the threaded port. Nothing got into the tank this way. For those interested in replacing their expansion tank, here are the related coolant hoses. I highly suggest replacing them, as they are all molded hoses and none have the same inner diameter. The previous owner of my comanche decided to use a straight 3/4 hose from the bottom of my expansion tank and that caused me a huge headache. Expansion tank rubber hose replacement GATES 18072 / Dayco 87605: Water pump top to metal heater valve Tee. "L-shaped hose" GATES 18051 / Dayco 87301: Top right expansion tank hose, molded. Fits "mu" shaped metal tee GATES 28466: Bottom expansion tank L-shaped hose. Very snug fit on bottom, but it fits with some wd-40. It's also used for the heater core line to the dash. GATES 18413 / Dayco 87305: Hose that was previously crimped to "mu" shaped tee, bent on each end.
Salvagedcircuit Posted September 11, 2023 Author Posted September 11, 2023 Harmonic Balancer, Fuel Filter, O2 sensor, Ignition Coil, IAC, Throttle Body While we were working on the front end of the engine, I inspected the harmonic balancer. It did not look like it was recently replaced, but it showed no signs of failing. There was slight evidence of a rubber shoulder on the front face, but it was consistent and very marginal. If the rubber stuck out significantly I would have replaced it. I also inspected the drive belt. Usually I'd replace the drive belt but there was no signs of significant wear or cracking, so I kept using it. Rounding out the easier repairs, the fuel filter was replaced because it looked like it was returning to the elements and the O2 sensor was replaced. The engine was running well under load, but at idle, nos so much. My older brother came by with his renix REM monitor and my O2 sensor was reading all over the place so we decided that it was time to replace it. I grabbed a locally sourced bosch O2 sensor and the engine seemed to run a lot smoother. I also re-crimped the O2 sensor cable as the previous one was cut in 4 places. The O2 sensor is indeed smaller than the old one and it made me a bit uneasy, but frankly, the more troubling part is how poorly welded the stock renix exhaust header was. It's just pure laziness to leave pipes of various lengths protruding into an exhaust cavity and welded hap-hazardously. I went ahead and refreshed the grounds in the engine compartment, added a battery ground to the frame, a new ground to the intake and started investigating the ignition coil. Boy did it need some attention! The wiring to the ignition coil was completely toast. Two of the wires were melted badly and several other wires were crimped in multiple spots along the same cable! I found the holy trinity of bad wiring jobs: ghost crimps, loose crimps and hand twists all in one cable! One of the connector pins were melted beyond recovery, so I went to the local advanced auto parts and grabbed a BYD weather pack connector so I could use the new terminal from the connector and replace it into the old harness. Worked a treat. While I was there I cleaned the contacts with CRC contact cleaner and applied OX-guard to the two terminals on the ignition coil and where it sits in the ignition coil base. Some dielectric grease was used on the repaired connectors of the ignition coil base. Further down the rabbit hole of cruiser54 tips, I went ahead and cleaned the IAC and throttle body. Both parts needed a cleaning desperately. Luckily, both parts cleaned up well. Don't forget to reinstall the IAC O-ring!
Salvagedcircuit Posted September 11, 2023 Author Posted September 11, 2023 Vacuum Line Repair Digging a little deeper into idle conditions, I noticed my heater core vacuum lines were crumbling and I found a sizeable hole in the rear vacuum line that runs along the bottom of the firewall seam. Ouch indeed. Since It's my first time experiencing vacuum lines I did not know what to expect in terms of a replacement. The heater valve vacuum lines ran right into a firewall grommet and I was in no rush to remove the dash to find out where they terminate. With a lot of experience in repairing electronics, I was hoping that heatshrink would come to the rescue. In this case I opted for adhesive lined heatshrink, but unfortunately my heatshrink kit did not include any adhesive lined strips. I usually grab genuine heatshrink from Digikey or Mouser, but I needed the heatshrink in a rush, so I took a risk and grabbed some from amazon. Amazon and ebay are the clonezone marketplaces of the western world, so I did not have high hopes that I would receive a useful product. The wirefy brand 4:1 shrink ratio adhesive lined heatshrink seemed to work pretty decently well at repairing the very fragile 1/8in vacuum lines. It leaves a nice bead of adhesive on the ends of the cut strip, indicating that the glue has properly flowed. So far I have used it throughout the engine bay on the small vacuum lines and for the very necessary wiring harness soldering repairs. It's been working decently well and reinforced the vacuum lines nicely. A low setting was used on the heatgun to prevent any unwanted vacuum line damage. Most heatshrink melts well around 200f, so keeping it below that is a good benchmark. I job I was dreading the most was repairing the larger rear vacuum line. I tried finding a replacement source of ~1/2in rigid black vacuum line but I could not find any line anywhere locally. It didn't seem like a consumable part and no 3rd party lines were available for the comanche online either. I used the heatgun on a low setting and worked my thin metal spudger into the 90 degree vacuum joint. Keeping heat on the joint, I wiggled the spudger around the diameter of the tube inside the right angle joint and with a bit of tugging, the tube came right out of the elbow. Success. I was concerned that I would overheat the tube and it would stretch and tear. That was not the case. With the tube removed, I was able to slide on the heatshrink tubing needed to properly repair the hole in the vacuum line. I used two stacked heatshrink segments for extra rigidity. So far the fix has worked well. I would highly suggest this method of vacuum line repair. It became evident that whatever rubber hoses attached to the rigid plastic vacuum lines in the engine bay were completely toast. One major example are the lines coming off of the emissions vapor tank. Hey Aveeno, I've got a great model for a skin care commercial Other rubber vacuum lines did not appear bad at first glance, but an easy way to tell is if you touch them and change skin pigment. The "J-shaped" rubber tube to the air box ended up just like this. The smaller rubber vacuum lines that connect to the air box were clearly cracked but luckily you can easily source those. 5/32 windshield washer tubling is a direct replacement for the tiny rubber vacuum line that allows for the hot air port to function on the renix air boxes. I purchased prestone brand 5/32 tubing from my local autozone. The tubing fits nice and snug into the side air box clips.
Salvagedcircuit Posted September 11, 2023 Author Posted September 11, 2023 Valve Cover Inspection and Filing After taking care of all the easy to access maintenance items, I decided to remove the valve cover and get a better idea about the extent of the sludge in the top of my engine. Boy was she dirty. It was so bad that there were marble sized globs of sludge just chilling on top of my lifters. I spent some time with my brother using plastic spudgers and rags evacuating the sludge and grime from the top of the engine. If you look at the photos of the rag you can see how messy this procedure was. If you do something like this, make sure to be extra careful not to get these globs of sludge back into the engine through the valves, we did our best to pull away the debris from the valve area to where we could safely remove the material from the top of the head. One of the neat things I noticed when I first opened the engine was the distinctively blue valve cover gasket. This is a reusable higher cost gasket from fel-pro that is designed to be reused multiple times. This could only mean someone has replaced this recently and shelled out the extra $ for convenience. This is nice to see because it vaguely implies that whoever worked on the engine decided to not cut corners and use the cheapest available fiber gasket off ebay. However, I ended up chucking this gasket - such a waste! Why? Well my valve cover casting has many inclusions and cavities in it. The flanges that are supposed to seal are very pitted and even have burs on them. This is not from wear or the miles, but rather these came from factory. Casting is not always a consistent process and if a dressing and de-burring procedure is intentionally skipped, sealing issues can occur. The best way to fix sealing issues other than this lovely blue gasket is to clean up your valve cover! Since I did not have a 3ft granite reference stone on hand, I took the next best option. I used a reference 8in Norton sharpening stone and cleaned up the edges and shoulders of the casting. I attached some photos of the before carnage. Obviously, because I changed the quality of the mating surface, a new gasket was needed. There were also deep impressions into the blue felpro gasket from the poor surface quality of the valve cover. While I was here, I wire-wheeled the entire inside of the valve cover as it had a lovely patina of 270K miles of baked in sludge. Simple green, purple power and power washing was nowhere near enough to clean this residue off. I also cleaned up the valve cover port metal flaps and cut out some new seals out of fel-pro gasket material. I did not cut down the height of the vent towers as stated on the cruiser 54 pages as I did not find any traces of oil on my air filter when I picked up the engine and I did not want to damage something that was working. If I develop this issue in the future, I'll go back and trim the vent towers down.
Salvagedcircuit Posted September 12, 2023 Author Posted September 12, 2023 Gauge Cluster, Wiring Gremlins and a Stuck Battery Tray Being a base model comanche, I was greeted by a dummy cluster in the drivers seat. I was not a fan of the lack of information provided to the driver even though the oversized gas gauge was rather humorous. The previous owner installed an external tachometer on the steering column which I did not particularly admire either. Luckily I was able to find a mostly full gauge cluster on ebay and modified it for the AW4 column shifter. I followed some guides here on how to trim it properly and everything fit well. Wiring Gremlins One of the most off-putting sights in my engine bay were the hodge-podged electrical mods from the previous owners. There seemed to be a never ending amount of splices, ghost clips, open circuits and poor grounds wherever you looked. Ironically, the main firewall ground strap was repurposed as a wiring harness tie down and I did not know this was supposed to be the main ground until I read over the cruiser54 tips. This nonsense unfortunately extended to the rear of the comanche too. The tail light wiring harness was spliced four times too many, and even so the license plate lights simple did not work. I believe there must have been a different bumper at some point in time as there were two sets of license plate lights. A Grote 6000 light box was screwed into the sheet metal behind the bumper while two round snap-in lights adorned the rear face of the bumper. Everything was tied together with exposed wire. Excellence. Battery Tray I was trying to get access to the alternator to get better photos of the label to see what alternator was in my truck, the 60a, 90a or 105a, and I also wanted to get a vacuum in and around the battery tray to remove a bunch of dirt, debris and old acorns. This is what was waiting for me under the battery. There was no saving the bolts. The only option was as the grinder. Luckily AMC decided to go with a plastic battery tray. It survived 34 years with no sweat. The metal underneath was also smooth and rust free. My '97 astro van had a metal battery tray and it did not last anywhere near as long. I added some new standard bolts and now I at least have access to the alternator in an emergency situation. If I didn't replace those bolts, I'd be toast for sure.
Salvagedcircuit Posted September 12, 2023 Author Posted September 12, 2023 Tires and Rims Onto the most subjective part of jeep ownership. I'm very much in the "stock forever and always" camp, but there are some situations that can sway my moral compass. This is not one of them. The 10 spoke OEM rims are arguably the best rims that were available on the XJ / MJ series and have a timeless presence that is unmatched by anything I have come across since, including aftermarket. I think you can see my bias is coming out here strong. The previous owner installed a set of (5) Dick Cepek Extreme Country 31x10.5R15 Tires on 4.5x5 black gloss amazon rims with substantial backspacing. This combination filled the rear wheel wells but made the front wheels stick out considerably. I'd say they were quite cheeky indeed. There's no doubt that the offroad tires were high quality and properly chunky. Most definitely a lovely tire. They provided a rugged stance to the comanche that made the MJ look like a monster truck. Look at them against my brother's XJ. Monstrous. As cool as that looks, this is going to be my daily driver. I wanted a modest, quiet, and reliable truck. I did heed the words of comancheclub members near and far and and sized up the tires. I went with a firestone destination AT/2 235/75R15 tire and the 10 spoke rims. The combination is perfection. The destination AT series have worked a treat on my family's Astro van and that thing has close to 250,000 miles on it. Astro to the moon. I sold the Dick Cepek tires to a local New Hampshire jeeper with a YJ. He is enjoying them very much when out mudding and overall I think it's a better fit. Refurbishing the Turbines Lately, finding a complete set of 10 spoke rims is becoming a bit of a challenge. Finding a set that is not completely destroyed by the sands of time is even harder. I came across two separate poorly labeled marketplace listings. This is frankly the best way to find them. The set of two rims required bead blasting as the unforgiving east coast road salt conditions eroded the front surface of the hubs. The untouched rim is on the left. The bead blasted rim is on the right. Bead blasting removed the shiny surface finish of the spokes but cleans up the oxidation on the rim. Once bead blasted, it's like the oxidation never happened. This was the result of the first round of bead blasting. The rims were spotless the second round. Since I did not want to go through the trouble of machining down the faces of the 10 spokes, I decided to experiment with polishing. I grabbed a Mothers Power Ball and Mothers 05100 Mag & Aluminum Polish and the combination worked very well. I did not bother sanding the surface of the spokes. I bead blasted the rim, blew off the rim with compressed air and went right to polishing. The results were adequate for me. As a test, I spent a few minutes on one spoke and then used Isopropyl Alcohol on a paper towel to clean the spokes. I wanted to see if the shine remained. It did indeed. After the test run, I decided to polish the entire rim. The setup was pretty basic: Two 5 gallon buckets, polishing compound, polishing ball, polishing rag, paper towels, rubbing alcohol and a drill. A 5 gallon bucket was used because it's plentiful and it fits perfectly behind the rim. It's easy enough to sit beside the rim on another bucket and bang out an entire rim in 15-20min. The procedure is also straight forward: Blow off rim with compressed air Insert buff ball into drill, apply polishing compound to the buff ball Press puff ball against the spoke for 1-2minutes. Wipe away remaining polishing residue with a cotton cloth Inspect shine. If you hit your target result, move to the next spoke. Once all the polished areas are complete, clean the residual polishing compound off with paper towels and isopropyl alcohol. Blow off rim with compressed air in preparation for paint It's hard to capture on camera how shiny the spokes were following the procedure. The end result was adequate enough for my tastes, but it may not be as shiny as the original factory machined face. Achieving ~60% of the effect for 5% of the refurbishing cost worked for me, so I duplicated this procedure on the other blasted rim. Finally, I coated the rims in two coats of Rust-Oleum 248929 Clear Wheel Spray Paint. I have my doubts that this spray paint will last more than a year, but I did not feel like $150/hour for powder coating (before material costs) was justifiable when I can get completely refinished turbines on ebay for around $160 each with little to no risk. My method is by no means the proper way to refurbish the rims. A more correct method would involve: Bead blasting the rim Machining the face and spokes of the rim. Doing this on a lathe is not fun as you have many interrupted cuts Masking the spokes of the rim Pre-heating the rim in an oven Silver Powder coating the pockets between the spokes Removing masking from the spokes Baking the rim Clear Powder coating the entire rim Baking the rim The Black spray painted set cleaned up well with acetone, but took a lot of manual labor to completely remove all traces of the paint. Some rims were painted multiple times with different colors and these rims took considerably longer. The benefit of acetone is you do not need to blast the rim. I tried Goof-Off but frankly, acetone worked just as well for less cost.
Pete M Posted September 16, 2023 Posted September 16, 2023 On 9/12/2023 at 3:30 PM, Salvagedcircuit said: The set of two rims required bead blasting as the unforgiving east coast road salt conditions eroded the front surface of the hubs. The untouched rim is on the left. The bead blasted rim is on the right. Bead blasting removed the shiny surface finish of the spokes but cleans up the oxidation on the rim. Once bead blasted, it's like the oxidation never happened. This was the result of the first round of bead blasting. The rims were spotless the second round. that photo makes me sad. definitely one of the things I don't miss from my life up north.
Salvagedcircuit Posted September 4, 2024 Author Posted September 4, 2024 The Floor: Analysis The saga continues! Here's everyone's favorite part: the floor! My mj featured a work-truck specc'd vinyl floor. It was cracked and cut in many spots, especially by the foot wells. Luckily, ACC carpets still makes a replacement which is awesome. I didn't have to worry about saving this heap of a floor. I started by pulling up the back passenger corner. Boy, it didn't look good even from there! Oof Bobby, she ain't lookin' too good. The floor was rusted out so bad the carpet adhered to the steel sheathing of the parking brake cable. 35 years of trapped moisture transformed the bx-clad style parking brake cable into the consistency of a rotten tree root. Now I know why it didn't work.... Poking around a bit more revealed an untold secret by the Toledo assembly late night crew: a 35 year old gyro sealed in plastic underneath the passenger side heat shield. I'm guessing they were taking dibs on how long it would take for someone to find its molding carcass. Sliding away the passenger heat shield revealed a lovely hole towards the passenger wheel well. The MJ was sold with mention of poor condition floor boards, but boy does lifting the floor tell the entire story. Look at the poor 4x4 selector. No exposed metal was spared. The transmission tunnel cover was dissolving at the edges and whatever seam sealer used was the consistency of kids-toy kinetic sand. I pulled up the remainder of the vinyl and filled a shopvac full of plastic, rubber, dirt, metal and shotgun shells. The driver side floor was so bad the shopvac aided in sheet metal rot removal. Here it comes, the money shot: Welcome to the drivers side. Half a day of wire wheeling the floor and old seam sealer from the footwells, I finally was able to get a good idea of how bad the damage was. To sum it up: I needed a patch job on the passenger side and an entire floor pan on the drivers side. The floor fan was invaluable to my work as it pulled all of the fumes from inside the cab outside. Also, removing dried seam sealer makes an absolute mess. I found that a cup wire wheel on a grinder was the only way to quickly remove the hardened spackle like material. A blade and scraper was too much effort and took far too long. When I was finished my n95 was light gray and the asphalt outside had a nice dusting of rust and abrasive soot. Captain video would be proud. If someone else does this, make sure to tape over the rear glass window, several wire strands from the cup wheels hit the back glass and melted in tiny divots. Not a big deal, but save the glass folks!
Skylynx Posted September 4, 2024 Posted September 4, 2024 Absolutely loving these! i was so close to getting some of those turbine rims as well, but i don't hate the ones i have right now, and i think i'm better off investing that money in a new driveshaft!
89 MJ Posted September 4, 2024 Posted September 4, 2024 Looks pretty close to the way my floors did. I also had the vinyl flooring.
GonzoTheGreat Posted September 5, 2024 Posted September 5, 2024 I love the detailed posts on your build. It’s a really great read. Really good pictures too. but also, wait. wtf? A sandwich??? You found a sandwich in your floor??
Salvagedcircuit Posted September 5, 2024 Author Posted September 5, 2024 2 hours ago, GonzoTheGreat said: I love the detailed posts on your build. It’s a really great read. Really good pictures too. but also, wait. wtf? A sandwich??? You found a sandwich in your floor?? Hahaha. It was a white pouch in the shape of a pita bread you would find on a gyro at a greek restaurant. It was likely some kind of covering that was supposed to be adhered to the bottom side of the floor. The assembly folks must have been busy reading the latest issue of sports illustrated....It certainly would explain some of the passenger side welds in my engine bay. Notice something present on the drivers side but missing on the passenger side
Salvagedcircuit Posted September 5, 2024 Author Posted September 5, 2024 The Floor: Patchwork Collage I started attacking the passenger side first as the geometry was far more straightforward. Most of the metal rot was concentrated to the right of the top unibody cap with just a few small spots to the left. I decided to patch instead of replace here and I'm glad I did so, as the results were pretty excellent. I cut the entire right side flush to the inside rocker and bottom frame rail. The rockers were solid on both sides of the comanche, which I was so incredibly grateful for. I started with a good ol' thin walled postal service box, grabbed a sharpie and made some creases. Who would have thought medium flat rate boxes made such great Cardboard Aided Design templates I transferred the template onto the steel, cut it out with a grinder and began the bending process. A bench vise is a godsend in any workshop. This is the MIG welded large patch. It just hugs the inside rocker. It truly fit like a glove. If it fits it ships! For small holes, my brother came up with this excellent method of using elevator bolts and welding up around the damaged areas. This way you are not blasting larger holes into material that is already thinning in spots. The cut down elevator bolts work swimmingly and as an added bonus hold themselves into place. All you have to do is wire wheel them and cut them down in length. Well worth it. You can see the end result to the left of the passenger unibody top rail. A huge productivity boost was tie-wiring a $10 led work light to the back half of the cab. It worked wonders at night. The driver's side needed a lot more attention. The rot was pervasive. The top uniframe had to come out. This member sits above the floor and sandwiches the floor to the bottom frame rail. The top uniframe is a pain to remove, and the method I chose was not particularly wise, but it was my first time redoing a floor so I have to cut myself some slack. Purchase spot weld cutters yall! I went with a drill bit and a chisel. It worked but caused a lot of frustration and yielded one very mangled top cap. The top cap was pitted badly but just barely recoverable. At the time I did this, keyparts did not duplicate this part, so I had no other choice. I would have gladly paid their price to not have to bead blast, weld, straighten and repaint mine. I used a beefy prybar to remove the side braces. The steel flooring underneath was so thin, it prompted my to remove a considerable amount of flooring and patch away. Here's the final cut before patch work. It's not too pretty. What I was amazed by was the state of my frame rails. It's like they were untouched. Completely nuts! Toyota owners eat your heart out. No high impurity recycled steel here. Bonkers! I vacuumed the inner frame rails, lightly hand wire brushed the surface, blew it out and prepped for paint. My brother had spare por-15 left over from another project so I prepped the surface with the phosphate coating and painted it. Might as well do something while you're in there. I also did the same thing to the inside of the top uniframe and inside side bracket. This was the perfect time to test fit the replacement driver side floor pan I ordered from c2c fabrication. It's nicely formed, wide, and decent quality but was inadequate for the extent of the floorboard rot. Patch work was needed well into the wheel well. Ironically, c2c fabrication claimed "made in the motor city" (Detroit) but the panel has a very legible "made in Taiwan" by CHL. Quite misleading to say the least, but I'm thankful the part exists, especially at the very reasonable ~$75.

Recommended Posts
Create an account or sign in to comment
You need to be a member in order to leave a comment
Create an account
Sign up for a new account in our community. It's easy!
Register a new accountSign in
Already have an account? Sign in here.
Sign In Now