89 MJ Posted January 14, 2021 Posted January 14, 2021 Let's discuss what you used for paint/primer/clear on your truck, how you went about applying it, and why you decided to go that way with your truck. We don't need part numbers for the supplies that you used, just the brands and where it ranks in their brand (affordable, medium, money means nothing to me at this point levels). Let's also talk about tips and tricks that you have learned from painting. Primer: The high end PPG stuff Bodyfiller: Rage Extreme and Rage Ultra (good show car stuff) Paint: PPG's Omni line (more of their inexpensive line, but my paint was still $250/gallon, so it was still good stuff) Clear: PPG's high end stuff again How my truck was painted: 90% of the truck was stripped to bare metal, epoxy primed, blocked out, filler used where it was needed, primed, blocked, sealed, painted, cleared. Of course, all of that happened after cutting out and butt-welding the rust and using metal shaping tools to get all of the parts together. The truck was painted completely apart, doors, fenders, bed, tailgate were all taken off and painted separately. If you paint your truck the way I did, you NEED to make sure that you paint the part the way it will sit on the truck, otherwise the metallic will "lay down" differently and it will look like your paint doesn't match. Another issue with this is that it is relatively easy to scratch the parts when reinstalling them. A way you could get around that, but still want everything painted would be the method that many bodyshops use. They edge the parts out. On an MJ, this would be painting the front of the bed, door jambs, insides of the fenders, tailgate jambs, rear of the cab, while they are all separate, then bolting everything together, aligning the gaps correctly, masking everything that you already painted, then sealing and painting the truck. Doing paint this way will make sure your metallic is all "laying" the same way and reducing the chances of scratching parts. The issue with this method is that everywhere that you masked off will have tape lines that you will be able to see. This will not matter to most people, but if you are building a show truck, then I recommend the method that we used on my truck, just make sure you put it together very carefully. Of course if you wanted a presentable daily driver/work truck/trail rig, then I would scuff and prime over the original paint, block it, use filler when needed (after getting the dents as straight as possible with metal working tools, block the truck again, prime it, block it, seal it, and shoot some color on it. In this case, especially if it is a backyard/driveway/garage job, I would recommend edging the truck out, then painting the truck together. I would also recommend using a single stage paint, which has clear coat built into it. Single stage often times looks as nice as base/clear, but is more affordable. If you have any other topics like this that you want to discuss, I would be happy to come up with another thread next week.
Tex06 Posted January 14, 2021 Posted January 14, 2021 Primer: None Bodyfiller: Also None Paint: Rustoleum Matte Green Clear: Also also, none How my truck was painted: Surface was cleaned and scuffed with scotchbrite. Windows and handles were masked off, grille and lights were removed. Spray away! (P.O. did it and now I'll be removing all his handiwork)
Torq_Shep Posted January 14, 2021 Posted January 14, 2021 My truck will be: Epoxy Primer: Eastwood Primer: Nason Bodyfiller: Evercoat Paint: Nason Colorado Red Clear: PPG European speed clear How my truck was painted: Its not yet...
hassyfoto Posted January 20, 2021 Posted January 20, 2021 Primer: The high end PPG stuff Bodyfiller: Evercoat Paint: PPG's Shop Line Clear: PPG's Shop Line How my truck was painted: The truck was edged first. All the jambs, fender, hood, tailgate, inside bed edges, wheel well edges, fender well edges and grille edges were painted first. The truck was assembled and painted as a single unit. Now to correct for overspray, the truck had a third coat of clear added during the paint process with the specific intentions to water sand and buff the entire truck. This allowed me to water sand between the cab & bed, and all those transition areas between the edges & exterior of the vehicle.
87MJTIM Posted January 20, 2021 Posted January 20, 2021 1 hour ago, hassyfoto said: Primer: The high end PPG stuff Bodyfiller: Evercoat Paint: PPG's Shop Line Clear: PPG's Shop Line How my truck was painted: The truck was edged first. All the jambs, fender, hood, tailgate, inside bed edges, wheel well edges, fender well edges and grille edges were painted first. The truck was assembled and painted as a single unit. Now to correct for overspray, the truck had a third coat of clear added during the paint process with the specific intentions to water sand and buff the entire truck. This allowed me to water sand between the cab & bed, and all those transition areas between the edges & exterior of the vehicle. From Frederick County! Who did your paint and body work?
89 MJ Posted January 20, 2021 Author Posted January 20, 2021 1 hour ago, hassyfoto said: Primer: The high end PPG stuff Bodyfiller: Evercoat Paint: PPG's Shop Line Clear: PPG's Shop Line How my truck was painted: The truck was edged first. All the jambs, fender, hood, tailgate, inside bed edges, wheel well edges, fender well edges and grille edges were painted first. The truck was assembled and painted as a single unit. Now to correct for overspray, the truck had a third coat of clear added during the paint process with the specific intentions to water sand and buff the entire truck. This allowed me to water sand between the cab & bed, and all those transition areas between the edges & exterior of the vehicle. Beautiful!
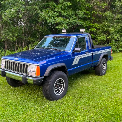
PCO6 Posted January 20, 2021 Posted January 20, 2021 My MJ body and paint are good but I'm currently doing my LJ. I restored and painted several cars during the 70s and 80s but got away from it for many years. Things have changed since then so I'm keeping this one simple as I re-educate myself. I'm going right back to my high school VW and off road car days in the late 60s and doing it with single stage enamel. This is not a show piece, it will be used and abused and done over again as I modify, wreck and rebuild things. It's an outdoor, backyard weather dependent job using basic equipment. I'm using off the shelf Tremclad (Canadian Rustoleum) products for the most part. Most of the body was good but I have replaced sections of the floor and one torque box. I replaced the front fenders and windshield frame with repro panels. I'll be doing some patch panels on the rear fenders and they will be pretty straight forward. Anything that can come off has/will for body work and paint (fenders, doors, hood, tailgate, windshield, grill, etc.). I'm doing a colour change which also makes it extra fun. I've taken some panels down to bare metal but most of the the original paint was good so I scuffed them with Scotchbrite pads and sprayed enamel over them. Most panels have 4 coats with wet sanding as needed. Most panels will be buffed out when done (next summers job). Products are ... Primer & Paint - Tremclad enamel - "Gloss Grey" similar to Jeep "Sting Grey" and I believe the same as Rustoleum "Smoke Grey" Reducer - Varsol (mineral spirits) Hardener - Valspar Mix Ratio - generally 3:1:0.3 Filler - Bondo (very little) Here are a few pics from new fenders arriving (obligatory MJ pic) to current status ...
Comunchy Posted January 23, 2021 Posted January 23, 2021 Guy very new to bodywork here; what's meant by "edge out" the truck?
Strokermjcomanche Posted January 23, 2021 Posted January 23, 2021 7 hours ago, Comunchy said: Guy very new to bodywork here; what's meant by "edge out" the truck? Basically it's painting the inside of the door jams / fenders / hood etc so you can bolt everything on the truck to get the exterior portion to all be the same color .

Recommended Posts
Create an account or sign in to comment
You need to be a member in order to leave a comment
Create an account
Sign up for a new account in our community. It's easy!
Register a new accountSign in
Already have an account? Sign in here.
Sign In Now